With the default configuration of Windows 10/8/7, all opened windows of a certain app or File Explorer combines into a single taskbar button. Keeping the cursor on its icon on the taskbar or clicking on its icon on the taskbar, you’ll see the preview thumbnail of every window. If you want to open the exact window or restore the last active window, it isn’t easy to find out.
In this gearupwindows article, we will show the steps to enable the Last Active Click feature in Windows 10 / 8 / 7, so you can easily switch to the last active window with just a single click. It will also help you to cycle through the opened window of a separate app. For instance, if you have opened 10 windows of Chrome. Just keep clicking on its icon on the taskbar to rotate between opened windows of Chrome. Isn’t it a cool feature?
Although Enable Last Active Click is a cool feature, to enable this on your Windows 10 / 8 / 7 PC, you need to take the help of the Windows Registry. Let us see the steps in detail.
How to Turn On Last Active Click for Windows 10 / 8 / 7 Taskbar?
Since you will modify the Windows Registry, we recommend taking a full backup of the Windows Registry and creating a system restore point. If something goes wrong, you can revert your PC to a previous working state.
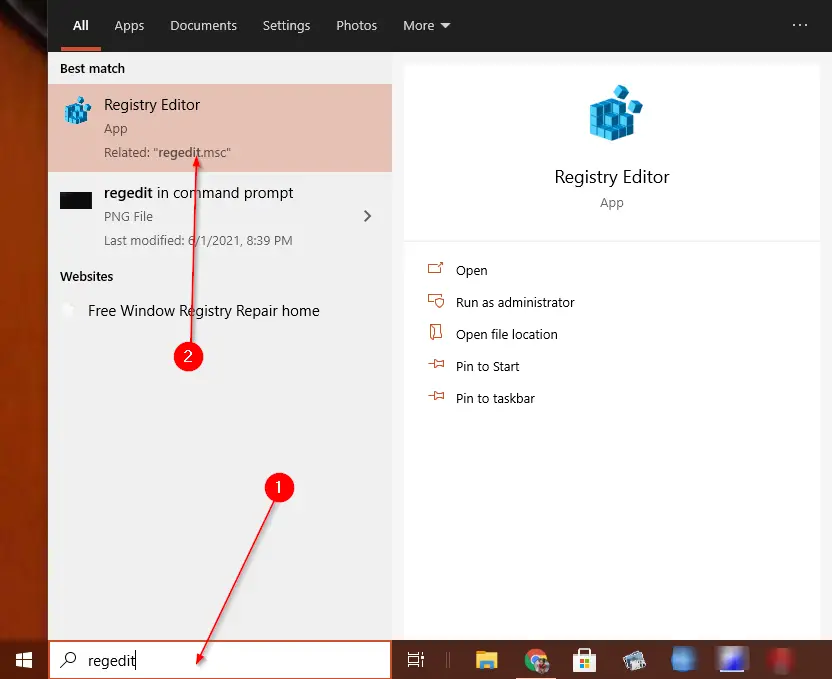
Step 1. Open the Registry Editor window.
To do so, click the Start button on the taskbar and then type regedit. From the available results, click on the “Registry Editor” entry to launch it.

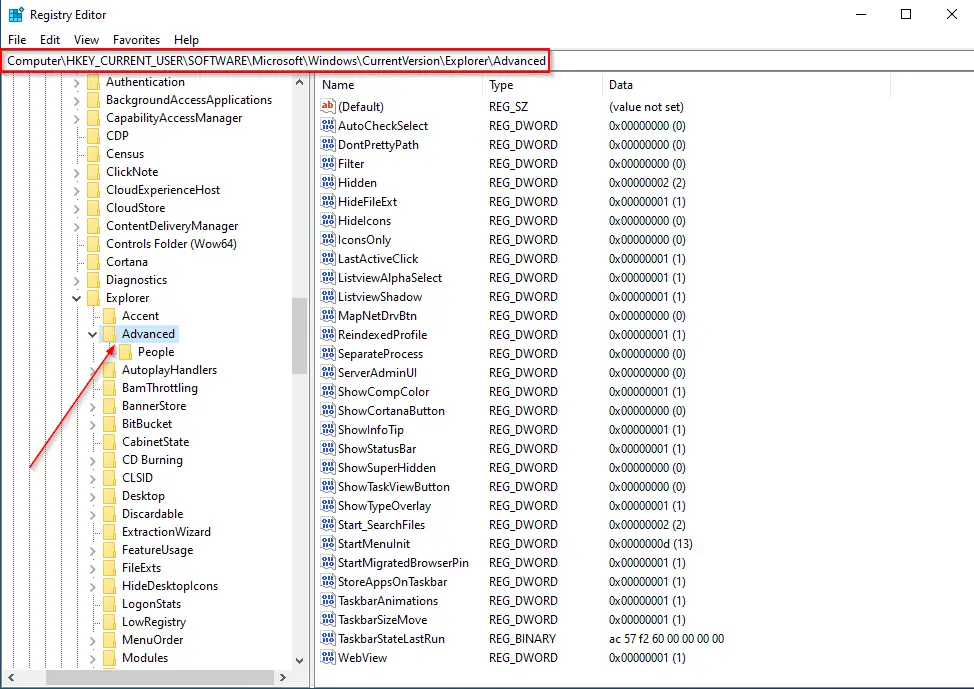
Step 2. In the Registry Editor window, navigate or browse for the following key from the left side pane:-
Computer\HKEY_CURRENT_USER\SOFTWARE\Microsoft\Windows\CurrentVersion\Explorer\Advanced
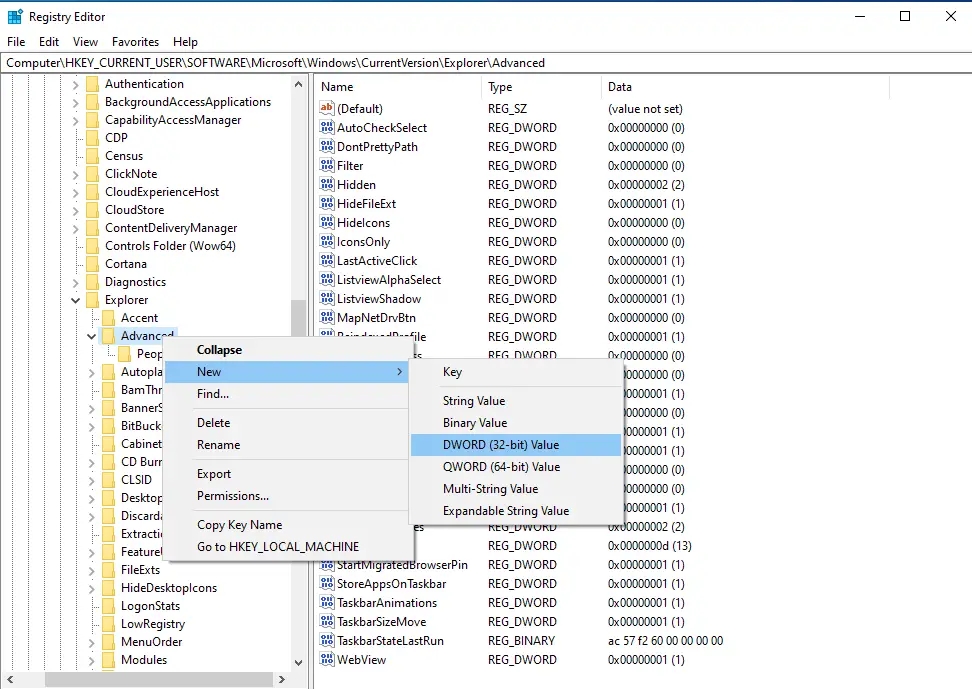
Step 3. Now, right-click on the Advanced key, select New, and then DWORD (32-bit) Value. Name it LastActiveClick.
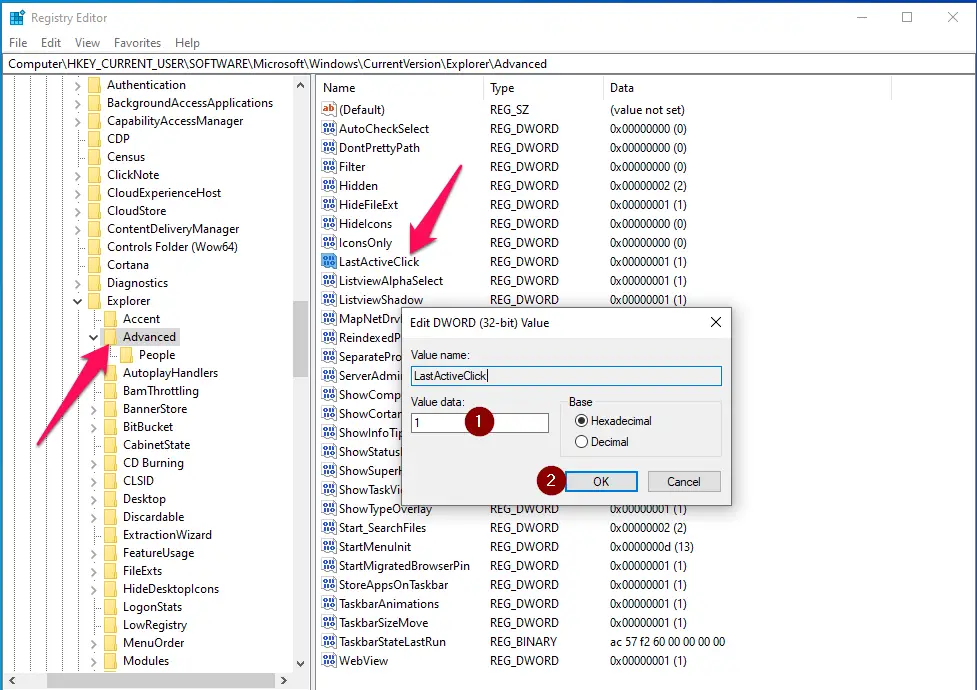
Step 4. The above action will create a new DWORD (32-bit) Value (LastActiveClick) on the right side pane of the Advanced key. Now, double-click on LastActiveClick to open its settings. Change its Value data from 0 to 1 and then click on OK.
Step 5. Finally, reboot your computer to apply the changes.
Now, if you have multiple windows opened for an app, click on its icon on the taskbar to rotate between opened windows.
Conclusion
In conclusion, the Last Active Click feature in Windows 10/8/7 is a handy tool that enables users to switch to the last active window of an app or cycle through multiple windows of an app with just a single click. Although enabling this feature requires modifying the Windows Registry, it is a straightforward process that can be accomplished by following the steps outlined in this article. Remember to create a system restore point before making any changes to the Windows Registry, and always proceed with caution.