On Windows 11/10, you can quickly create multiple user accounts if you want to share your computer with your family or friends. However, if a user account is no longer required or you wish to restrict access to a user, in such a case, instead of deleting that account, disable that account so that the settings and personal files of that account will be preserved on your PC. Whenever you want, restore that user account to gain access so that the user will start working from where there left off.
Reasons may be several to disable/enable a user account; on a Windows 11/10 machine, you can turn On/Off a user account through several methods. These include Computer Management, Command Prompt, and PowerShell.
When you disable a user account on your Windows 11/10 machine, the system will void access and remove the account from the user menu in the Start menu and the sign-in screen.
This gearupwindows article will guide you on enabling and disabling a User Account on Windows 11/10 through Computer Management, Command Prompt, and PowerShell.
How to Enable or Disable User Account using Computer Management?
To enable or disable user accounts using Computer Management, do the following:-
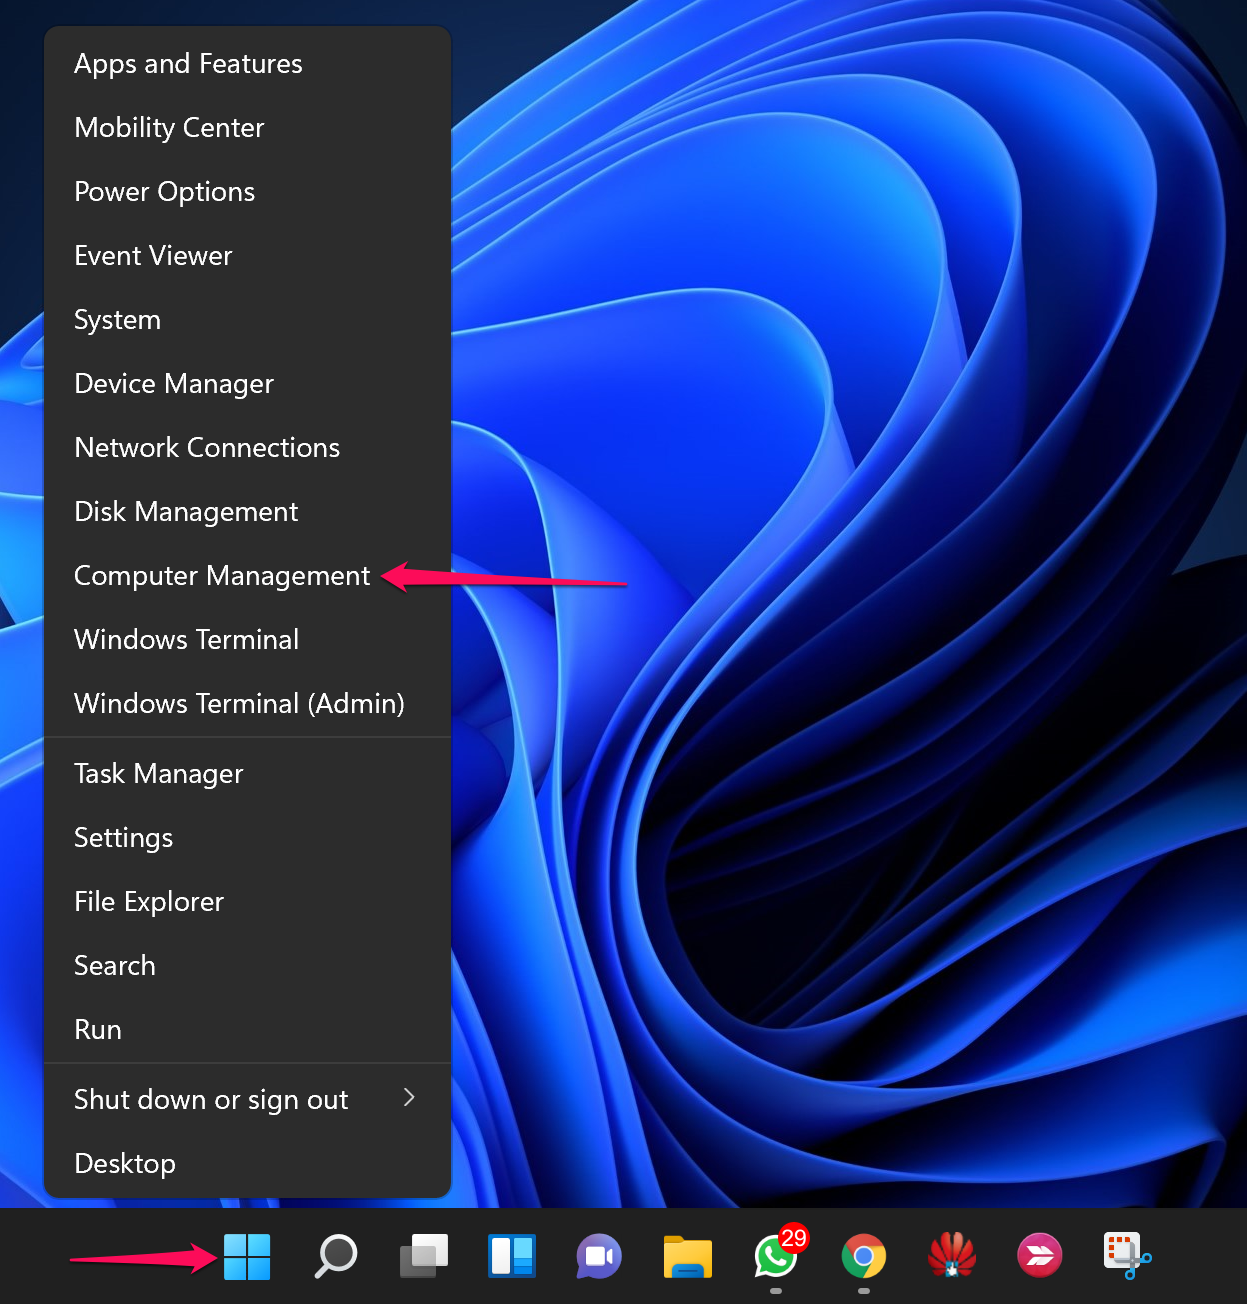
Step 1. Open the Computer Management.
To do that, right-click on the Start button and select Computer Management.
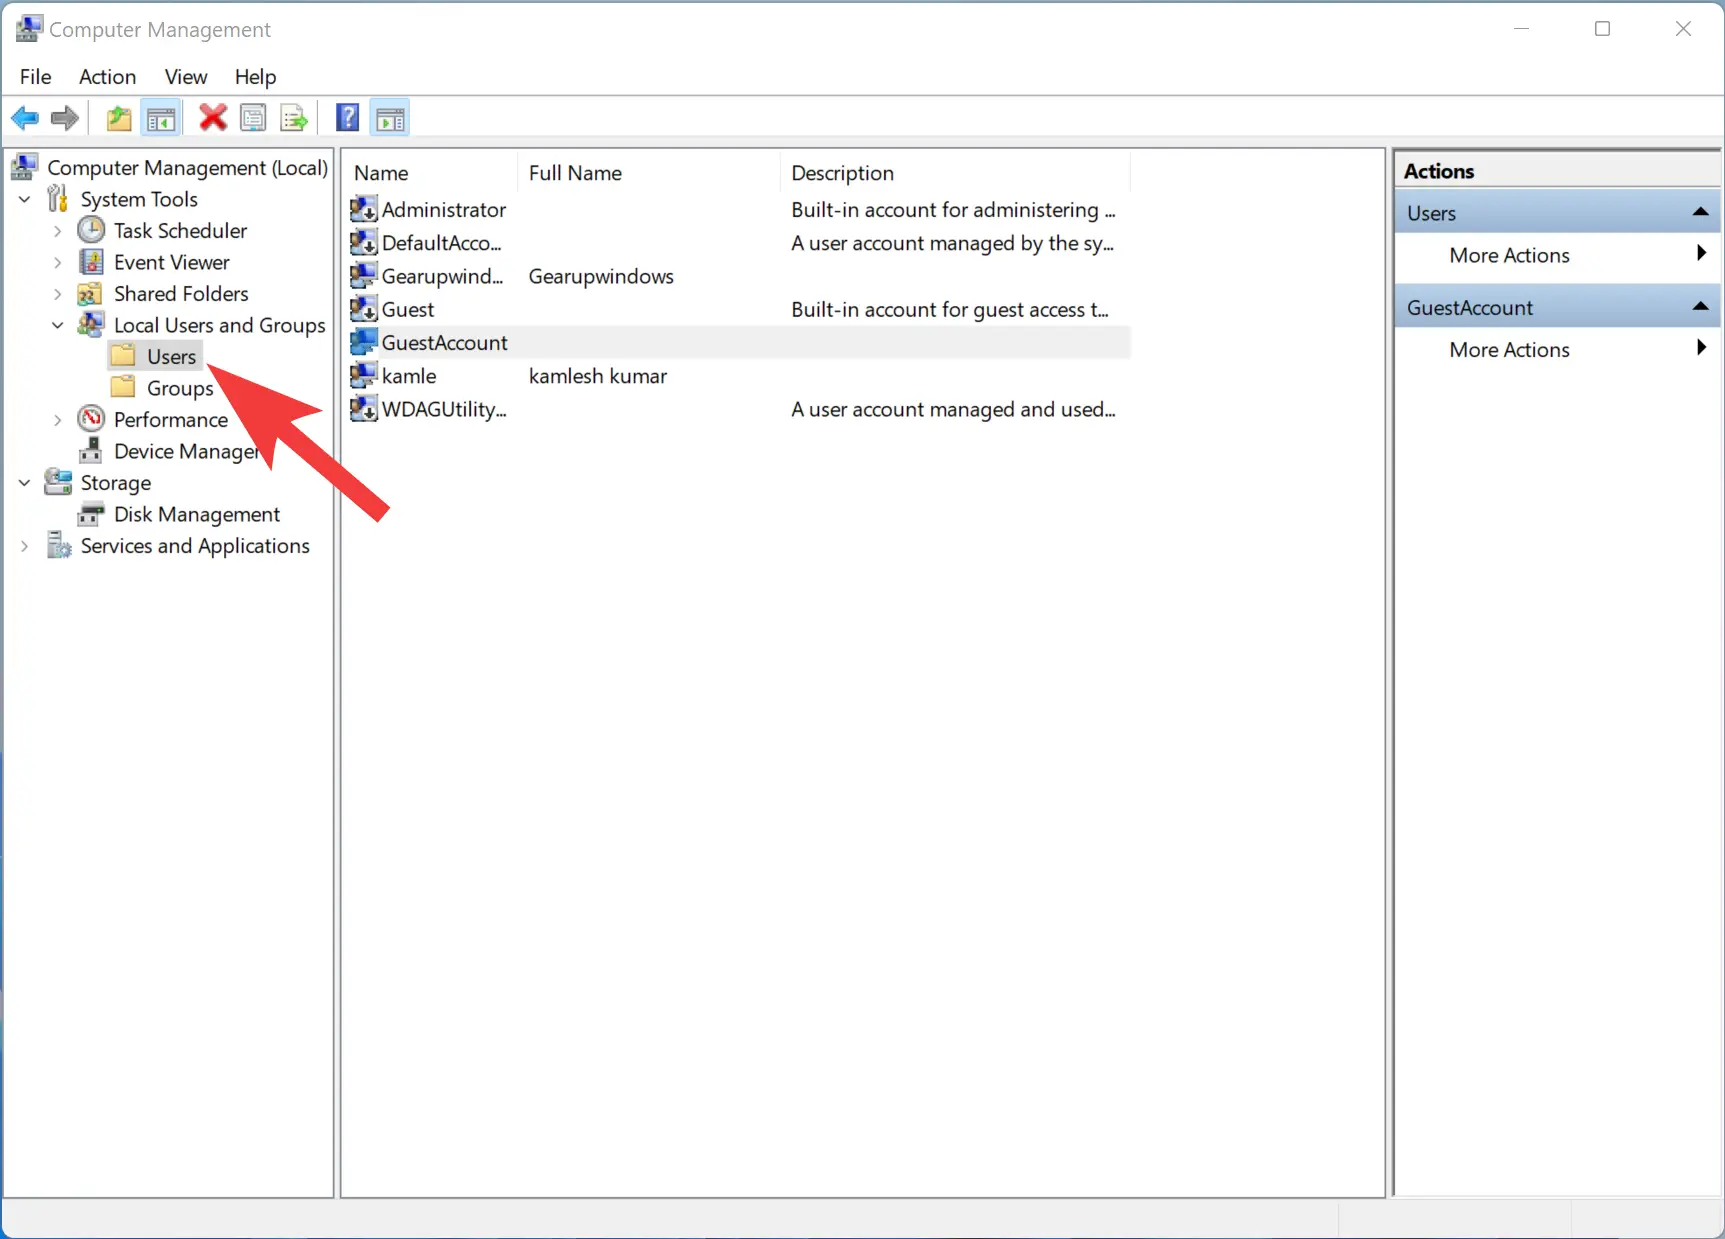
Step 2. When the Computer Management window appears, navigate to the following path in the left sidebar:-
Computer Management > System Tools > Local Users and Groups > Users
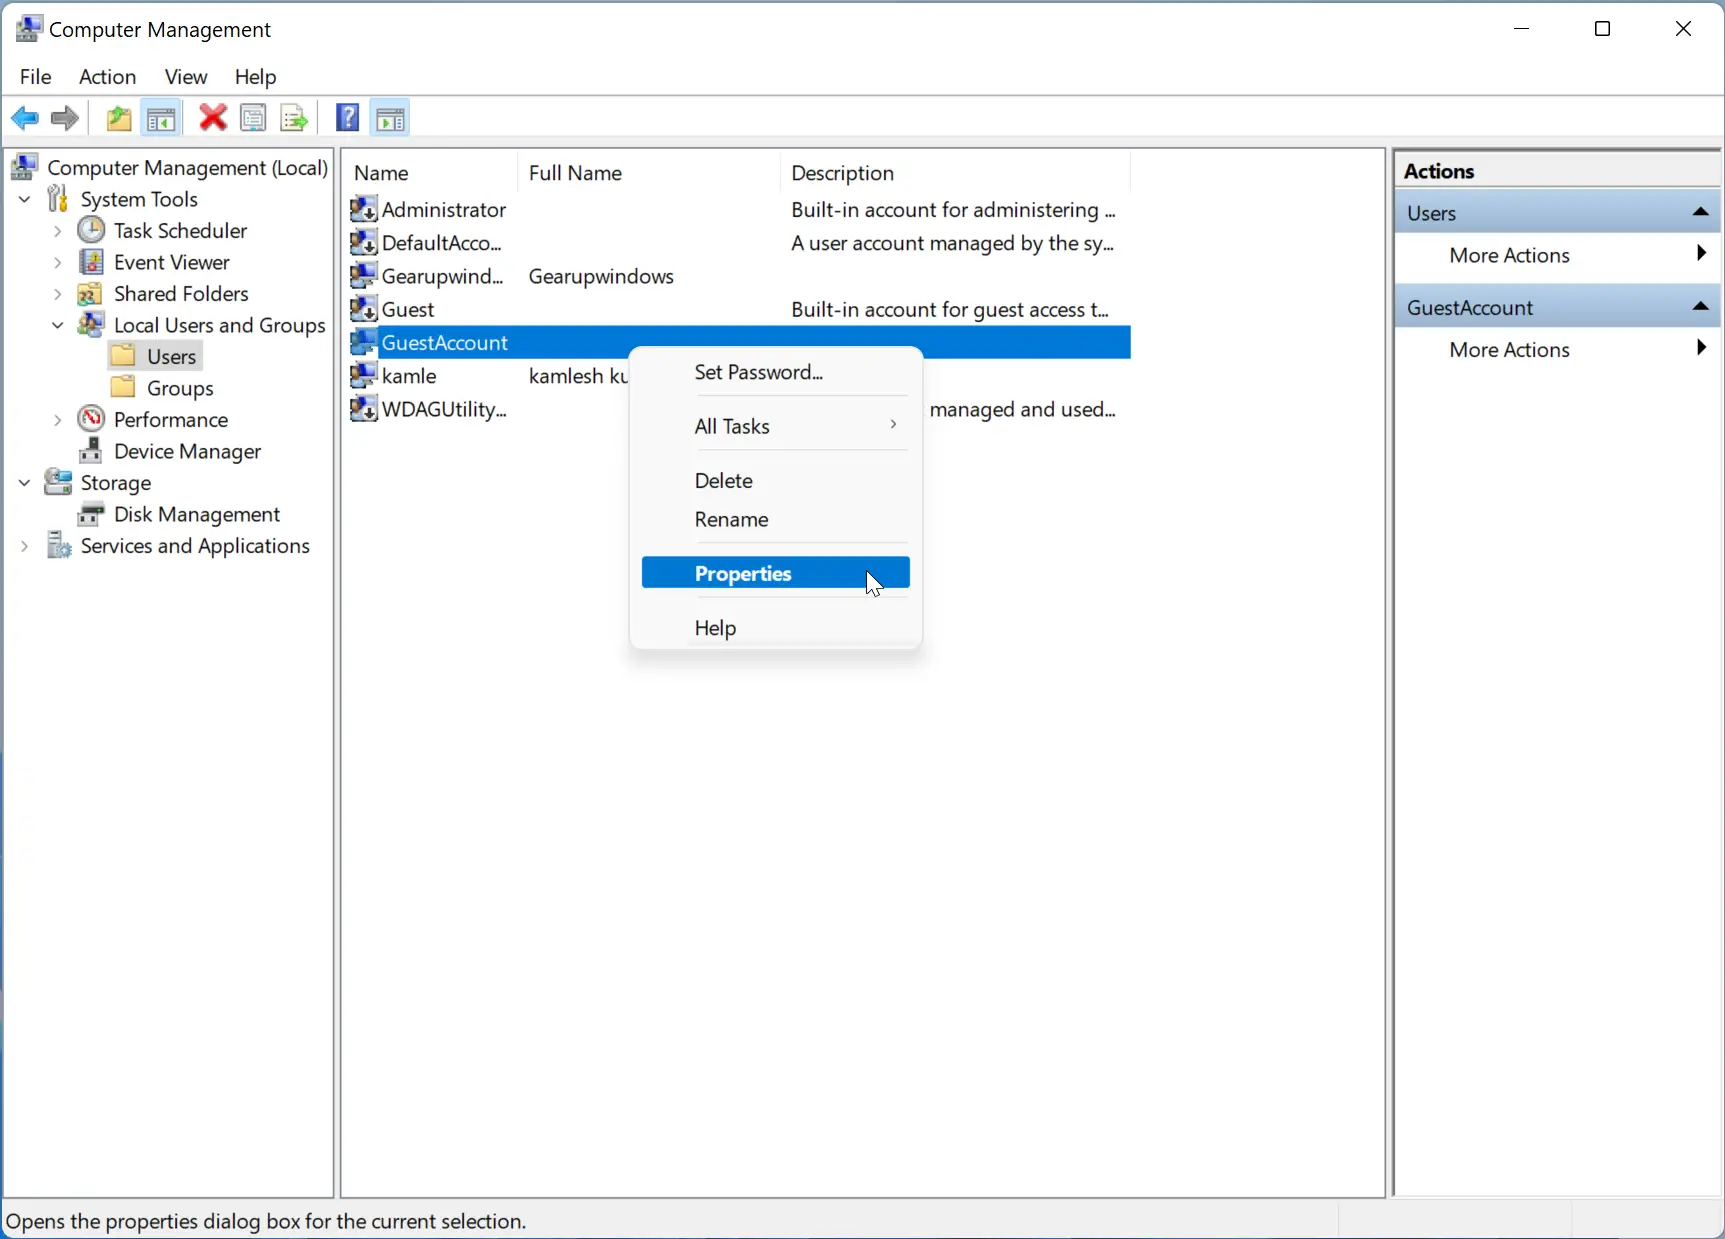
Step 3. Right-click the user name you want to disable and select the Properties option.
Step 4. Switch to the General tab in the next window.
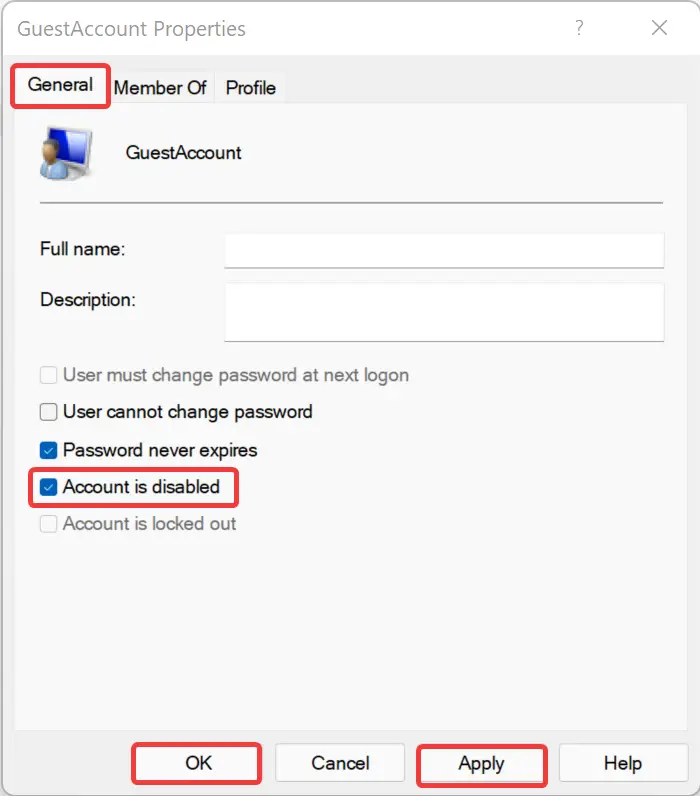
Step 5. Check or uncheck the Account is disabled option to disable or enable the selected account.
How to Turn On or Off User Account using Command Prompt?
To disable a user account using Command Prompt, do the following:-
Step 1. Open Command Prompt with admin rights.
Step 2. Then, type the following text and hit Enter key to view the available user accounts on your computer:-
net user
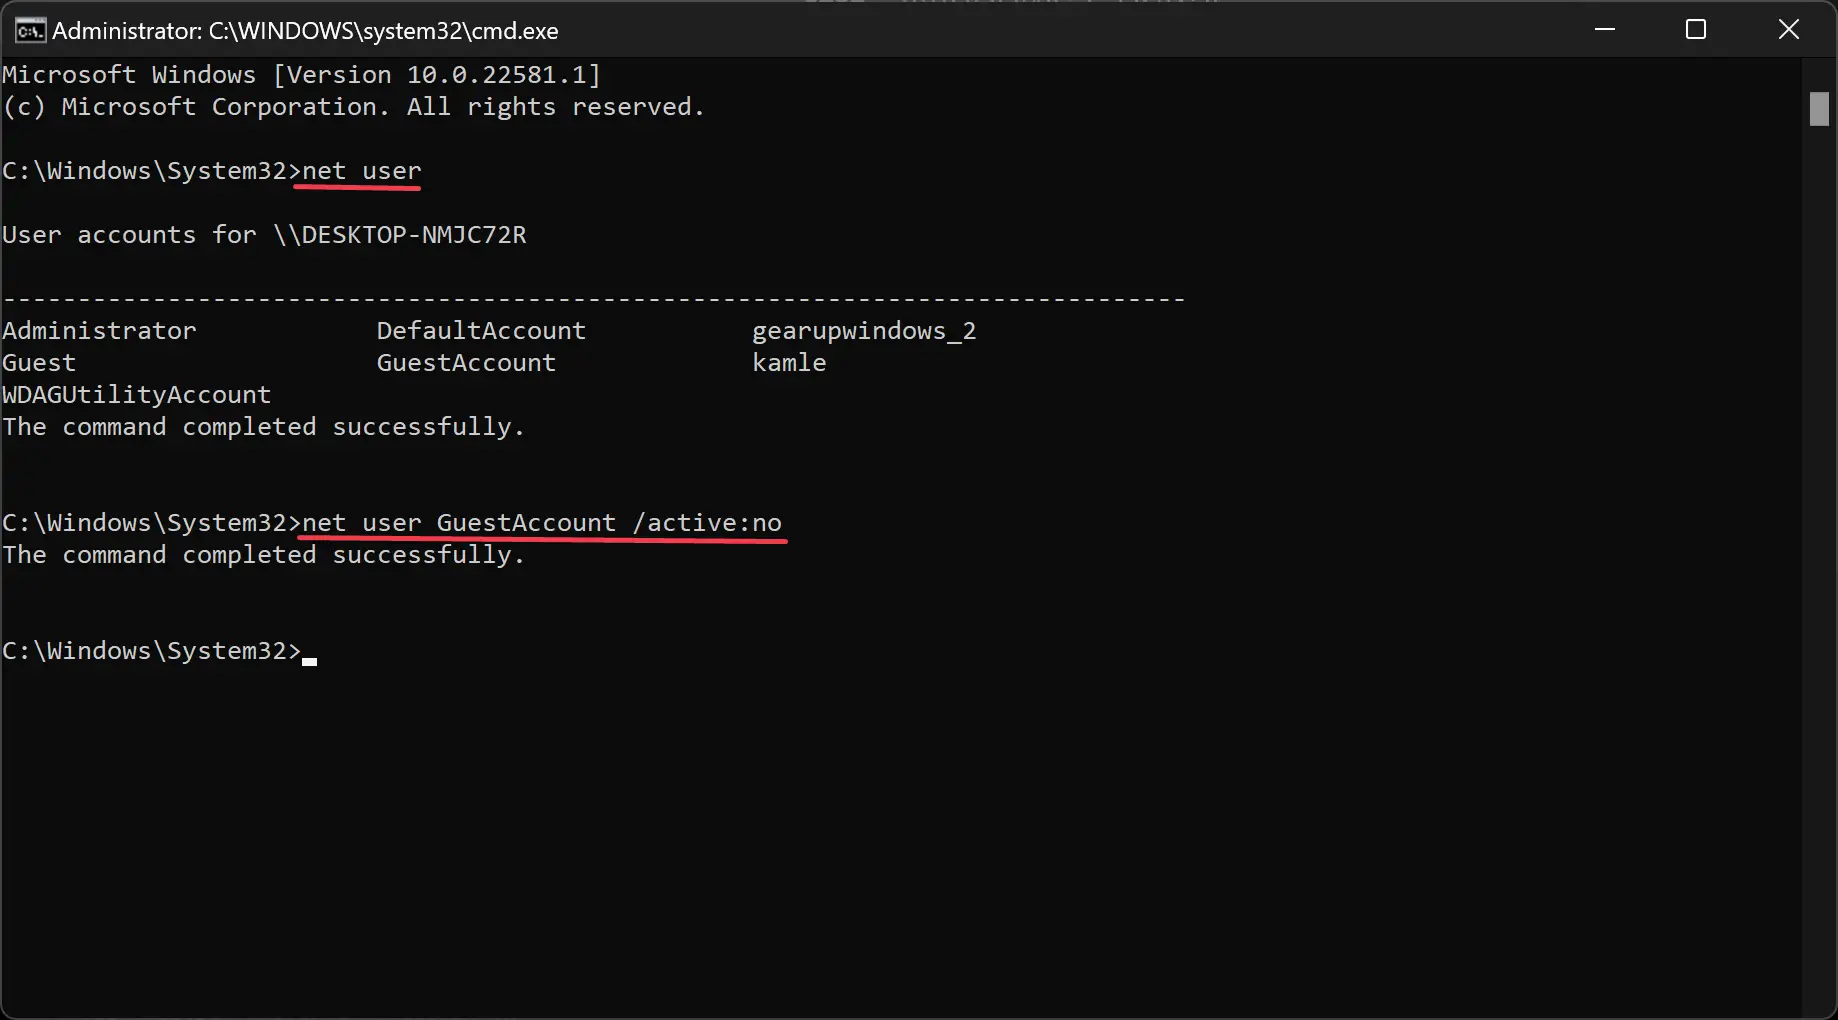
Step 3. After that, type the following command and hit Enter key to disable the account:-
net user ACCOUNT-NAME /active:no
Note: Please replace “ACCOUNT-NAME” with the account’s name to disable it. For example, we want to disable the user account GuestAccount, so my command is:-
net user GuestAccount /active:no
To enable the disabled account, you need to execute the following command:-
net user ACCOUNT-NAME /active:yes
How to Enable or Disable User Accounts Using Windows PowerShell?
To disable a user account using PowerShell, use these steps:-
Step 1. Open PowerShell with admin privilege.
Step 2. Then, type the following command and hit Enter to display the available accounts:-
Get-LocalUser
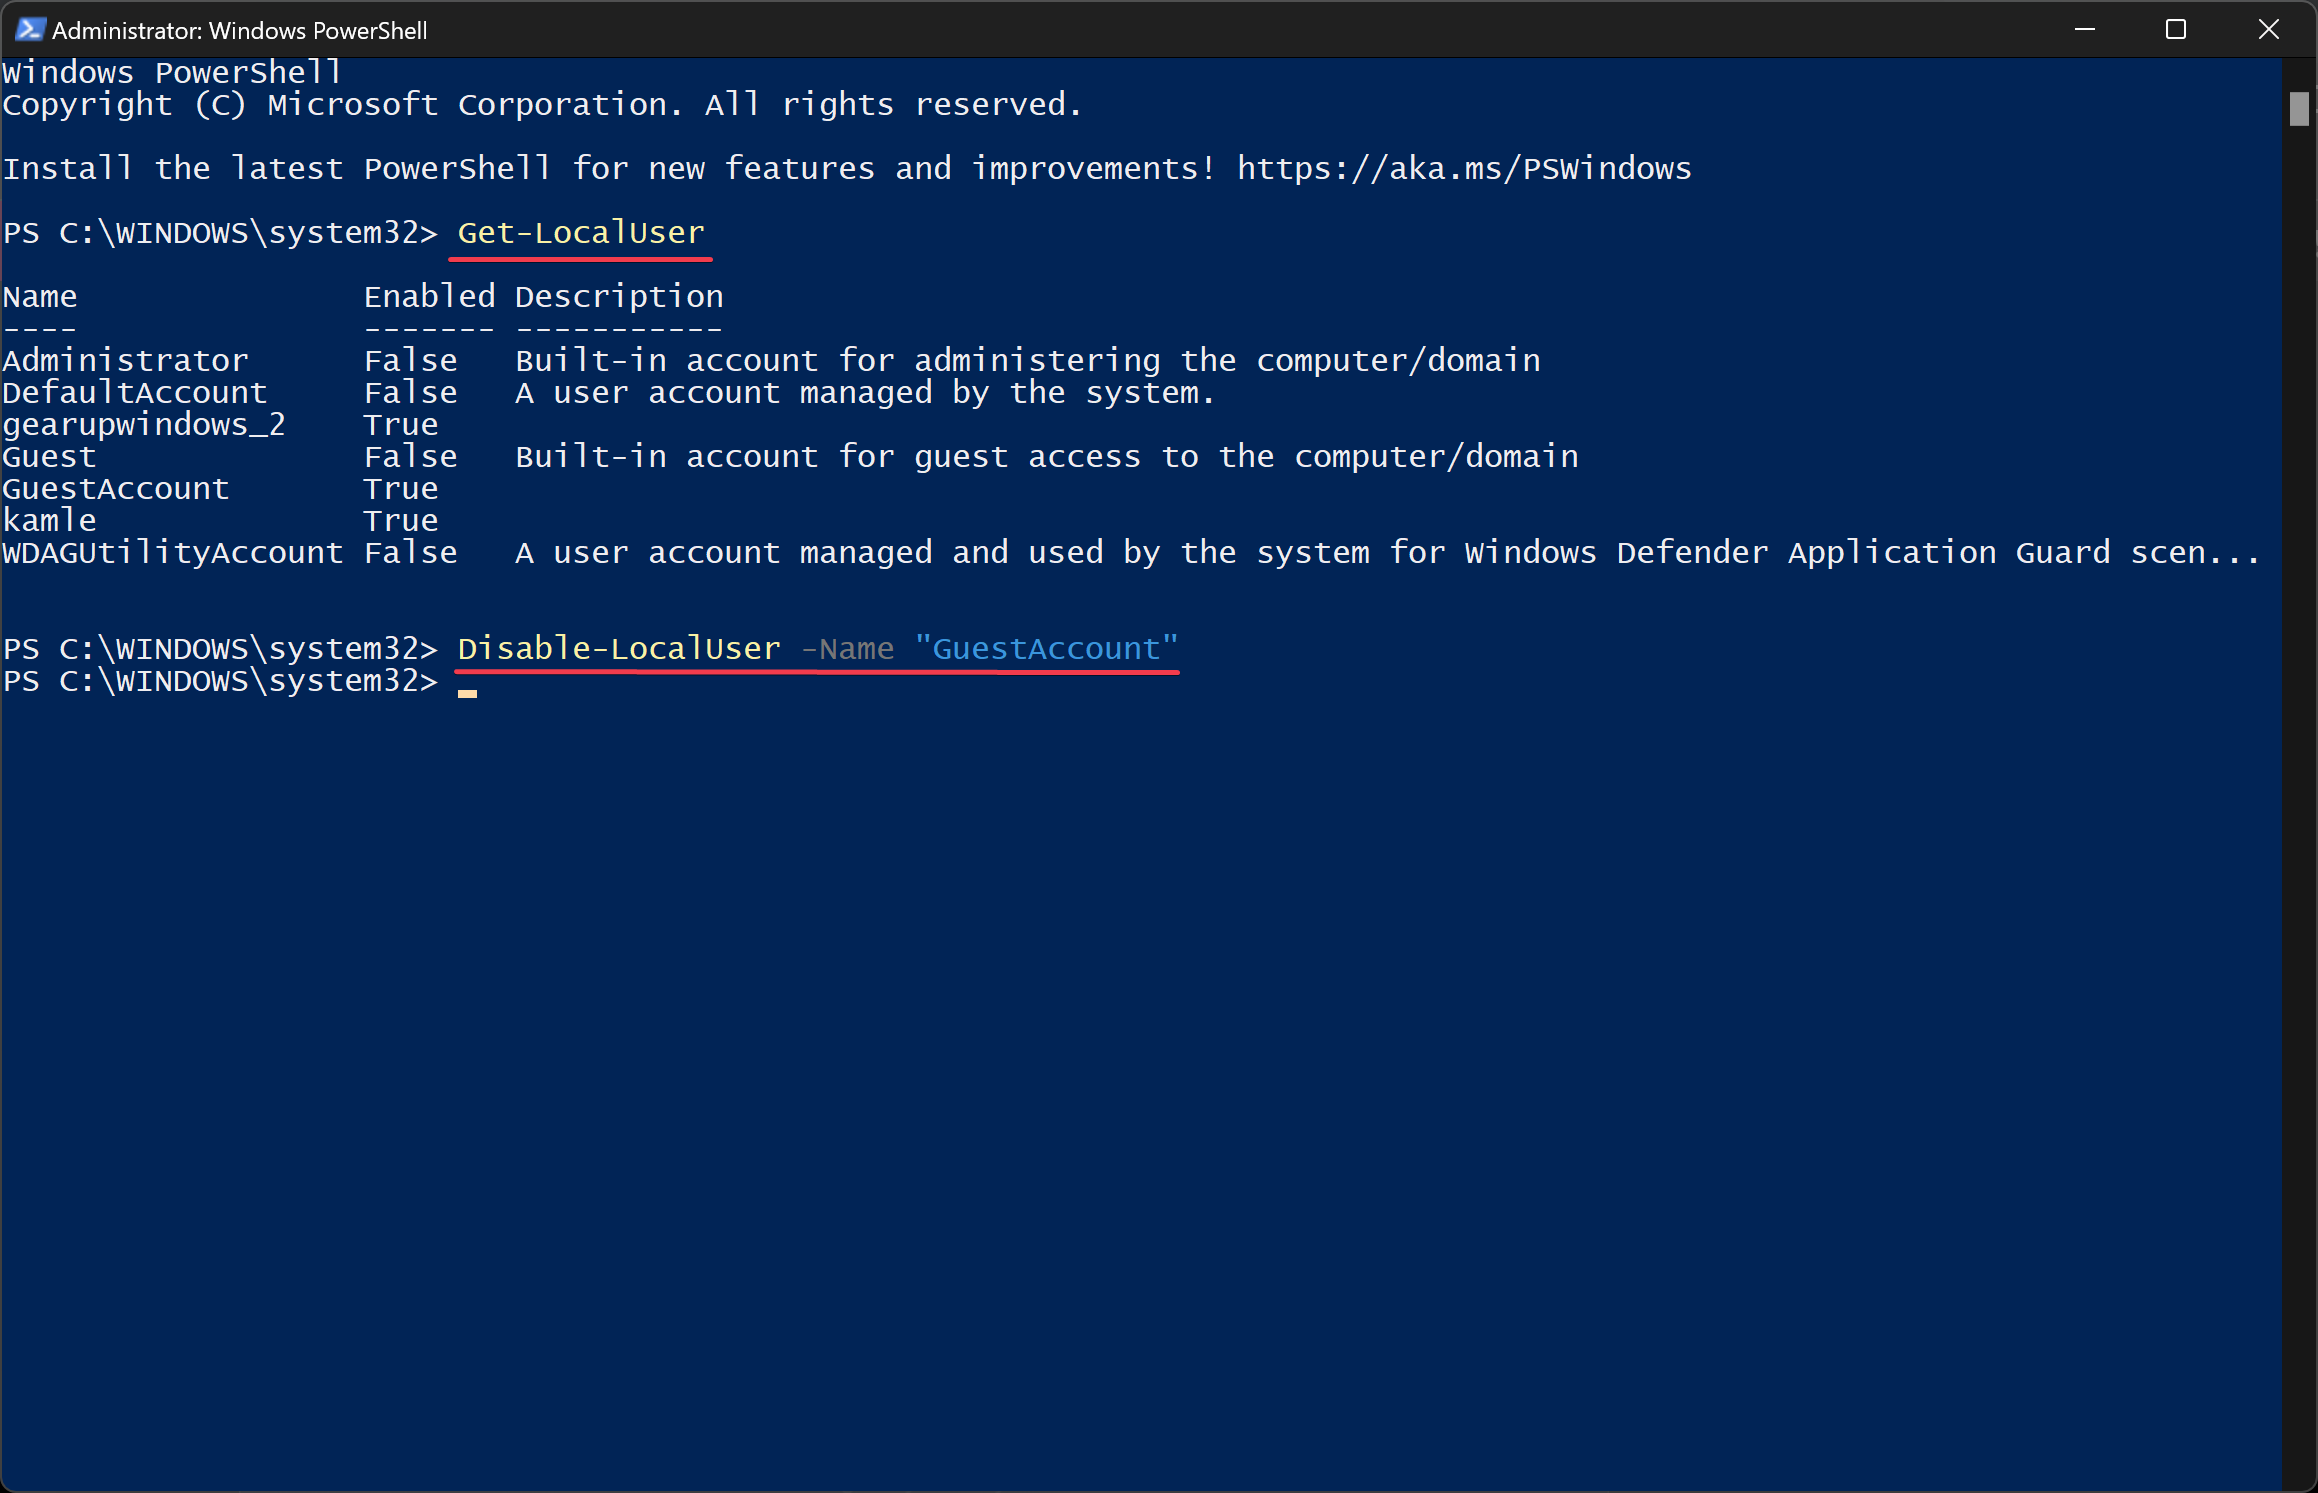
Step 3. After that, type the following command and hit Enter key on the keyboard to disable the user account:-
Disable-LocalUser -Name "ACCOUNT-NAME"
Note: Please replace “ACCOUNT-NAME” with the account name you want to disable. For instance, to disable the “GuestAccount,” the command will be:-
Disable-LocalUser -Name "GuestAccount"
To enable the user account, you will need to execute the following command:-
Enable-LocalUser -Name "ACCOUNT-NAME"
That’s it.
Conclusion
In conclusion, enabling or disabling a user account on Windows 11/10 is a simple process that can be done through various methods, including Computer Management, Command Prompt, and PowerShell. Disabling a user account is helpful when you no longer need that user account or want to restrict access to that account. By disabling an account, you can keep the settings and personal files of that account preserved on your PC. When you want to use that account again, you can quickly restore it to gain access to all the previous settings and files. By following the steps mentioned in this article, you can enable or disable a user account with ease, depending on your requirements.