Battery Saver is a critical feature of Windows 11. If your laptop is low on battery and you want to get the most out of every minute of power, turning on Battery Saver mode may work as a boon for you. It is a unique Windows power-saving mode that juices more life from your battery by dimming your screen brightness, reducing background apps, and limiting notifications.
A similar feature is available on iPhone, known as “Low Power Mode,” and on Android, “Battery Saver.”
By default, Windows 11 turns on Battery Saver mode automatically when your battery reaches 20% power if your device ships with a battery. However, it is also possible to alter this mode percentage by navigating to Settings > System > Power & battery. One should note that even if the battery saver is turned on and battery power is lower than the specified limit when you plug your machine into the charging point, this Battery Saver mode will be turned off automatically. Moreover, if you wish to conserve battery life, you can manually enable this Battery Saver mode on your PC at any time.
There are several ways through which you can enable or disable this Batter Saver mode on Windows 11. You can use either method to turn on/off this mode according to your needs.
How to Turn On or Off Battery Saver on Windows 11 using the Quick Settings Menu?
To enable or disable battery saver on your Windows 11 machine through the Quick Settings menu, use these steps:-
Step 1. Open the Quick Settings menu by pressing Windows + A keyboard shortcut. Alternatively, click the Quick Settings area on the taskbar.
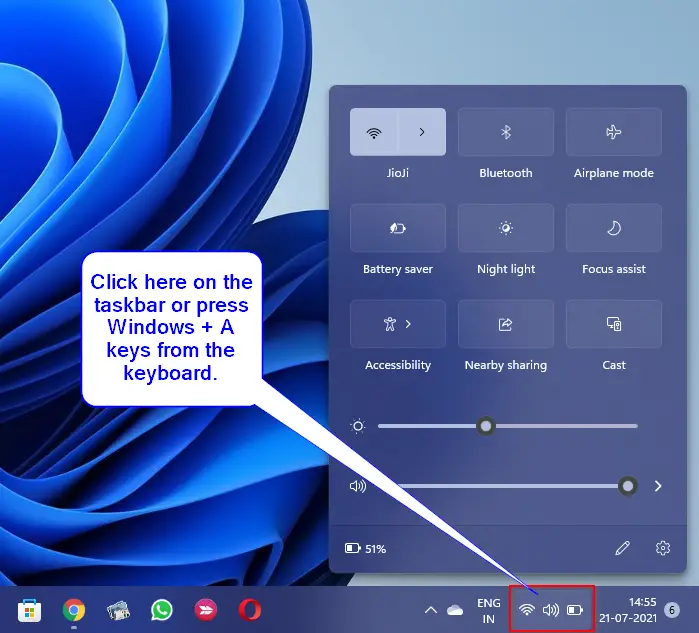
Step 2. When the Quick Settings menu opens, click the Battery Saver button to enable or disable it.
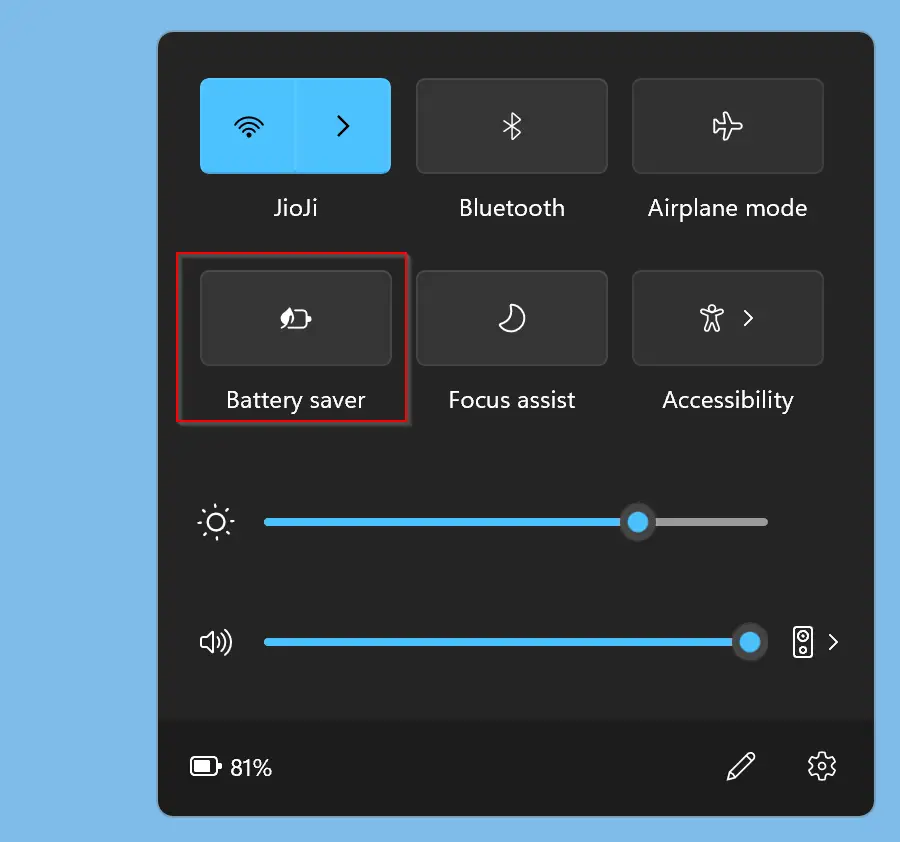
If you don’t find Battery Saver under Quick Settings, click the pencil icon at the bottom and choose Add option. Then select Battery Saver in the list that appears. Now that Battery Saver will appear in the Quick Settings menu immediately. When you’re done, click on its icon to turn it on/off.
How to Enable or Disable Battery Saver on Windows 11 through the Settings App?
To turn on or off battery saver on Windows 11 using the Settings app, do these steps:-
Step 1. To configure Battery Saver, first open Windows Settings by pressing Windows + I on your keyboard.
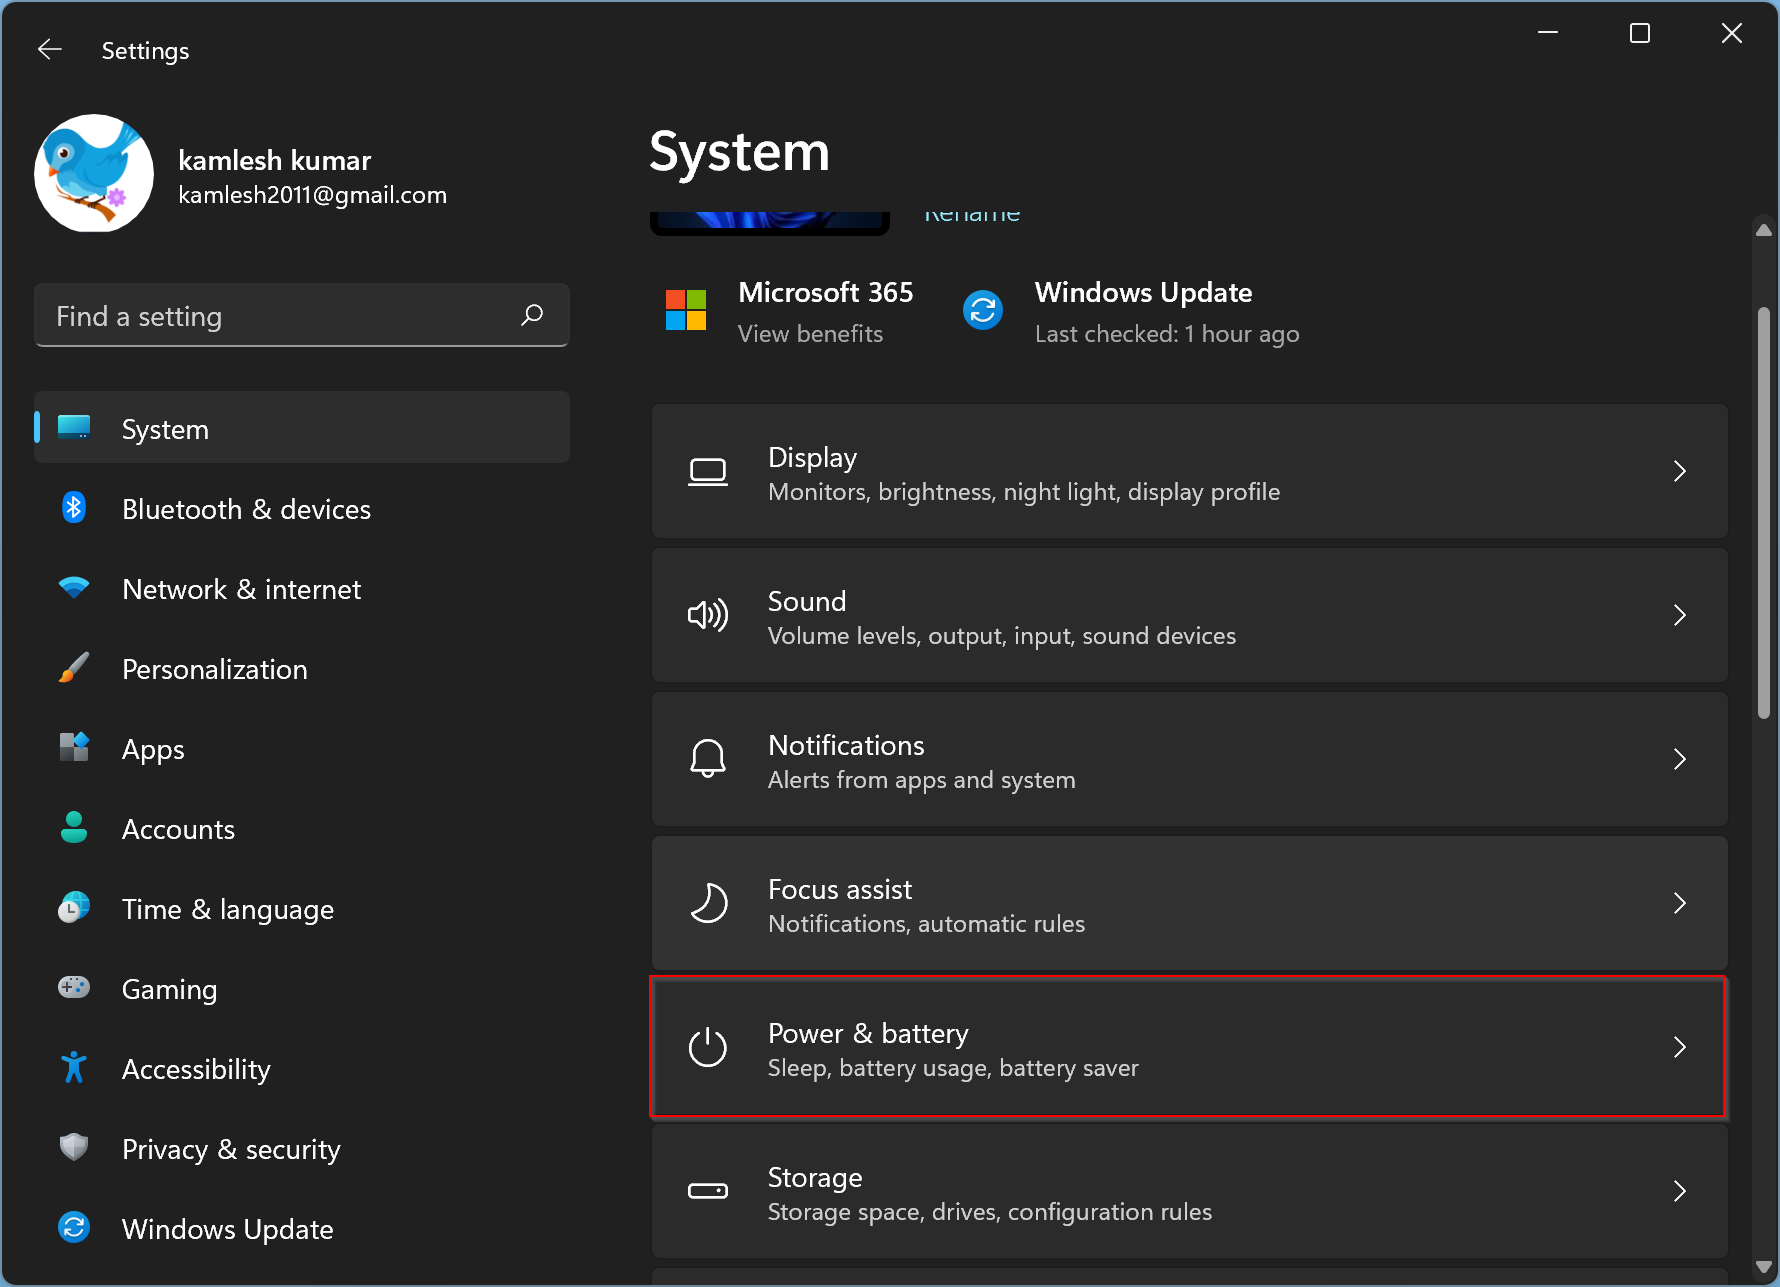
Step 2. When Windows Settings opens, select the System category in the left sidebar.

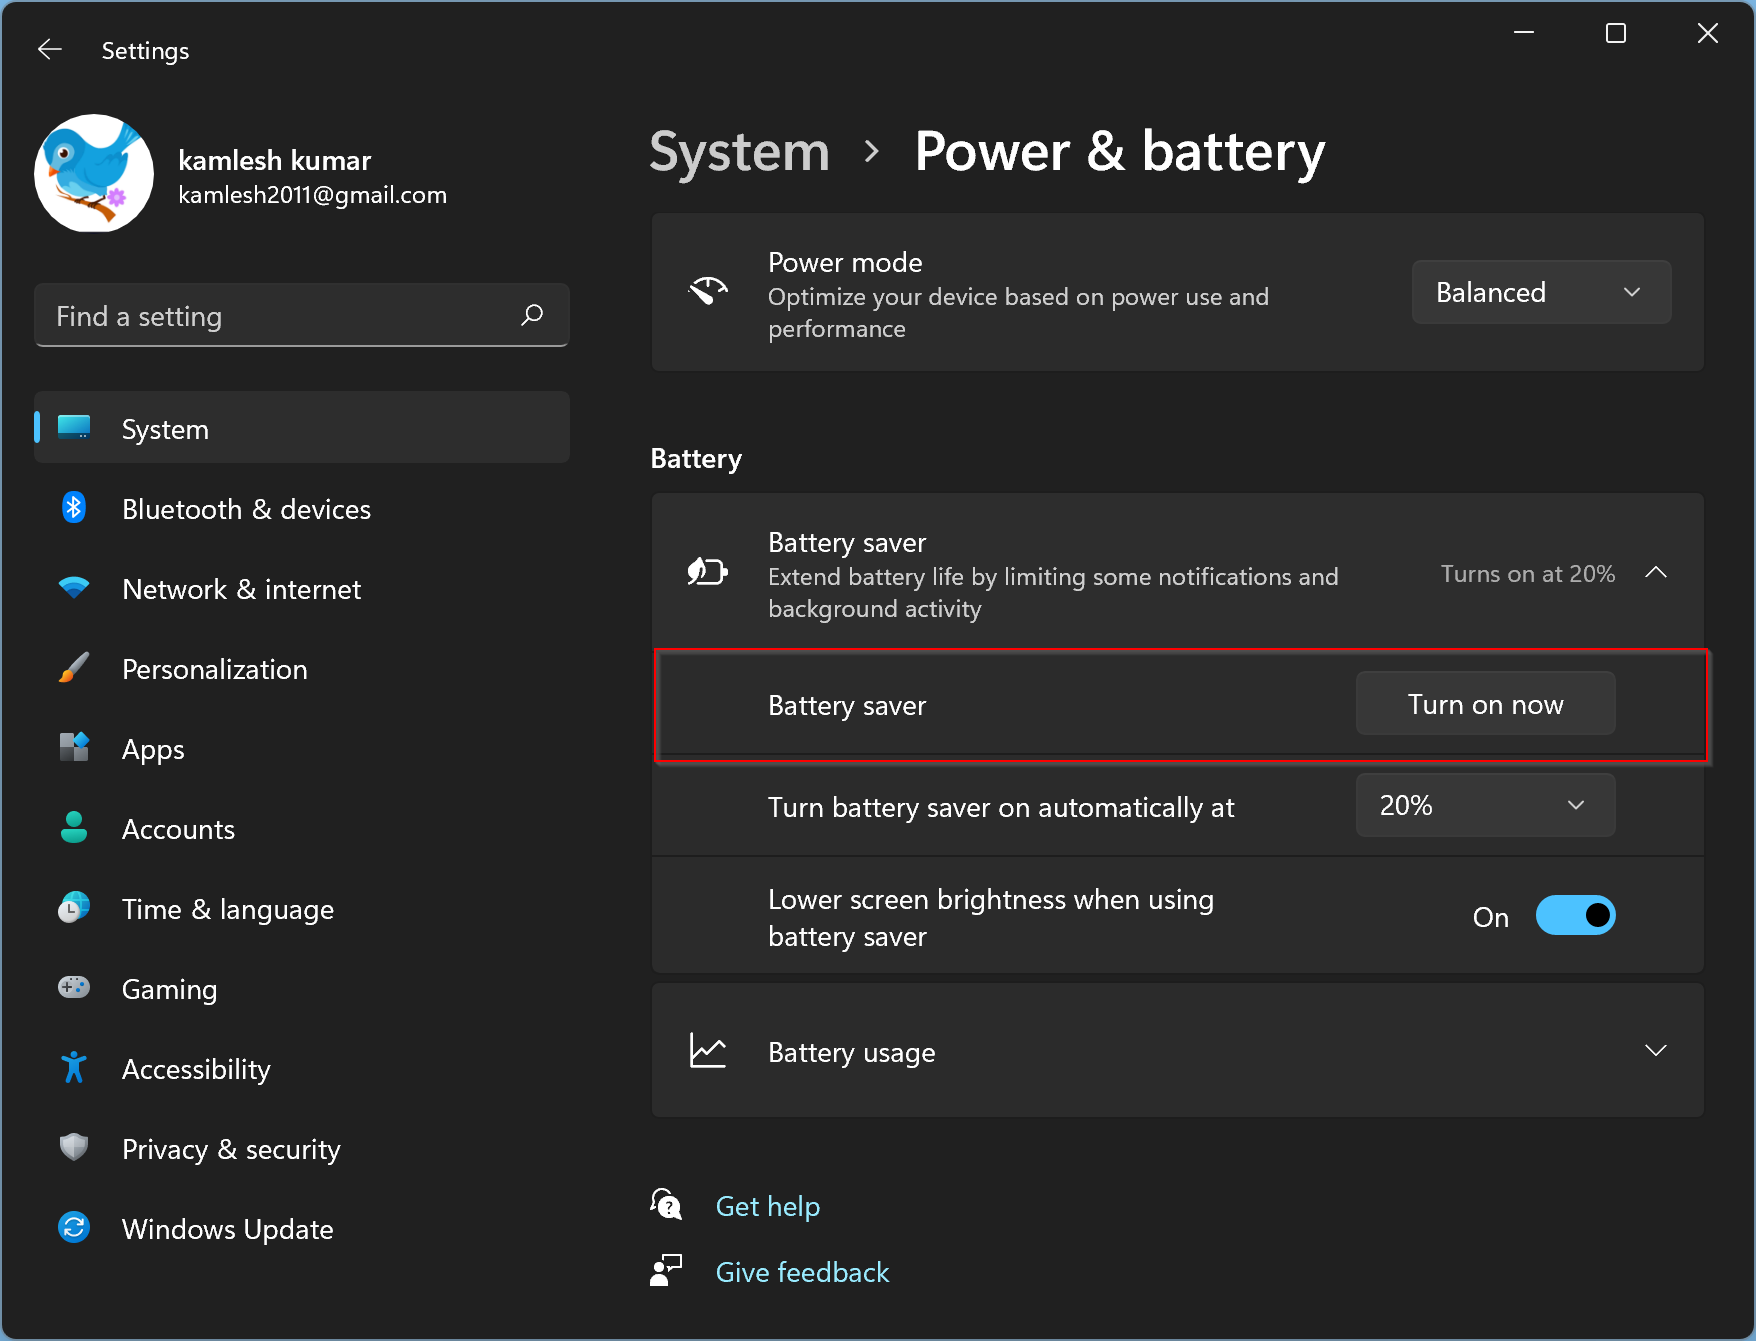
Step 3. Then, click the Power & battery tab on the right sidebar of the System.
Step 4. After that, click the Battery saver option to expand it.
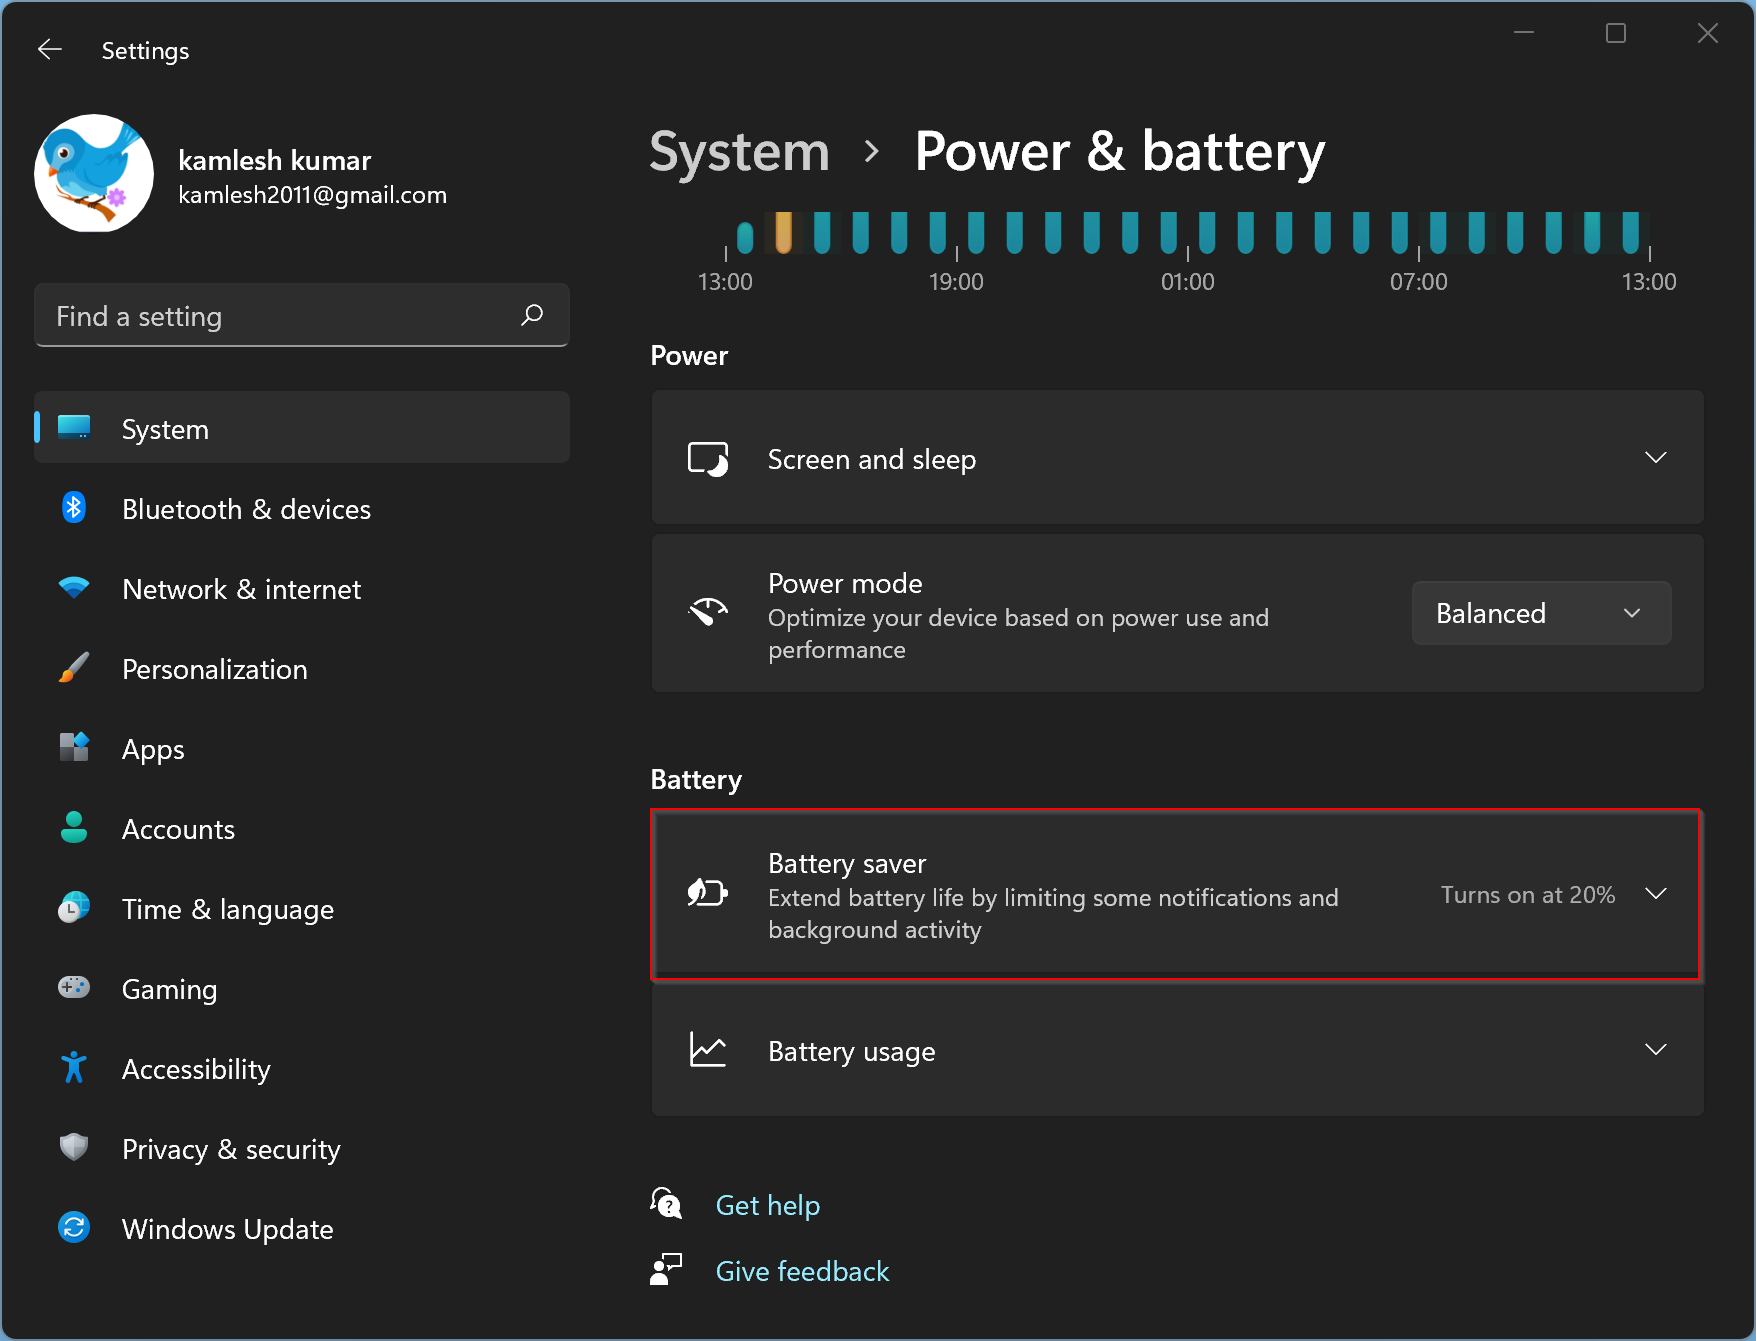
Step 5. When the Battery saver is expanded, click the Turn on now button beside the Battery saver to immediately enable the Battery Save mode.
When Battery Saver mode is enabled, and you wish to turn it off, click the button Turn off now beside Battery saver.
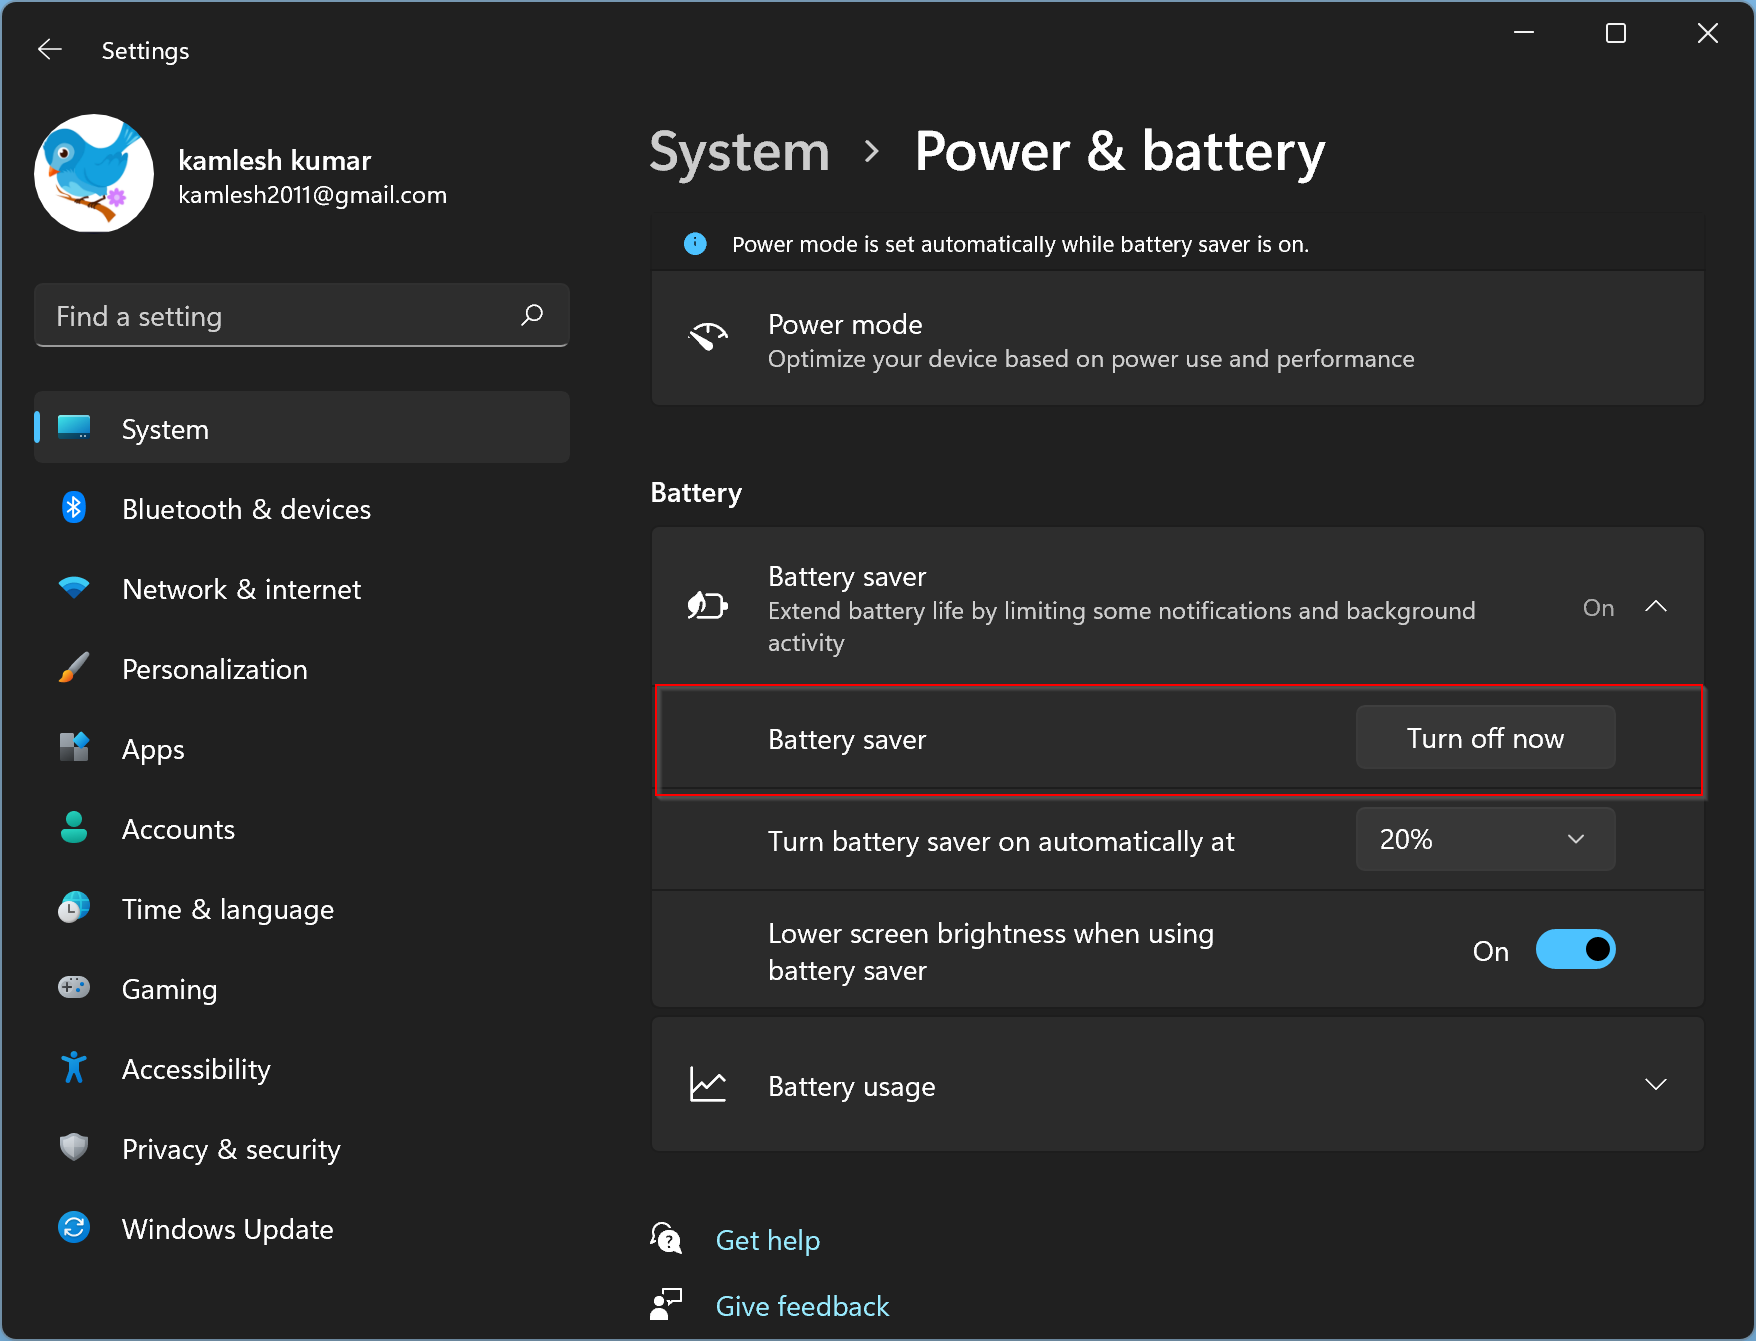
You can also change the percentage at which Battery Saver will enable itself when you are on the above screen. To do that, click the drop-down menu “Turn battery saver on automatically at” and select the desired percentage. Select the Always option if you wish to turn on Battery Saver mode permanently. And if you want to disable Battery Saver mode forever, select the Never option.
If you need, turn on/off the toggle switch beside “Lower screen brightness when using battery saver,” whether Battery Saver should dim the screen. We recommend keeping this option turned on; that will help you significantly extend your PC’s battery life.
Further, if you want to see the Battery usage in detail, expand the Battery usage option by clicking on it. You can see the battery usage percentage in a graph for the last 24 hours or 07 days. Here, you will also find the battery usage percentage by application.
Conclusion
In conclusion, Battery Saver mode is an essential feature of Windows 11 that helps users extend their device’s battery life by dimming the screen brightness, limiting notifications, and reducing background app activity. This mode is automatically enabled when the battery level reaches 20%, but users can also enable it manually or change the percentage at which it activates through the Settings app. Moreover, users can turn on/off the Battery Saver mode through the Quick Settings menu as well. By using this feature, users can optimize their device’s battery life and make the most out of every minute of power.