When you set up Windows 11/10, a unique advertising ID for each user on your PC is generated. App developers and advertising networks use this advertising ID for their own purposes to provide more relevant advertising in apps. When the advertising ID is enabled, apps can access and use it the same way as websites can access and use a unique identifier stored in a cookie. Location-based apps can easily track and access your location and provide you with more targeted ads and services to you.
This might also be a privacy issue, as advertising networks can collect your personal data and activities. Although this feature applies to Windows apps using the Windows advertising identifier, it can be accessed and used by third-party networks that don’t abide by policies.
In this gearupwindows article, we will guide you on enabling and disabling Advertising ID in Windows 11 and 10. Here is how to do it.
How to Enable or Disable Device Advertising ID in Windows 11 using Settings?
To turn on or off the device advertising ID on Windows 11, do the following:-
Step 1. First, open the Settings app by pressing Windows + I keys on the keyboard.
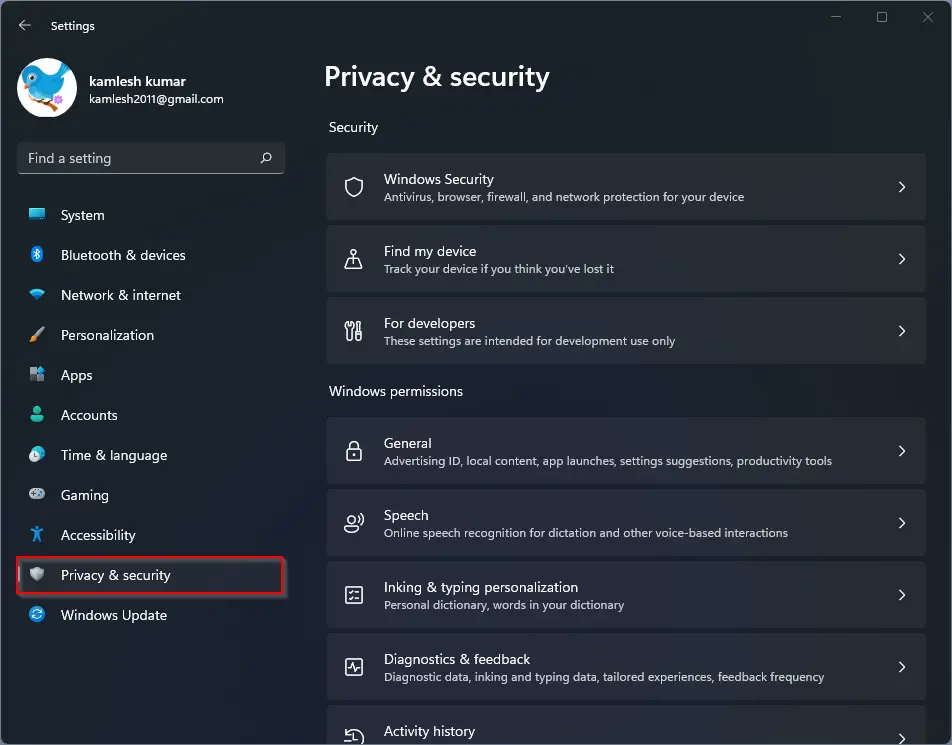
Step 2. Then, select Privacy & security in the left sidebar.
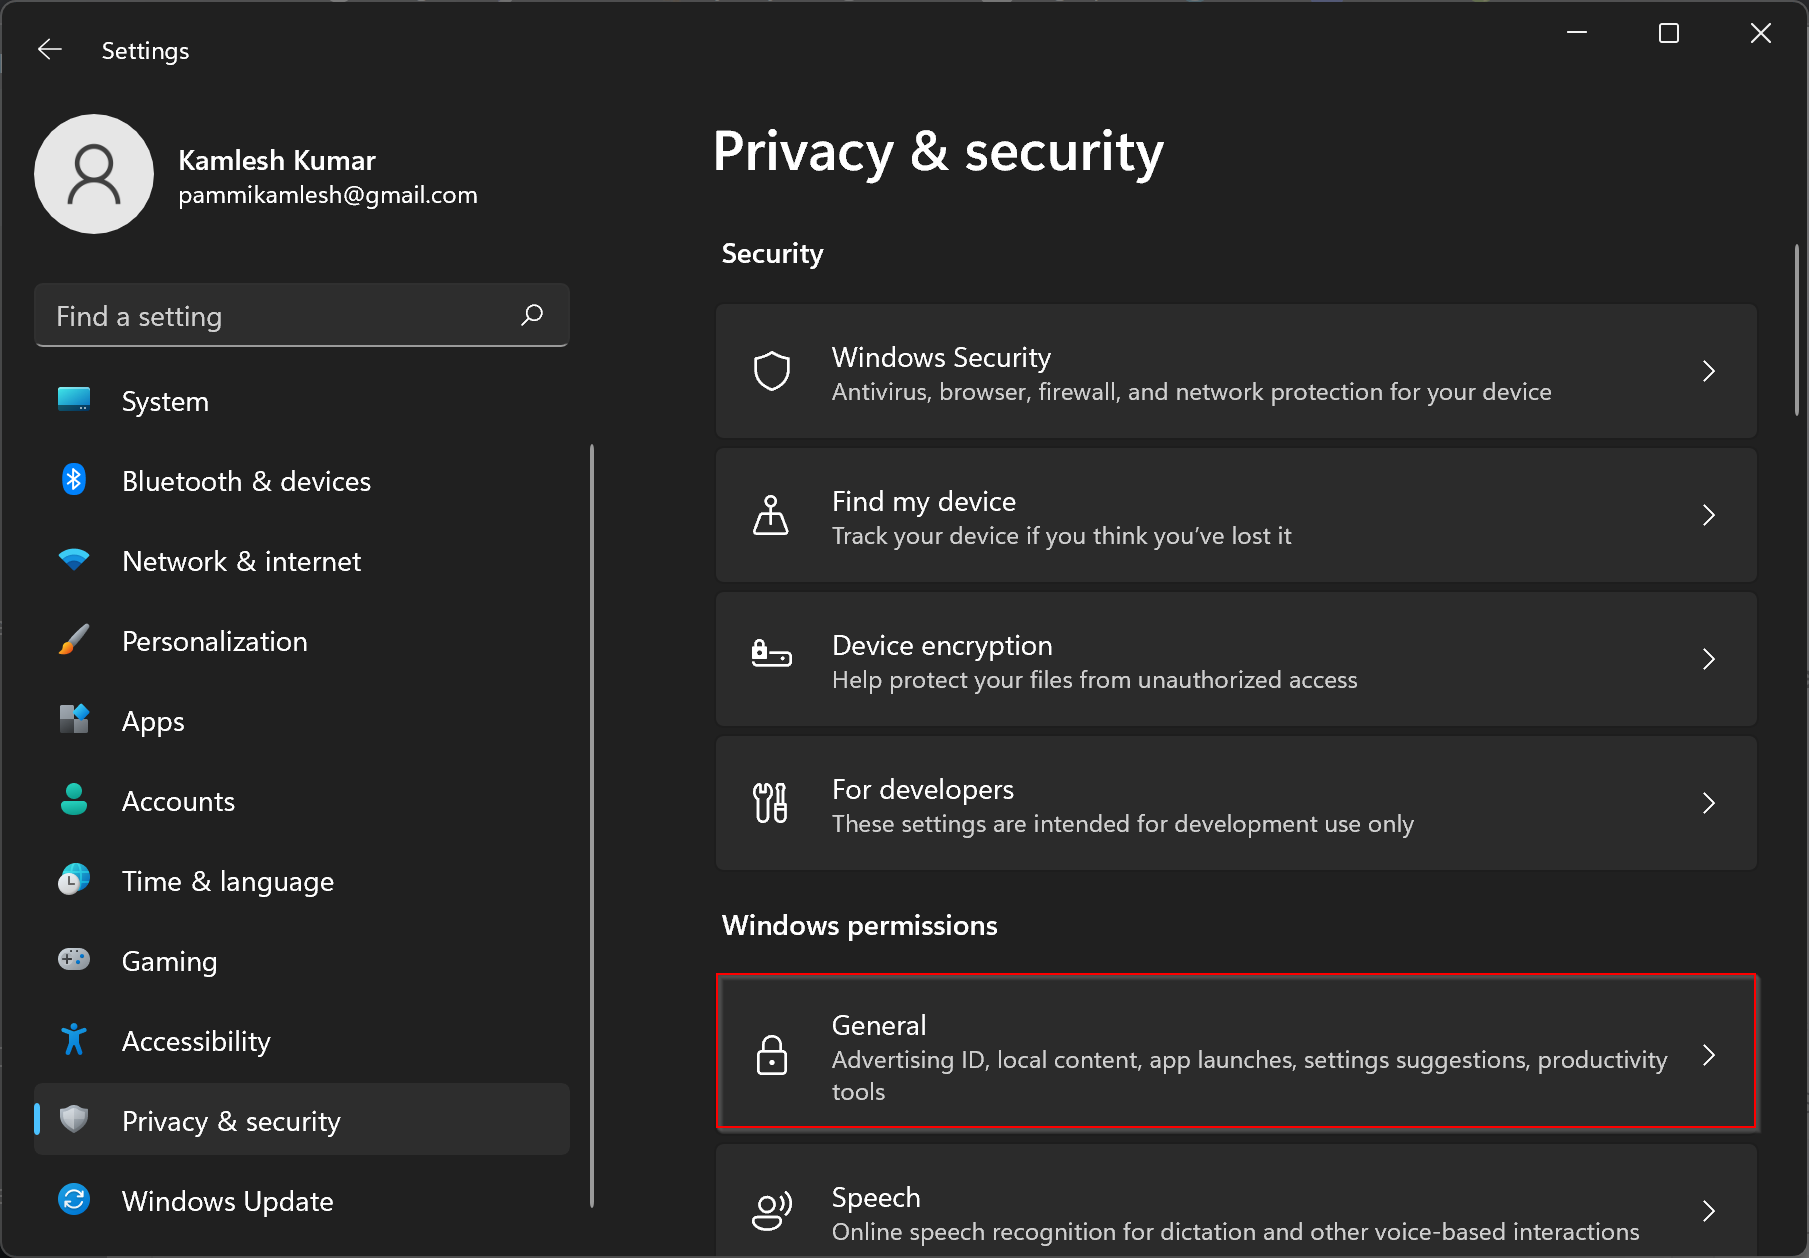
Step 3. After that, click General under the “Windows permissions” section.
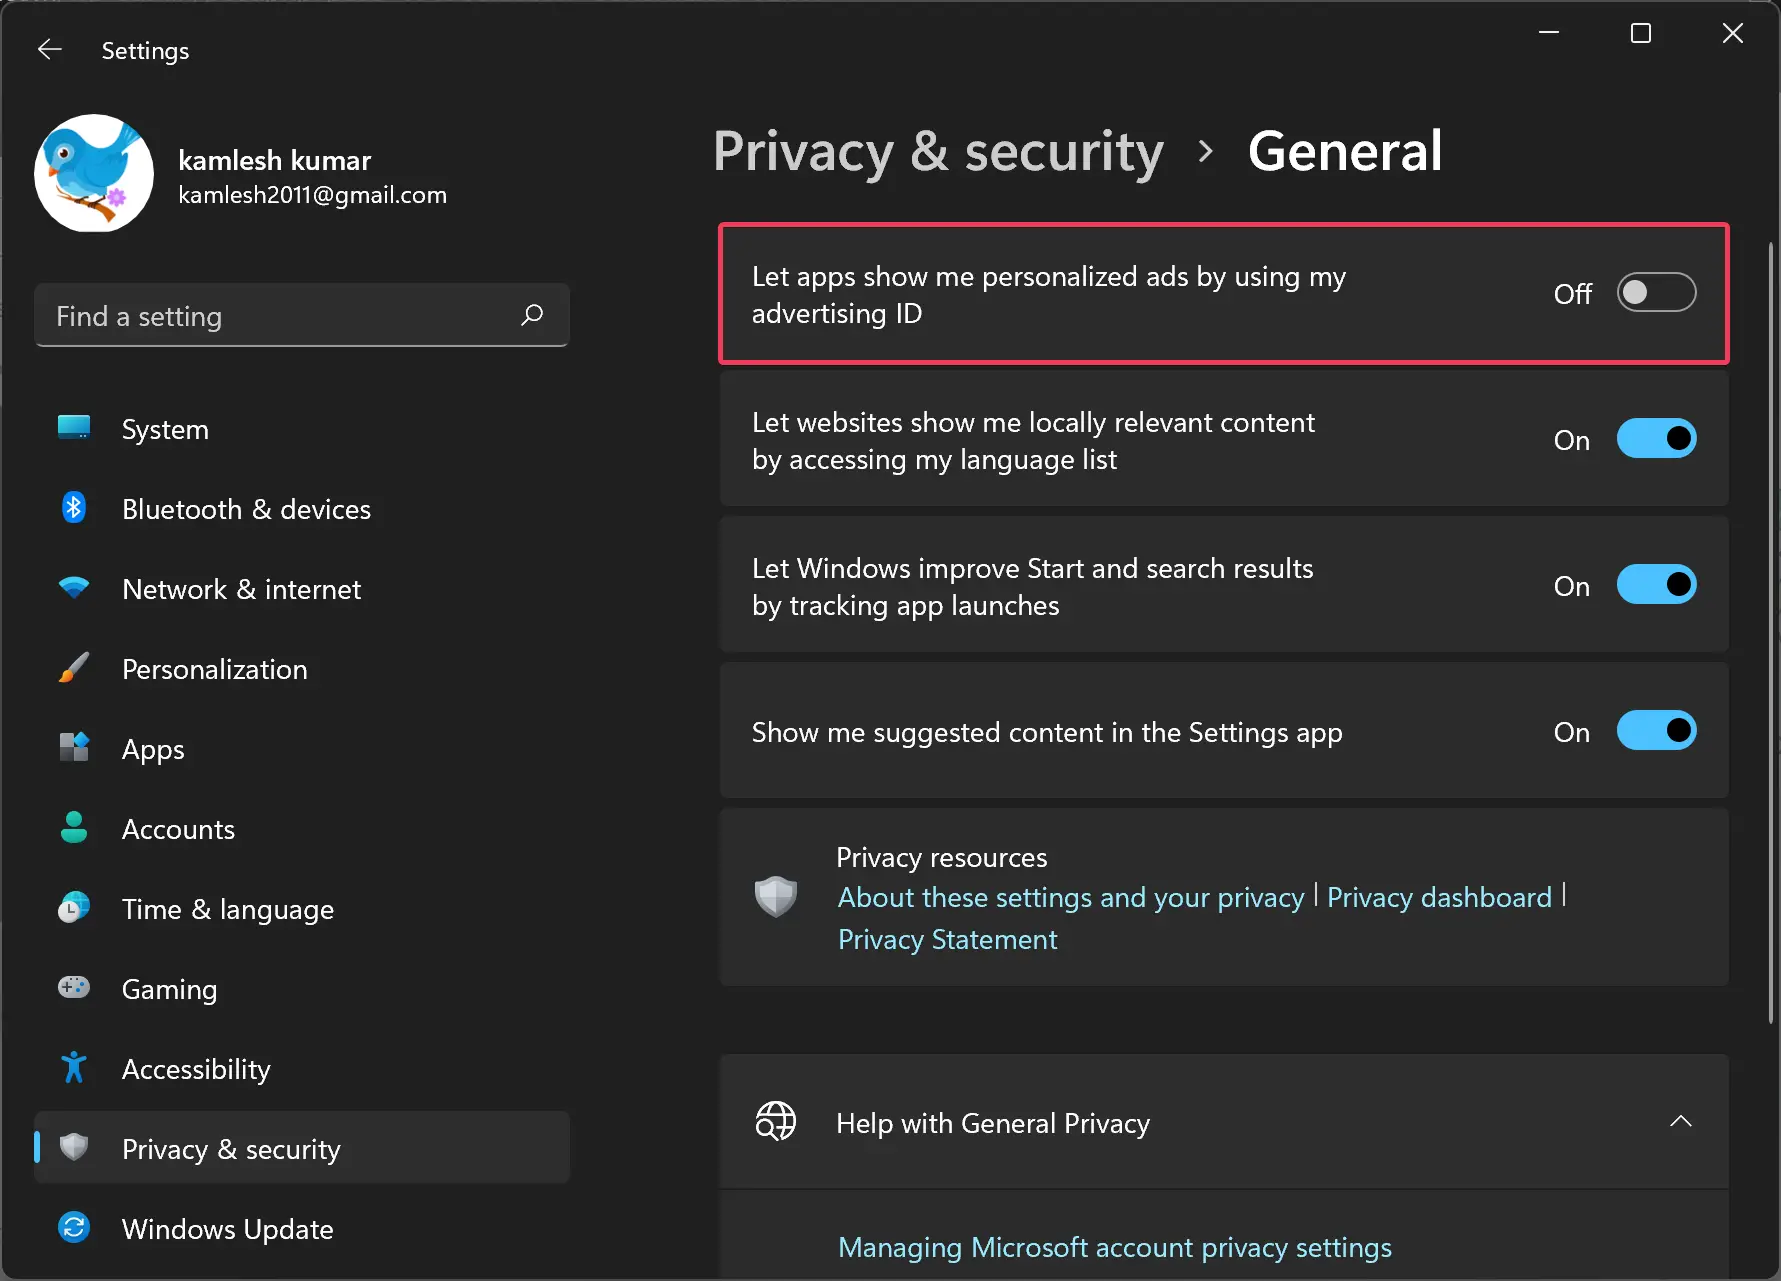
Step 4. Then, on the General settings page, toggle the button to the Off position beside “Let apps show me personalized ads by using my advertising ID” to disable this function. To enable this feature, you need to turn on this toggle.
How to Stop Targeted Ads in Windows 10 through Settings?
To delete or stop your advertising identifier ID on Windows 10, use the following steps:-
Step 1. Open the Settings app.
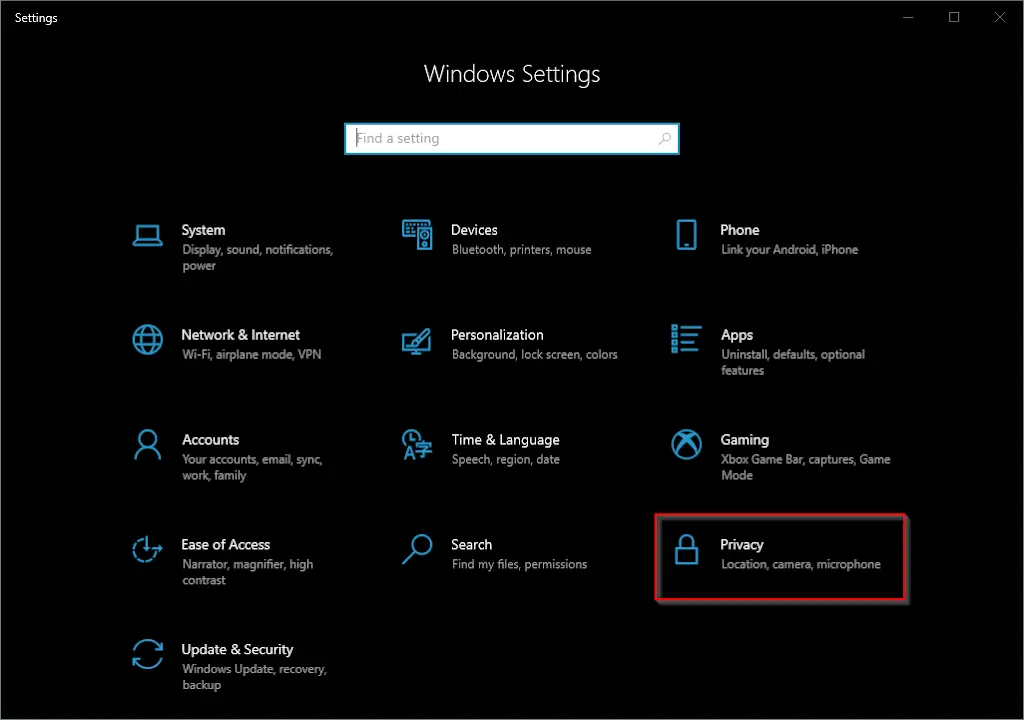
Step 2. Then, click on the Privacy option.
Step 3. After that, select General in the left sidebar.
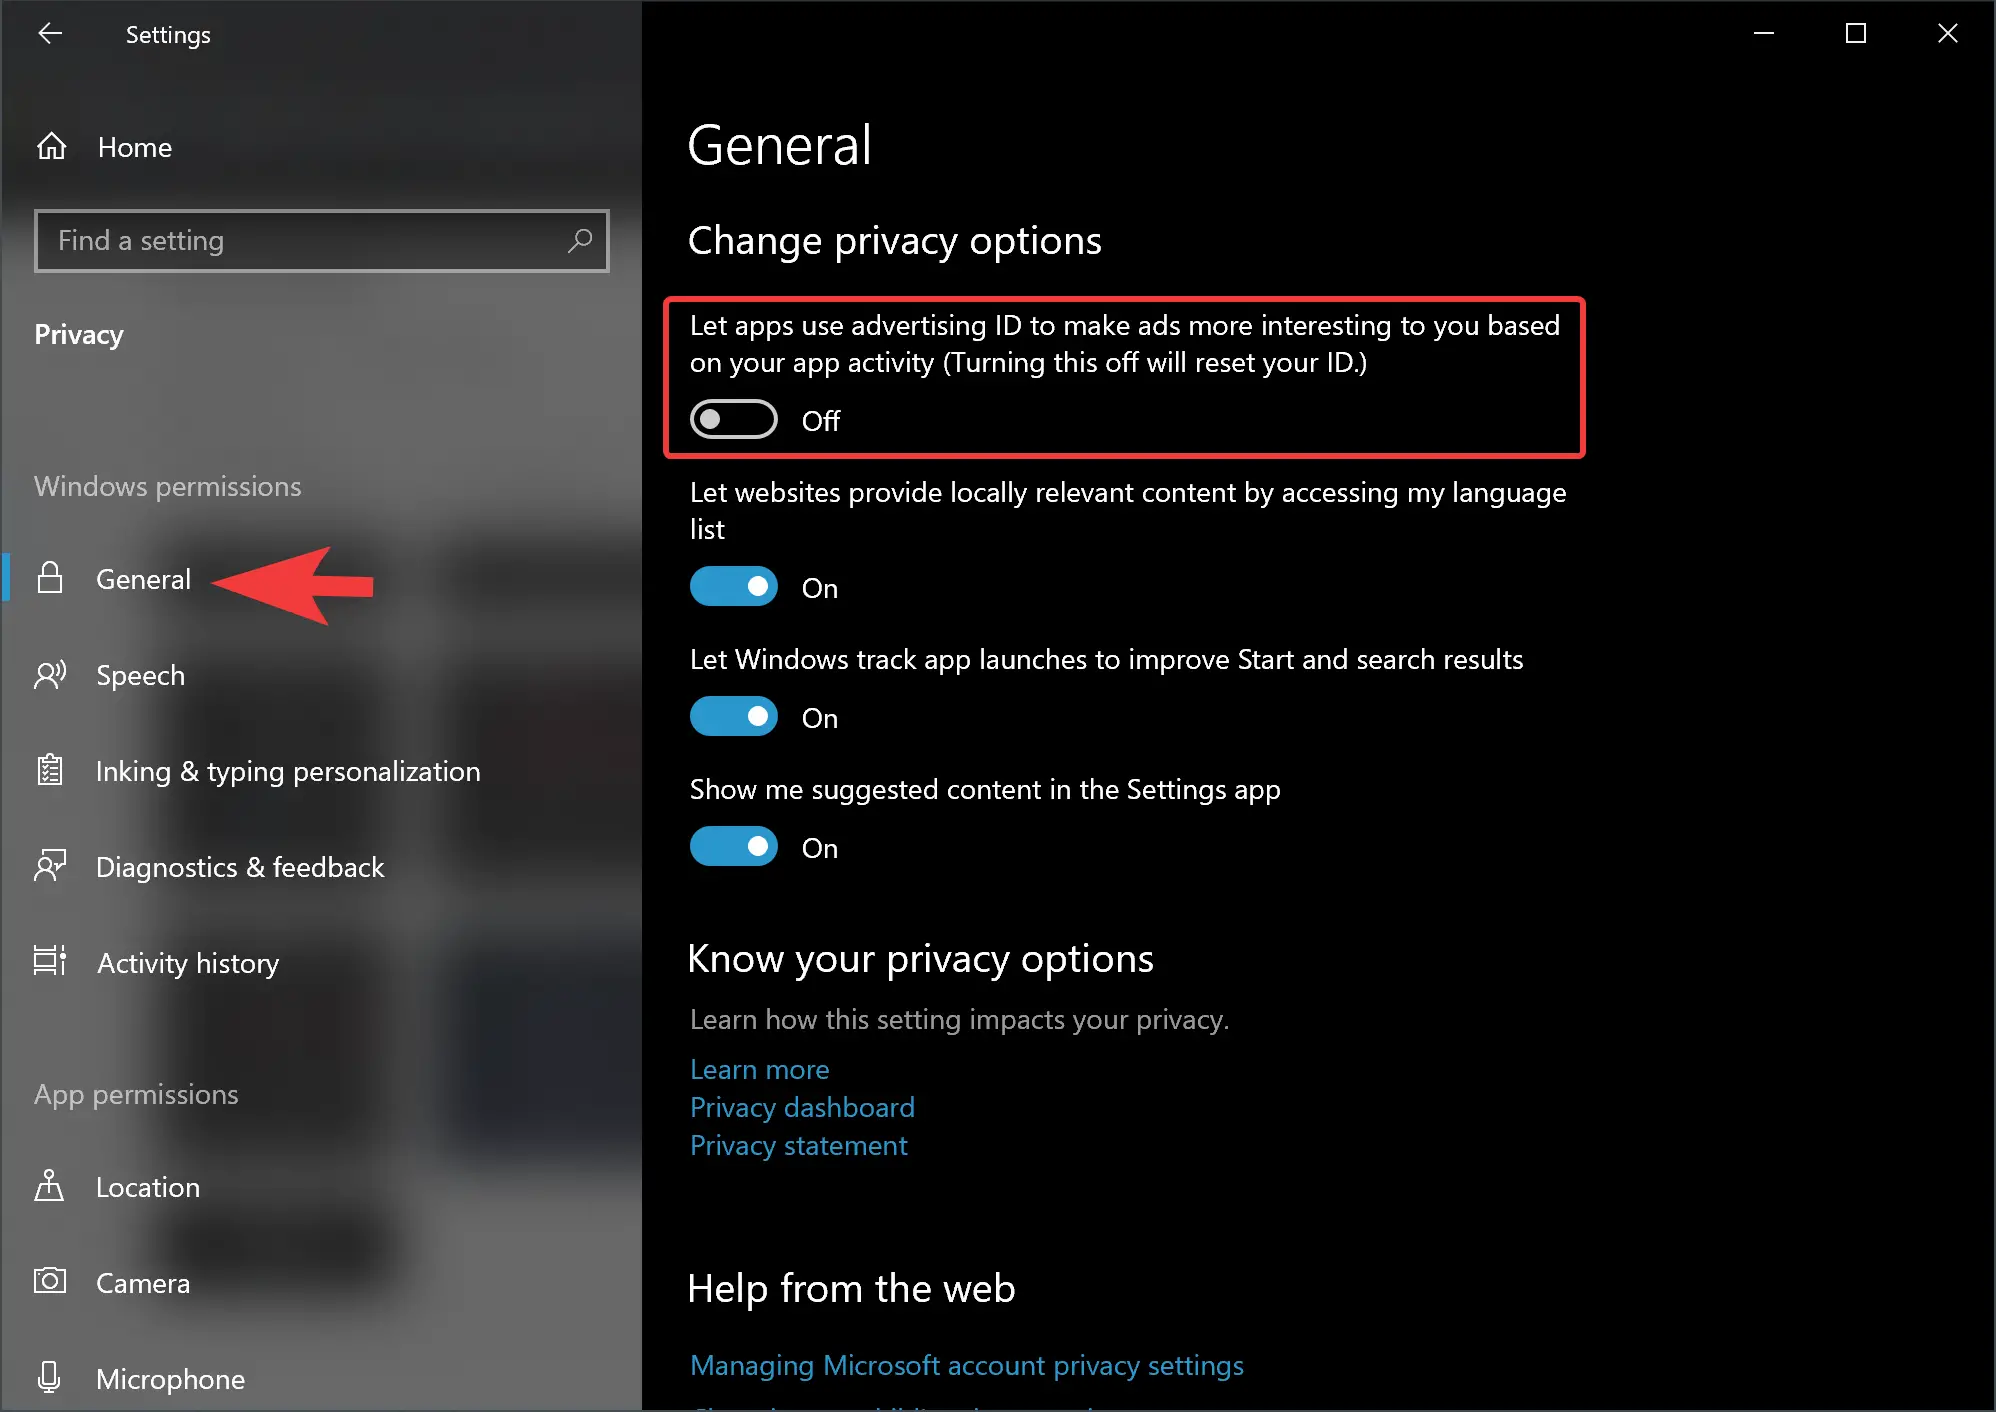
Step 4. On the right side, under the “Change privacy options” section, turn off/on the “Let app use Advertising ID to make ads more interesting to you based on your app activity” toggle switch.
After disabling the advertising ID, you’ll continue to see ads through the experience, but they won’t be based on your activities.
How to Enable or Disable Advertising ID using Group Policy on Windows 11 or 10?
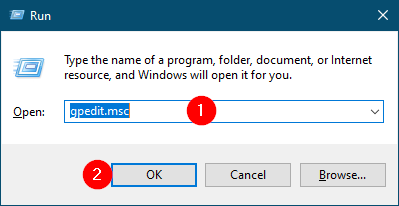
If you’re running the Pro version of Windows 11 or 10, you can also prevent tailored advertising using the Local Group Policy Editor.
Step 1. First, using the Windows + R keyboard shortcut, open the Run command.
Step 2. Then, type gpedit.msc and click OK to open the Local Group Policy Editor.
Step 3. When the Local Group Policy Editor window appears on your computer, browse the following path:-
Computer Configuration > Administrative Templates > System > User Profile
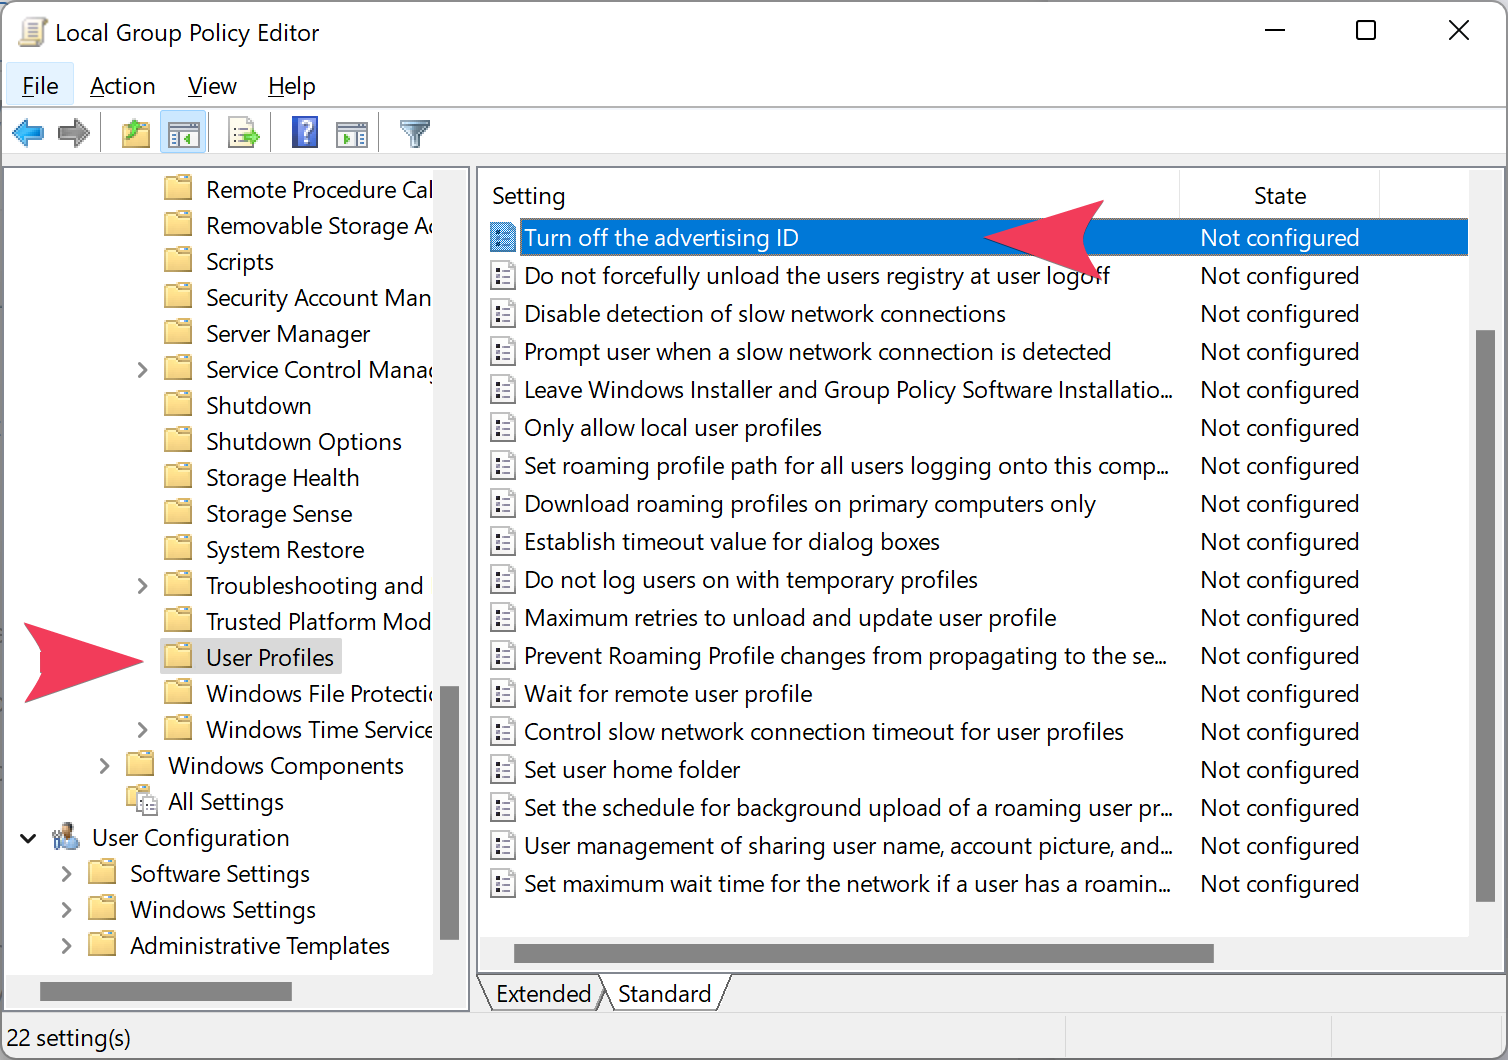
Step 4. On the right side, double-click the policy Turn off the advertising ID.
Step 5. Select the Disabled option.
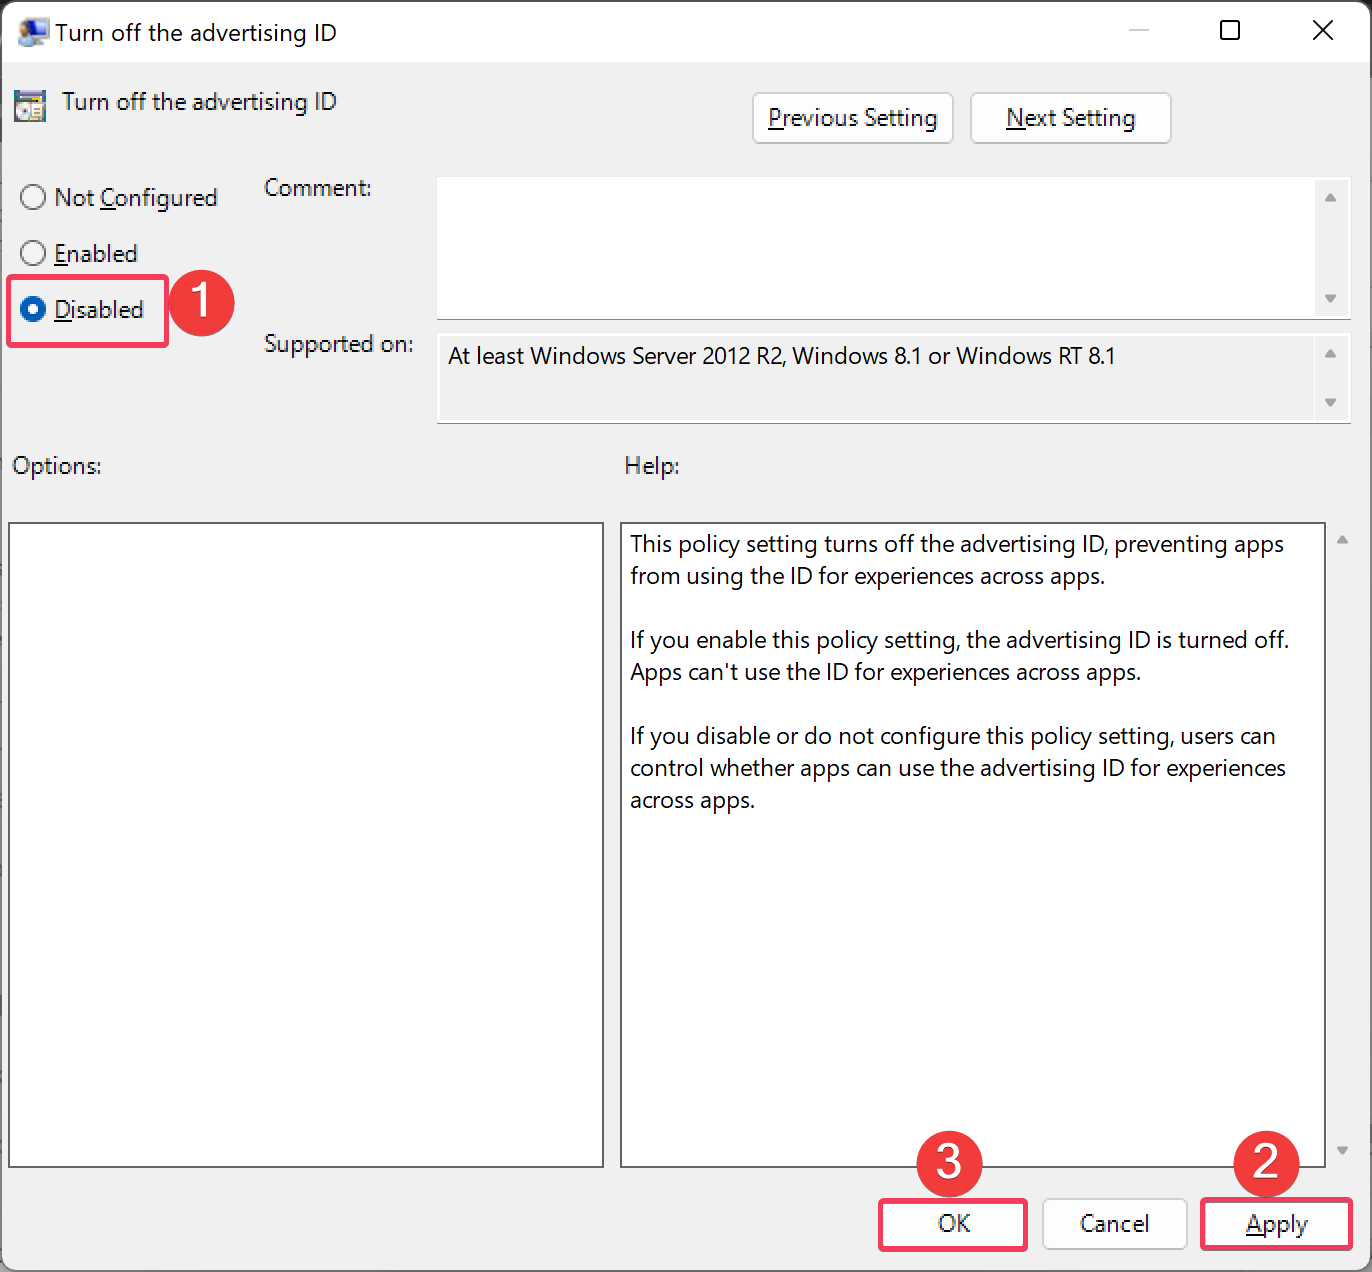
Step 6. Then, click Apply.
Step 7. Finally, hit the OK button to exit.
After completing the above steps, Microsoft Store apps will no longer show relevant ads on your Windows 11 or 10 PC.
If you change your mind and want to roll back the previous settings, use the above steps, and in step 5 above, select the Not Configured option.
You might be interested in Ashampoo Antispy and O&O ShutUp10++, which allow you to control privacy on Windows 11 and 10 computers.
Conclusion
In conclusion, while the Advertising ID feature in Windows 11 and 10 allows for more personalized ads and services, it also raises privacy concerns as personal data can be collected by advertising networks. Fortunately, users can easily enable or disable the Advertising ID feature in Windows through the Settings app or the Local Group Policy Editor. Additionally, third-party privacy control tools like Ashampoo Antispy and O&O ShutUp10++ can provide users with greater control over their privacy on their Windows devices. It’s important for users to understand and take advantage of these options to ensure their personal data is protected.