The File History is a built-in Windows backup tool that helps you back up all folders in a user’s home directory and files within them, including Documents. Music, Pictures, Videos, Contacts, and a Desktop. When this feature is enabled on your Windows 11 and the original files are deleted or damaged, you can use the backup versions created by File History to restore them.
By default, Windows only backs up the files and folders in a user home directory (C:\Users\Username). However, if you need, you can include additional folders from other locations to backup.
How to Turn On or Turn Off File History on Windows 11 using Control Panel?
To enable or disable File History on Windows 11 using Control Panel, do the following steps:-
Note: To configure and run File History, you need an external drive connected to your PC. Alternatively, you can use any network drive/folder if you have one.
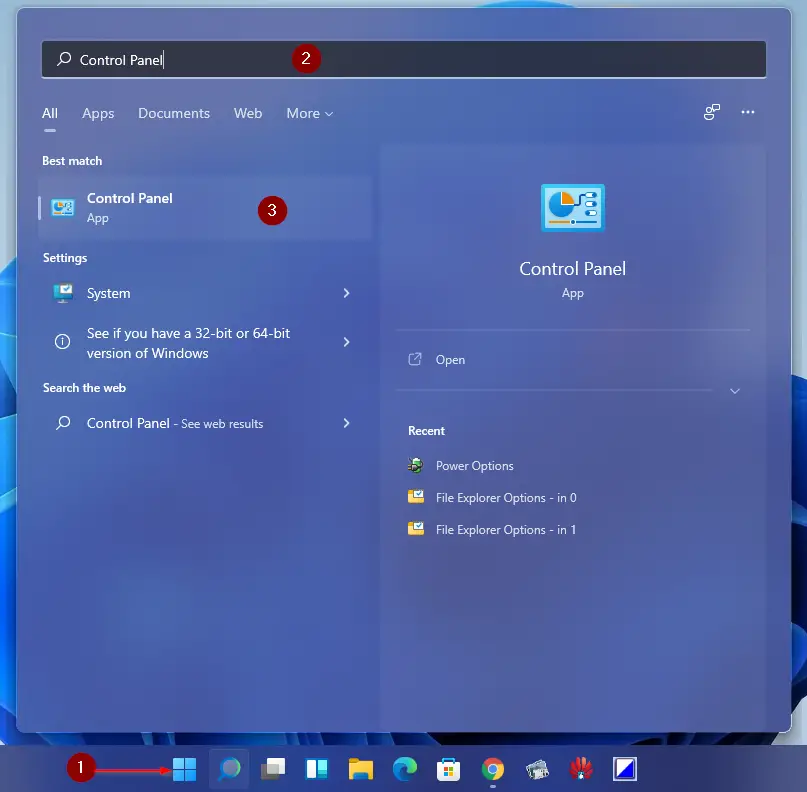
Step 1. Open Control Panel.
To do that, click the Start button and type Control Panel. On the available results, click on its entry to open the same.
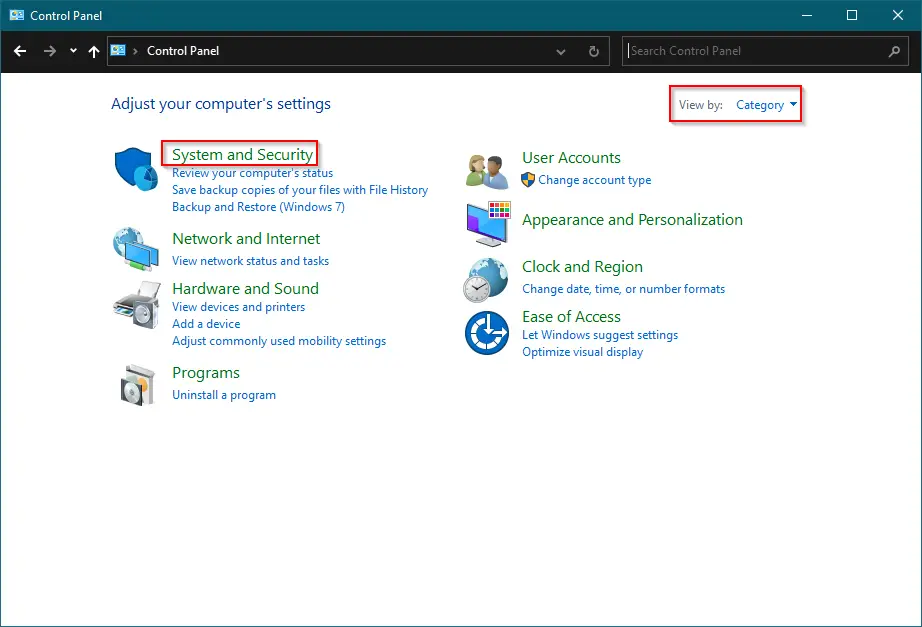
Step 2. When Control Panel opens, select the System and Security category.
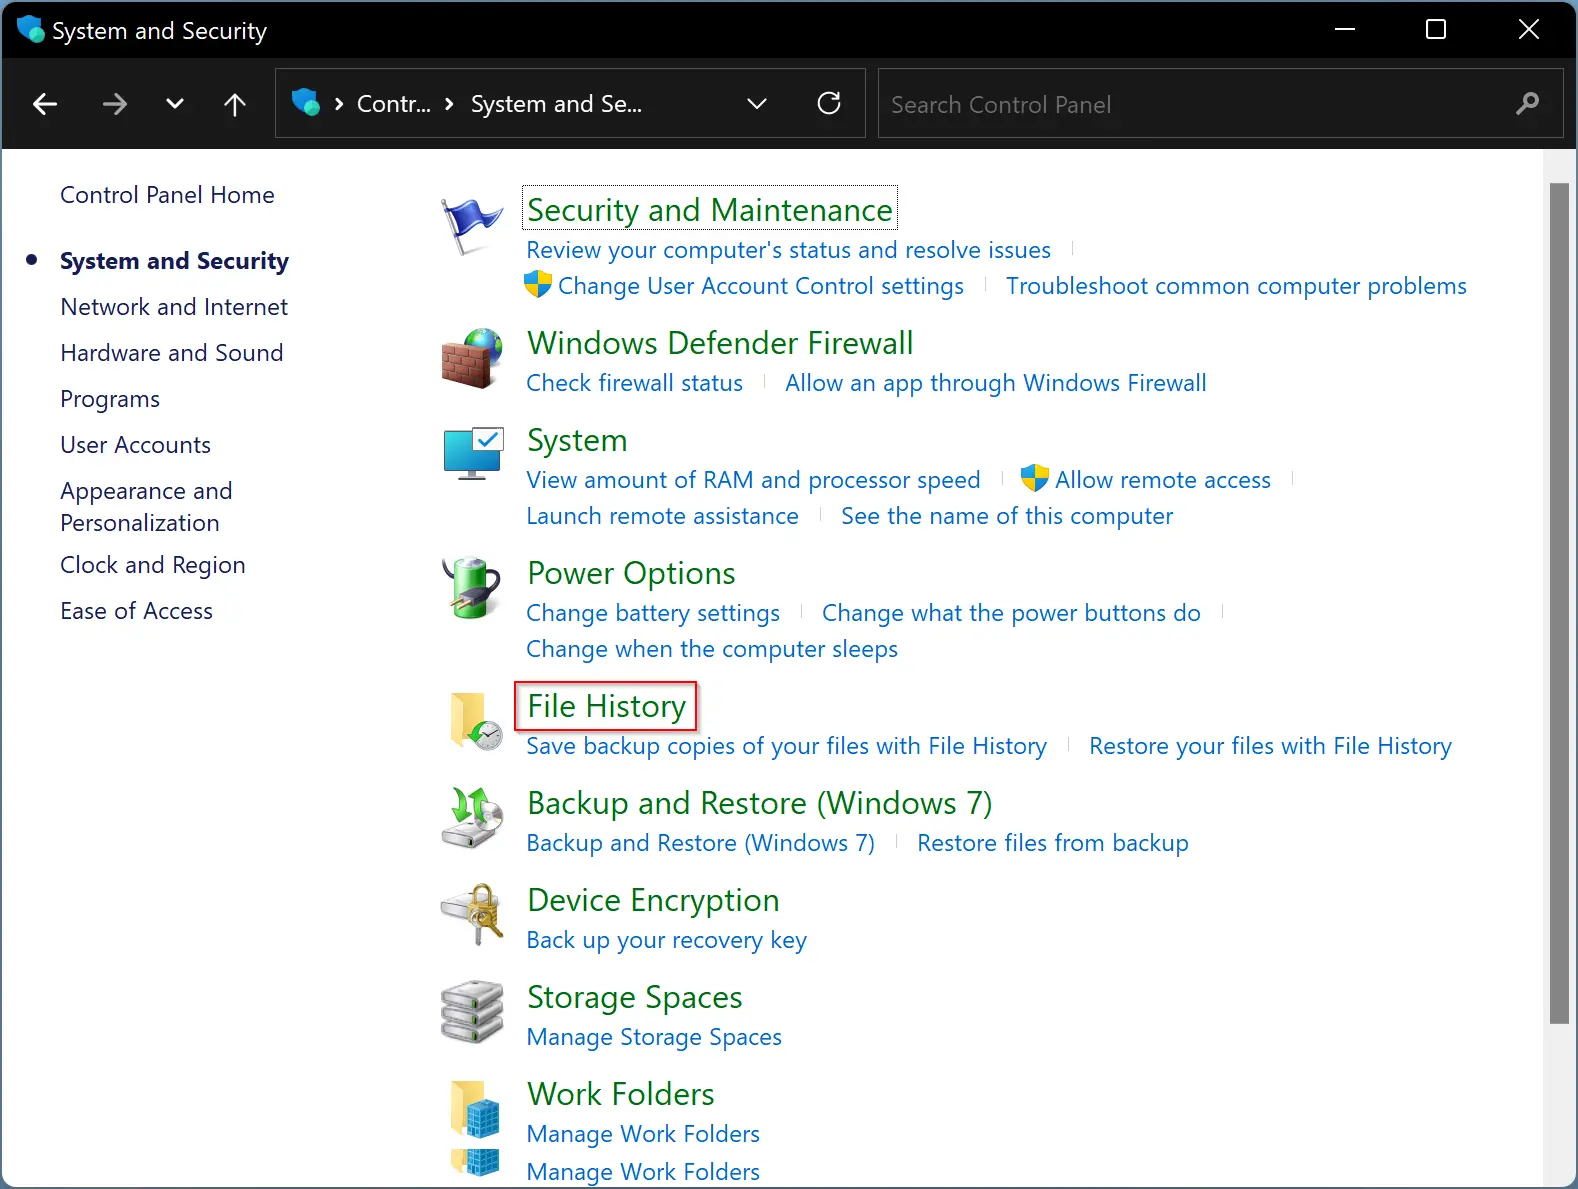
Step 3. From the right sidebar, click on File History.
Step 4. When the File History window opens, it will scan the available external storage device. Then click the Turn on button below the external hard disk.
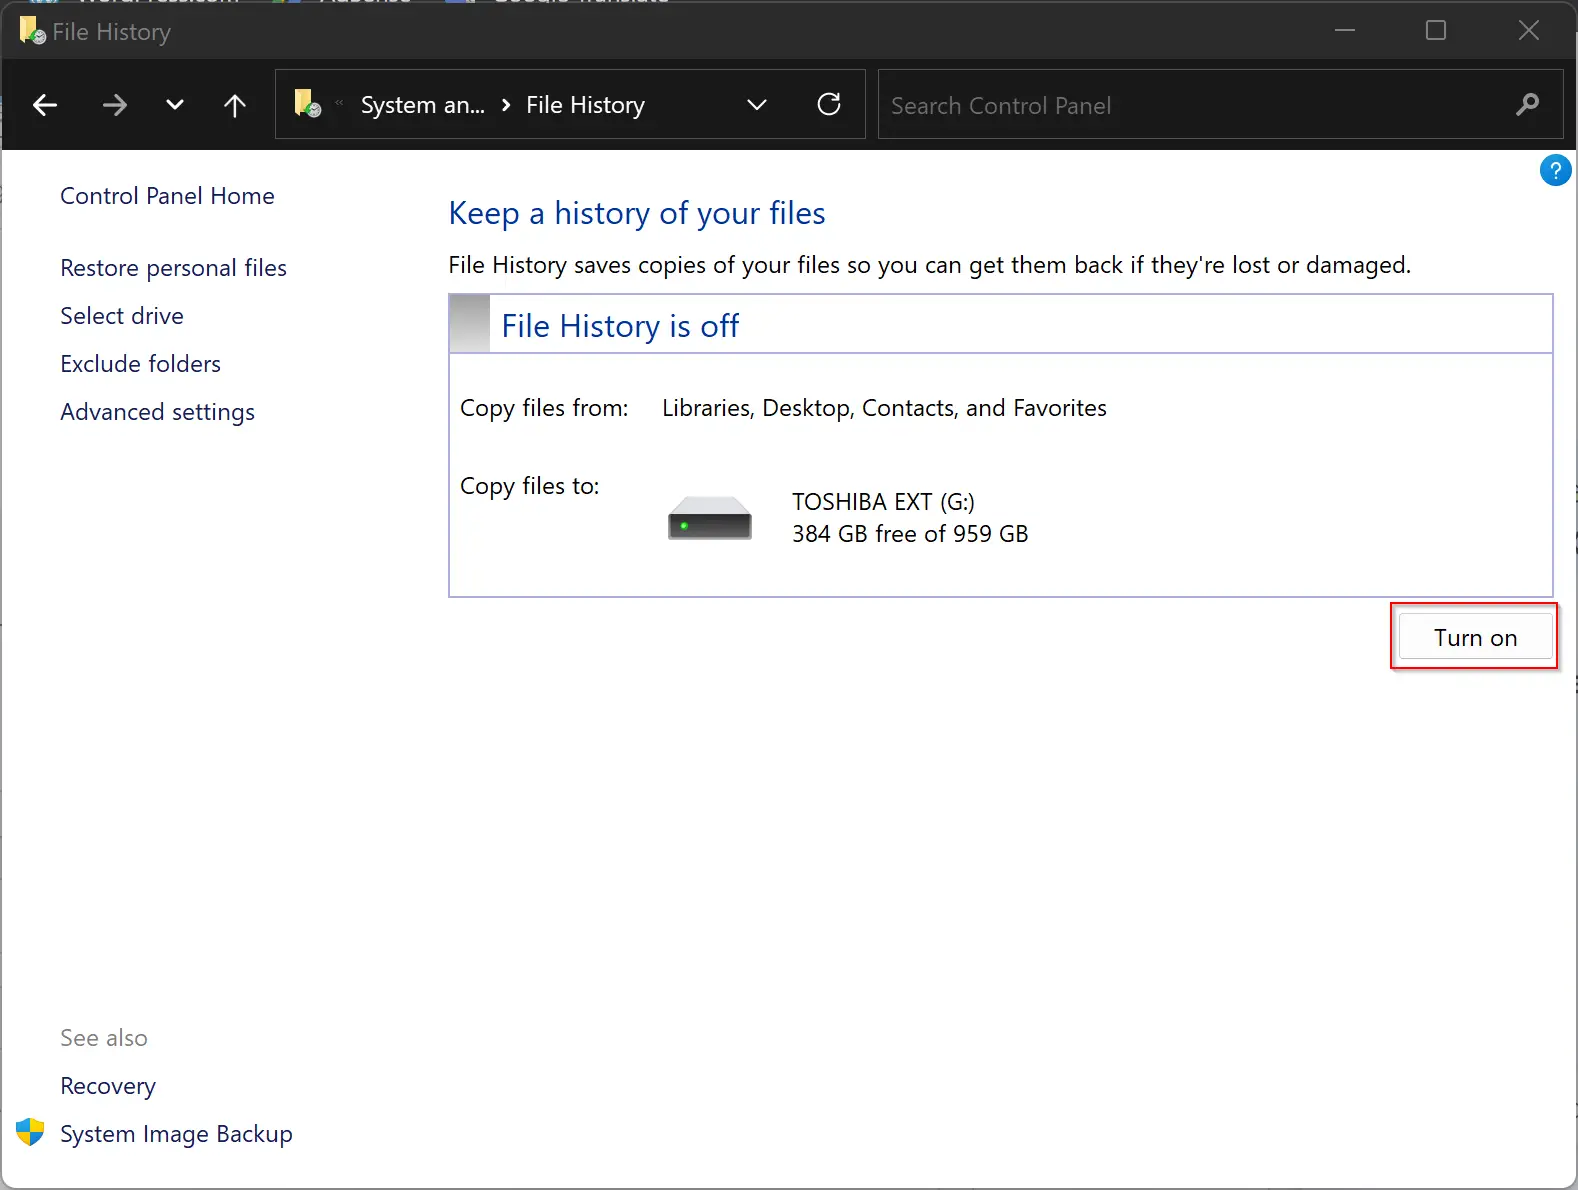
Once you turn on File History, it will immediately backup files from your PC.
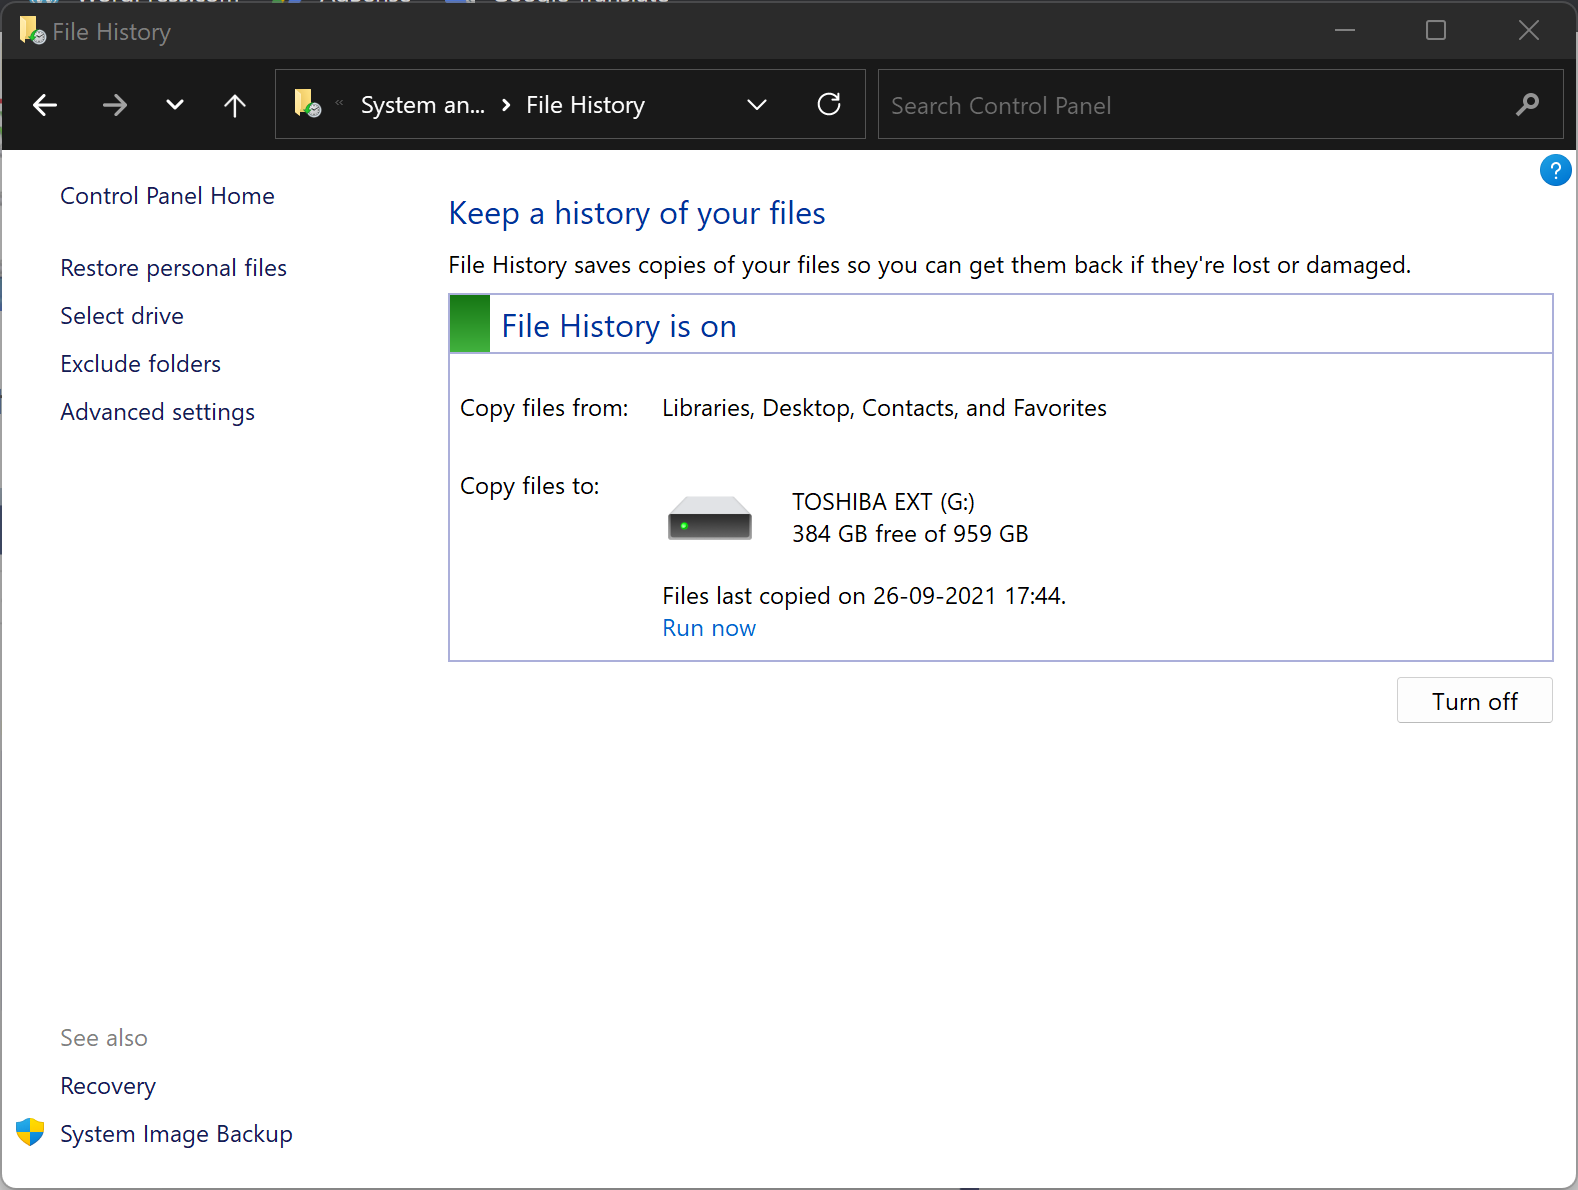
If your external disk is not connected permanently to your PC, you can manually do the backup also. Just connect the external drive to your computer and in the above window, click the Run now link.
At any time, if you wish the disable this File History feature, repeat the above steps, and in step 4, click the Turn off button.
How to Restore Files from File History on Windows 11?
When you have File History running on your machine, and you want to restore a missing or damaged file, you can simply use the below steps:-
Step 1. Open Control Panel.
To do that, click the Start button and type Control Panel. On the available results, click on its entry to open the same.
Step 2. When Control Panel opens, select the System and Security category.
Step 3. From the right sidebar, click on File History.
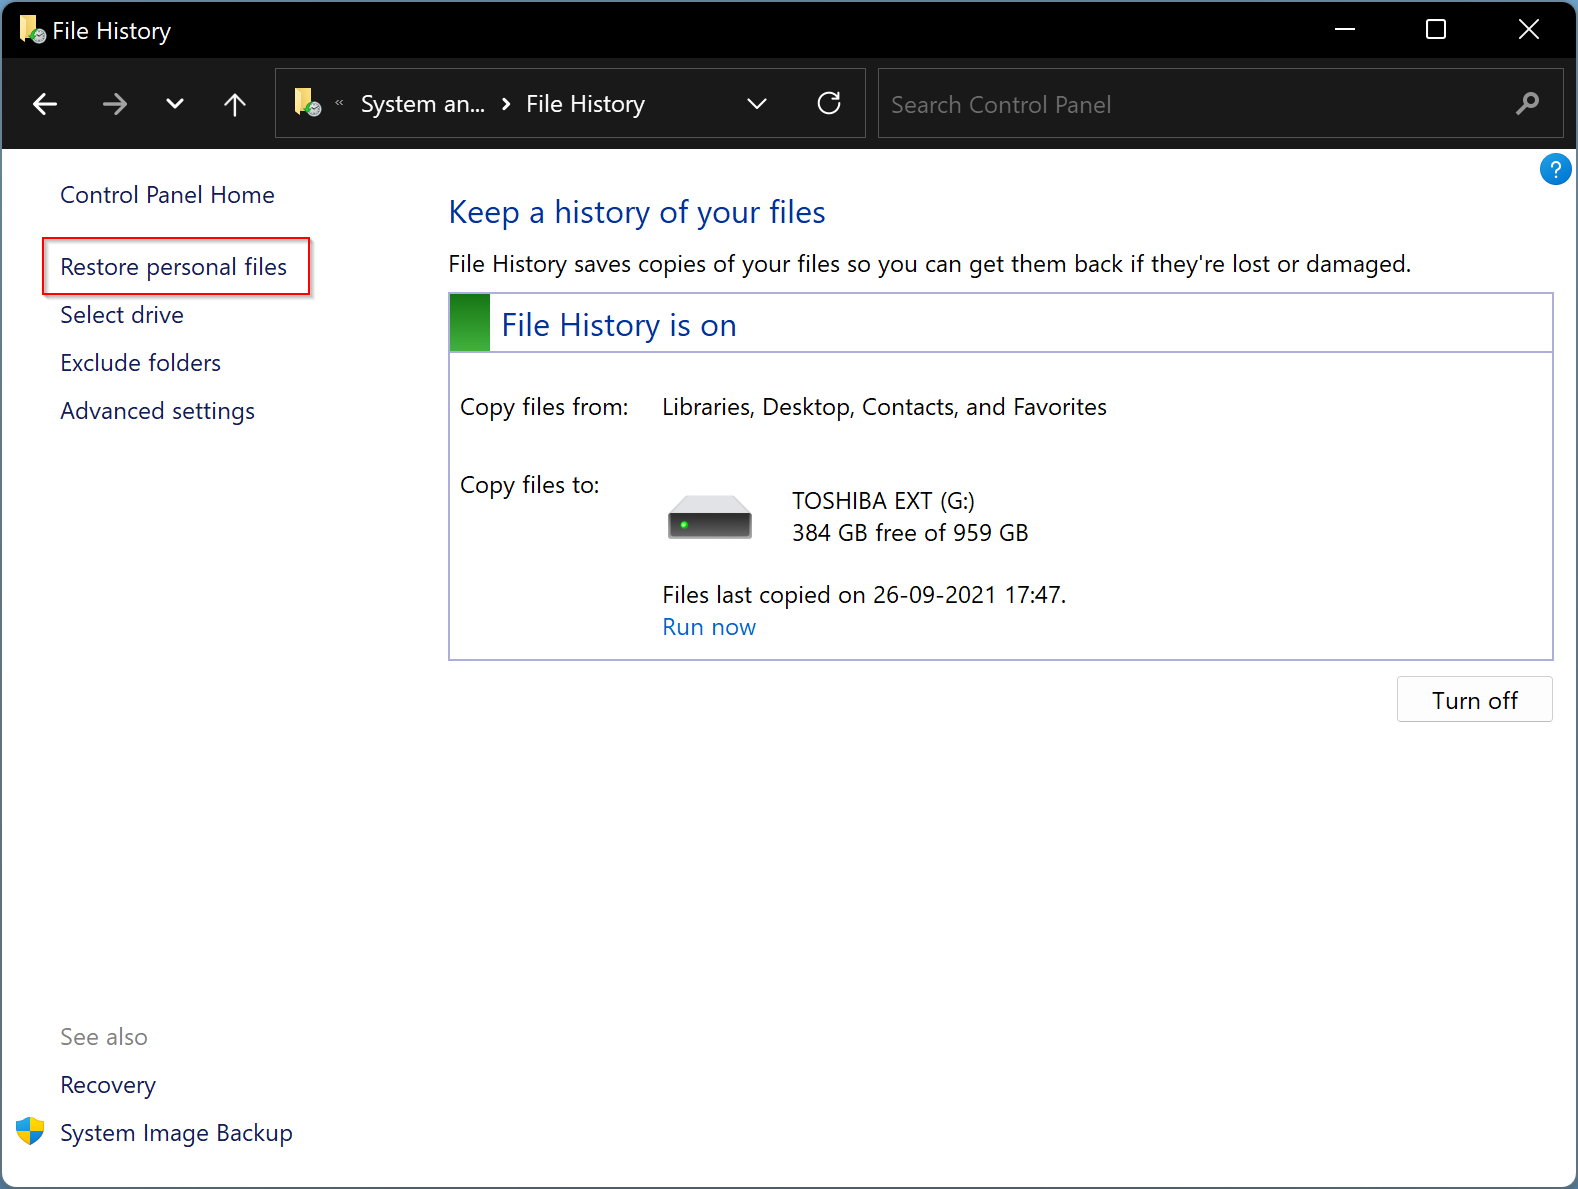
Step 4. In the File History window, from the left sidebar, click the link Restore personal files.
Step 5. When you complete the above steps, a new window opens where you can find all the folders that were backup by File History. You can navigate through all the backups by clicking on the Previous (CTRL + Left Arrow) button or the Next (CTRL + Right Arrow) button at the bottom.
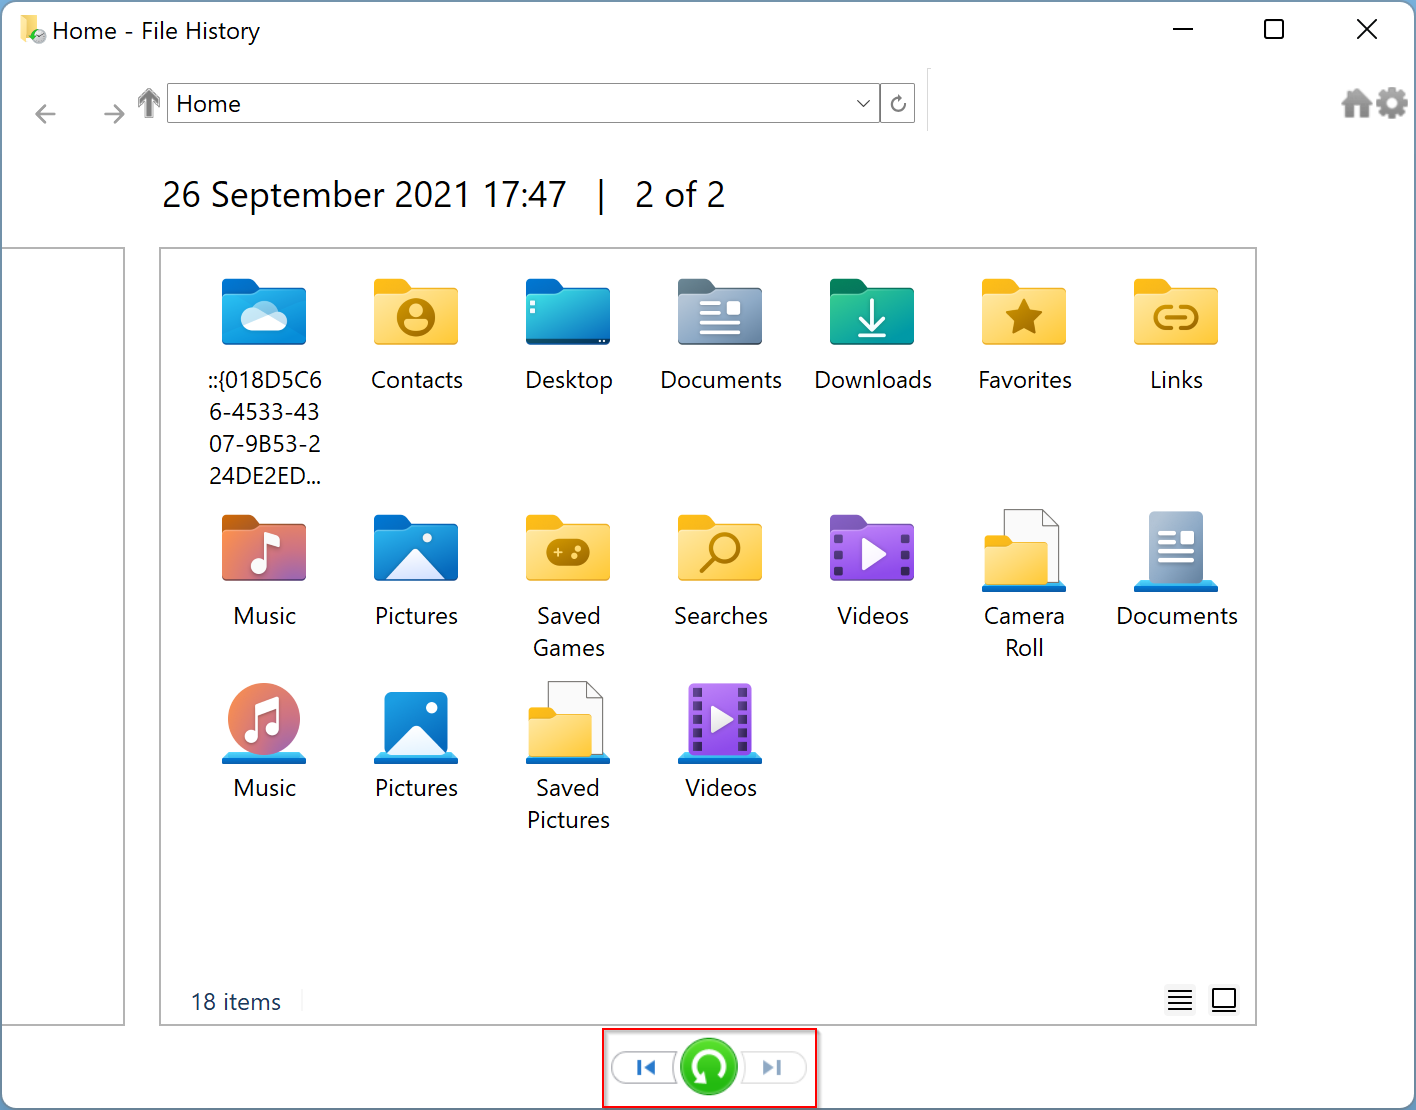
Step 6. Please select the file or folder you want to restore and then click the Restore button to restore the file/folder to its original location.

By default, File History restores files/folders to their original location. If you want to fix them in another place than the default, click on the Settings gear icon and select the “Restore to” option.
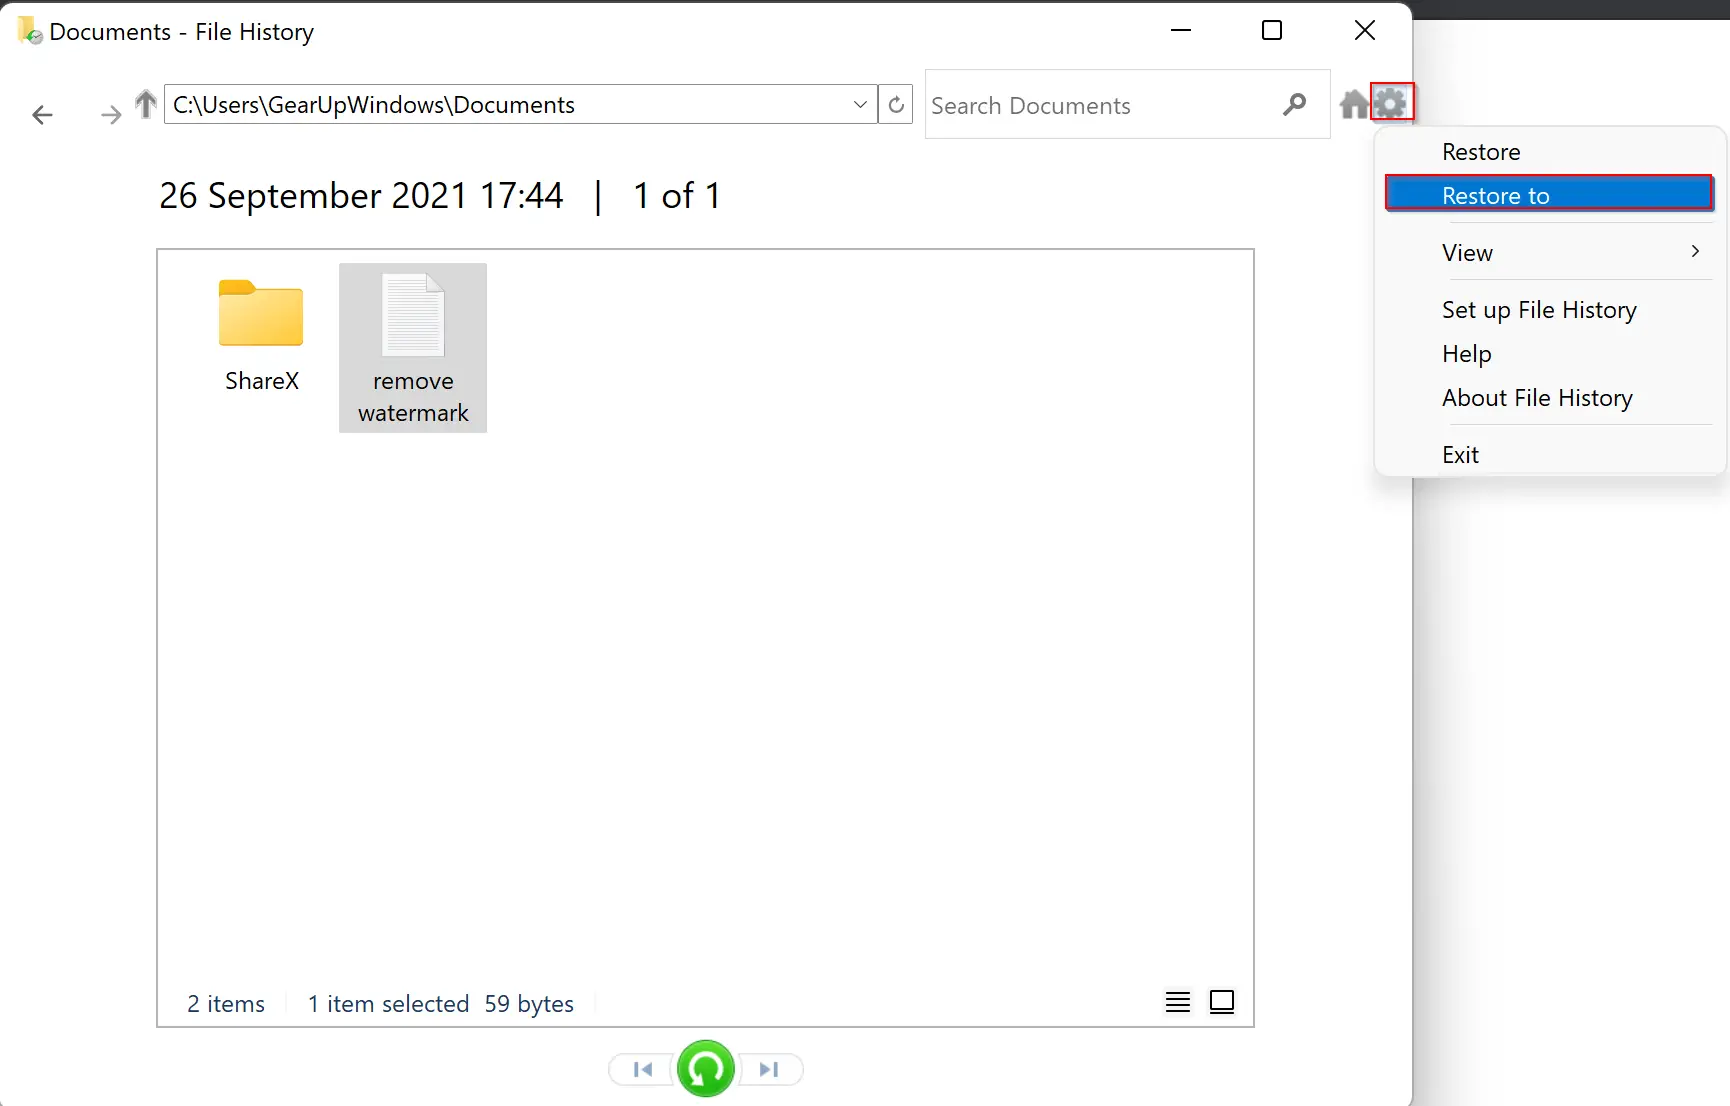
On the file explorer window, select the folder on your PC to restore the selected file(s)/folder(s). That’s it!
Conclusion
In conclusion, File History is a useful feature in Windows 11 that allows you to back up important files and folders on your PC to an external storage device or network drive/folder. This backup can be used to restore your files if they are lost or damaged. By default, Windows only backs up files in the user’s home directory, but you can include additional folders if needed. Enabling or disabling File History can be done through the Control Panel, and restoring files is a straightforward process as well. With File History, you can have peace of mind knowing that your files are backed up and can be easily restored if necessary.