Similar to Chrome and Edge browsers, Brave browser also lets you turn off Hardware Acceleration in Brave browser on Windows 11 and 10.
To disable Hardware Acceleration in Brave browser, you don’t need a third-party app as it natively supports it. That means, using the built-in option of Brave browser, you can turn off this feature if the Brave browser is causing any issues. Disabling the hardware acceleration could be a solution.
How to Disable Hardware Acceleration in the Brave Browser on Windows 11 or 10 PC?
To disable or turn off Hardware Acceleration in Brave browser on your Windows 11 or 10 machine, use these steps:-
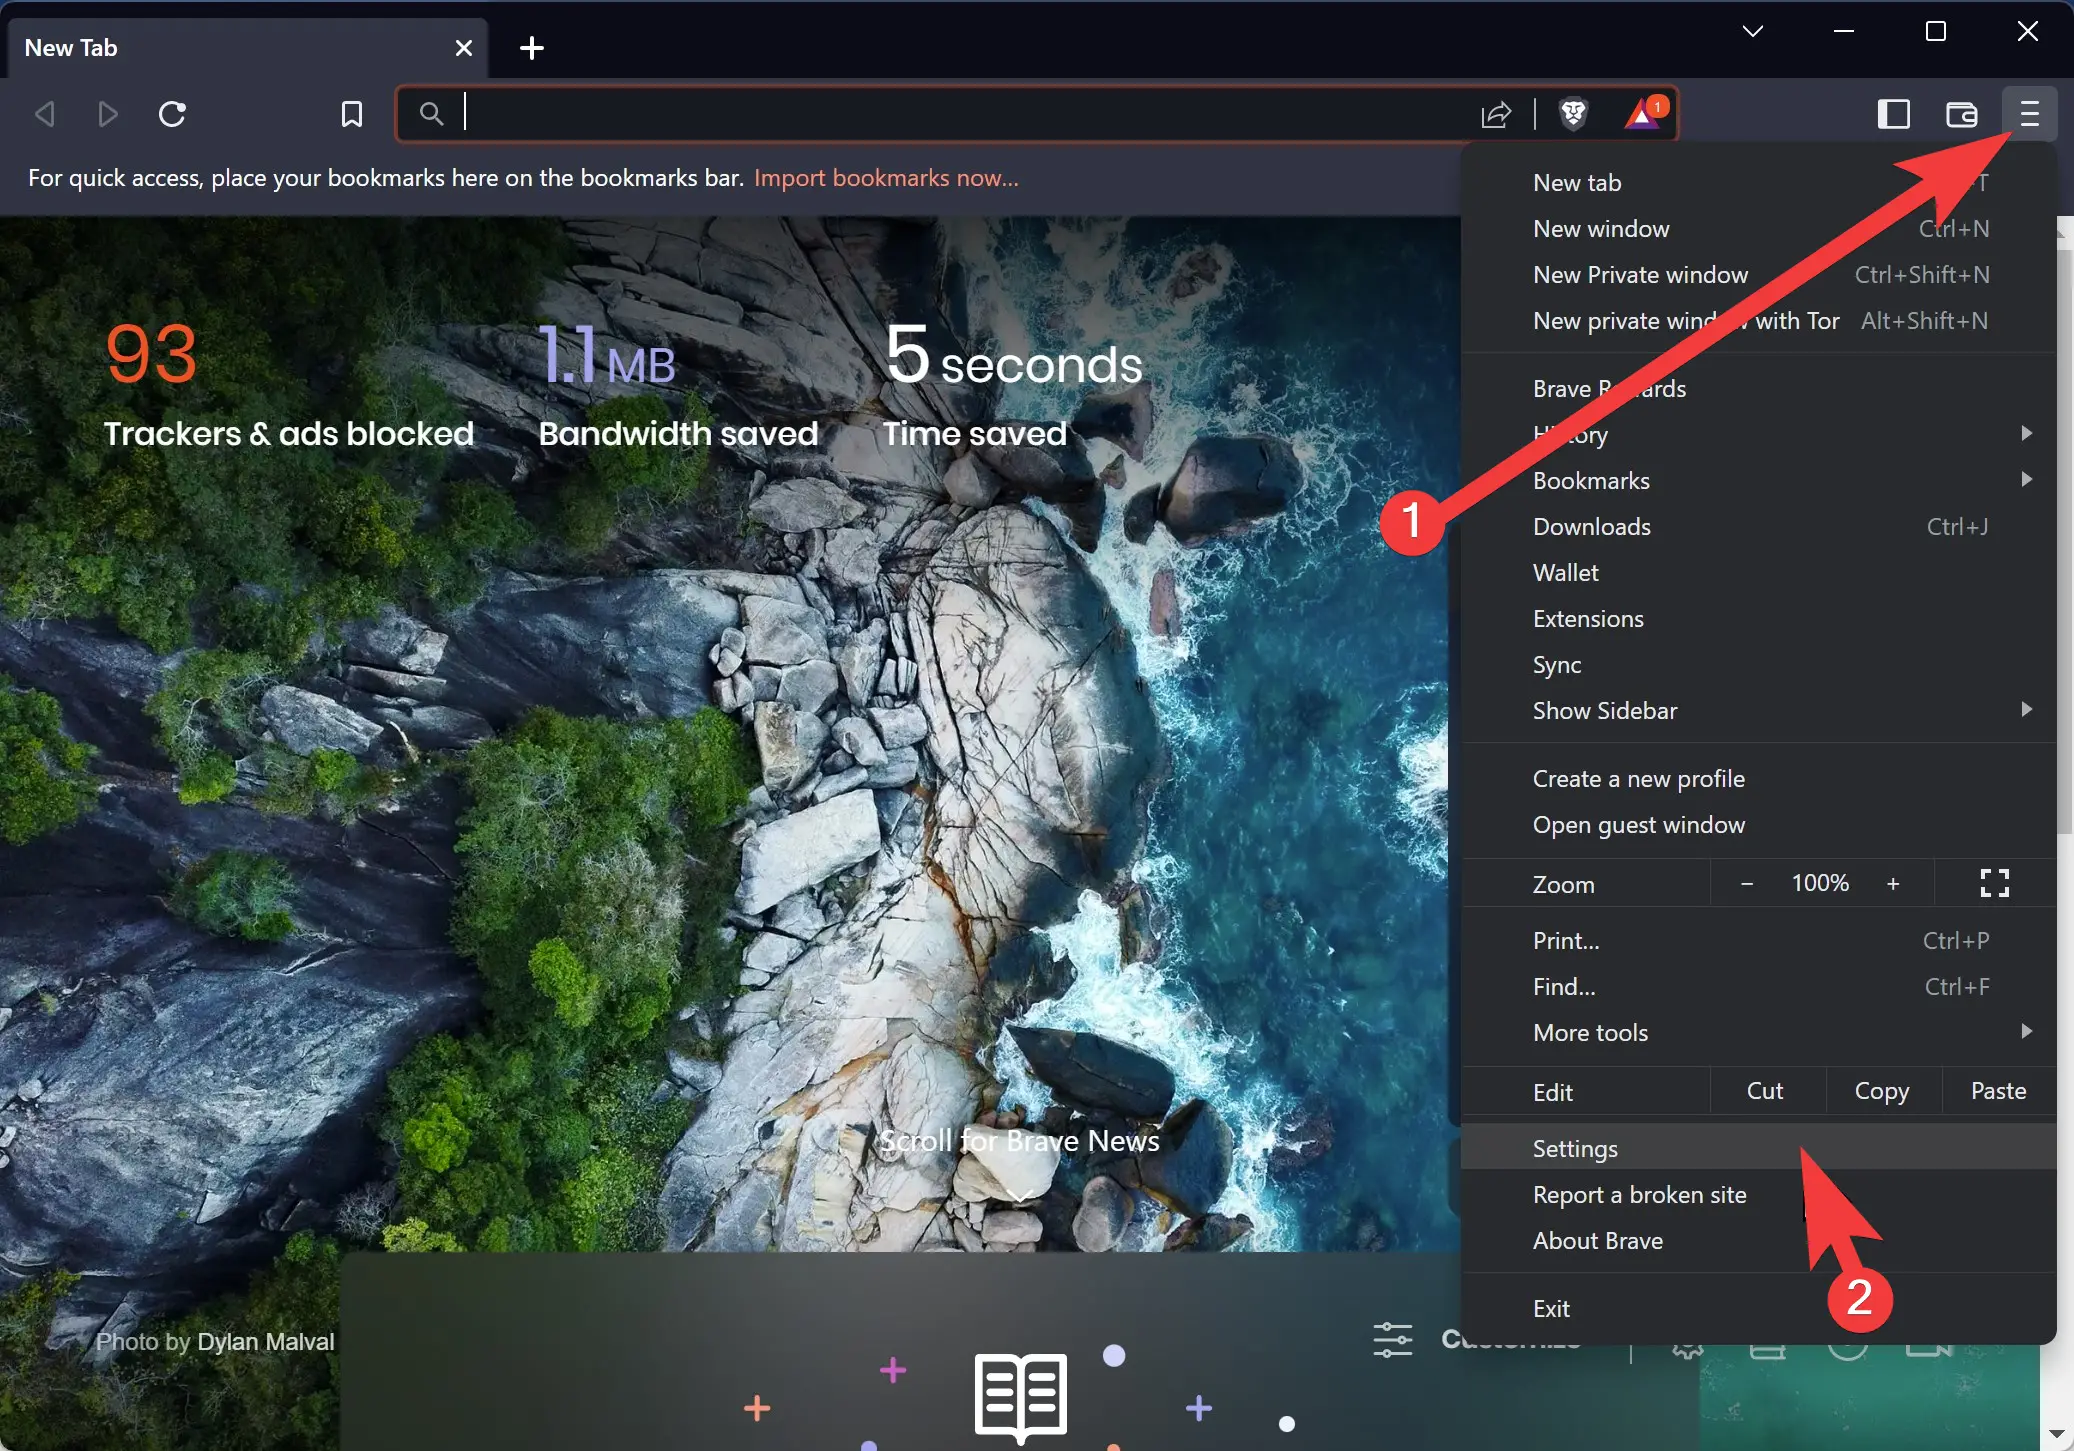
Step 1. First, open the Brave browser on your computer.
Step 2. Then, click the menu (Customize and control Brave) button and select the Settings option.
Step 3. Next, switch to the System tab on the left side.
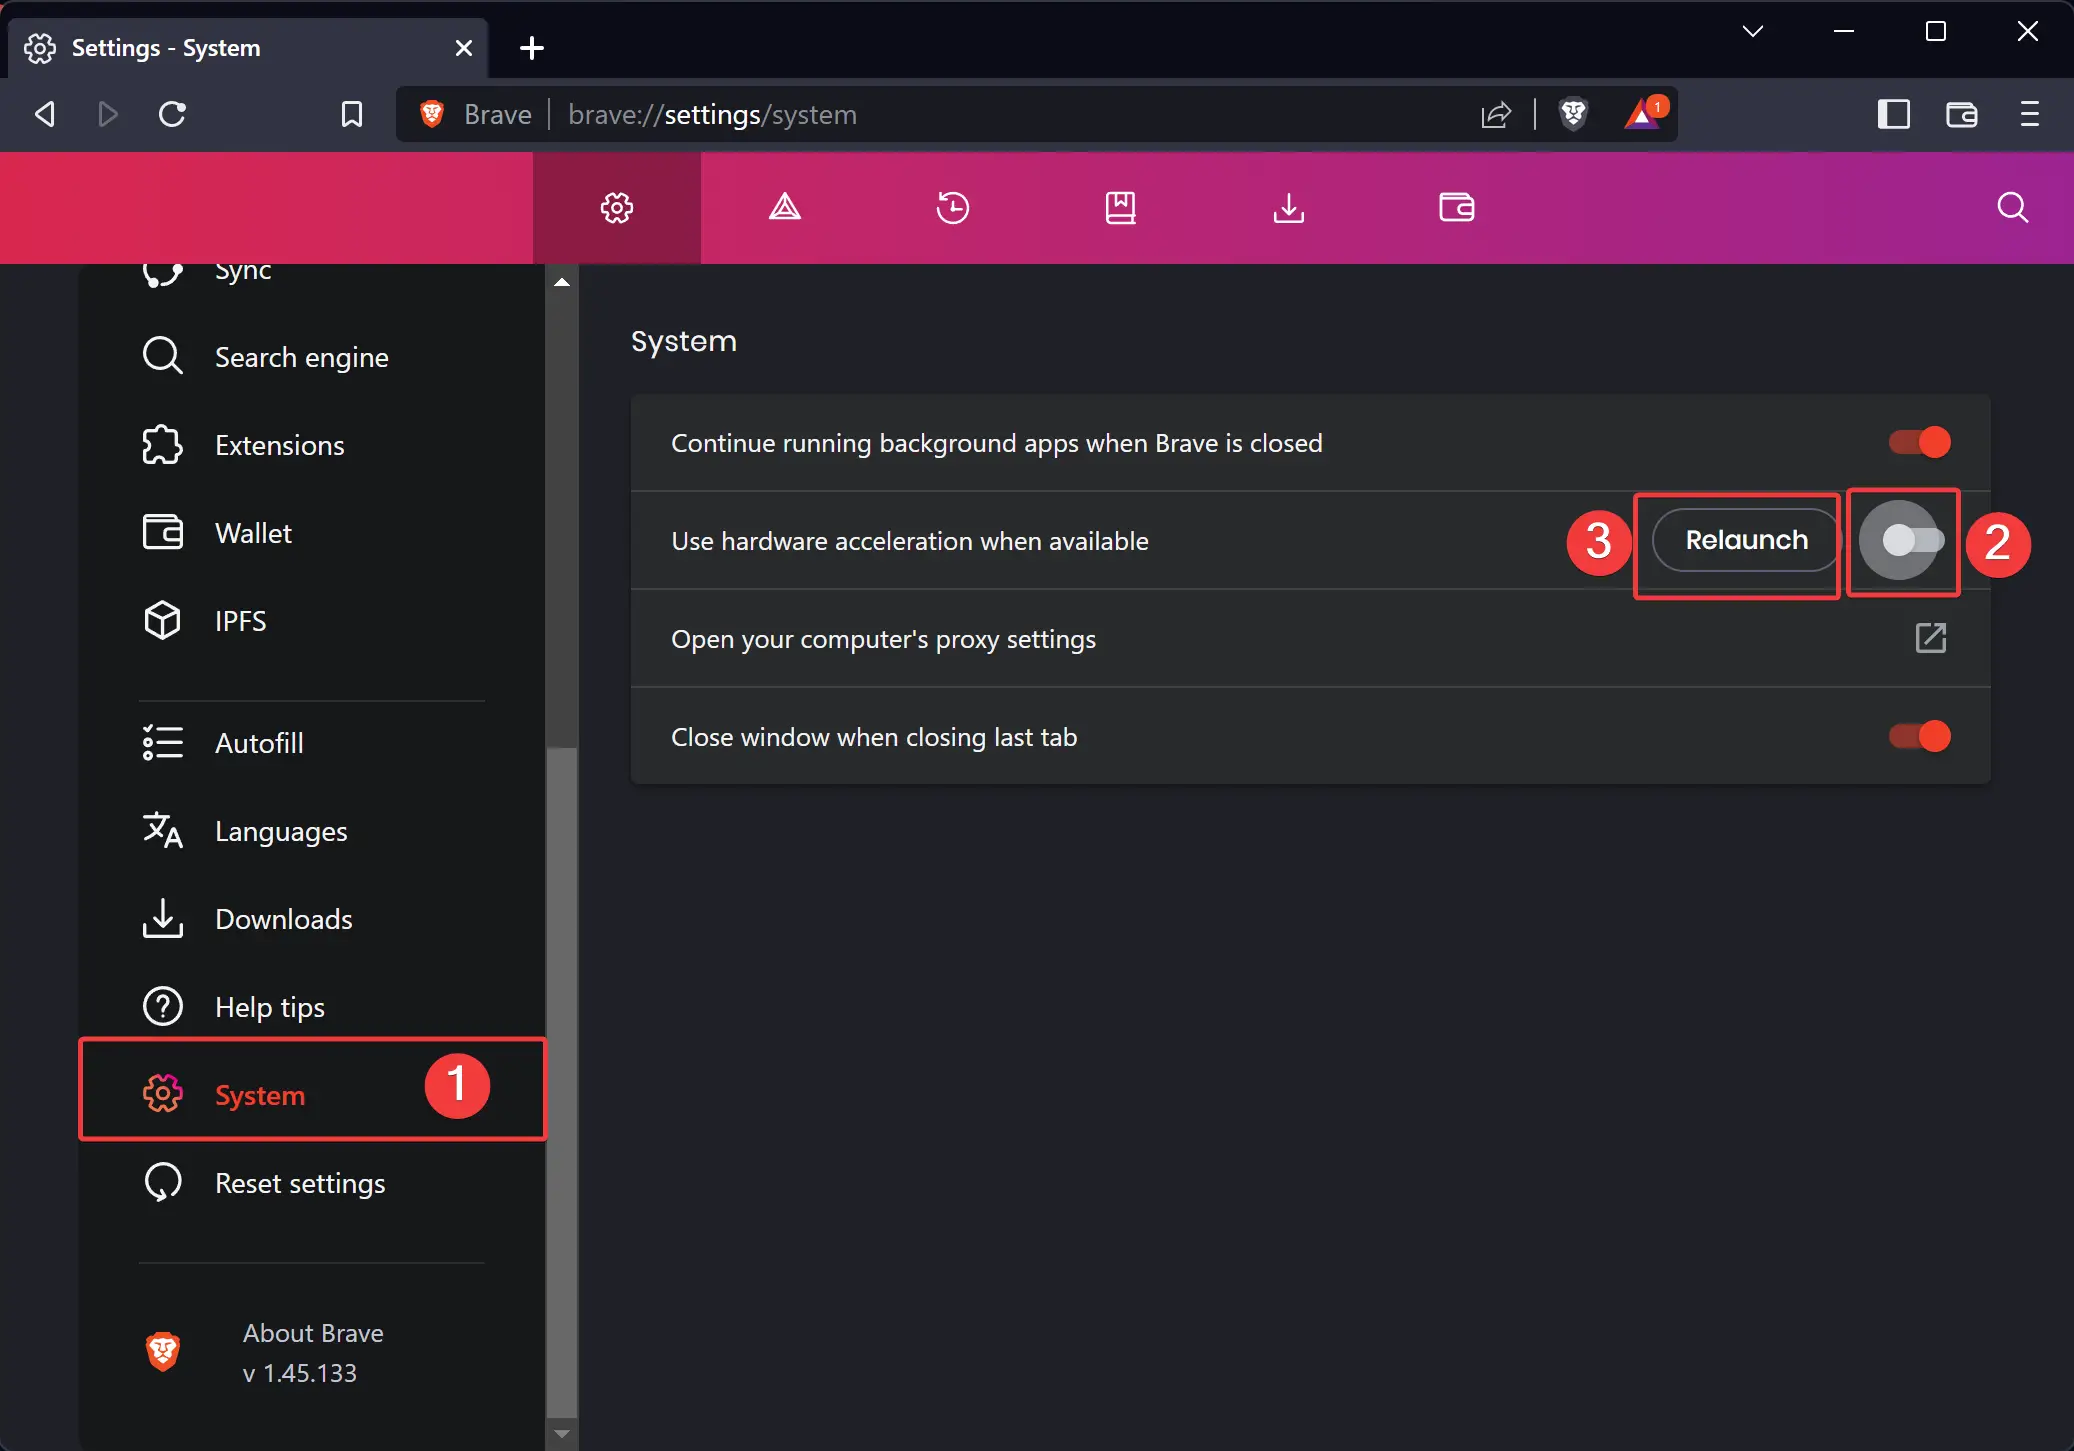
Step 4. On the right sidebar, turn off the Use hardware acceleration when available toggle switch.
Step 5. Then, click the Relaunch button to restart the browser.
Once you complete the above steps, hardware acceleration will be disabled on your Brave browser.
How to Enable Hardware Acceleration in the Brave Browser on Windows 11 or 10 PC?
To enable or turn on Hardware Acceleration in Brave browser on your Windows 11 or 10 PC, follow these steps:-
Step 1. First, open the Brave browser on your computer.
Step 2. Then, click the menu (Customize and control Brave) button and select the Settings option.
Step 3. Next, switch to the System tab on the left side.
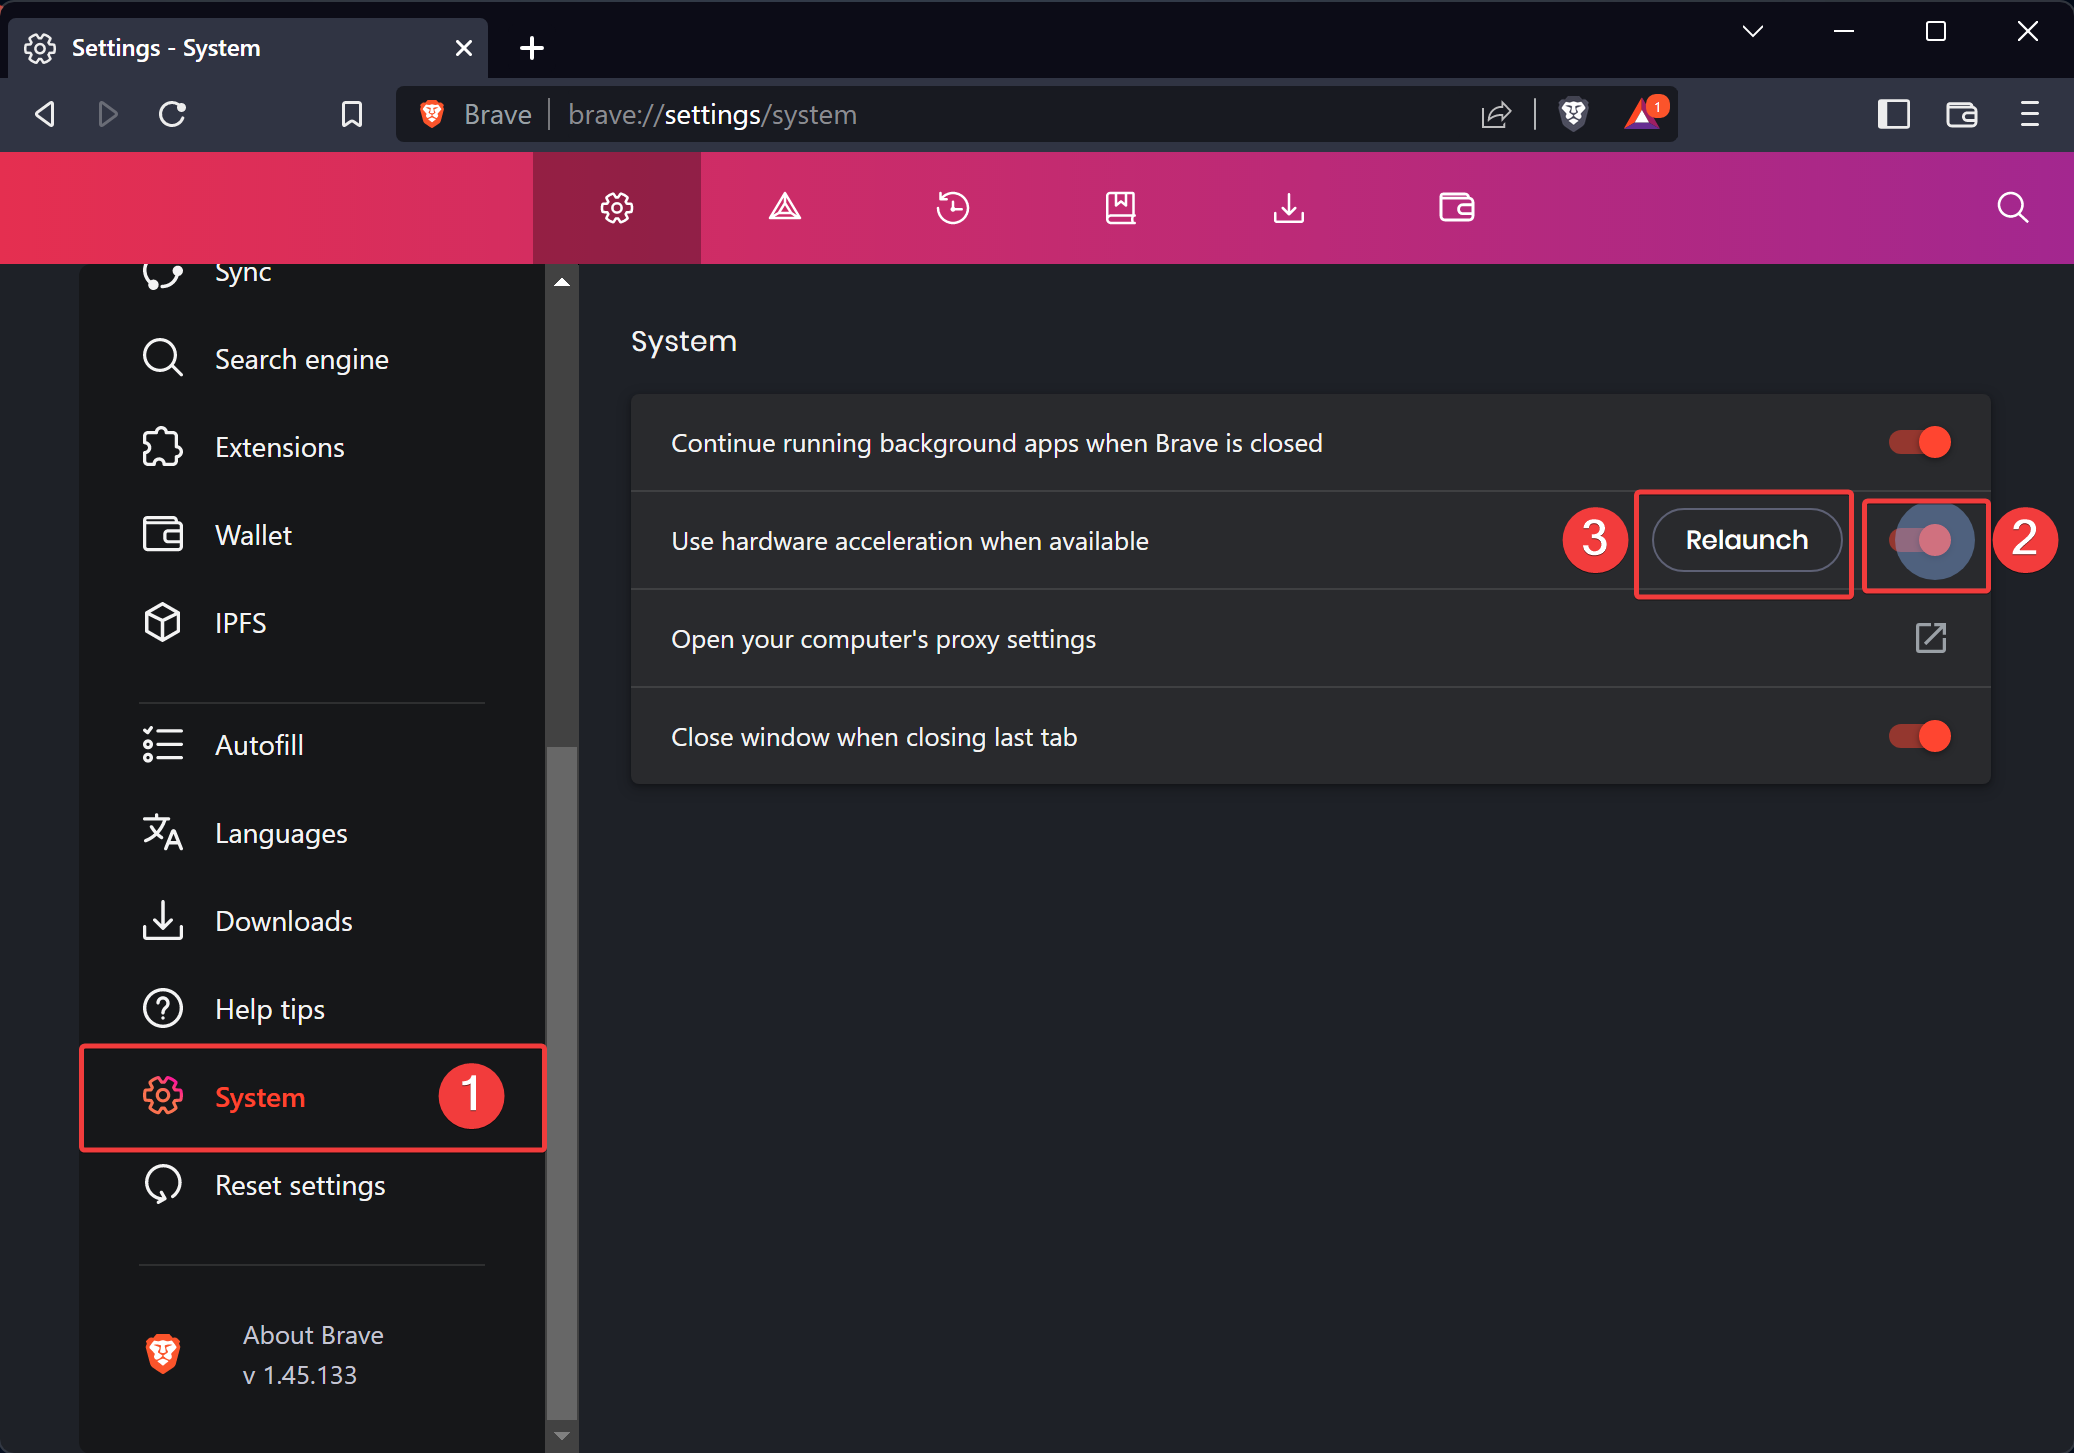
Step 4. On the right sidebar, turn on the Use hardware acceleration when available toggle switch.
Step 5. Then, click the Relaunch button to restart the browser.
Once you complete the above steps, hardware acceleration will be enabled on your Brave browser.
Also Read: How to Enable Extensions in Brave Incognito Window in Windows 11 or 10?