A built-in feature of Windows 11/10, the Internet Printing Client helps you connect and print files using your connected printer on the internet or LAN. It is turned on by default on Windows computers; however, you can disable it if you want.
You might often find some websites where you might directly print an image, document, or something else. It is a handy function if you need it. However, due to some reason, if you want to disable this feature, you can do it using Registry Editor or Group Policy Editor.
In this gearupwindows article, we will guide you on enabling and disabling Internet Printing in Windows 11/10.
How to Turn On/Off Internet Printing in Windows 11/10 using Registry Editor?
To enable or disable the Internet Printing feature in Windows 11/10 using Registry Editor, do the following:-
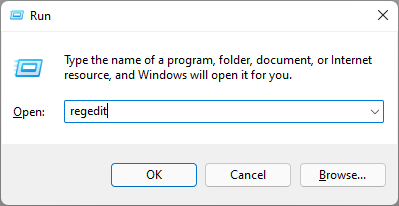
Step 1. At first, open the Registry Editor on your computer.
To do that, press the Windows + R keys on the keyboard. Then, type regedit in the Run dialog box that opens. After that, hit the Enter button. If the UAC prompt appears on your screen, click on the Yes button.

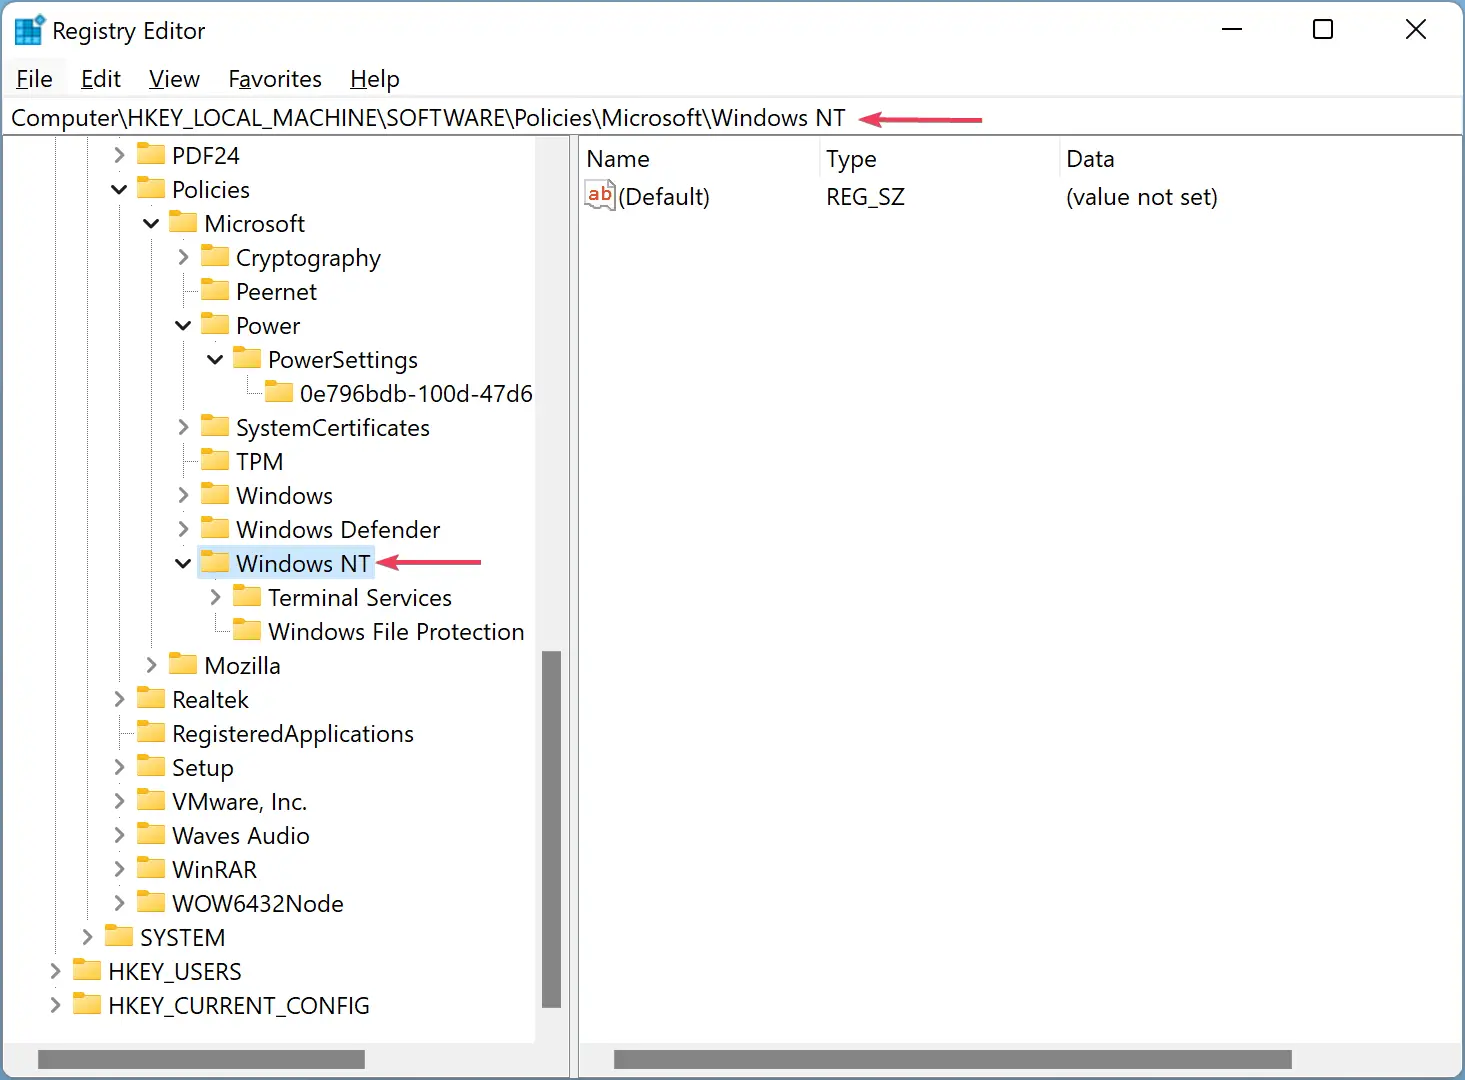
Step 2. Once the Registry Editor window opens, navigate to the following path:-
HKEY_LOCAL_MACHINE\SOFTWARE\Policies\Microsoft\Windows NT
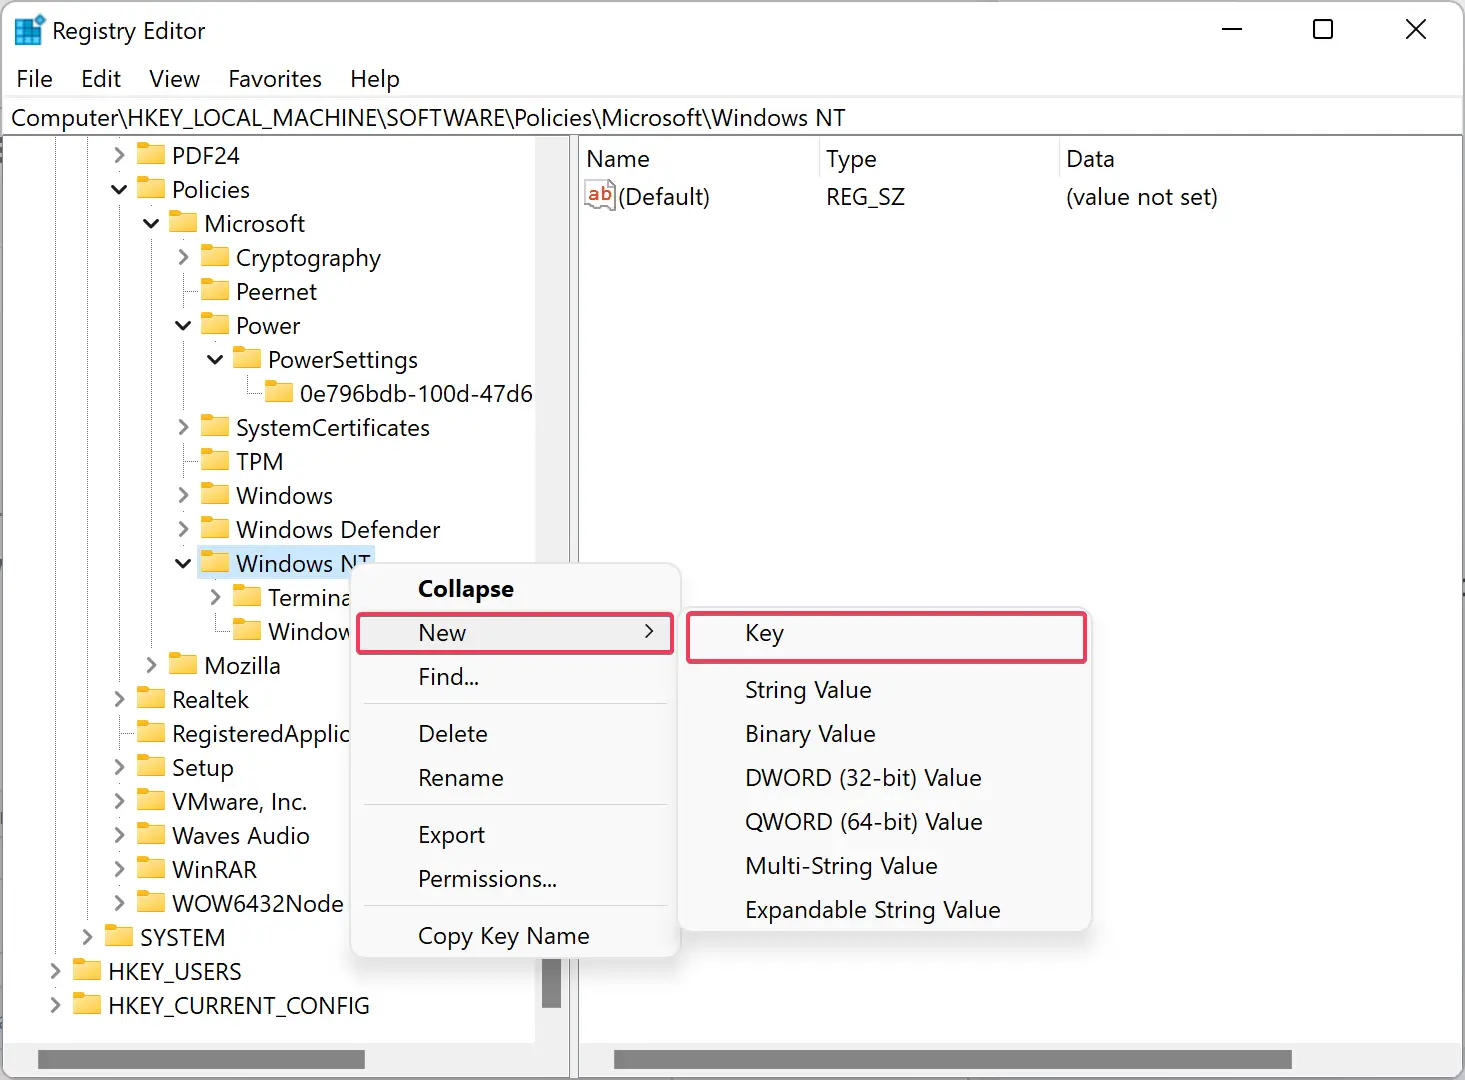
Step 3. Then, right-click on the Windows NT folder and select the “New > Key” option. Name it Printers.
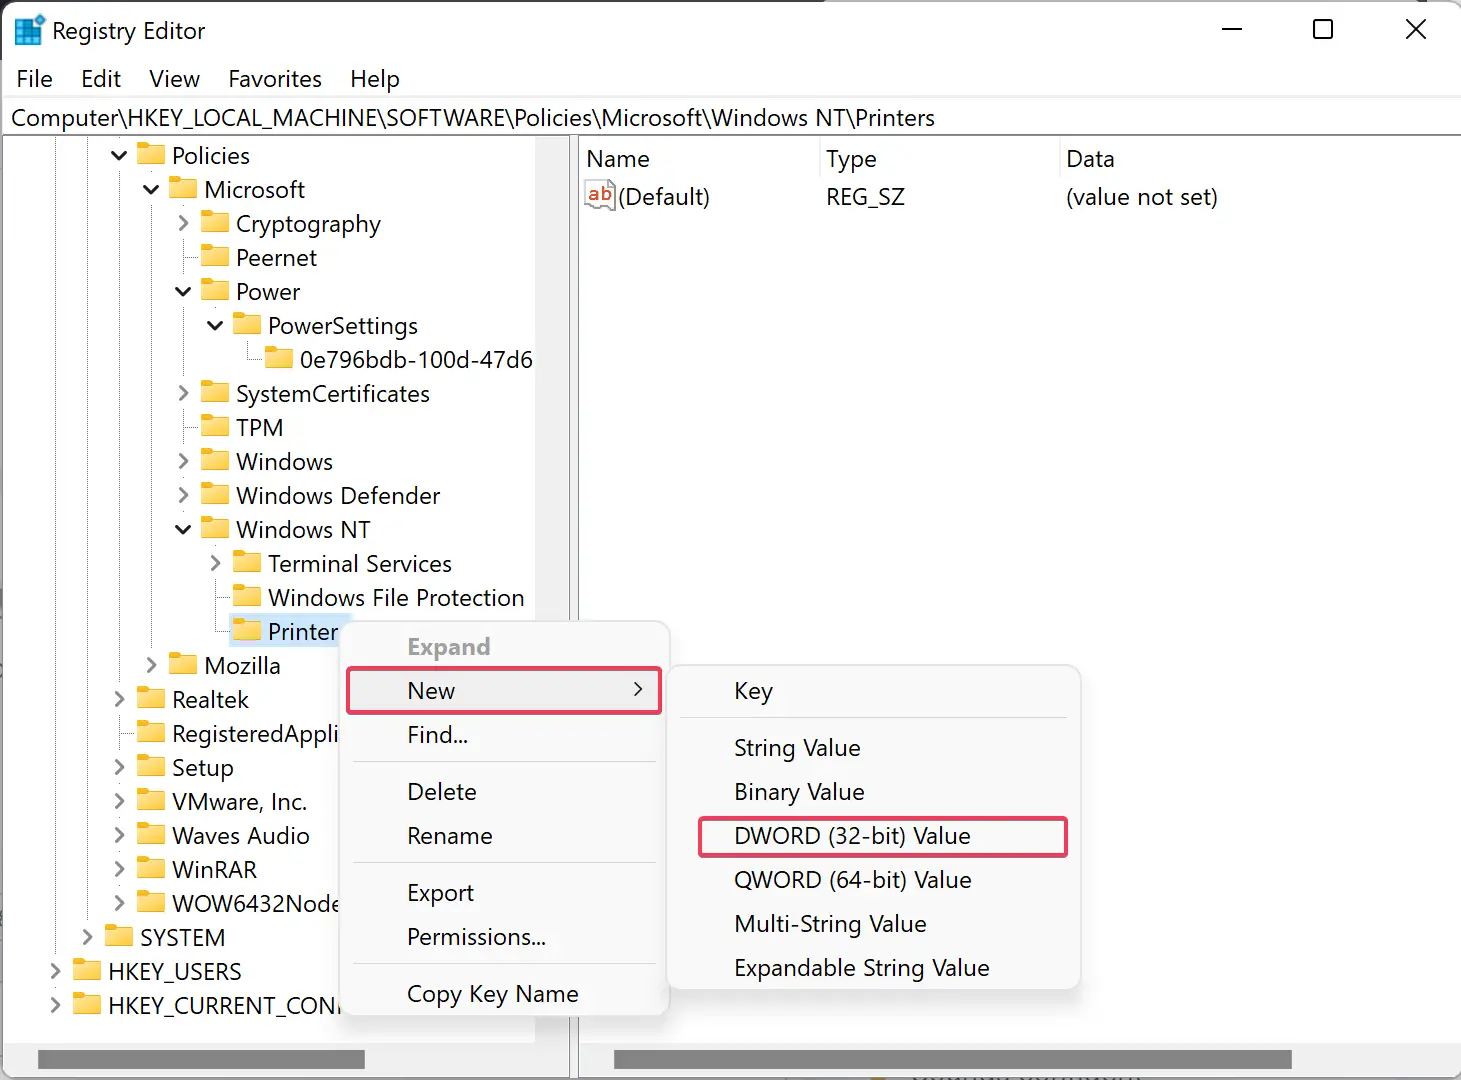
Step 4. After that, right-click on the Printers key, and select the “New > DWORD (32-bit) Value” option. Set its name as DisableWebPrinting.
Step 5. Now, double-click on DisableWebPrinting to change its Value data. To turn on internet printing, you need to keep the Value data 0. However, if you want to turn off the internet printing, set the Value data as 1.
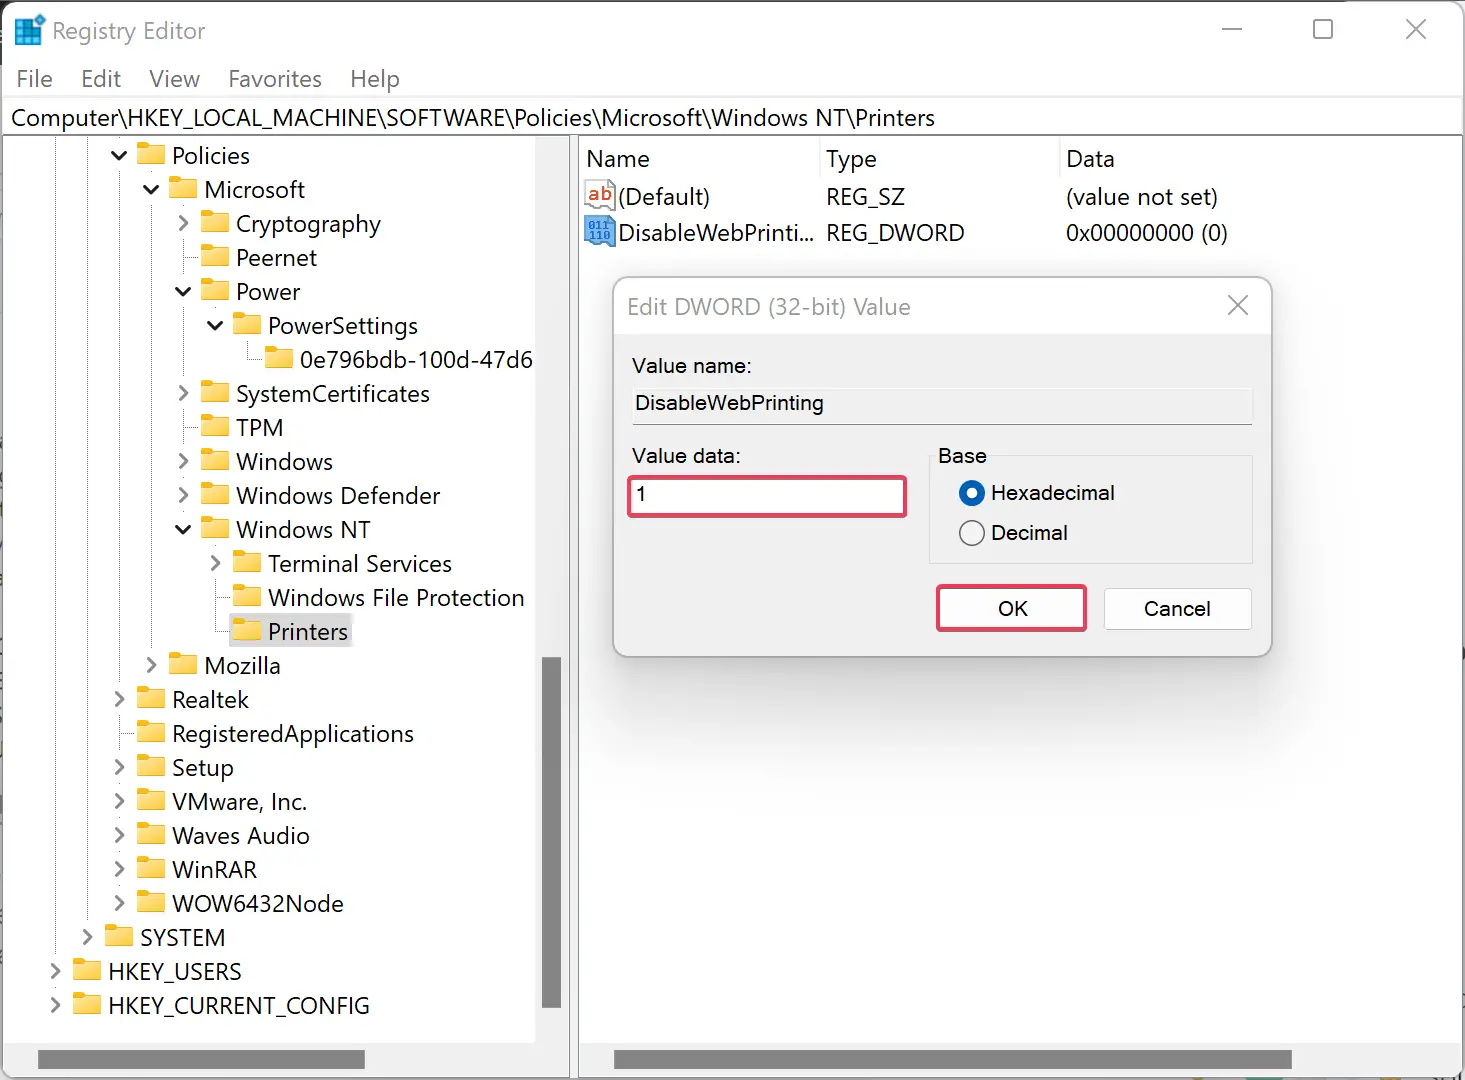
Step 6. Finally, click the OK button to save.
Step 7. Reboot your computer to apply the changes.
How to Turn On/Off Internet Printing in Windows through Group Policy?
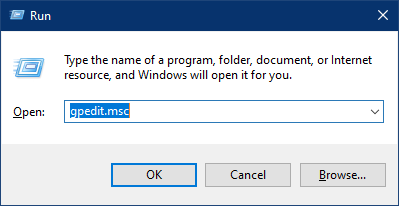
Step 1. First, open the Local Group Policy Editor.
For that, press the Windows + R keys on the keyboard to display the Run prompt. Then, type gpedit.msc and hit the Enter button.
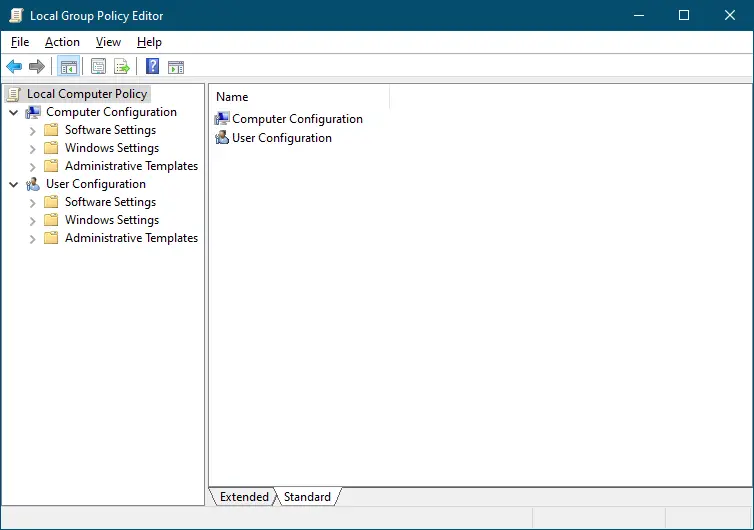
Step 2. When the Local Group Policy Editor window opens, navigate to the following path in the left sidebar:-
Computer Configuration > Administrative Templates > Printers
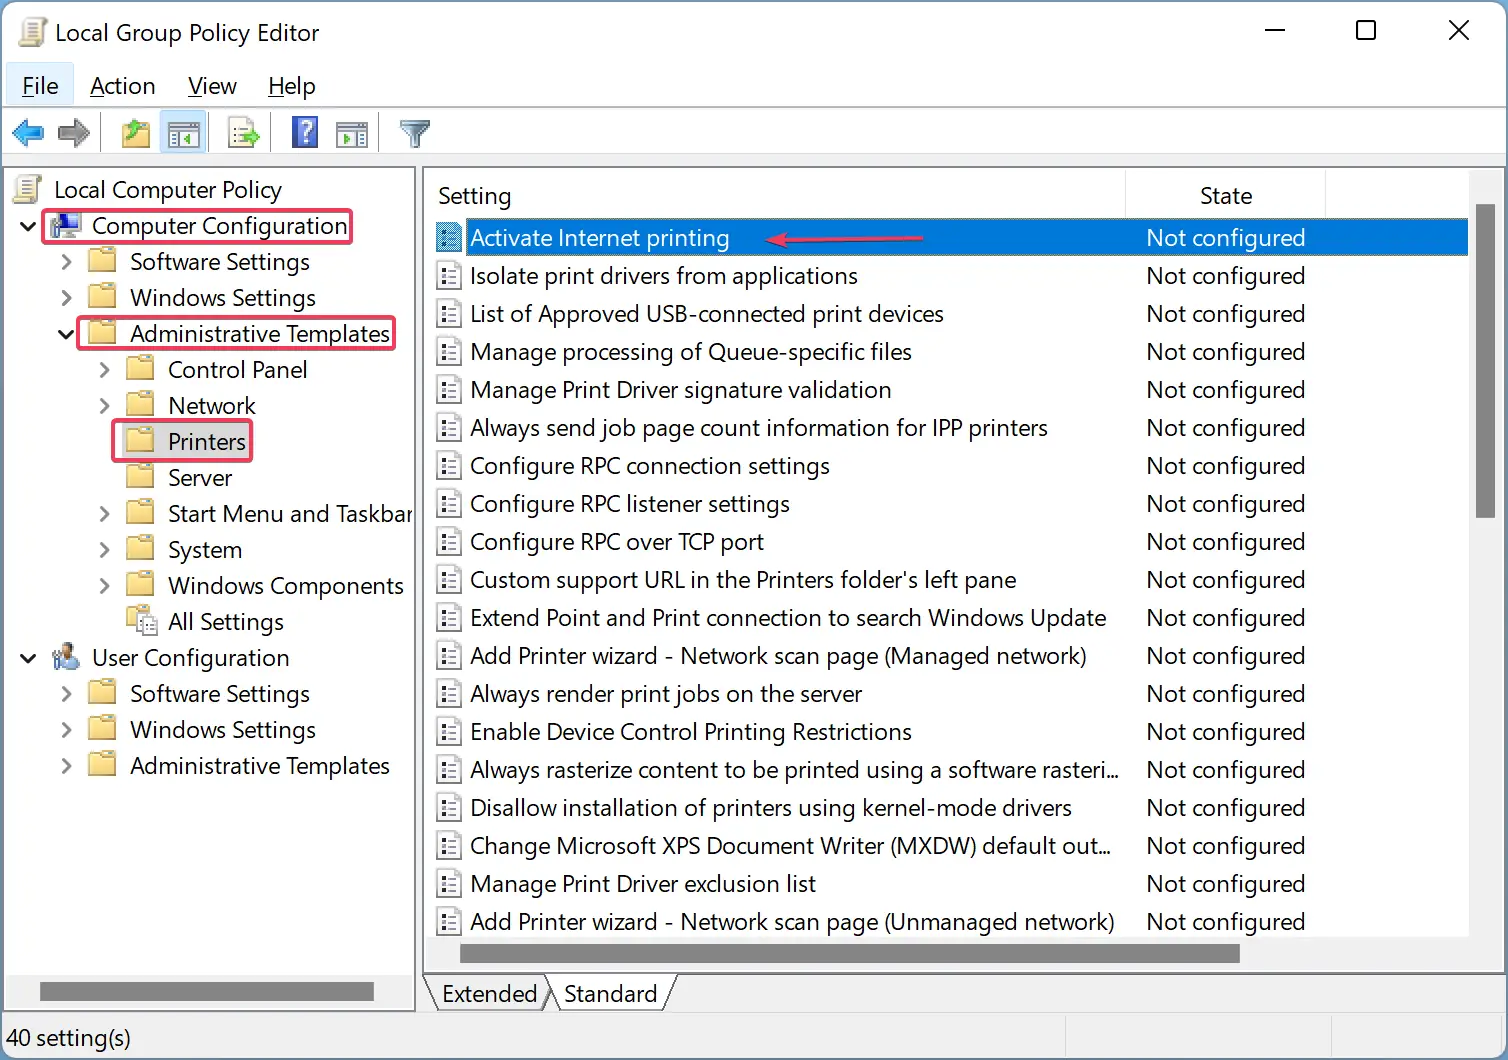
Step 3. On the right side of the Printers folder, look for the policy name “Activate Internet printing” and double-click on it to configure this policy.
Step 4. Select the Enabled option to turn on Internet printing, and you can choose the Disabled option to turn off Internet printing.
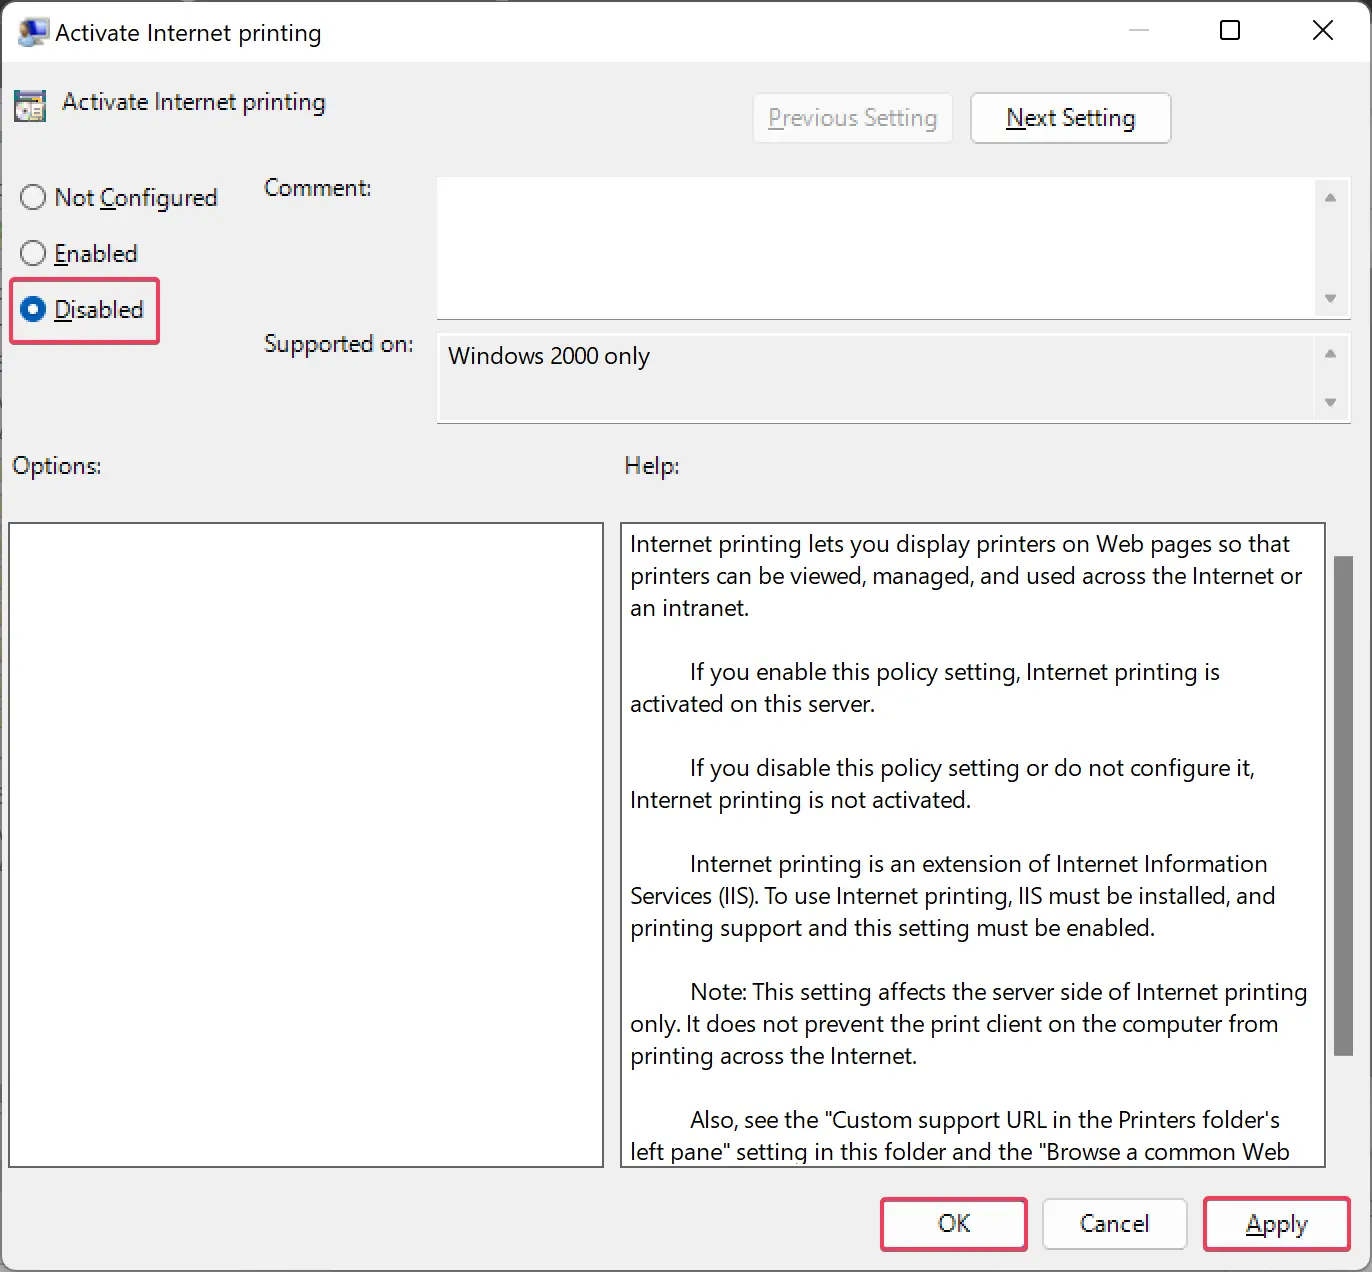
Step 5. Then, click the Apply button.
Step 6. Finally, click the OK button to exit.
Restart your computer to see the changes.
Conclusion
In conclusion, the Internet Printing Client is a useful built-in feature of Windows 11/10 that allows users to connect and print files using their connected printer on the internet or LAN. However, some users may want to disable this feature for various reasons, and this article provides step-by-step instructions on how to do it using either the Registry Editor or Group Policy Editor. Whether you want to enable or disable Internet Printing, following these steps will help you easily configure this feature according to your preference.