Microsoft Defender is a built-in antivirus that protects your computer from known and unknown threats. However, many Windows users rely on a third-party antivirus to protect their computers.
Once you install Windows 11 on your computer, Microsoft Defender’s “Real-time protection” feature starts protecting your computer. When it finds suspicious activity, it immediately blocks them.
By default, Real-time protection is enabled in Windows 11. It monitors events such as file processes, file/registry changes, and other events on your devices for suspicious and known malicious activity. This antivirus also scans downloaded files and attachments automatically. Hence, disabling real-time protection is not recommended. To disable the Real-time protection feature, you’ll need administrator rights.
How to Turn On or Off Microsoft Defender Real-time Protection in Windows 11?
To enable or disable Microsoft Defender’s real-time protection in Windows 11, use the following steps:-
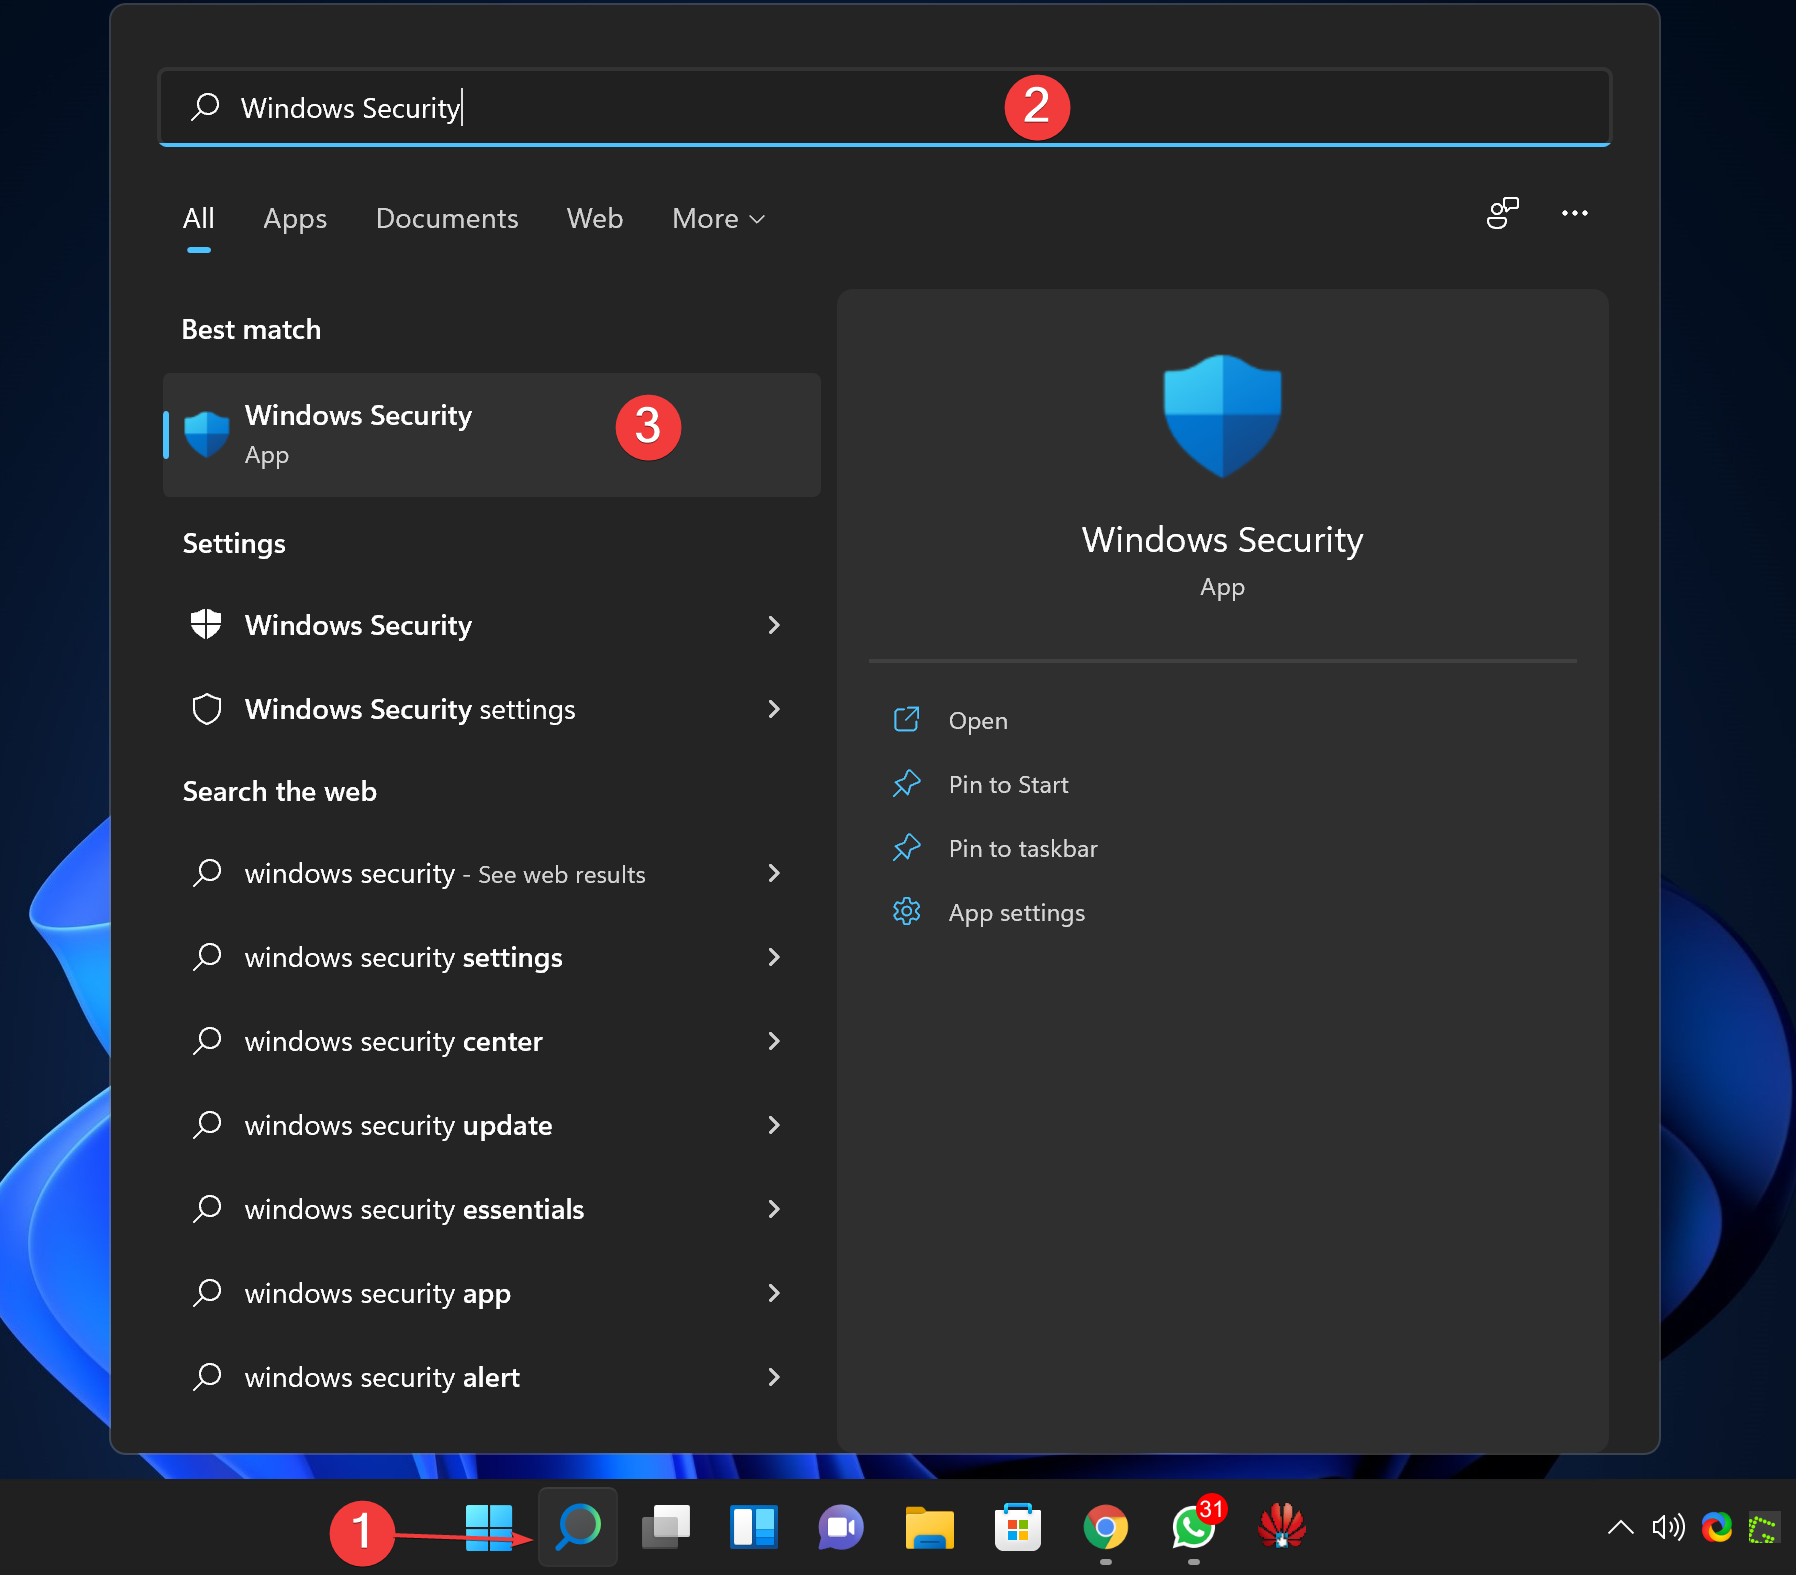
Step 1. First, click on the Search or Start button on the Windows 11 taskbar and type Windows Security. In the available search results, click on Windows Security to open it.
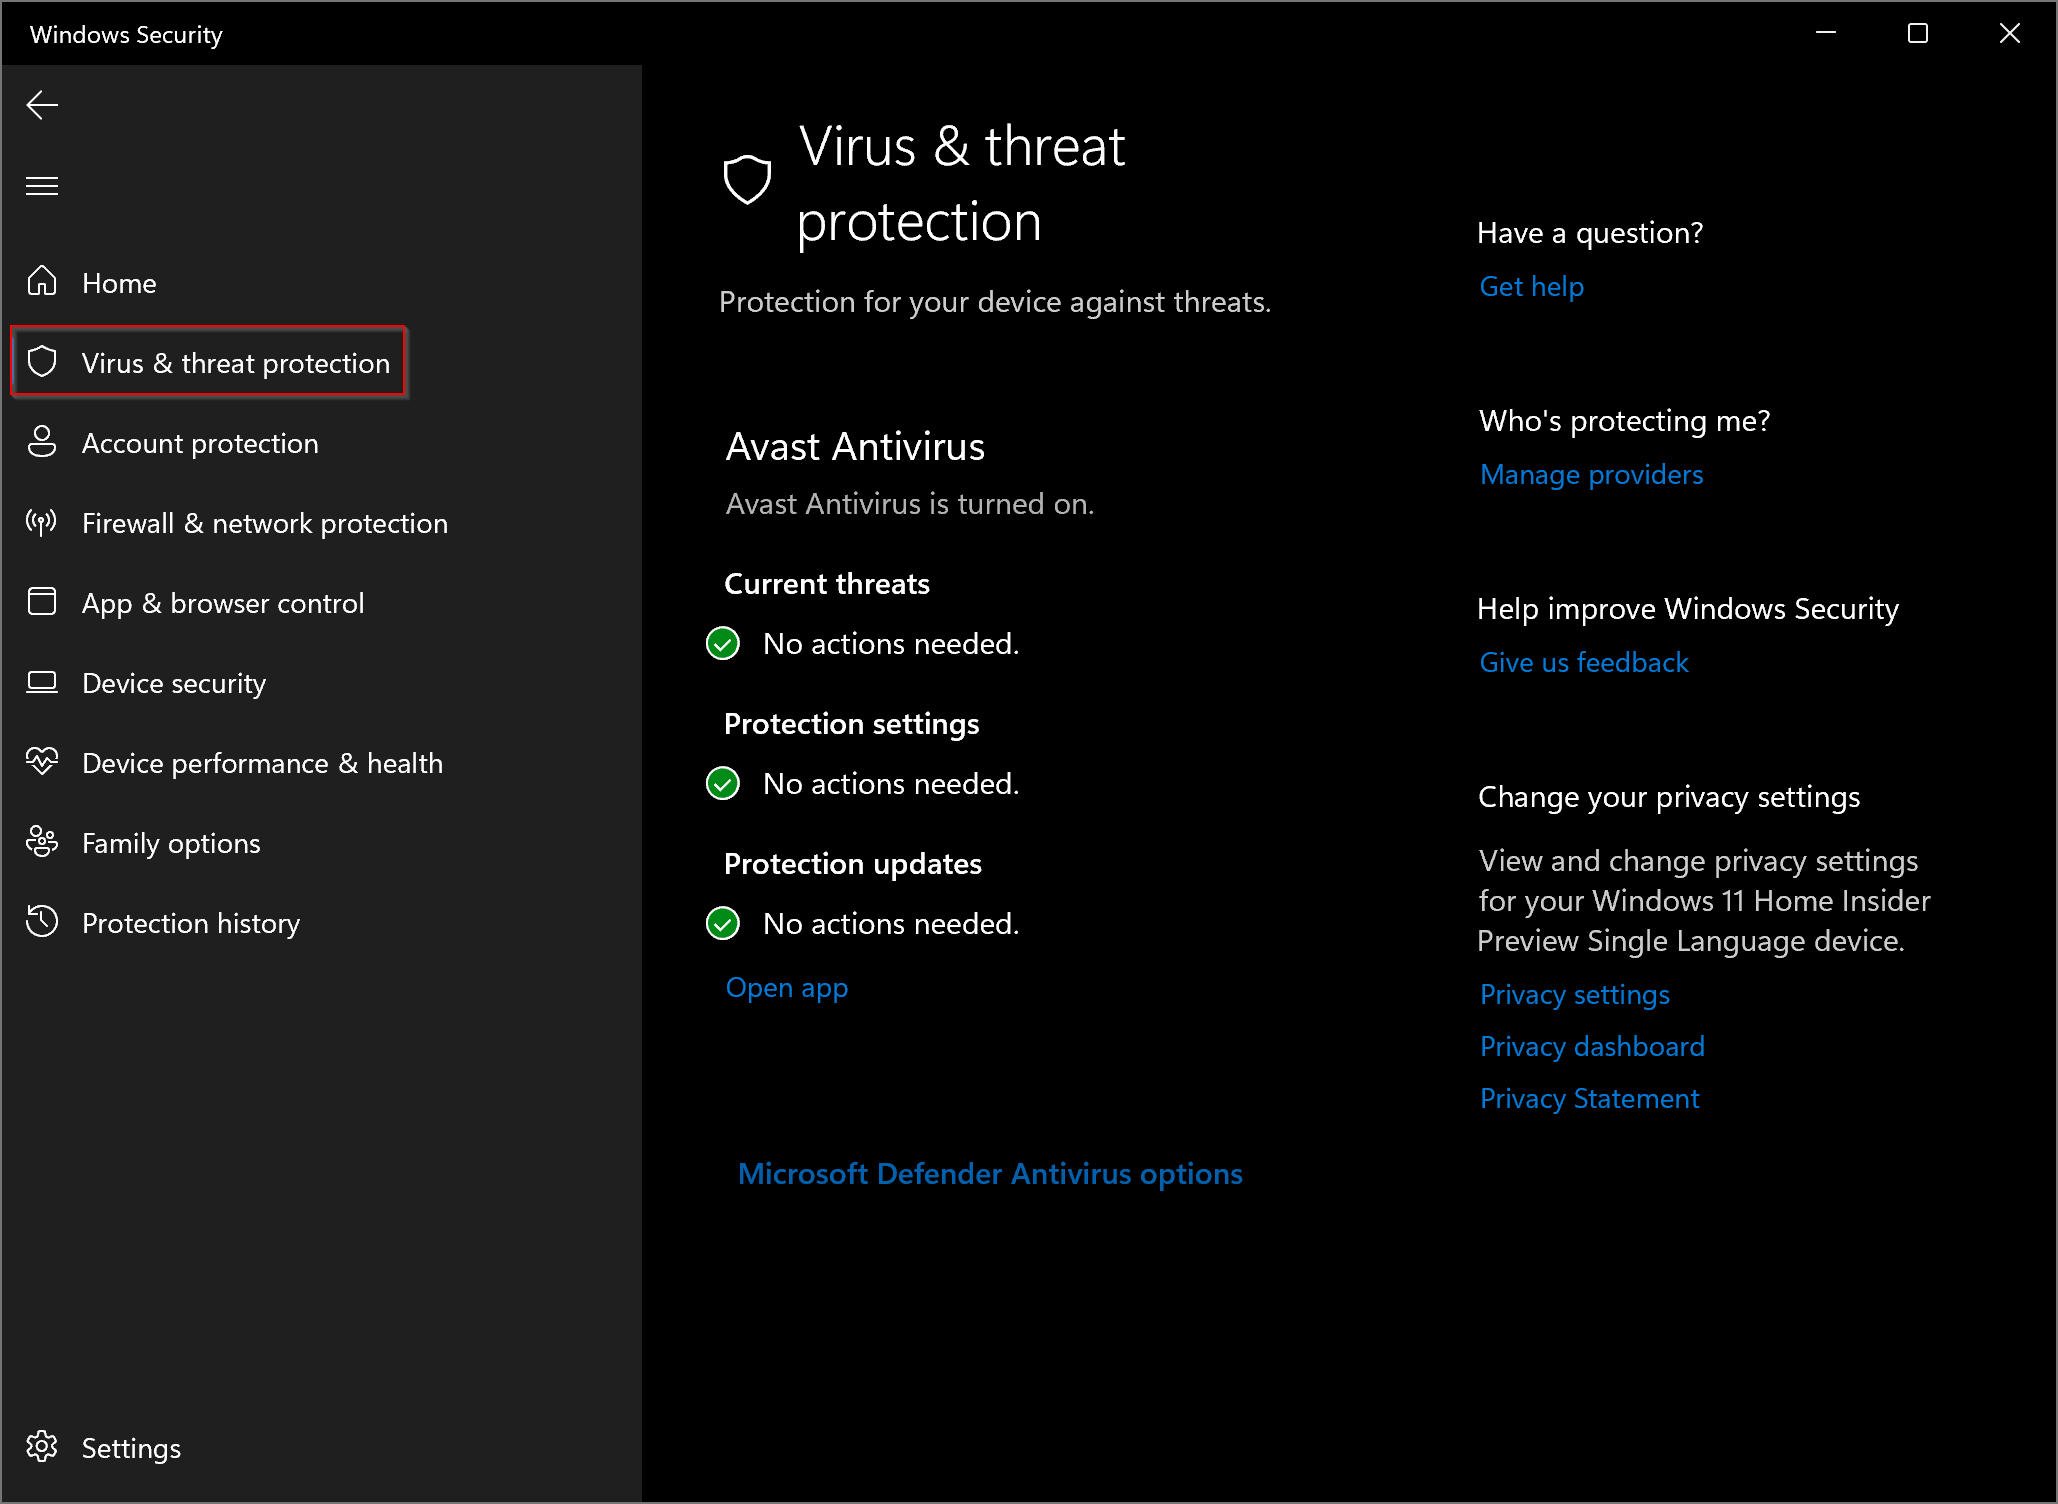
Step 2. When the “Windows Security” window appears on your computer, choose the Virus & threat protection option in the left sidebar.
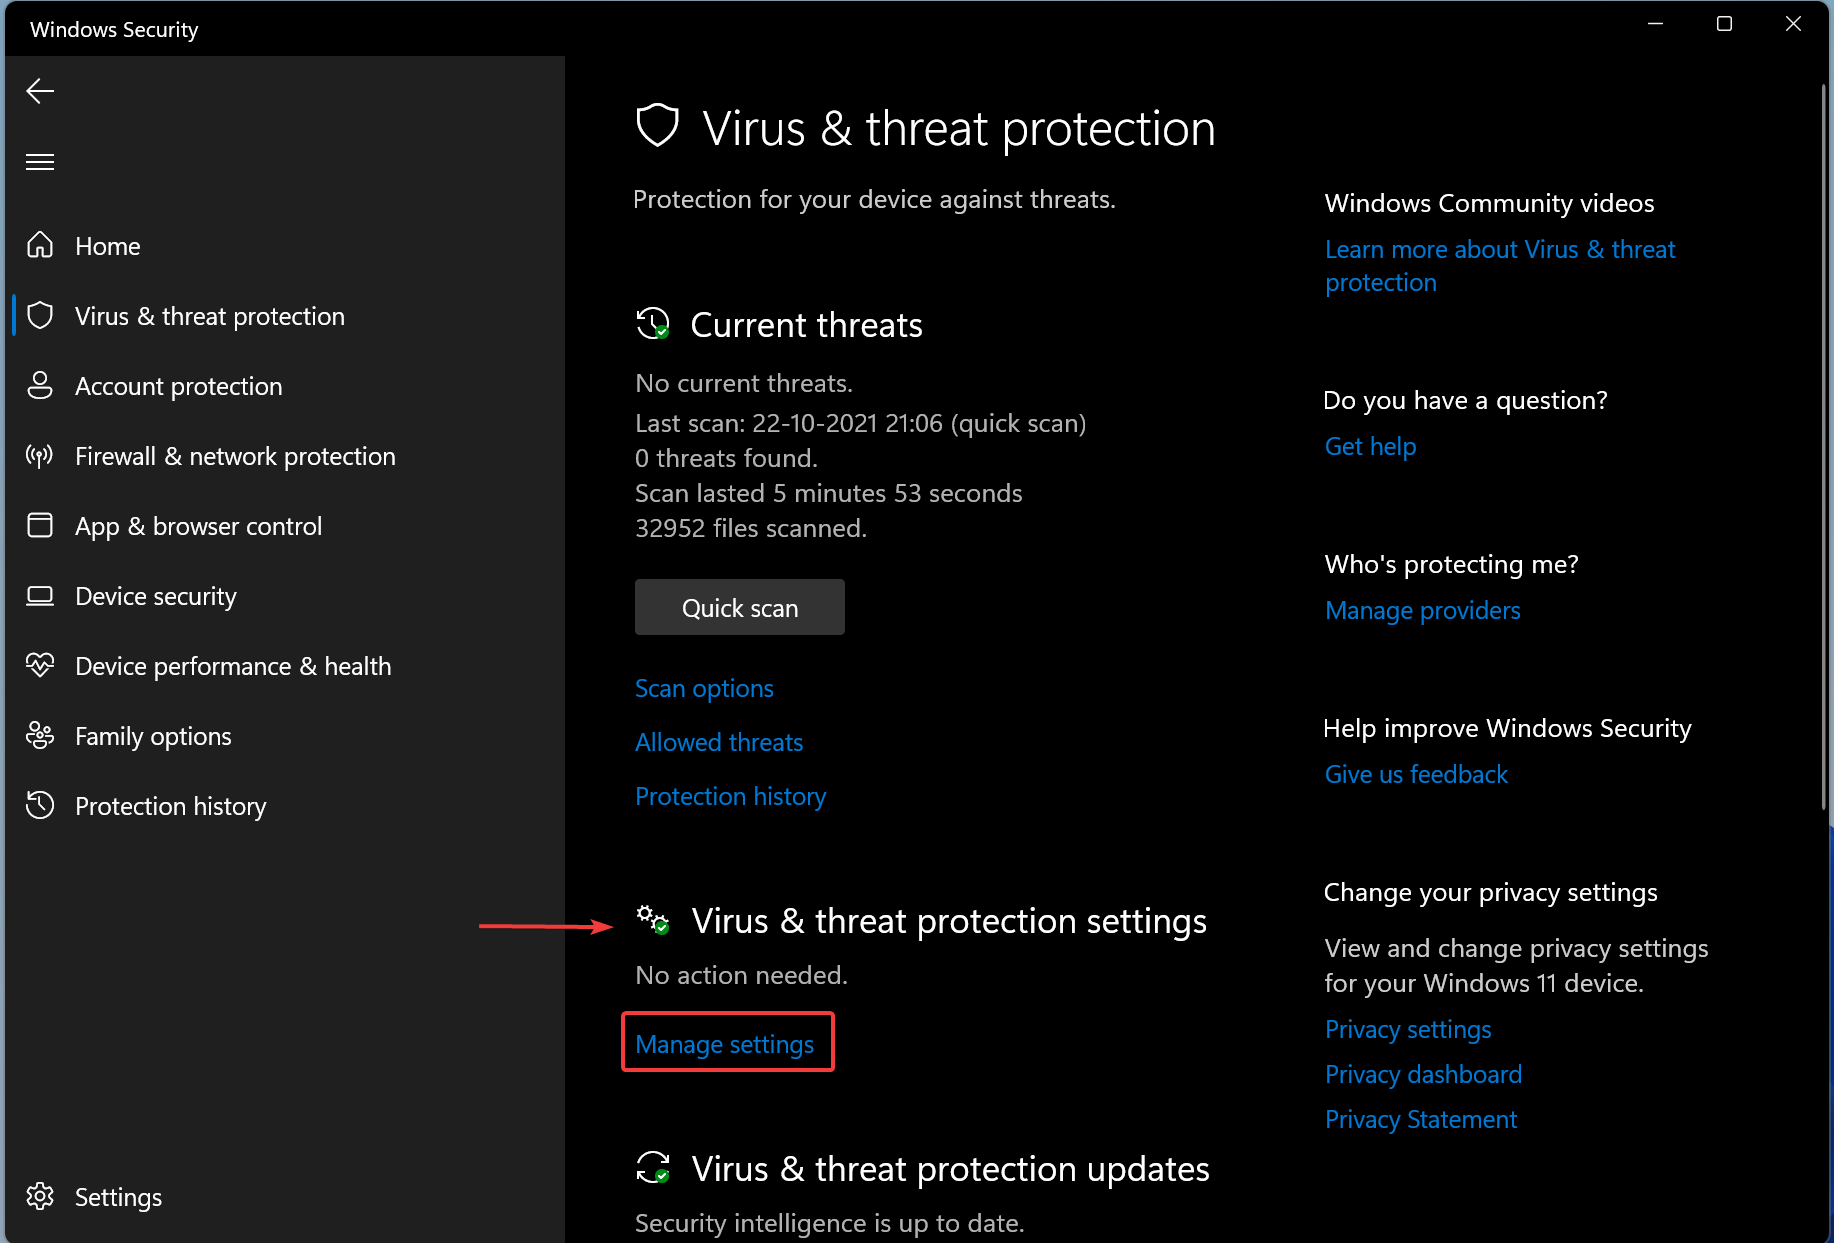
Step 3. Click the Manage settings link under the “Virus & threat protection settings.”
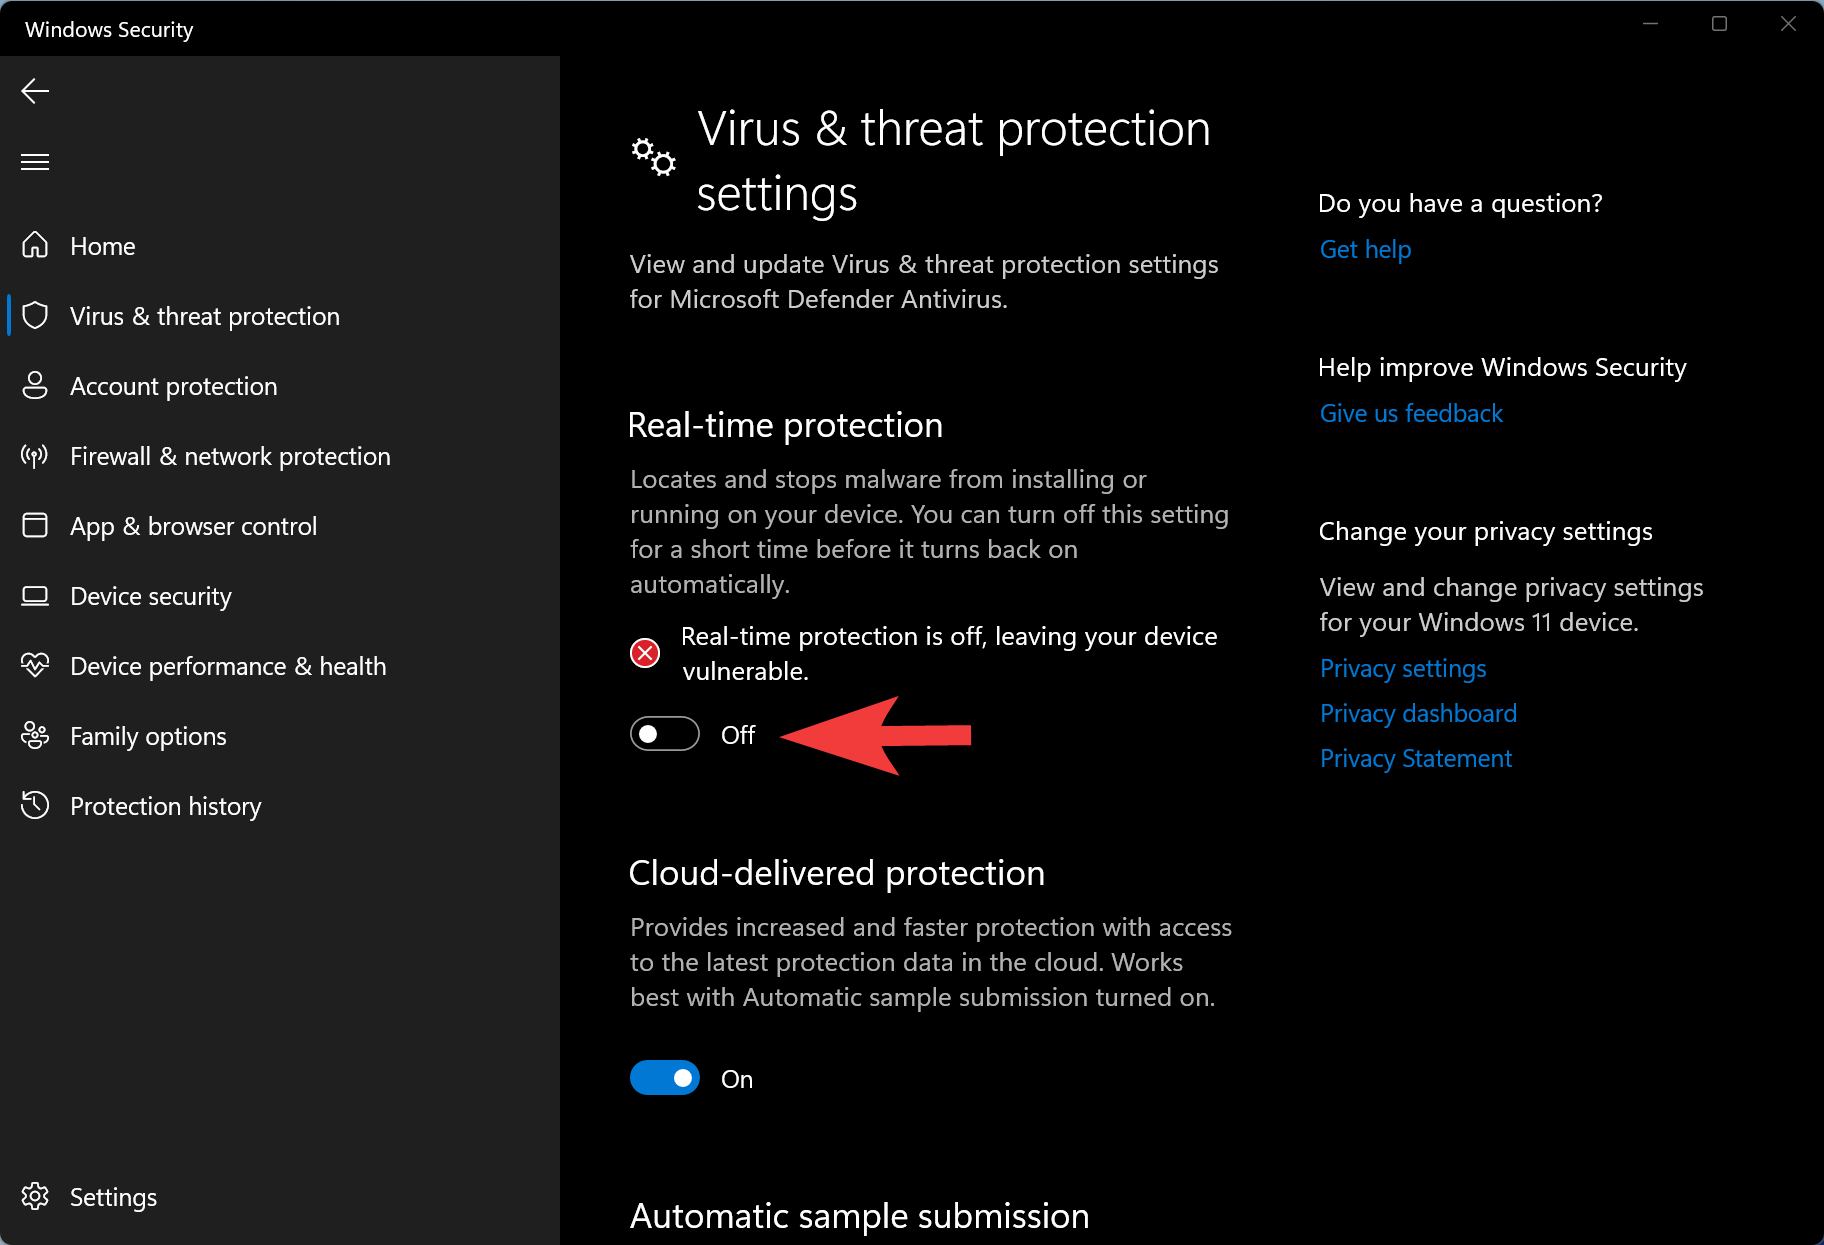
Step 4. You will see a toggle switch under the “Real-time protection” option. Turn it Off or On according to your needs.
How to Enable or Disable Microsoft Defender Real-time Protection in Windows 11 using Local Group Policy Editor?
It is also possible to enable or disable Microsoft Defender Real-time Protection in Windows 11 using Local Group Policy Editor. You need to enable gpedit.msc on Windows 11 Home edition computers before proceeding with this method.
Step 1. First, open the Local Group Policy Editor on your computer.
Step 2. Then, navigate to the following path in the left sidebar of the Local Group Policy Editor window:-
Computer Configuration > Administrative Templates > Windows Components > Microsoft Defender Antivirus > Real-time Protection
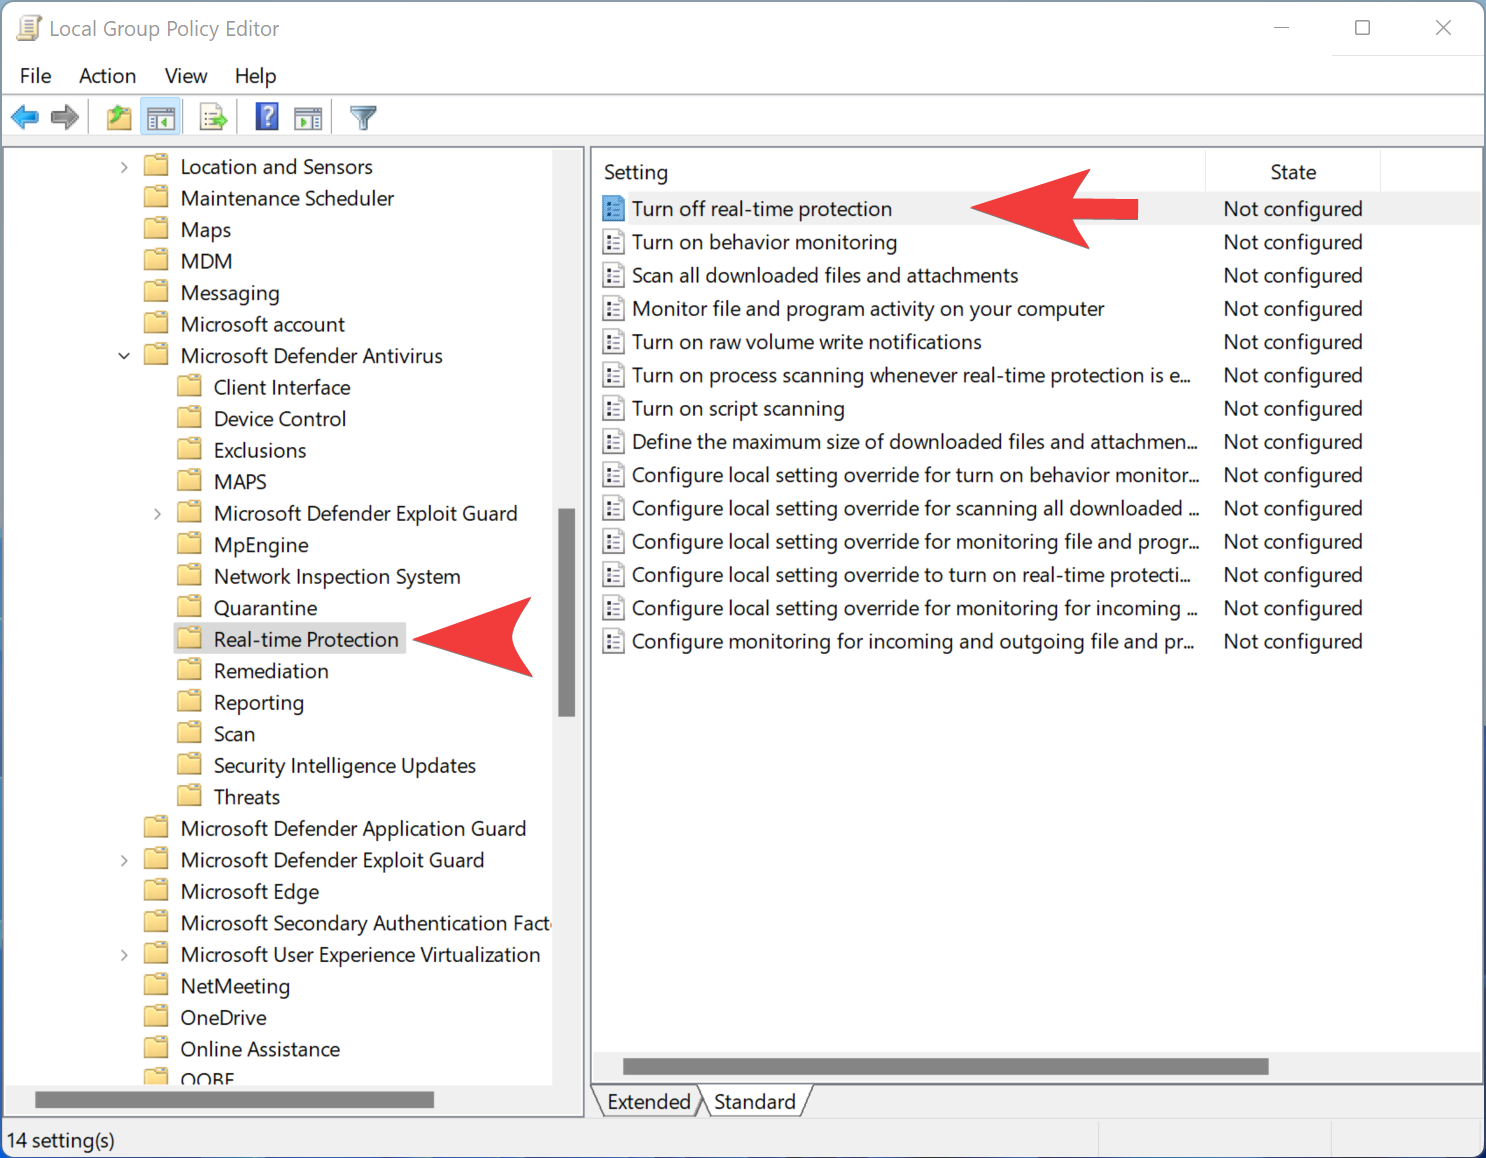
Step 3. On the right side of the “Real-time Protection” folder, locate and double-click the setting “Turn off real-time protection.”

Step 4. Select the Enabled option to turn off “Real-time protection.” To turn on “Real-time Protection,” you’ll need to choose the Not Configured or Disabled option.
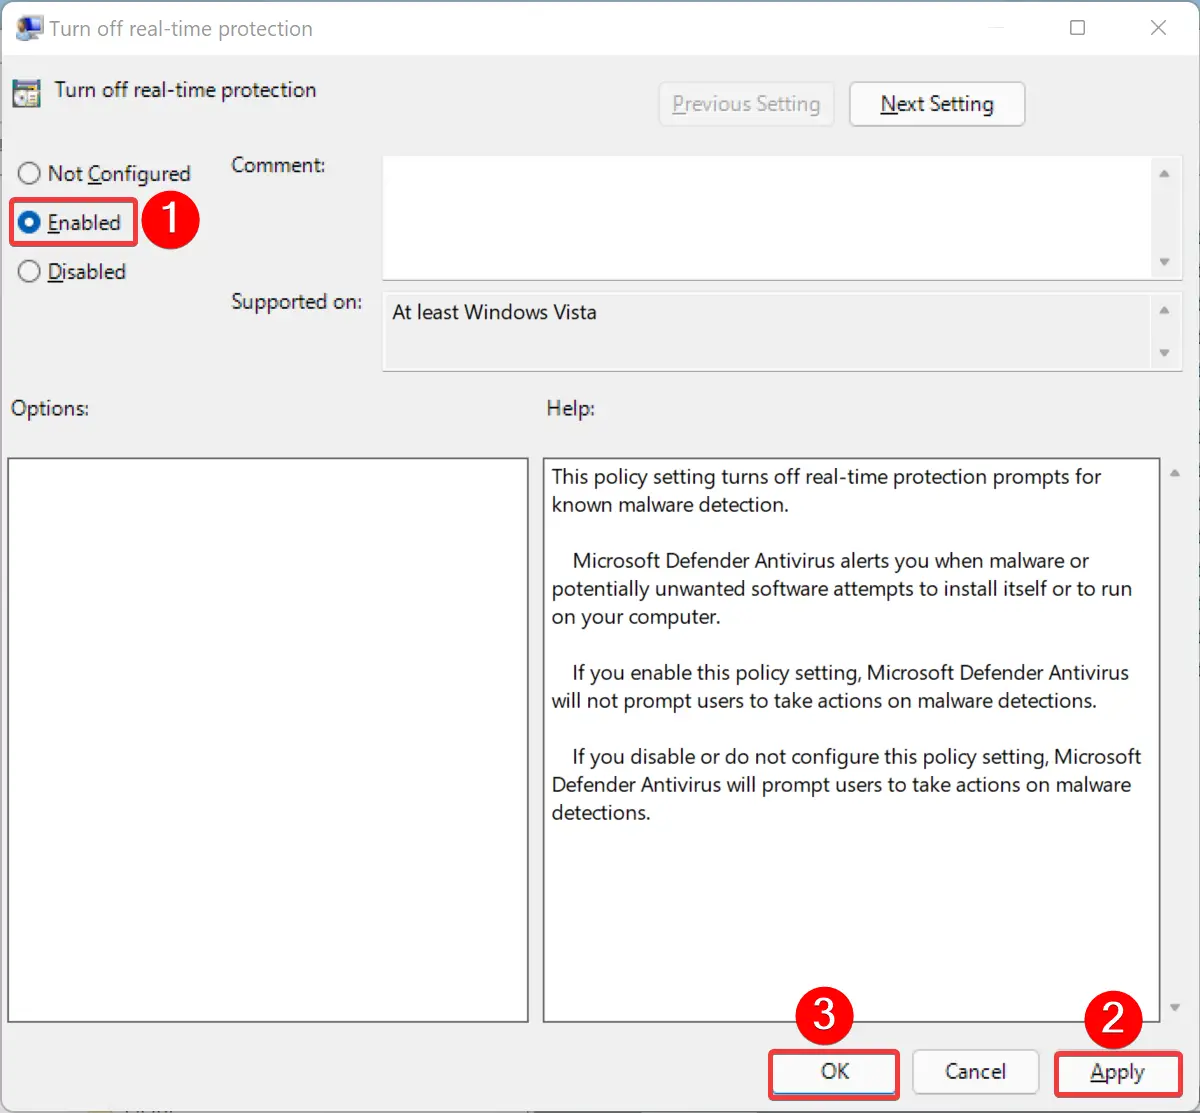
Step 5. Click Apply.
Step 6. Click OK.
Conclusion
In conclusion, Microsoft Defender is a reliable and powerful antivirus built into Windows 11 that provides protection against known and unknown threats. Real-time protection is enabled by default and monitors your computer for malicious activity, making it an essential feature to keep your device secure. While it is possible to disable Real-time protection, it is not recommended. However, if necessary, it can be turned on or off using the Windows Security app or the Local Group Policy Editor. Regardless of your choice, ensuring that your device has reliable protection is crucial in safeguarding your data and privacy.