Windows 11 includes an improved Network Discovery feature that allows Windows computers to find and discover other computers and devices on a network. By default, this functionality is enabled for the private network such as home or workplace. However, for public networks like guest Wi-Fi or untrusted networks, Microsoft has made it disabled by default. So that other machines can’t discover your device automatically.
Due to some reason, if you want to disable or turn off or turn on Network Discovery for private or public networks, this gearupwindows article will guide you.
How to Enable Network Discovery in Windows 11?
If your Windows 11 device is not discoverable by other devices on your private network, it may be that you or a third-party software have disabled the Network Discovery on your PC. To turn on or enable the network discovery in your Windows 11 computer, use the following steps:-
Step 1. Open the Settings app.
For that, press Windows + I keys on the keyboard or use any other method that you would like to you.
Step 2. When Windows Settings appears on your computer, select Network & internet in the left sidebar.
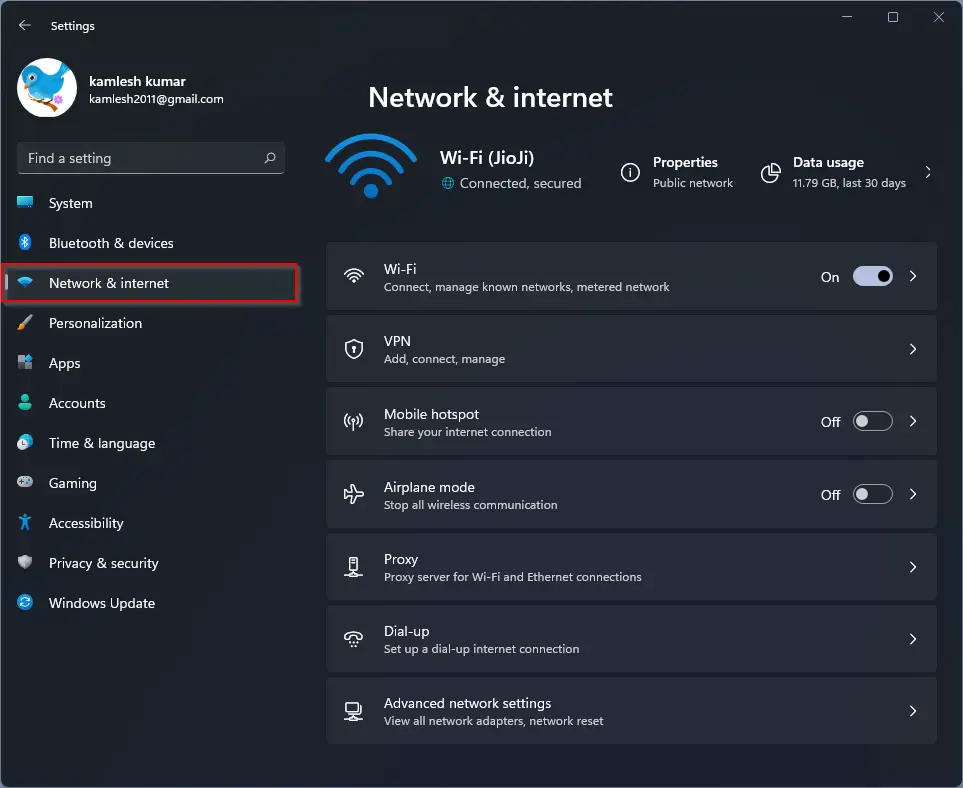
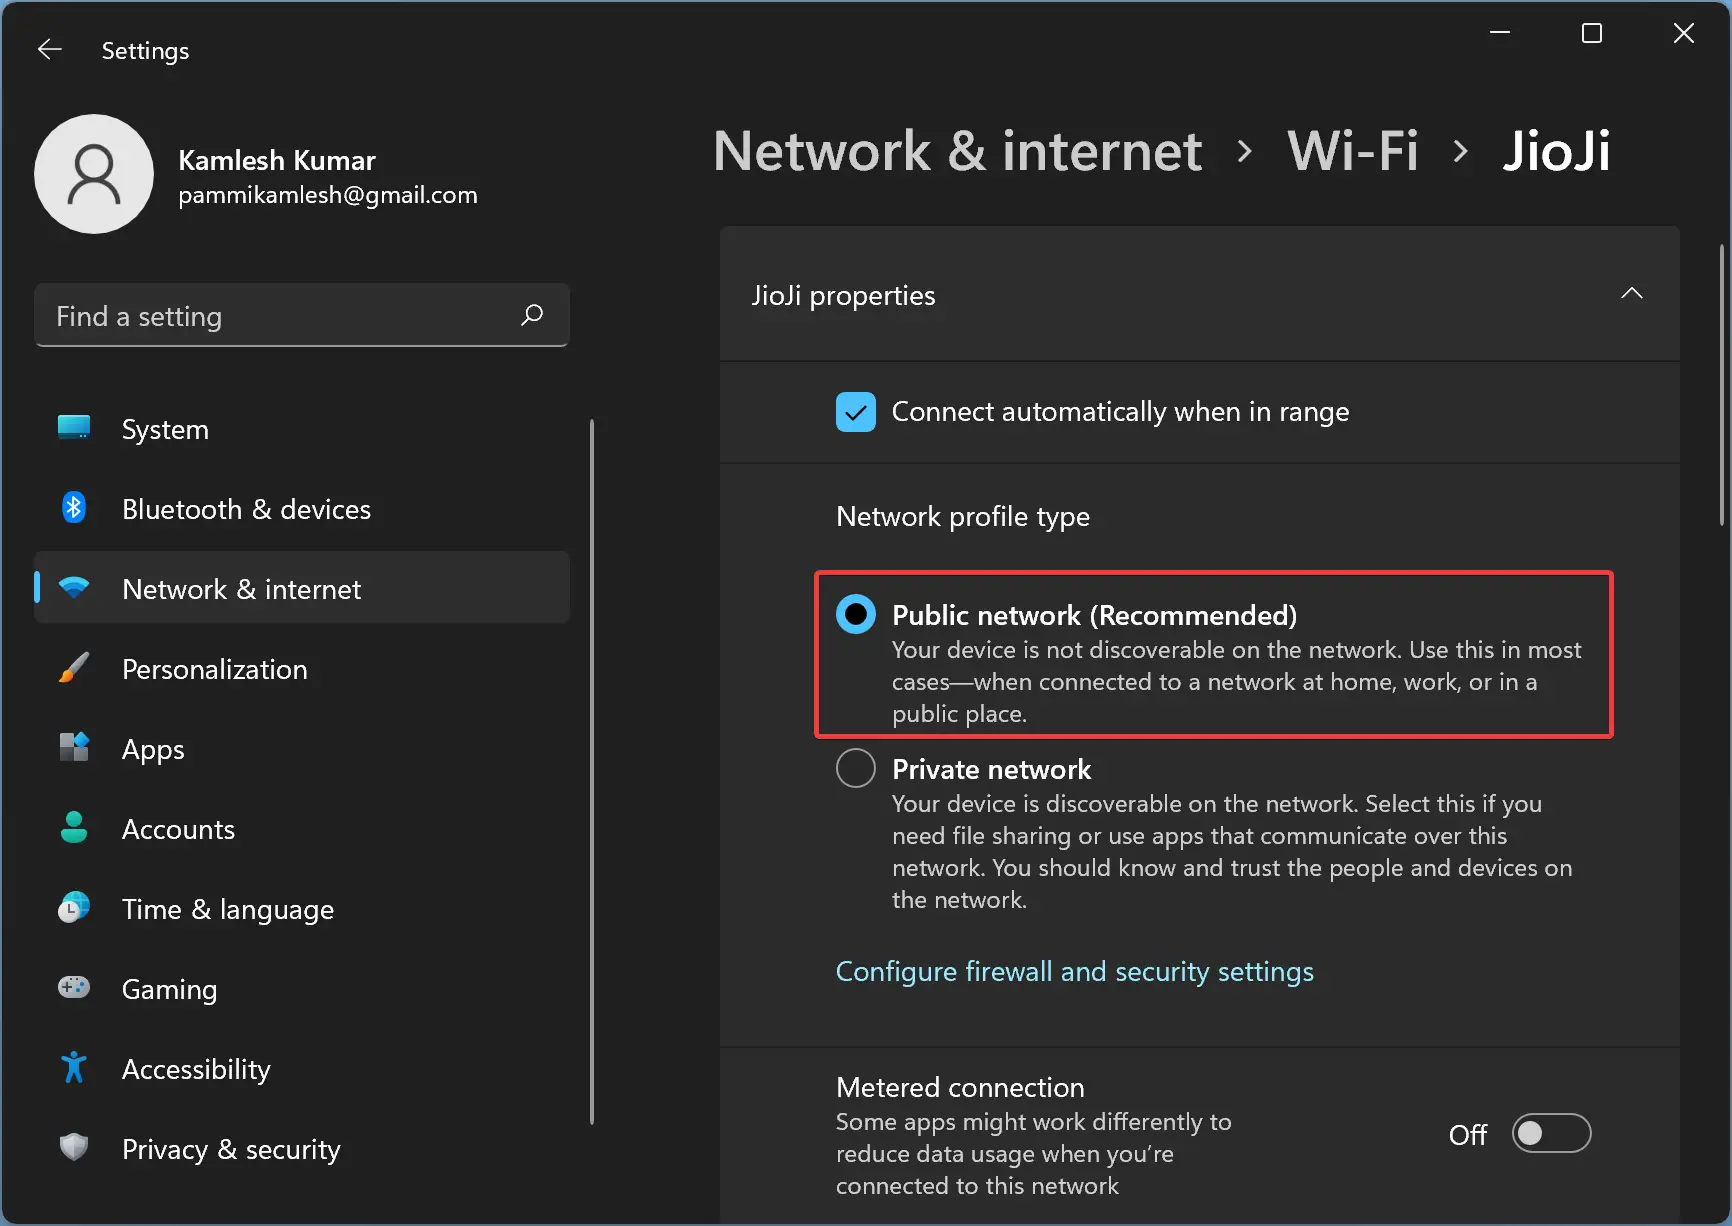
Step 3. On the right side of “Network & internet,” click Wi-Fi or Ethernet, which you want to make discoverable on the private network. For instance, my PC is connected to Wi-Fi, and I want to allow Network Discovery.
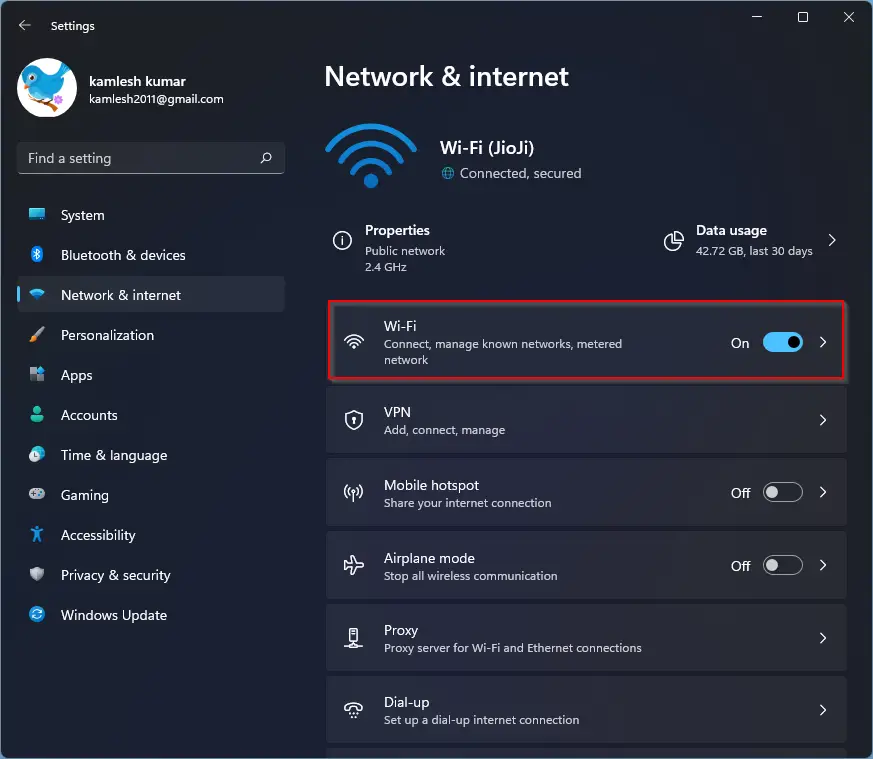
Step 4. After that, select the Wi-Fi properties tile on the Wi-Fi settings page.
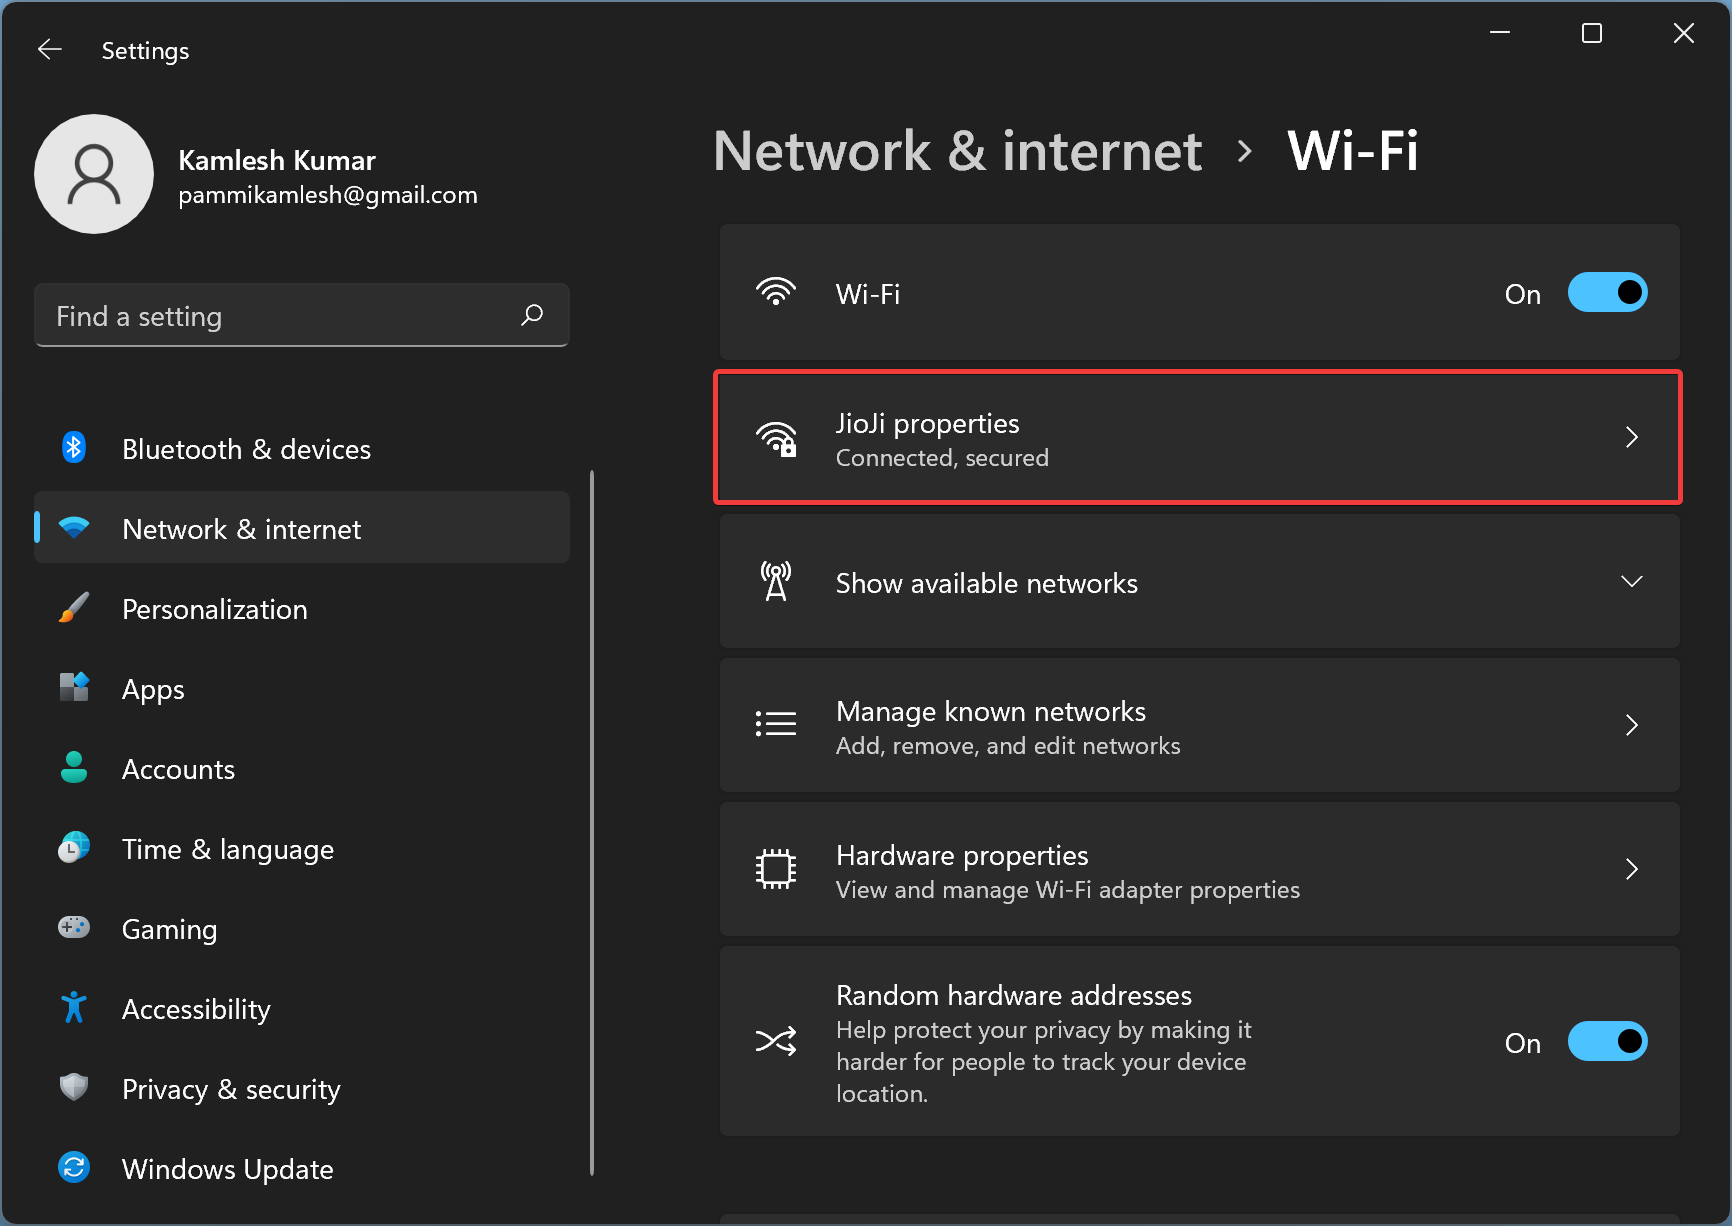
Step 5. Finally, select the Private network option.
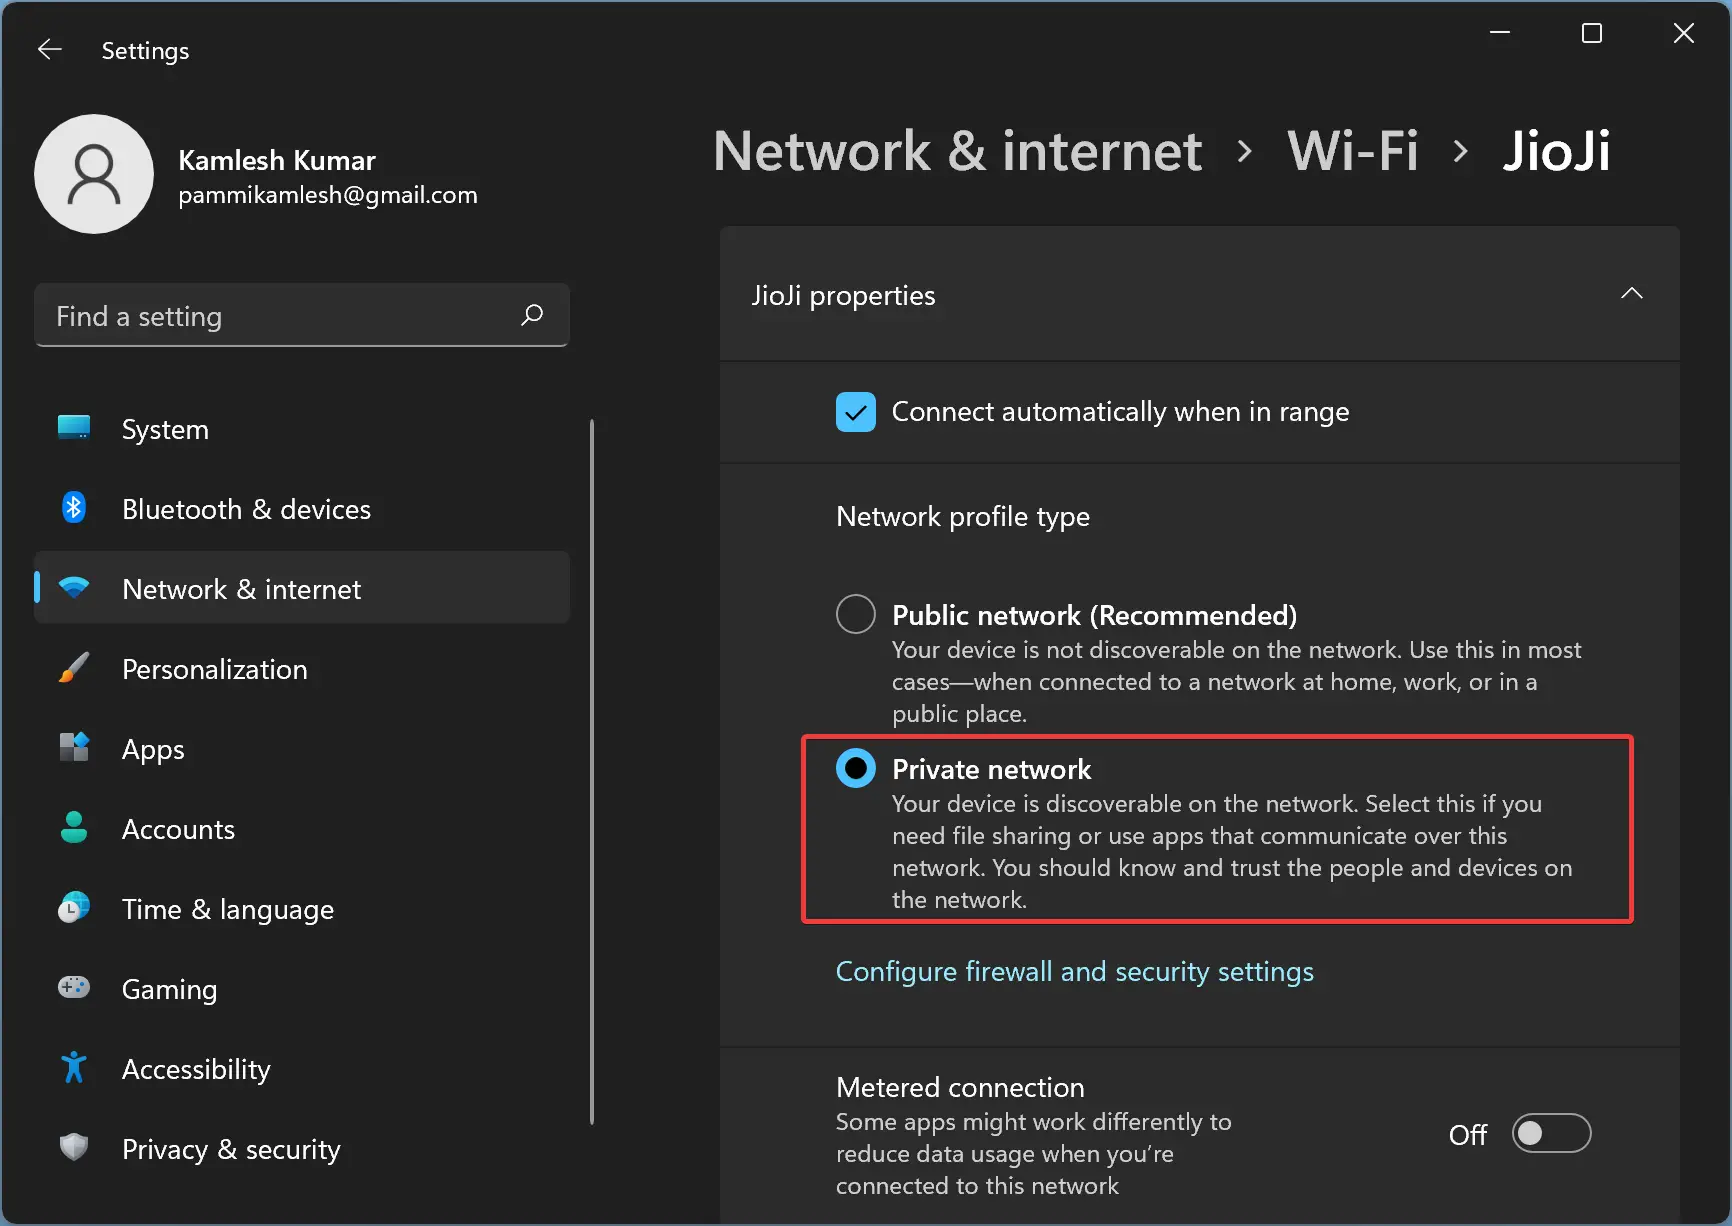
That’s it. This profile will automatically allow your device to be discovered in the network.
How to Disable Network Discovery in Windows 11?
If you want to make your Windows 11 PC undiscoverable in a network, you’ll need to disable network discovery. For that, use the following steps:-
Step 1. Open the Settings app.
Step 2. When Windows Settings opens on your computer, select Network & internet in the left sidebar.
Step 3. On the right side of “Network & internet,” click Wi-Fi or Ethernet that you want to make undiscoverable on the public network. For instance, my PC is connected to Wi-Fi, and I want to disallow Network Discovery.
Step 4. After that, select the Wi-Fi properties tile on the Wi-Fi settings page.
Step 5. Finally, select the Public network option.
That’s it. This profile will automatically disallow your device from being discovered in the network.
Conclusion
In conclusion, enabling or disabling Network Discovery in Windows 11 is an essential feature that allows users to make their devices visible or hidden on the network. By default, it is enabled for private networks, but for public networks, it is disabled to prevent unauthorized access to the device. However, there may be situations where users want to turn on or turn off Network Discovery on their Windows 11 computers, and the steps mentioned in this article can be helpful. By following the simple steps mentioned above, users can easily enable or disable Network Discovery on their Windows 11 devices as per their requirements.
Also Read: How to Fix the “Network Discovery is Turned Off” Error on Windows 11?
Doesnt work. Still not discoverable. 🙁
Dear Tim,
If it is still not discoverable, consider enabling “Network Discovery” for both profiles: Public and Private.
Here is the fix for “Network Discovery is Turned Off” error.
https://gearupwindows.com/how-to-fix-the-network-discovery-is-turned-off-error-on-windows-11/