Windows 11 includes a feature that is known as System Protection. This function creates a system restore points on your computer so that you can restore your PC to its previous working state. When you enable System protection for a drive, Windows creates restore points so that you can revert changes and go back to an earlier good condition on the drive.
You need to enable or disable the System protection feature for each drive. When a drive is added for System protection, Windows creates a restore point that helps you return to a working condition using the data from a restore point. If you are running out of storage, you can delete a restore point to free up space on the computer.
How to Enable or Disable System Protection for Drives in Windows 11?
System Restore on Windows 11 monitors system changes and saves the system state as a restore point. If you find difficulties on your device, you can return the system to a previous state using the data from a restore point. Windows automatically generates Restore points before critical changes are made, such as a major Windows update. Further, the System Restore automatically manages the disk space that is allocated for restore points. It automatically purges the oldest restore points to make room for new ones. System Restore allocates space based on the size of the hard disk and the version of Windows you run. However, you can adjust the maximum disk space per drive used for system protection.
To turn on System protection for drives in Windows 11, use the following steps:-
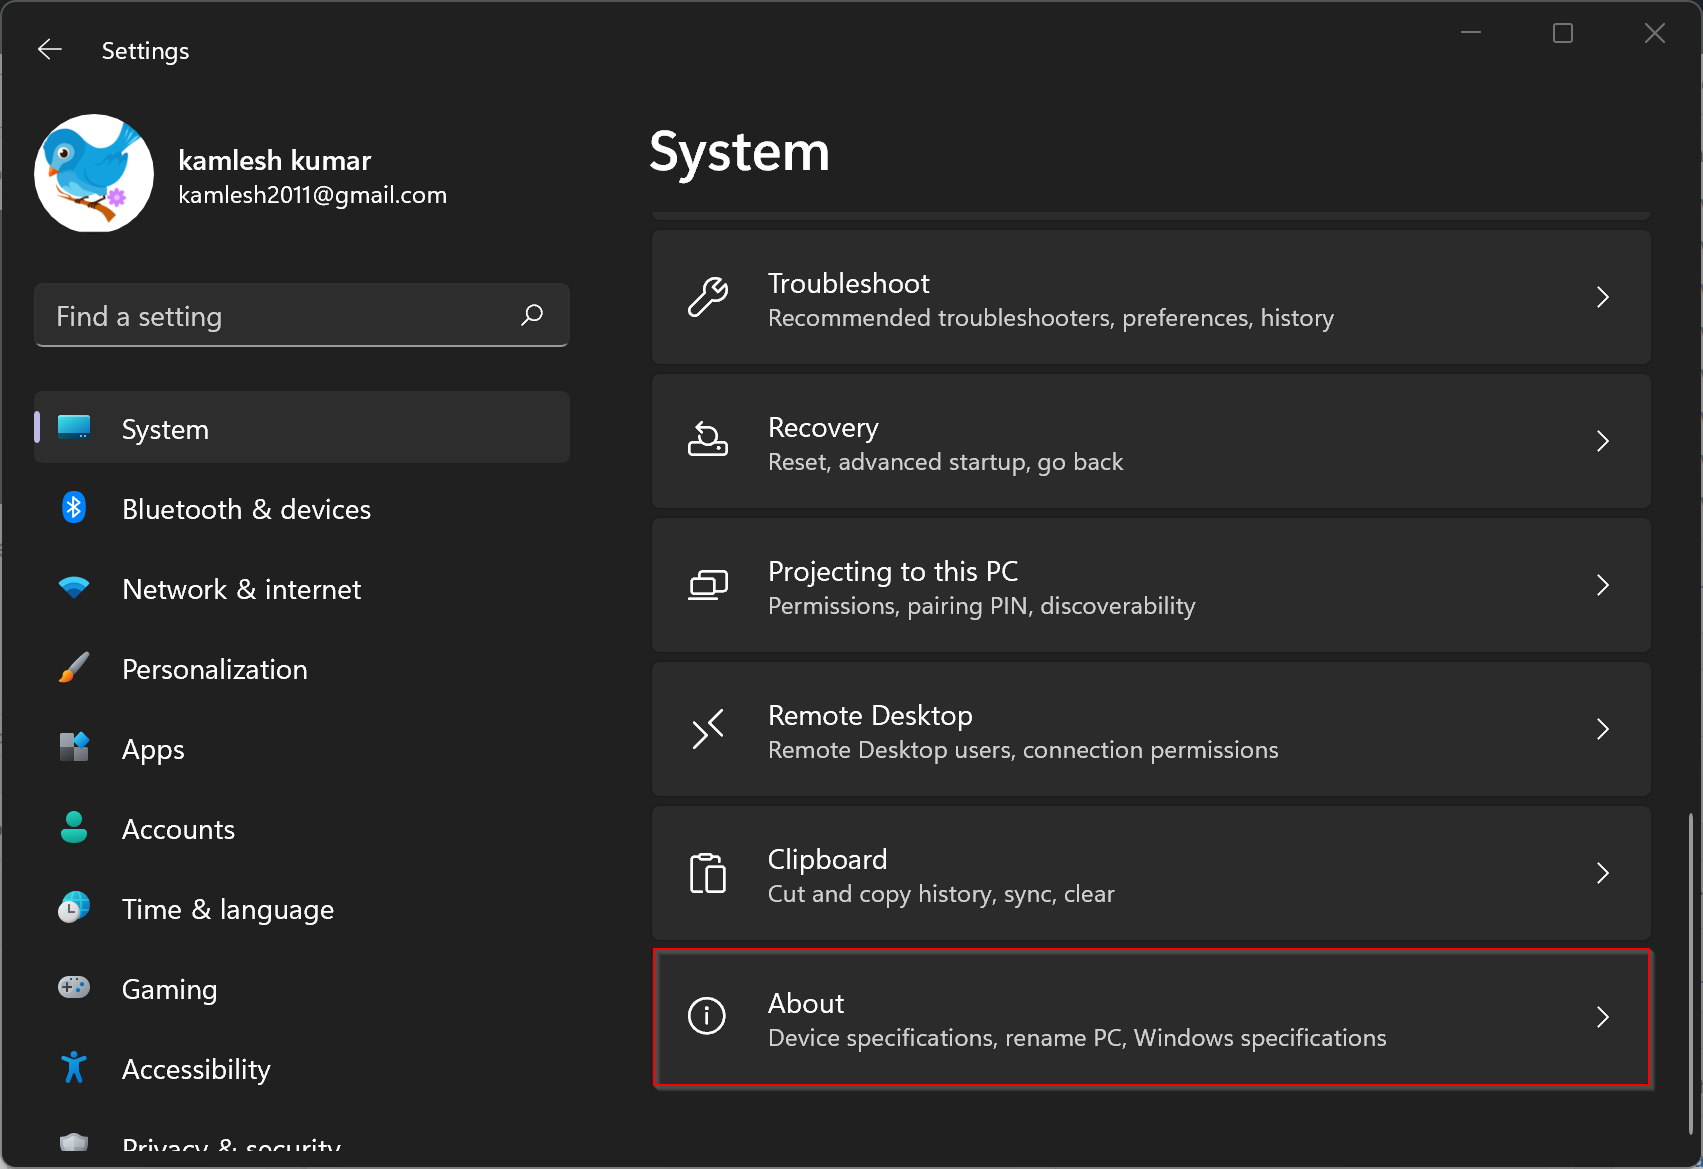
Step 1. First, open the Settings app by pressing Windows + I keys on the keyboard.

Step 2. When Windows Settings opens, select System in the left sidebar.
Step 3. Then, click the About option on the right sidebar of System.
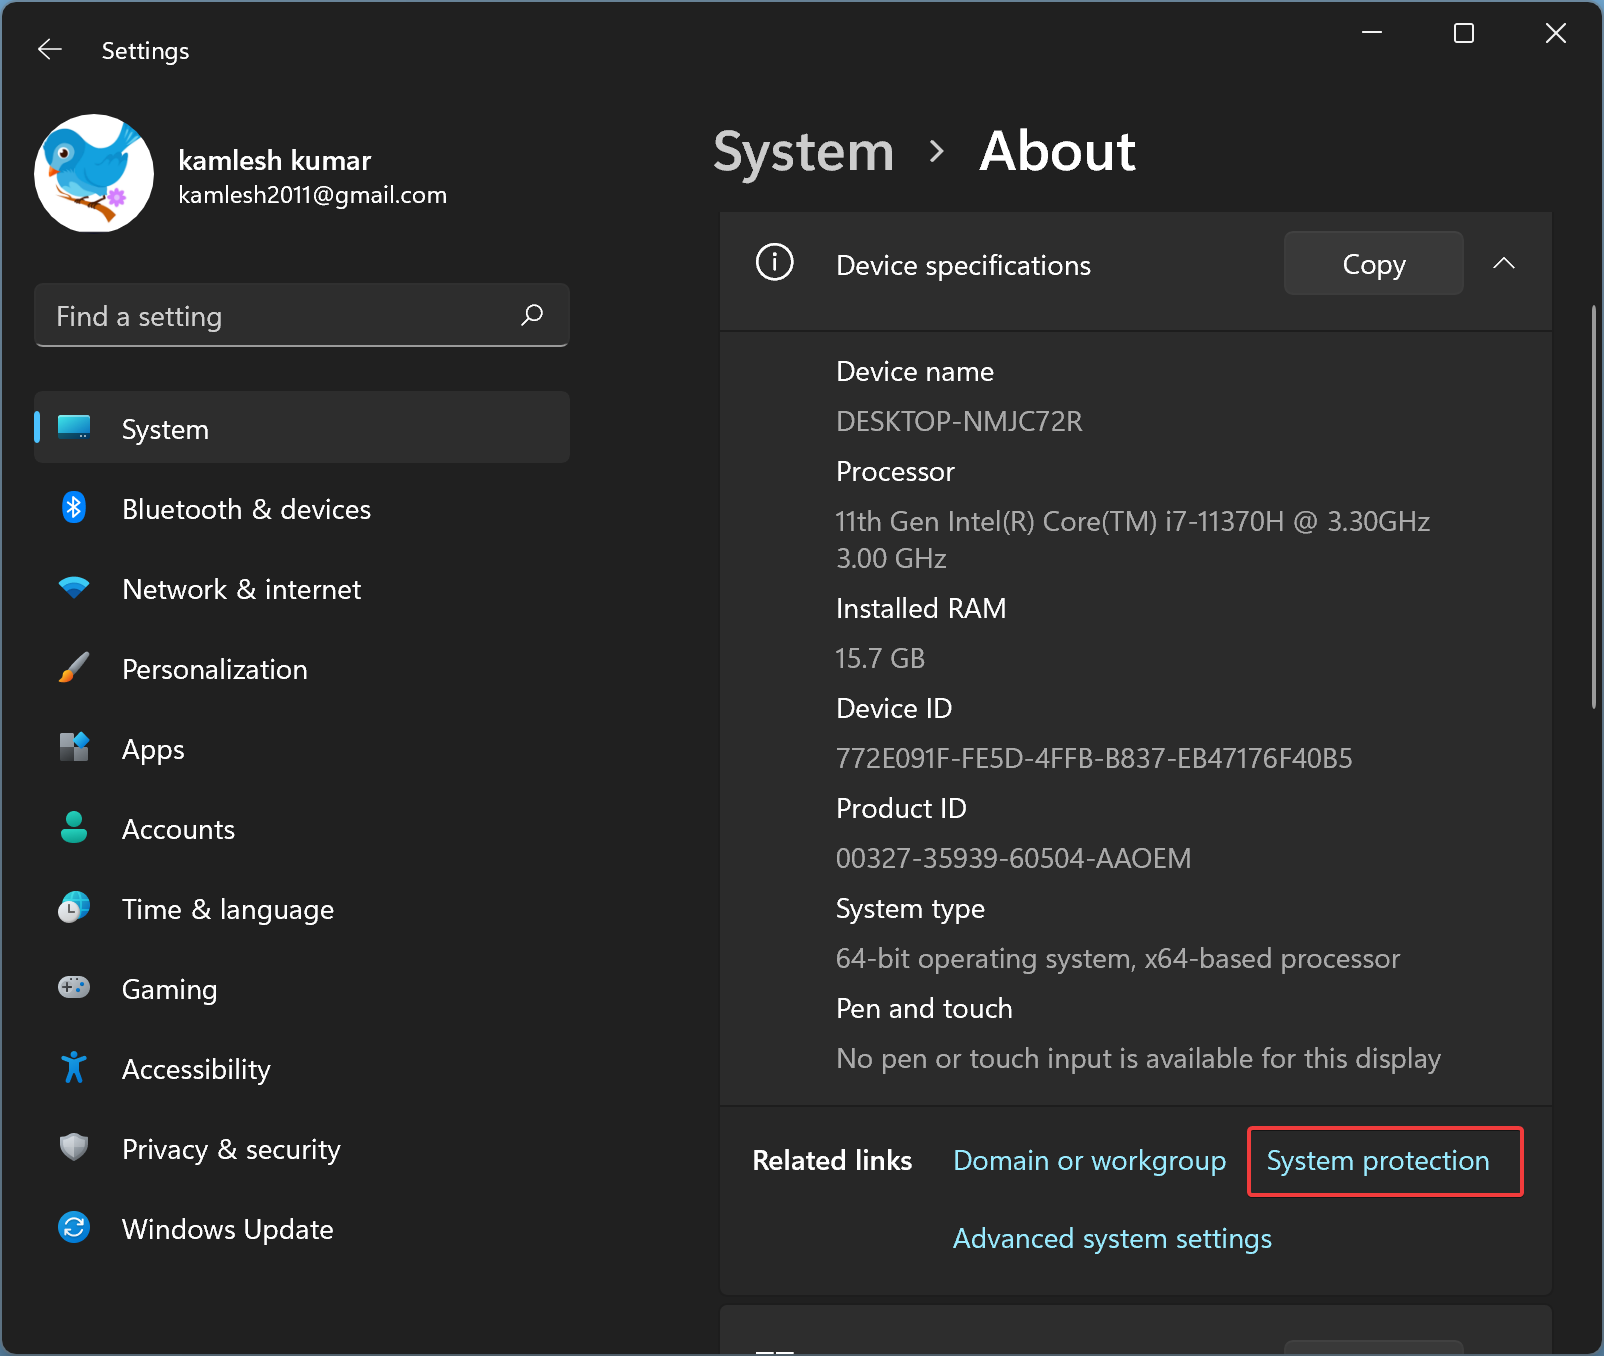
Step 4. After that, on the About settings page, click the link System protection.
Step 5. Once you complete the above steps, a System Properties window will open. On the “System Properties” window, select the System Protection tab.
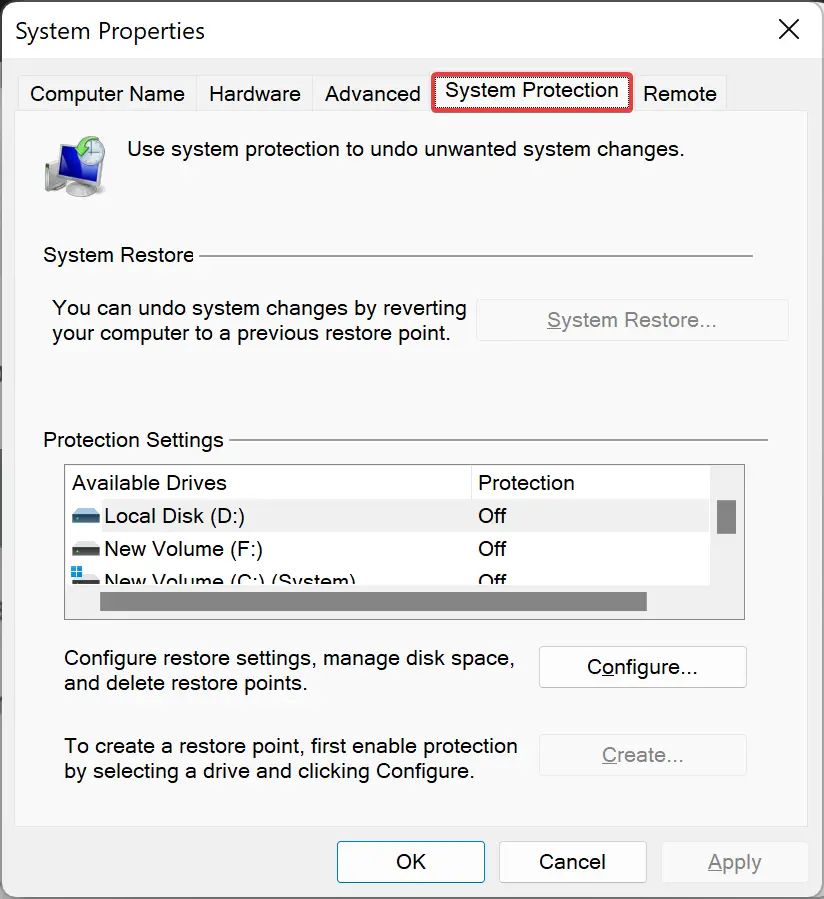
Step 6. Here, under the “Protection Settings” section, select a drive for which you want to enable system protection. Then click the Configure button.
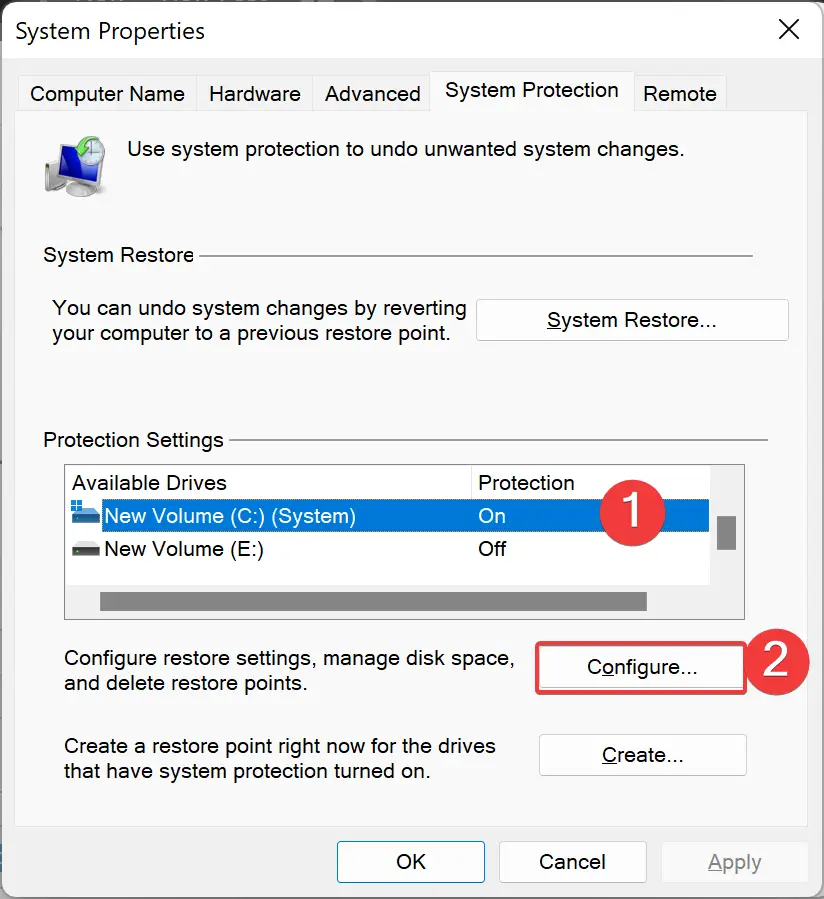
Step 7. Select “Turn on system protection” to enable the protection for the drive and choose the “Disable system protection” option to disable the same.
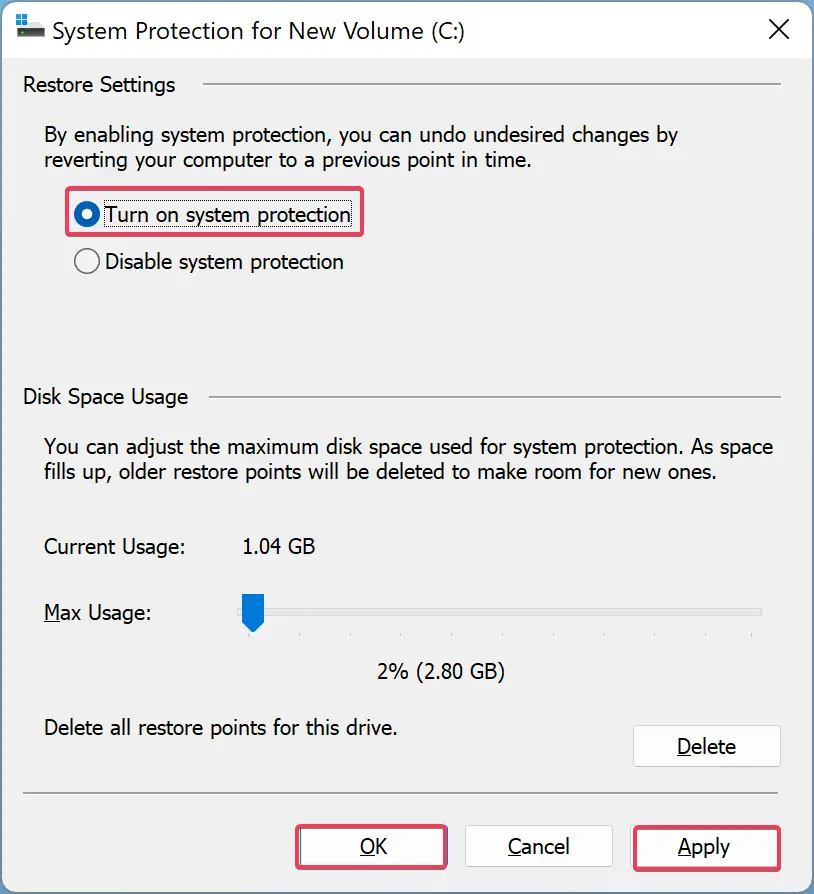
Step 8. Once done, hit the Apply button.
Step 9. Finally, click the OK button to exit.
If you wish, in the above step 7, you can also adjust the “Max usage” slider to allocate the maximum disk space for system protection.
Conclusion
In conclusion, System Protection is an essential feature of Windows 11 that can help you restore your PC to a previous working state. It is a useful tool when you encounter any system issues, and it allows you to revert changes made to your PC. You can enable or disable System Protection for each drive and adjust the maximum disk space allocated for system protection. Following the steps mentioned above, you can easily turn on or off System Protection for your drives in Windows 11.