In recent years, biometric authentication has become increasingly popular as a secure and convenient way to access devices and applications. With Windows 11, Microsoft has introduced a range of biometric authentication features, including fingerprint, facial recognition, and iris scanning.
While these features offer many benefits, some users may prefer not to use them for various reasons, such as privacy concerns or hardware limitations. In this guide, we will show you how to enable or disable the use of biometrics in Windows 11, giving you greater control over your device’s security and privacy settings.
Are you looking to enhance the security of your Windows 11 device using Windows Hello Biometrics but not sure how to turn it on or off? Look no further. In this article, we will guide you through the process of enabling or disabling Windows Hello Biometrics using two different methods: Local Group Policy Editor and Windows Registry Editor.
How to Enable or Disable Biometrics on Windows 11 via Local Group Policy Editor?
Follow these steps to turn on or off Biometrics on Windows 11 using Local Group Policy Editor:-
Step 1. First, open Local Group Policy Editor by pressing the Windows key + R, typing “gpedit.msc,” and hitting Enter.
Step 2. Then, expand the following folders on the left sidebar of Group Policy Editor:-
Computer Configuration > Administrative Templates > Windows Components > Biometrics
Step 3. On the right sidebar, double-click the setting “Allow the use of biometrics” to open.
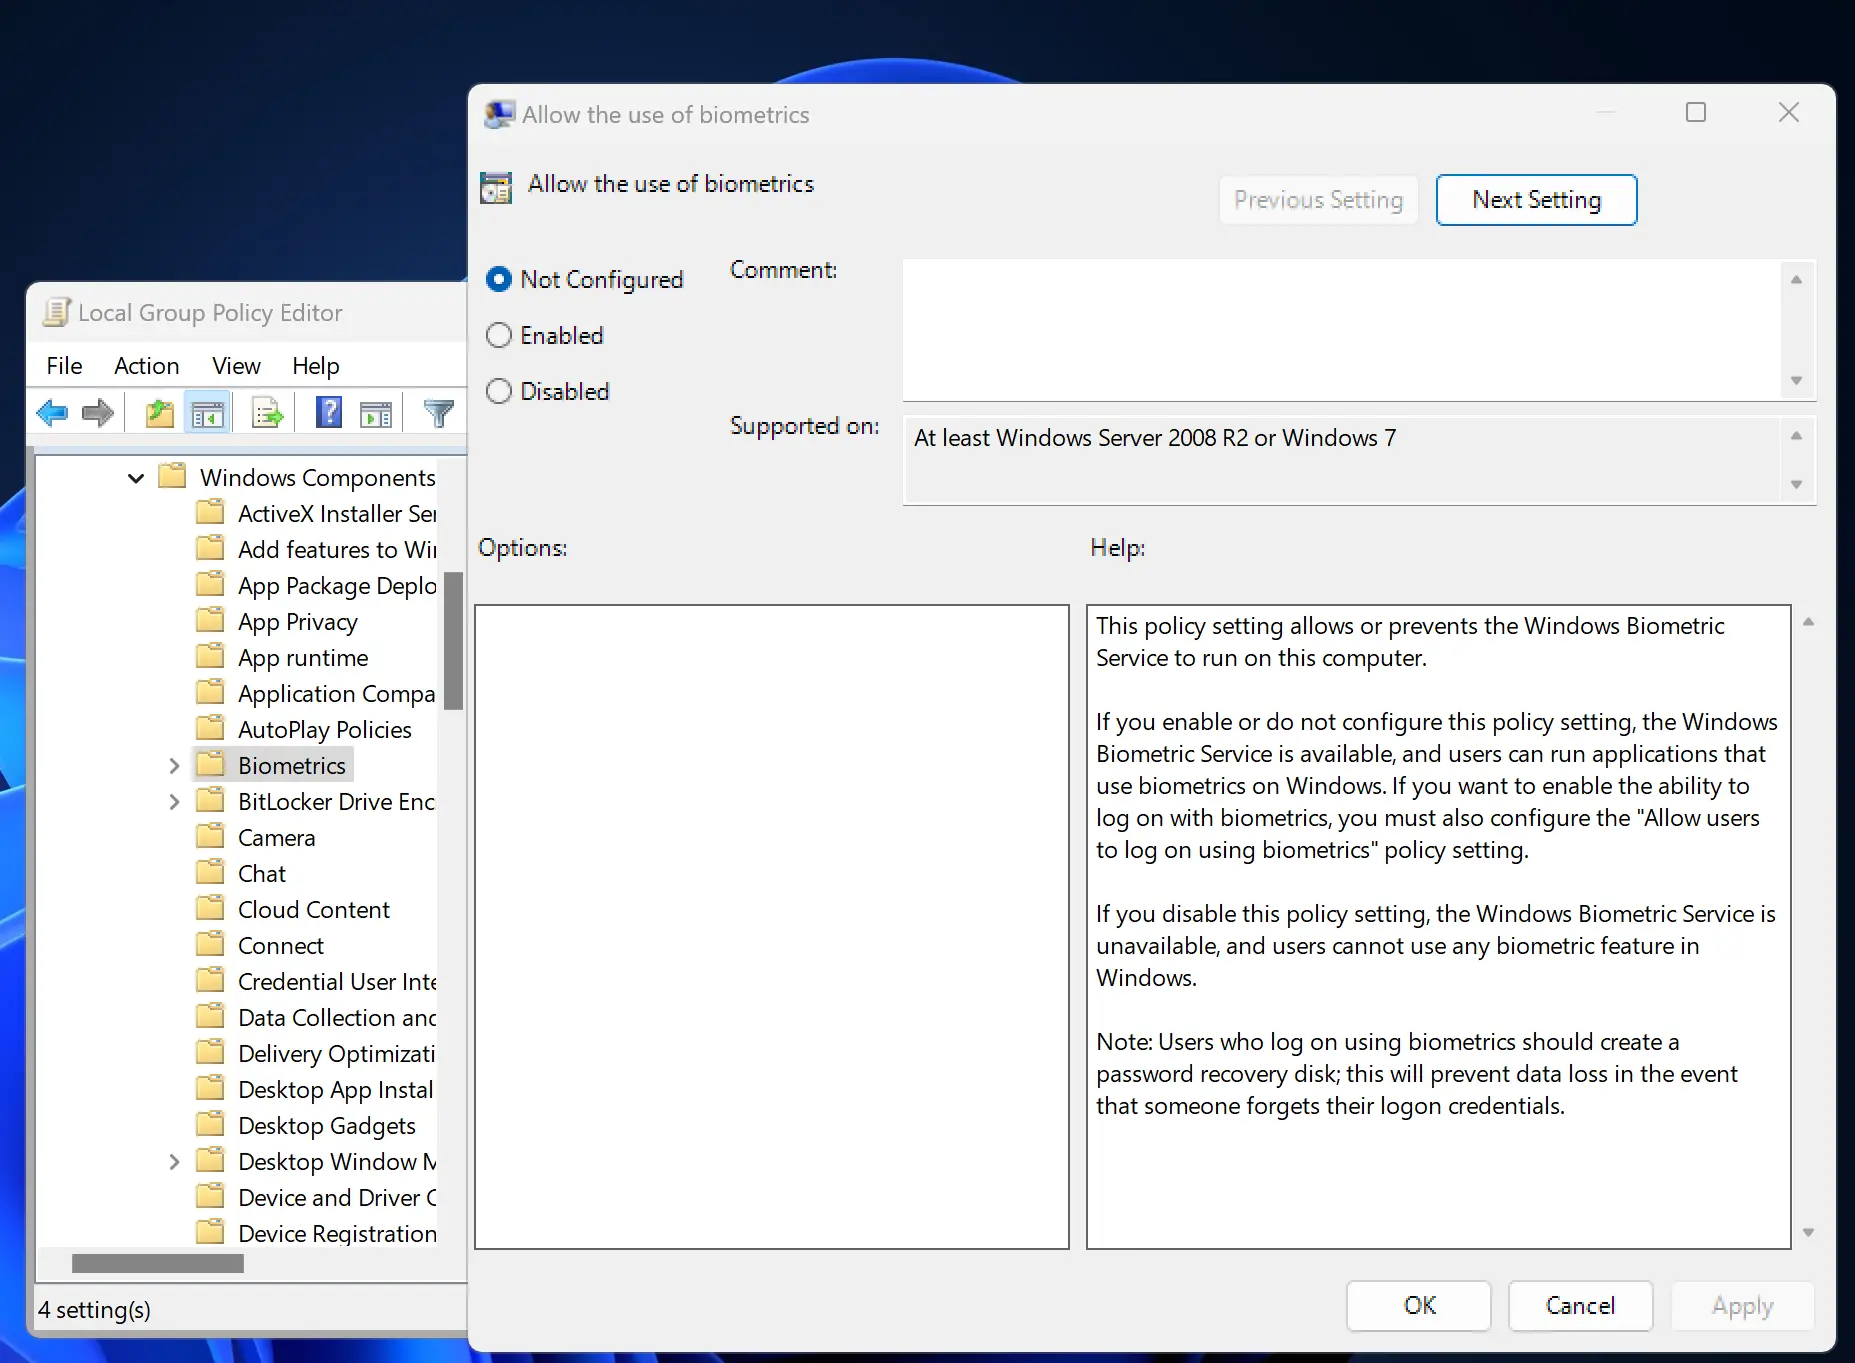
Step 4. Select the Enabled option in order to enable and use Biometrics. And if you wish to disable the Windows Hello Biometrics service, select the Disabled option.
Step 5. Click the Apply button.
Step 6. Click the OK button.
Step 7. Finally, restart your PC to apply the changes.
How to Turn On or Off Biometrics on Windows 11 using Registry Editor?
Follow these steps to enable or disable Biometrics on Windows 11 through Registry Editor:-
Step 1. Open Registry Editor by pressing the Windows key + R, typing “regedit,” and hitting Enter.
Step 2. Then, navigate to the following folder in the left sidebar:-
HKEY_LOCAL_MACHINE\SOFTWARE\Policies\Microsoft
Step 3. Now, right-click the Microsoft key and select the New < Key option. Name this key to Biometrics.
Step 4. After that, move your cursor to the right sidebar and select New > DWORD (32-bit) Value. Set the name to Enabled.

Step 5. Now, double-click Enabled REG_DWORD and set its “Value data” to “1” to enable this feature and “0” to turn the feature off.
Step 6. Click OK.
Step 7. Finally, restart your computer.
Conclusion
In conclusion, whether you prefer the Local Group Policy Editor or Windows Registry Editor, enabling or disabling Windows Hello Biometrics in Windows 11 is a straightforward process. With the steps outlined in this article, you can customize your device’s security and privacy settings to your liking.