Visual search on hover is a feature in Microsoft Edge that allows you to search for additional information about images by hovering over them with your mouse cursor. While this feature can be useful, some users may find it distracting or unwanted. Fortunately, enabling or disabling visual search on hover is a simple process that can be done using either the browser settings or the Registry Editor.
How to Enable or Disable Visual Search on Hover in Microsoft Edge Settings?
Enabling or disabling visual search on hover in Microsoft Edge Settings can be done in just a few simple steps. Here is how you can do it:-
Step 1. Launch Microsoft Edge on your device.
Step 2. Click on the three-dot menu icon in the top right corner of the browser window and choose “Settings” from the drop-down menu.
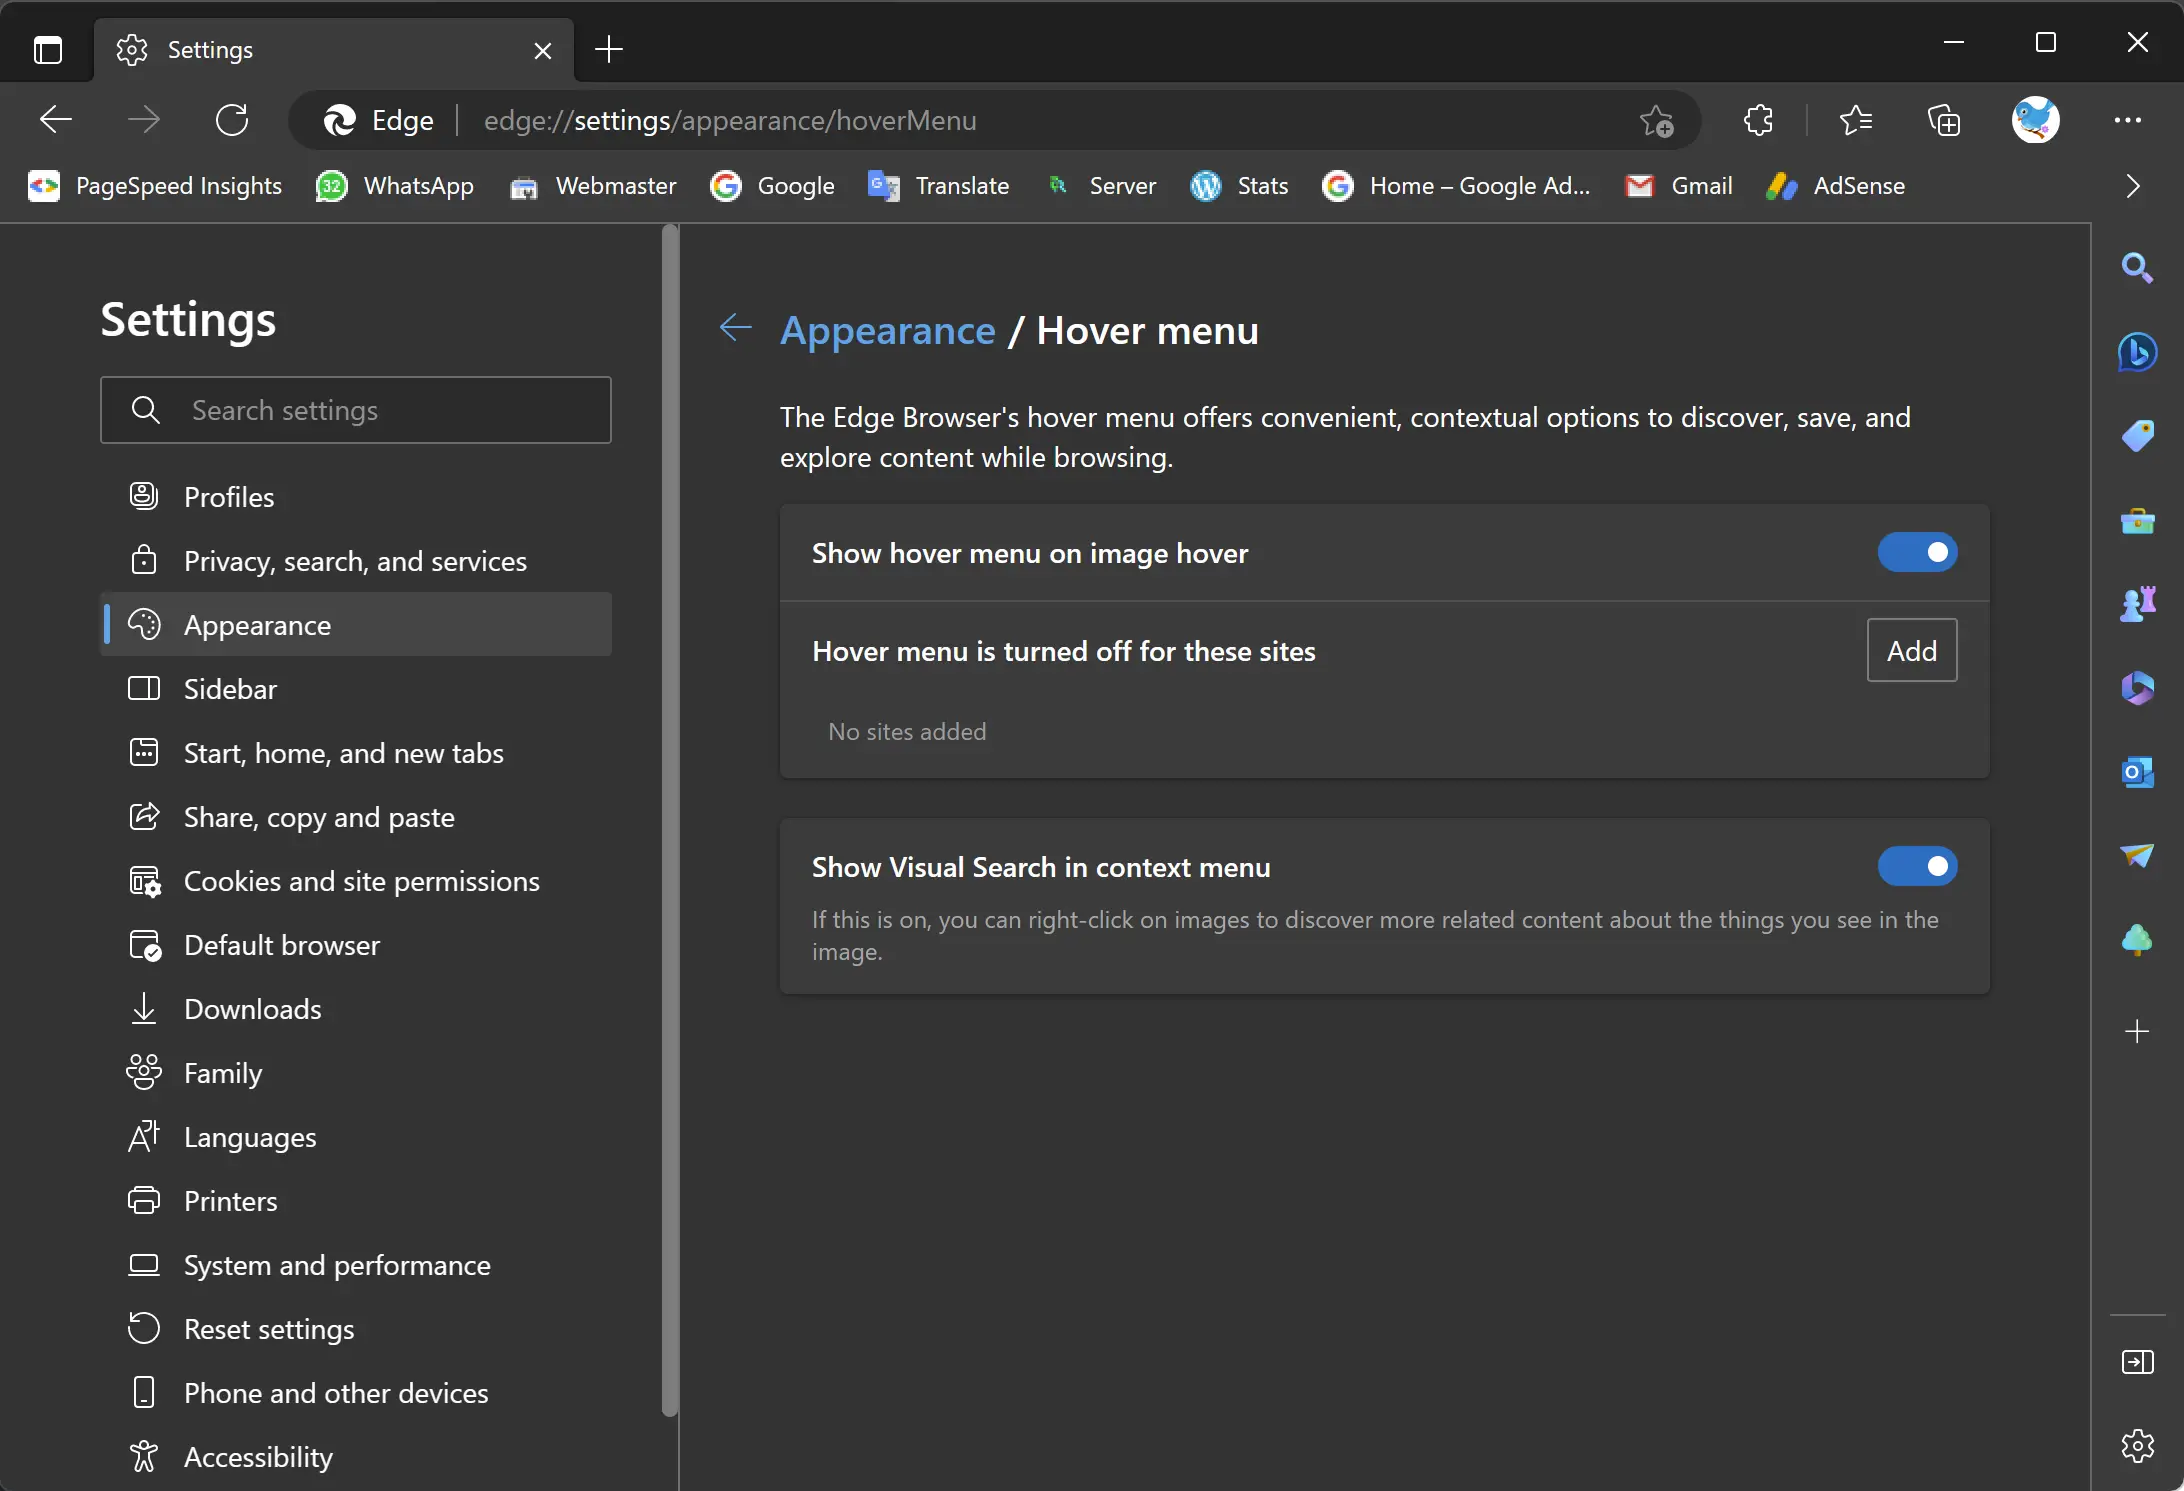
Step 3. In the Settings page, scroll down and click on “Appearance.”
Step 4. Scroll down again on the right pane until you find the “Context menus” section. Here, select the Hover menu tile to expand it.
Step 5. Now, toggle the switch for “Show hover menu on image hover” to either enable or disable visual search on hover, depending on your preference.
That’s it! With these easy steps, you can quickly enable or disable visual search on hover in Microsoft Edge and customize the feature to your liking.
How to Enable or Disable Visual Search on Hover in Microsoft Edge using Windows Registry?
Here are the steps to turn on or off Visual Search in Edge via the Windows Registry Editor:-
Step 1. Open Windows Registry Editor.
You can do this by pressing the Windows key + R on your keyboard, typing “regedit” in the Run dialog box, and pressing Enter.
Step 2. Then, navigate to the folder key path:-
HKEY_LOCAL_MACHINE\SOFTWARE\Policies\Microsoft\Edge
Note: If you don’t see the Edge folder key, right-click on the Microsoft key and select the New > Key option. Then, name the new key Edge.
Step 3. Next, right-click on the Edge folder and select New > DWORD (32-bit) Value.
Step 4. Name the new REG_DWORD VisualSearchEnabled.
Step 5. Now, double-click the newly created REG_DWORD and make sure the Base option is Decimal.
Step 6. Here, type 1 to turn on Visual Search, and 0 will set Visual Search to off.
Step 7. Click OK to save the changes.
Step 8. Finally, restart your computer for the changes to apply.
That’s it! By following these steps, you can easily turn on or off Visual Search in Edge using the Windows Registry Editor.