Wi-Fi is a wireless local area network (WLAN) technology that uses high-frequency radio waves to provide wireless high-speed Internet and network connections. Most Windows devices include a Wi-Fi adapter to connect to your preferred WiFi Network.
If you are new to Windows 10, this gearupwindows article will guide you on enabling and disabling Wi-Fi in several ways.
How to Turn On or Off Wi-Fi using Keyboard?
This is the simplest way to turn WiFi ON/OFF if your Windows 10 machine is equipped with a dedicated WiFi key on the keyboard. Just press the WiFi Key on your computer’s keyboard to enable/disable the Wi-Fi.
How to Enable or Disable WiFi from Windows 10 Taskbar?
To turn on or off Wi-Fi from the Taskbar of Windows 10, do these steps:-
Step 1. First, click on the Wi-Fi icon located in the Taskbar’s right-side corner.
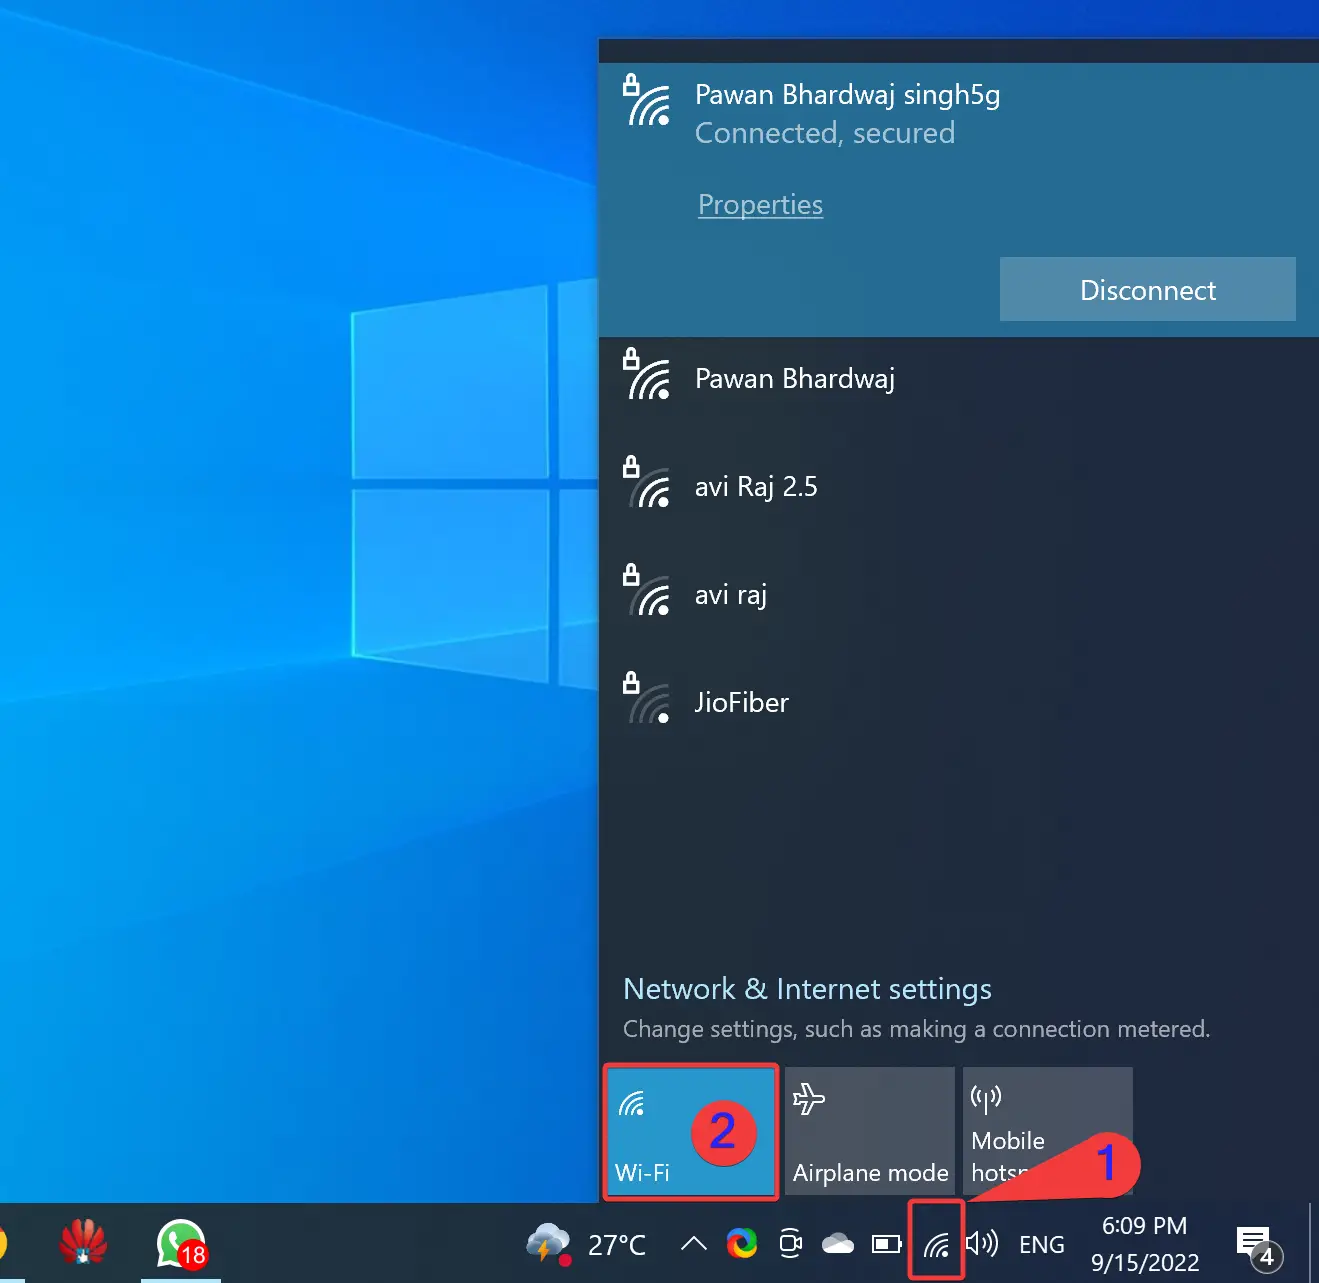
Step 2. In the menu that appears, click on the Wi-Fi tile to turn ON/OFF WiFi.
How to Turn On or Off Wi-Fi using Notification Icon?
To enable or disable Wi-FI through Notification Icon, use these steps:-
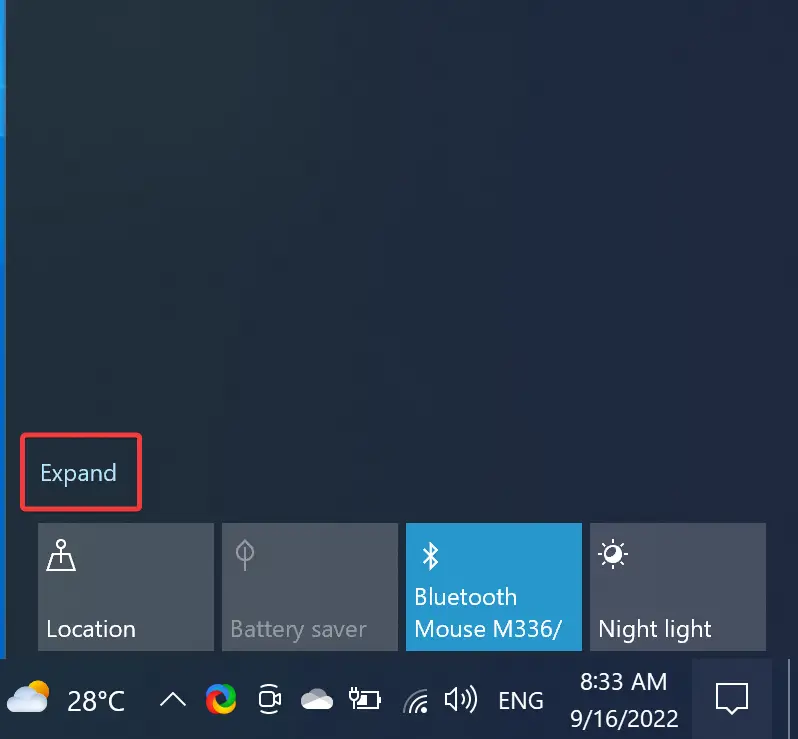
Step 1. First, click on the Notification icon located in the Taskbar at the bottom right corner of your screen.
Step 2. In the menu that appears, if you see a few tiles only, then click the Expand option.
Step 3. Next, click on the Network tile.
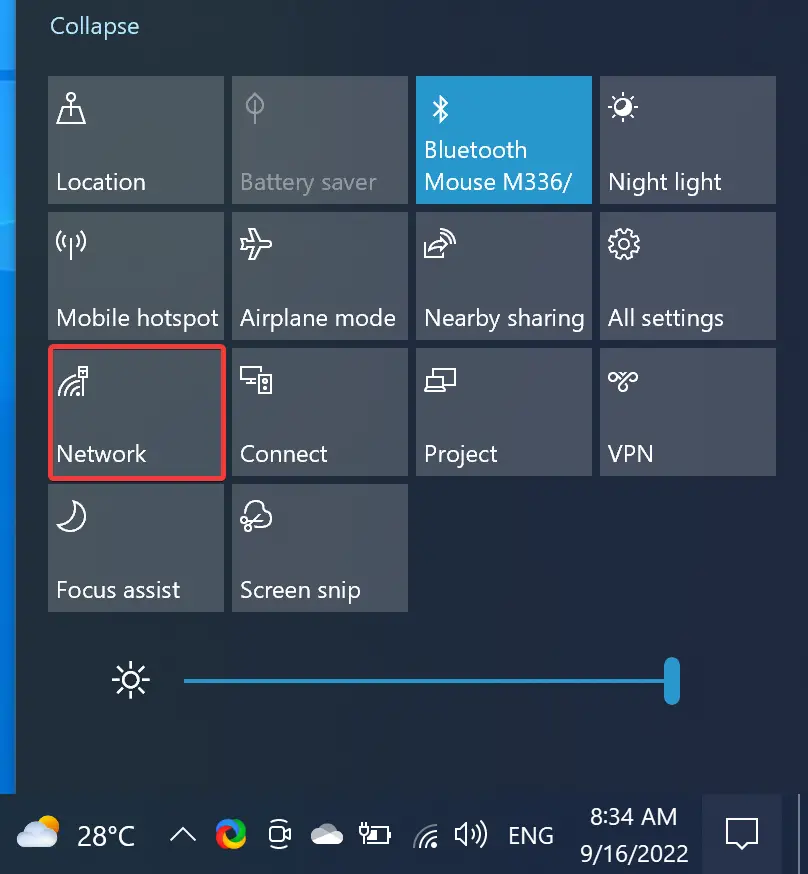
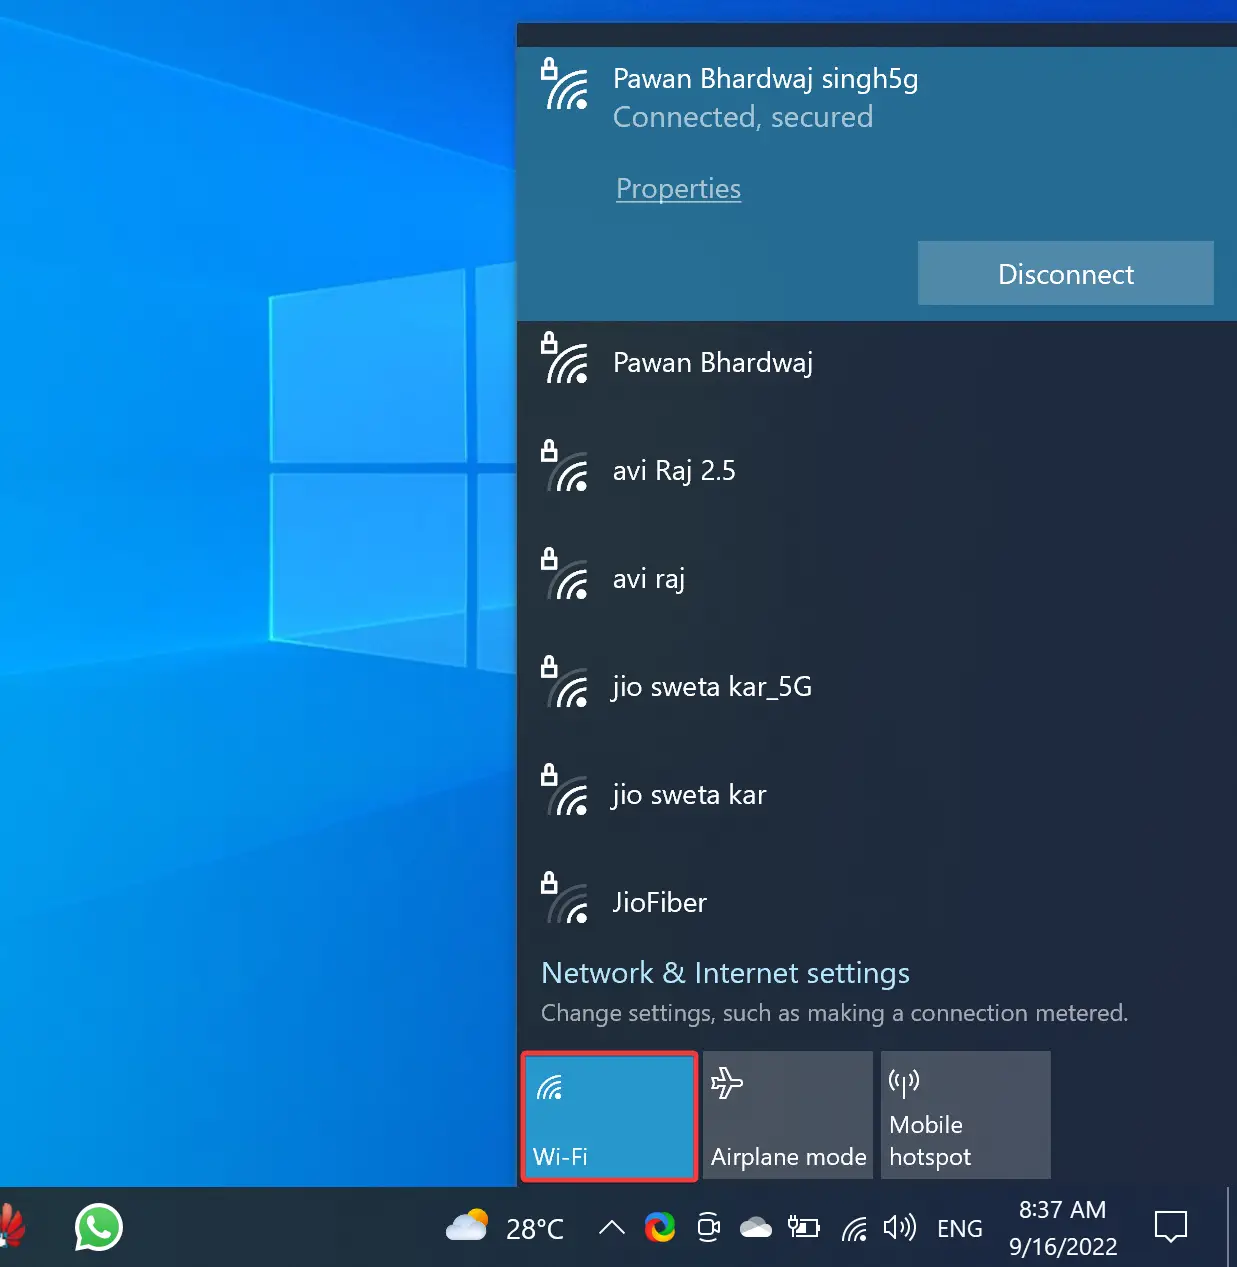
Step 4. Finally, click on the Wi-Fi tile to turn ON/OFF WiFi.
How to Enable or Disable Wi-Fi through Windows 10 Settings?
To turn on or off WiFi in Windows 10 Settings, use these steps:-
First Method
Step 1. Open Settings.
To do that, use the Windows + I keyboard shortcut. Or, right-click on the Start button and select Settings in the menu.
Step 2. When Windows Settings appears on the screen, click on Network & Internet.

Step 3. Next, select the Wi-Fi option in the left sidebar.
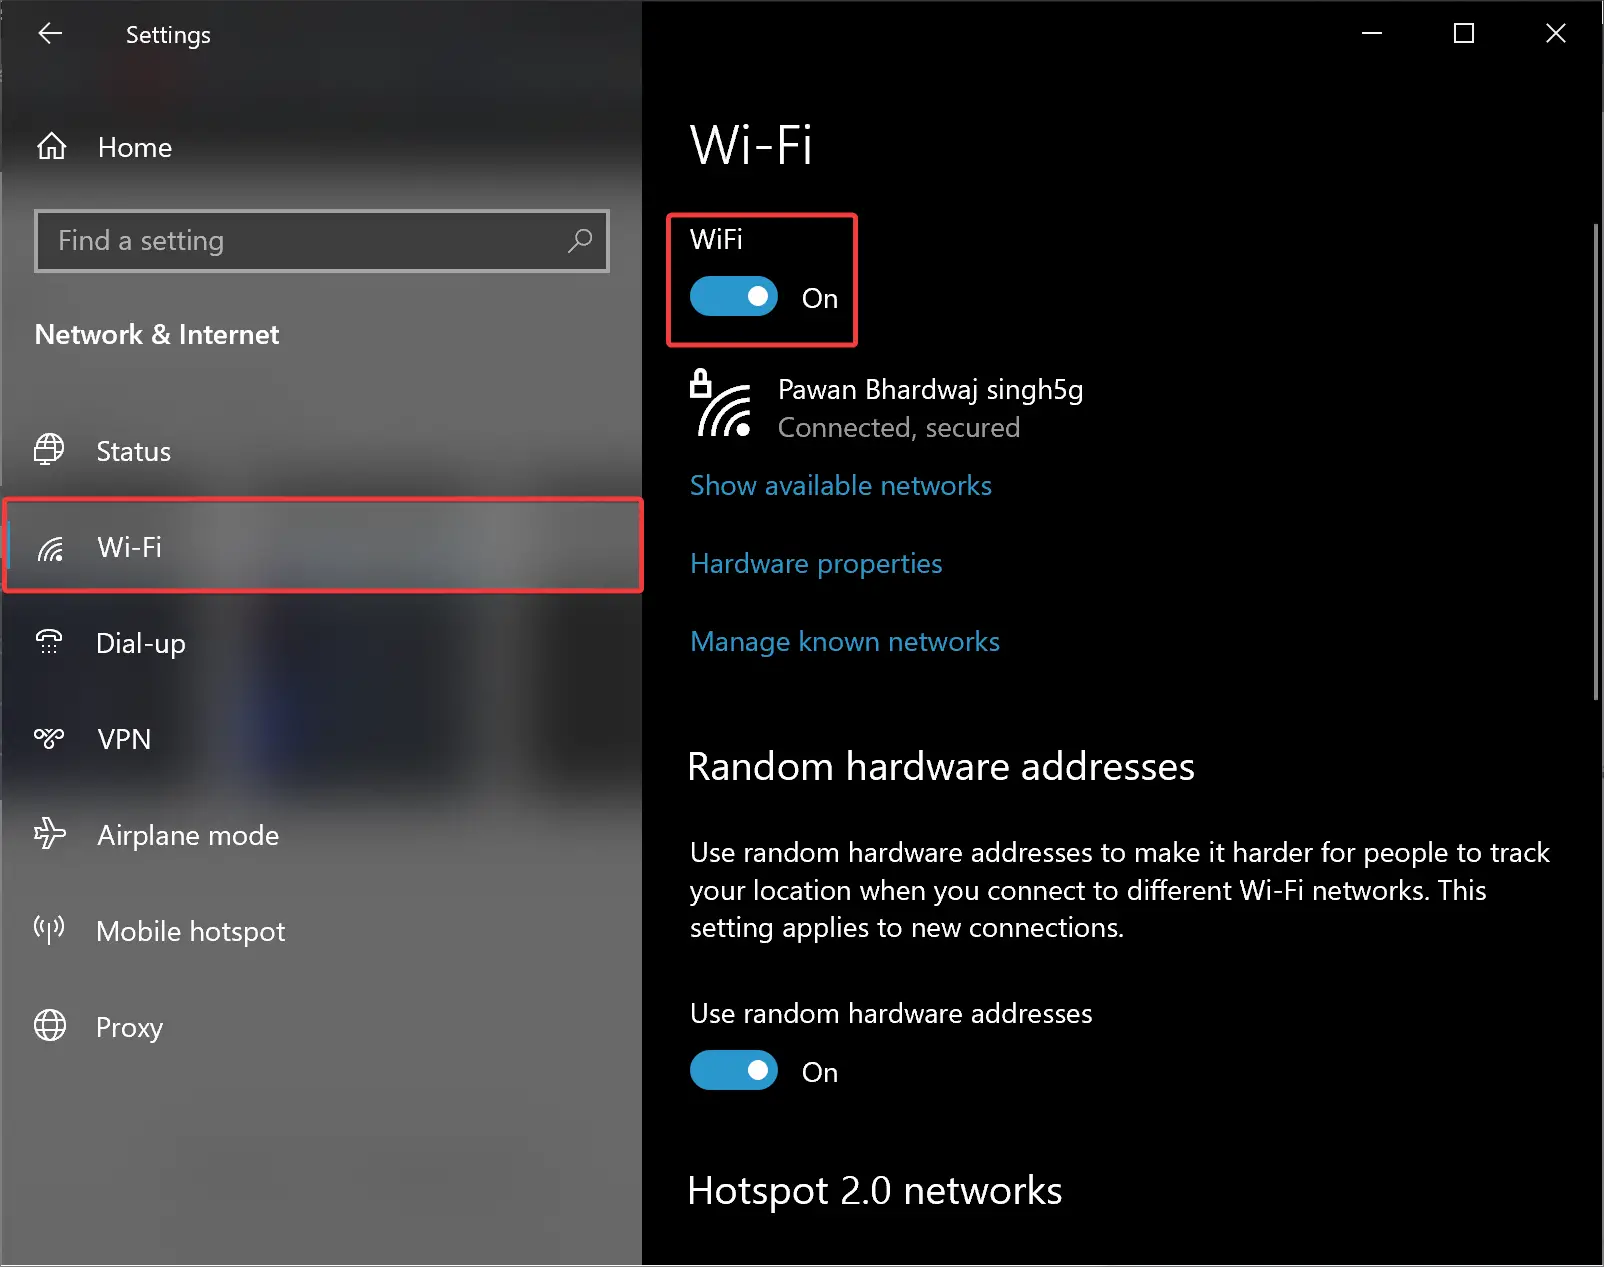
Step 4. On the right-sidebar, turn ON/OFF the toggle switch WiFi to enable or disable it.
Second Method
Step 1. Open Settings.
To do that, use the Windows + I keyboard shortcut. Or, right-click on the Start button and select Settings in the menu.
Step 2. When Windows Settings appears on the screen, click on Network & Internet.
Step 3. Next, select the Wi-Fi option in the left sidebar.
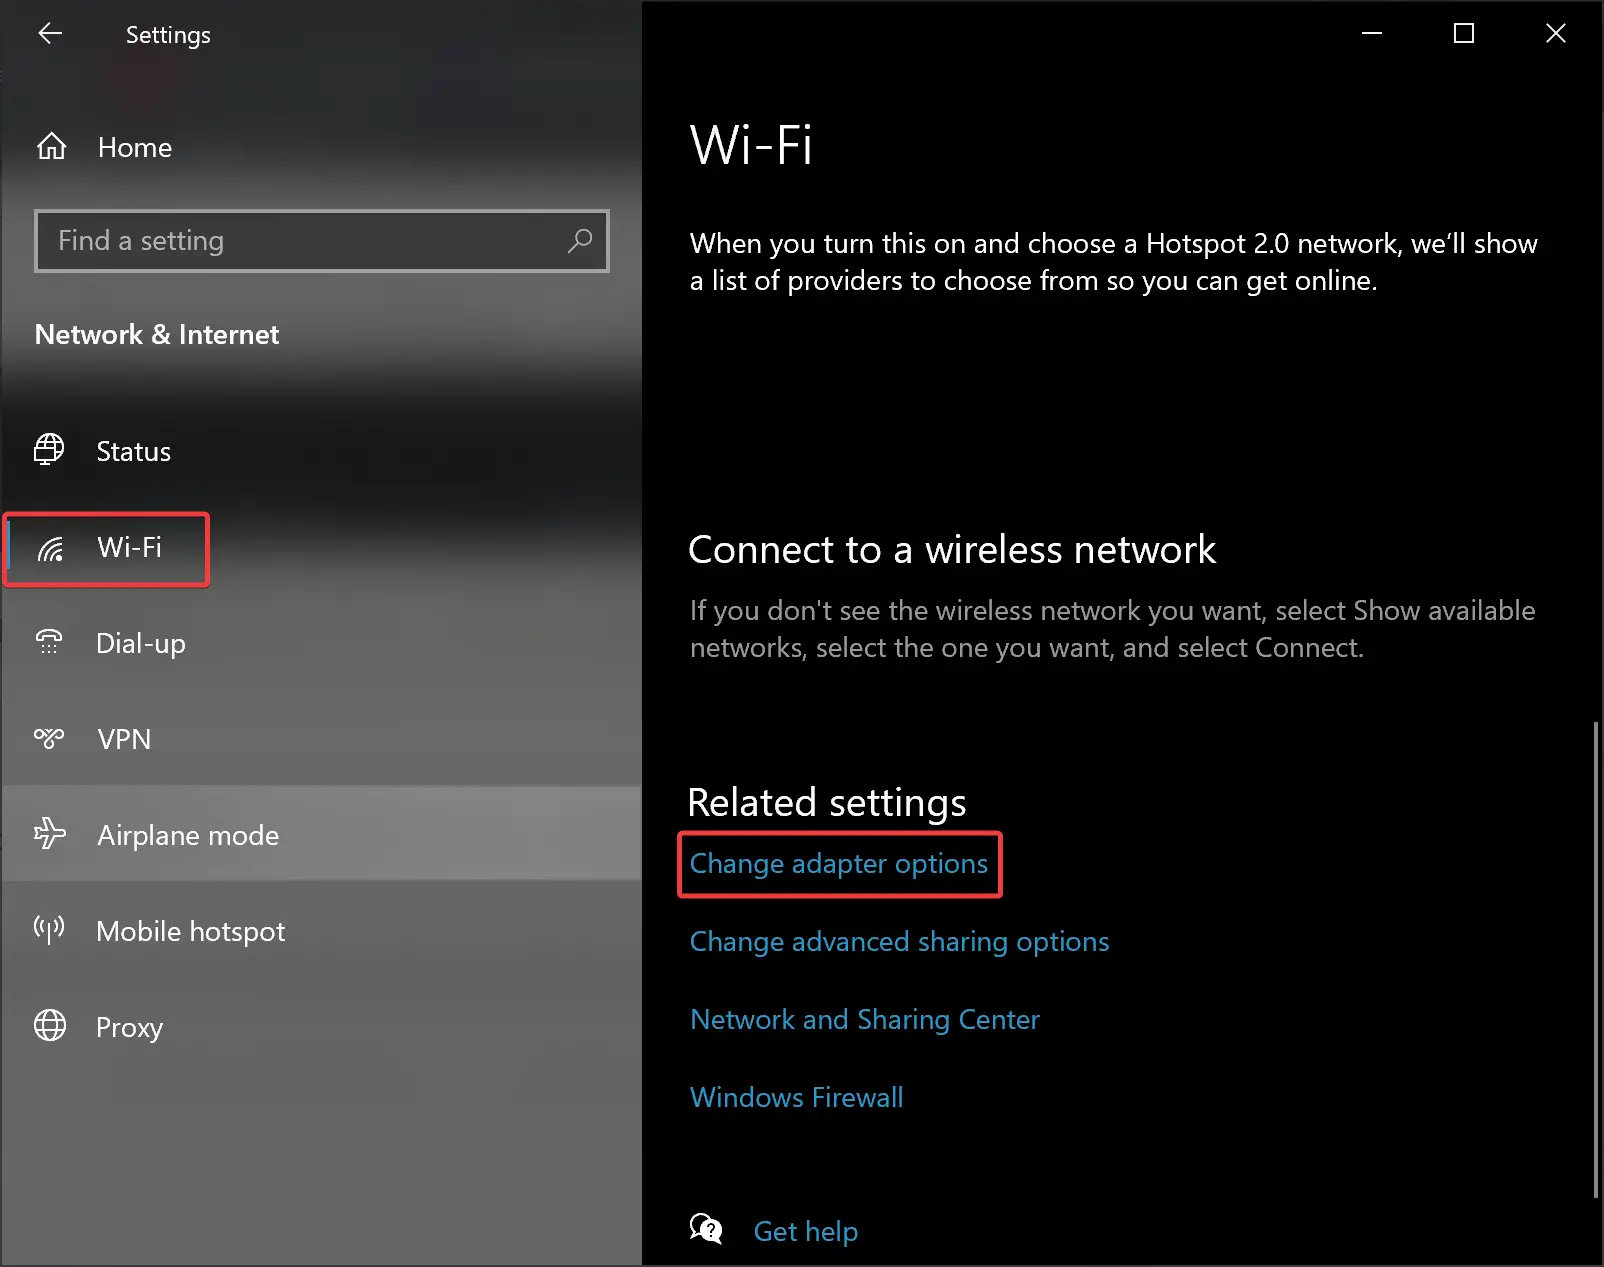
Step 4. After that, click on the link Change adapter options under the Related settings section.
Step 5. When you’re done, the “Network Connections” window will appear. Right-click on WiFi (Wireless Network Connection) and click on Disable option if WiFi is already enabled.
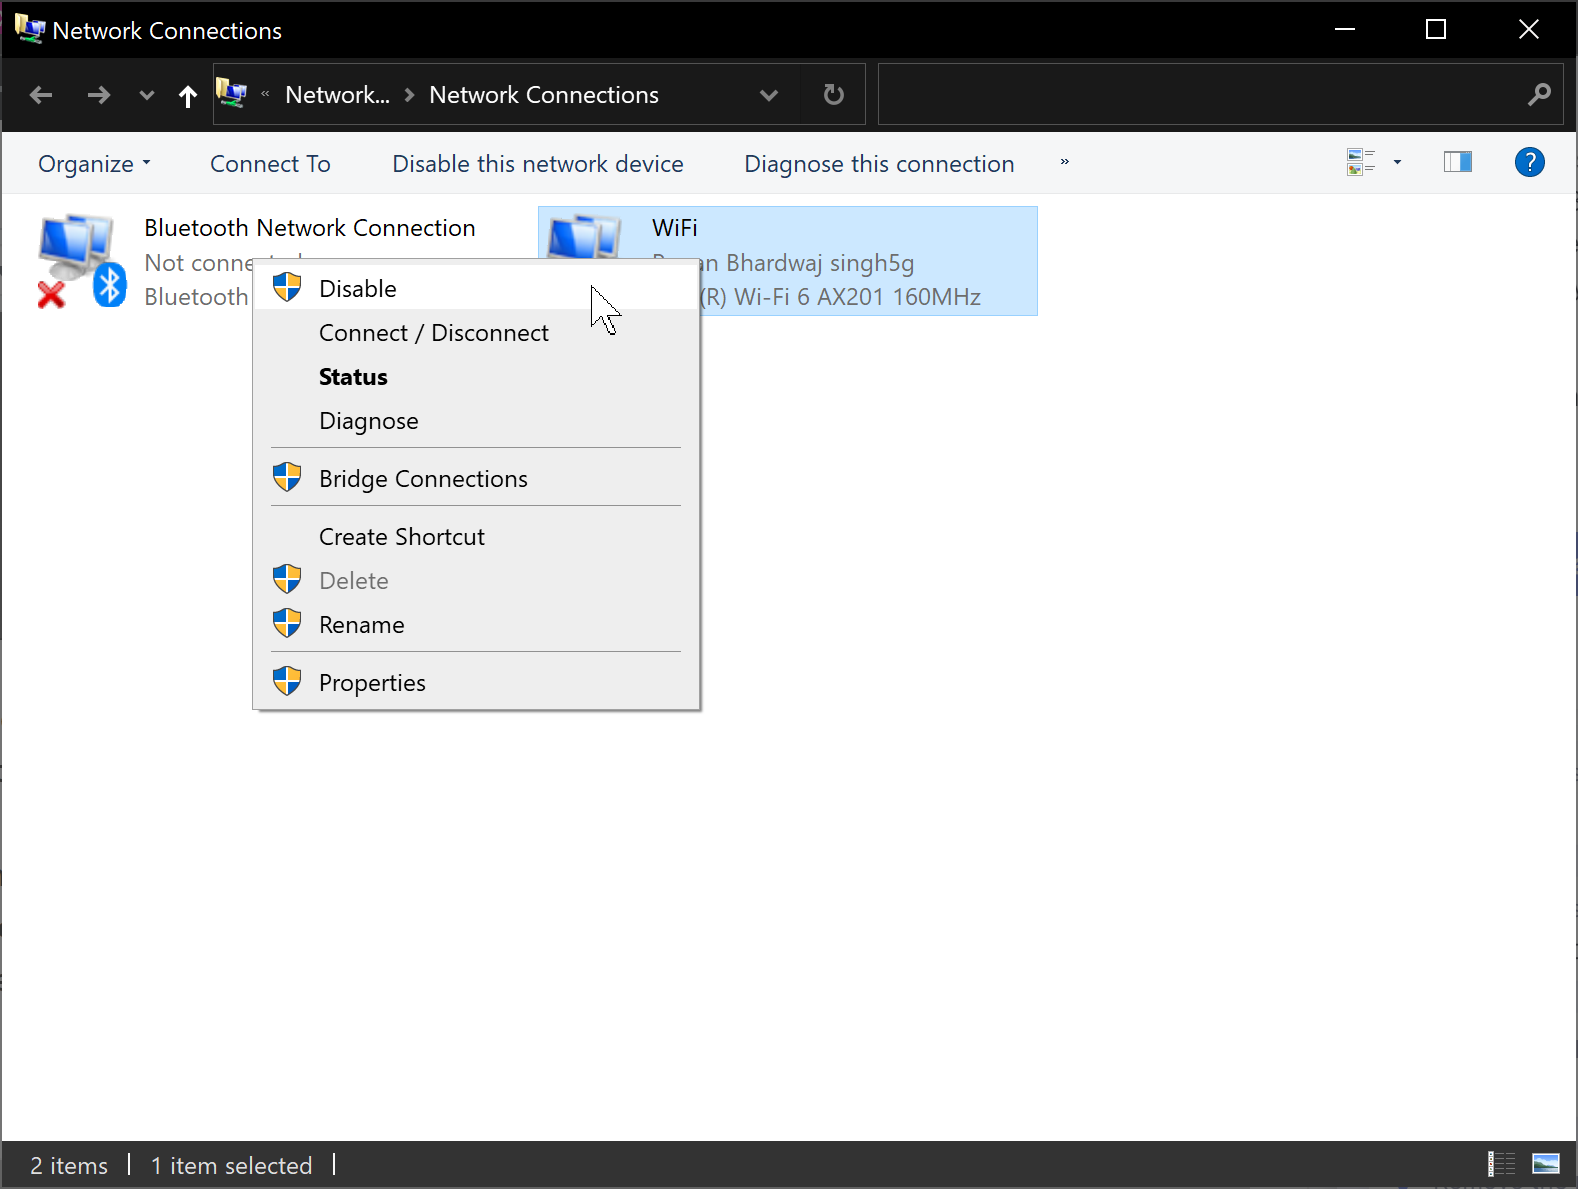
And, if WiFi is already disabled, right-click on it and select the Enable option to turn on the Wi-Fi.

Third Method
Step 1. Open Settings.
To do that, use the Windows + I keyboard shortcut. Or, right-click on the Start button and select Settings in the menu.
Step 2. When Windows Settings appears on the screen, click on Network & Internet.
Step 3. Next, select the Airplane mode option in the left sidebar.
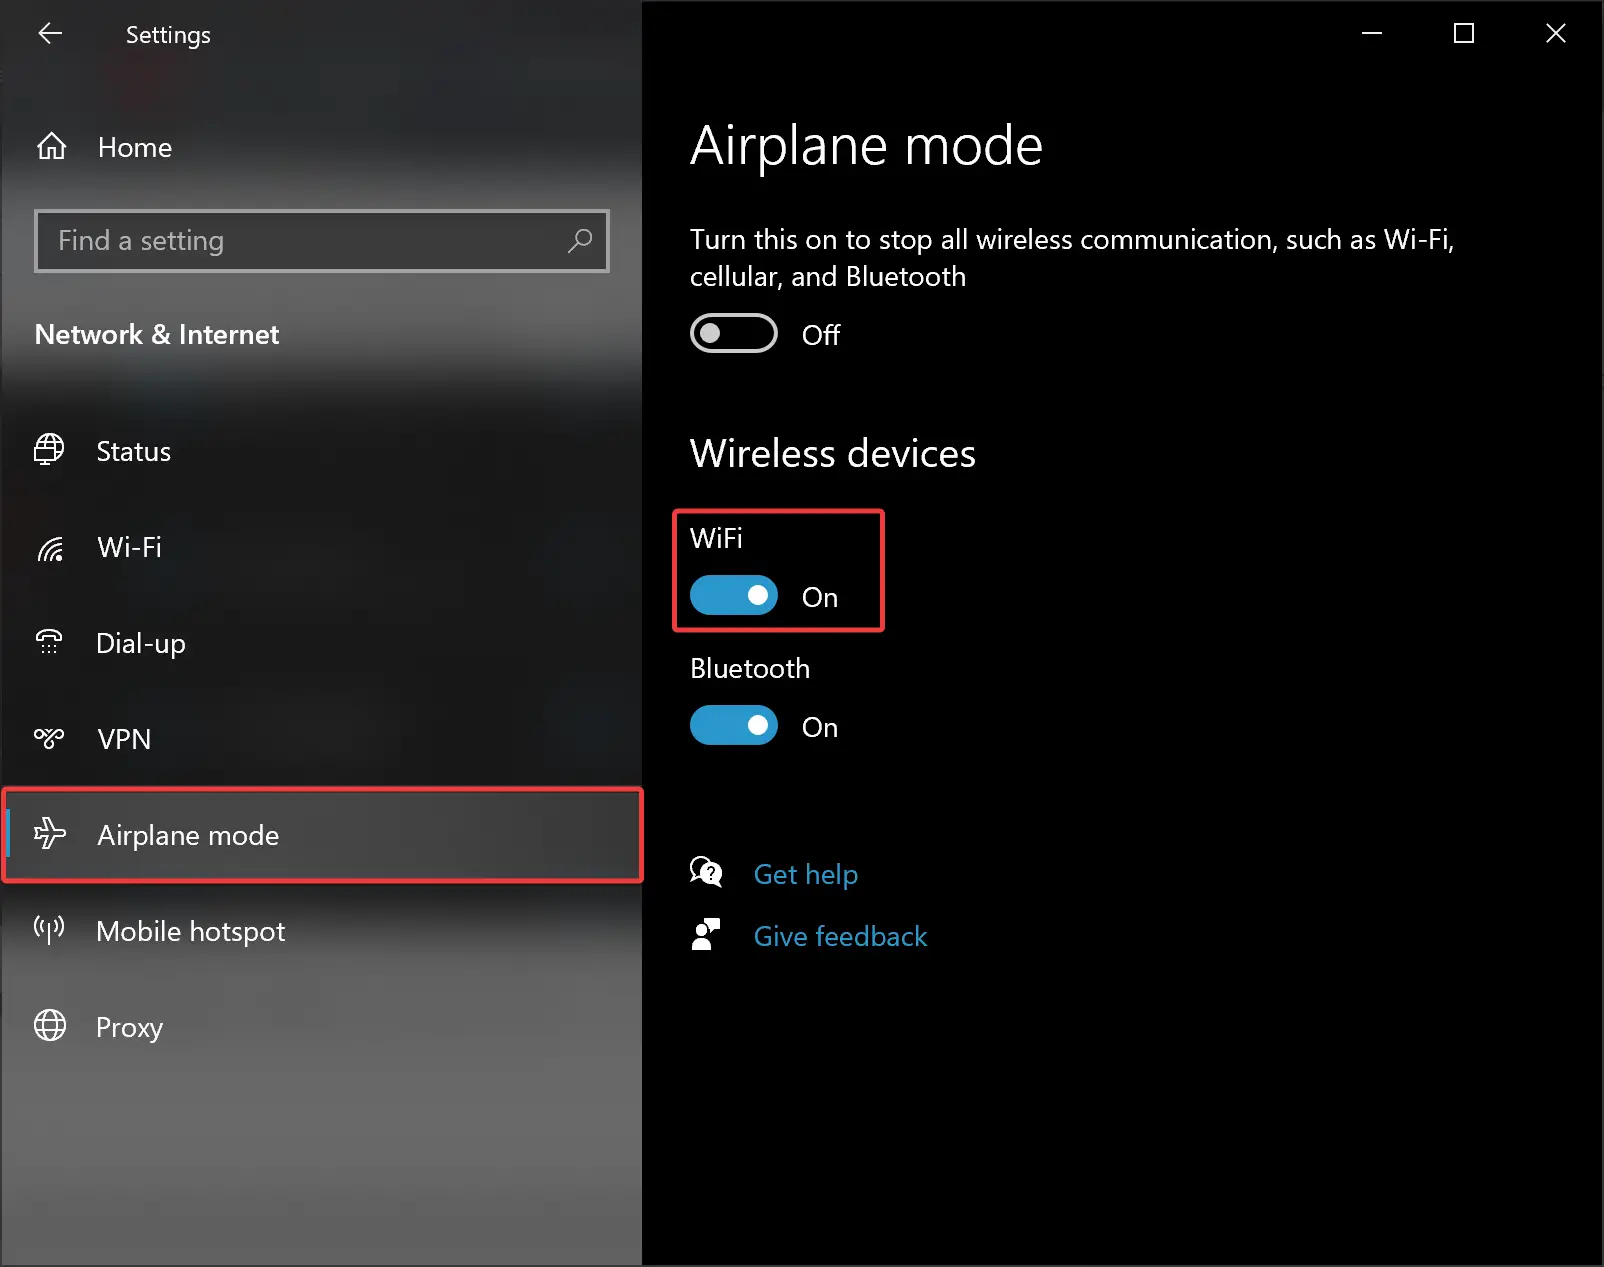
Step 4. On the right sidebar, turn ON/OFF the toggle switch WiFi to enable or disable it.
Conclusion
In conclusion, Wi-Fi technology has revolutionized the way we connect to the internet and share data wirelessly. Windows 10 has made it easy for users to enable or disable Wi-Fi using various methods, including keyboard shortcuts, taskbar icons, notification icons, and Windows Settings. By following the steps outlined in this article, users can quickly turn on or off Wi-Fi on their Windows 10 devices, depending on their preferences and needs.