Hearing unnecessary audio from anywhere may be annoying for most people. It usually happens when you open a website and start playing a video. It isn’t easy to find out from where sound is coming if you have opened a lot of tabs. Fortunately, the Google Chrome browser allows you to stop the audio by right-clicking on the tab and selecting Mute Site. Again, right-click on the tab and choose Unmute Site to listen to the audio.
![]()
What is Tab Audio Muting?
Chrome also offers the Tab Audio Muting feature, apart from the Mute Site and Unmute Site. This Tab Audio Muting function of Chrome allows you to quickly mute or unmute a tab sound by clicking on the speaker icon on the browser tab.
When you enable Tab Audio Muting on Chrome, every time a website plays audio, a speaker icon will appear on that tab. You can rapidly mute or unmute a tab by clicking on the speaker icon (audio indication) directly on the tab—no need to right-click on the tab and select Mute Site.
In this gearupwindows article, we will guide you on how you can enable Tab Audio Muting in Google Chrome.
How to Enable Tab Audio Muting in Google Chrome?
If you want to turn on Tab Audio Muting in Google Chrome, use the following steps:-
Step 1. First, open Google Chrome on Windows 11/10, Mac, or Linux.
Step 2. Then, copy and paste the following into Chrome’s address bar, and press the Enter key on the keyboard:-
chrome://flags/#enable-tab-audio-muting
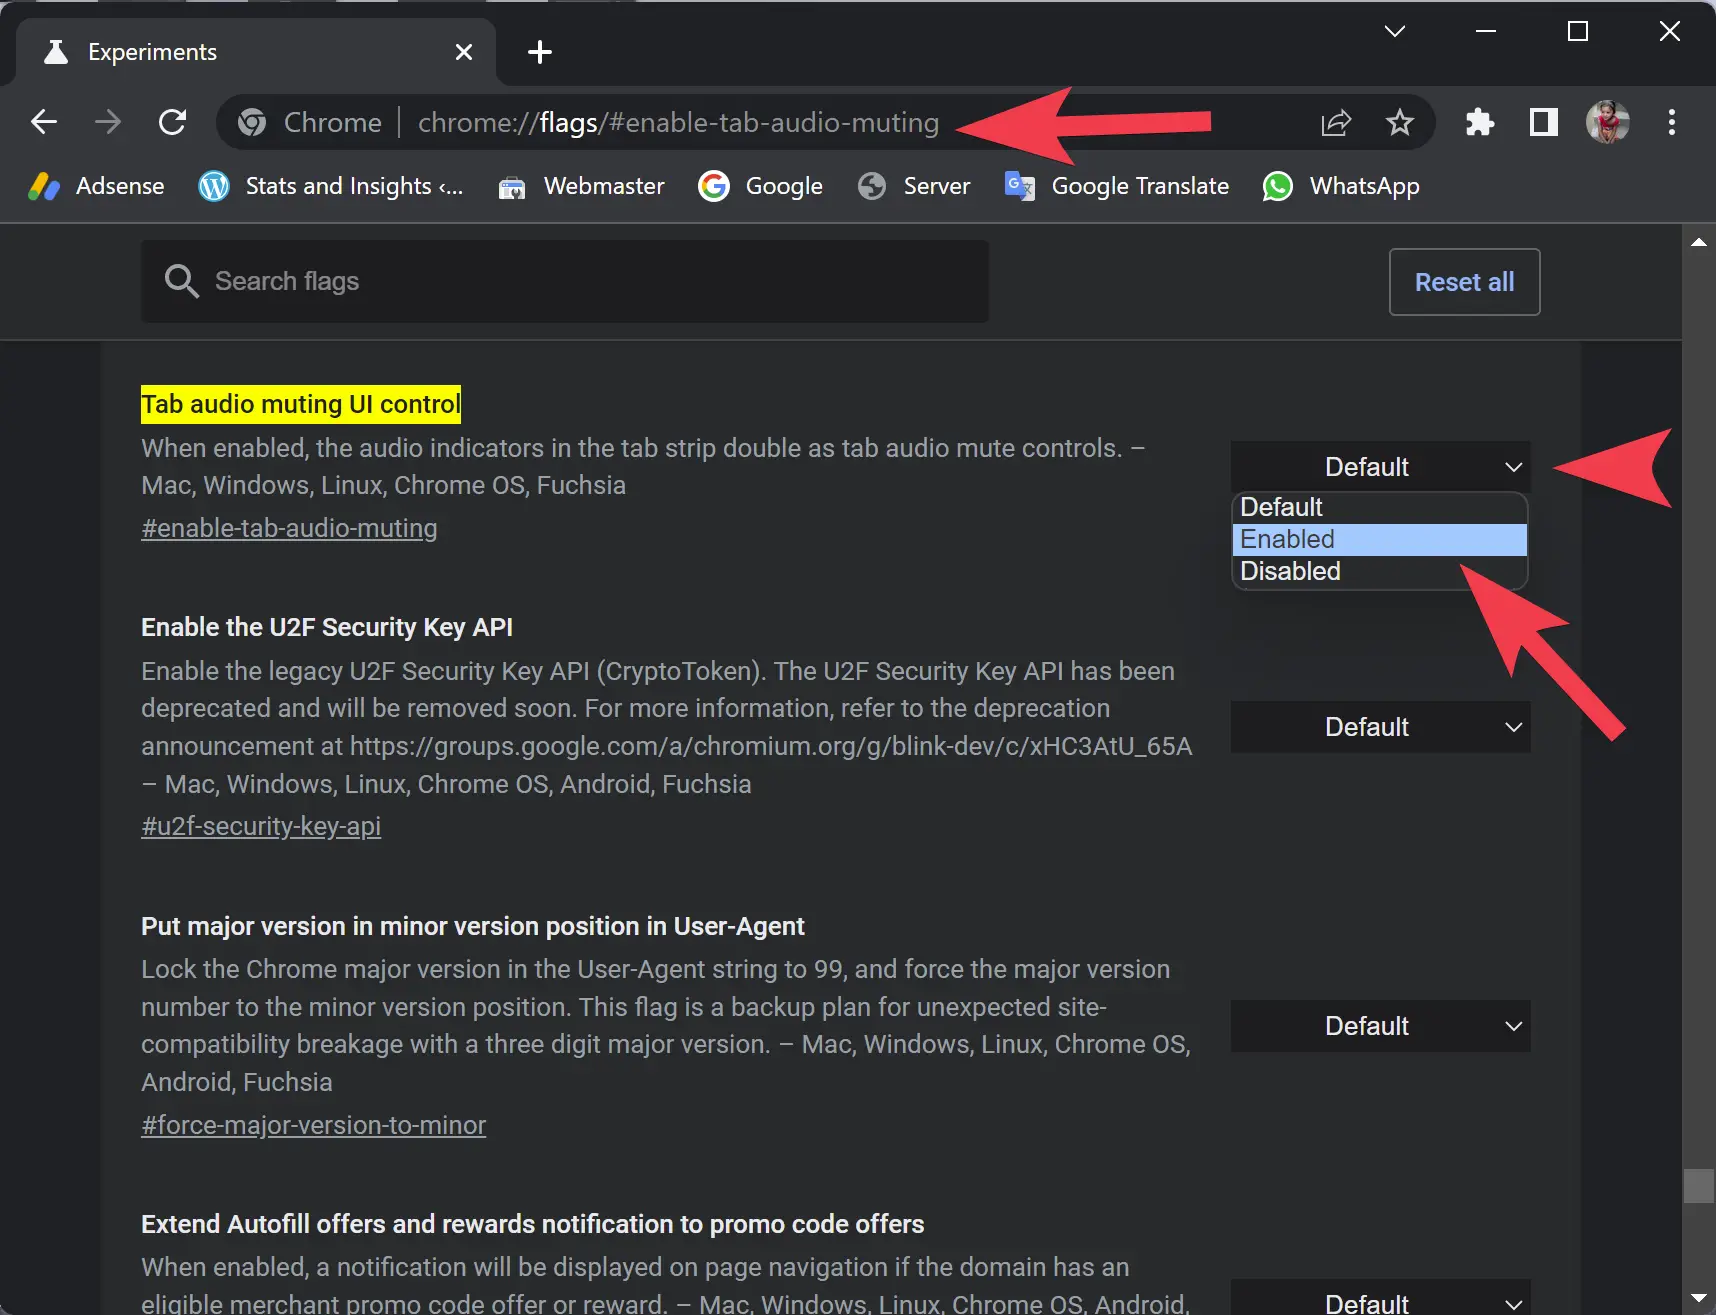
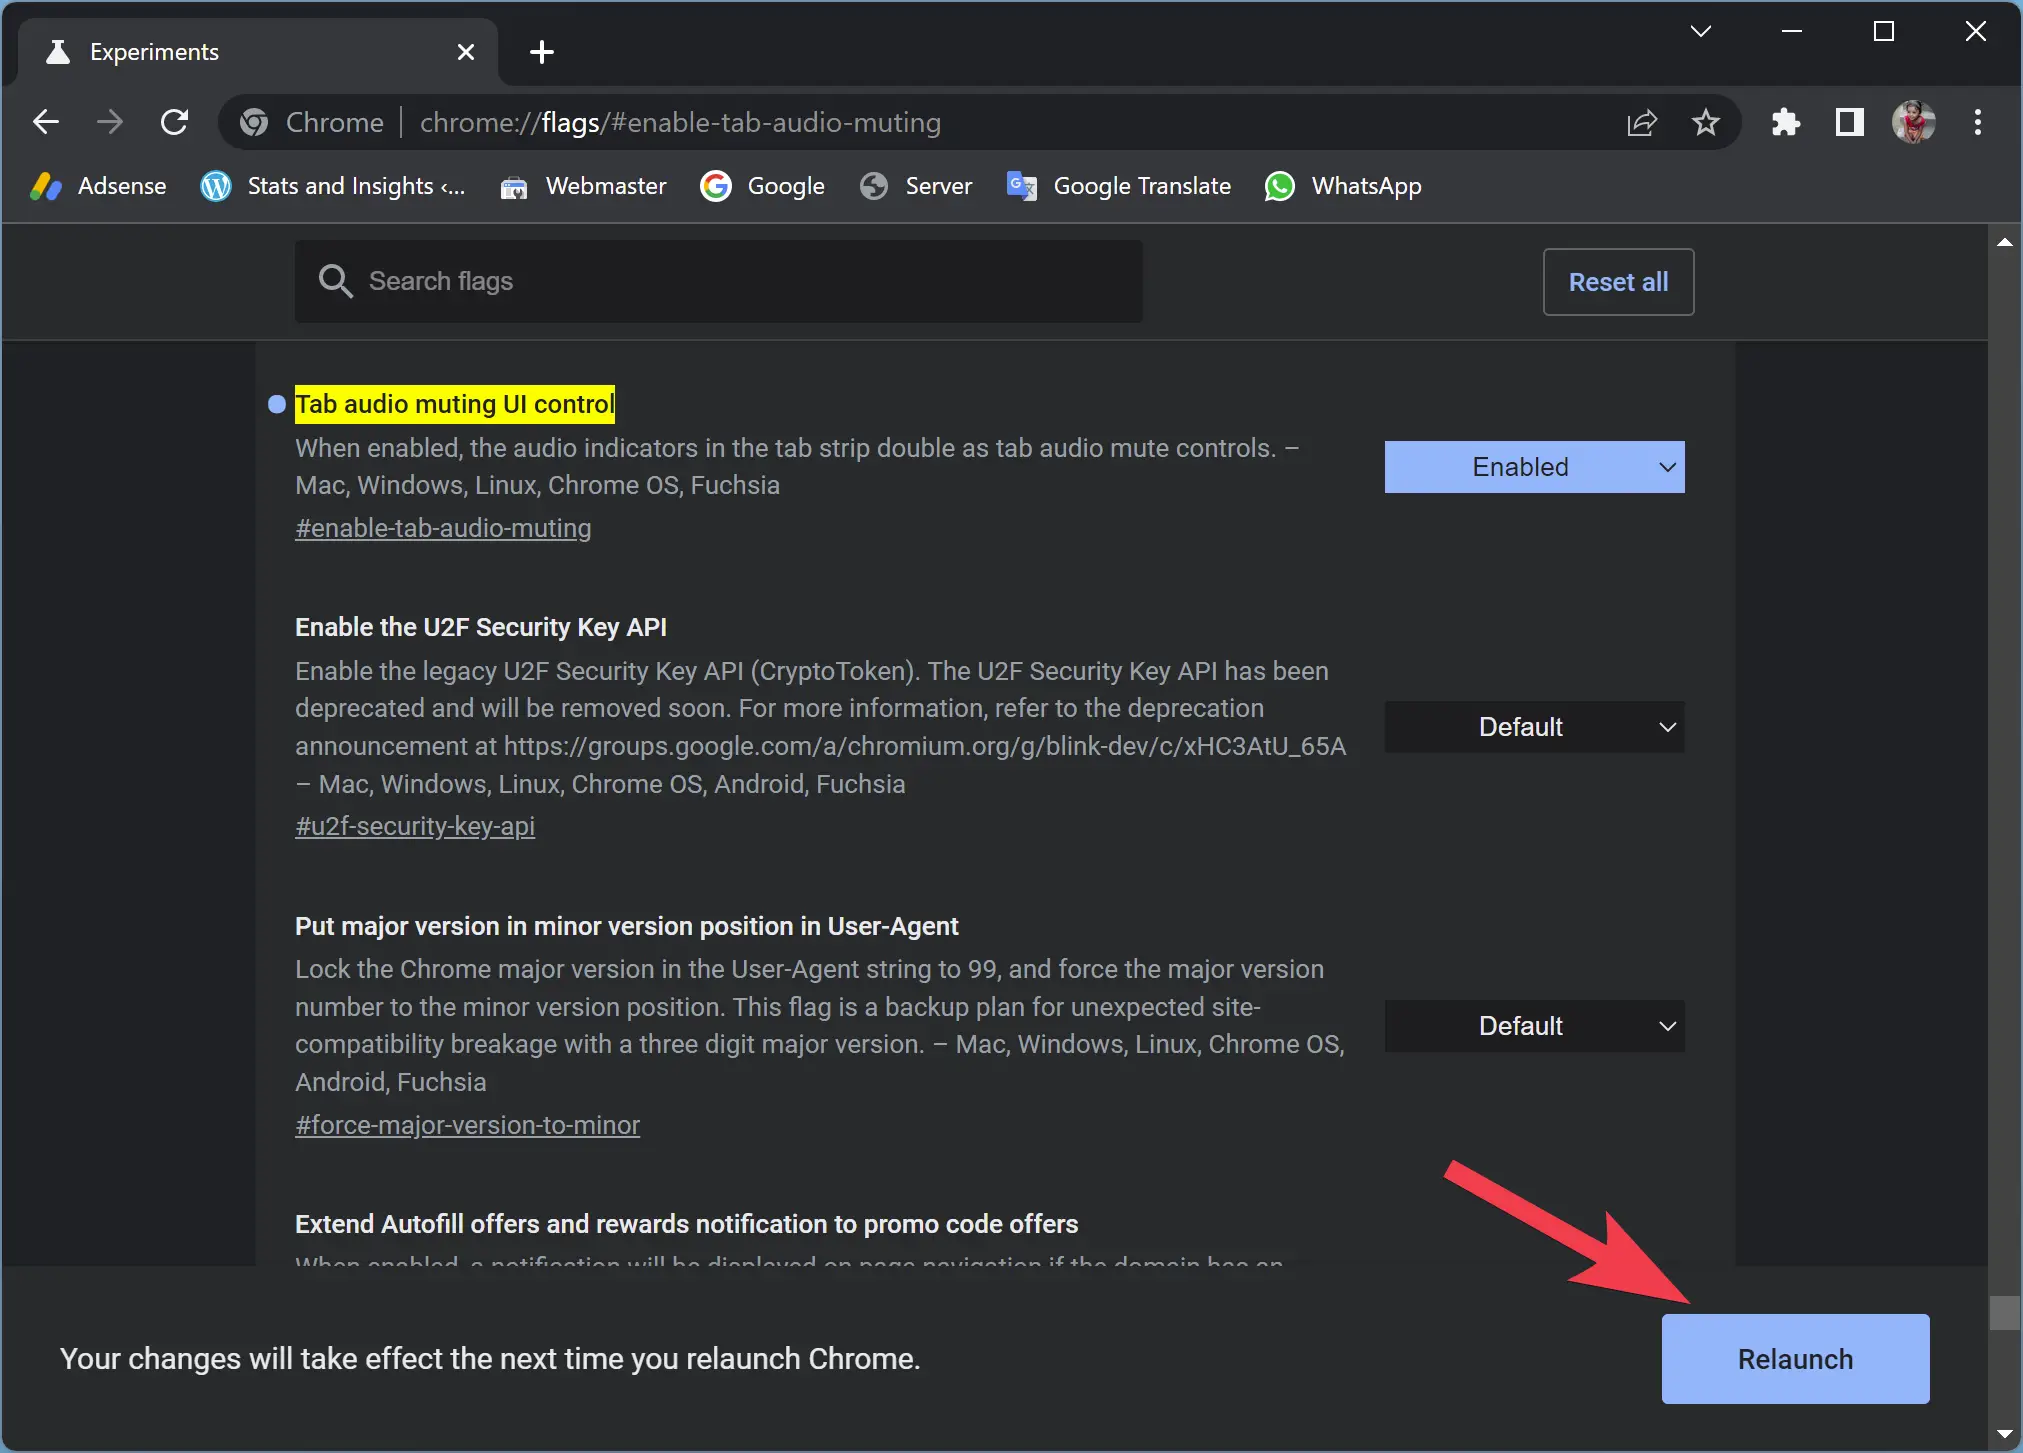
Step 3. From Tab audio muting UI control setting, select the Enabled option.
Step 4. Then, click the Relaunch button at the bottom of the Chrome window.
Once you complete the above steps, Tab Audio Muting in Google Chrome is enabled.
To test Tab Audio Muting, open any music or video website and play. You will notice a speaker icon in that tab. Click on it to mute. Again, click on the speaker icon to hear the sound.
Conclusion
In conclusion, the Tab Audio Muting feature in Google Chrome allows you to quickly mute or unmute the sound of a tab by clicking on the speaker icon on the browser tab. This feature is especially helpful when you have multiple tabs open and want to identify and mute the one that is playing audio quickly. Enabling Tab Audio Muting in Google Chrome is a simple process that can be done by following a few easy steps. By enabling this feature, you can have more control over the audio in your browsing experience and avoid unnecessary sounds from websites.