Sometimes duplicate data is valuable, while you may want to remove all the duplication data a few times. Reasons may be many; in this gearupwindows article, we will guide you to find and remove duplicate rows in Microsoft Excel.
How to Remove Duplicate Rows in Excel?
In the old days, removing duplicate data was a challenging task as you had to do it manually. But those days are now gone. Starting with Excel 2007, Microsoft offers a Remove Duplicates command. Using the Remove Duplicates command, you can quickly and easily get your job done.
If you have some data in Excel and want to remove the duplicate, you can quickly do it. For example, we have created an Excel workbook where you can find a lot of duplicate entries. And we want to remove the duplicate ones.
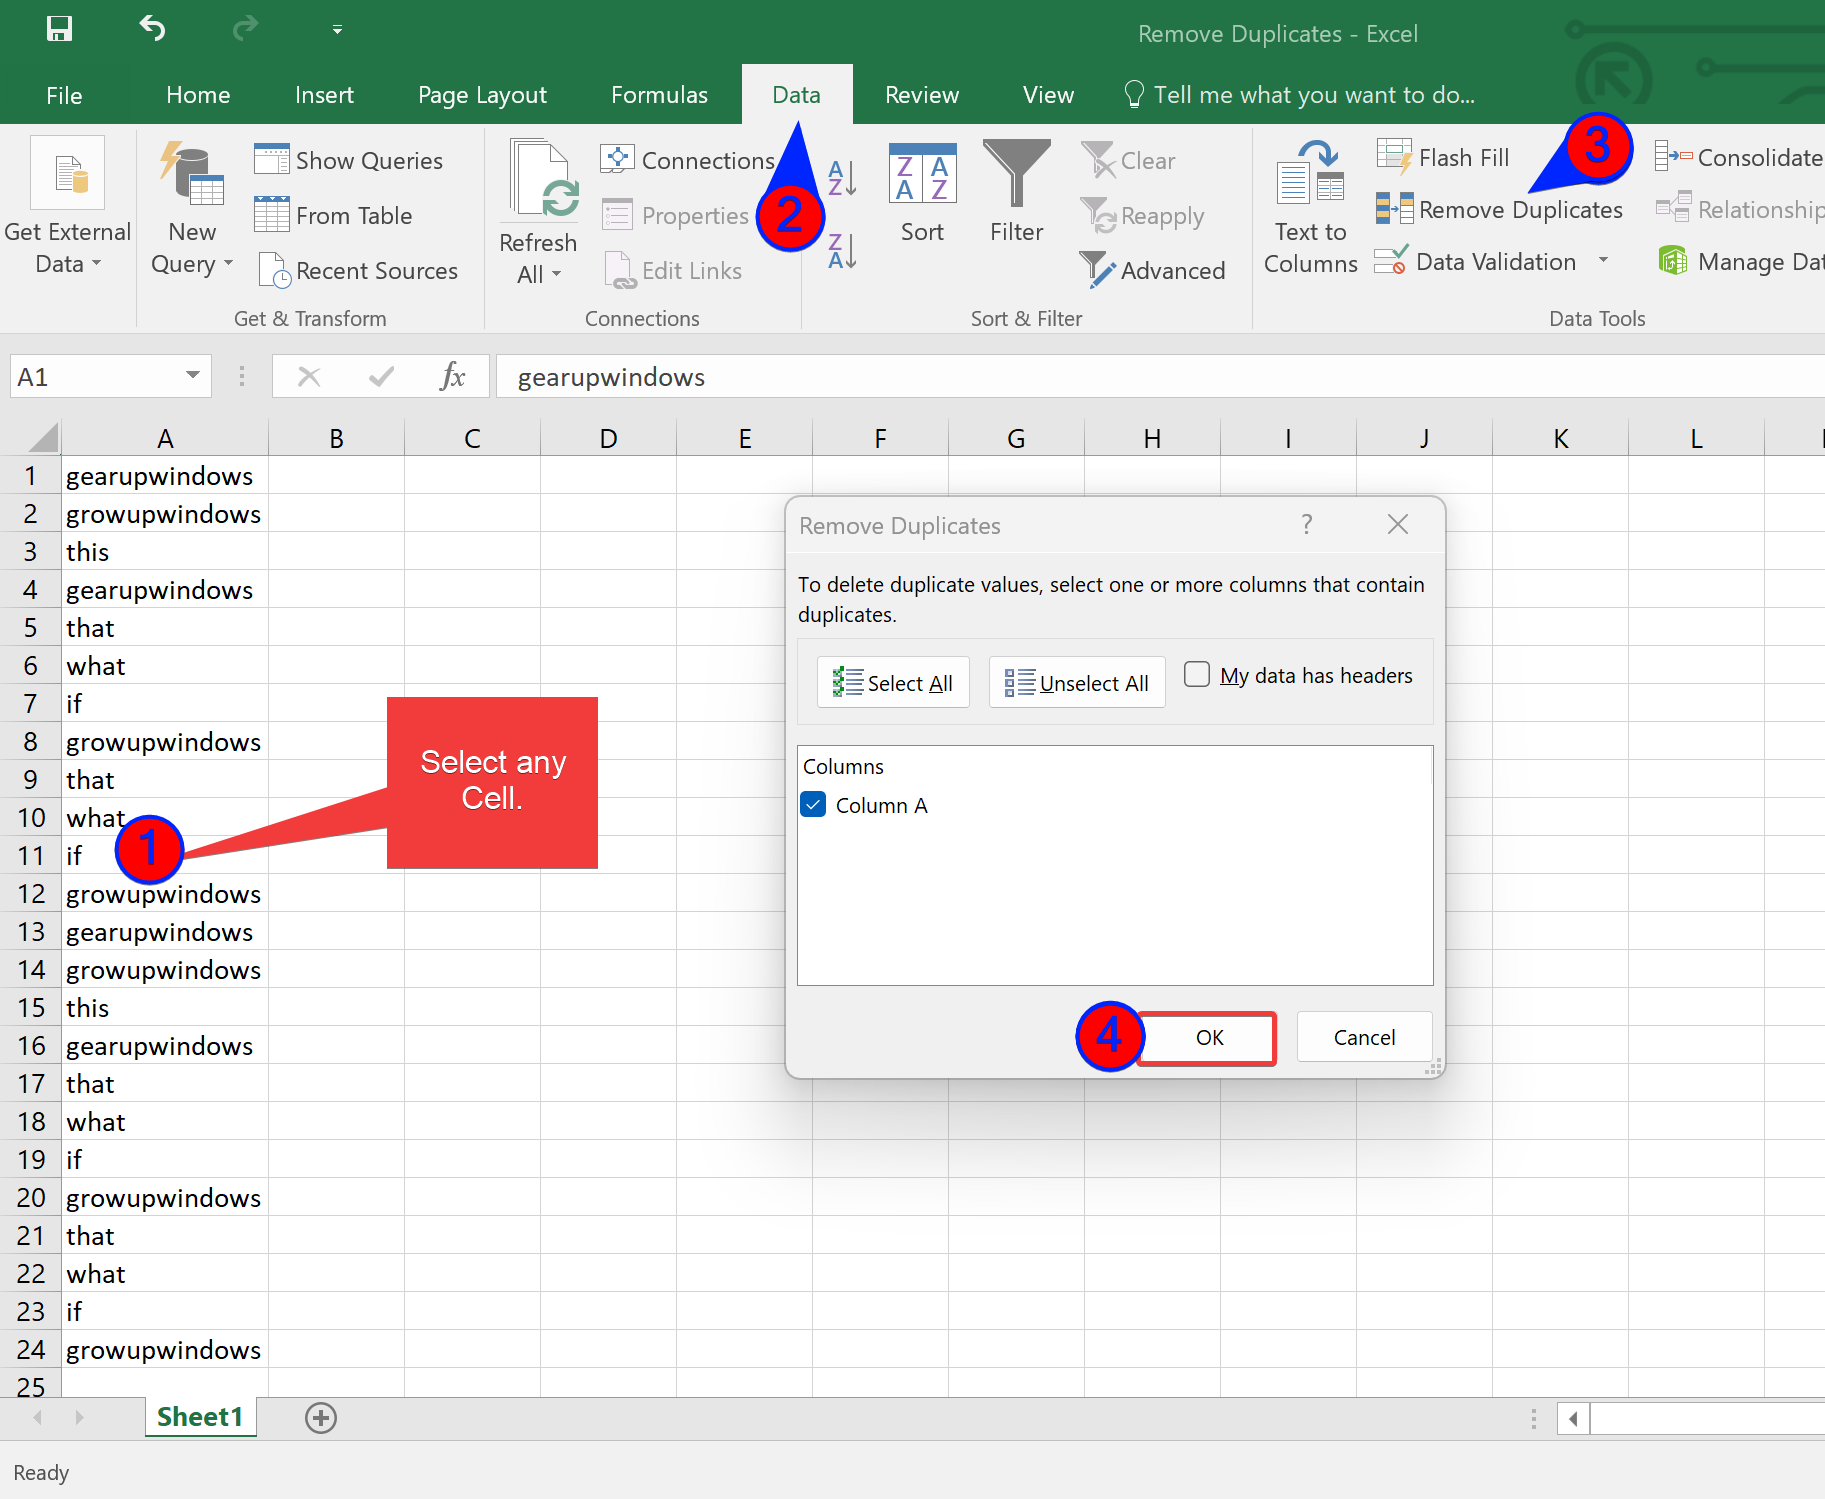
Select any cell in the column where your data exists. Then click the Data > Remove Duplicates. Once done, the Remove Duplicates dialog box will appear on your computer. By default, Columns are automatically selected where your data exist.
So, just hit the OK button to remove the duplicated data in chosen column.
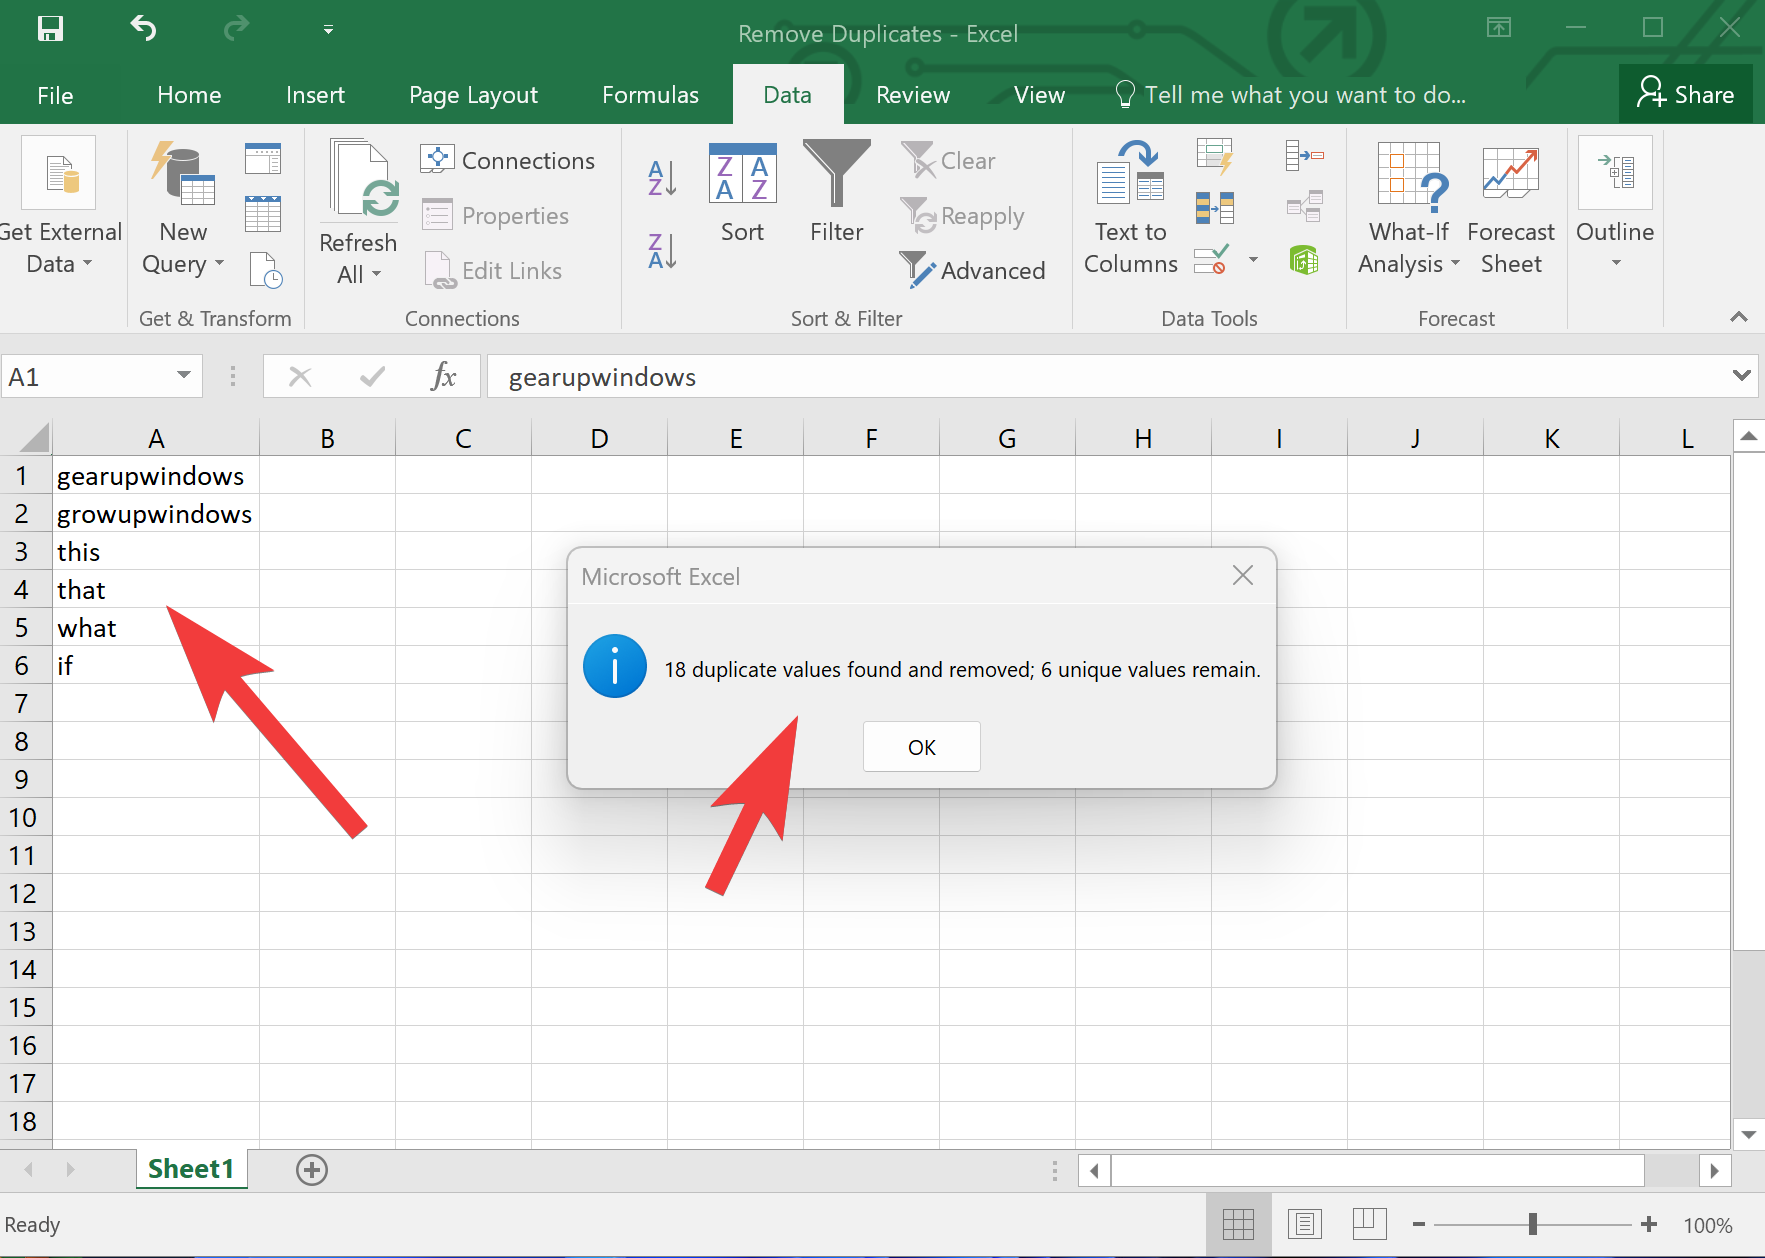
Once done, Excel will clean the duplicate rows, and a message will appear on the screen to let you know how many duplicate values have been removed. When duplicate rows are found, the first will be kept, and subsequent duplicate rows will be deleted.
Quick Note: If your data is distributed in more than one Column, then also you can use the above steps to remove duplicate rows. You’ll need to select all the Columns and then click “Remove Duplicates.” If your data has a header, then check the option “My data has headers” in the “Remove Duplicates” dialog box. While removing the duplicate data, the header will be untouched by Excel.
To undo the changes, you can press CTRL + Z shortcut keys.
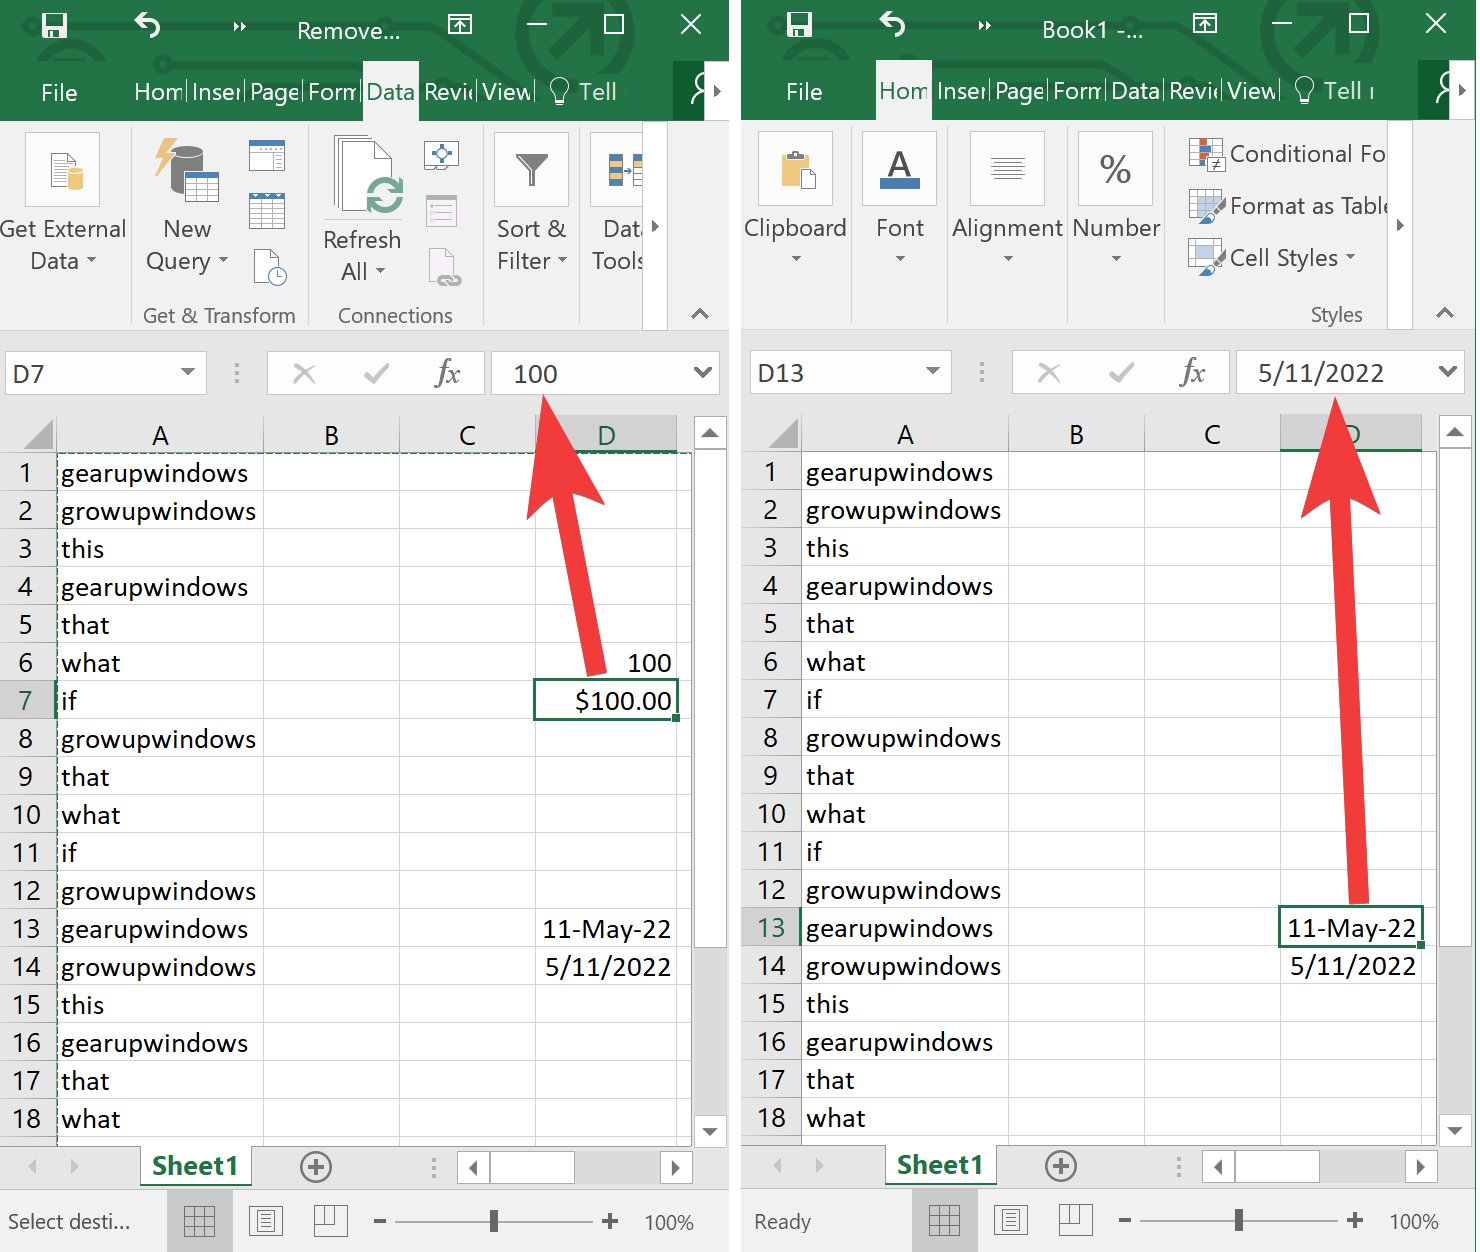
Quick Note: Excel treats values as duplicates based on what cells are displaying, not what cells contain. For instance, 5/11/2022 and 11 May 2022. These two have an identical value for Excel. But, they appear different on the screen based on cell formatting. Similarly, $100.00 is different from 100.00, though the first one is just the formatted product of a 100.00 value. If you want to count both as duplicate values, format the whole column first and then use the Remove Duplicates command to find the identical cells.
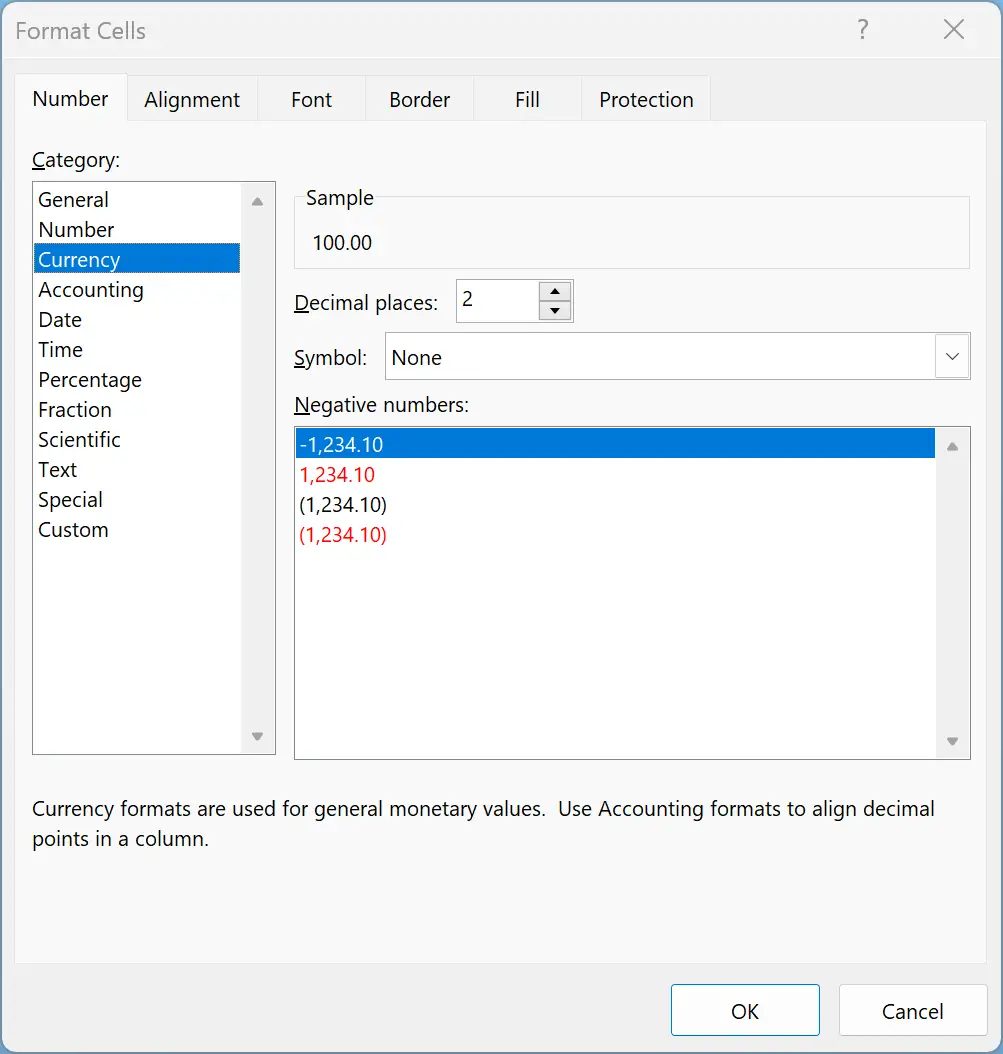
To show the data in a Column in a similar format, select the Column, right-click on that, and choose the Format Cells option.
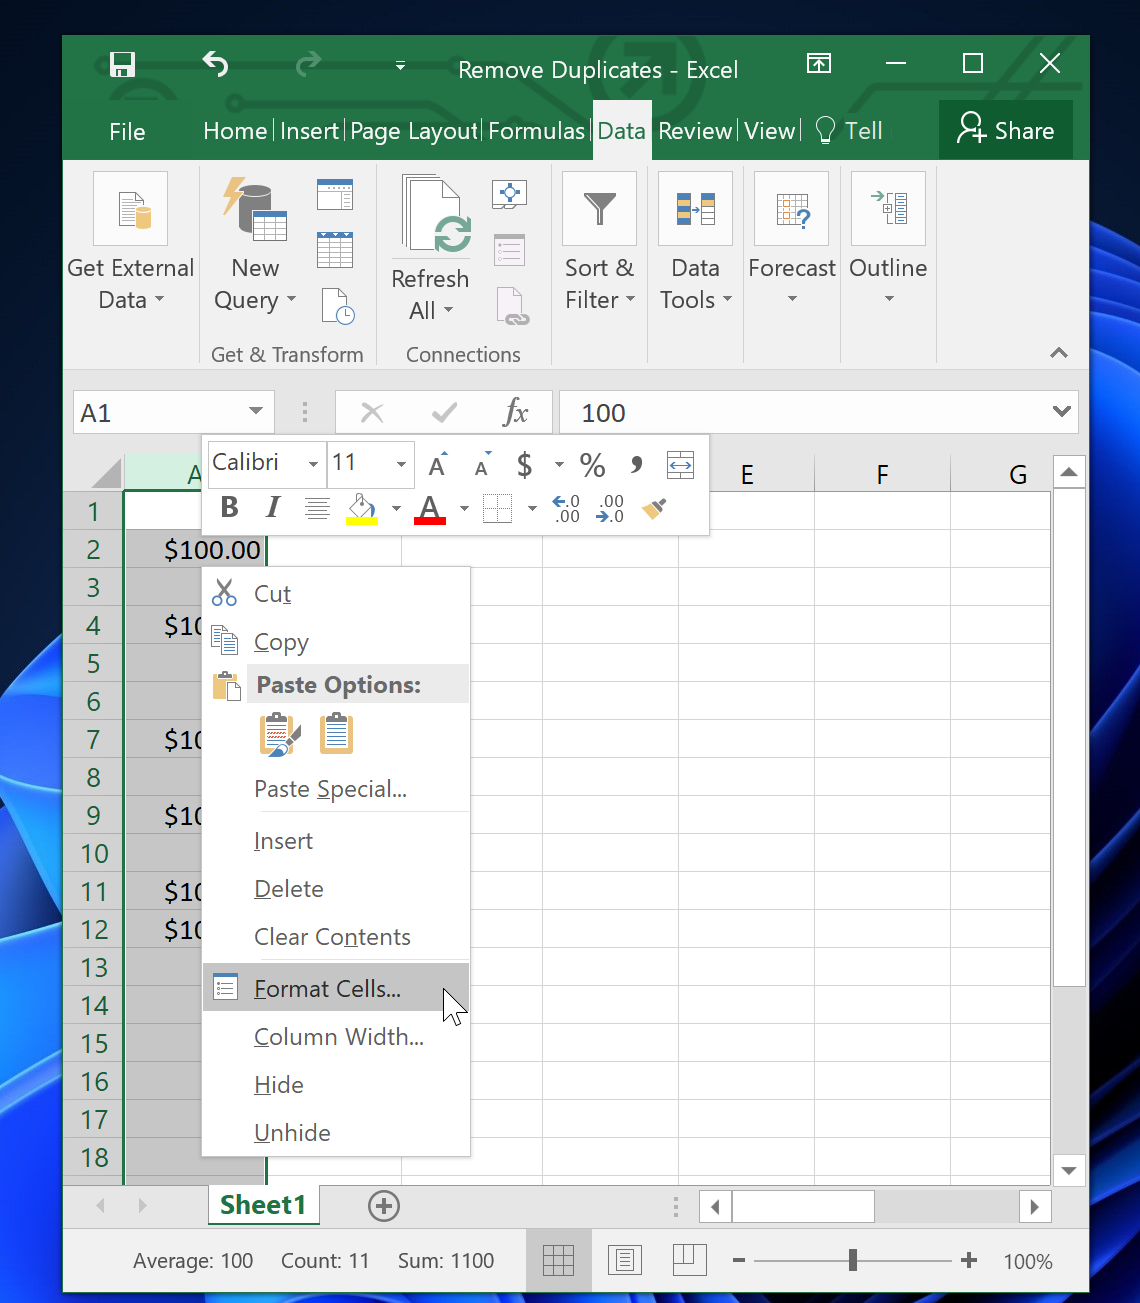
Then, in the Format Cell dialog box, select which type your data is in the Number tab, and then select the desired formatting on the right-side. Finally, click the OK button to display your data in that format.
Conclusion
In conclusion, removing duplicate data is essential to keep your Excel spreadsheets organized and free from errors. With the help of the Remove Duplicates command in Excel, you can quickly and easily remove duplicate rows, saving time and effort. However, it is crucial to keep in mind that Excel treats values as duplicates based on what cells are displaying, not what cells contain. Therefore, it is essential to format your data correctly before using the Remove Duplicates command. Overall, by following the steps outlined in this gearupwindows article, you can easily find and remove duplicate rows in Excel, keeping your data clean and accurate.