Whether you’re using one of the best gaming laptops or cheap gaming laptops, you should know how to check your VRAM in Windows 10. Knowing how much VRAM (Video RAM) you have is very important, especially when playing top-tier games like Assassin’s Creed Valhalla or Resident Evil Village or if you want to perform specific GPU-intensive tasks like 3D modeling. Of course, you can always Google your GPU to find your VRAM, but that can be an issue if you don’t know what GPU you have.
What is VRAM (Video RAM)?
VRAM (Video RAM) is a specific type of RAM (Random Access Memory) that is used in graphics processing units (GPUs) for expensive computers. If your computer has its own dedicated graphics cards, it has its own advantage. VRAM is separate from the physical RAM, which is reserved for memory functions pertaining to display and graphics. Different graphics cards have different amounts of VRAM. So, the more VRAM a graphics card has, the better it is since more VRAM means a graphics card can handle more graphics and display operations simultaneously.
Fortunately, on Windows 10, a user can quickly check how much VRAM they have on their computer using two different ways – Settings app and DxDiag. In this gearupwindows article, we will review both methods one by one.
How to Check VRAM using Windows 10 Settings?
To find out how much VRAM you have in your Windows 10 machine, use the following steps:-
Step 1. First, open Windows Settings.
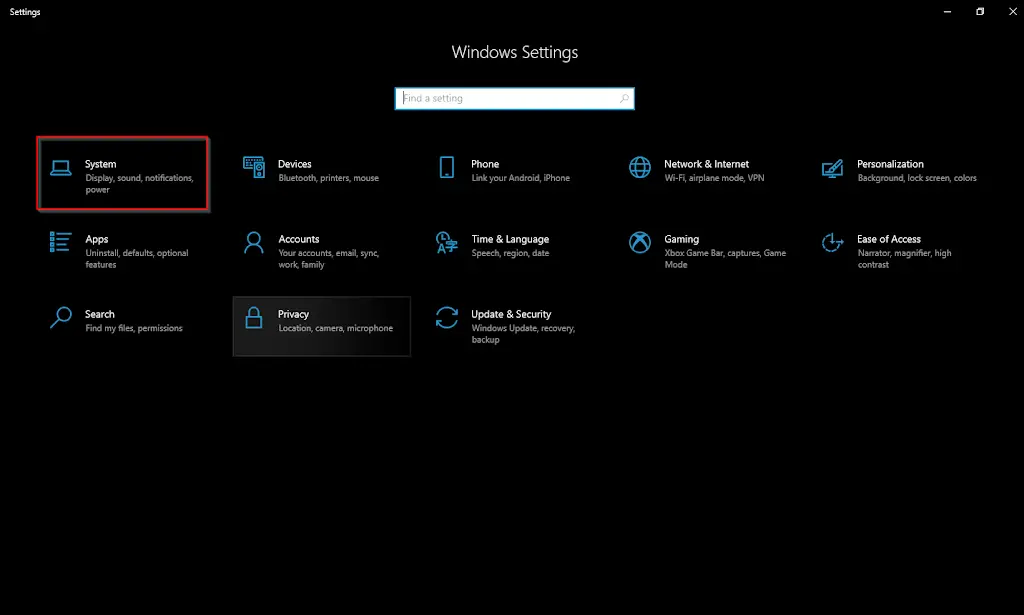
Step 2. Then, click on System.
Step 3. Next, select Display in the left sidebar.
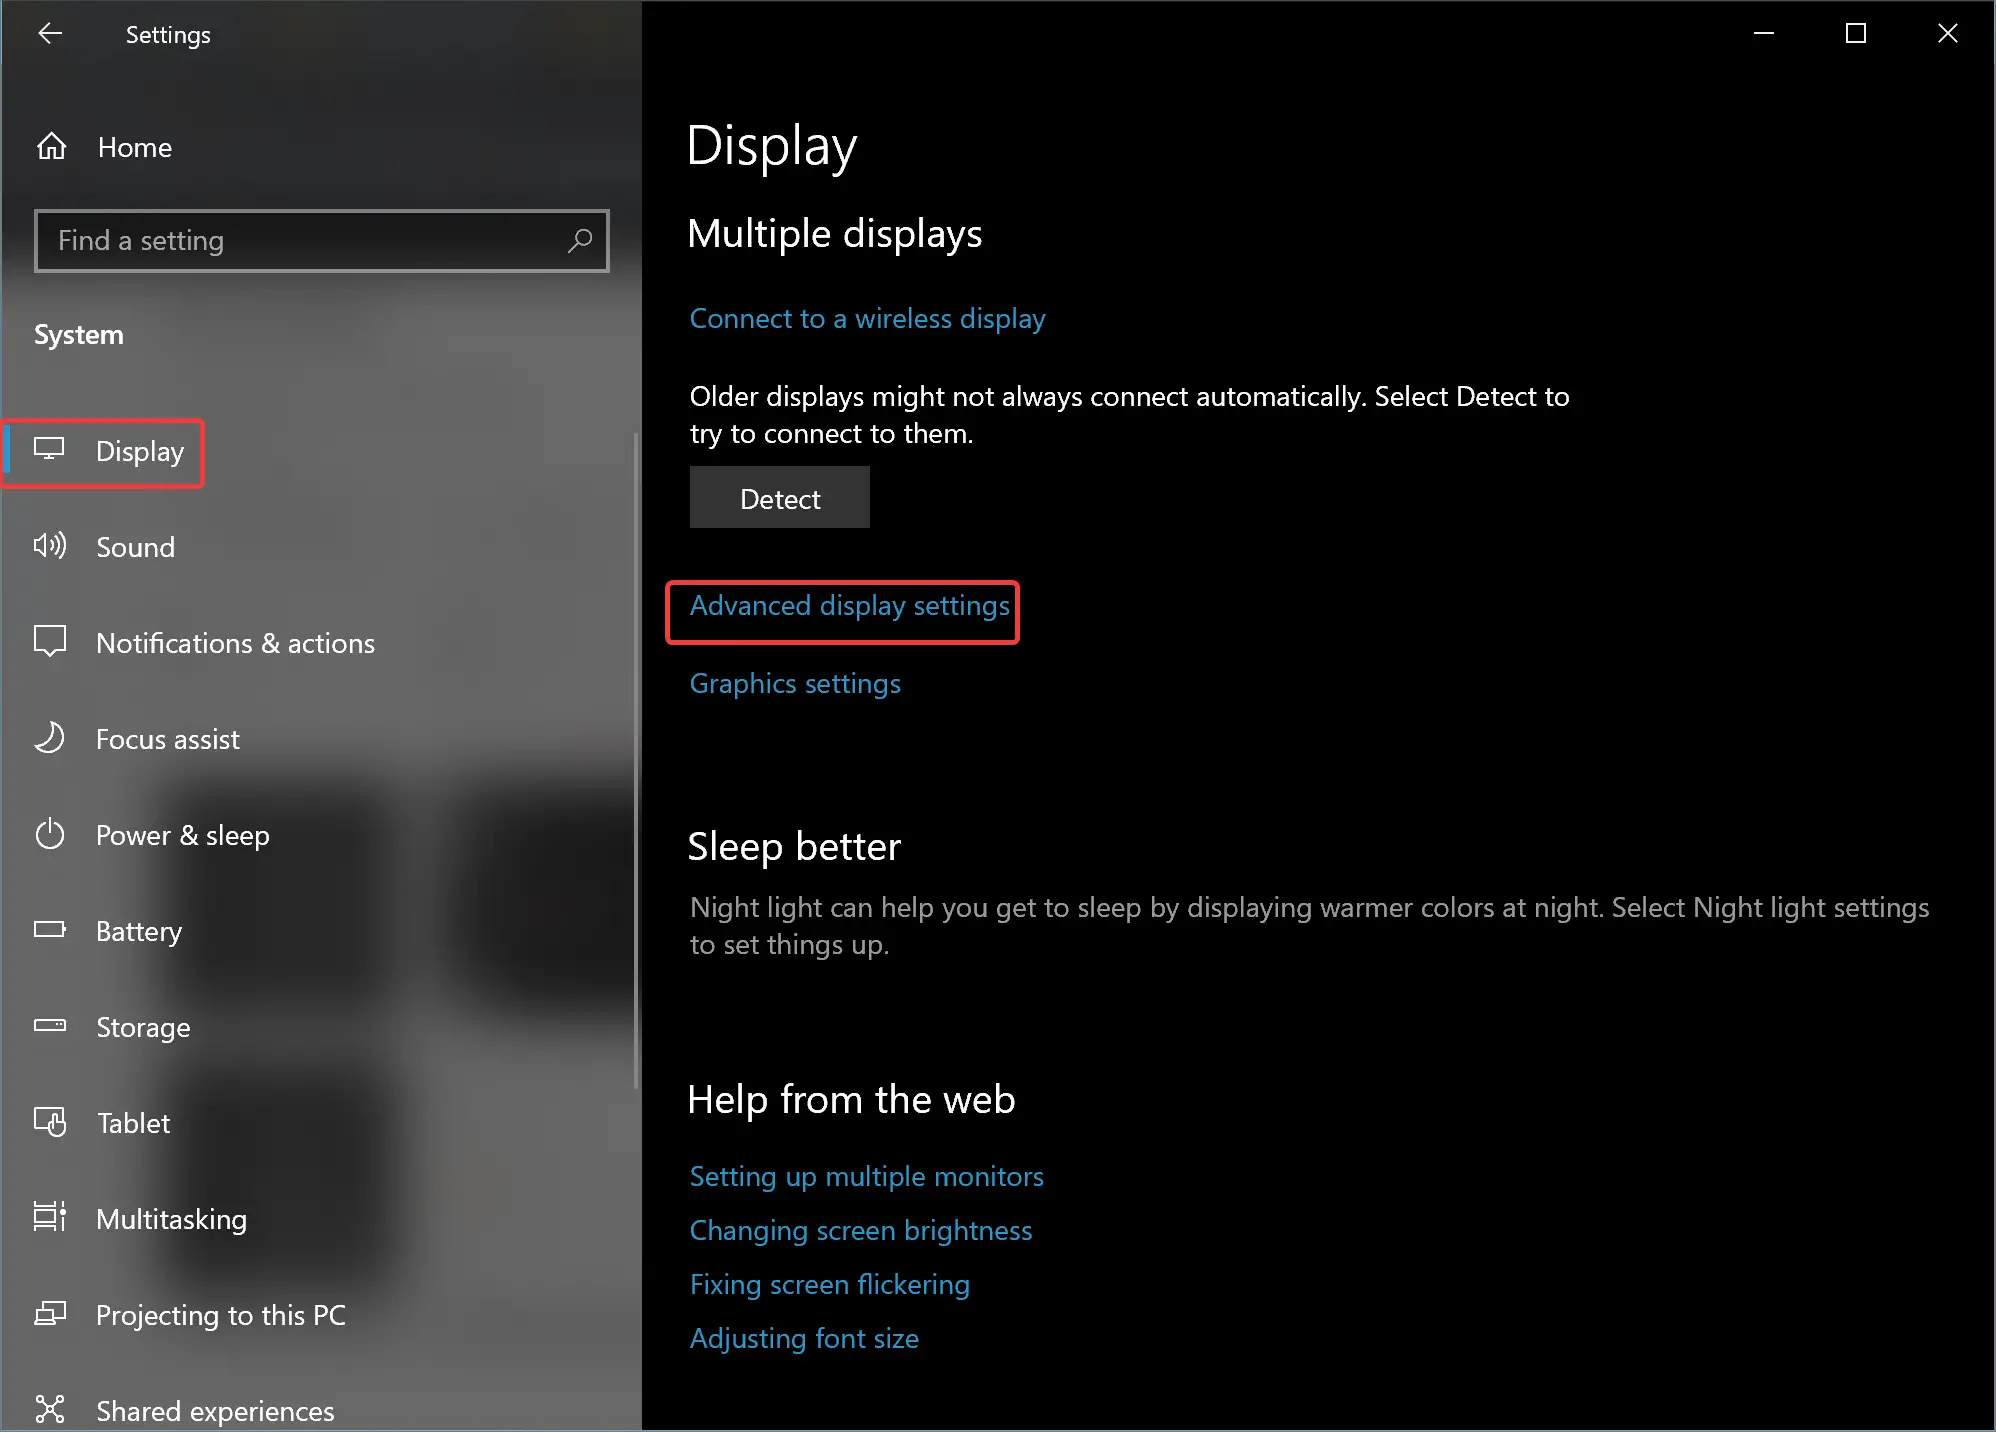
Step 4. After that, scroll down in the right sidebar to find the “Multiple displays” section. Then, click on the link Advanced display settings.
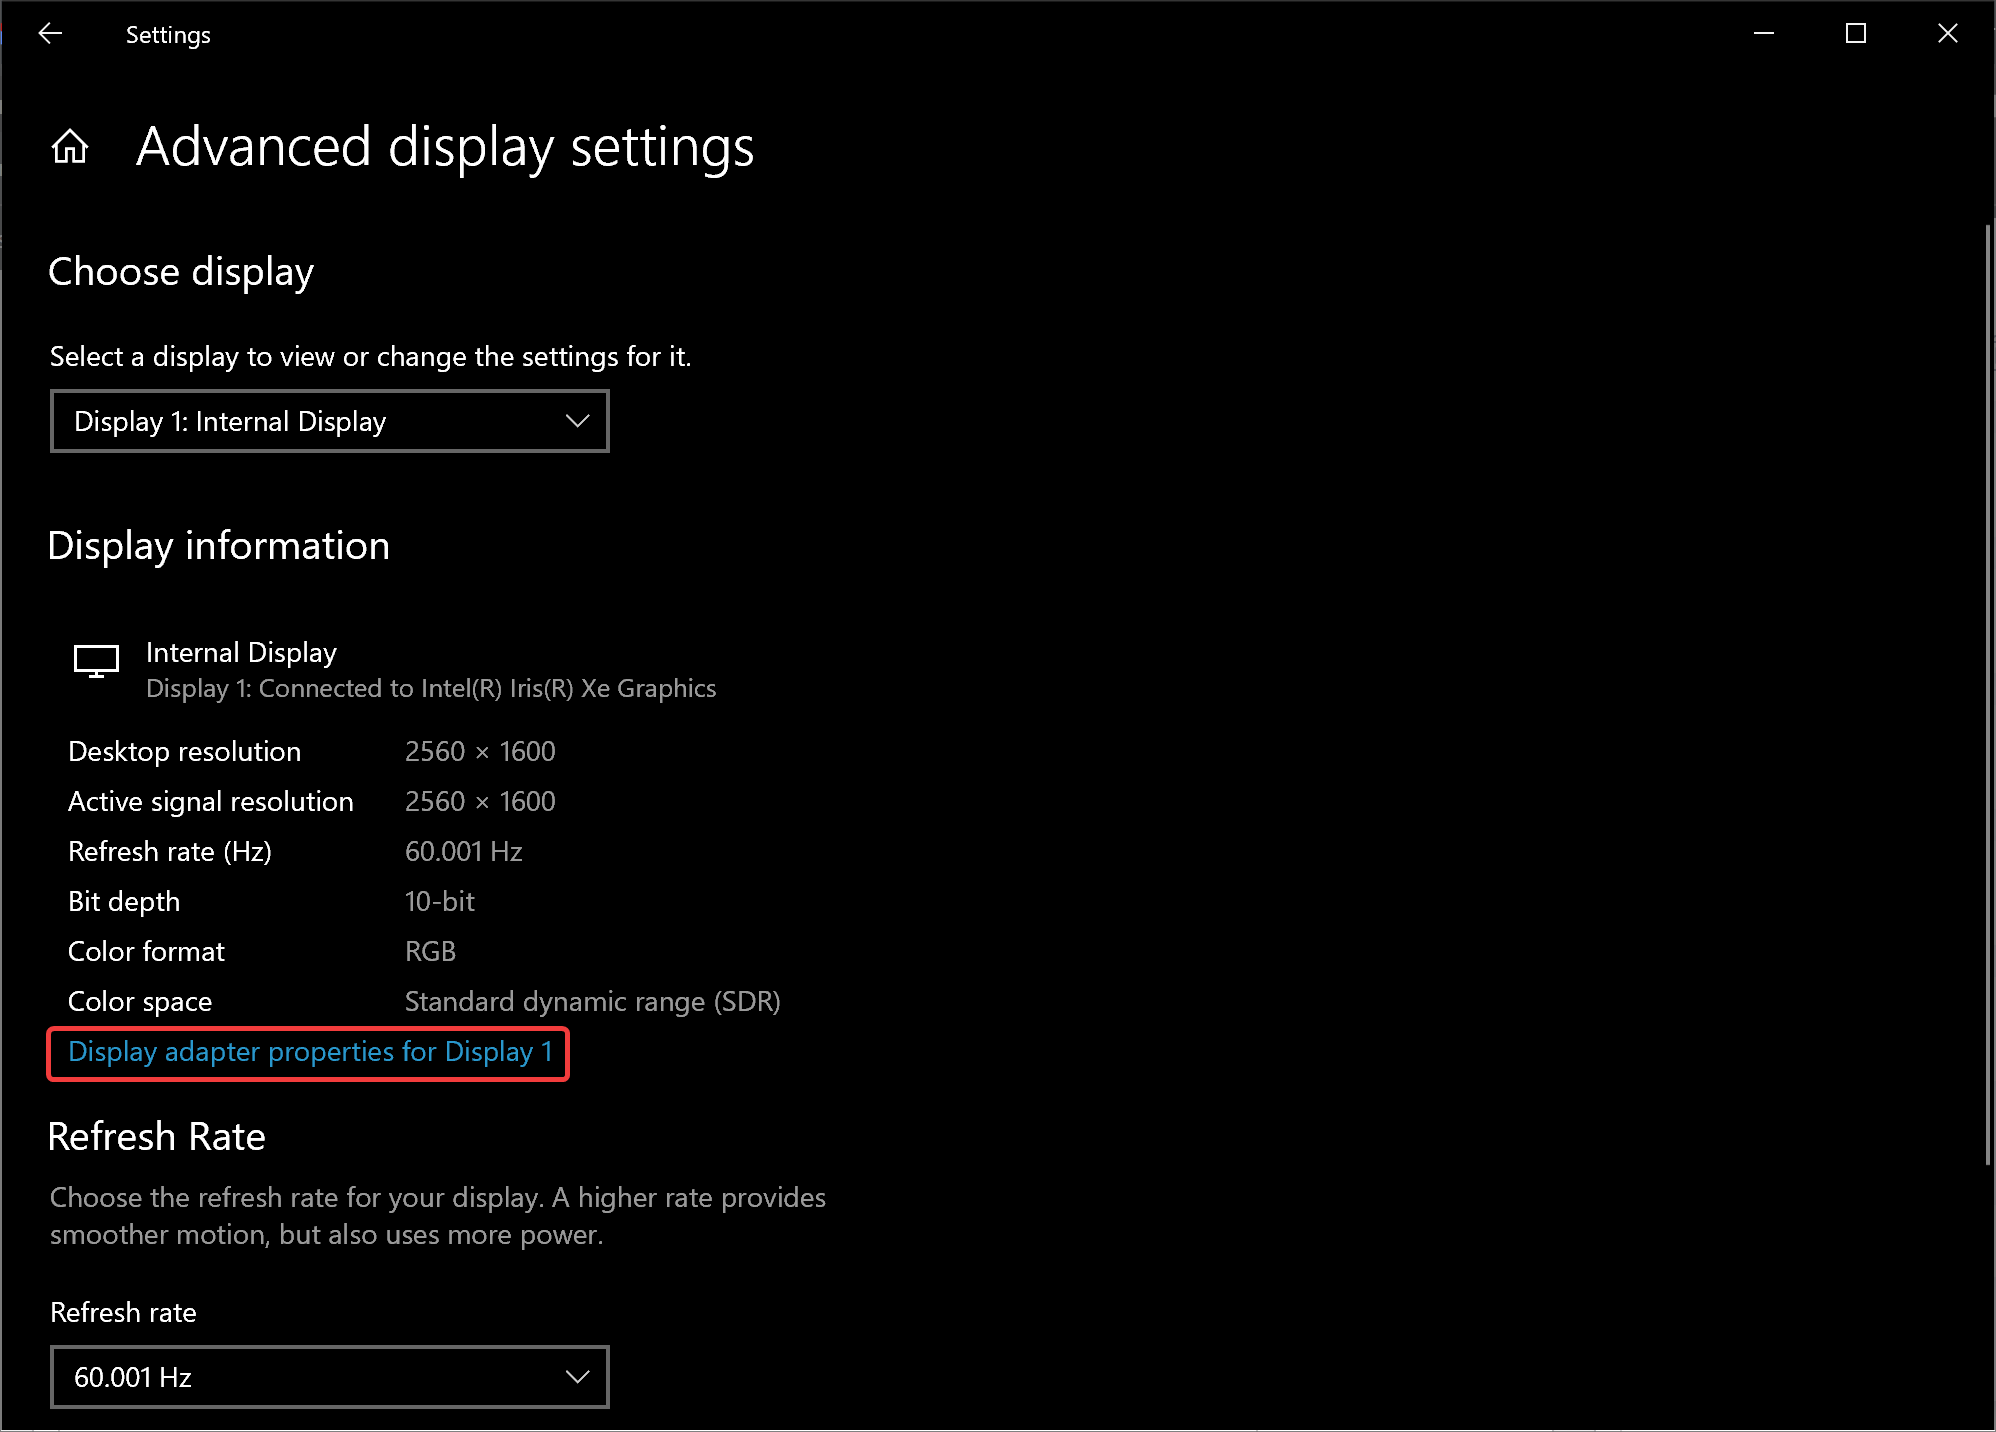
Step 5. On the next screen, click Display adapter properties for Display 1 or the adapter you want to view.
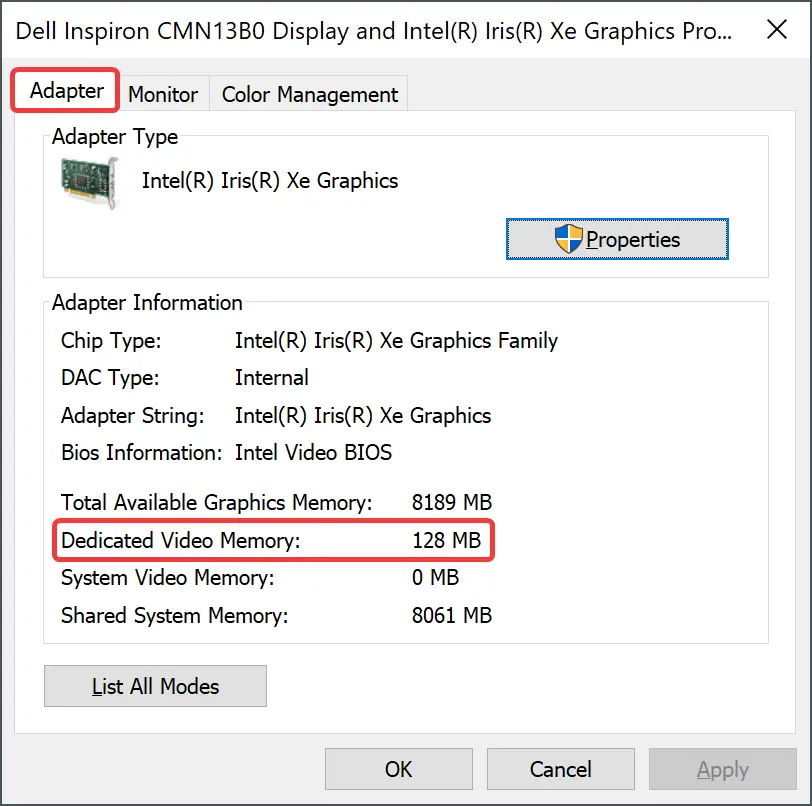
Step 6. In the window that appears, navigate to the Adapter tab. Your video card’s VRAM and specifications will be displayed next to “Dedicated Video Memory.”
How to View VRAM through DxDiag?
DxDiag is a lesser-known feature of Windows where you can find your Computer’s specifications, including the video card. To use this tool, follow these steps:-
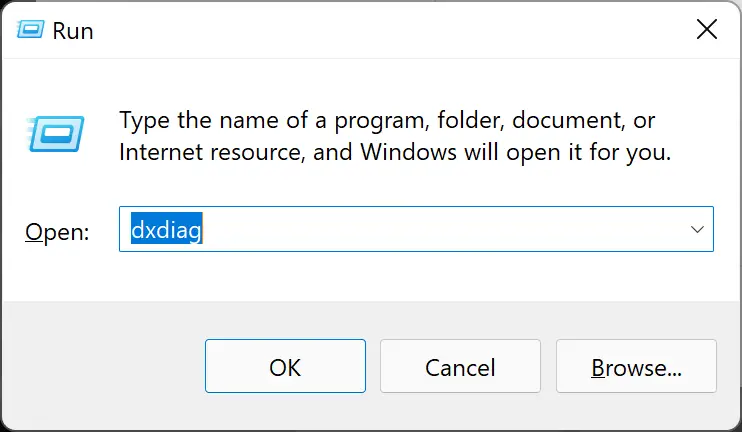
Step 1. First, press and hold the Windows + R keys together to open the Run dialog box.
Step 2. Then, type DxDiag in the Run dialog box and press the Enter key on the keyboard.
Step 3. When the DirectX Diagnostic Tool opens, head over to the Display tab.
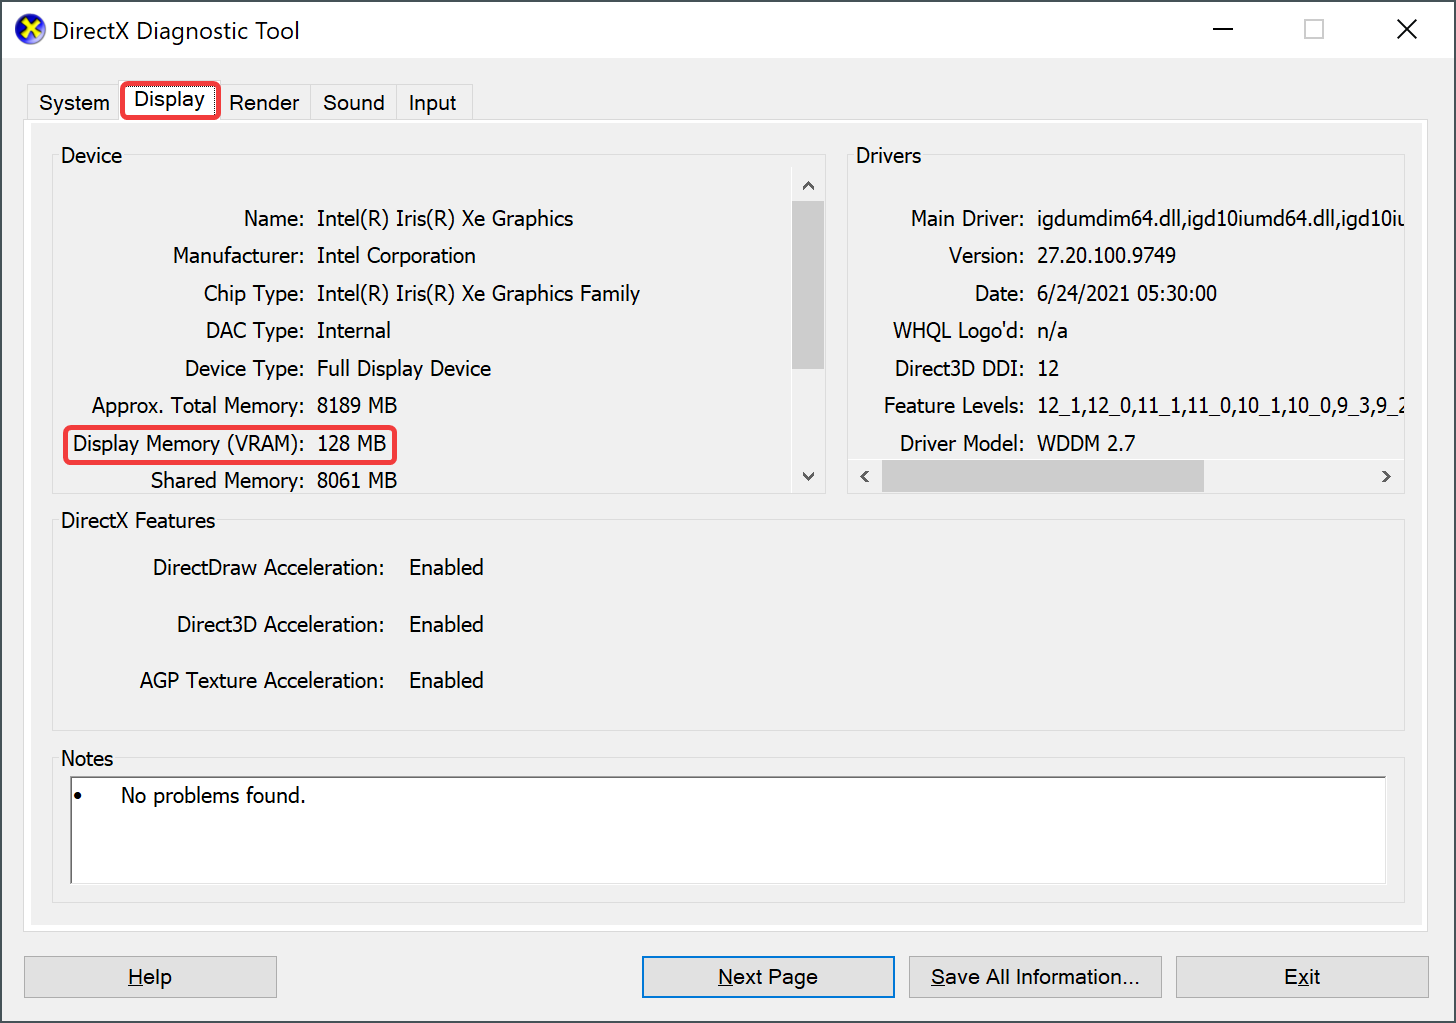
Step 4. Here, underneath the Device section, you will see all the amount of Display Memory (VRAM) of the graphics card on your computer.
Conclusion
In conclusion, knowing how much VRAM you have on your Windows 10 computer is crucial, especially for gaming and other GPU-intensive tasks. In this article, we explored two methods for checking the amount of VRAM on your computer – using the Settings app and DxDiag. The Settings app method involves navigating to the Display adapter properties for the display you want to view, while the DxDiag method requires accessing the Display tab in the DirectX Diagnostic Tool. By following the simple steps outlined in this guide, you can easily check your computer’s VRAM and ensure that your system is up to par for your graphics-intensive needs.