By default, the wireless or Wi-Fi icon always appears at the taskbar in Windows 10, irrespective of the internet connection status. The wireless icon automatically refreshes when the PC is connected to a network or disconnected from a network to reflect the internet connection’s current situation.
![]()
If the Wi-Fi icon is missing from your computer’s taskbar system notification area, this gearupwindows article will help you restore them. You may try to restart your PC once; if the problem does solve, you can try these methods one by one.
There are several ways to restore or fix the missing wireless icon on the Windows 10 taskbar. We will review them one by one.
Check if the network or wireless icon is hidden.
First, you should try to check if the network or wireless icon is hidden. For that, do the following:-
Sep 1. Click on the upward arrow icon on the taskbar and see if the Wi-Fi icon is available here.
![]()
Step 2. If you find out the wireless icon here, your search is over—no need to go through the following steps. Simply drag them to the taskbar area and then leave the mouse cursor. It will now sit on the taskbar.
![]()
If you cannot find the Wi-Fi icon in a hidden area on the taskbar, then go ahead with the following procedure.
Enable Network or Wireless icon in the Settings app.
Step 1. Open the Settings app by pressing Windows + I keys from the keyboard.
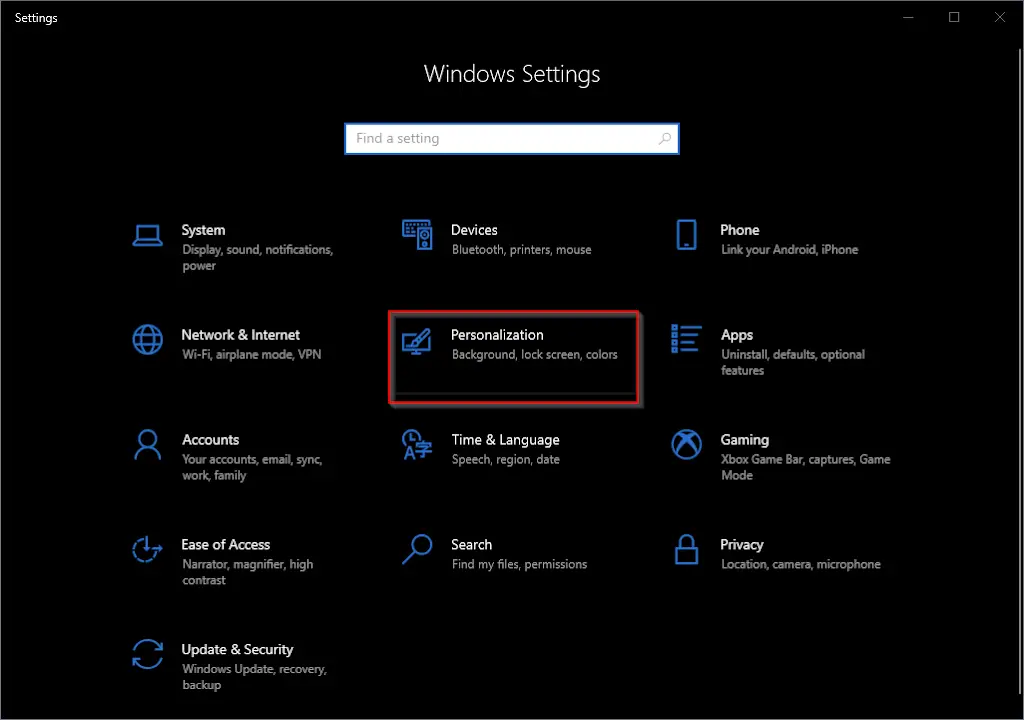
Step 2. When Windows Settings opens, select the Personalization category.
Step 3. On the Personalization settings page, click on the Taskbar tab in the left sidebar.
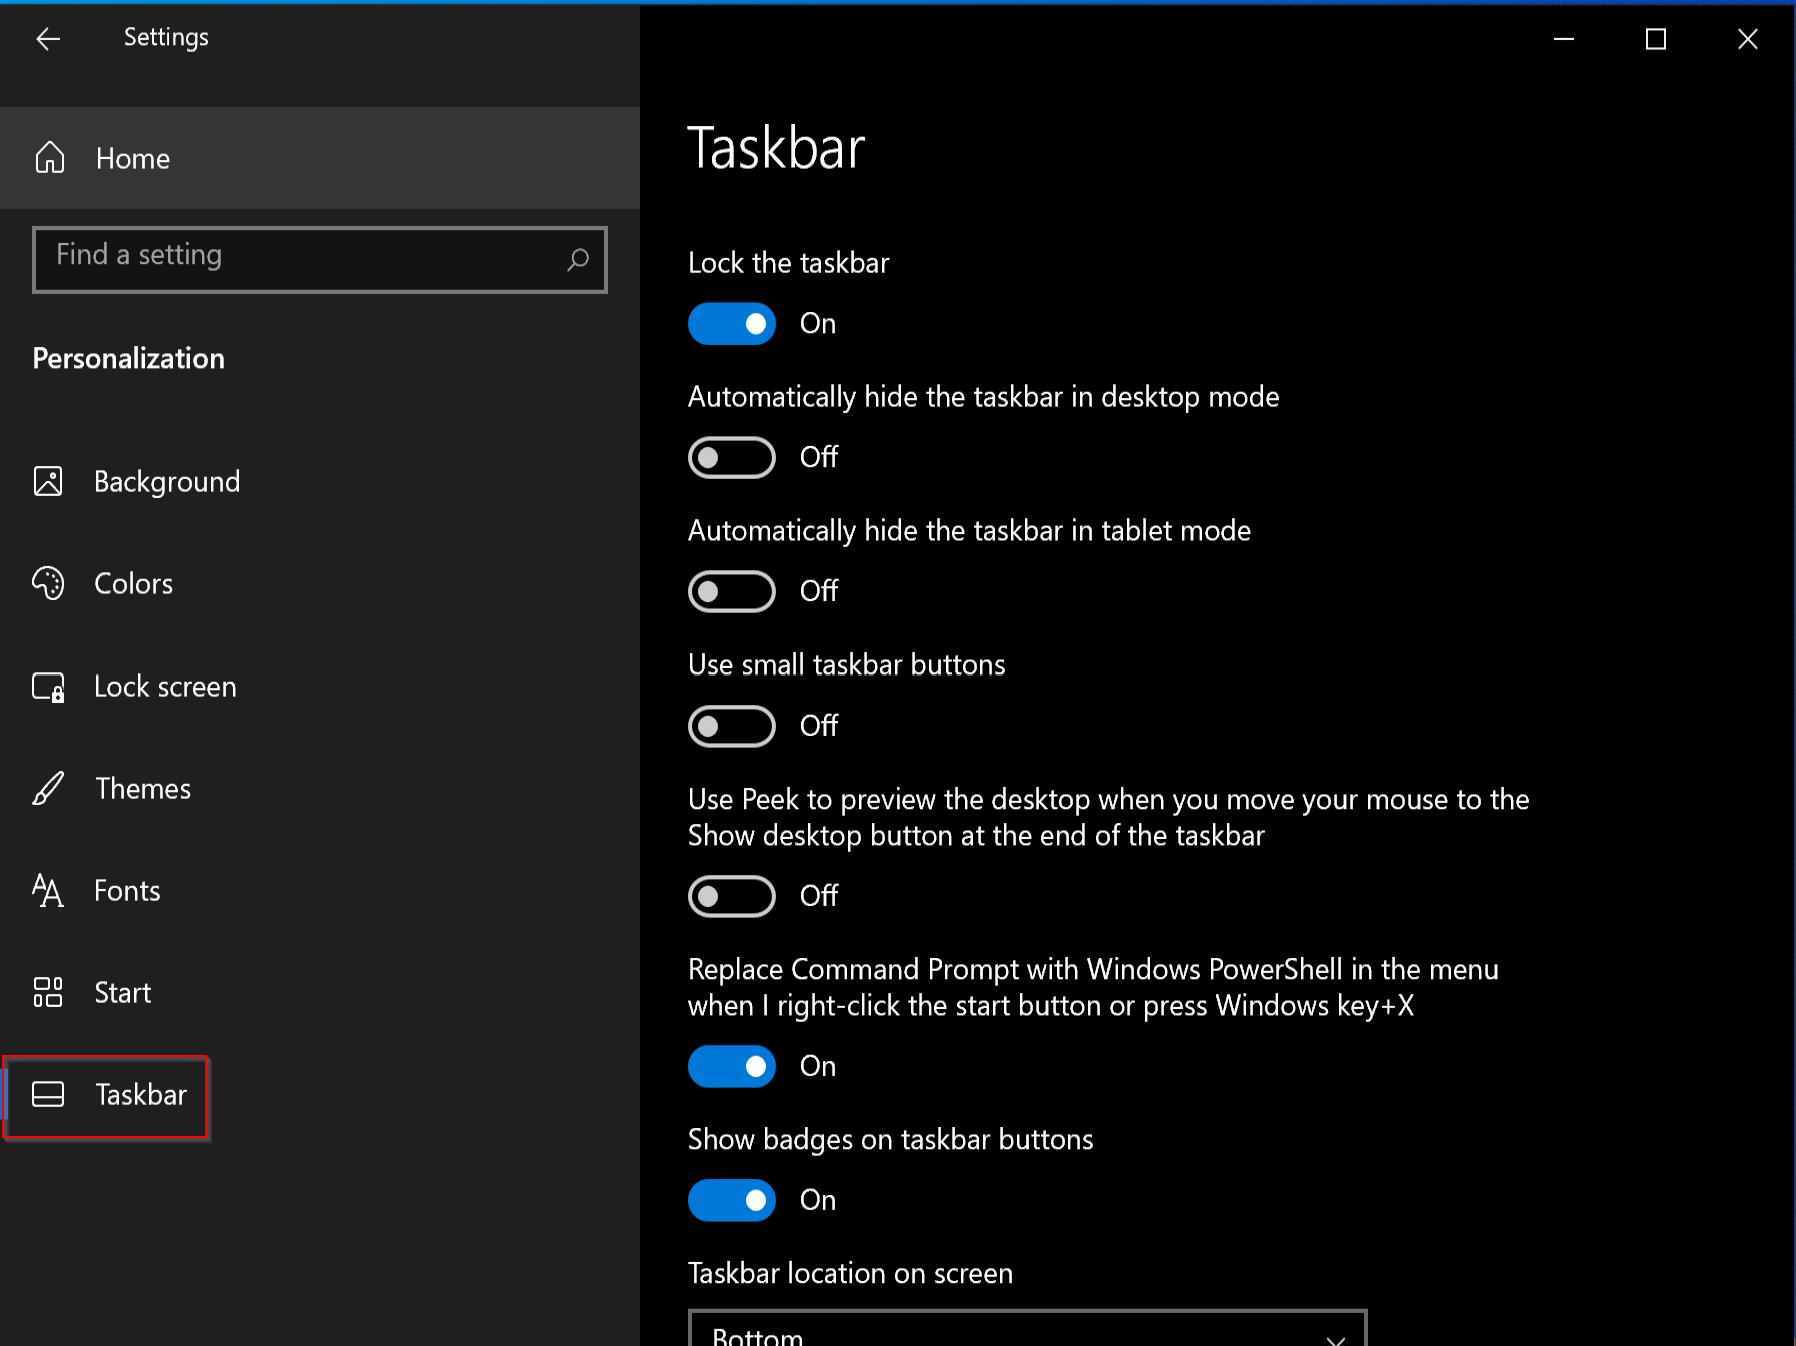
Step 4. After that, scroll down on the Taskbar pane to see the “Notification area” section.
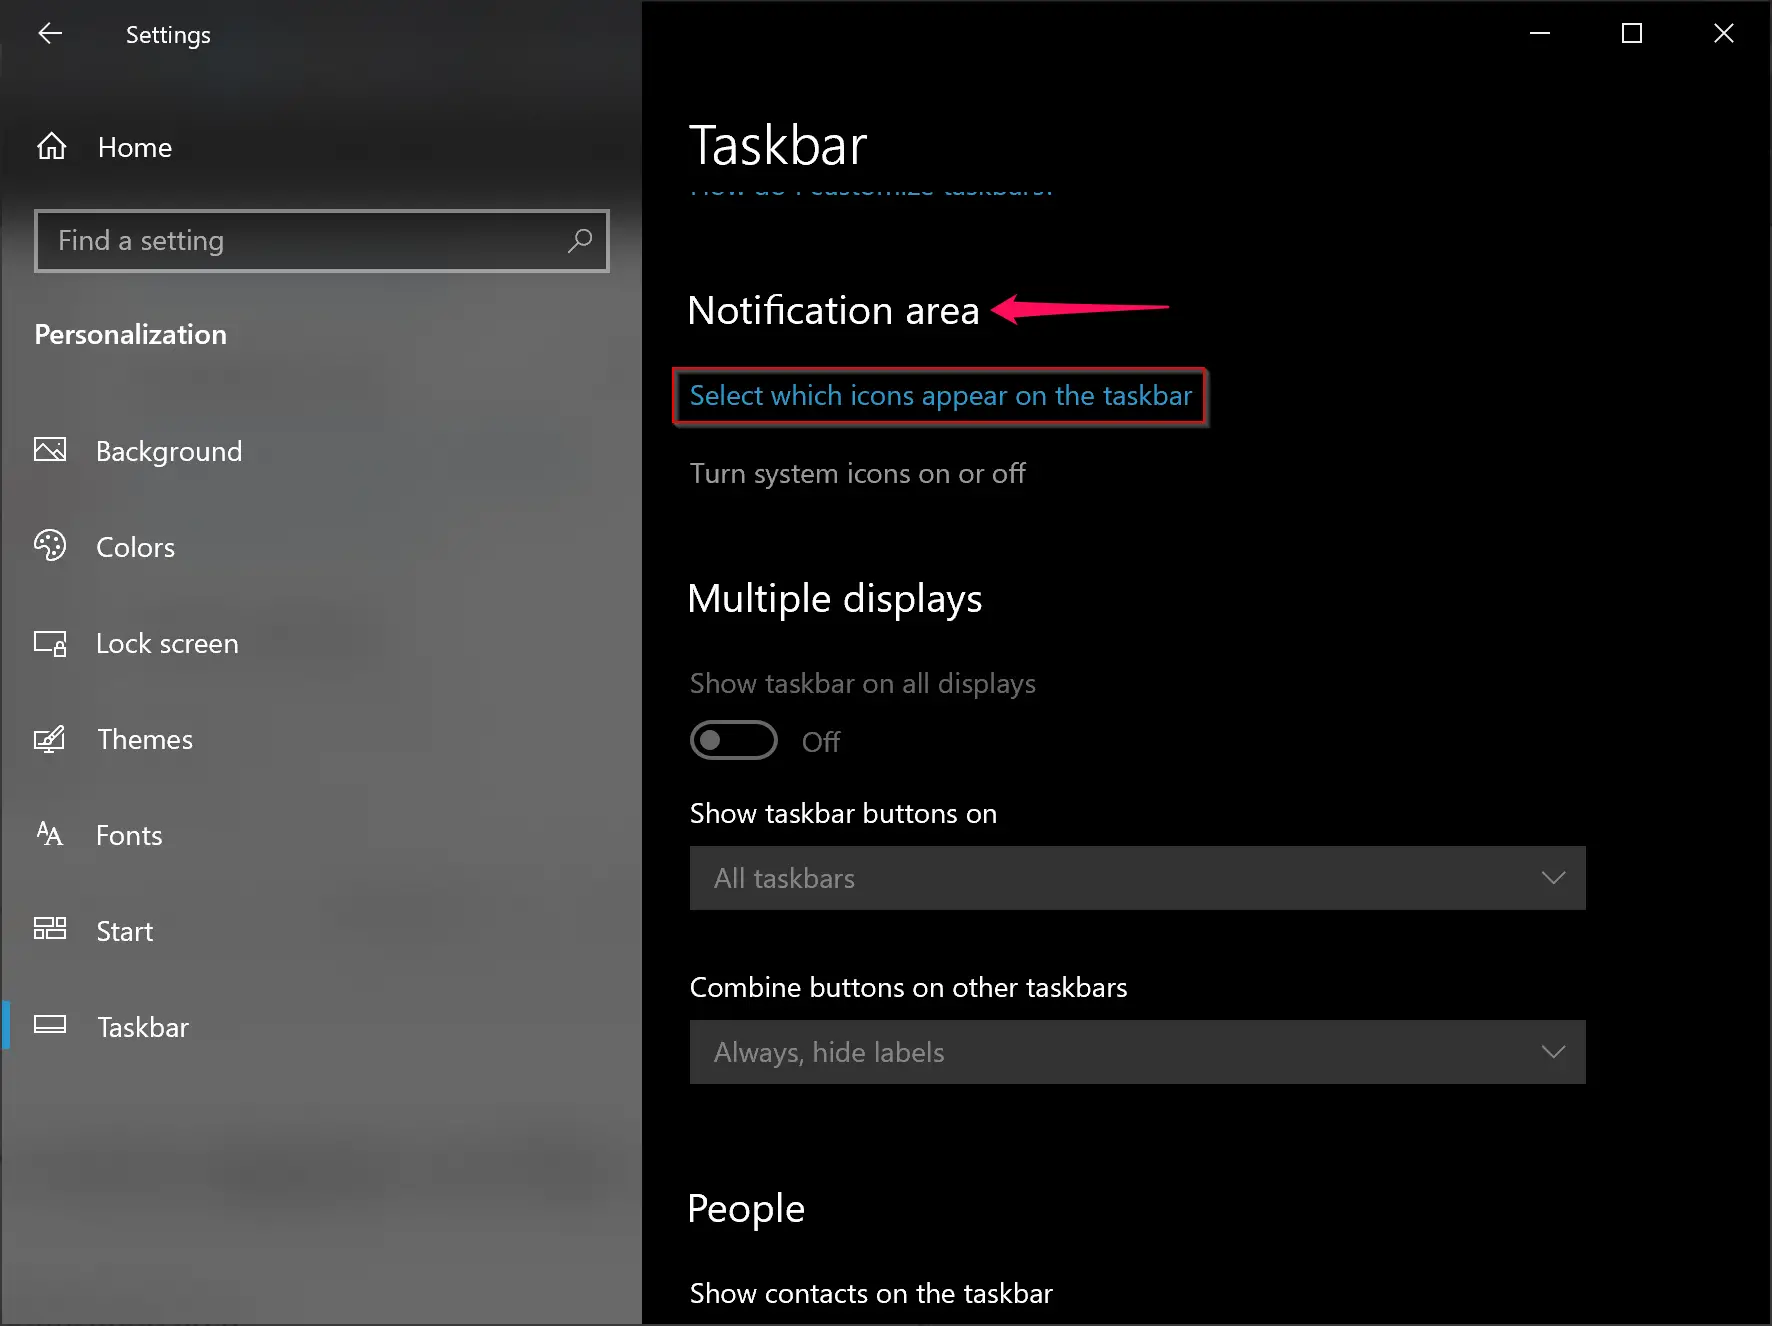
Step 5. Then click the link Select which icons appear on the taskbar.
Step 6. On the next window, turn the toggle On beside the “Network” option.
![]()
Step 7. If the Network option is missing in the above step, click the left-facing arrow to go back to the previous settings.
![]()
Step 8. Then click the link Turn system icons on or off under the “Notification area” section.
![]()
Step 9. Here, turn On the toggle switch beside the Network option.
![]()
Enable Network Icon in Group Policy
This method applies only to Windows 10 Pro and Enterprise editions. If you are using Windows 10 Home edition, then first you need to enable gpedit.msc.
Step 1. Open Local Group Policy Editor.
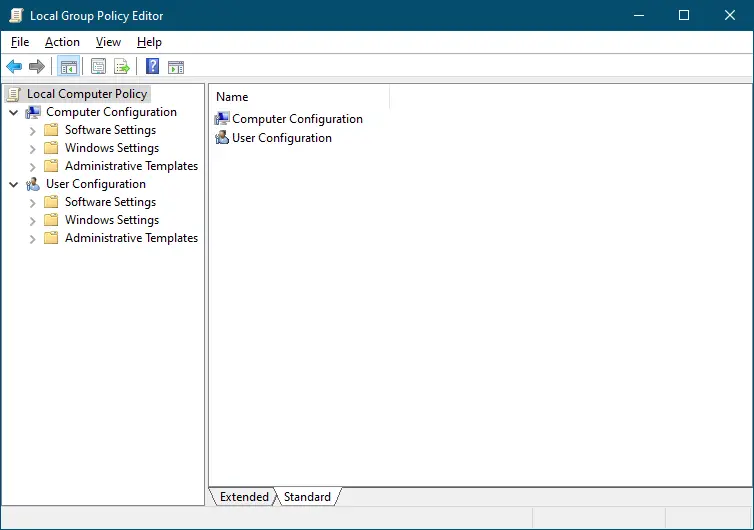
Step 2. When Local Group Policy Editor opens, navigate to the following path from the left sidebar:-
User Configuration > Administrative Templates > Start Menu and Taskbar

Step 3. On the right side pane of the “Start Menu and Taskbar” folder, look for the policy name, “Remove the networking icon.” Then double-click on it to open its settings.
![]()
Step 4. Select the Disabled option.
Step 5. Click the Apply and then the OK button.
If none of the above methods restores the Wi-Fi icon on the taskbar, then try to uninstall and reinstall the drivers. For the latest drivers, you can approach the manufacturer’s website.
Conclusion
In conclusion, the Wi-Fi or wireless icon is an essential feature in Windows 10 that shows the internet connection status. If you encounter a missing Wi-Fi icon on the taskbar, you can try several methods to restore it. Firstly, check if the icon is hidden on the taskbar by clicking on the upward arrow icon. If not, you can enable the network or wireless icon in the Settings app by following the provided steps. Additionally, if you have Windows 10 Pro or Enterprise Edition, you can use the Group Policy Editor to enable the network icon. If none of the above methods work, you can try uninstalling and reinstalling the drivers. By following these steps, you can restore the Wi-Fi icon and check your internet connection status with ease.