Apple’s latest stable operating system is macOS Big Sur, but the company is preparing to release macOS Monterey for Mac. The announcement was made at the WWDC keynote, where iOS, iPadOS, and watchOS were also showcased. When it launches, macOS Monterey will replace macOS Big Sur and introduce a new look and design with curved edges and new box settings.
Developers were able to access the first beta of macOS Monterey (macOS 12) on June 9, 2021. The final version of macOS Monterey is expected to be released in the fall, but the exact date is still unknown. Meanwhile, Microsoft is scheduled to launch Windows 11 on October 5, 2021. If you’re eager to try out Windows 11 before its official release, you can install it on a virtual machine.
macOS Monterey Compatible Devices
According to Apple, here is a list of Macs that are compatible with macOS Monterey:-
- 2015 and later MacBook
- Early 2015 and later MacBook Air
- Early 2015 and later MacBook Pro
- Late 2014 and later Mac mini
- Late 2015 and later iMac
- 2017 and later iMac Pro
- Late 2013 and later Mac Pro
Requirements to Install macOS Monterey on Windows 11/10
The following files you need to download:-
- VirtualBox for Windows
- macOS Monterey (macOS 12) ISO Image (Monterey is still in the Beta stage. When the final version is released, we will change the link.)
- VirtualBox Extension Pack
How to Install macOS Monterey on VirtualBox?
When downloading of the above-required files is completed, do the following:-
Step 1. First, install VirtualBox and then its extension pack.
Step 2. Now launch VirtualBox by double-clicking on its shortcut icon on the desktop.
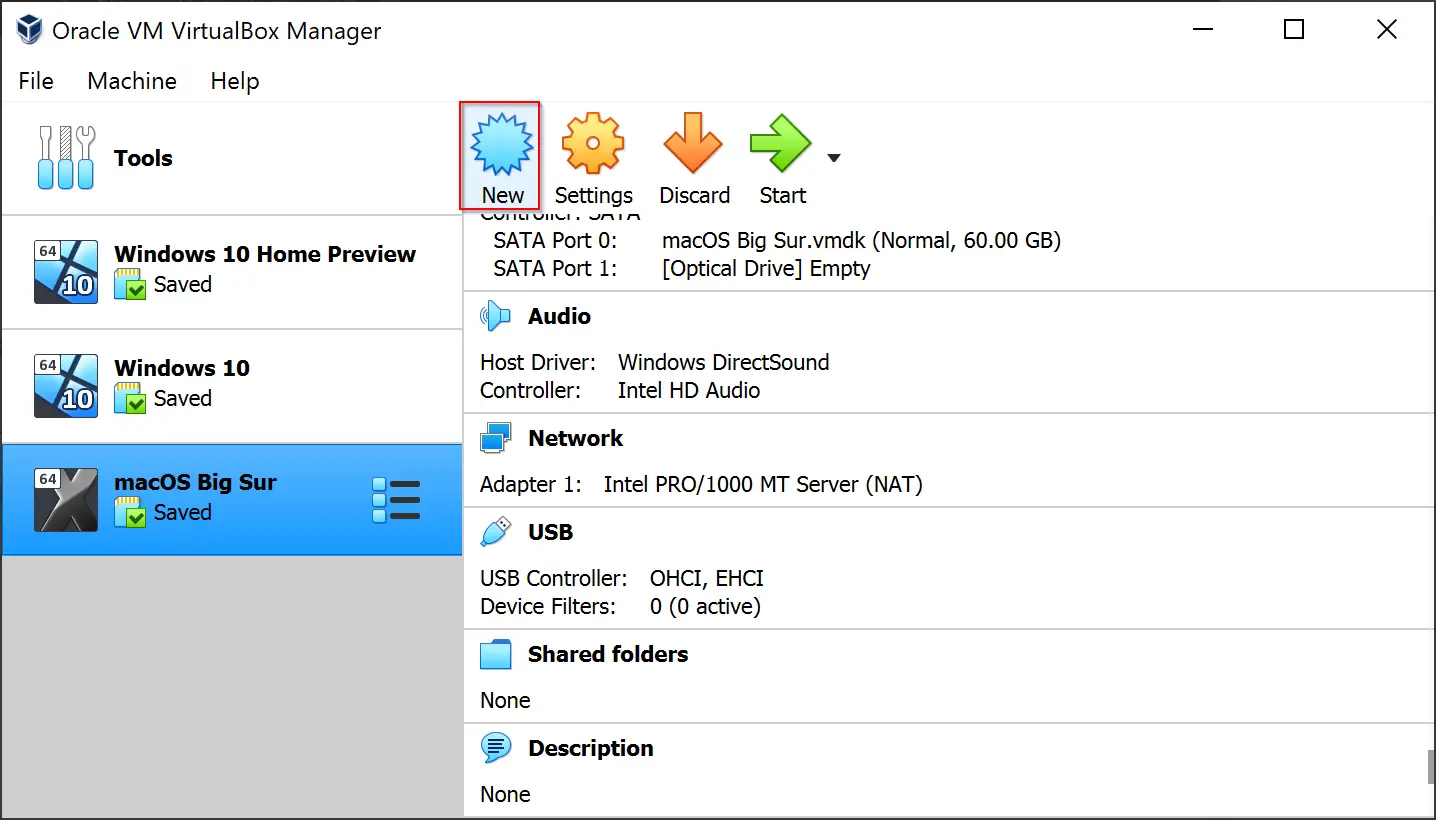
Step 3. Click New.
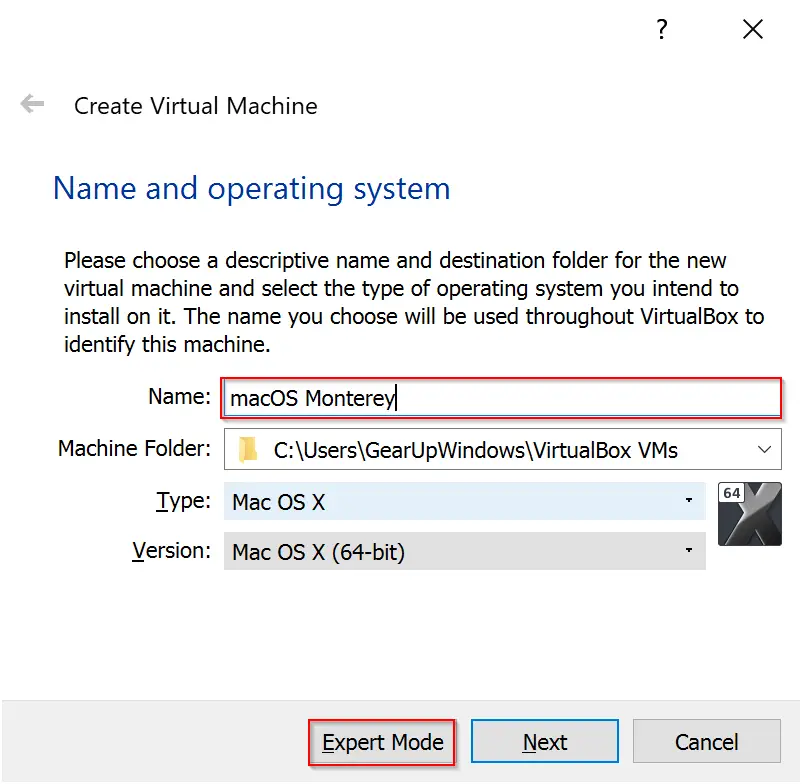
Step 4. Type the name as macOS Monterey and then click the Expert Mode button.
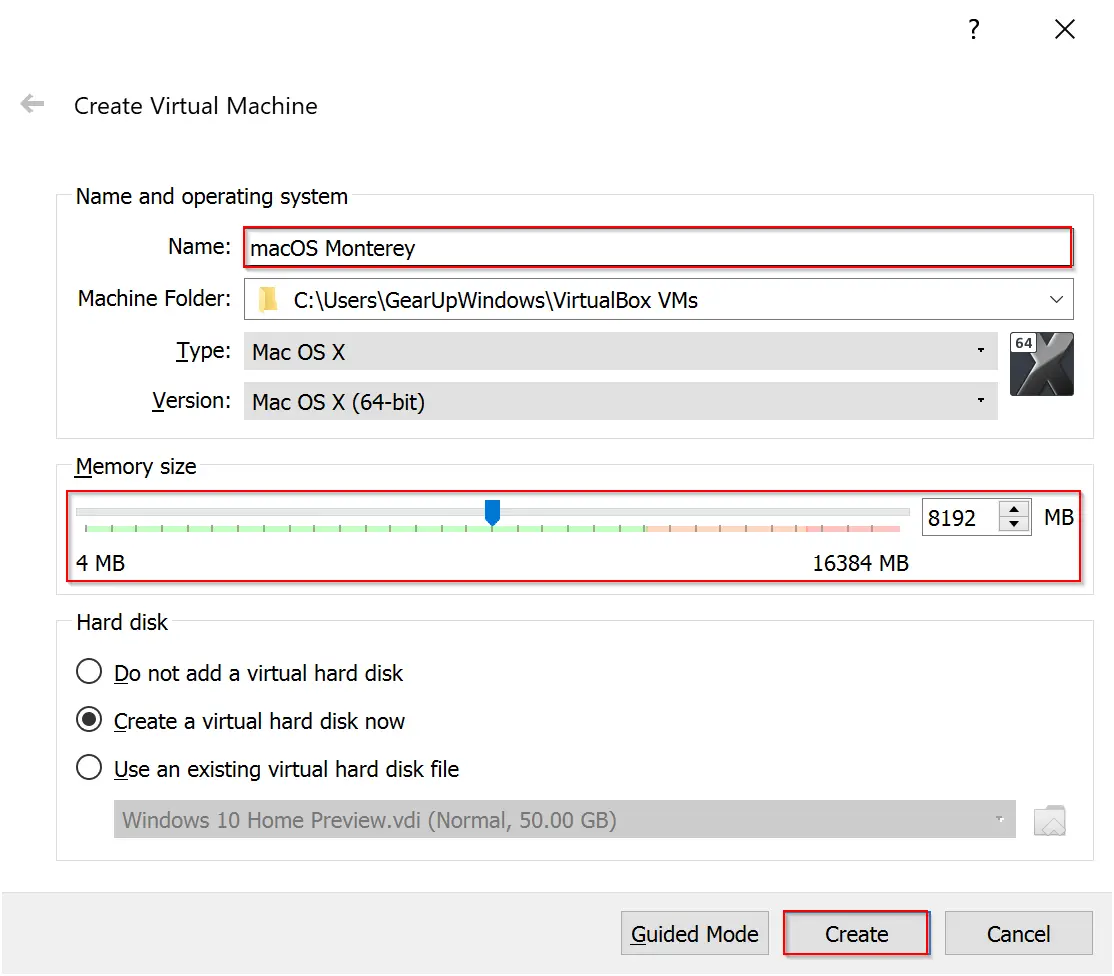
Step 5. Name the operating system as macOS Monterey and then use the slider to increase the memory size. It is recommended to provide at least 50% of physical RAM for smooth functioning. Then click the Create button.
Step 6. In the next window, increase the file size to at least 40GB. For that, you can use the slider of File size. Leave other fields blank if you have no advanced knowledge, and then click the Create button.

Step 7. While macOS Monterey is selected on the left sidebar, click Settings on the VirtualBox Manager window.

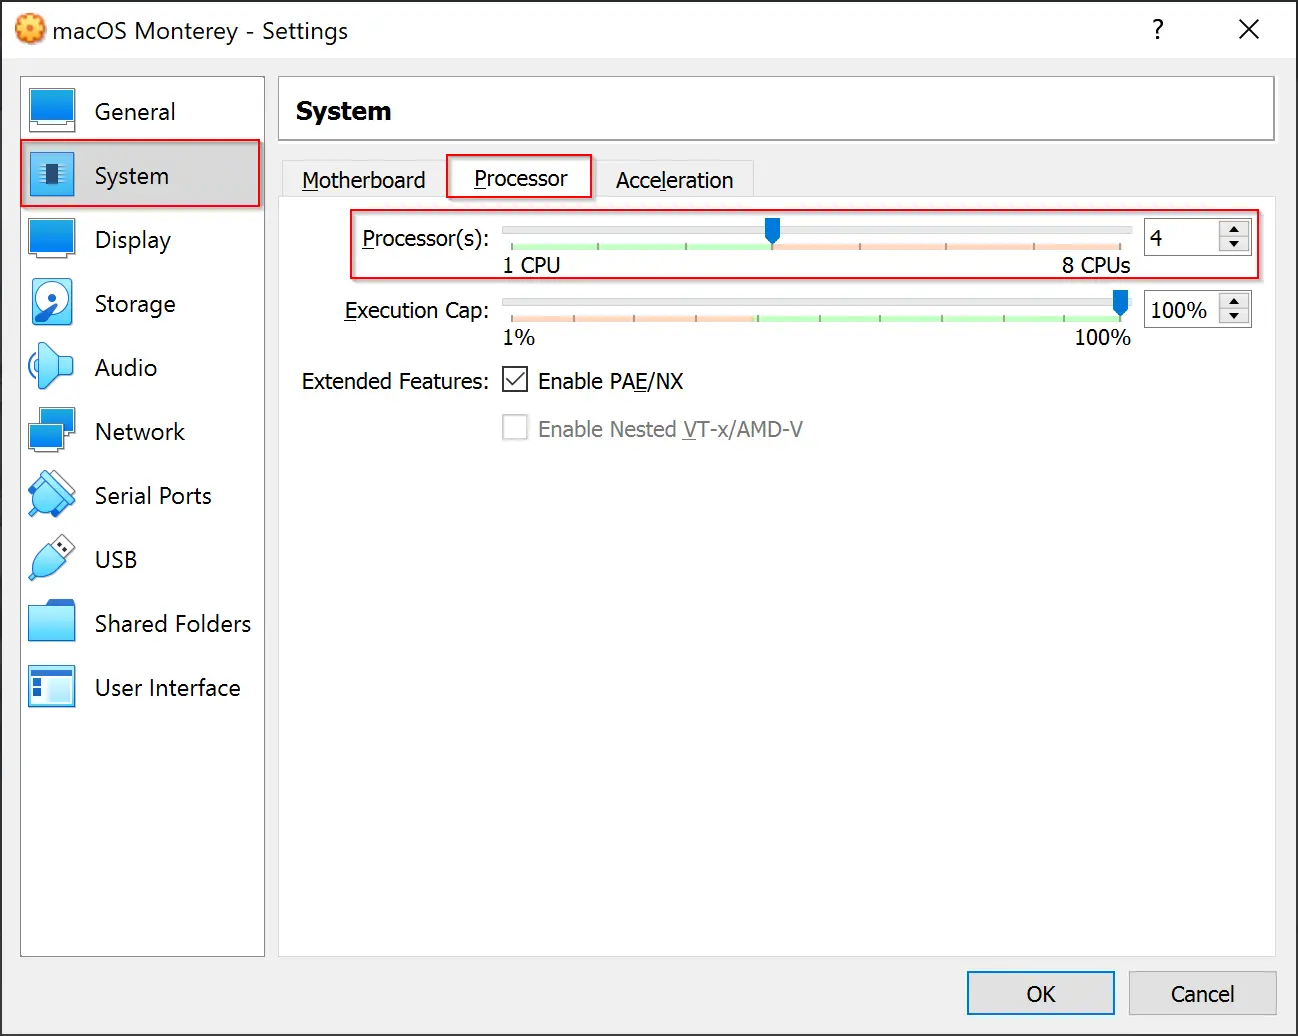
Step 8. Now, select the System category under the Settings window to configure it more. Navigate to the Processor tab and then use the slider to adjust the Processor allocation. Again, it is recommended to allocate half of your Processor’s core count for the virtual machine.
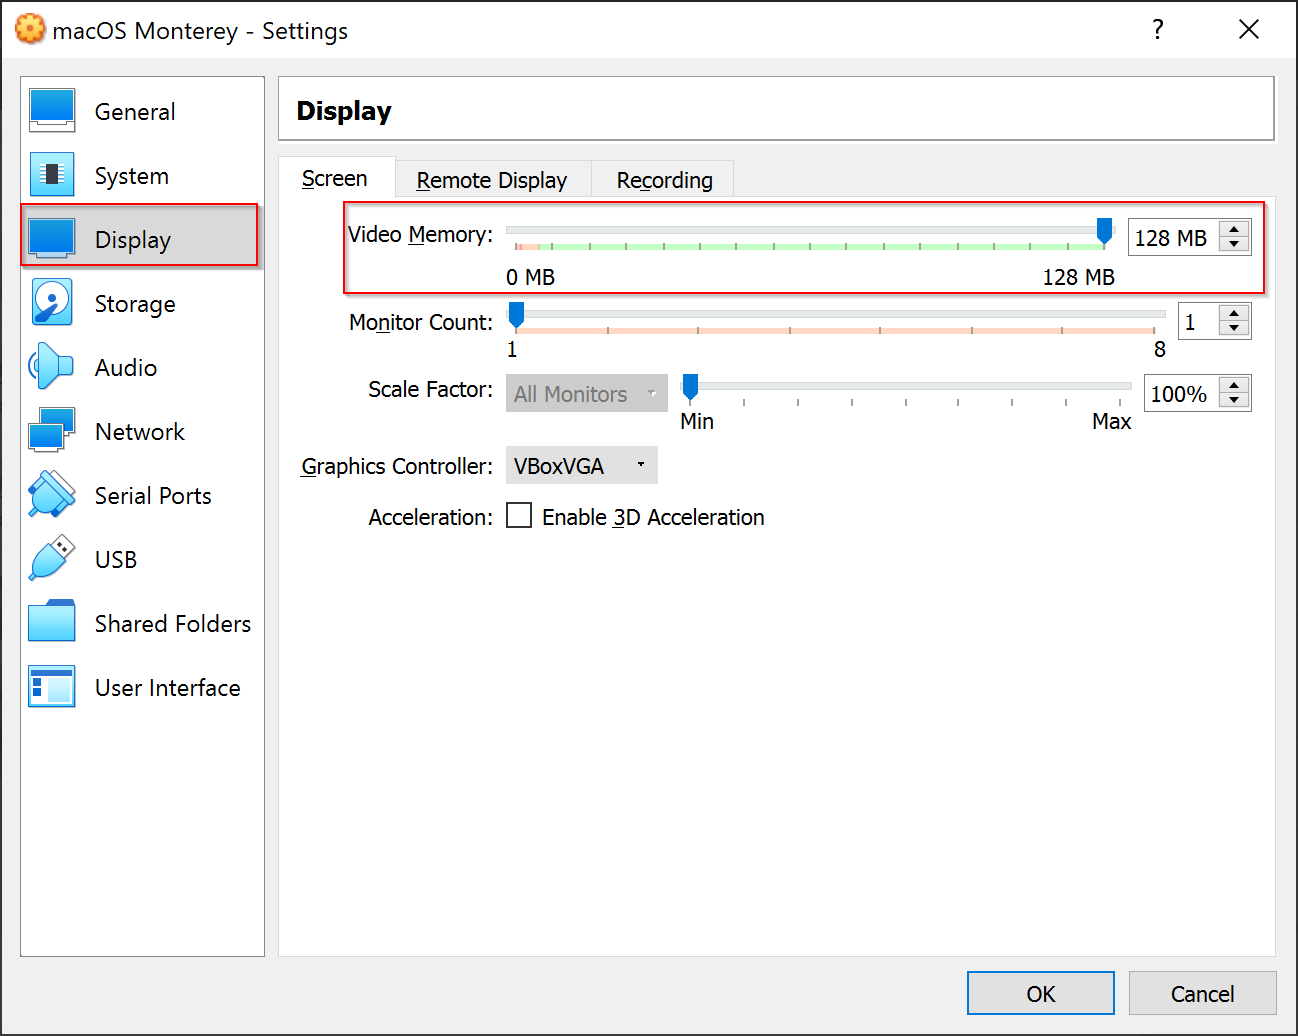
Step 9. Further, select the Display category and then move the slider under the “Screen” tab of “Video Memory.”
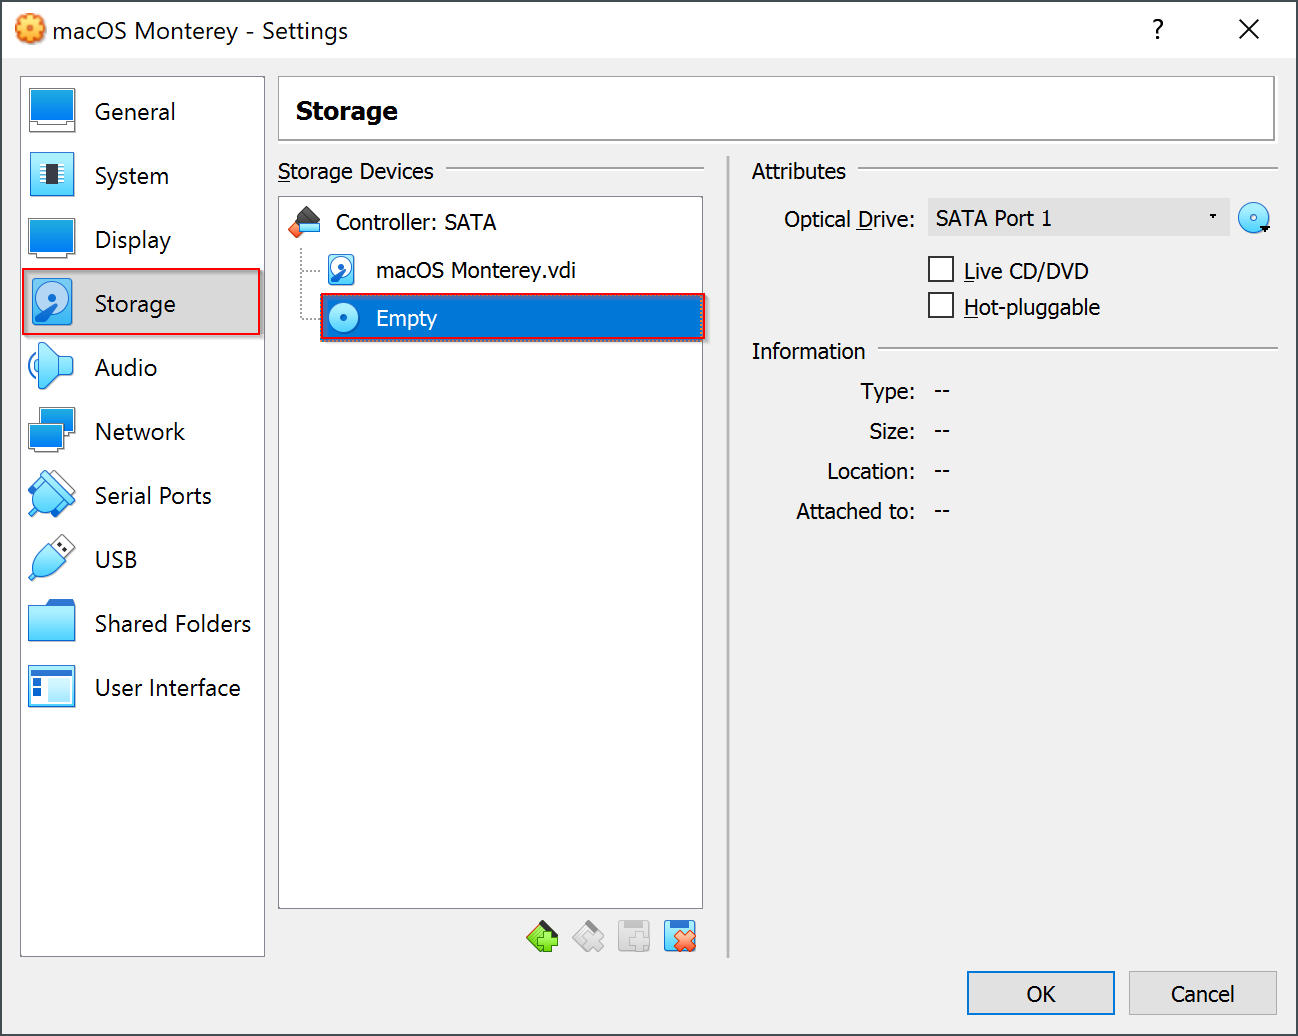
Step 10. Now that you have provided the resources to run macOS on a virtual machine, you need to locate the ISO file of macOS Monterey that you have already downloaded. For that, select the Storage category and then click the Empty option under Storage Devices section.
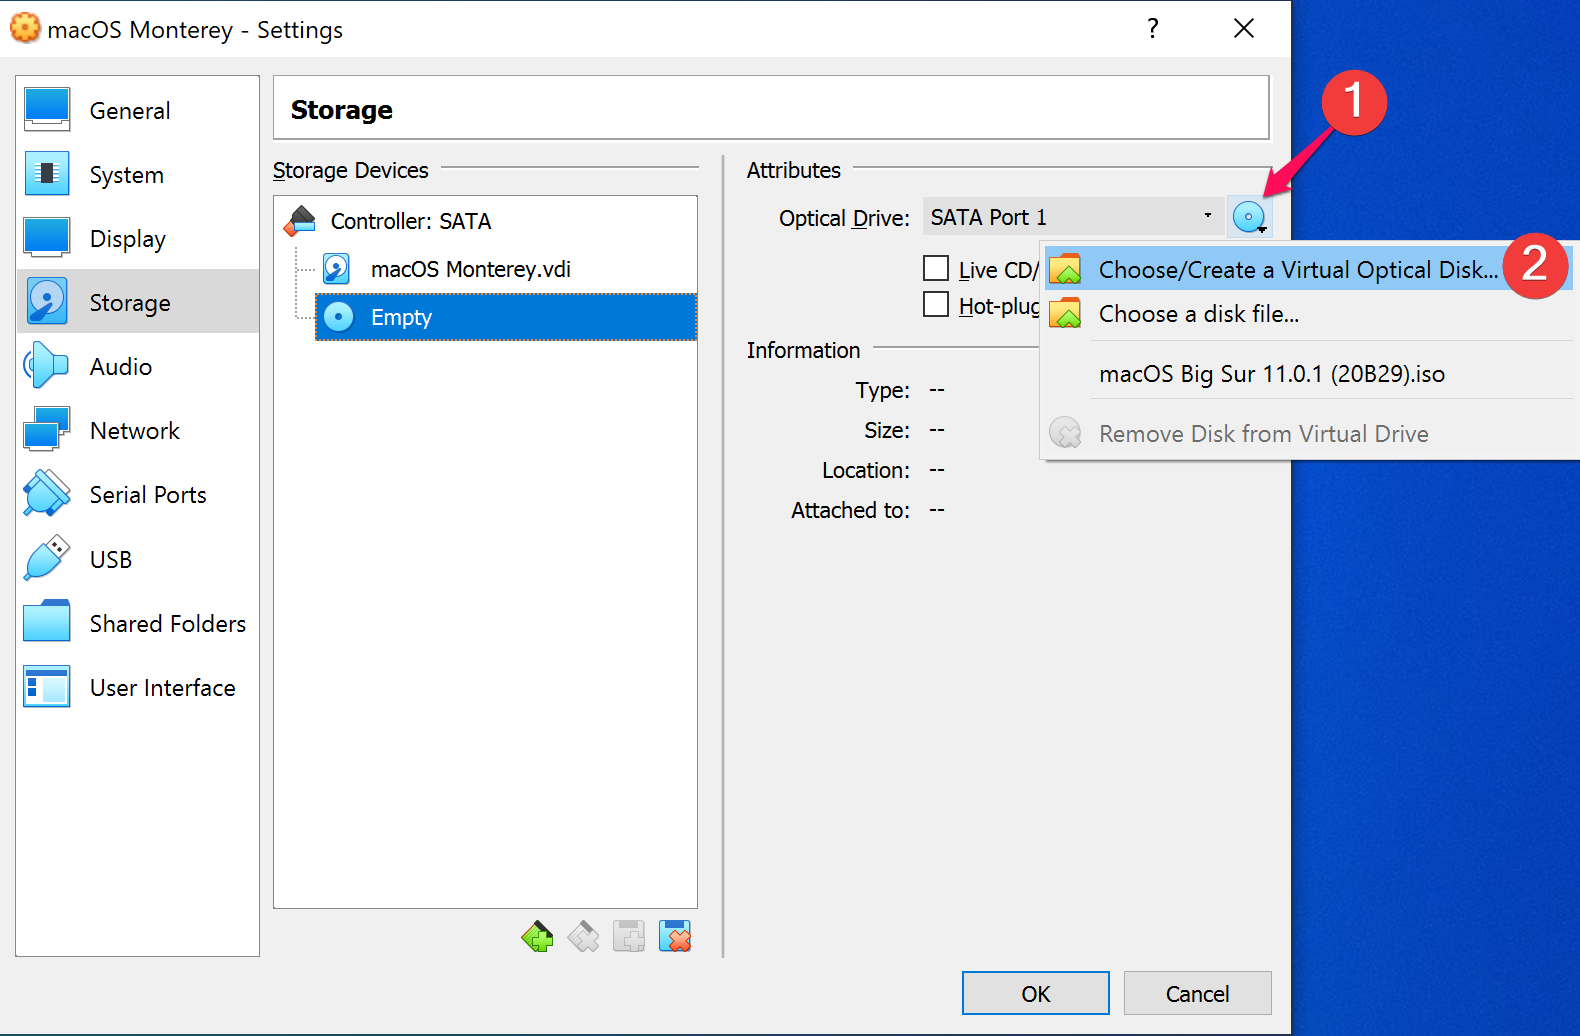
Step 11. Click the optical disk icon on the top right corner and choose “Choose/Create a Virtual Optical Disk” from the dropdown menu.
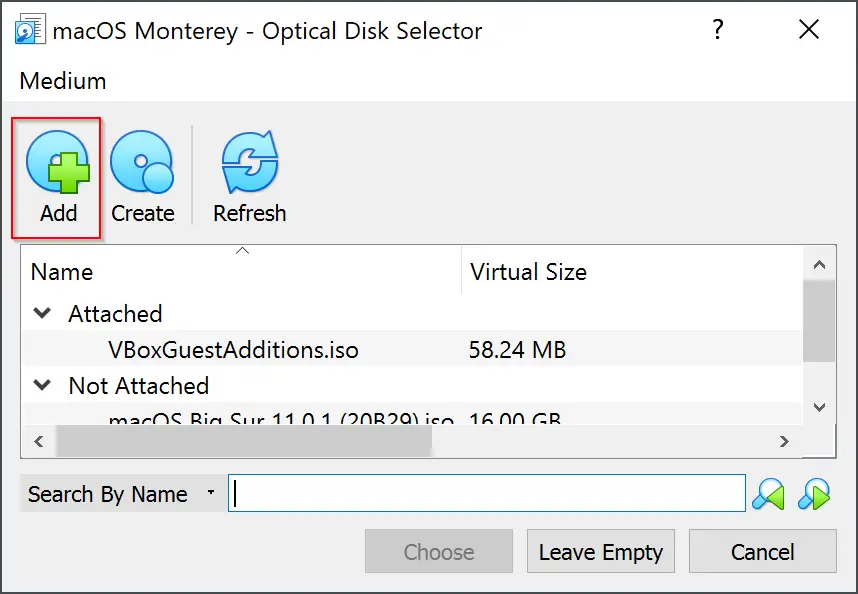
Step 12. On the pop-up window that appears, click the Add button.
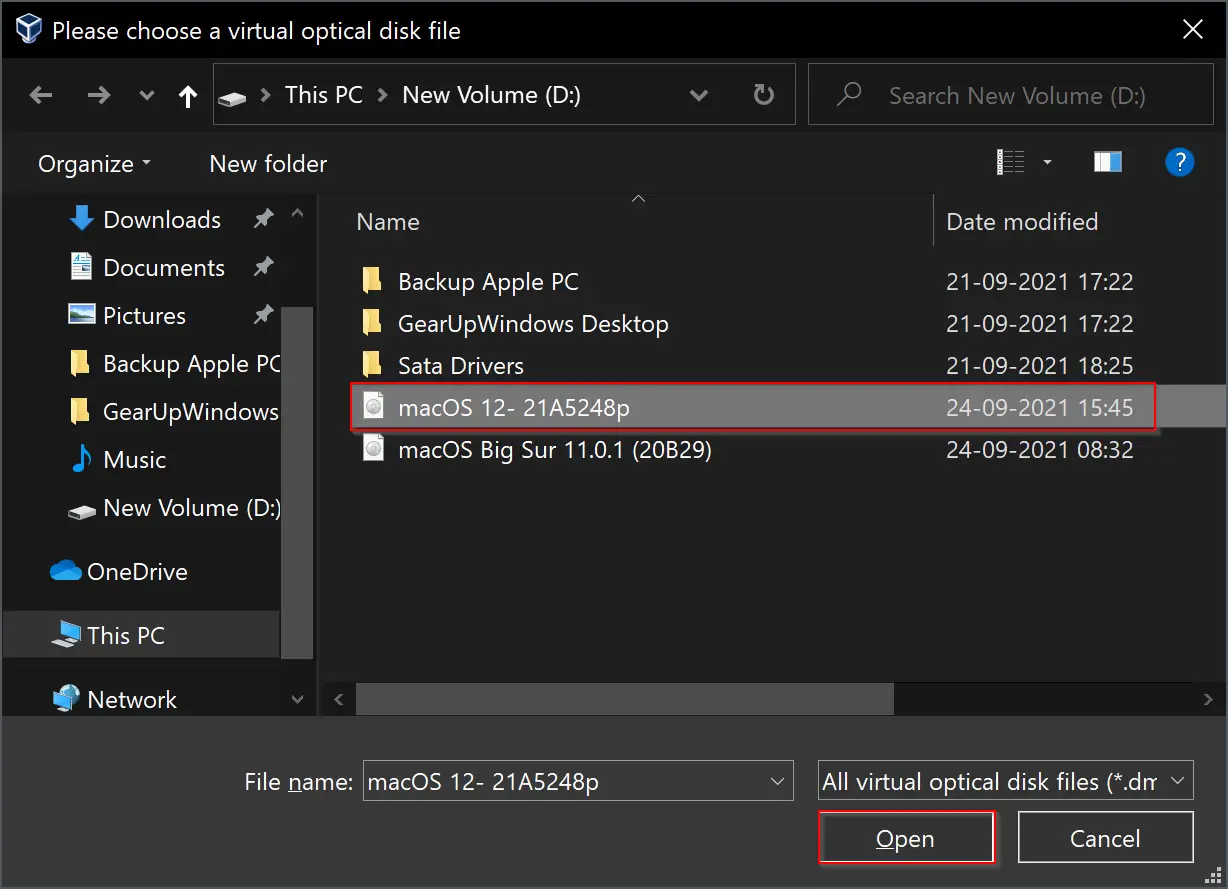
Step 13. Select the macOS Monterey ISO file when File Explorer opens and click the Open button.
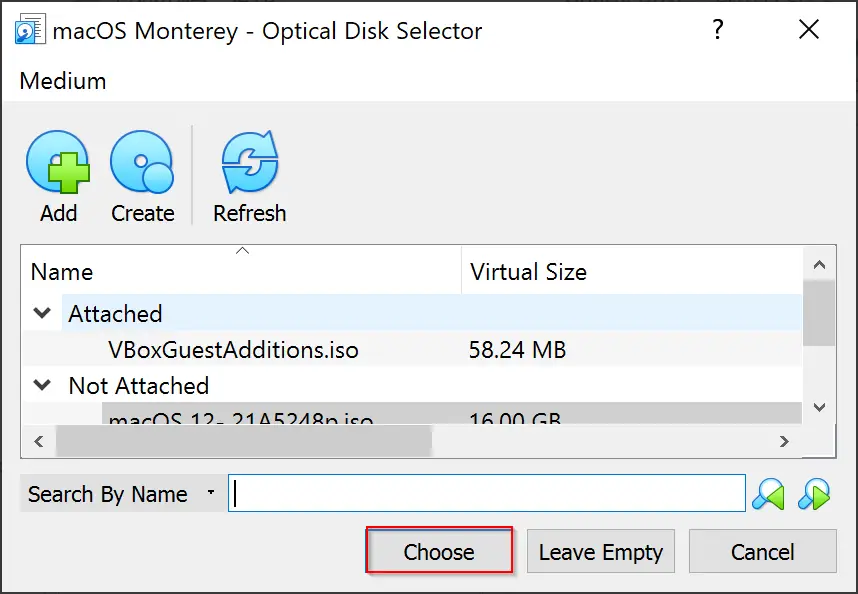
Step 14. Click the Choose button now.
Step 15. Click OK to exit from the Settings window.

Step 16. Close the VirtualBox window now. You need to run a few commands on your Windows PC. For that, open Command Prompt with administrator privileges.
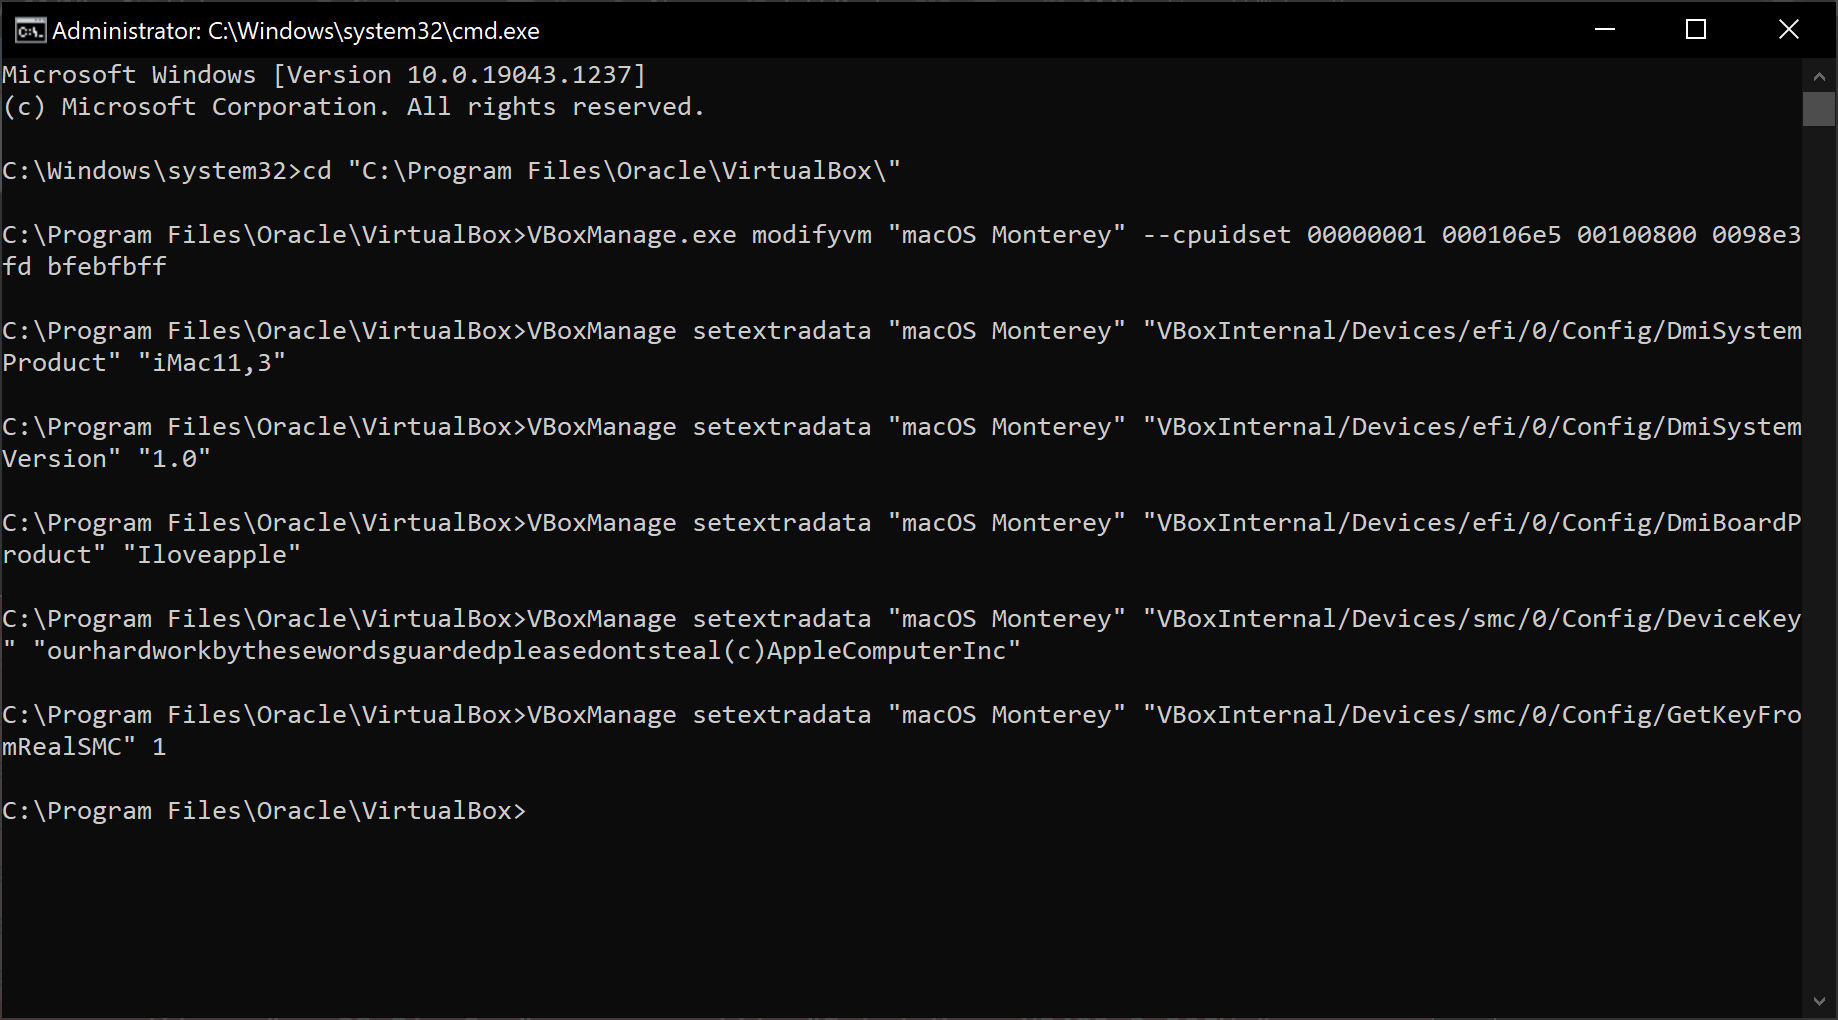
Step 17. When Command Prompt with elevated right opens, copy the following lines and paste them into the Command Prompt window. Then hit Enter from the keyboard:-
cd "C:\Program Files\Oracle\VirtualBox\"
VBoxManage.exe modifyvm "macOS Monterey" --cpuidset 00000001 000106e5 00100800 0098e3fd bfebfbff
VBoxManage setextradata "macOS Monterey" "VBoxInternal/Devices/efi/0/Config/DmiSystemProduct" "iMac11,3"
VBoxManage setextradata "macOS Monterey" "VBoxInternal/Devices/efi/0/Config/DmiSystemVersion" "1.0"
VBoxManage setextradata "macOS Monterey" "VBoxInternal/Devices/efi/0/Config/DmiBoardProduct" "Iloveapple"
VBoxManage setextradata "macOS Monterey" "VBoxInternal/Devices/smc/0/Config/DeviceKey" "ourhardworkbythesewordsguardedpleasedontsteal(c)AppleComputerInc"
VBoxManage setextradata "macOS Monterey" "VBoxInternal/Devices/smc/0/Config/GetKeyFromRealSMC" 1
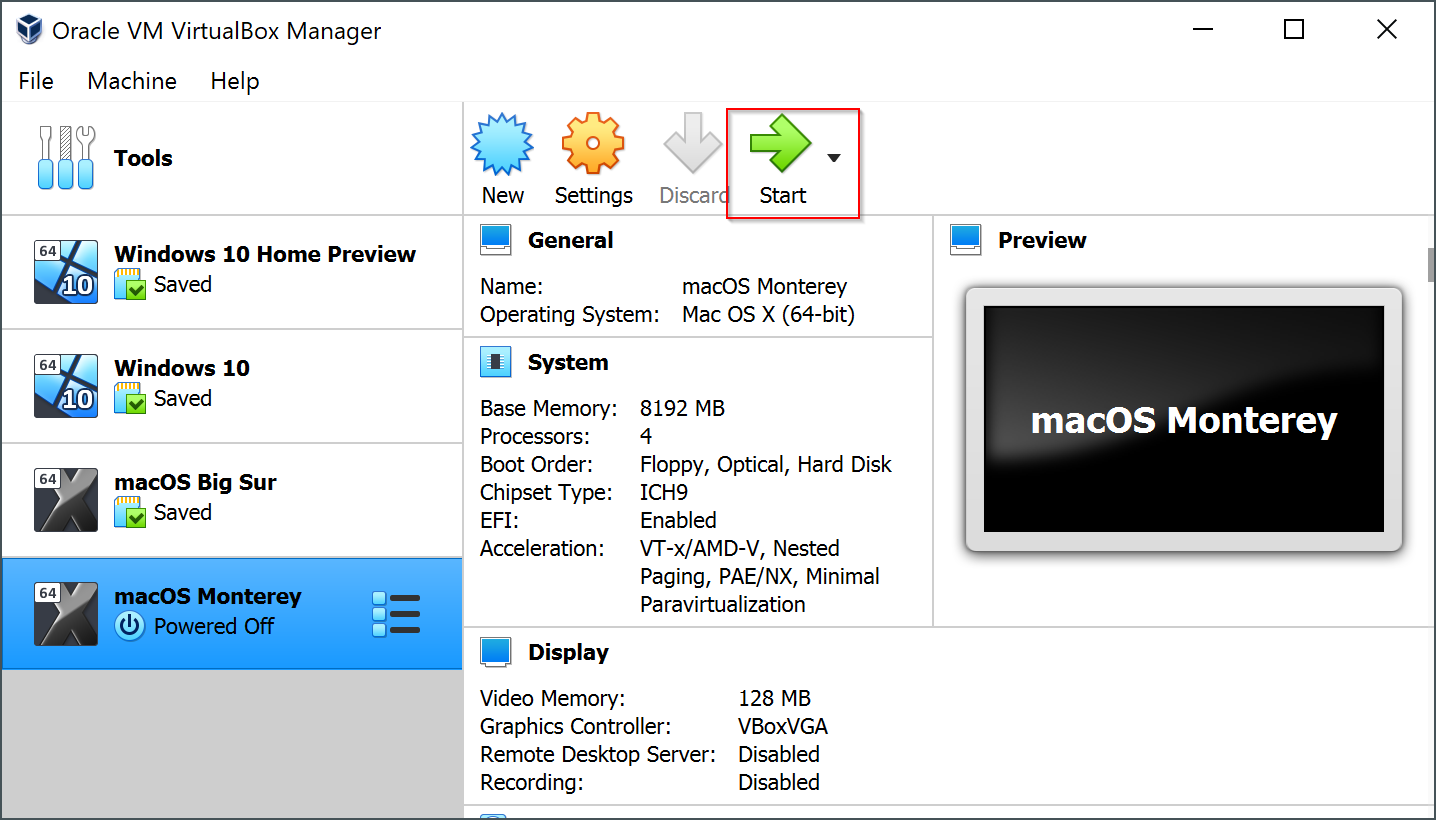
Step 18. When done, open the VirtualBox again. Launch the macOS Monterey system by clicking on the Start button.
Step 19. Select your language and then click the right arrow button at the bottom right of the screen.

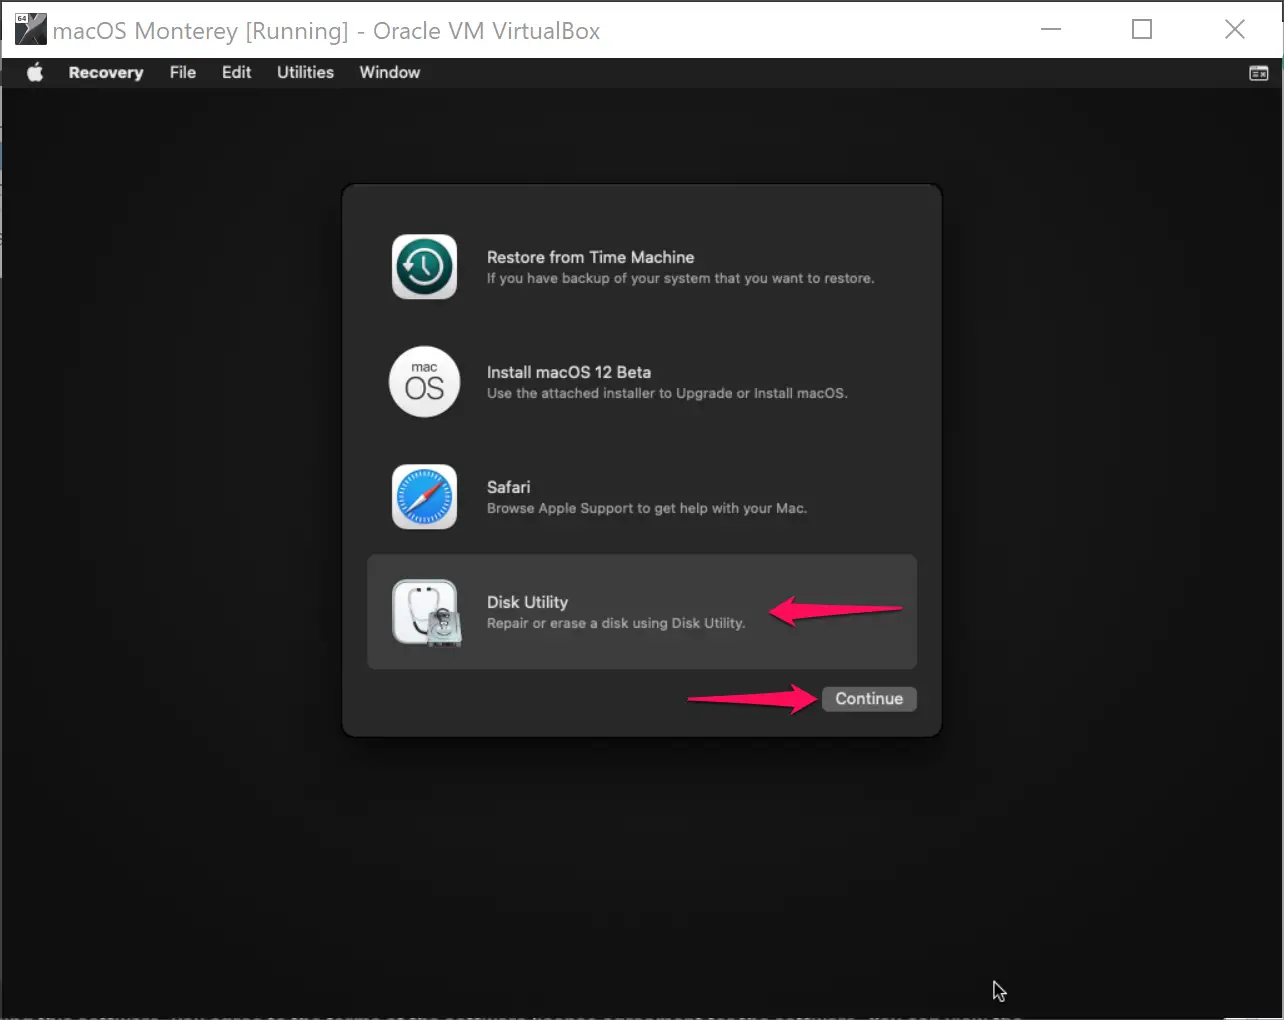
Step 20. Select Disk Utility from the available options and click Continue at the bottom of the screen.
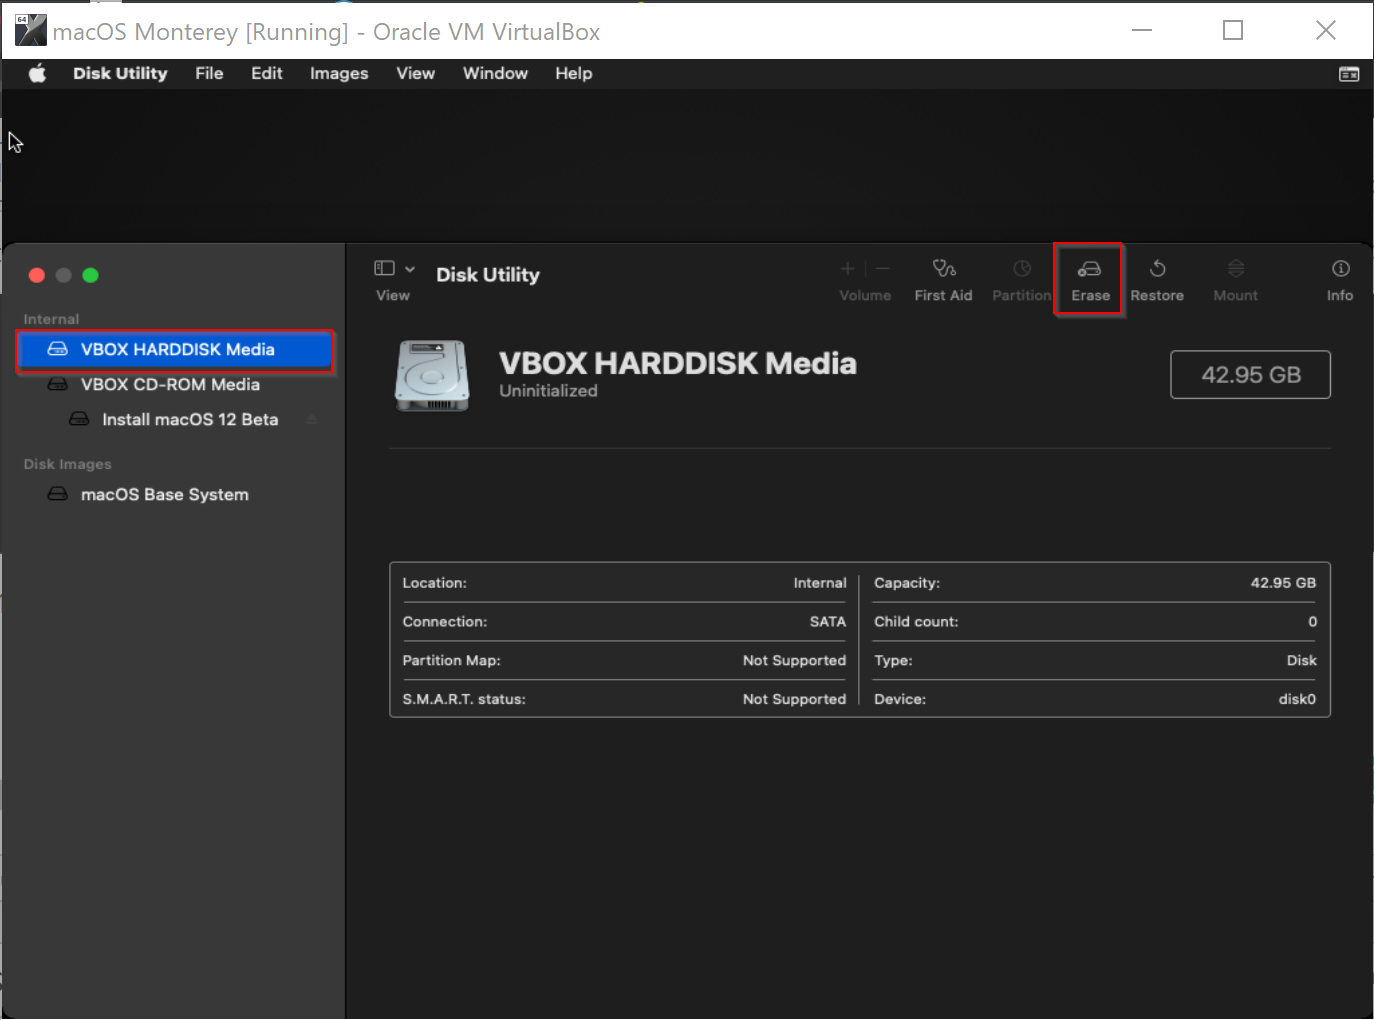
Step 21. Choose VBOX HARDDISK Media from the left sidebar and click the Erase button.
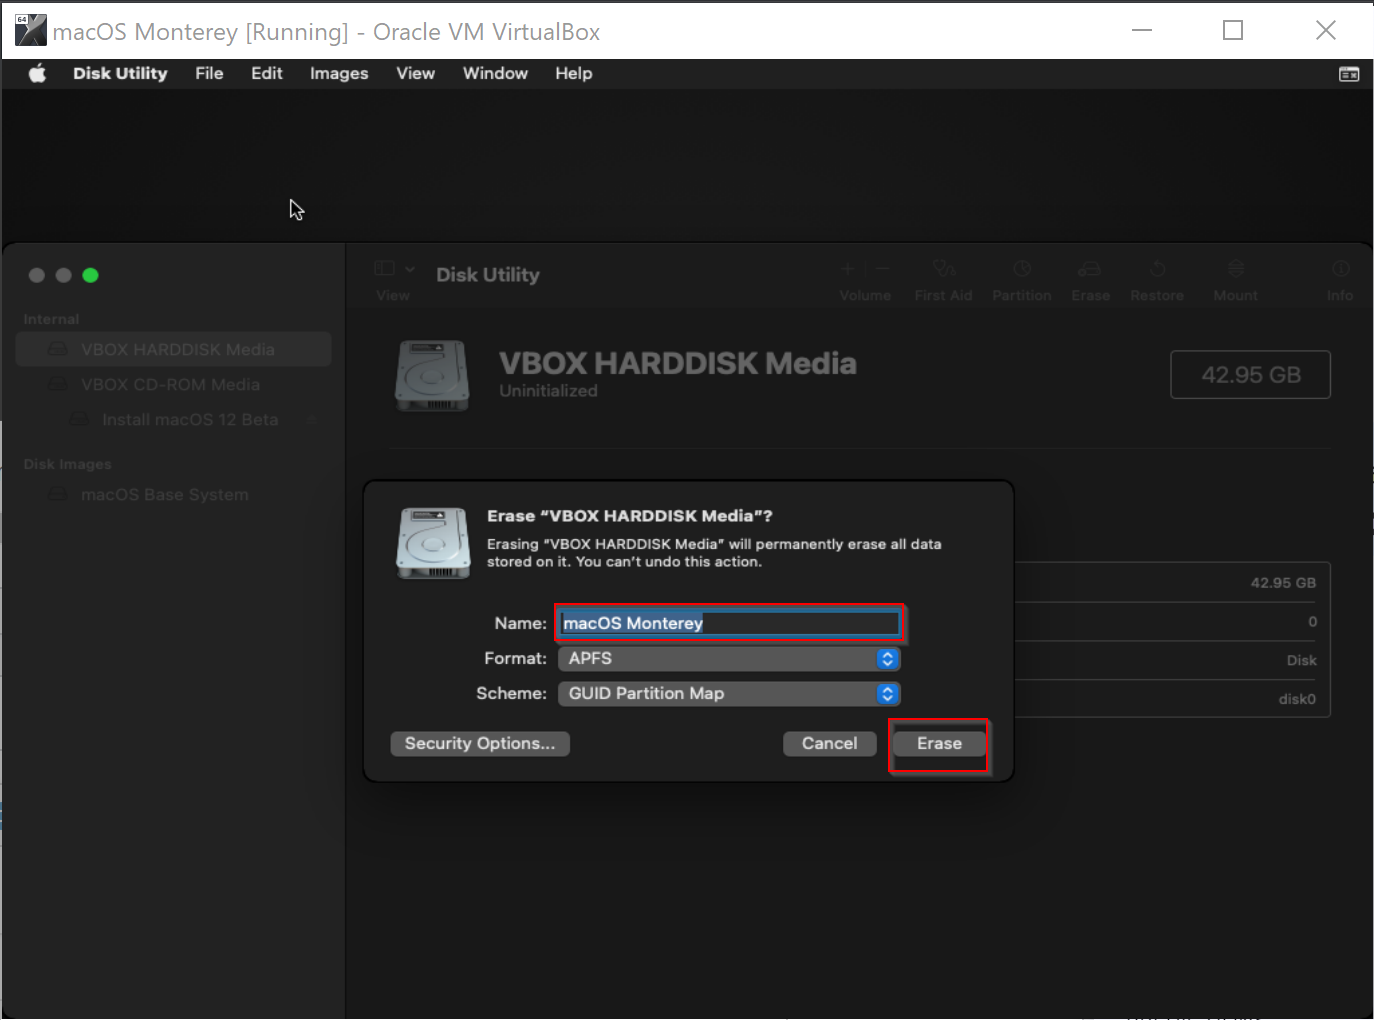
Step 22. Name the hard disk as macOS Monterey and then click the Erase button.
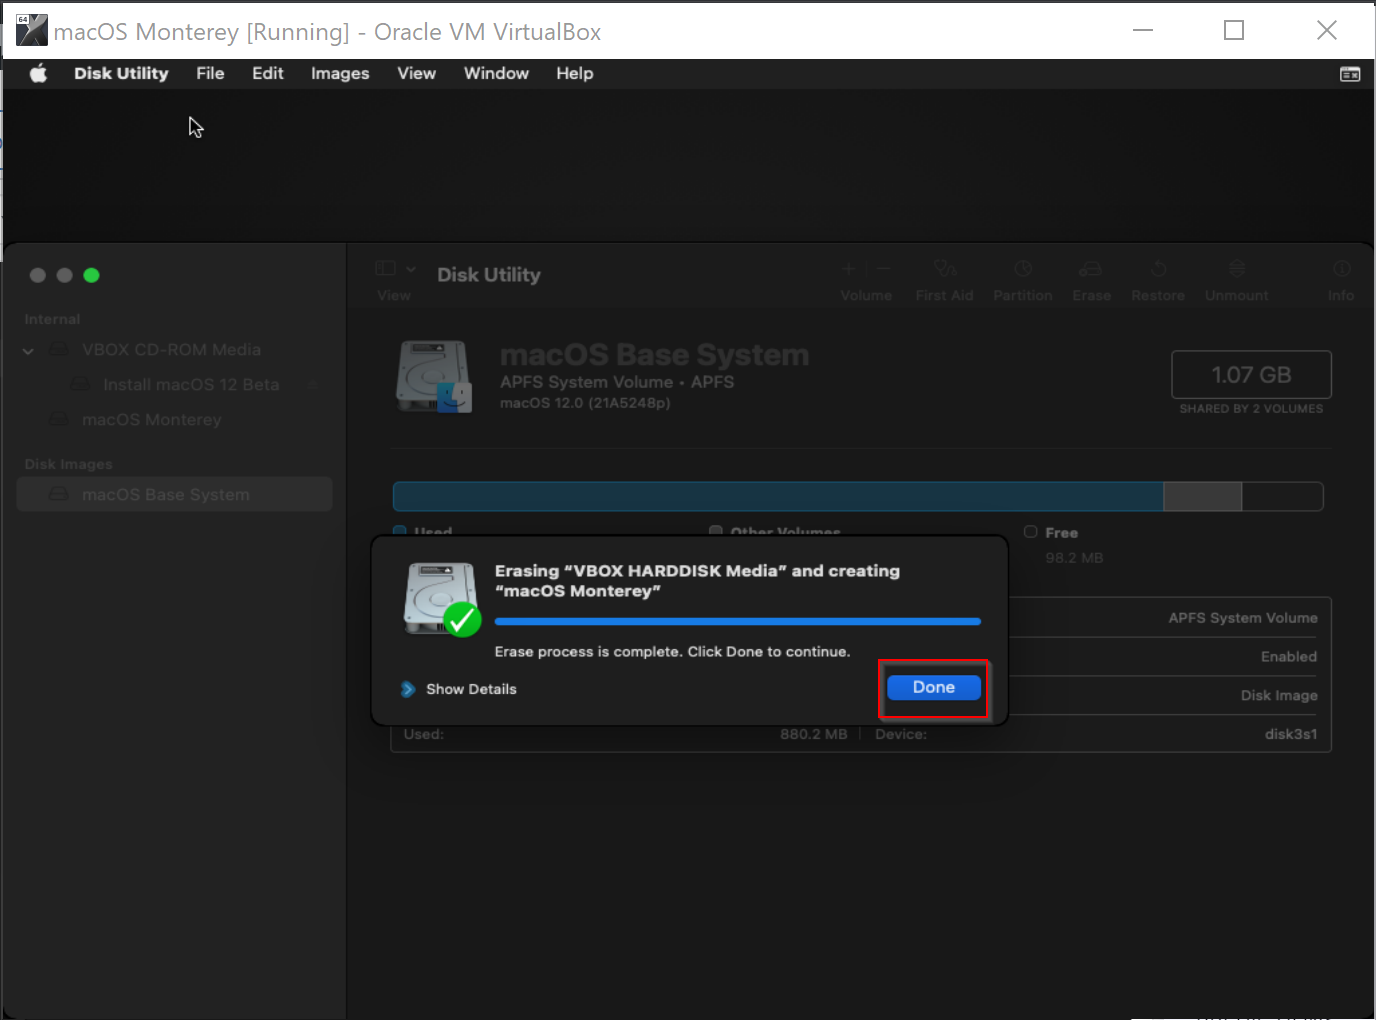
Step 23. Wait to format the hard disk. When completed, click the Done button.
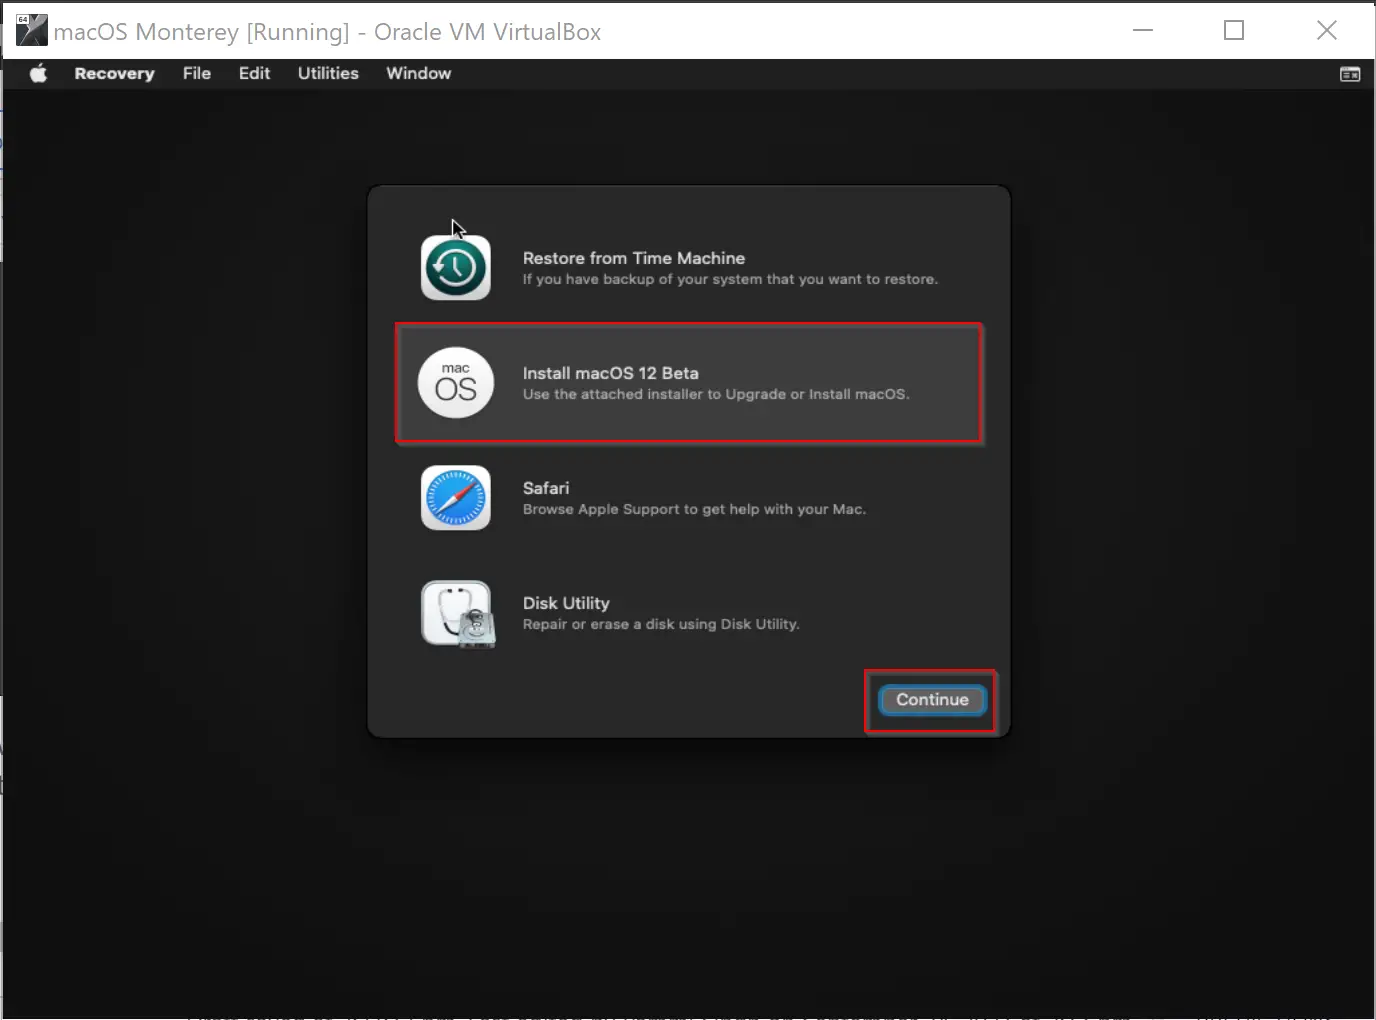
Step 24. Now that the Disk Utility task is completed, we will move toward the installation of macOS Monterey. For that, select Disk Utility on the menu and then choose the option Quit Disk Utility.

Step 25. On the upcoming window, select Install macOS 12 Beta. Then click the Continue button.
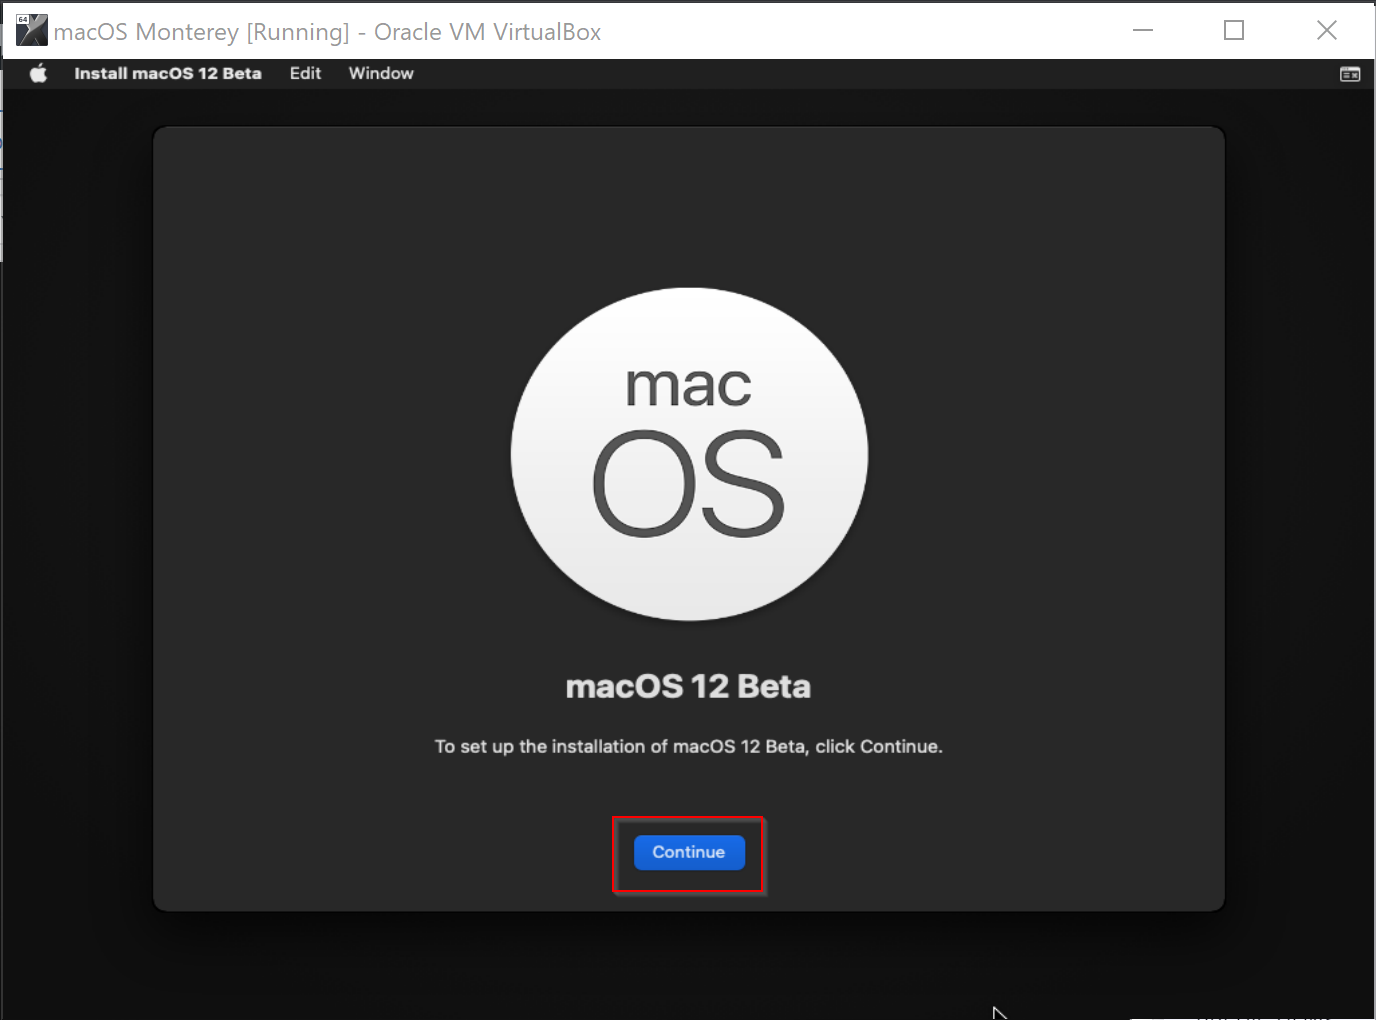
Step 26. Click Continue on the next window that appears.
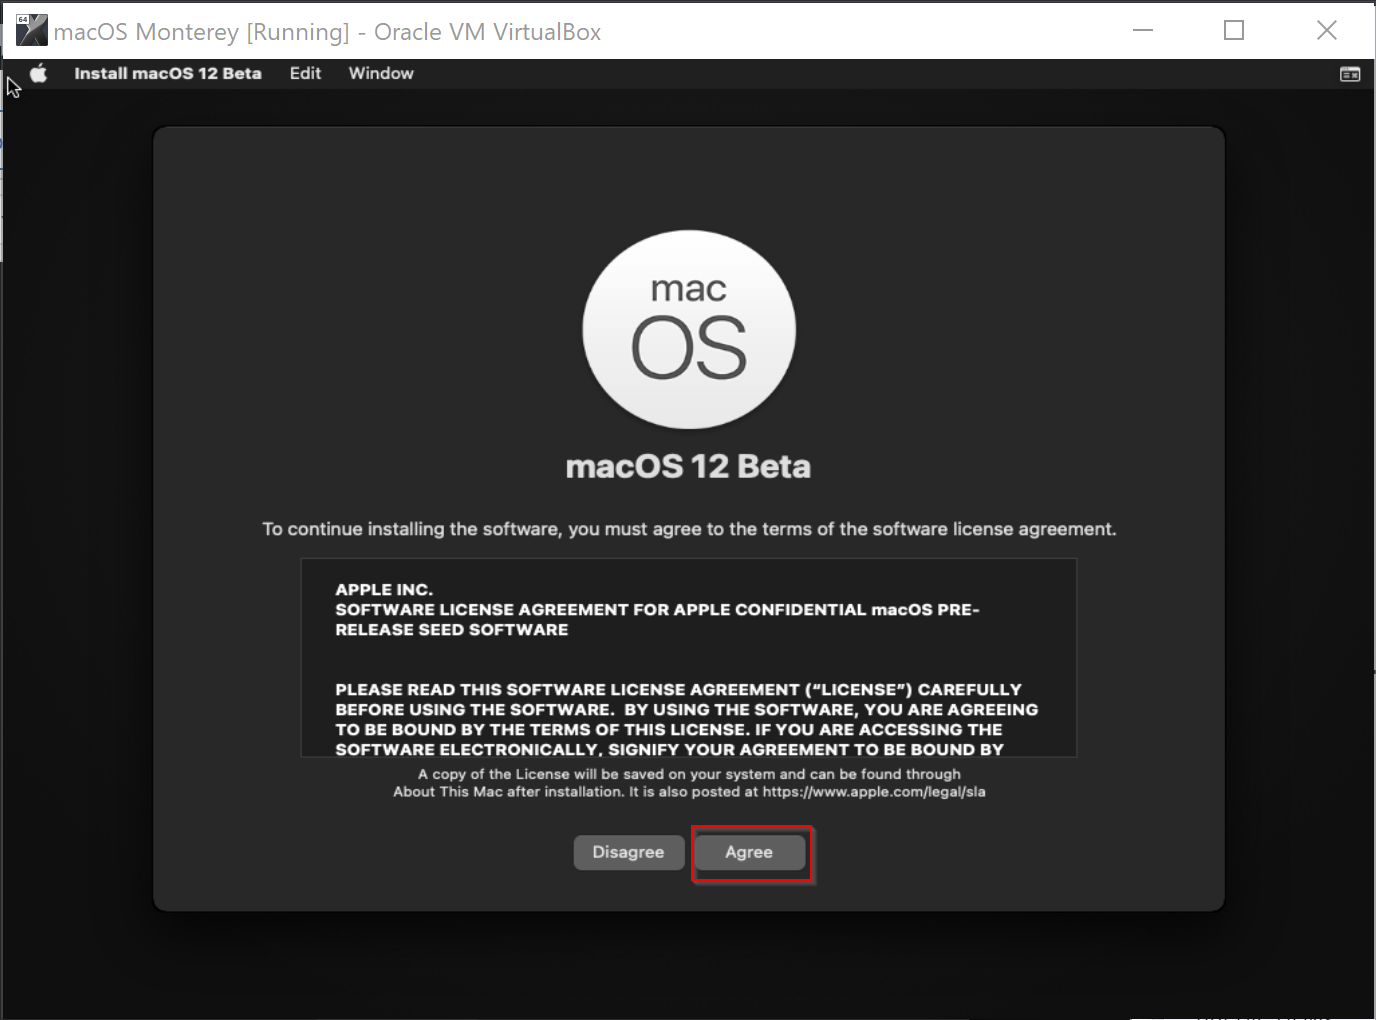
Step 27. On the license agreement window, click the Agree button.
Step 28. On the pop-up window, again click Agree.

Step 29. Select the virtual hard disk by clicking on its icon, and then press the Continue button.

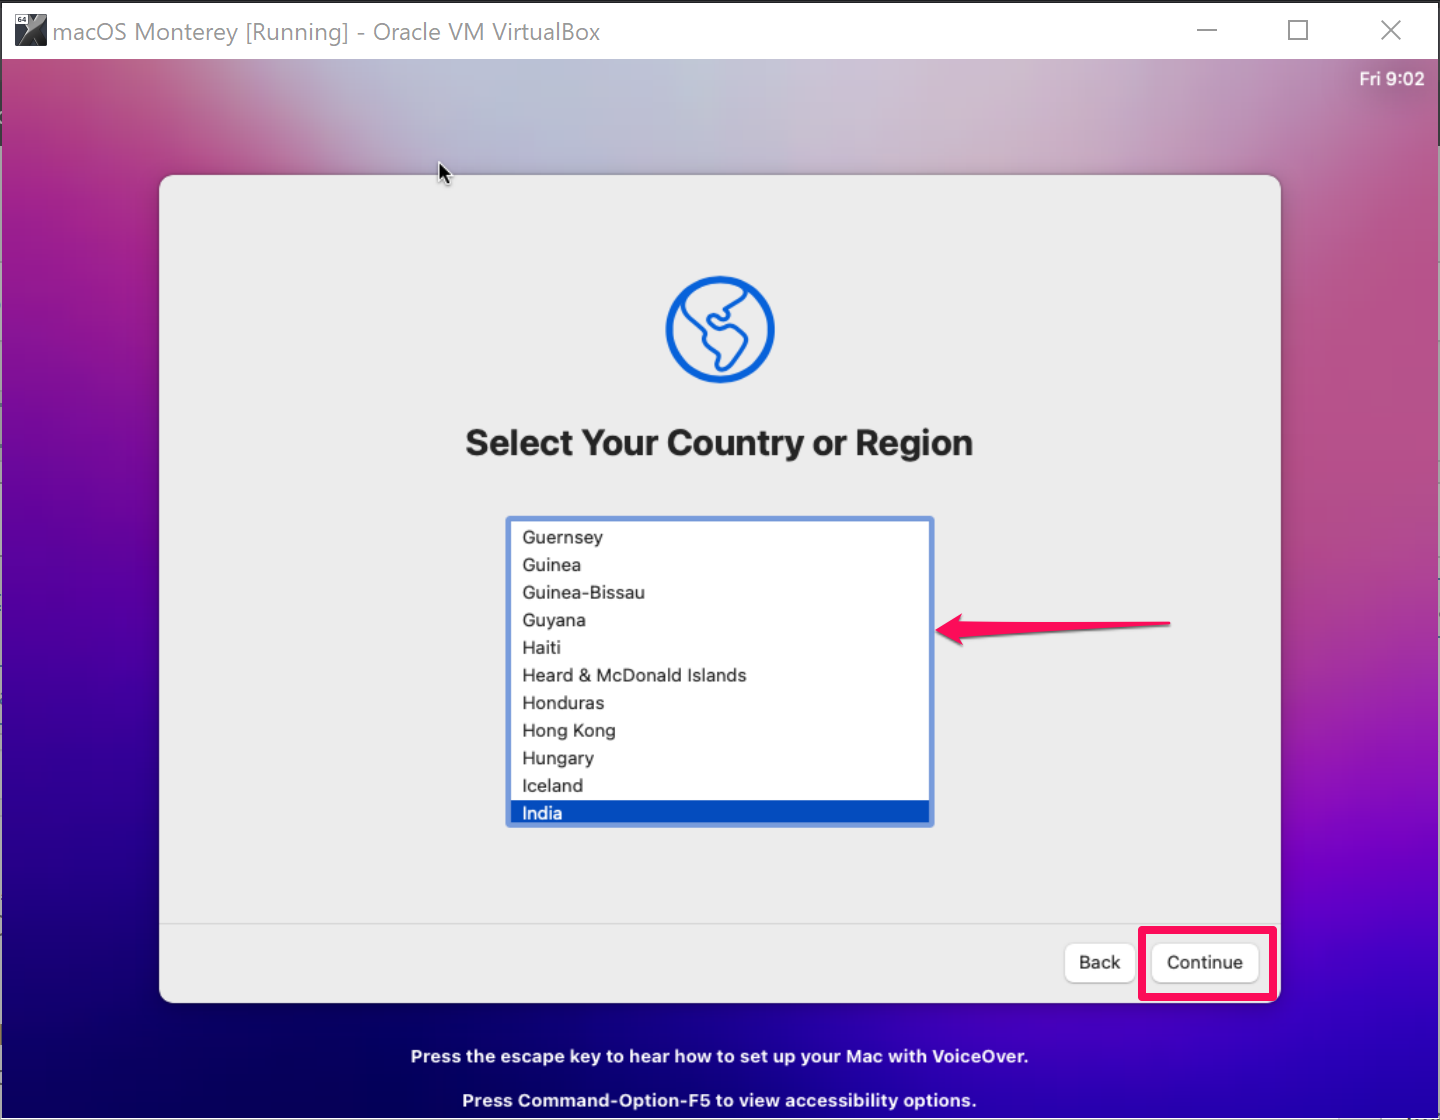
Step 30. After doing the above steps, you will see that macOS Monterey is installing. It may take a while, depending upon the resources you have provided to this machine. Also, note that your virtual macOS may restart several times during the installation process. When it asks for a country or region, select from the list of countries and then click the Continue button.
Step 31. Click Continue on the next window that appears.

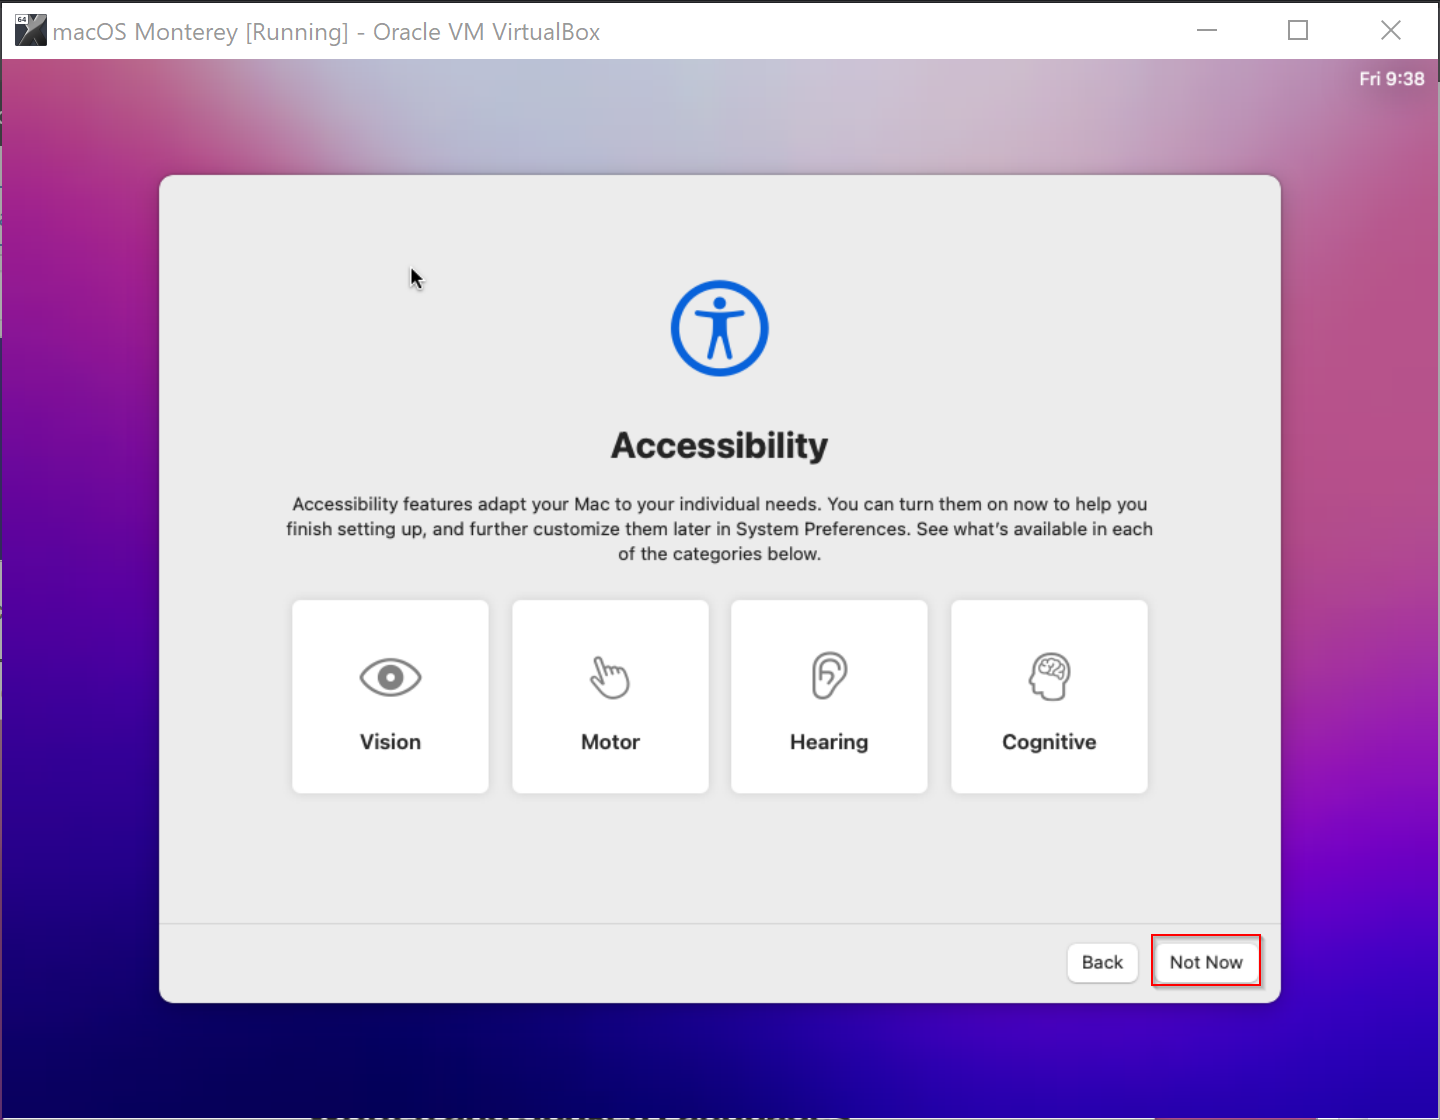
Step 32. Click the Not Now button on the Accessibility window.
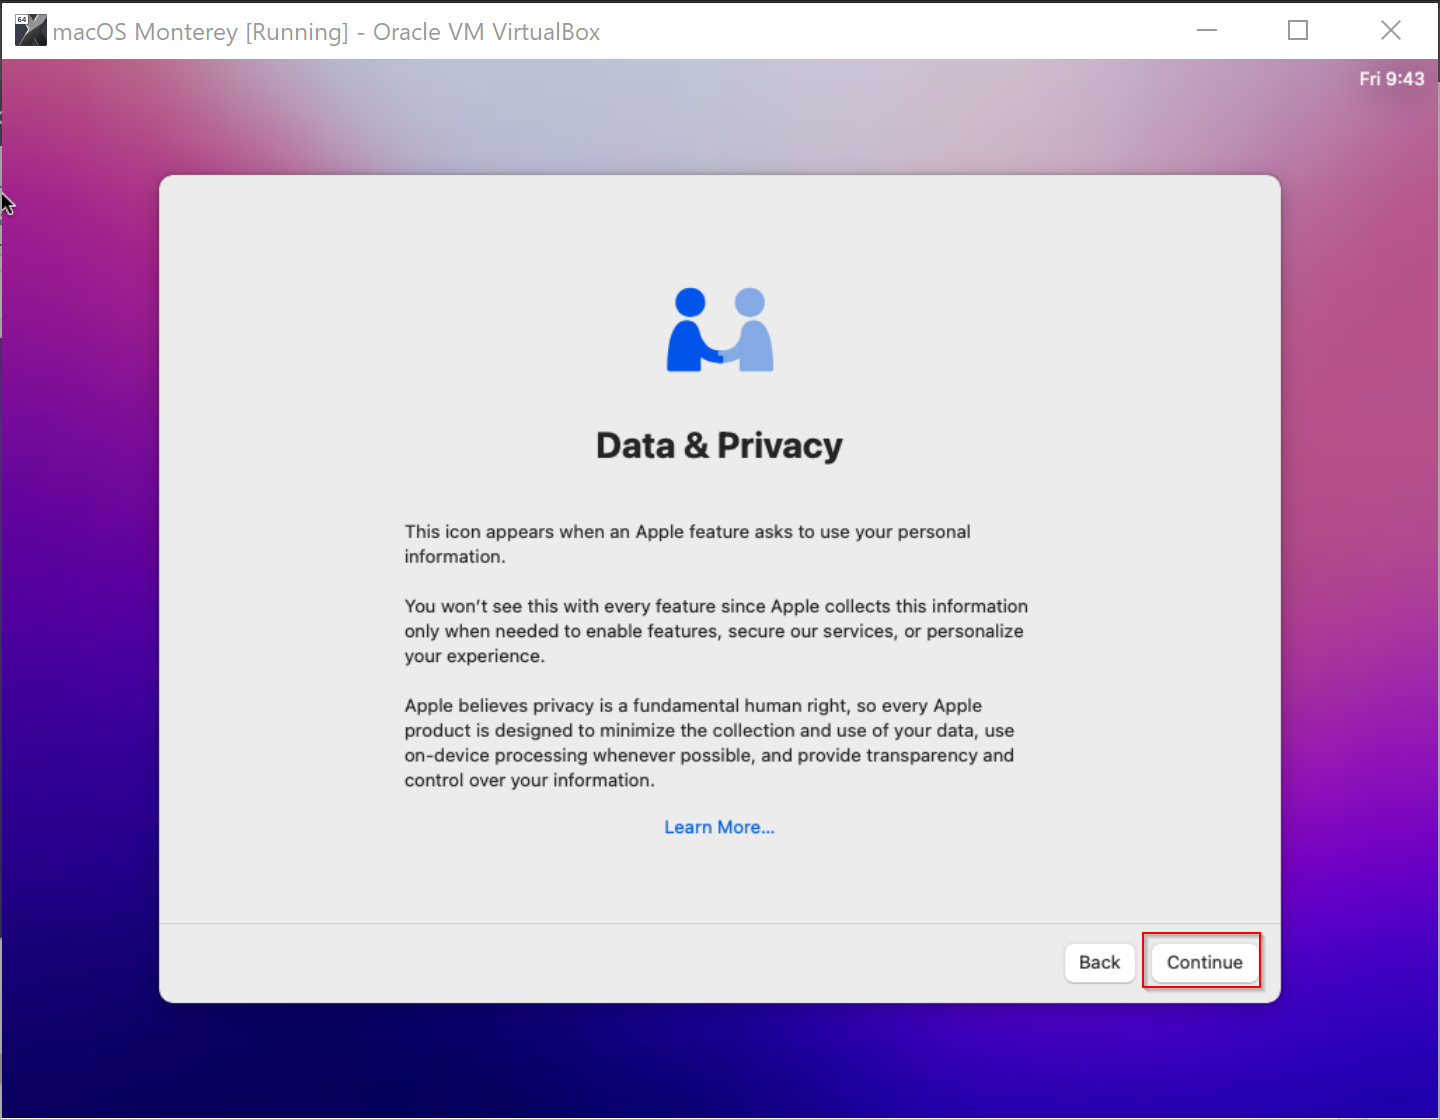
Step 33. On the Data & Privacy window, select the Continue button.
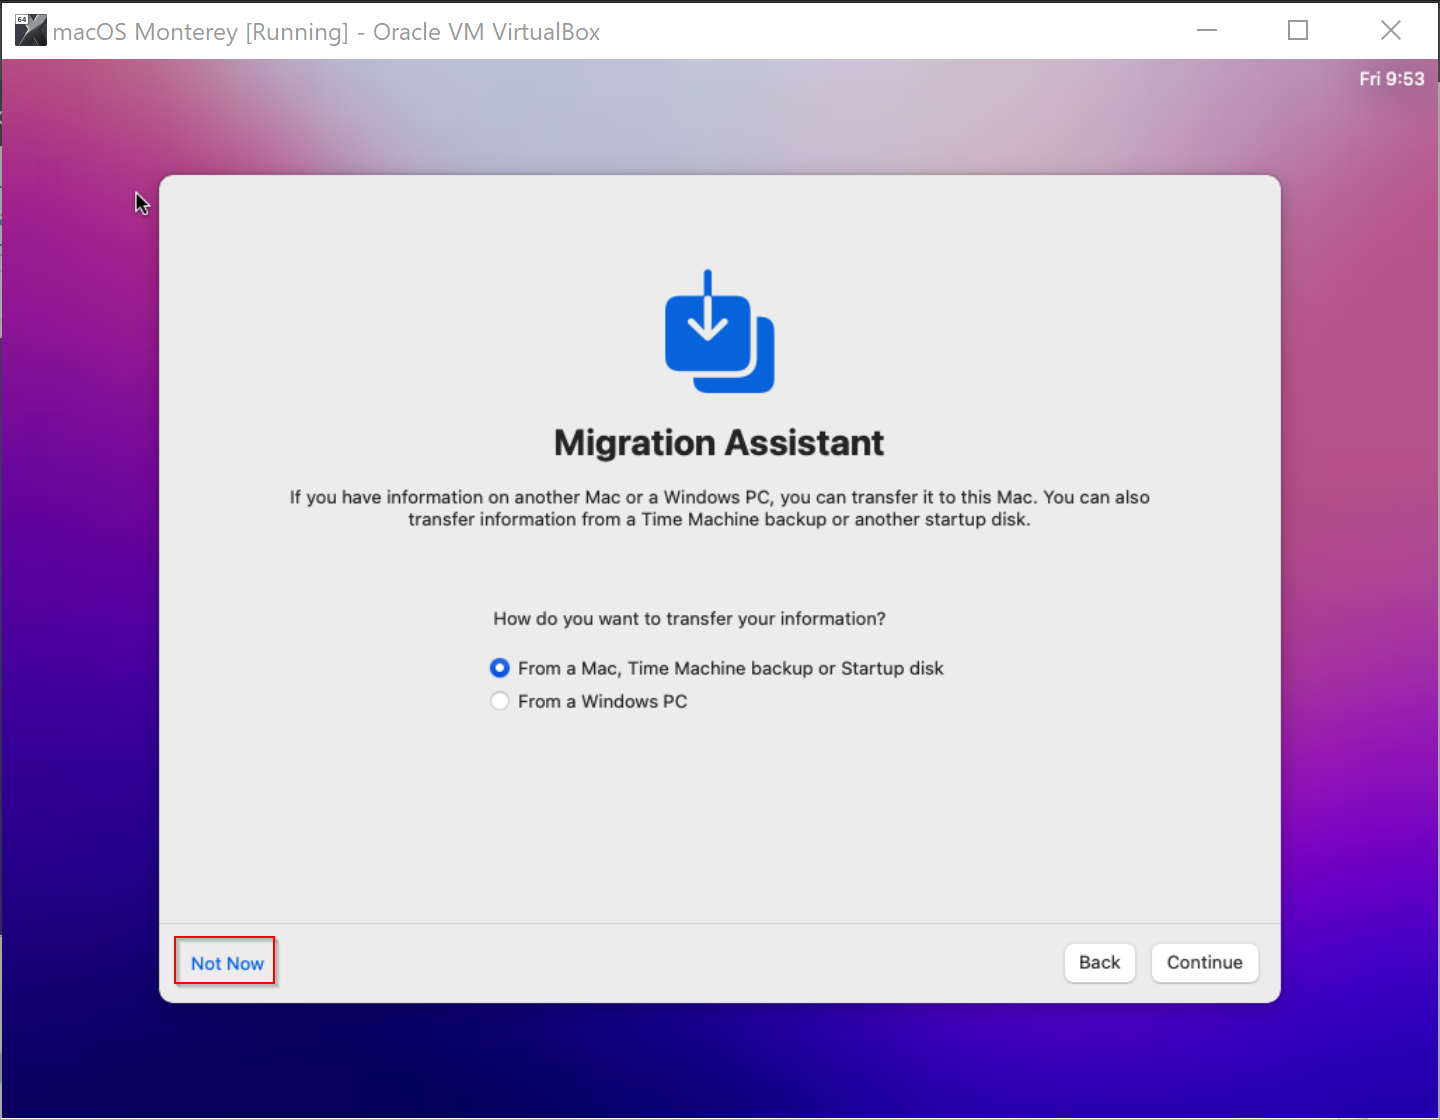
Step 34. In the Migration Assistant window, click the Not Now blue link.
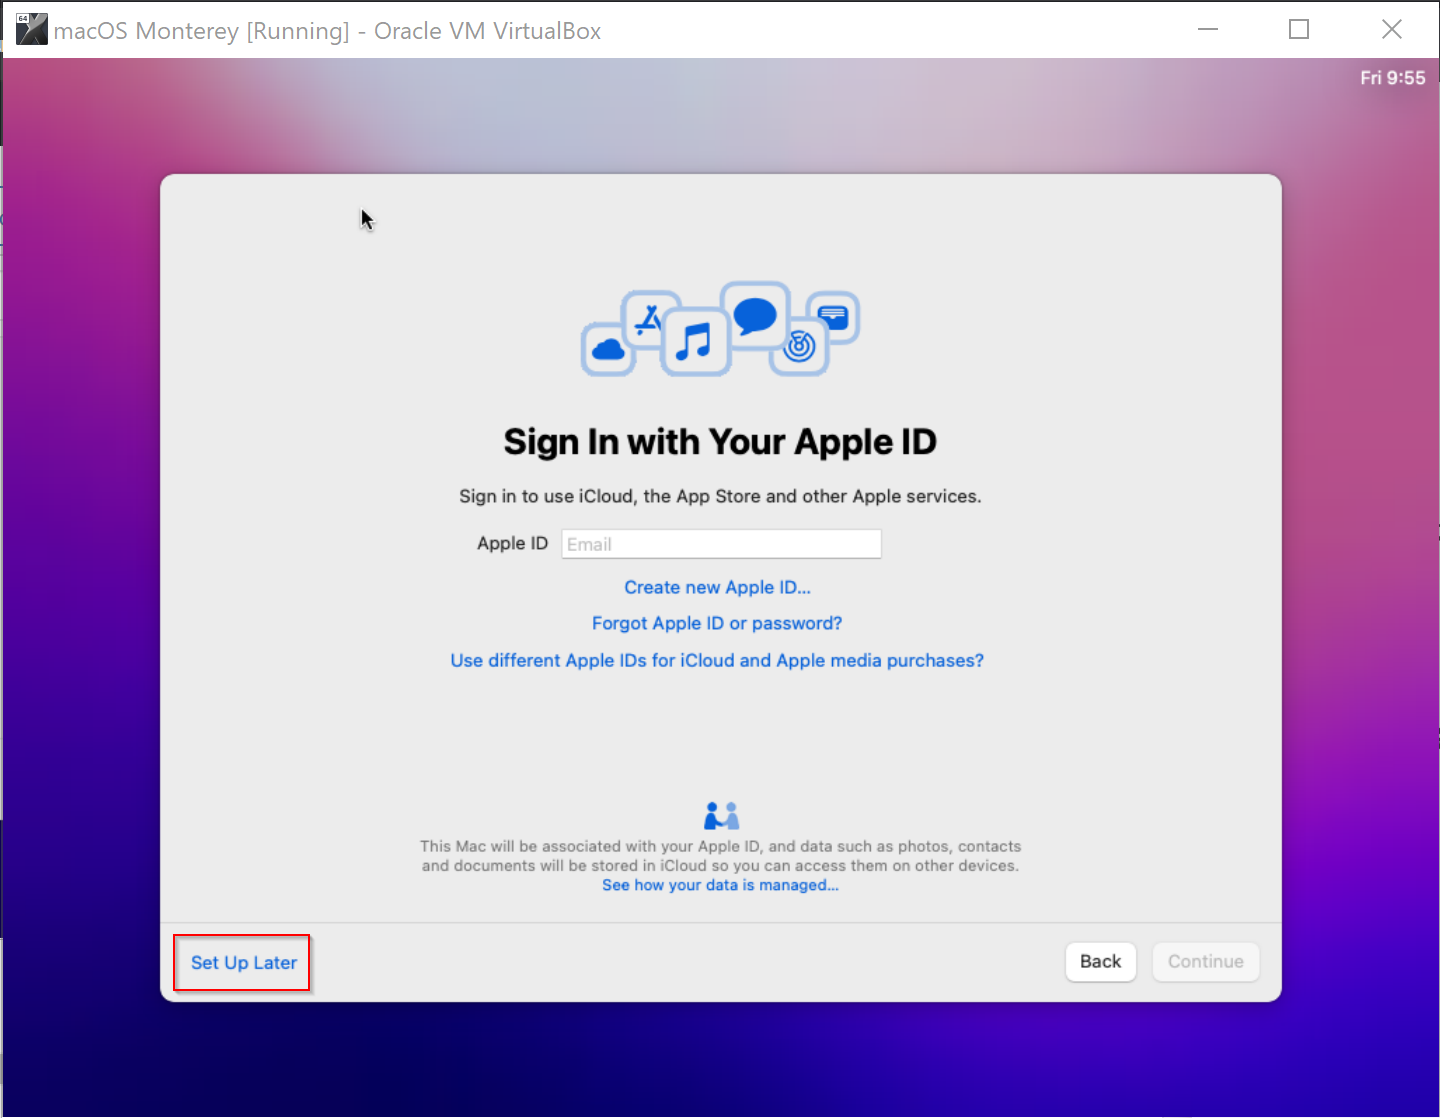
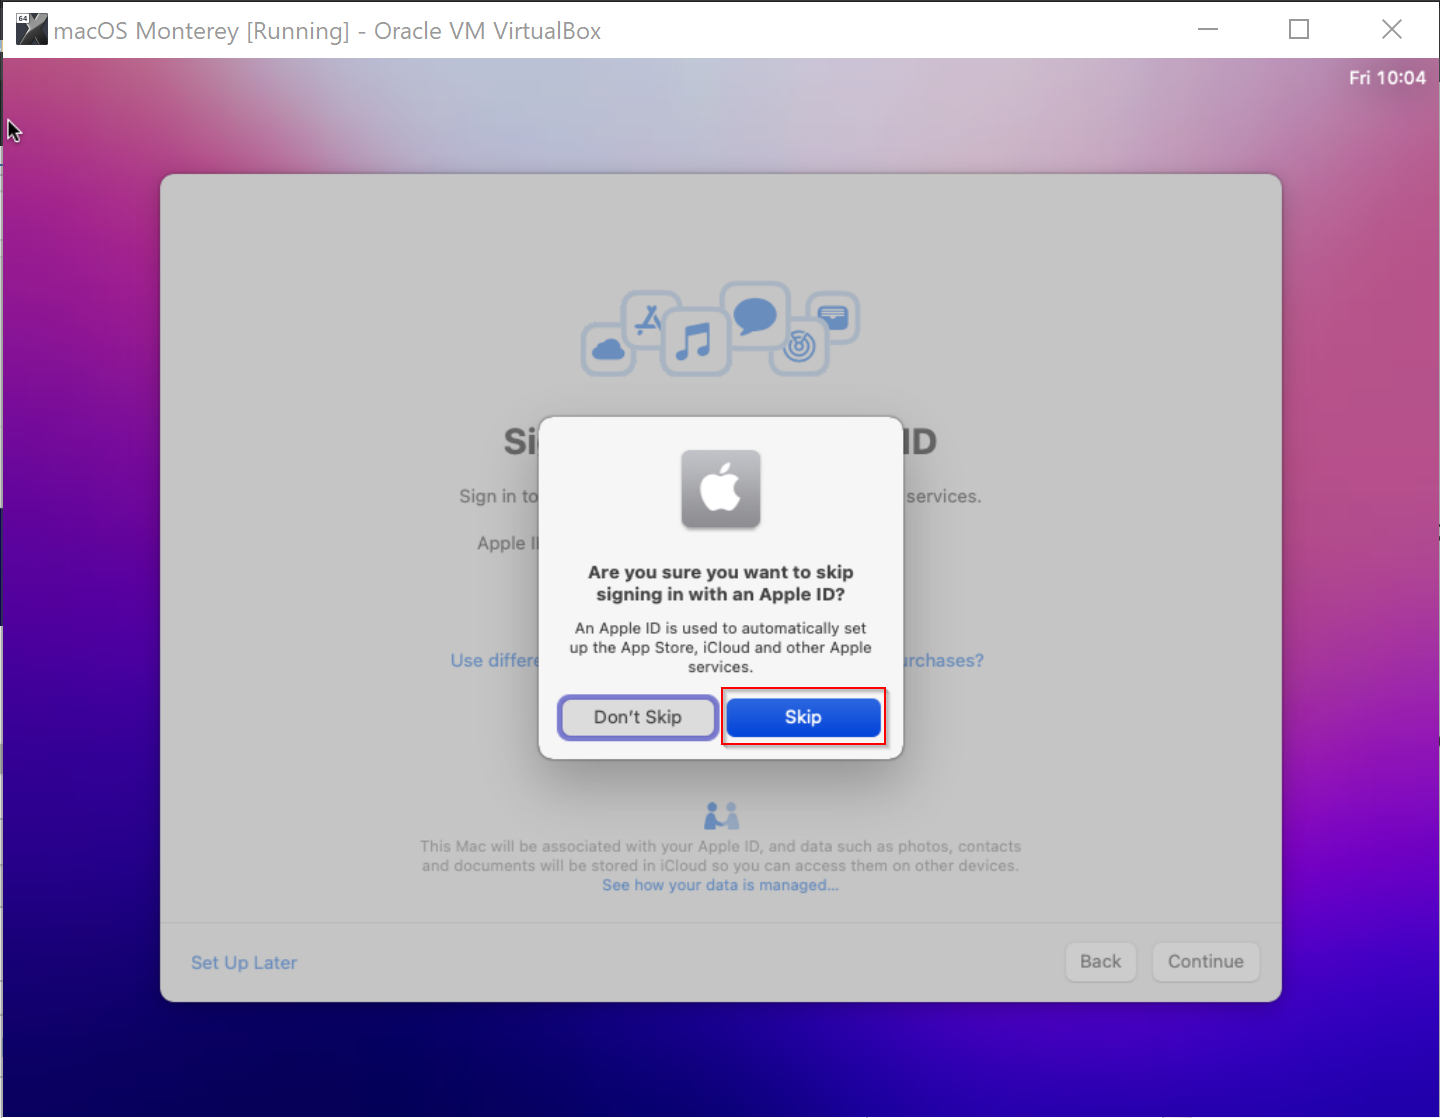
Step 35. Select the Set Up Later option in the “Sign In with Your Apple ID” window.
Step 36. Click the Skip button on the next pop-up window that appears.
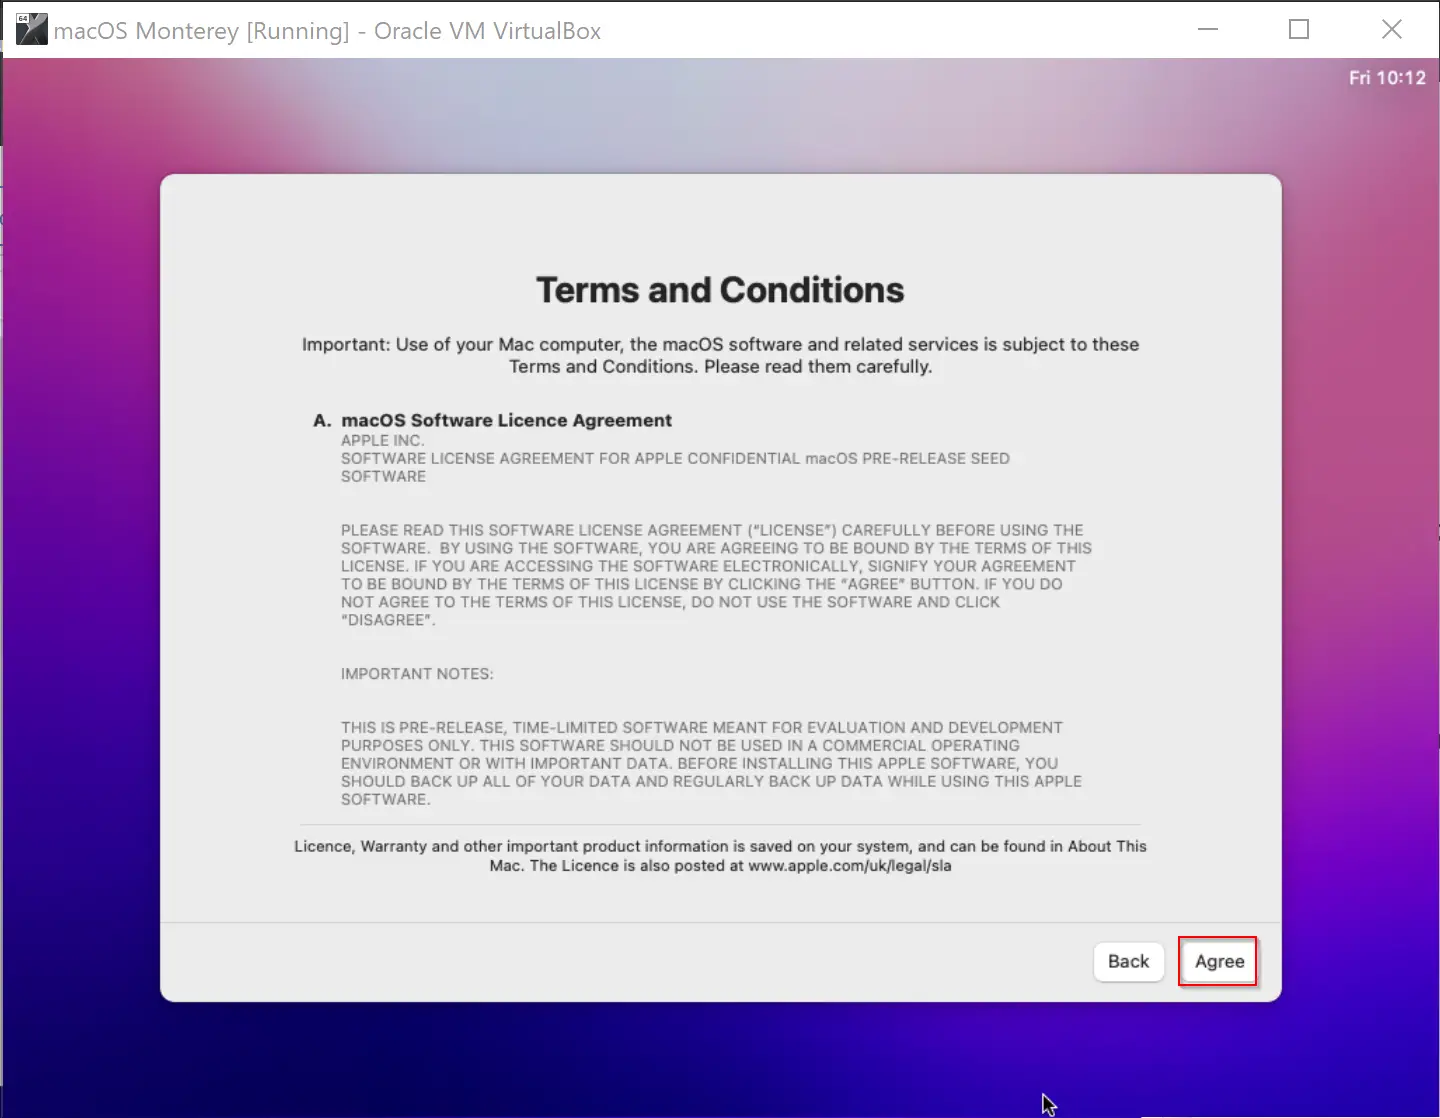
Step 37. Choose Agree button on the Terms and Conditions window.
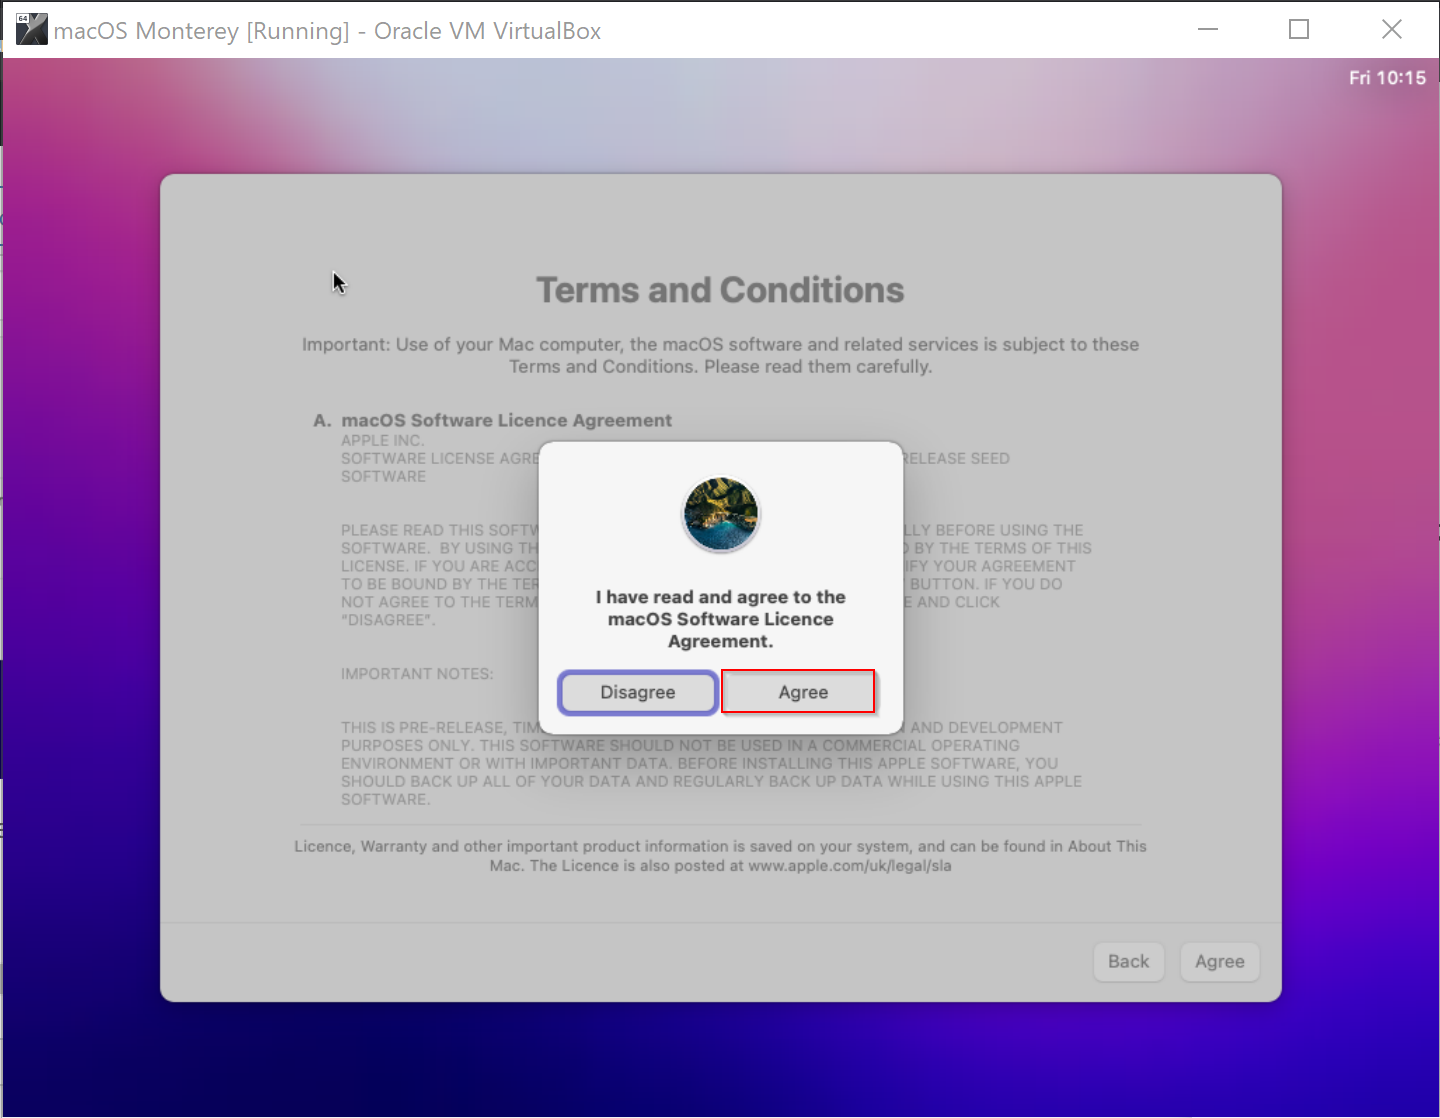
Step 38. Again click the Agree button when a pop-up window appears.
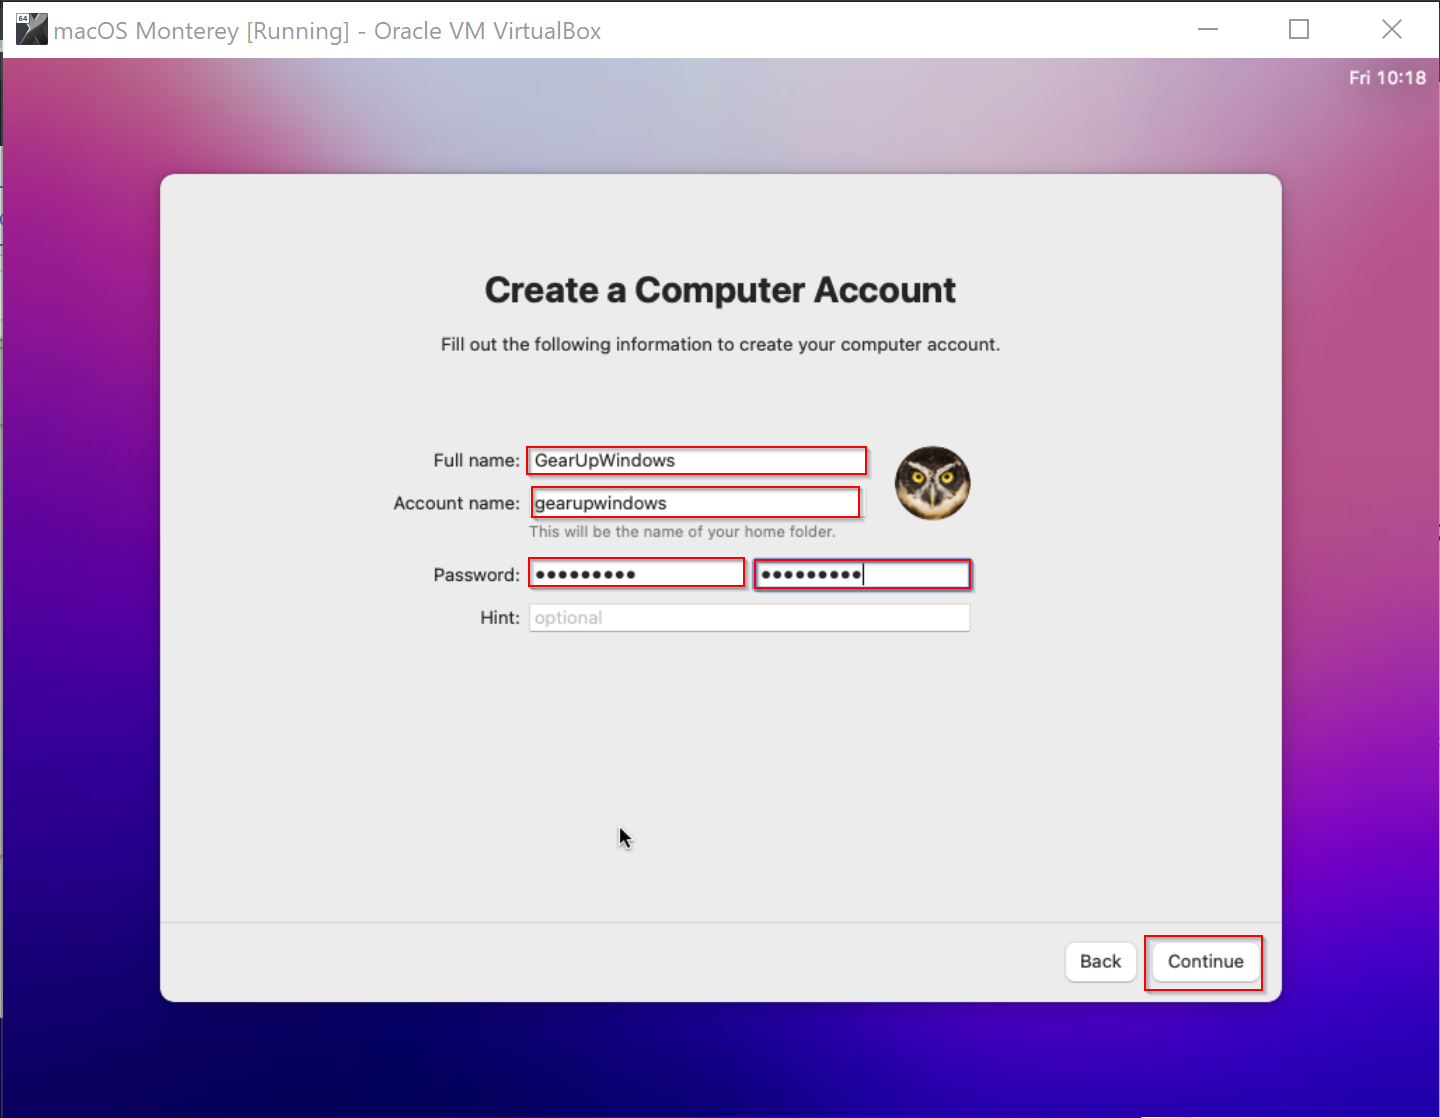
Step 39. In the Create a Computer Account window, type the full name, account name, password, verify password, and finally, click Continue.
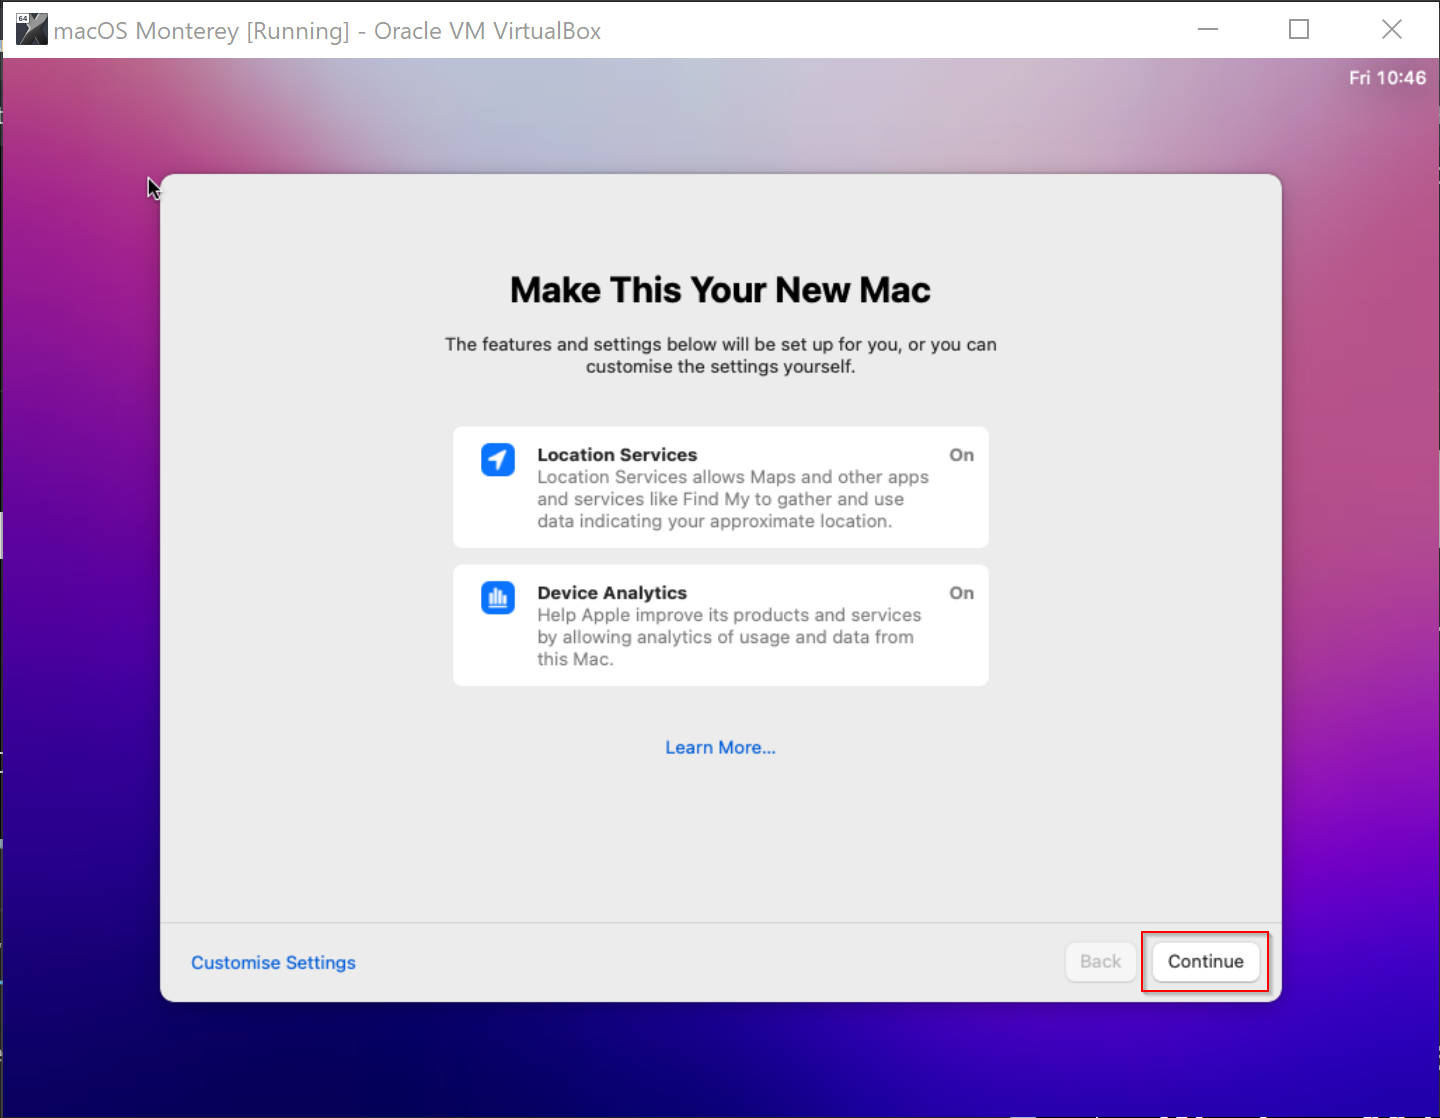
Step 40. Click Continue on the “Make This Your New Mac” window.
Now, follow the onscreen instructions, and you should have a macOS Monterey running in your VirtualBox.
Good luck!
Conclusion
In summary, Apple announced the release of macOS Monterey at the WWDC keynote, which will replace macOS Big Sur and bring a new design with curved edges and new box settings. The first beta version was available for developers to access on June 9, 2021, and the final version is expected to be released in the fall, although the exact date is unknown. Apple has listed the compatible devices that can run macOS Monterey, which includes several Mac models. Meanwhile, Microsoft has also announced the release of Windows 11 on October 5, 2021. It is possible to install macOS Monterey on a Windows 11/10 system using VirtualBox, but the user must follow several steps to configure the virtual machine correctly.