How do I download and install Windows 11? Installing Windows 10 on a virtual machine is a too easy task. You need to download Windows 10 ISO, and without making any changes to the ISO file, you can not use it to install on a virtual machine. Since to install Windows 11, Secure Boot and TPM 2.0 are mandatory but do not include Oracle VirtualBox, you need to modify Windows 11 ISO file. Basically, you need to remove the requirements of Secure Boot and TPM 2.0 to install Windows 11. Also, it would be best if you remembered that Windows 11 ISO boot file is not disturbed during editing.
You can refer to our complete guide on removing TPM 2.0 and Secure Boot on Windows 11 ISO. Once you have bypassed TPM 2.0 and Secure Boot from Windows 11 ISO file, you are ready to install Windows 11 on a virtual machine.
How to Install Windows 11 on VirtualBox Virtual Machine?
Follow these steps to install Windows 11 on VirtualBox virtual machine:-
Step 1. Download and install the latest version of free Oracle VM VirtualBox.
Step 2. Double-click on its desktop icon to launch it.
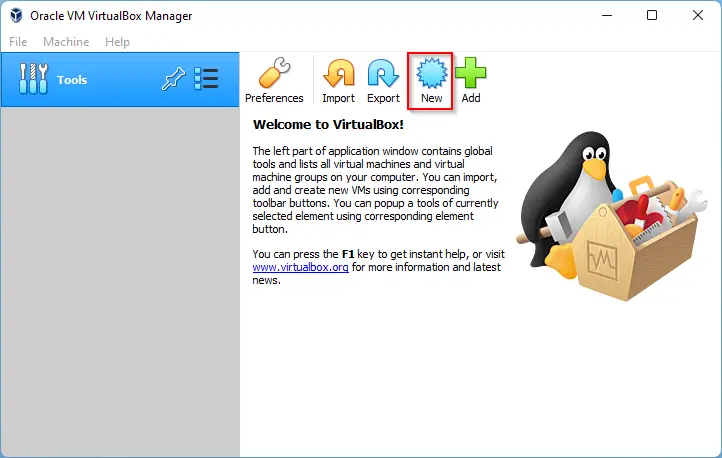
Step 3. Click on the New button to create a new virtual machine.
Step 4. In the next window that appears, next to the Name box, write Windows 11. From the Machine Folder drop-down menu, select the folder’s location where you want to store the new virtual machine. In the Type drop-down, select Microsoft Windows. Finally, from the Version drop-down menu, select Windows 10 (64-bit).
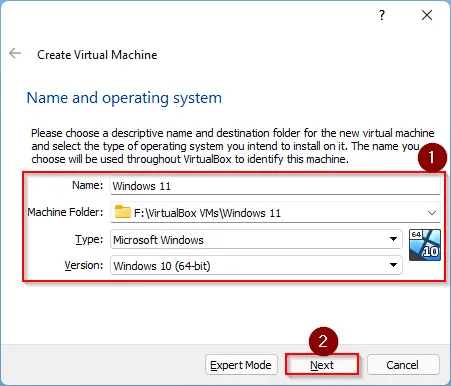
Step 5. After doing the above steps, click on the Next button.
Step 6. In the next window, you need to specify the RAM size for your virtual machine. You can use the slider to increase or decrease the RAM size of your virtual machine.
Note: 2 GB RAM is recommended for a 64-Bit OS, and at least 1 GB of RAM is recommended for a 32-Bit operating system. However, you can increase or decrease the RAM size according to your PC capacity. For our example, we are settings 3GB RAM.
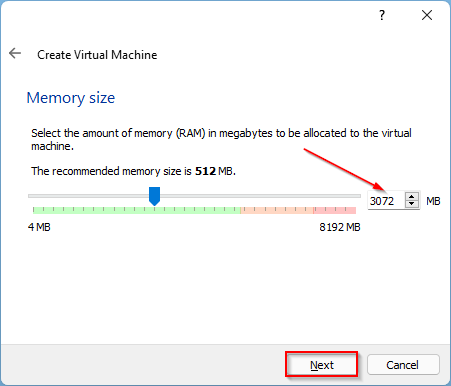
Step 7. Click the Next button.
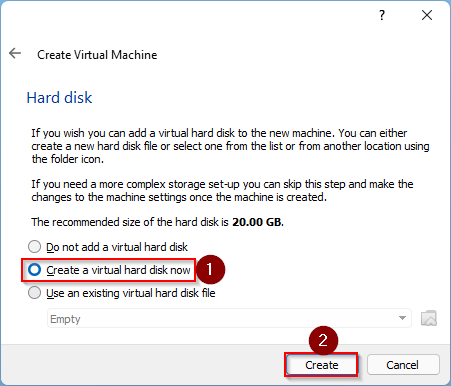
Step 8. In the next window, you will see three options:-
- Do not add a virtual hard disk,
- Create a virtual hard disk now,
- Use an existing virtual hard disk file.
Here, select the second option, “Create a virtual hard disk now,” and then click the Create button.
Step 9. On the next screen, leave the default option VDI (VirtualBox Disk Image) as the hard disk file type.
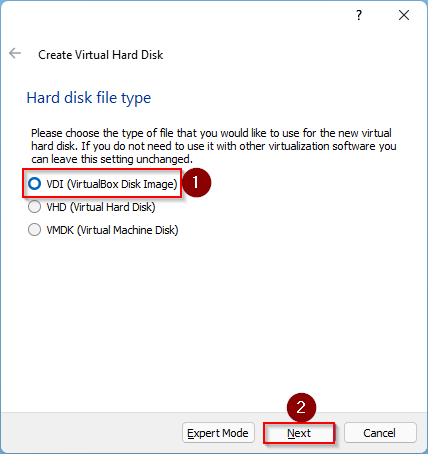
Step 10. Click Next.
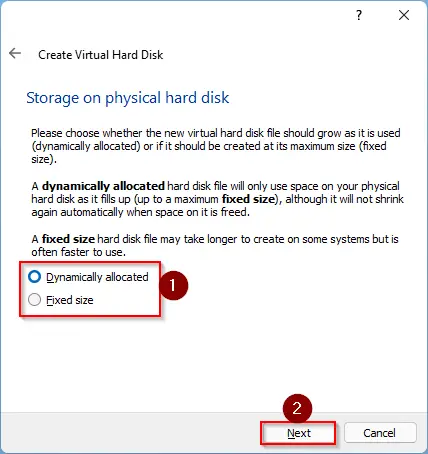
Step 11. On the next window, you will see two options:-
- Dynamically allocated
- Fixed-size
You can select any of them but make your wise decision. If you choose the Dynamically allocated option, depending on your virtual machine’s size, it will keep increasing or decreasing the virtual hard disk’s size automatically. You might notice a performance issue, but it is good for those running out with storage problems. On the other hand, the Fixed size option will fix the size of your virtual hard, which you will specify.
Select the Dynamically allocated or Fixed size option, and then click the Next button.
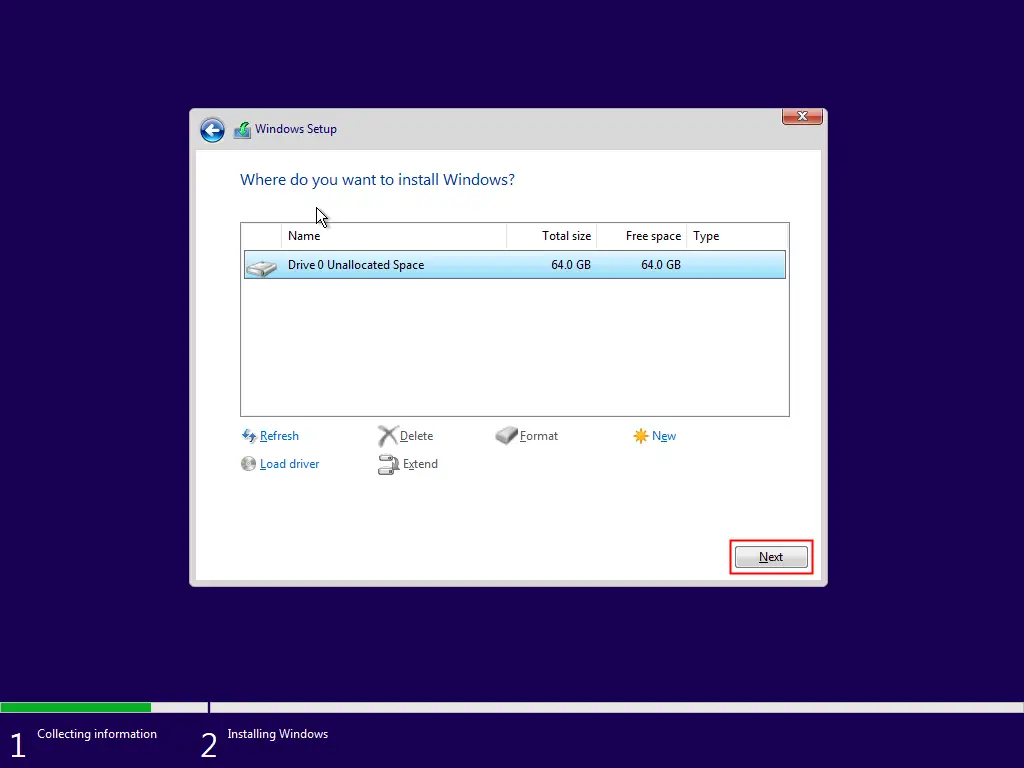
Step 12. On the next screen, you need to specify the maximum size of your virtual hard disk. VirtualBox will not occupy more than the specified storage by you. You can increase or decrease the maximum allocated hard drive size using the slider, or by clicking on its size, you can write your own. We recommend allocating at least 64GB of HDD to run your Windows 11 smoothly.
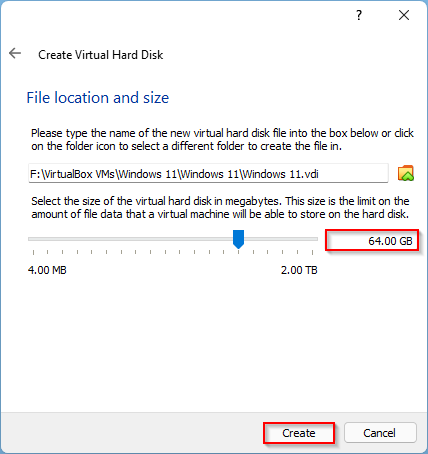
Step 13. Click the Create button.
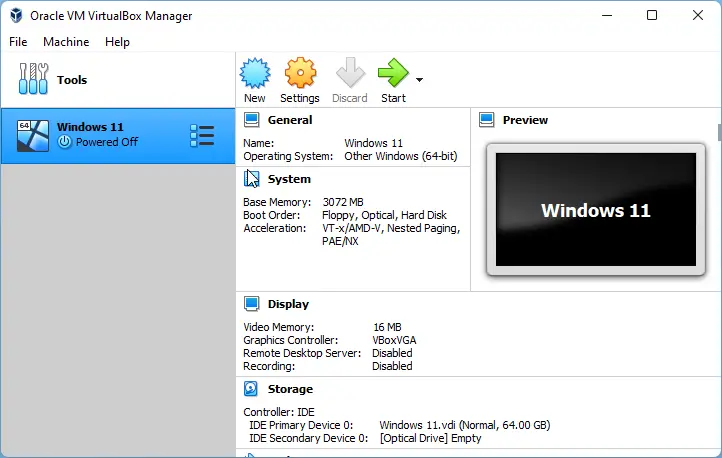
Step 14. According to your selection, a virtual hard disk is created, and it will show the details of your virtual machine.
Step 15. Till now, you have specified the Windows version to install, created a virtual hard disk drive, and allocated RM to install the Windows 11 operating system. Now you are ready to install Windows 11 on VirtualBox. To install Windows 11 on a virtual machine, we need a bootable Windows 11 USB flash drive or Windows 11 Bootable DVD, or a bootable ISO. To install Windows 11 on a virtual machine, we prefer to use a bootable ISO of Windows 11.
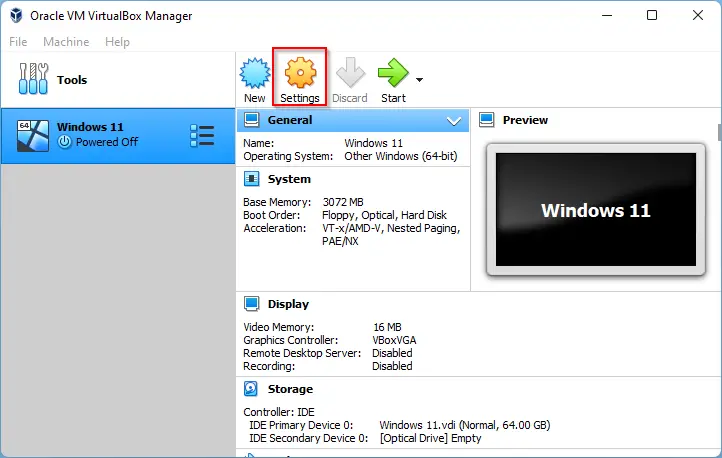
Once you are ready with an edited bootable ISO file of Windows 11, as we have mentioned above, click on the VirtualBox Setting icon.
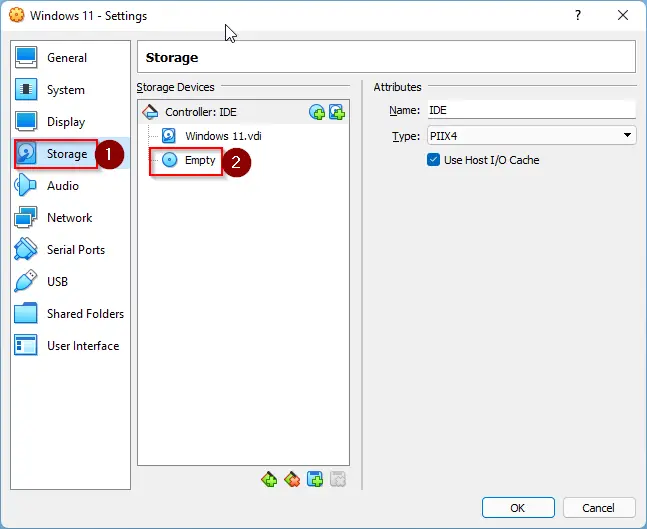
Step 16. From the left side pane, click on the Storage option, and then on the right, click on the Empty as shown in the above image.
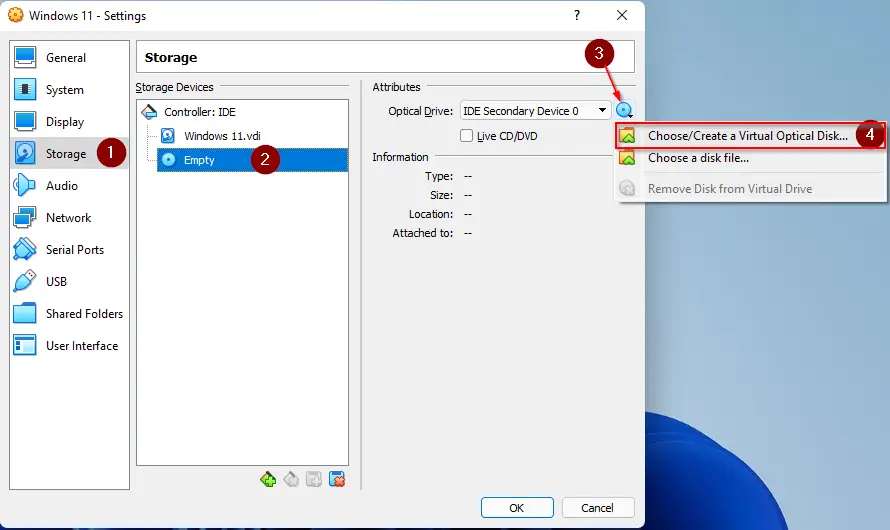
Step 17. Now, click on the CD icon next to Optical Drive and select “Choose/Create a Virtual Optical Disk.”
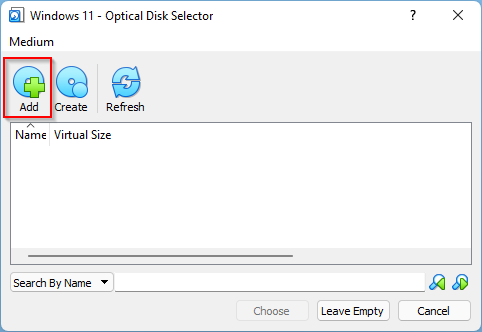
Step 18. Under the Optical Disk Selector dialog box, click on Add from the menu.
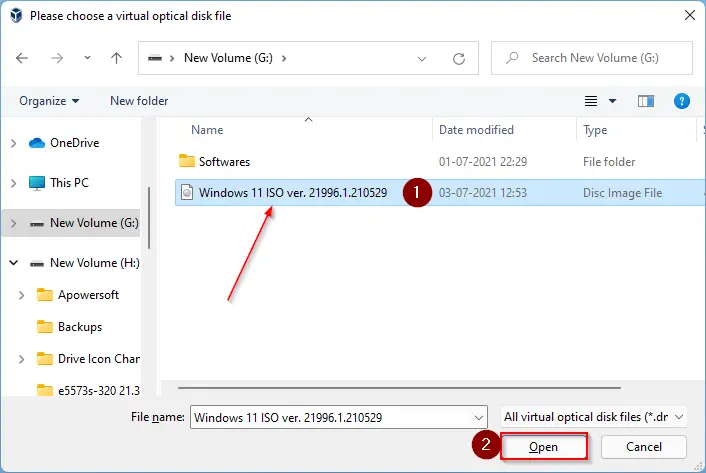
Step 19. In the next window, select the modified Windows 11 ISO file and then click the Open button.
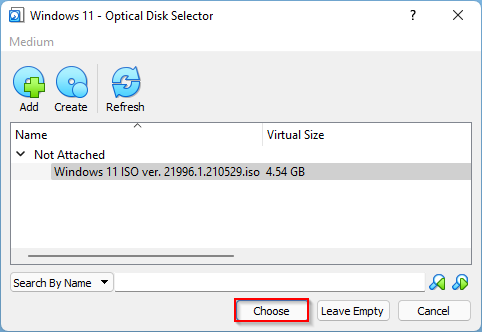
Step 20. Now, click on the Choose button to attach the Windows 11 ISO file to your virtual Windows 11 operating system.
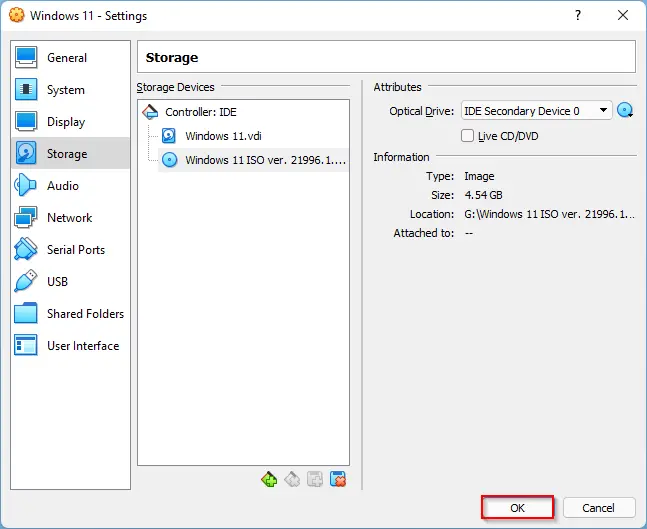
Step 21. The Empty place has been filled with Windows 11 ISO file and should look like the below image. Click OK.
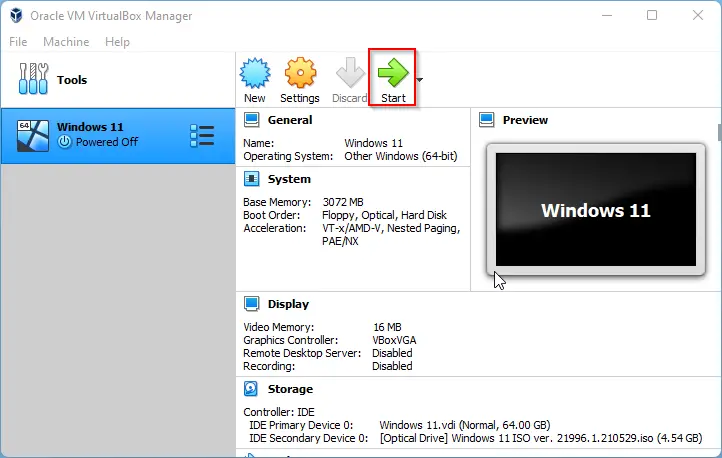
Step 22. Finally, you are ready to install Windows 11 on your virtual machine. Click on the Start button.
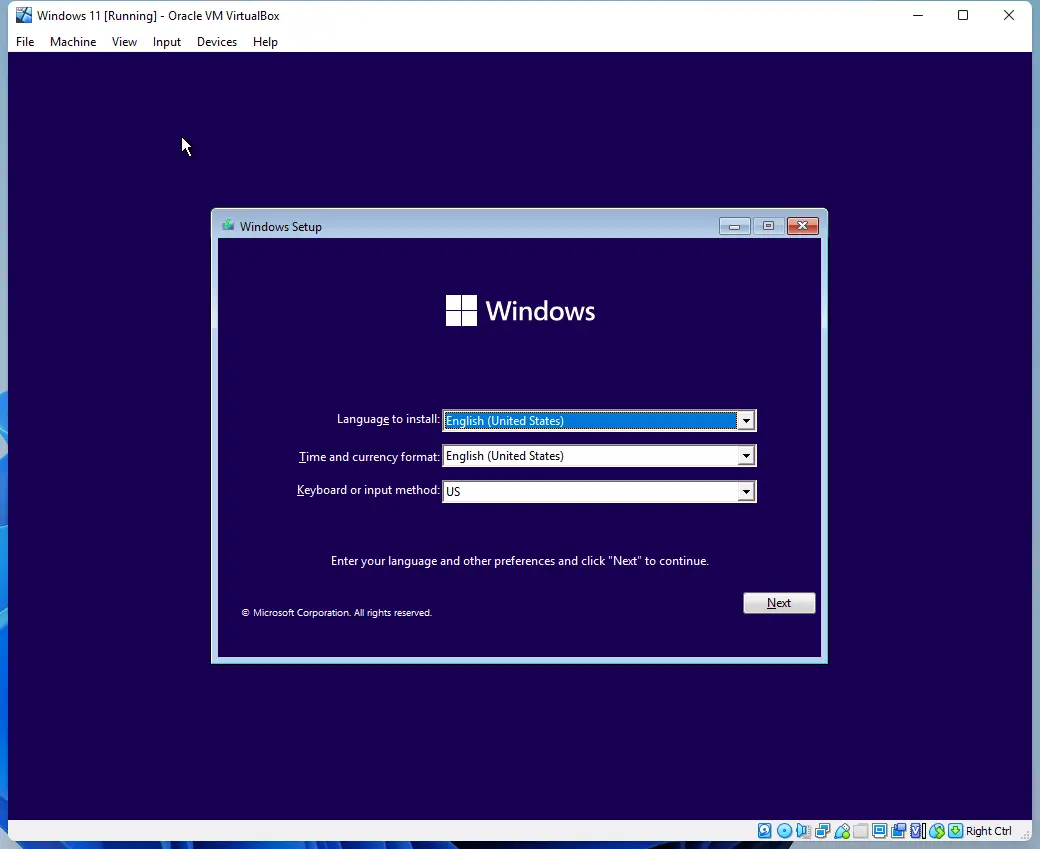
Step 23. Now, your virtual machine will be booted from the selected Windows 11 ISO, and installation is started on your virtual machine. When prompted, select language, time & currency format, and keyboard input method. Now, click the Next button.
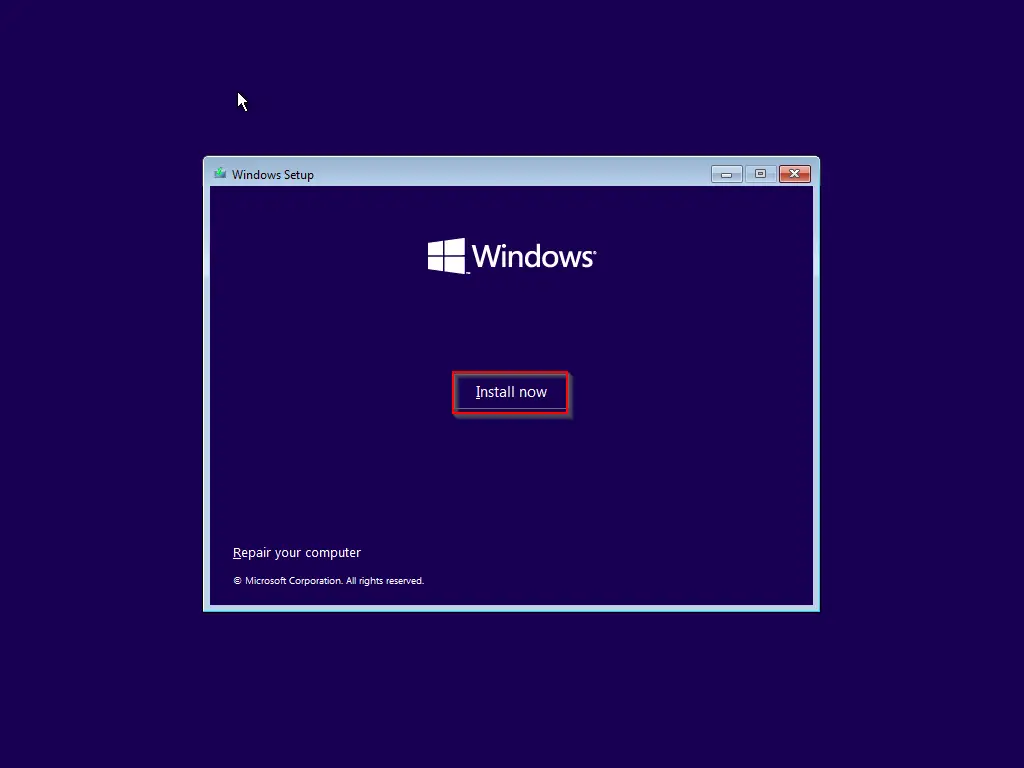
Step 24. On the next screen, click Install now.
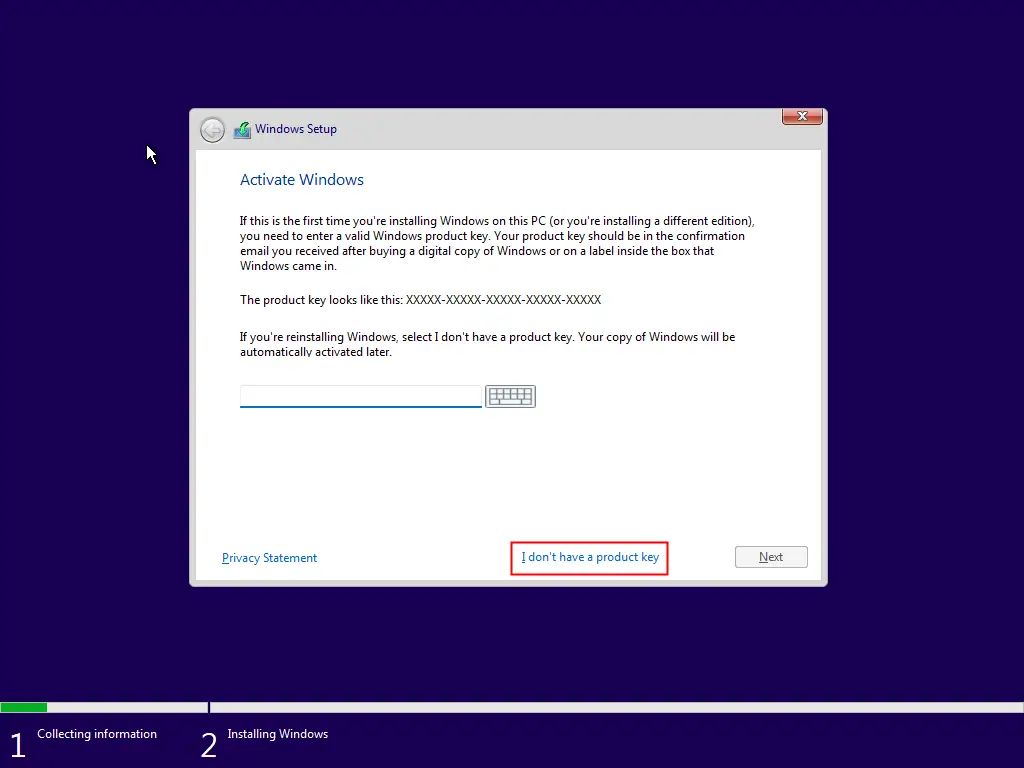
Step 25. On the next screen, you will be prompted to enter the product key and activate Windows. Type the genuine product key if you have it or click the link “I don’t have a product key.”
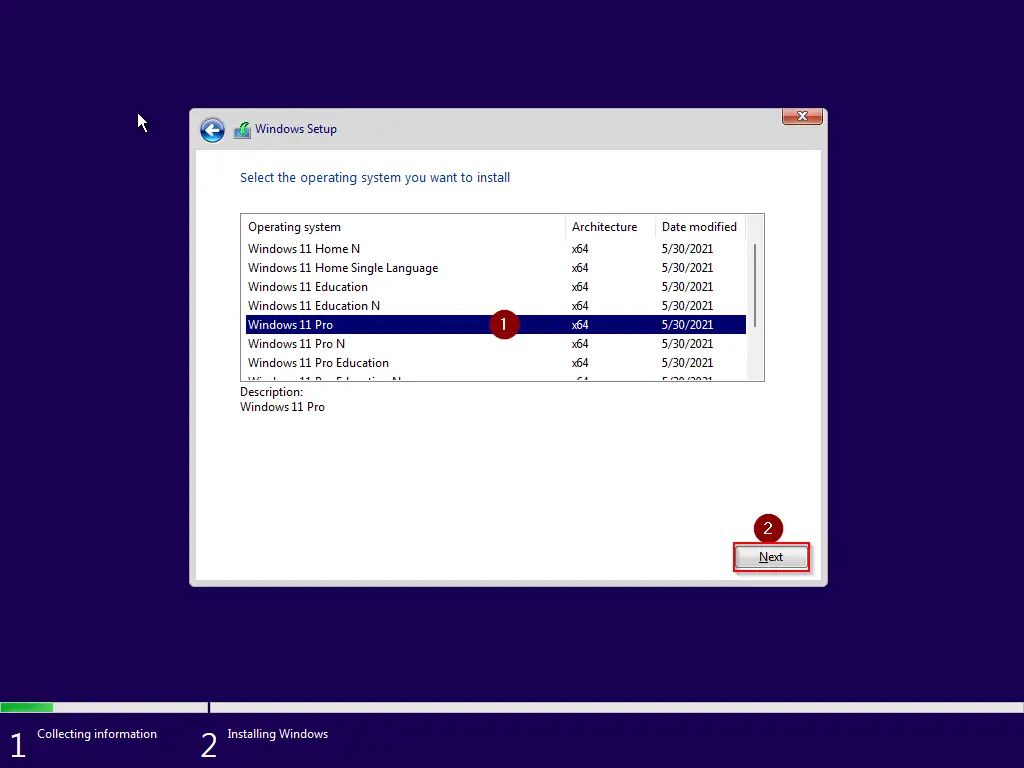
Step 26. In the upcoming window, select the Windows 11 edition you would like to install and then click the Next button.
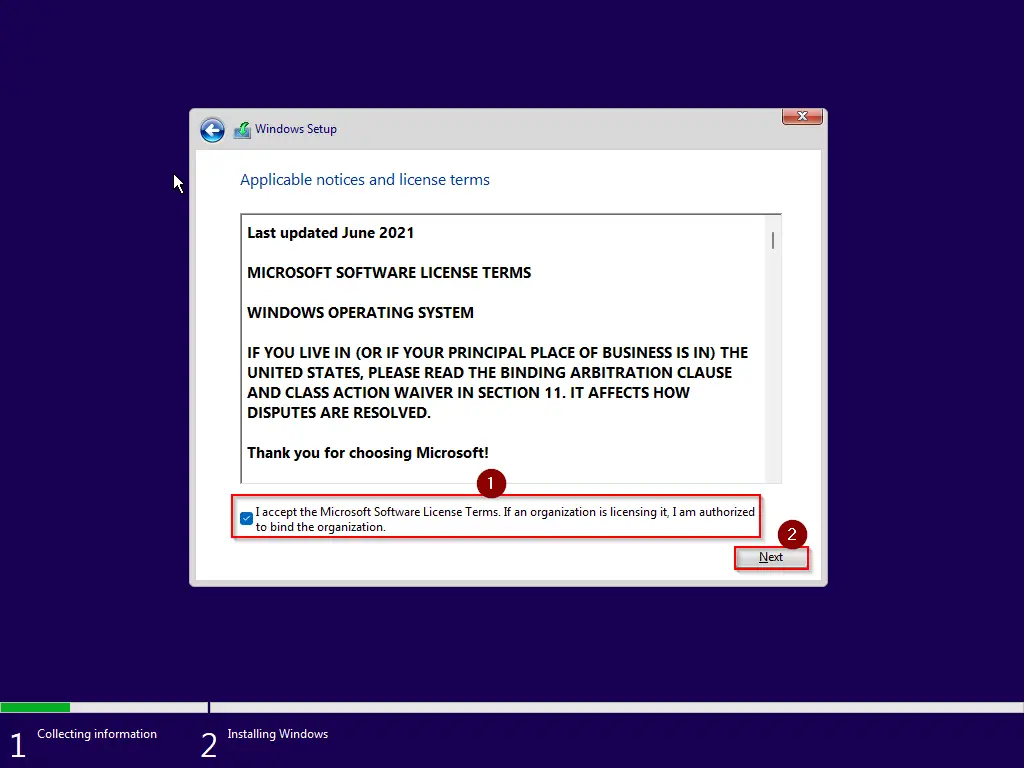
Step 27. Now, select the checkbox “I accept the Microsoft Software Licence Terms. If an organization is licensing it, I am authorized to bind the organization.” Then, click the Next button.
Step 28. Now, you will see two options:-
- Upgrade: Install Windows and keep files, settings, and applications.
- Custom: Install Windows only (advanced).
Since you will install a fresh Windows 11, choose the second option, “Custom: Install Windows only (advanced).”
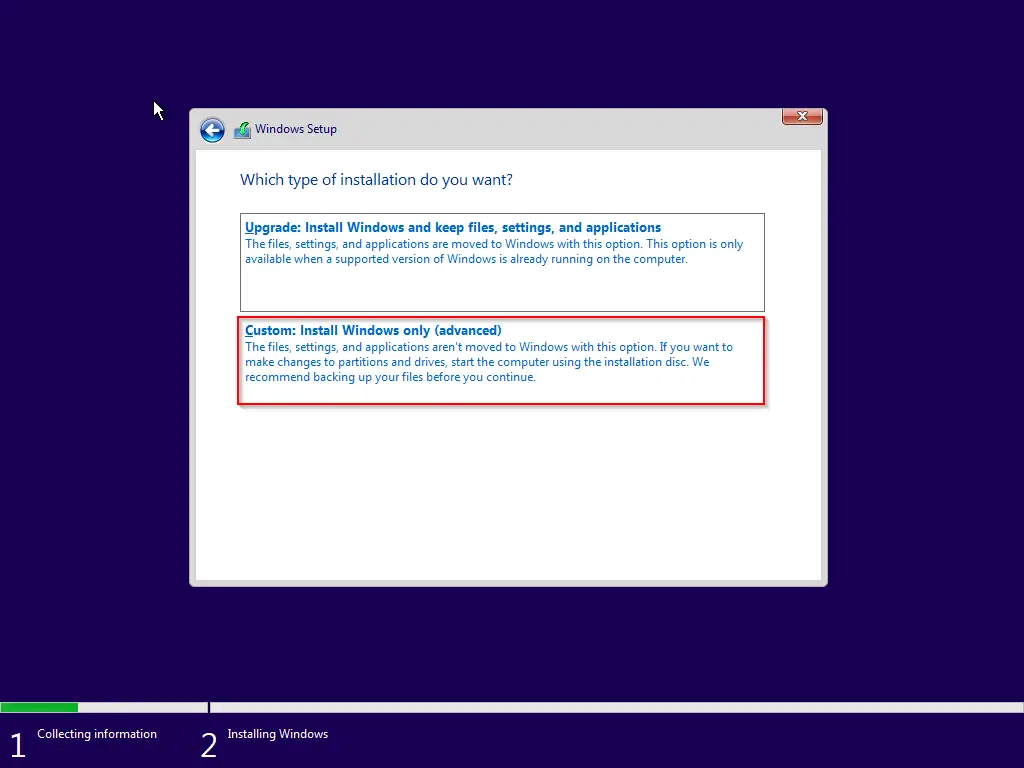
Step 29. Click the Next button.
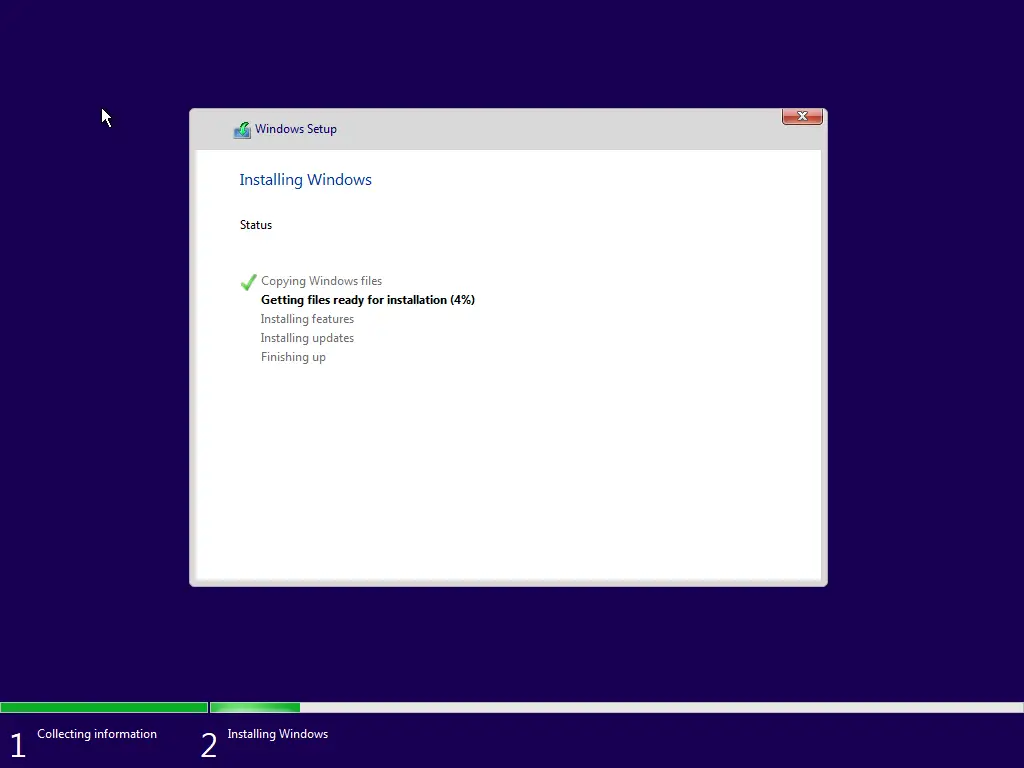
Step 30. Now, you should see the installation progress of your Windows 11. The virtual machine will start copying the required files to run Windows 11. Once done, it will be restarted automatically.
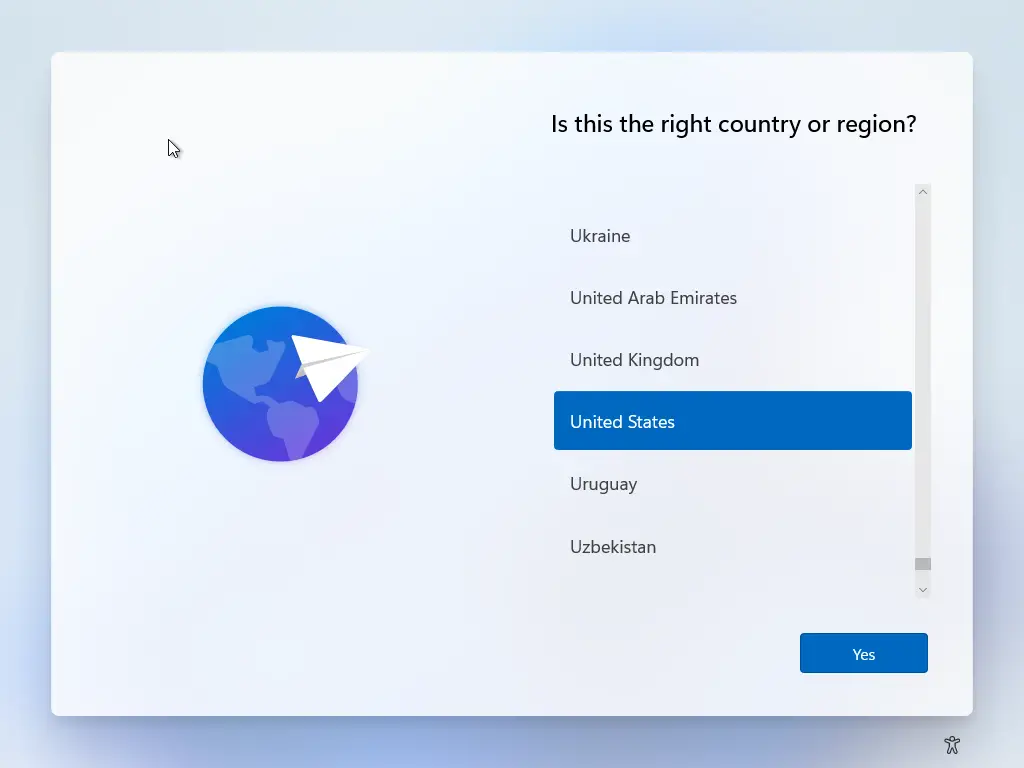
Step 31. Next, select the country from the list and then click the Yes button.
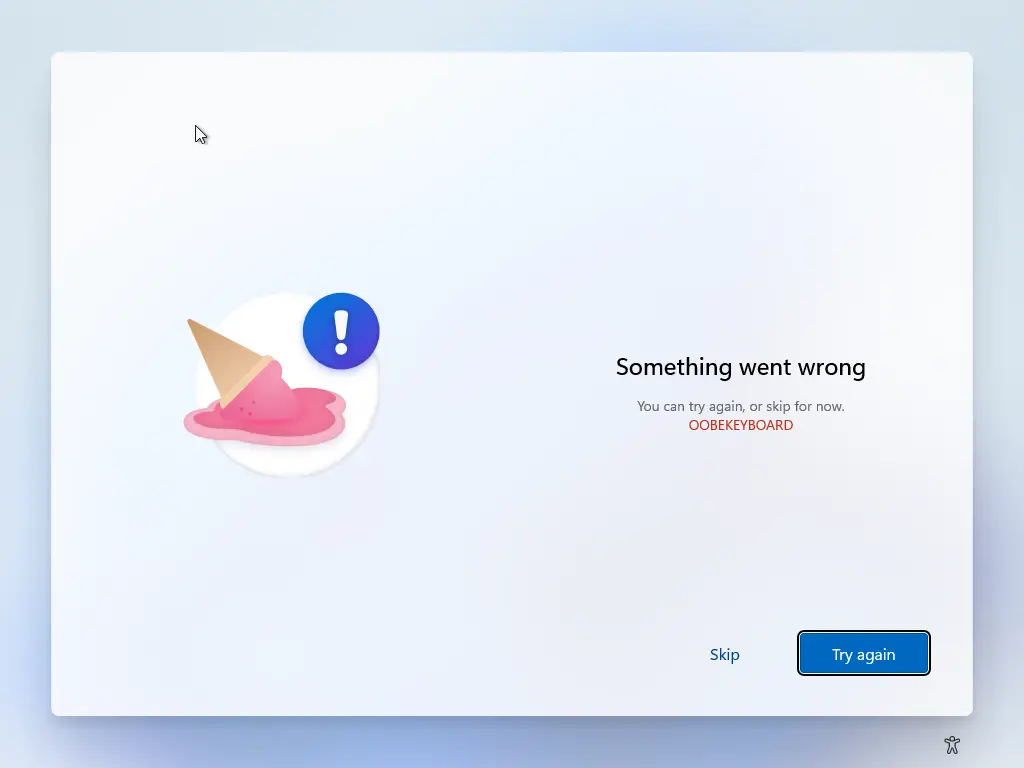
Step 32. You might get an error on the next screen, just ignore it and click the Skip button. This OOBEKEYBORD is just a keyboard error.
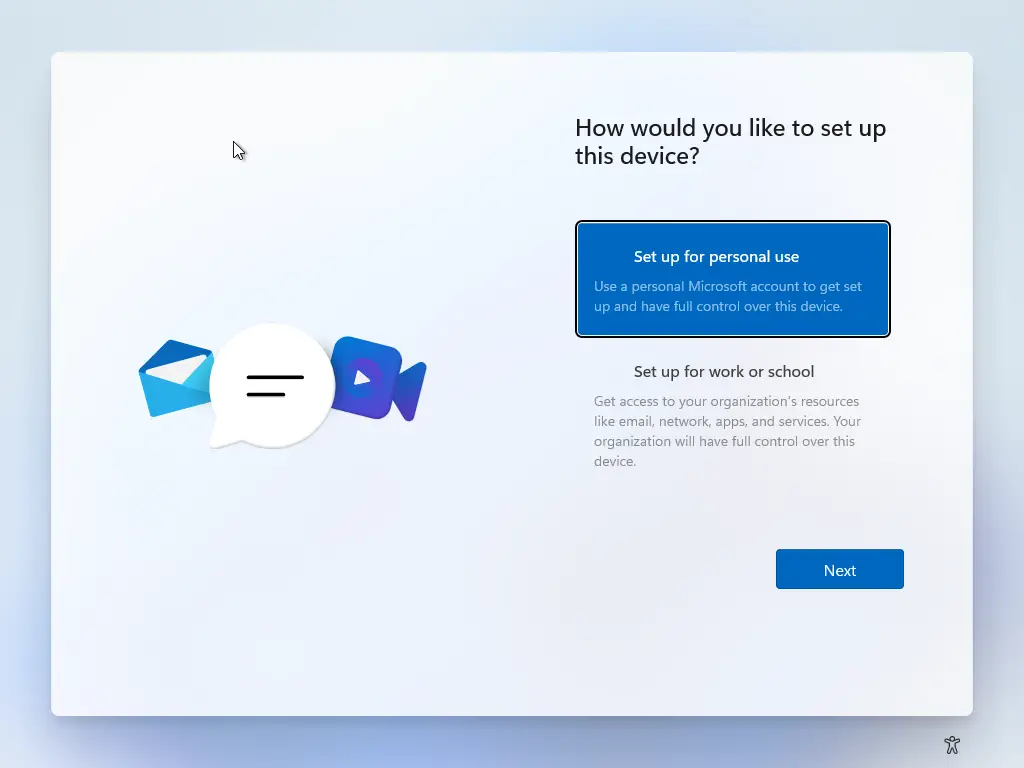
Step 33. Now, Windows 11 will start searching for the update. Wait for a while. On the next screen, click on the option “Set up for personal use.” Then click the Next button.
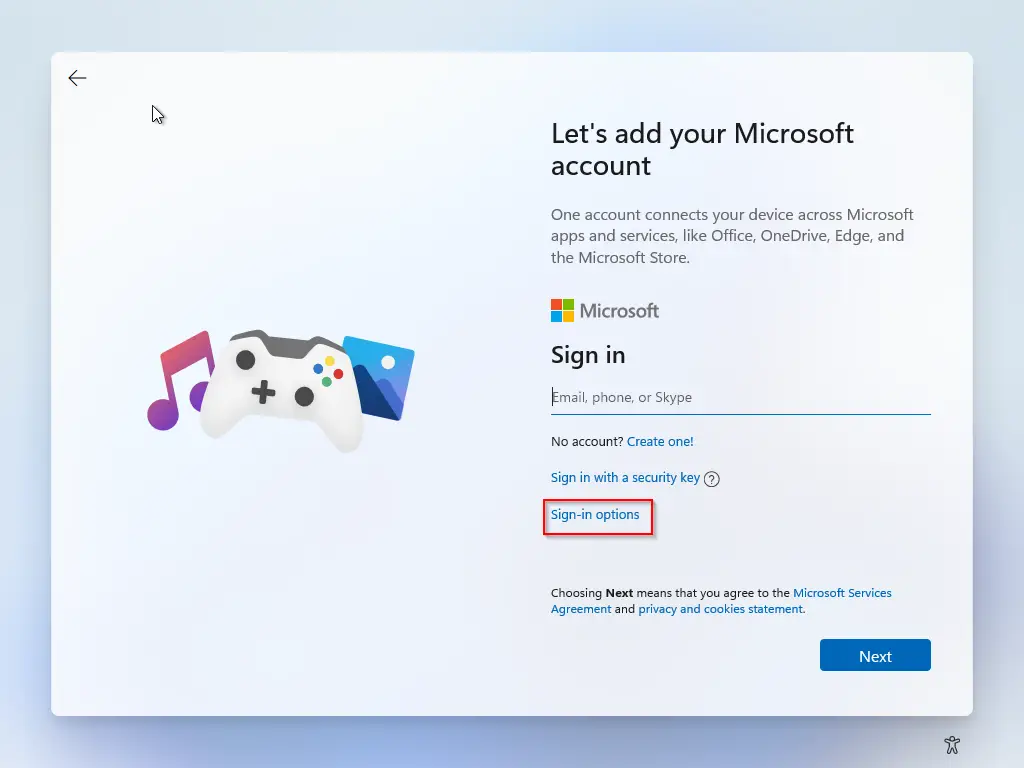
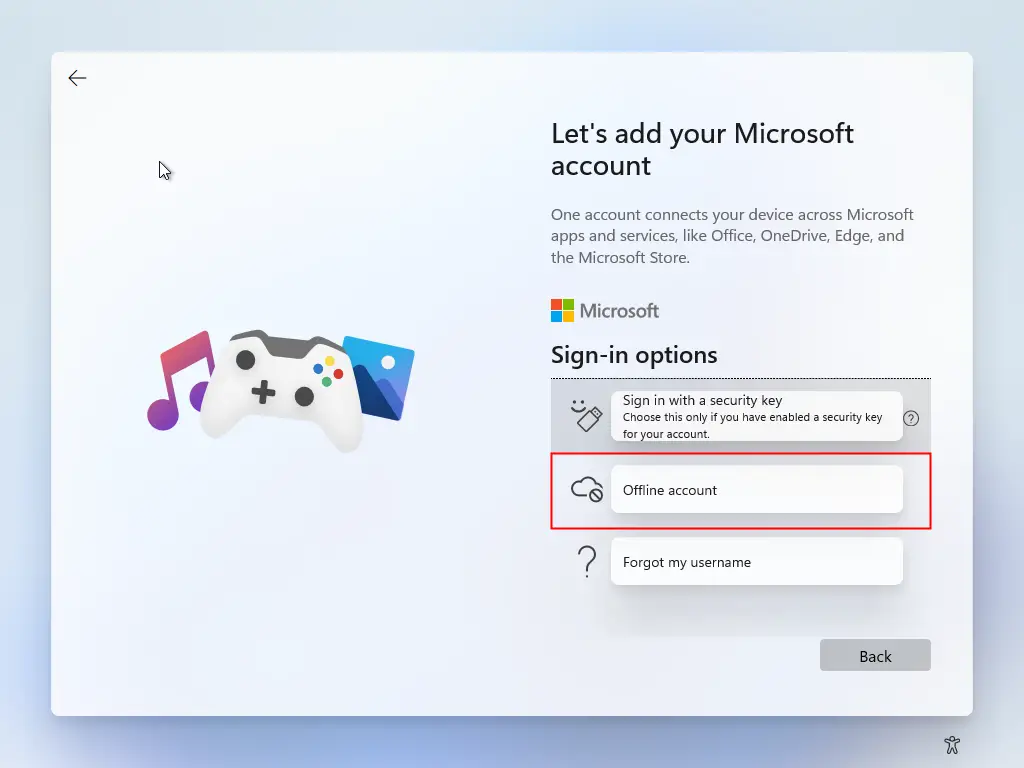
Step 34. Now, you need to create a user account on your Windows 11 machine. If your PC has active internet, then you can log in with Microsoft Account, or if you want to add an offline user account, click the link “Sign-in options.”
Step 35. Now, click on the Offline account option.
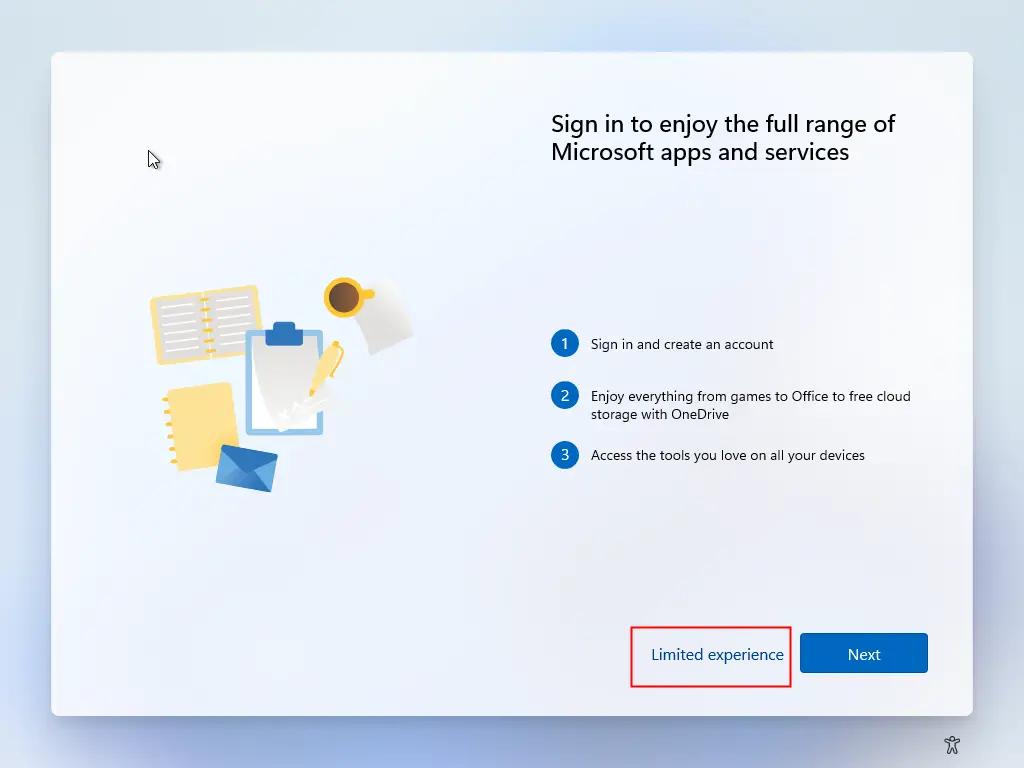
Step 36. Click the Limited experience link.
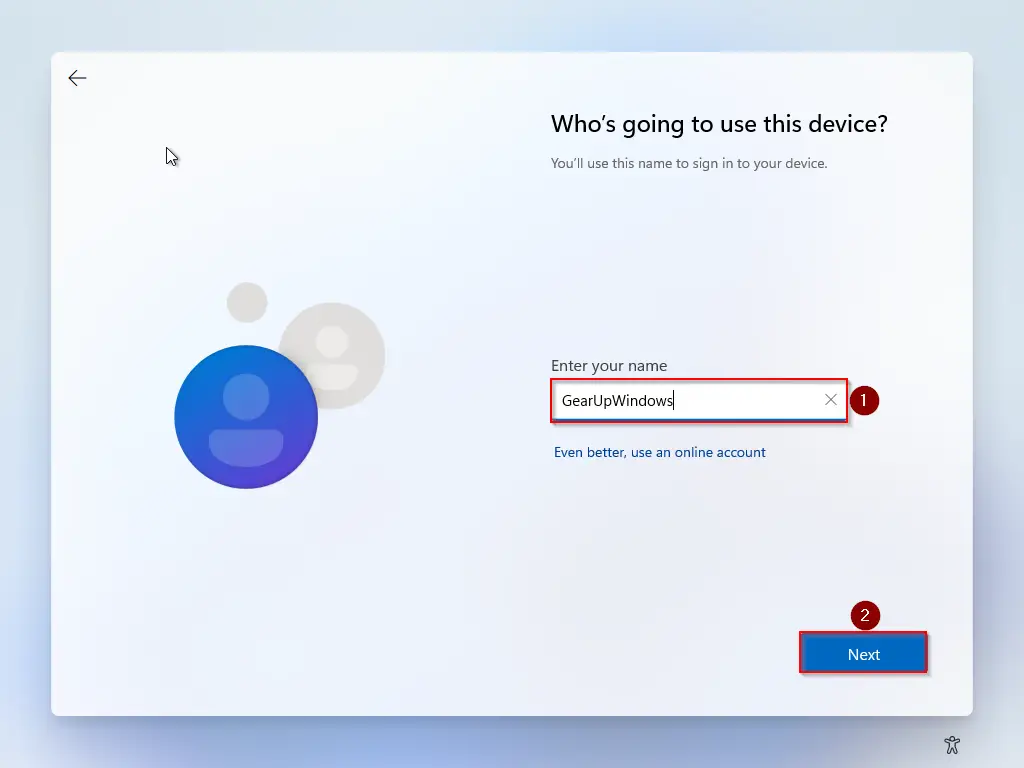
Step 37. In the “Enter your name” field, type the user name you would like to use on your Windows 11 PC and then click the Next button.
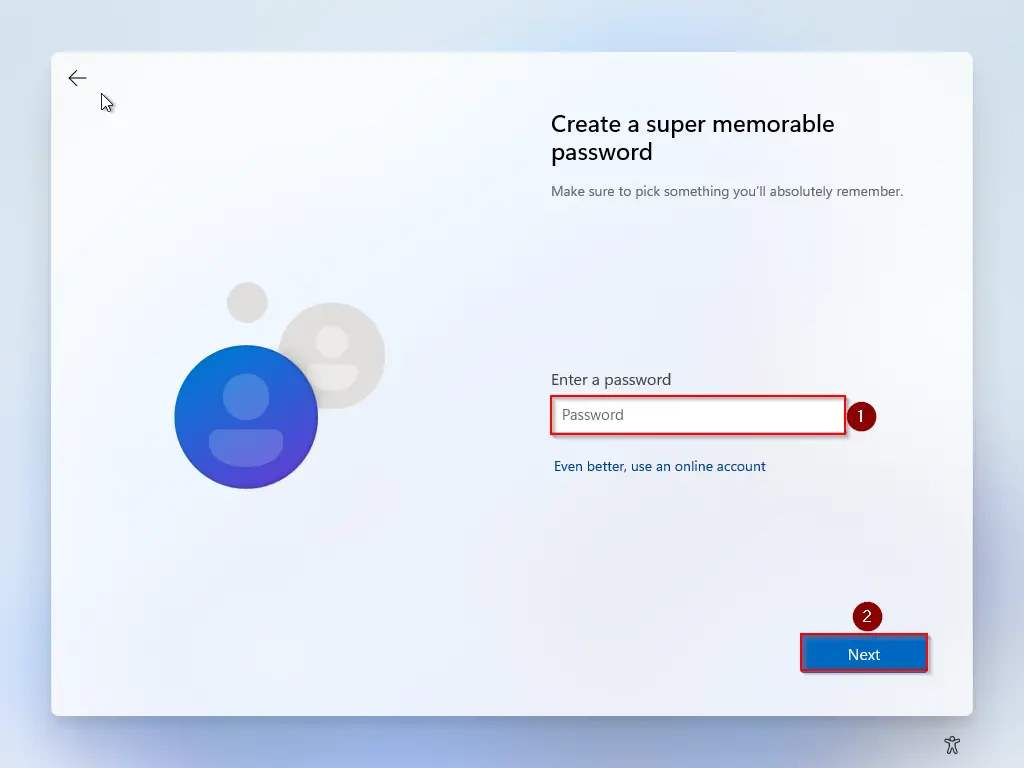
Step 38. Enter the password for the user name and then click the Next button.
Step 39. In the next window, confirm the password and then click the Next button.

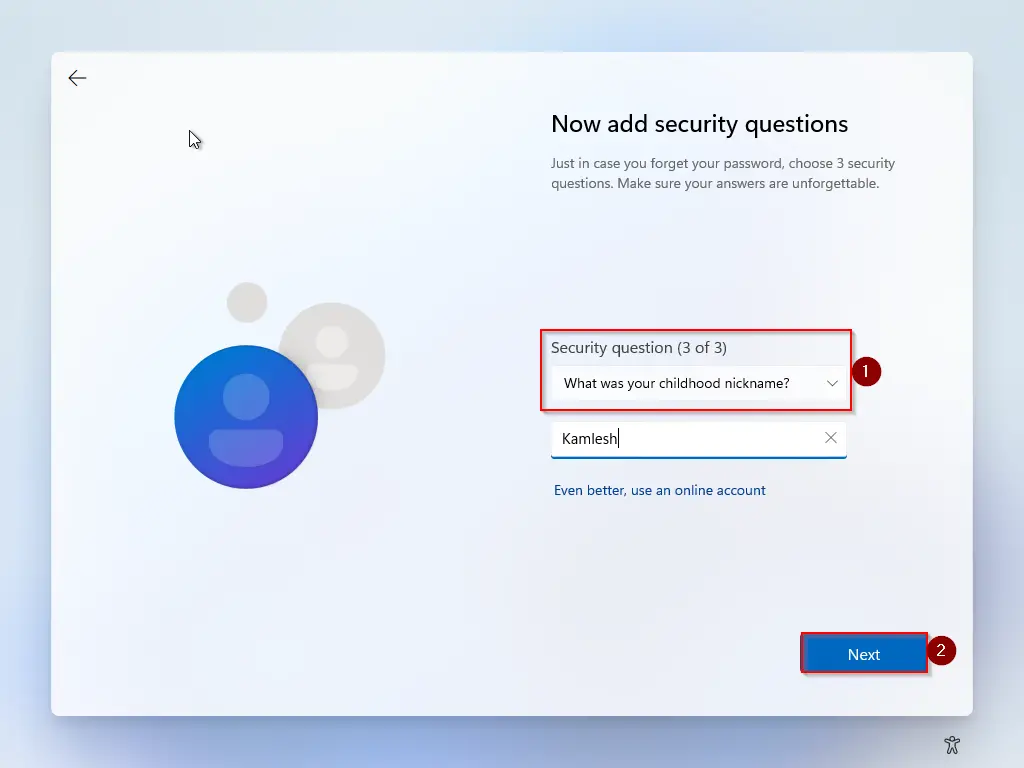
Step 40. Now, you need to select the security question and reply with the answer. You have to select three security questions one by one and need to reply to them. Once done, click the Next button.
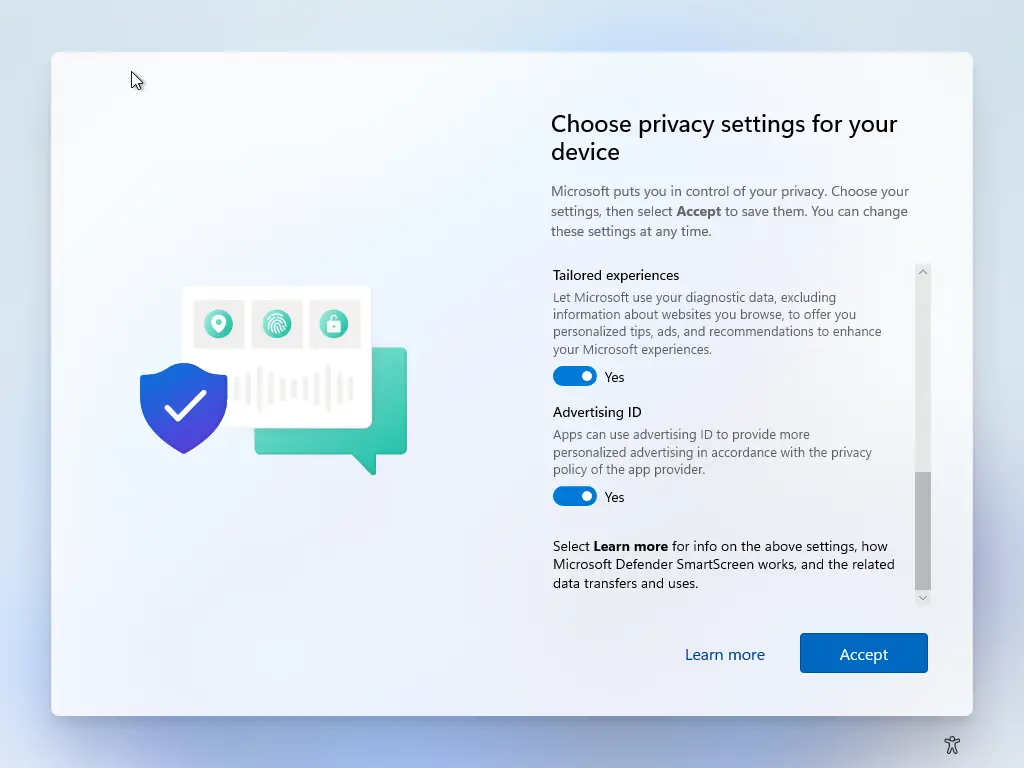
Step 41. Now you will see privacy settings options. By default, all the options will be turned On. If you wish, you can toggle Off to disable them. Finally, click the Accept button.
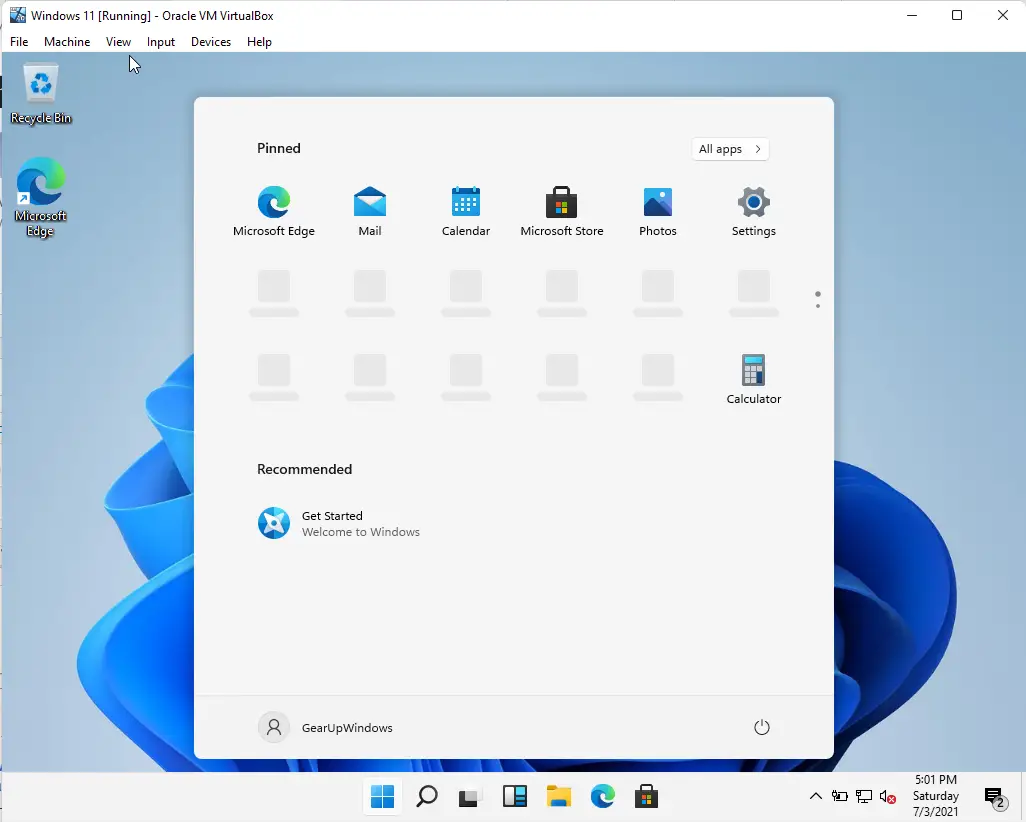
That’s all. Now, you have successfully installed Windows 11 on your virtual machine. The Settings app will be opened automatically after completing the Windows 11 installation.
Once virtual Windows 11 is up and running, it is recommended to install Guest Additions to Windows 11 in VirtualBox.
Conclusion
In conclusion, installing Windows 11 on a virtual machine may seem like a challenging task, as it requires bypassing Secure Boot and TPM 2.0 requirements from the ISO file. However, by following the step-by-step guide provided above, you can easily download and install Windows 11 on a VirtualBox virtual machine. Remember to download the latest version of Oracle VM VirtualBox, create a virtual machine, allocate RAM, and specify the virtual hard disk’s size before booting the virtual machine with the modified Windows 11 ISO file. By doing so, you can enjoy the new features and updates of Windows 11 without having to install it directly on your physical machine.
Hello Pammi,
Your guide was amazing.
Thanks for the ISO link as well.
It worked perfectly for me.
Thanks