VMware Workstation Player is a free virtualization program for the Windows operating system that enables you to install Windows 11. Installing Windows 11 on a VMware Workstation Player will not affect your core system files. When you don’t need it, then you can easily remove it from your PC.
If you use Windows 10 / 8 and want to try Windows 11 without upgrading or clean installation, the virtual machine is the only option. Earlier, we installed Windows 11 on VirtualBox; this time, I will use VMware Workstation Player to install it. Technically, both software is the same and provide a virtual interface to install any operating system without touching the host machine files/folders.
System requirements
- A 64-bit processor
- 1.3GHz or faster clock speed
- Minimum 4GB of RAM
- Windows 10/8 running host computer
- Required 60GB free storage
- Virtualization should be enabled in BIOS/UEFI
Apart from the requirement mentioned above, you need a Windows 11 ISO. If you haven’t yet downloaded the ISO, you can follow this tutorial to download Windows 11 ISO from Microsoft website.
How to Install Windows 11 on VMware Workstation Player?
To install Windows 11 on VMware Workstation Player, use the below-mentioned guidelines:-
Step 1. Download VMware Workstation Player from its official website.
Step 2. Then, install it on your computer as regular software.
Step 3. Double-click on its desktop shortcut icon to launch it.
Step 4. When the application opens for the first time, choose the first option, “Use VMware Workstation 16 Player for free for non-commercial use,” if you want to use this application without purchasing a license.
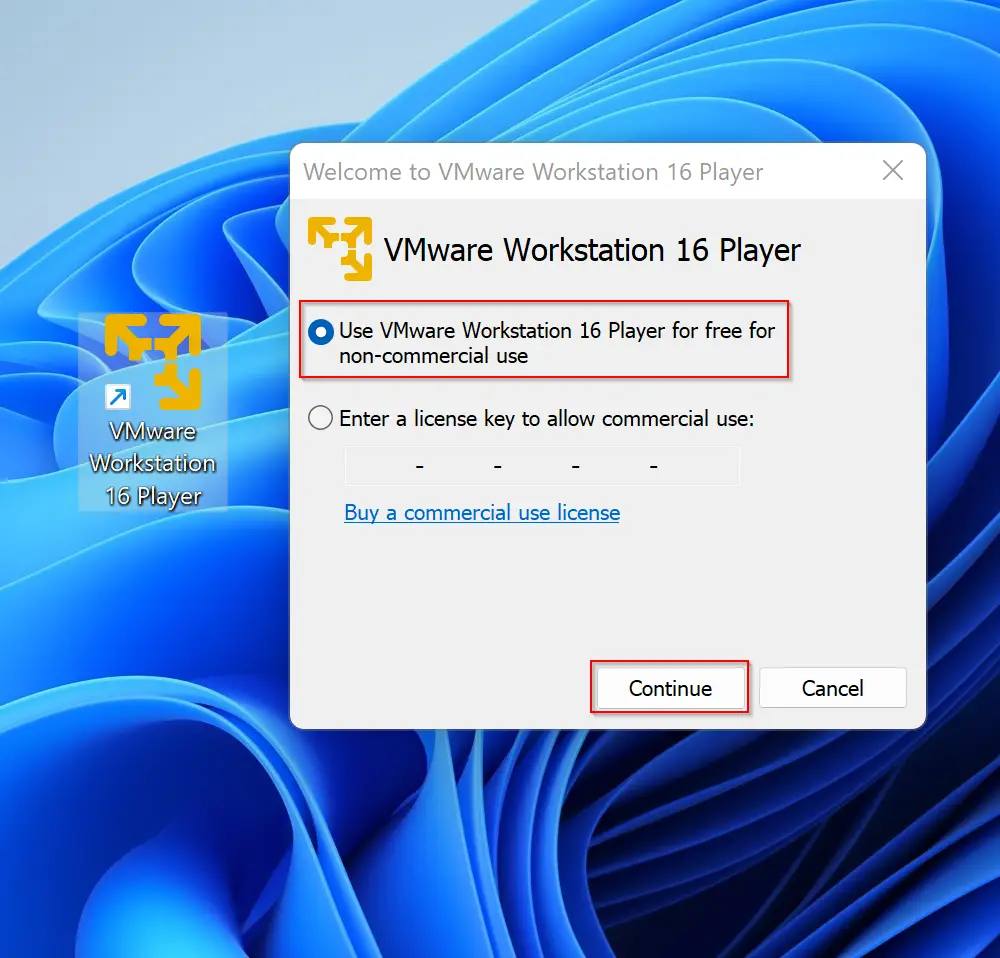
Step 5. Then, click the Continue button.
Step 6. Click “Finish” on the next screen.
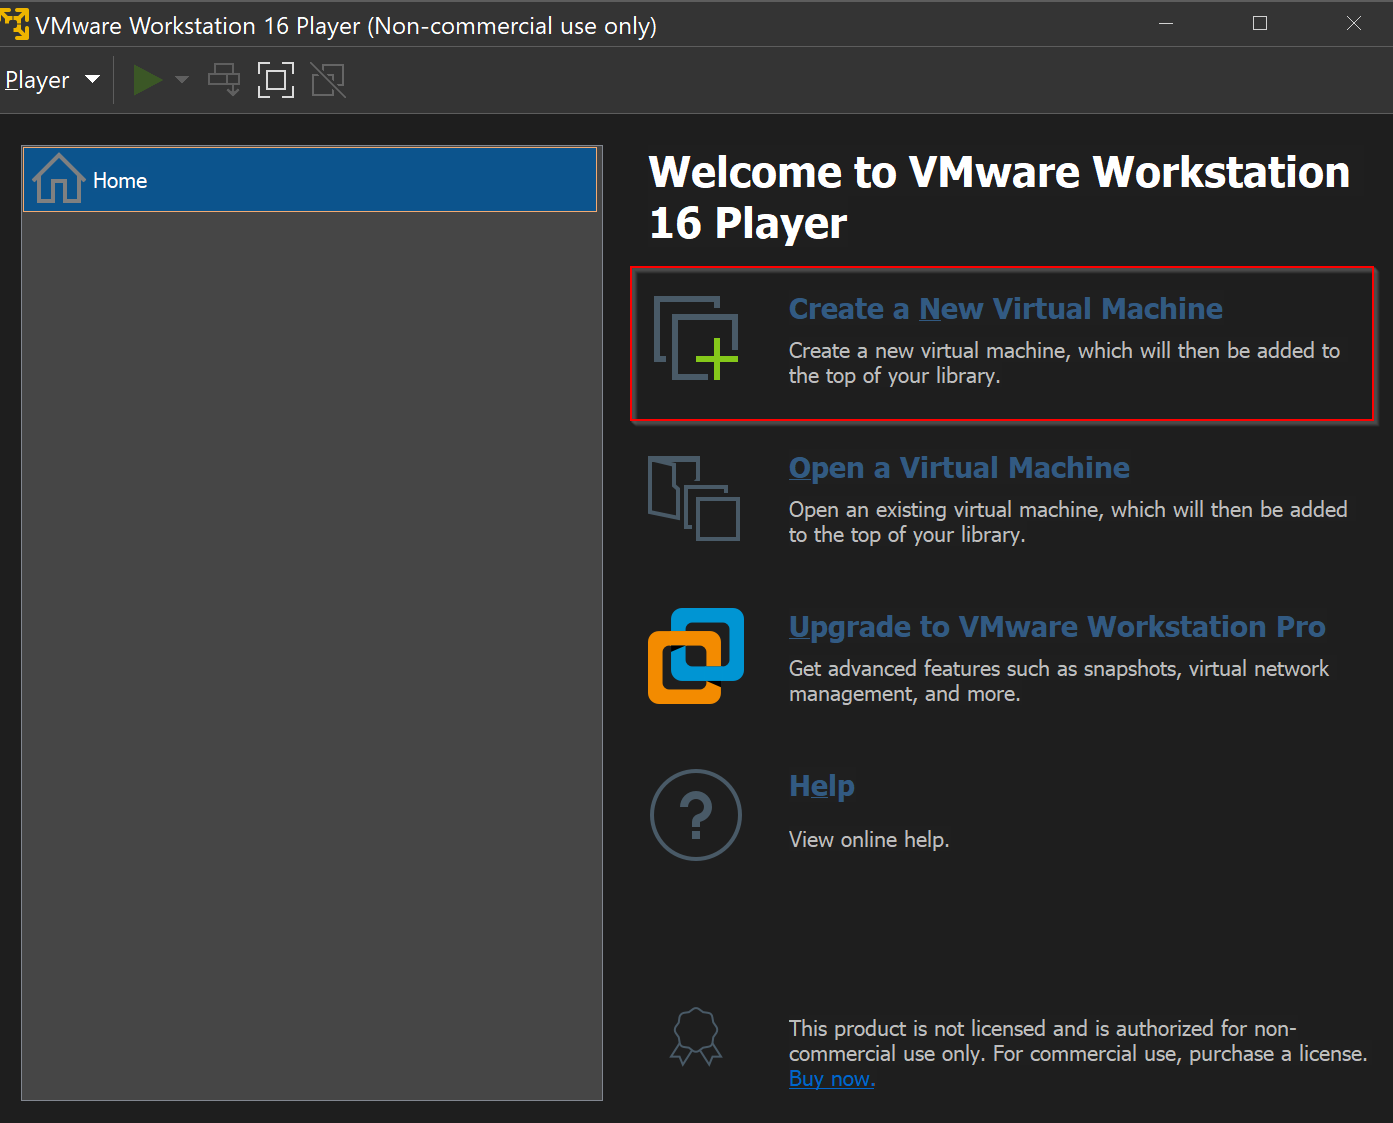
Step 7. After that, you will see the VMware player main screen, where you need to select the first option, “Create a New Virtual Machine.”
Step 8. Then, select the “Installer disk image file (iso)” option and click the Browse button to select the downloaded Windows 11 ISO file.

Step 9. When the ISO is added to the VMware interface, click the Next button.
Step 10. In the following screen, select Microsoft Windows under the “Guest operating system” section.
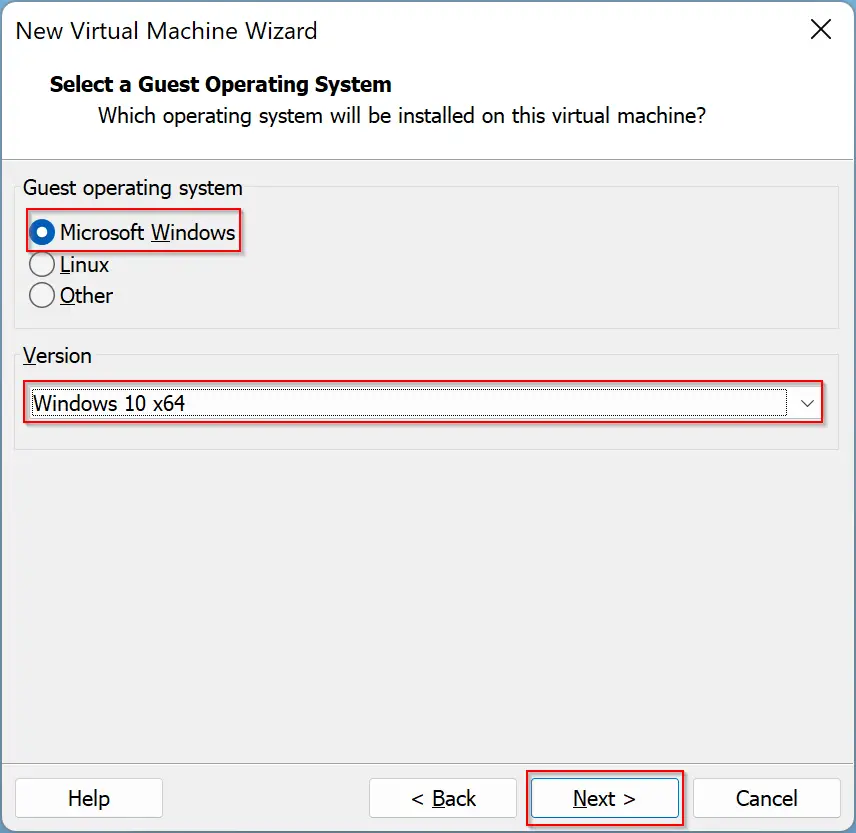
Step 11. Select Windows 10 x64 from the drop-down menu of “Version.” As of now, VMware doesn’t support Windows 11 officially.
Step 12. Then click the Next button.
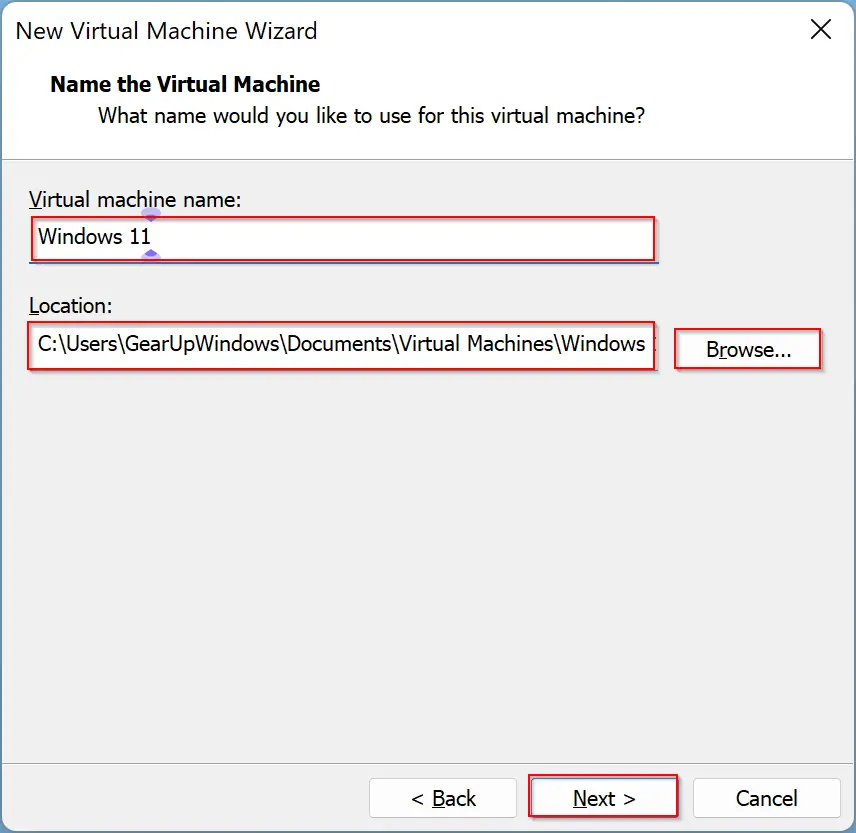
Step 13. Name the virtual machine Windows 11 or whatever you want to call it. Further, if you wish, change the destination of the virtual machine or leave it to the default location. When done, click the Next button.
Step 14. Now, assign the maximum disk size to 60GB, or if your HDD/SSD allows, you can set more than this. Then you can choose from either option “Store virtual disk as a single file” or “Split virtual disk into multiple files.” You can select the correct one after reading the description of the options.
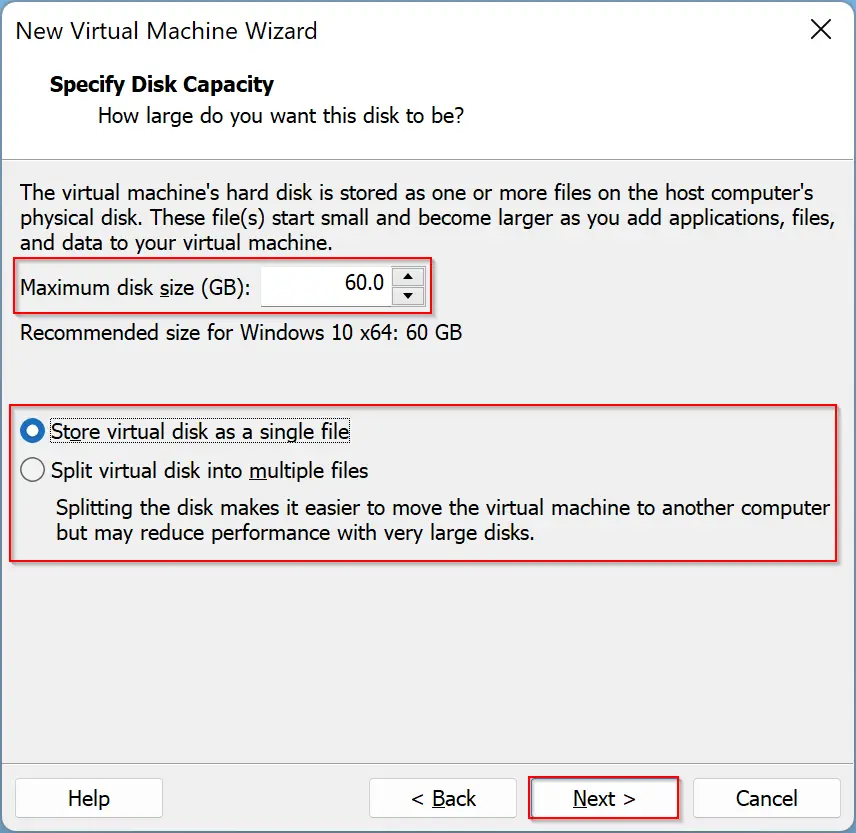
Step 15. When you’re ready, click the Next button.
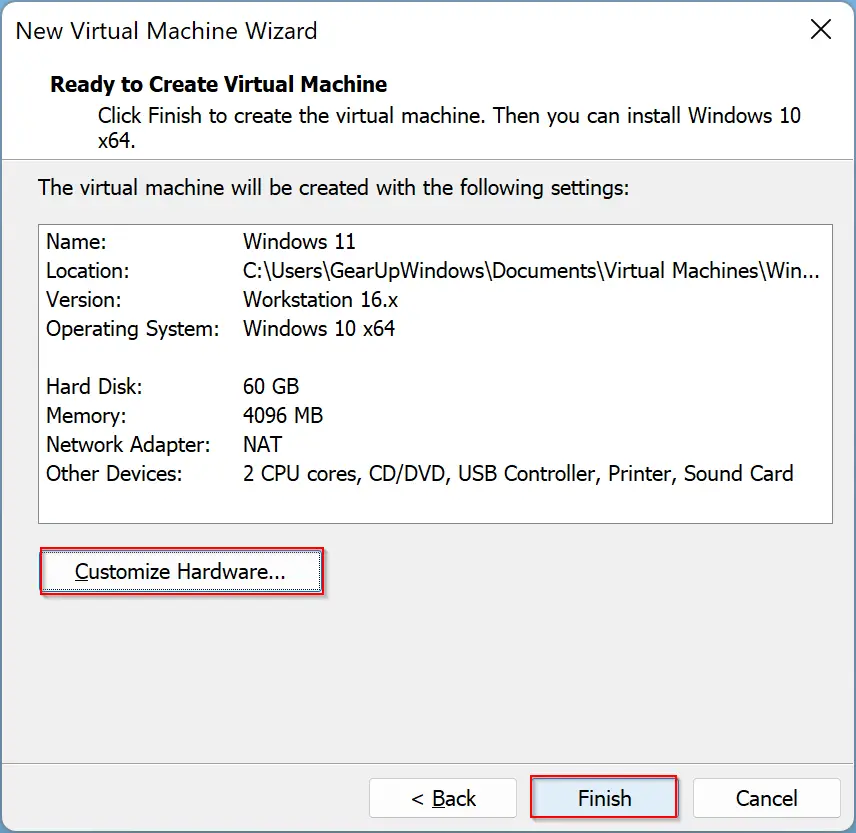
Step 16. The next screen displays all the hardware information regarding your virtual machine. If you are happy with the existing hardware, you can click the Finish button. Otherwise, you can click the Customize Hardware button to change your virtual machine hardware.
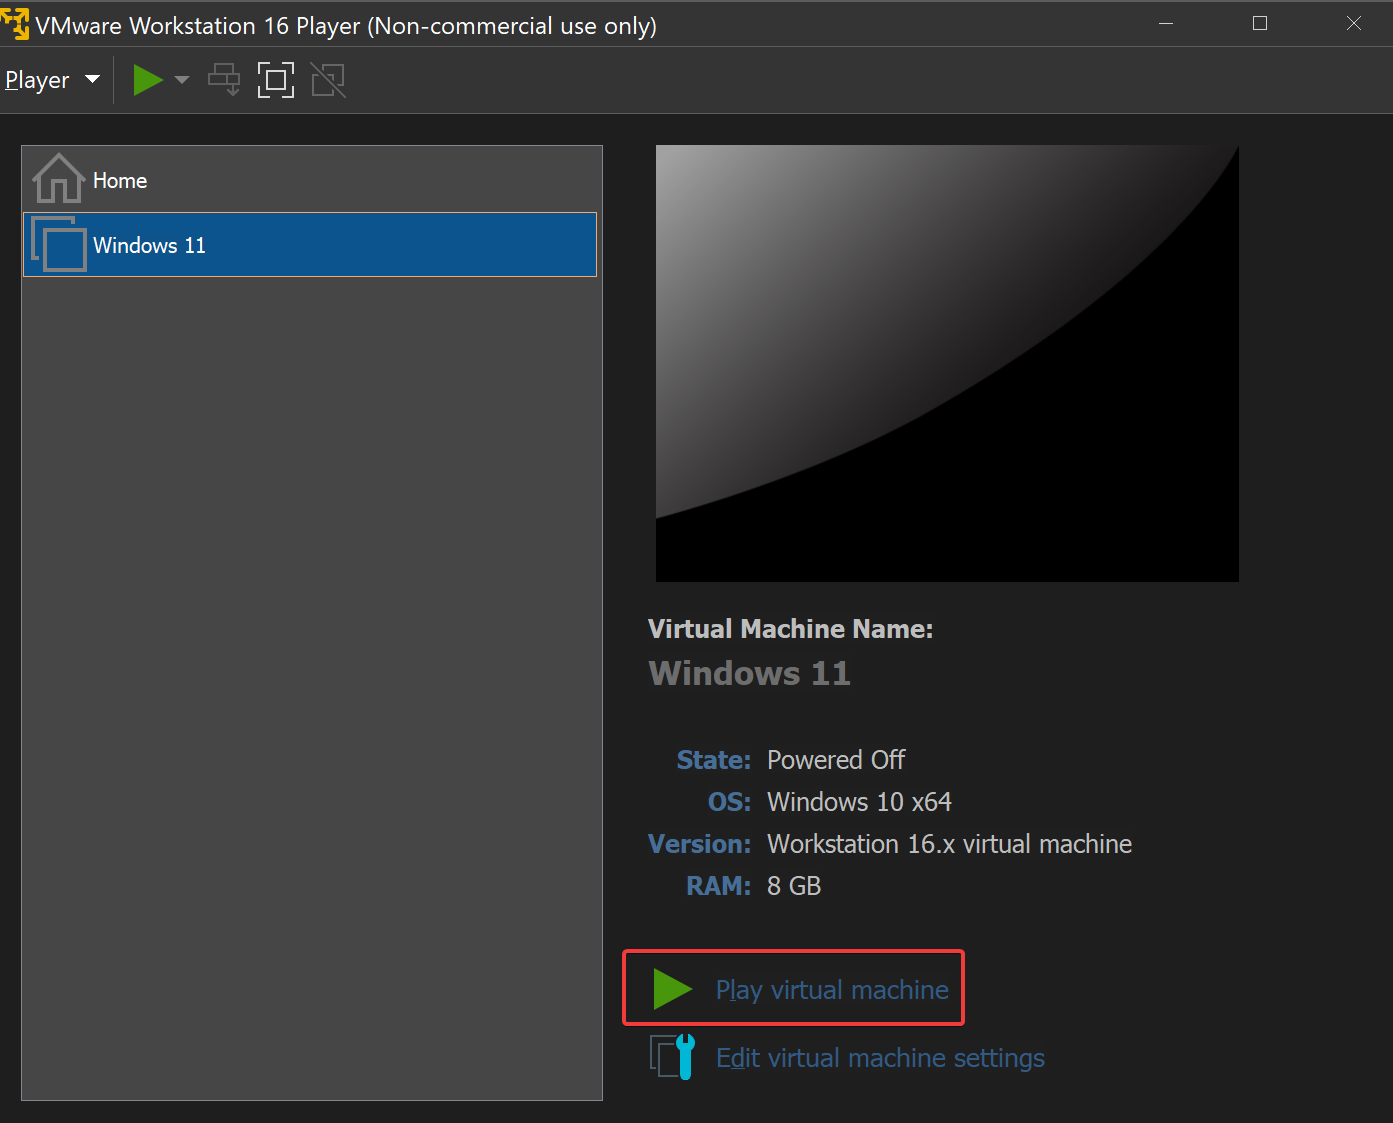
Step 17. Next, click the Play virtual machine option.
Step 18. Now, your Windows 11 installation will start on the virtual machine.
You will be prompted a few times when Windows 11 needs input from you. If you are new to Windows, you can follow the guidelines for installing Windows 11 on VirtualBox (from step 23 to step 41).
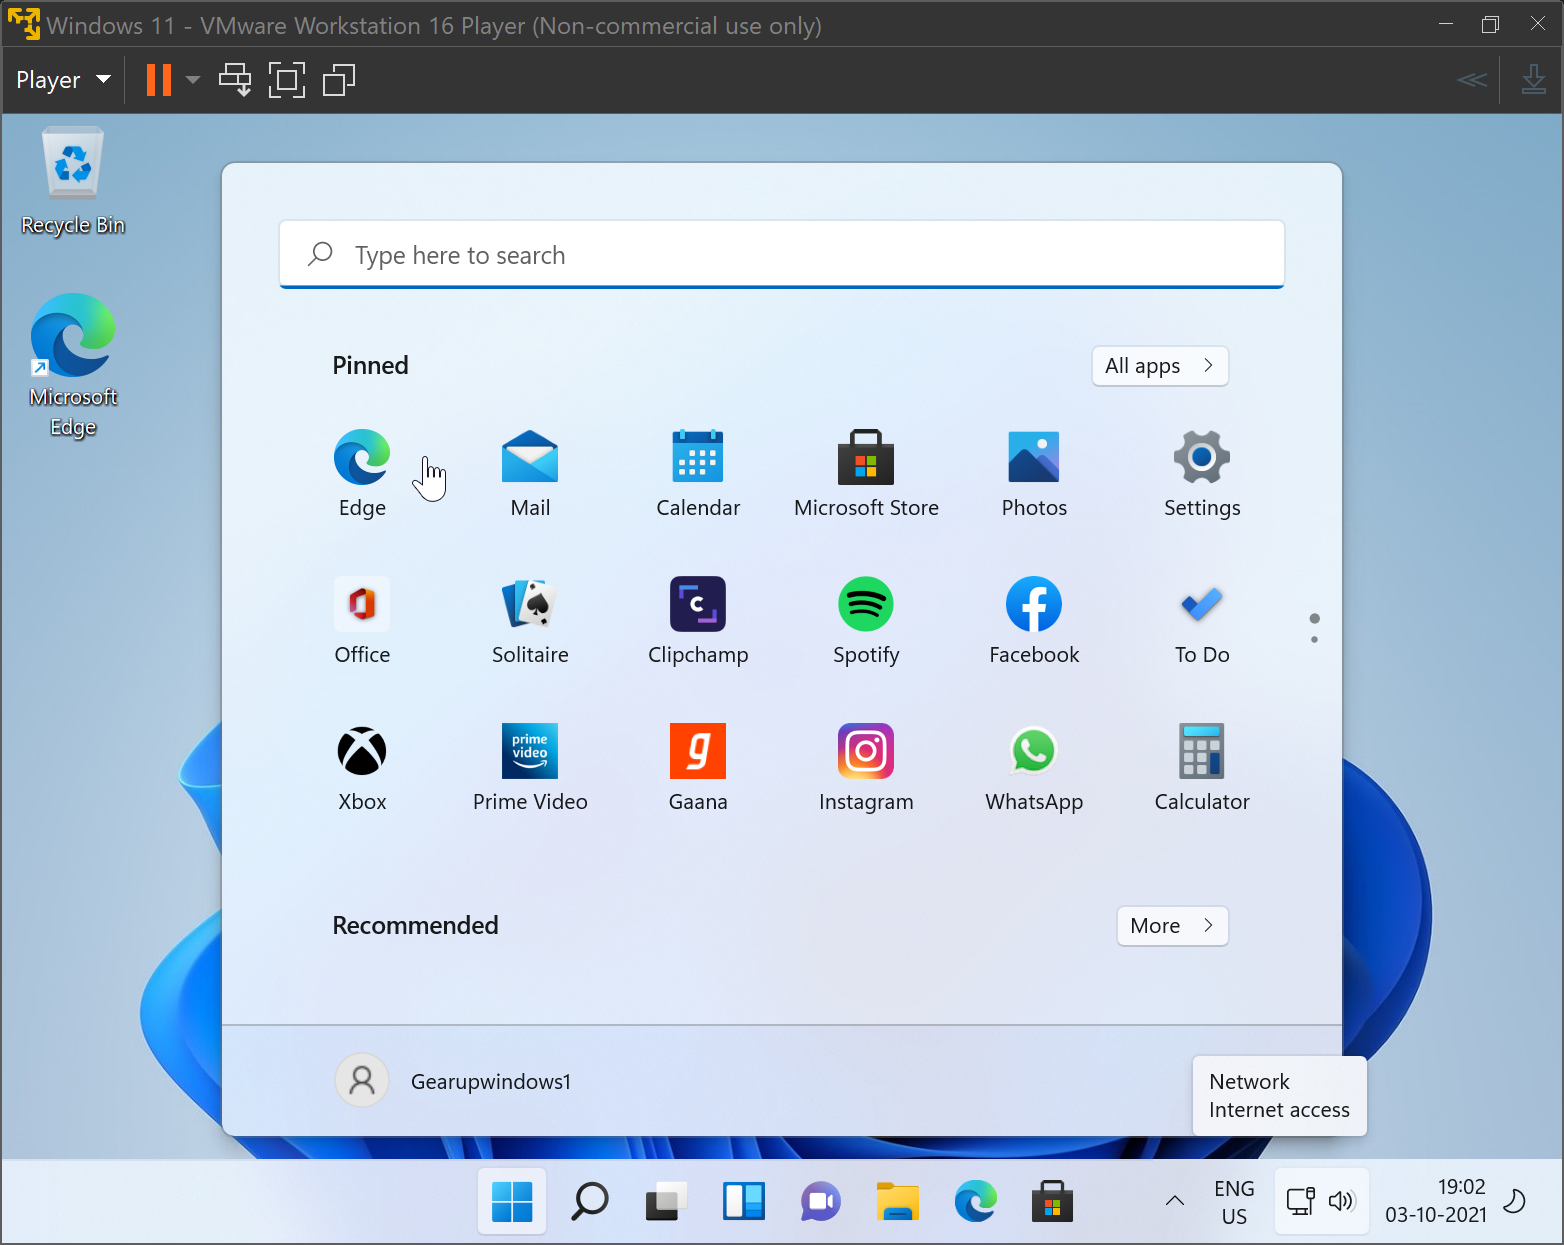
After completing all the steps, you will have Windows 11 running on a VMware Workstation Player.
Good luck!
Conclusion
In conclusion, VMware Workstation Player is a free and user-friendly virtualization program that allows you to install Windows 11 on your Windows 10/8 operating system without affecting your core system files. With a few simple steps, you can create a virtual machine and run Windows 11 smoothly. The system requirements are relatively low, and the process is easy to follow, even for those who are new to virtualization. Using a virtual machine is the best way to try Windows 11 without upgrading or clean installation, and VMware Workstation Player is an excellent choice for this purpose.