If you are new to Windows 11 and don’t know how to connect to a Wi-Fi network, this gearupwindows article will help you. Connecting to Wi-Fi on Windows 11 has changed a bit compared to Windows 10. Windows 11 does not offer a dedicated Wi-Fi icon on the taskbar that one can use to access Wi-Fi connection settings.
Wi-Fi is combined into Quick Settings that, include Wi-Fi, sound, and battery buttons. Each icon is independent when you hover over that, but when you click on a single button on the taskbar, it brings up the Quick Settings flyout. Using Quick Settings flyout, you can connect to a Wi-Fi network; disable and enable Wi-Fi.
In this gearupwindows article, we will guide you on connecting or disconnecting the Wi-FI network. After that, I will show you how to enable and disable the Wi-Fi connection on a Windows 11 PC.
How to Join a Wi-Fi Network on Windows 11?
Follow these simple steps to join a Wi-Fi network on Windows 11:-
Step 1. First, bring up the Quick Settings menu by clicking the Quick Settings area (click any icon on the taskbar, Wi-Fi, sound, or battery) on the taskbar.
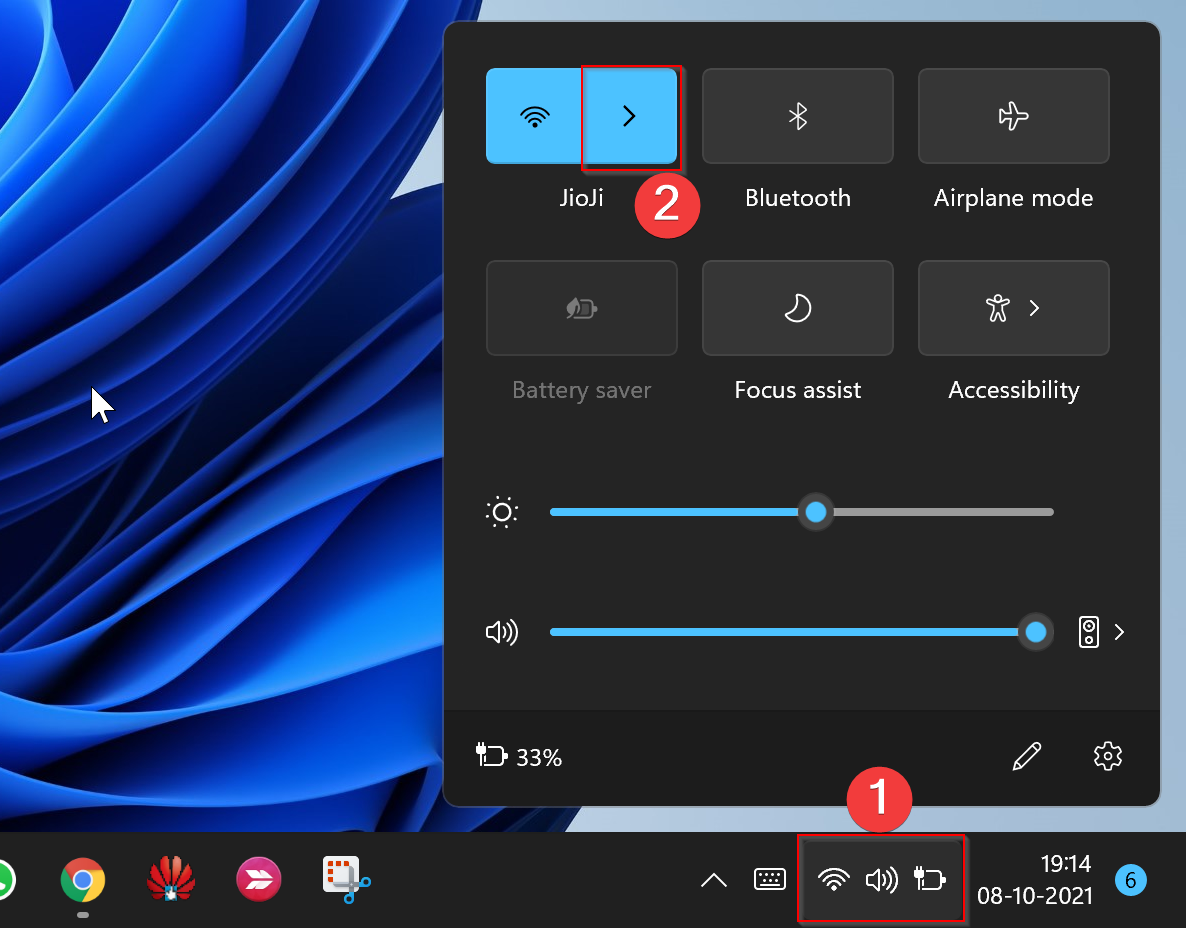
Step 2. When Quick Settings flyout opens, click on the right-facing caret beside the Wi-Fi symbol.
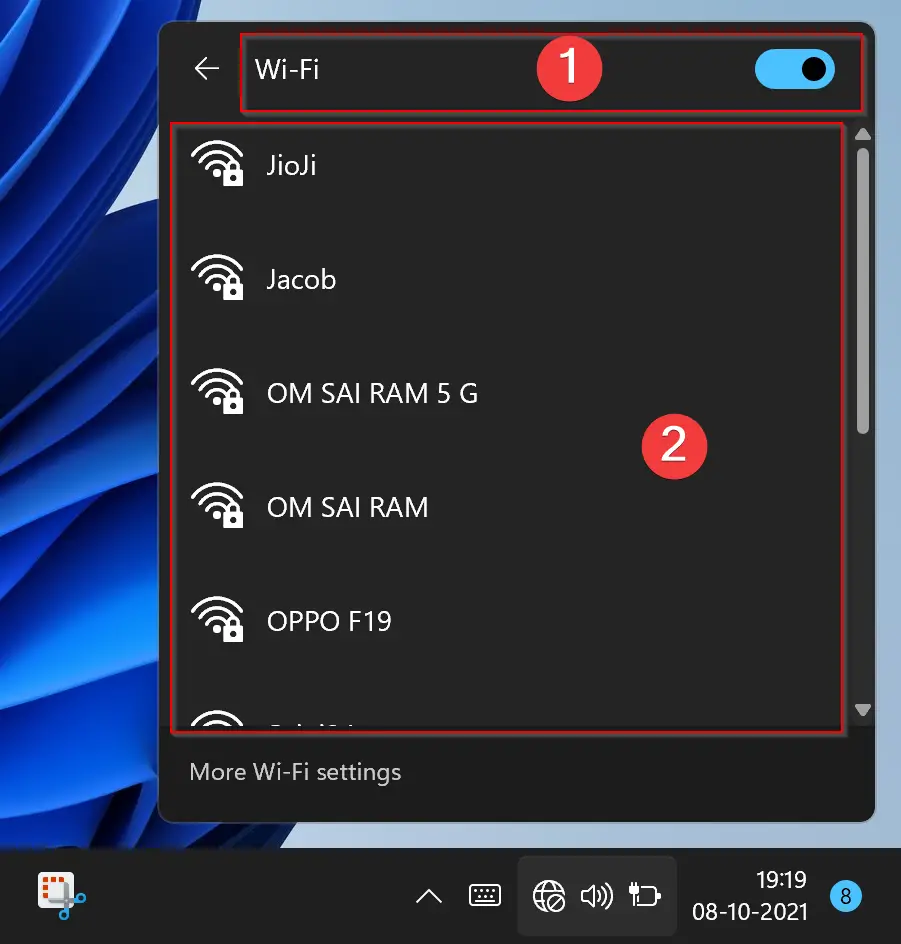
Step 3. After that, toggle the switch to turn On/Off Wi-Fi. When Wi-Fi is turned On, Windows will search and show available Wi-Fi connections within the range of your computer.
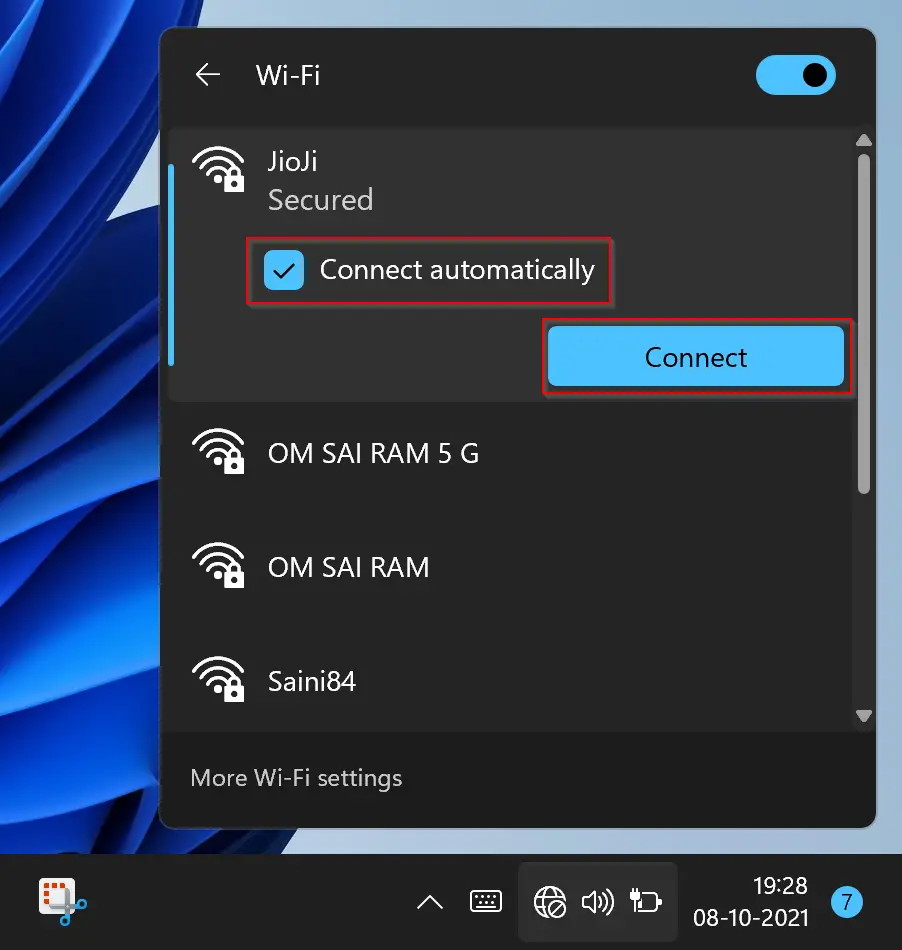
Step 4. Click on the Wi-Fi profile name that you want to connect to your computer. Check the option Connect automatically if you want to use that connection frequently. Then click the Connect button.
Step 5. Now, Windows will prompt you to “Enter the network security key.” Type the Wi-Fi profile password and then click the Next button.
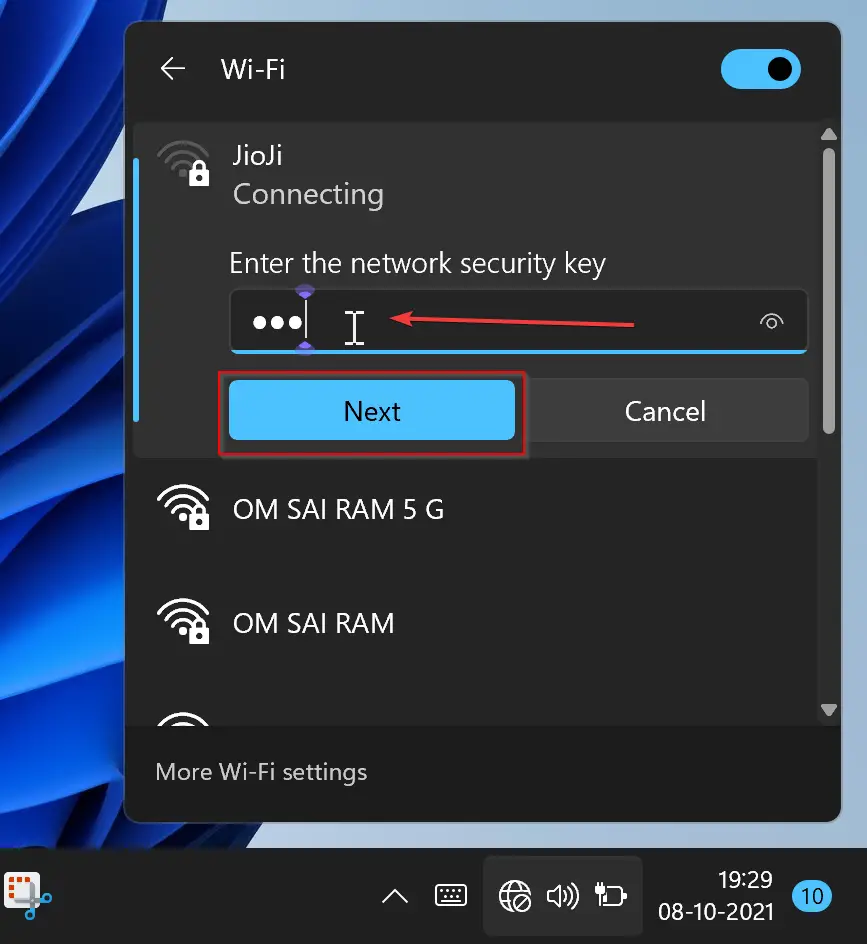
That’s it. Now you are connected to the selected network.
How to Connect to a Wi-Fi Network on Windows 11 using the Settings app?
To connect to a Wi-Fi network using the Settings app, do the following:-
Step 1. Open the Settings app by pressing Windows + I keys from the keyboard.
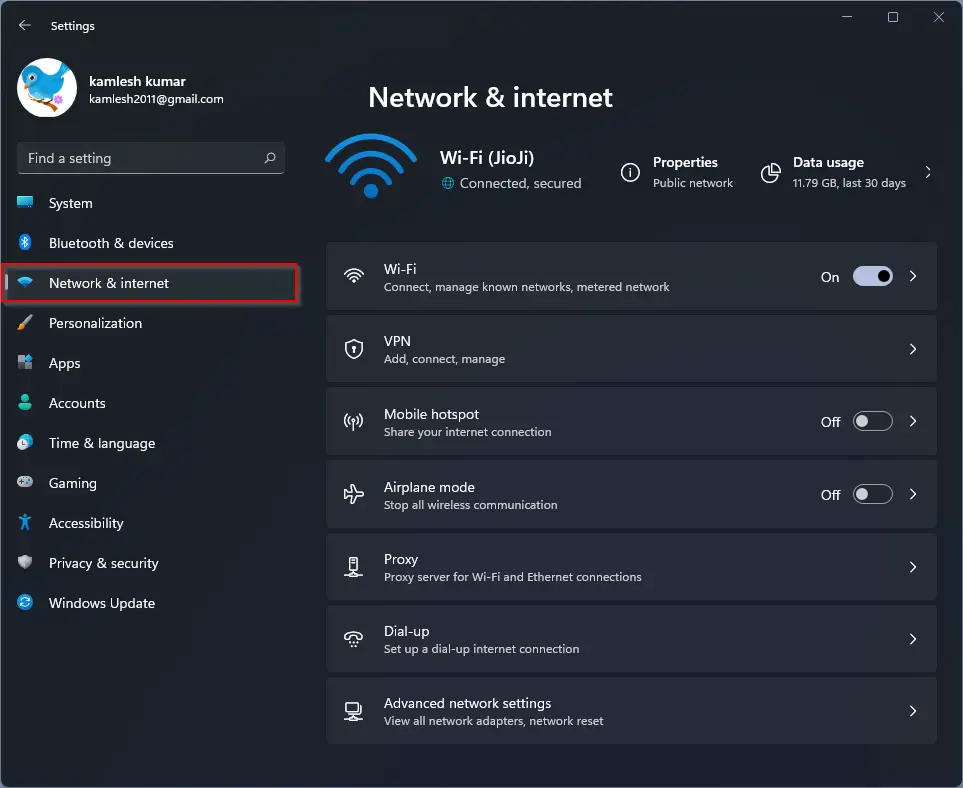
Step 2. In the Settings window, select Network & internet from the left sidebar.
Step 3. On the right side pane, click the Wi-Fi option.
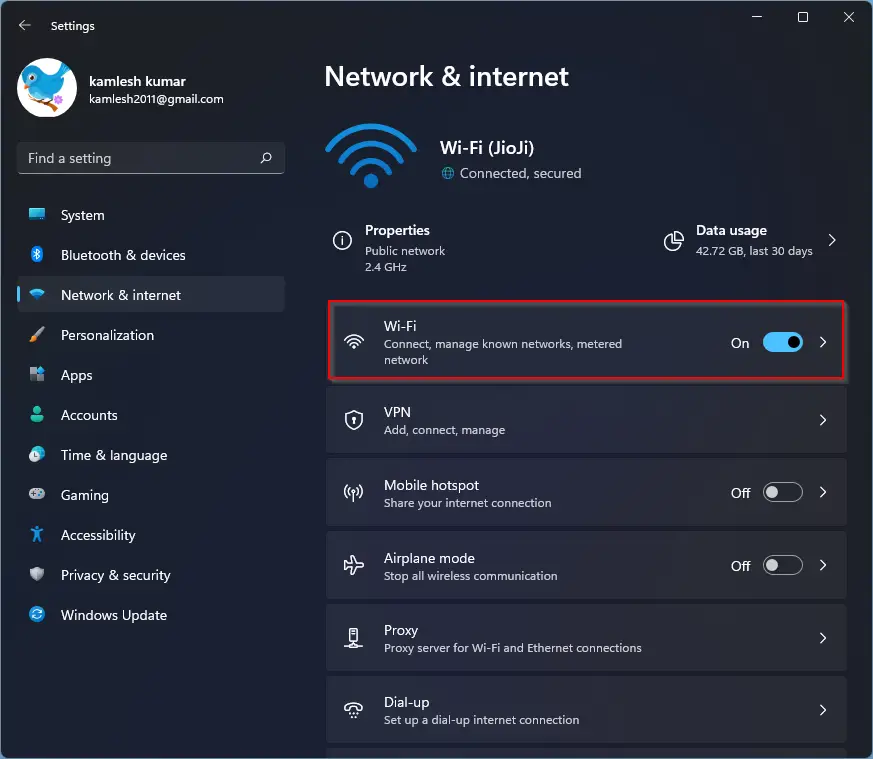
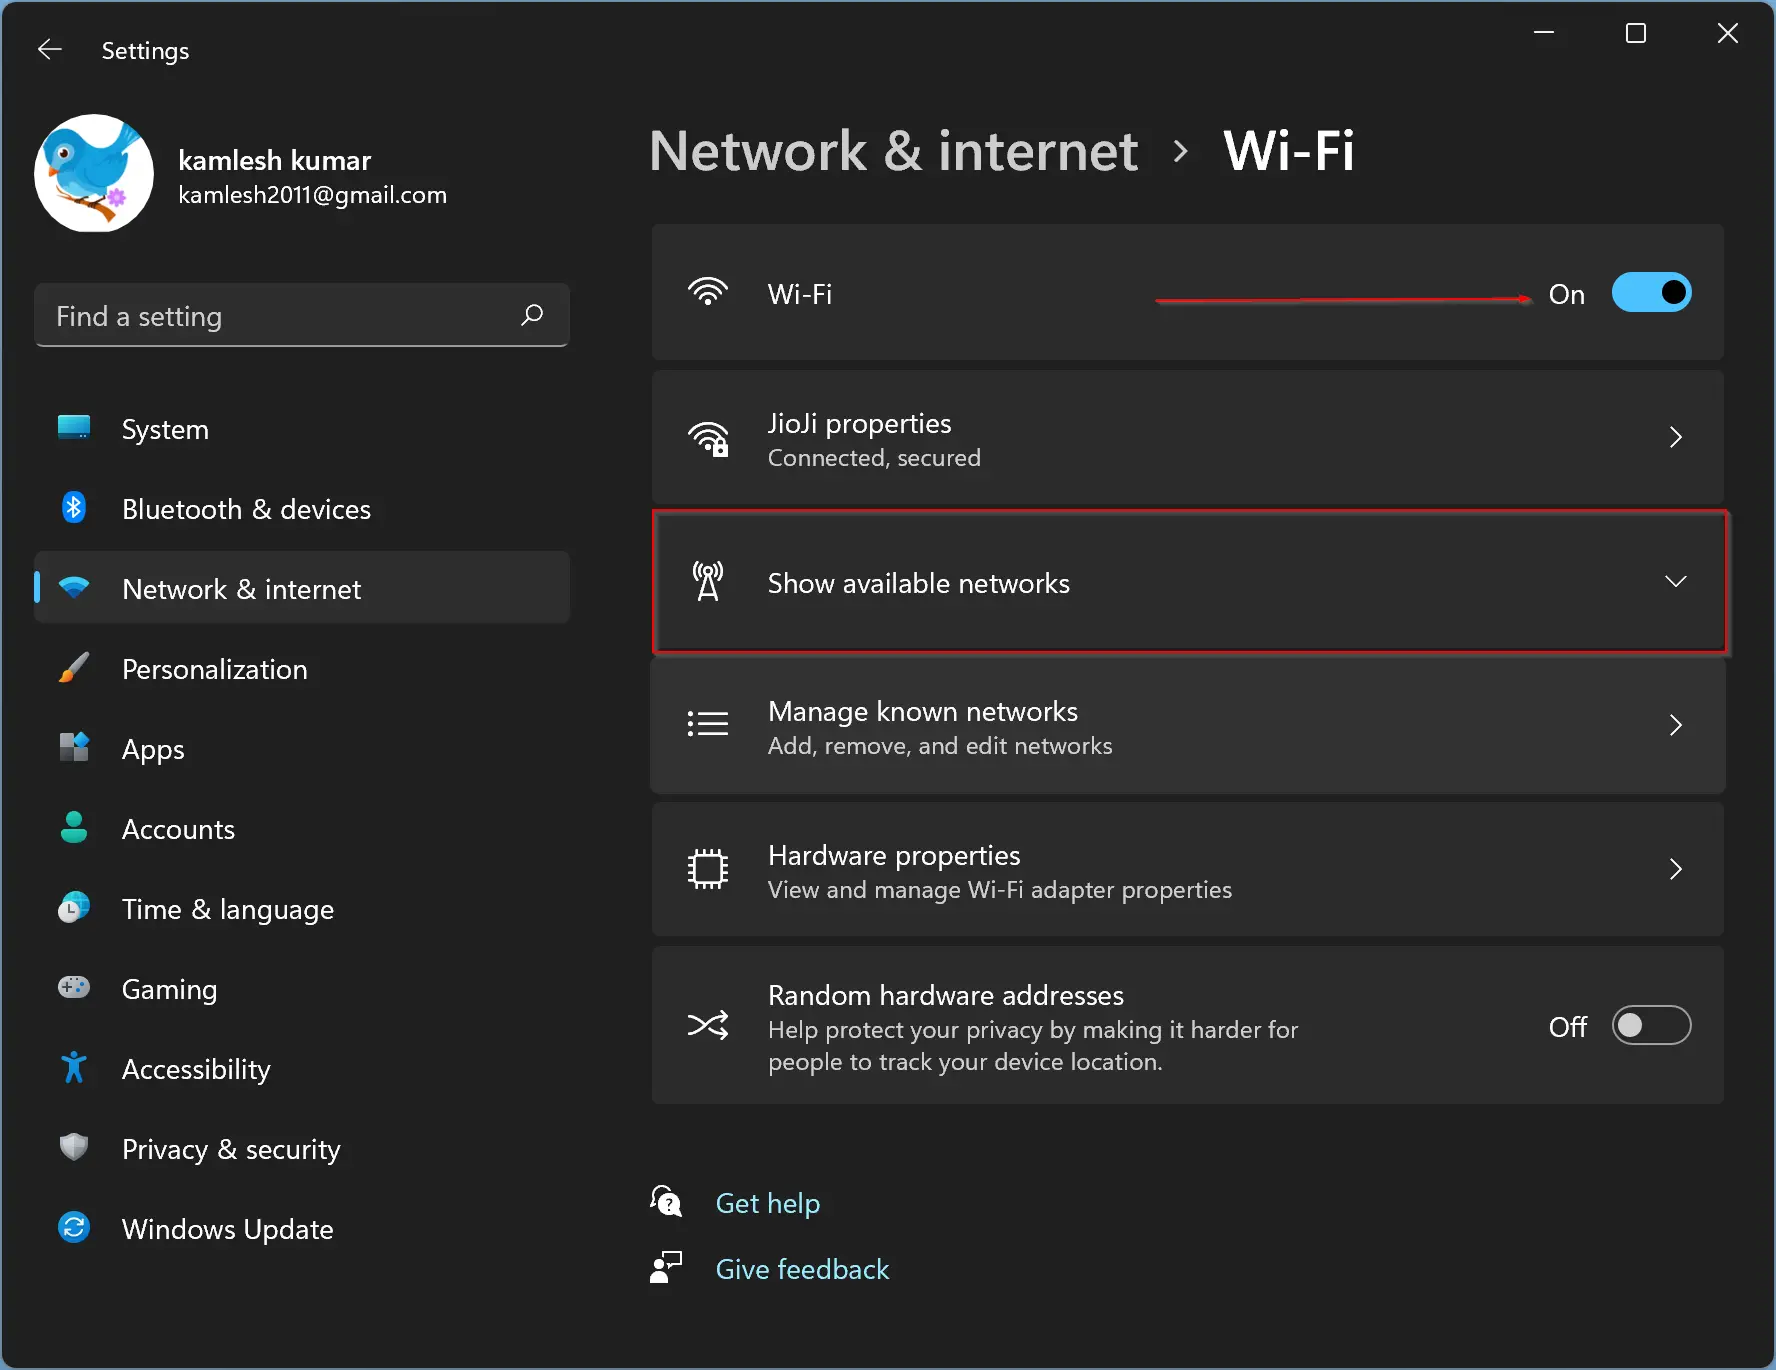
Quick Note: In the above settings, toggle the switch beside Wi-Fi to turn on/off.
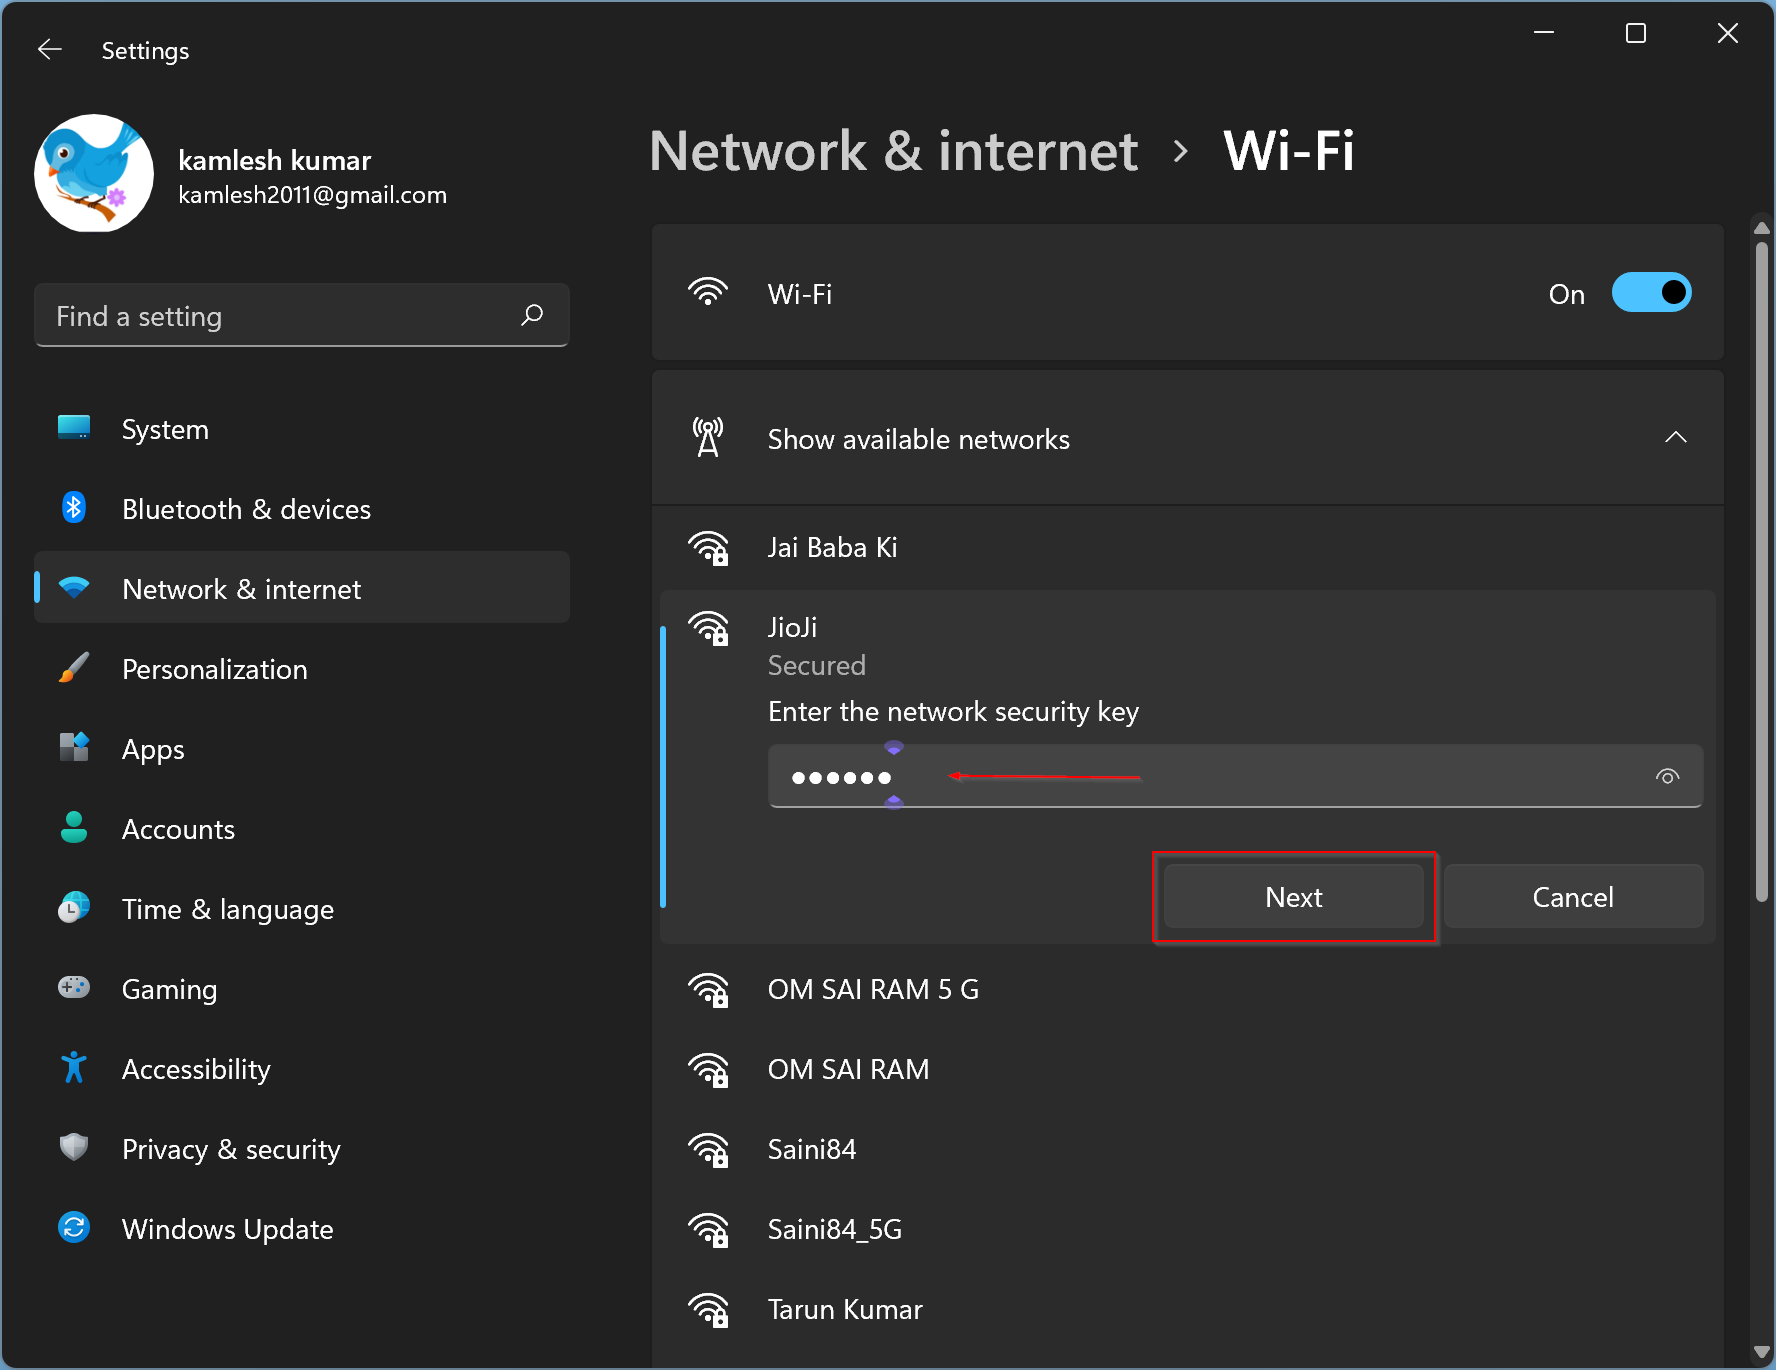
Step 4. Ensure the Wi-Fi is turned On, then click on Show available networks.
Step 5. In the upcoming window, you will see all the wireless networks within range of your computer. Select the connection from the list you wish to connect. Check the option “Connect automatically.” Then click the Connect button.
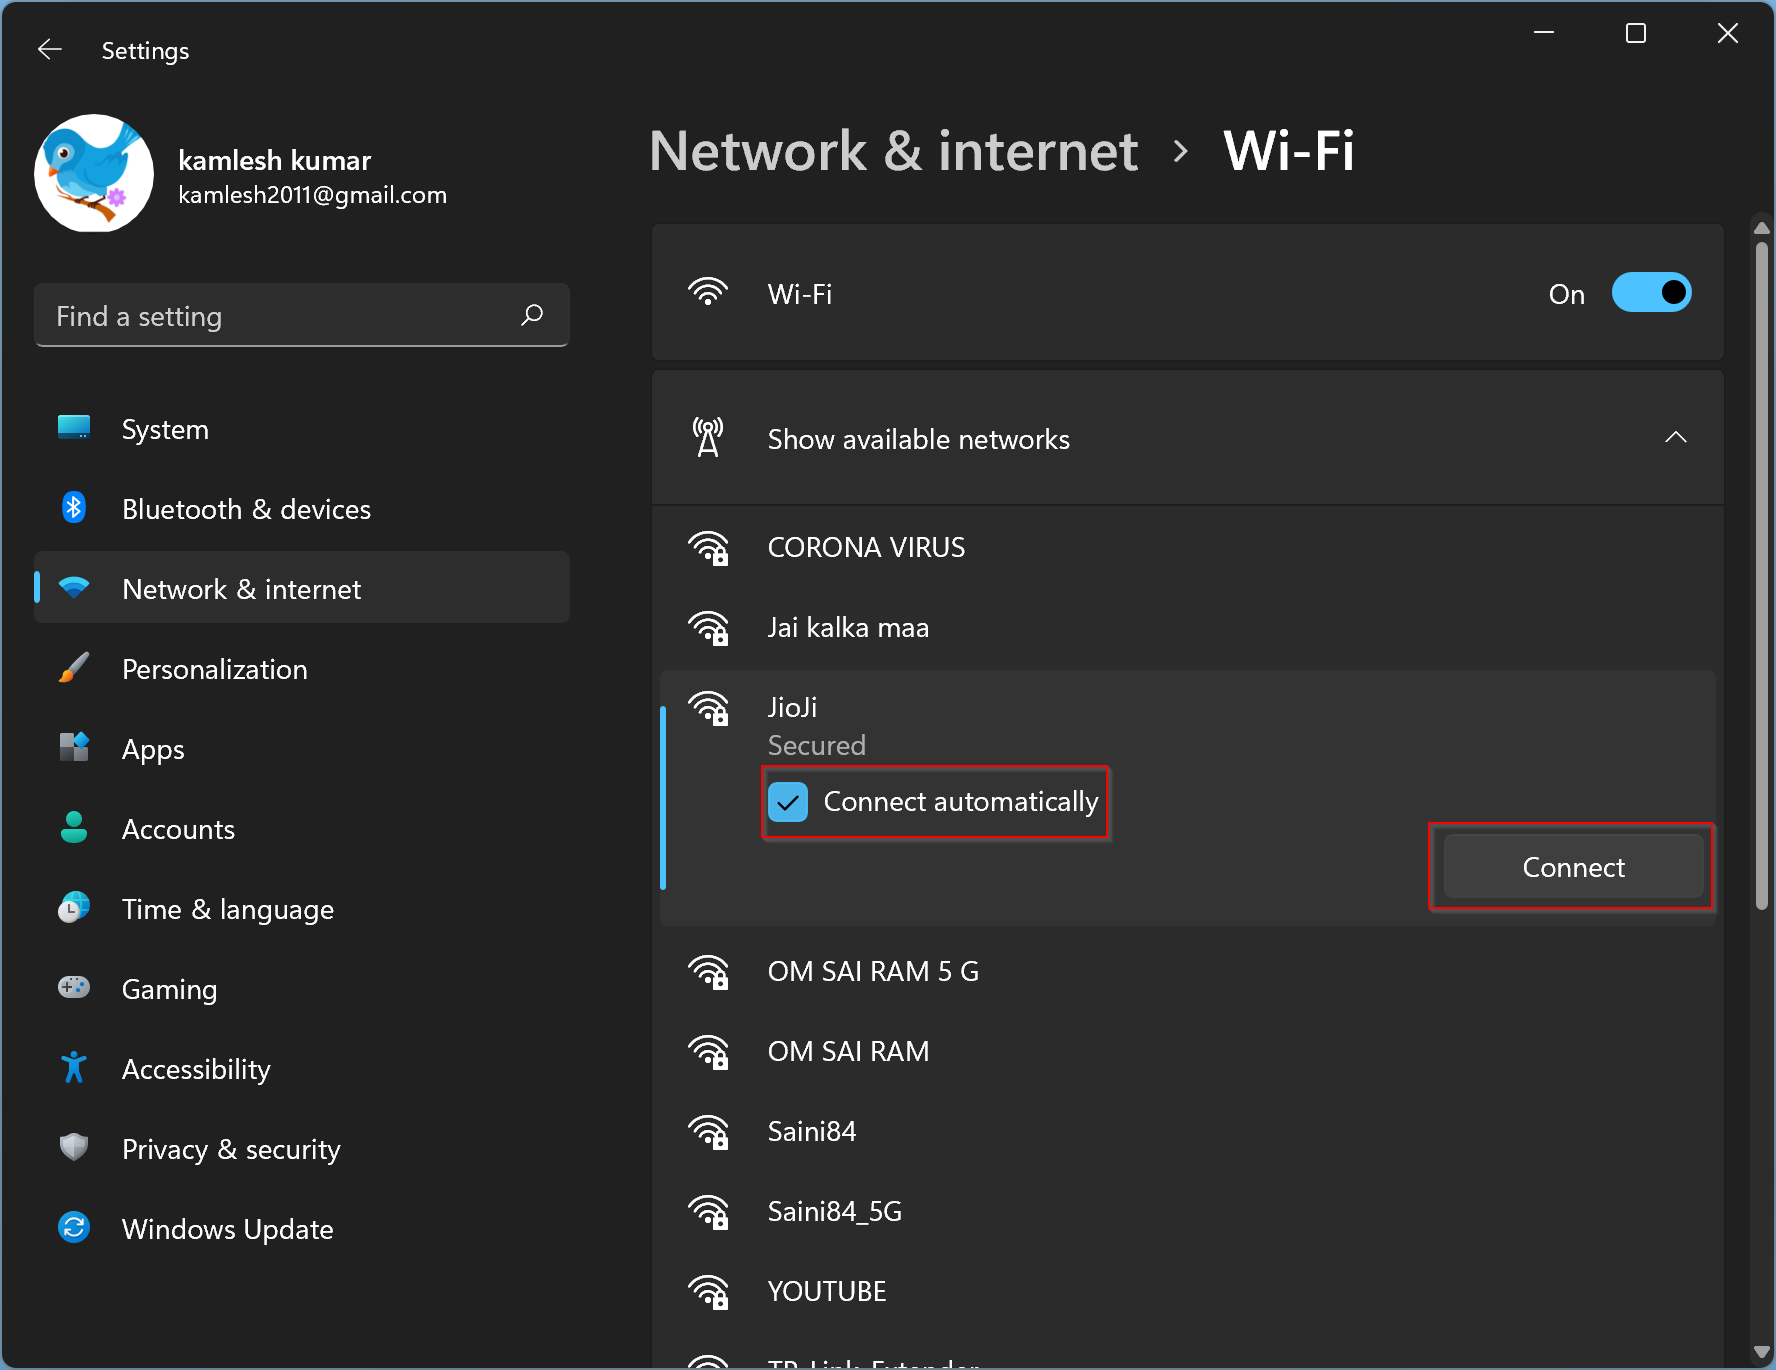
Step 6. When Windows 11 prompts, enter the selected network’s password or network security key and click the Next button to connect them to your PC.
Good luck.
Conclusion
In conclusion, connecting to a Wi-Fi network on Windows 11 may be a little different from Windows 10. However, it is a simple process, and this gearupwindows article has provided a step-by-step guide to help you through the process. Whether you prefer to connect through Quick Settings or the Settings app, both methods are straightforward and easy to follow. With this guide, you can quickly connect to a Wi-Fi network on your Windows 11 PC without any hassle.