Do you want to share your Windows laptop’s internet connection with other devices using Wi-Fi? Starting with Windows 10, Microsoft includes a hidden built-in tool that allows users to turn their computers into Wi-Fi hotspots. This built-in feature is still available on Windows 11, meaning users can easily turn their laptops into Wi-Fi hotspots without relying on third-party tools.
This hotspot feature can be incredibly useful in various situations, such as when users are limited to one login for a Wi-Fi network or rely on an Ethernet connection to access the internet. In such cases, users may not be able to connect their smartphones, tablets, or other Wi-Fi-enabled devices to the internet without activating additional internet connections, resulting in extra costs. However, with Windows 10 and Windows 11, users can easily turn their computers or laptops with Wi-Fi adapters into hotspots without needing a separate router or modem. This means that users can share a single internet connection with all Wi-Fi-enabled devices, saving them money.
How to Turn Windows 11 PC into a Mobile Hotspot?
There are both free and paid applications available online that can turn a PC into a Wi-Fi hotspot. However, if you are using Windows 11, there is no need to download or install any additional software to enable this feature. To activate the Wi-Fi hotspot feature on your Windows 11 PC or laptop, follow these simple steps:-
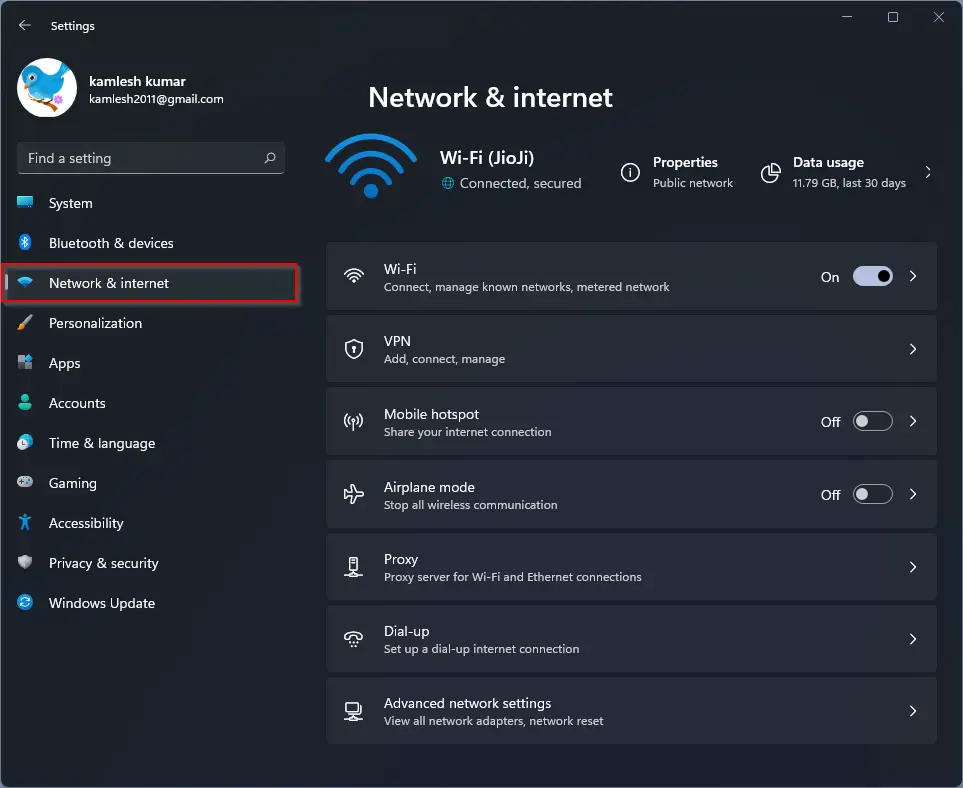
Step 1. Open the Settings app by pressing the Windows + I keys or any other method, and then click on the Network & internet category from the left side pane.
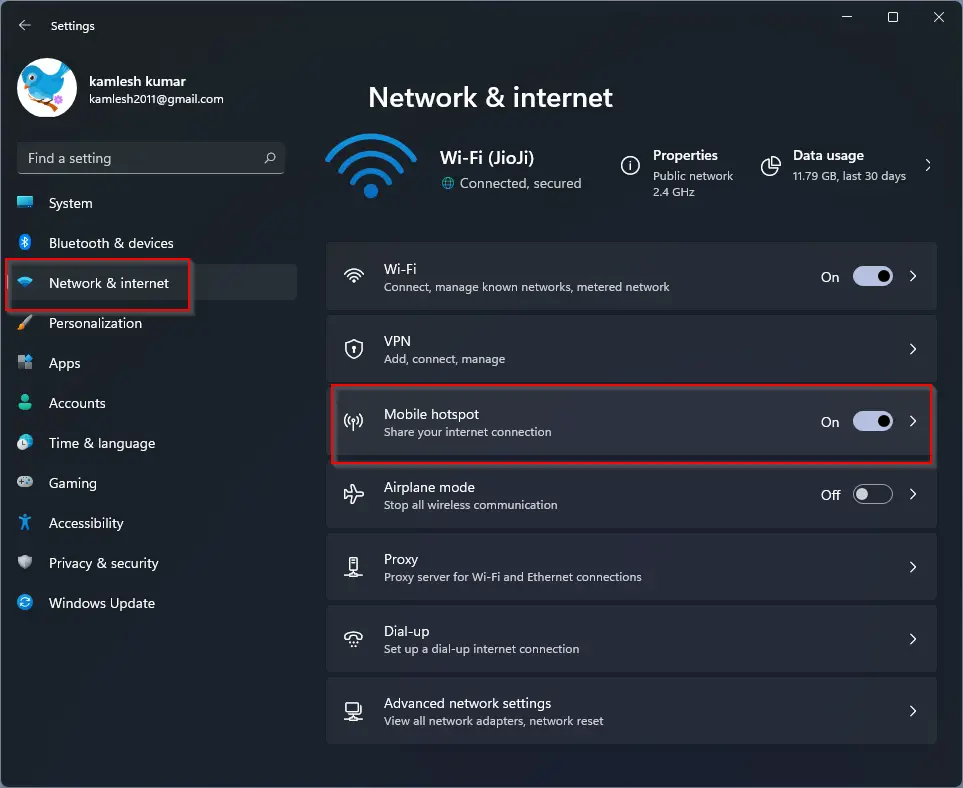
Step 2. On the opposite side of the “Network & Internet” category, turn the toggle switch to the On position next to the Mobile hotspot tab. Now, your Windows 11 will start broadcasting the SSID. Now, click anywhere under “Mobile hotspot” to configure its settings.
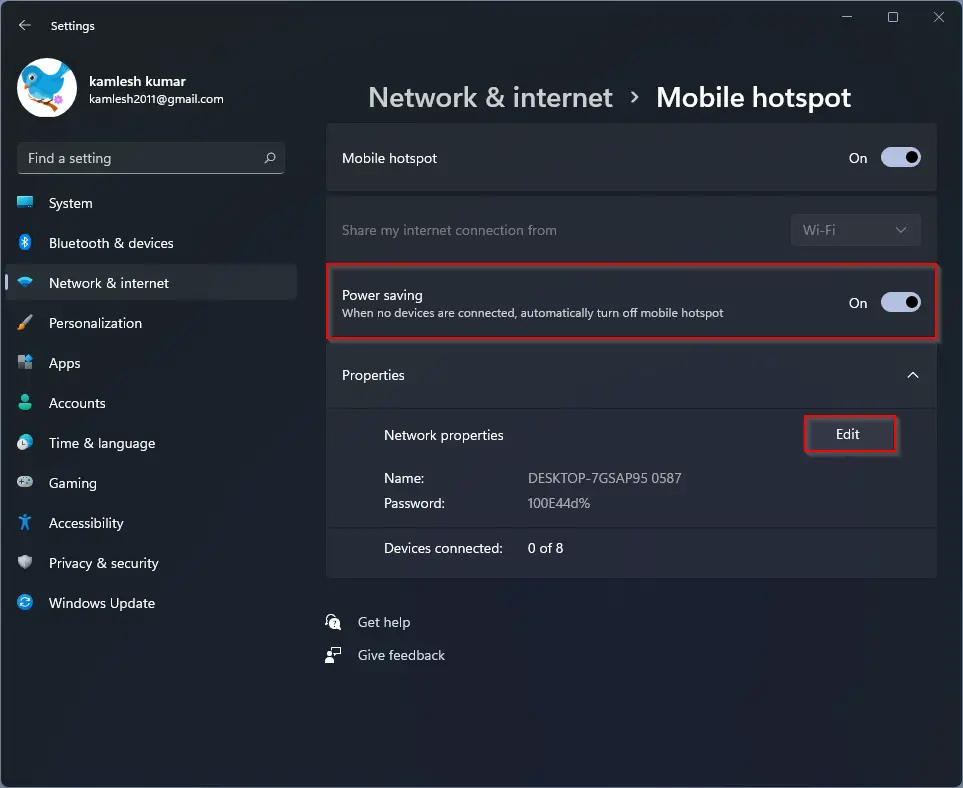
Step 3. Here turn the toggle switch On next to the “Power saving” option. Once you turn on the “Power saving” feature when no devices are connected to the hotspot, your PC’s mobile hotspot will automatically turn Off. If you want to keep broadcasting the SSID, you should turn Off the “Power saving” feature. It is an optional feature, which means you can turn it On or Off according to your need.
Next, the important setting that you should configure is the Network name and password. For that, click on the Edit button under the Properties section.
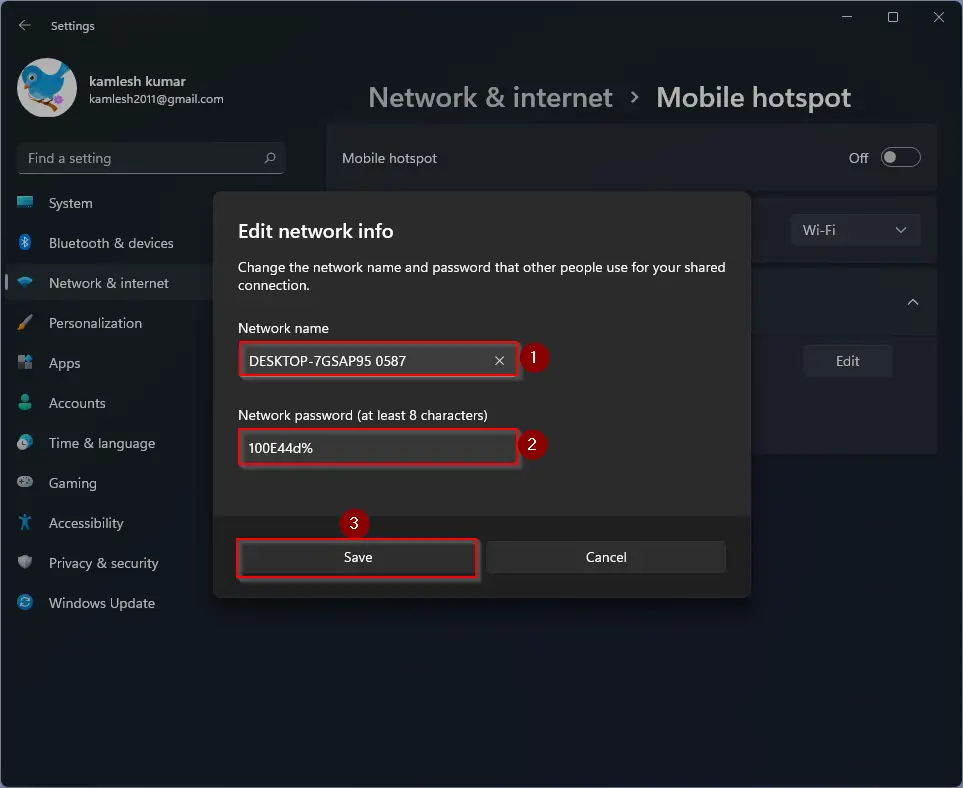
Step 4. On the “Edit network info” pop-up window, change the “Network name” according to your choice. Your PC will use this network name to broadcast WiFi SSID. Now set a strong Network password and then click on the Save button.
Now all the settings have been configured, and you are ready to share its internet connection with any other WiFi-enabled device. Turn On the WiFi on your WiFi-enabled device on which you would like to browse the internet. On the list, click on the SSID name that you have configured on your PC. Input the password and then enjoy the internet.
Conclusion
In conclusion, Windows 11 offers a built-in tool that allows users to turn their computers or laptops with Wi-Fi adapters into hotspots without the need for additional software. This feature can be very useful in situations where users are limited to one login for a Wi-Fi network or rely on an Ethernet connection to access the internet. By following the simple steps outlined above, users can easily configure their network settings and share their internet connection with any Wi-Fi-enabled device. This is a convenient and cost-effective way to connect to the internet without the need for a separate router or modem.