If you’re looking for a quick and easy way to open removable media or memory cards and automatically import files to your PC, AutoPlay is a convenient feature that can help. In this post, we’ll show you how to configure AutoPlay on your Windows 10 PC to ensure a seamless user experience.
By configuring the AutoPlay feature on your Windows 10 PC, you can easily set a default action when you connect any kind of media or device, including USB drives, memory cards, and more. Once you’ve configured AutoPlay for removable media, Windows 10 will automatically detect when you connect it to your PC and launch the media using a default action.
Some of the actions that can be set as default include opening the folder in File Explorer, configuring storage settings, importing images and videos, or playing videos. If you’ve previously set a particular action for your removable media and find that it’s no longer useful, you can easily change the default settings to take a different action when connecting to your Windows 10 PC.
To change the default action for removable media, simply access the Settings app on your Windows 10 PC. By following the steps outlined in this post, you can ensure that AutoPlay is configured to meet your needs and help you streamline your workflow when working with removable media and memory cards.
How to change AutoPlay settings using the Settings app?
To allow or prevent removable media or memory cards from launching automatically on Windows 10, do the following steps:-
Step 1. Open the Settings app (to open the Settings app, click on the Start menu, and then click on the Settings icon).
![]()
Step 2. Under the Settings window, click on Devices.

Step 3. From the left side pane, click on AutoPlay.

Step 4. Under AutoPlay, from the right-side pane, toggle the switch Use AutoPlay for all media and devices on or off for all media and devices.
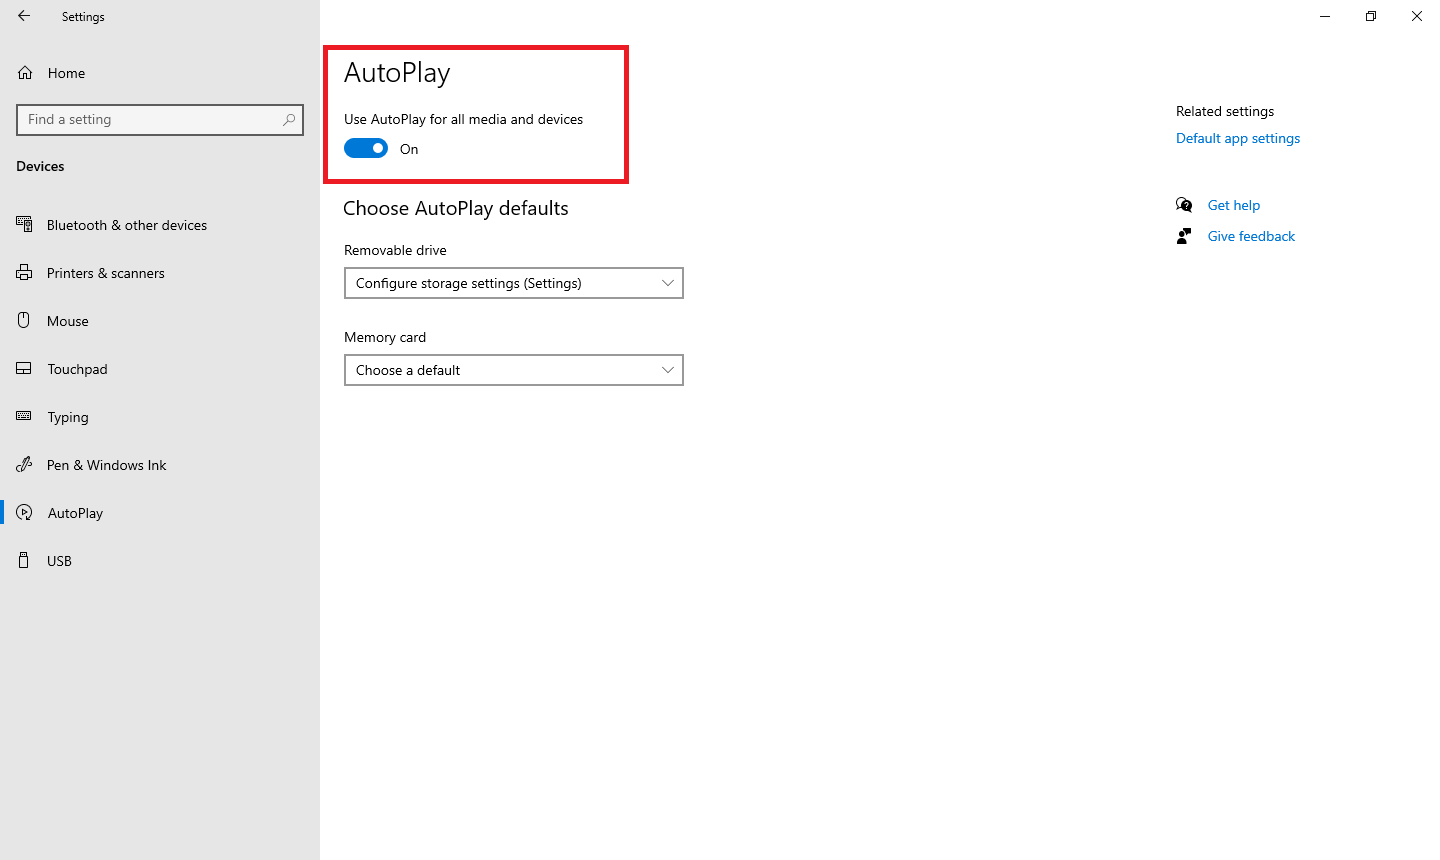
Once the above steps are completed, AutoPlay will be enabled or disabled on Windows 10, depending upon the configuration.
How to set up new AutoPlay default actions?
To set up a different default action when connecting a USB drive or another removable media, do the following:-
Step 1. Open the Settings app (to open the Settings app, click on the Start menu, and then click on the Settings icon).
Step 2. Under the Settings window, click on Devices.

Step 3. From the left side pane, click on AutoPlay.
Step 4. From the right-side pane, under AutoPlay, toggle the switch to the On position for “Use AutoPlay for all media and devices.”
Step 5. Under the “Choose AutoPlay defaults” section, from the drop-down menu of Removable drive, select a new default action when connecting a USB drive:-
- Take no action.
- Open folder to view files (File Explorer).
- Ask me every time.
- Configure storage settings (Settings).
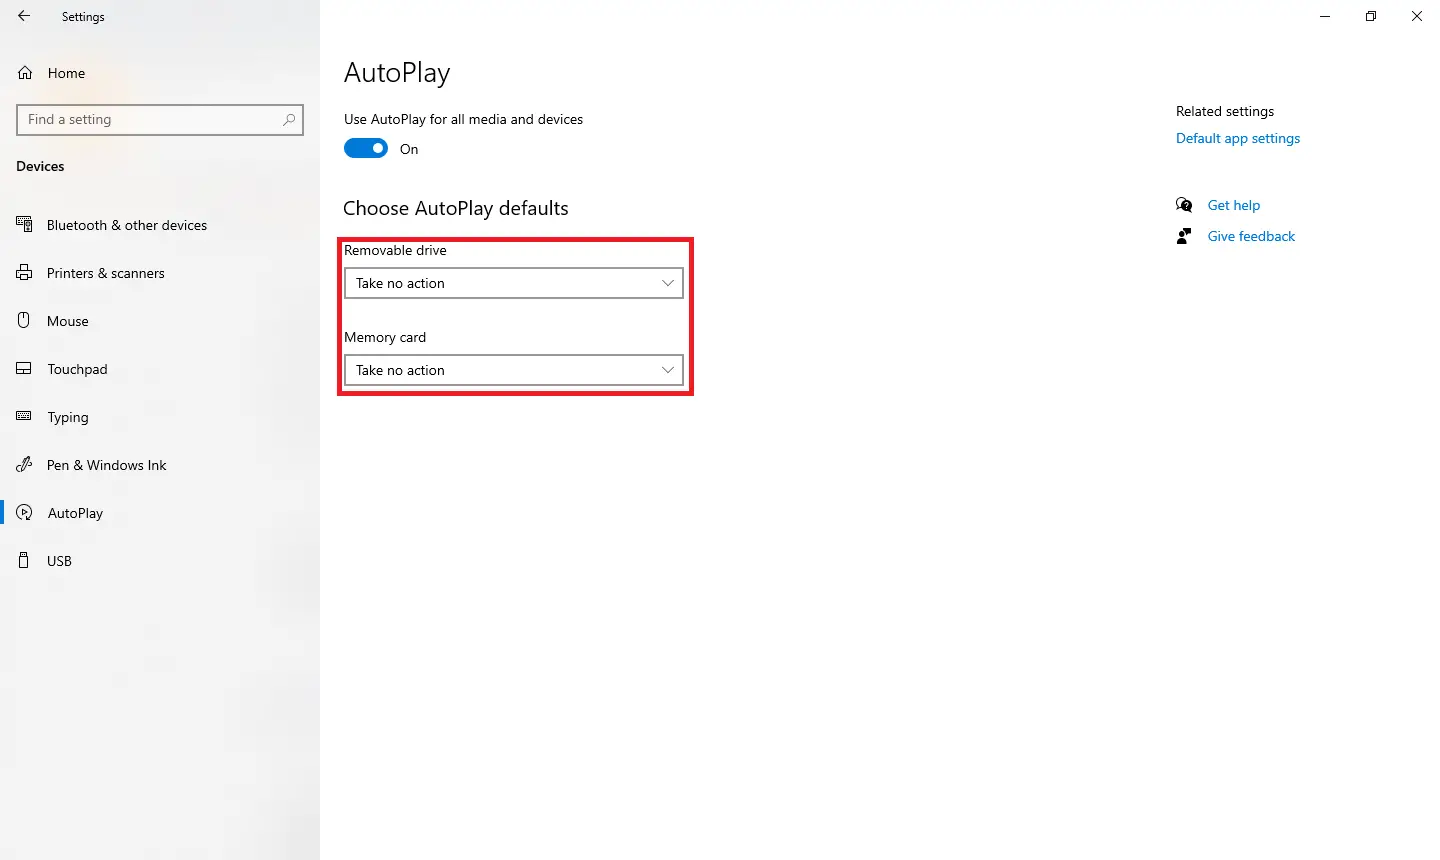
Step 6. Similar to the Removable drive, under the Memory card drop-down menu, select a new default action when connecting a Memory card:-
- Import photos and videos (Photos).
- Pay (Windows Media Player).
- Take no action.
- Open folder to view files (File Explorer).
- Ask me every time.
Once you have completed the above steps, the selected action is applied automatically when you connect a removable drive or Memory card to your Windows PC.
Conclusion
In conclusion, AutoPlay is a useful feature for those who frequently work with removable media and memory cards on their Windows 10 PC. By configuring AutoPlay, users can easily set a default action when connecting any kind of media or device, including USB drives and memory cards. This can help streamline workflow and save time, as Windows 10 will automatically detect and launch the media using the default action. Additionally, if the default action is no longer useful, users can easily change the settings to take a different action. By following the steps outlined in this post, users can configure AutoPlay to meet their needs and ensure a seamless user experience when working with removable media and memory cards.