Windows 11 includes an option that automatically puts the device into sleep mode after certain inactivity to help preserve energy and extend laptop battery life. In sleep mode, your device goes into a low-power mode that shuts down specific hardware, including your screen, to save battery power. This helps you to get back to your work more quickly than if it were in Hibernate Mode.
Usually, the default settings are good enough for most users to save energy and extend battery life. However, if you prefer to keep the device running longer or want to prevent your PC from entering the sleep low-power state mode, Windows 11 lets you change the times for the screen and sleep.
In Windows 11, sleeping and turning off the screen are two different things. When you put your PC to sleep, it goes into a low-power mode that temporarily shuts off certain hardware parts, including the screen, to save power. Apart from that, Windows 11 also have the option to turn off your PC’s screen but keep your PC awake in the background. That means you’ll save some power typically used by the screen, but your PC will still be able to perform background tasks if necessary.
In this gearupwindows article, you will learn to change the sleep times to control when your laptop or desktop should go into sleep mode. Besides that, you will also learn how to disable the feature to prevent the device from sleeping automatically.
How to Manage Sleep Times on Windows 11?
To change sleep times for the device and display, use these steps:-
Step 1. Open Settings.
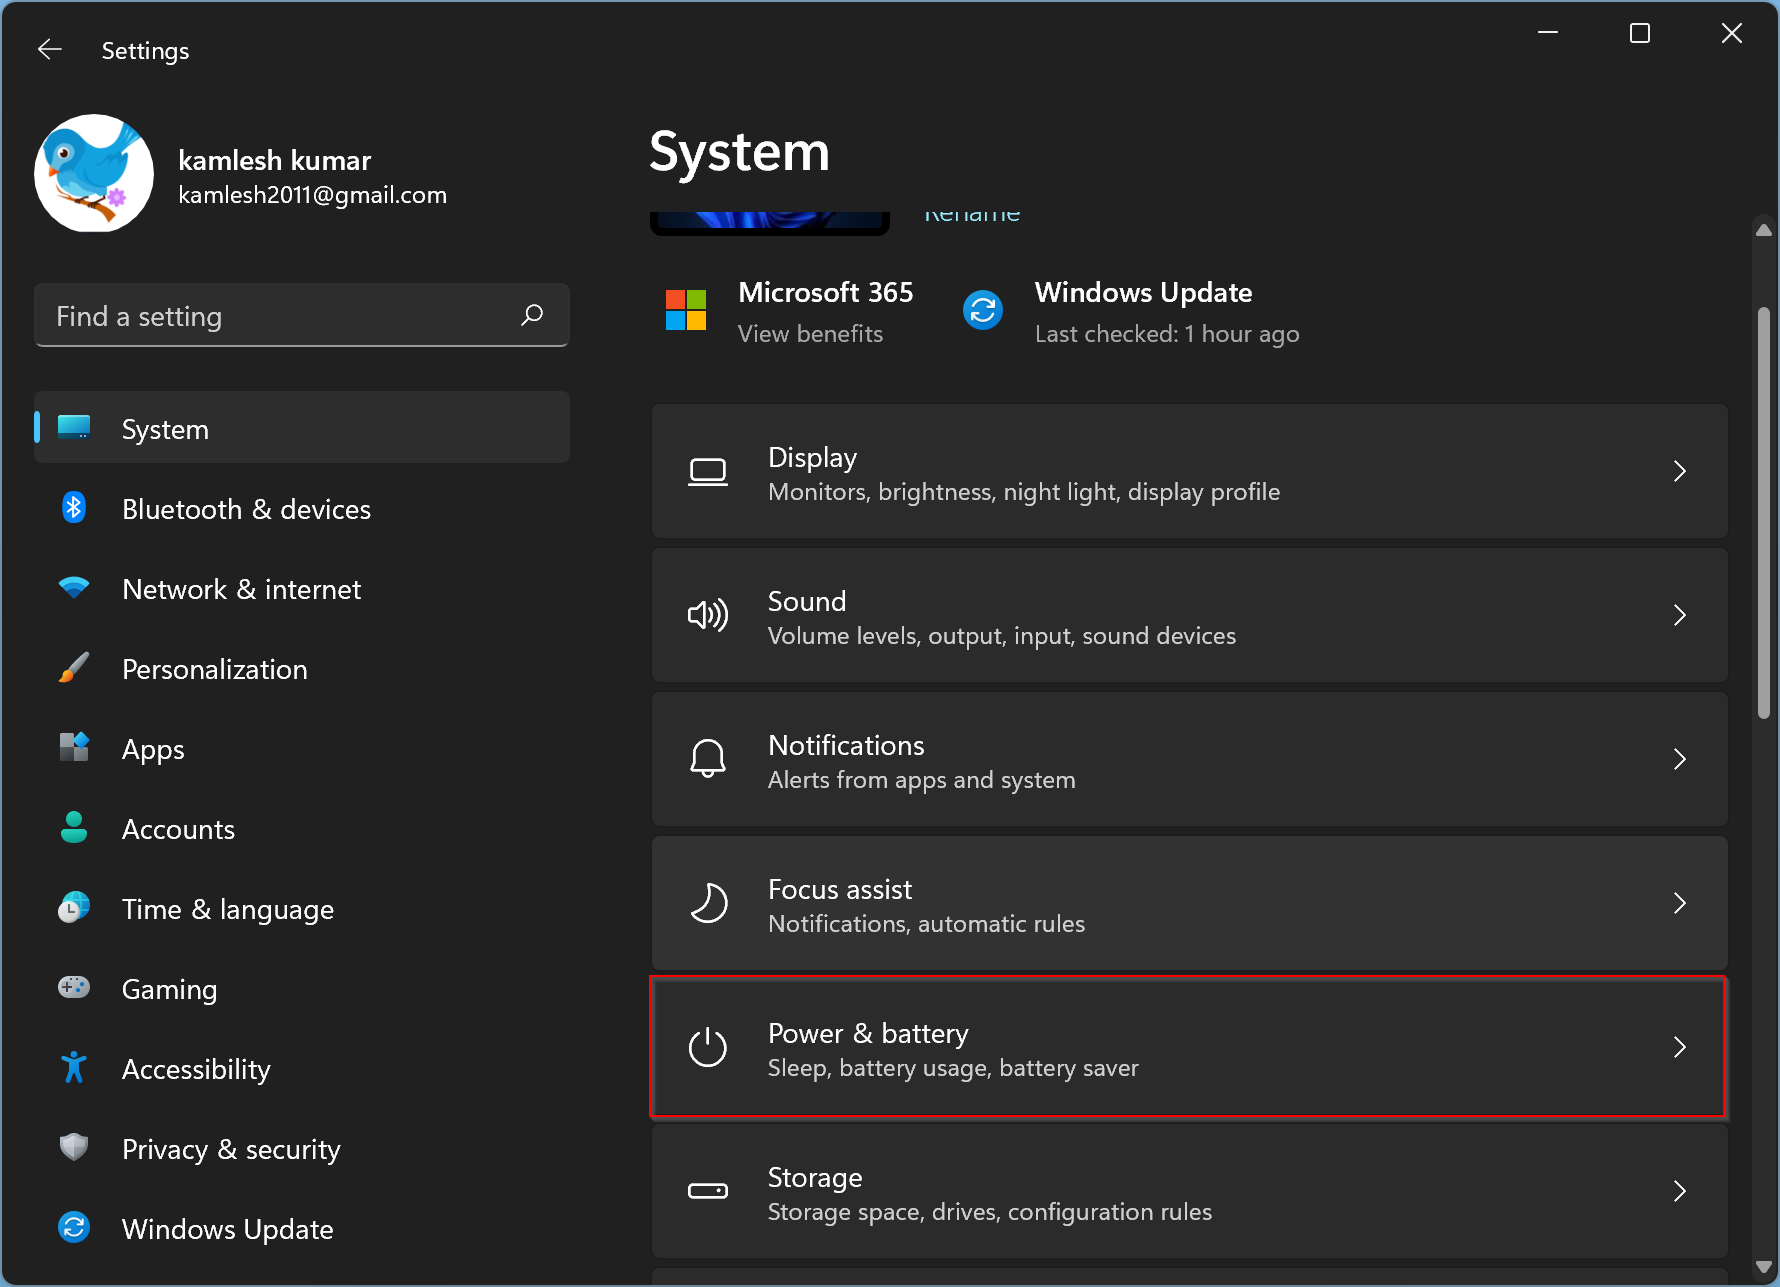
Step 2. Click System in the left sidebar.

Step 3. Click the Power & battery tab on the right sidebar.
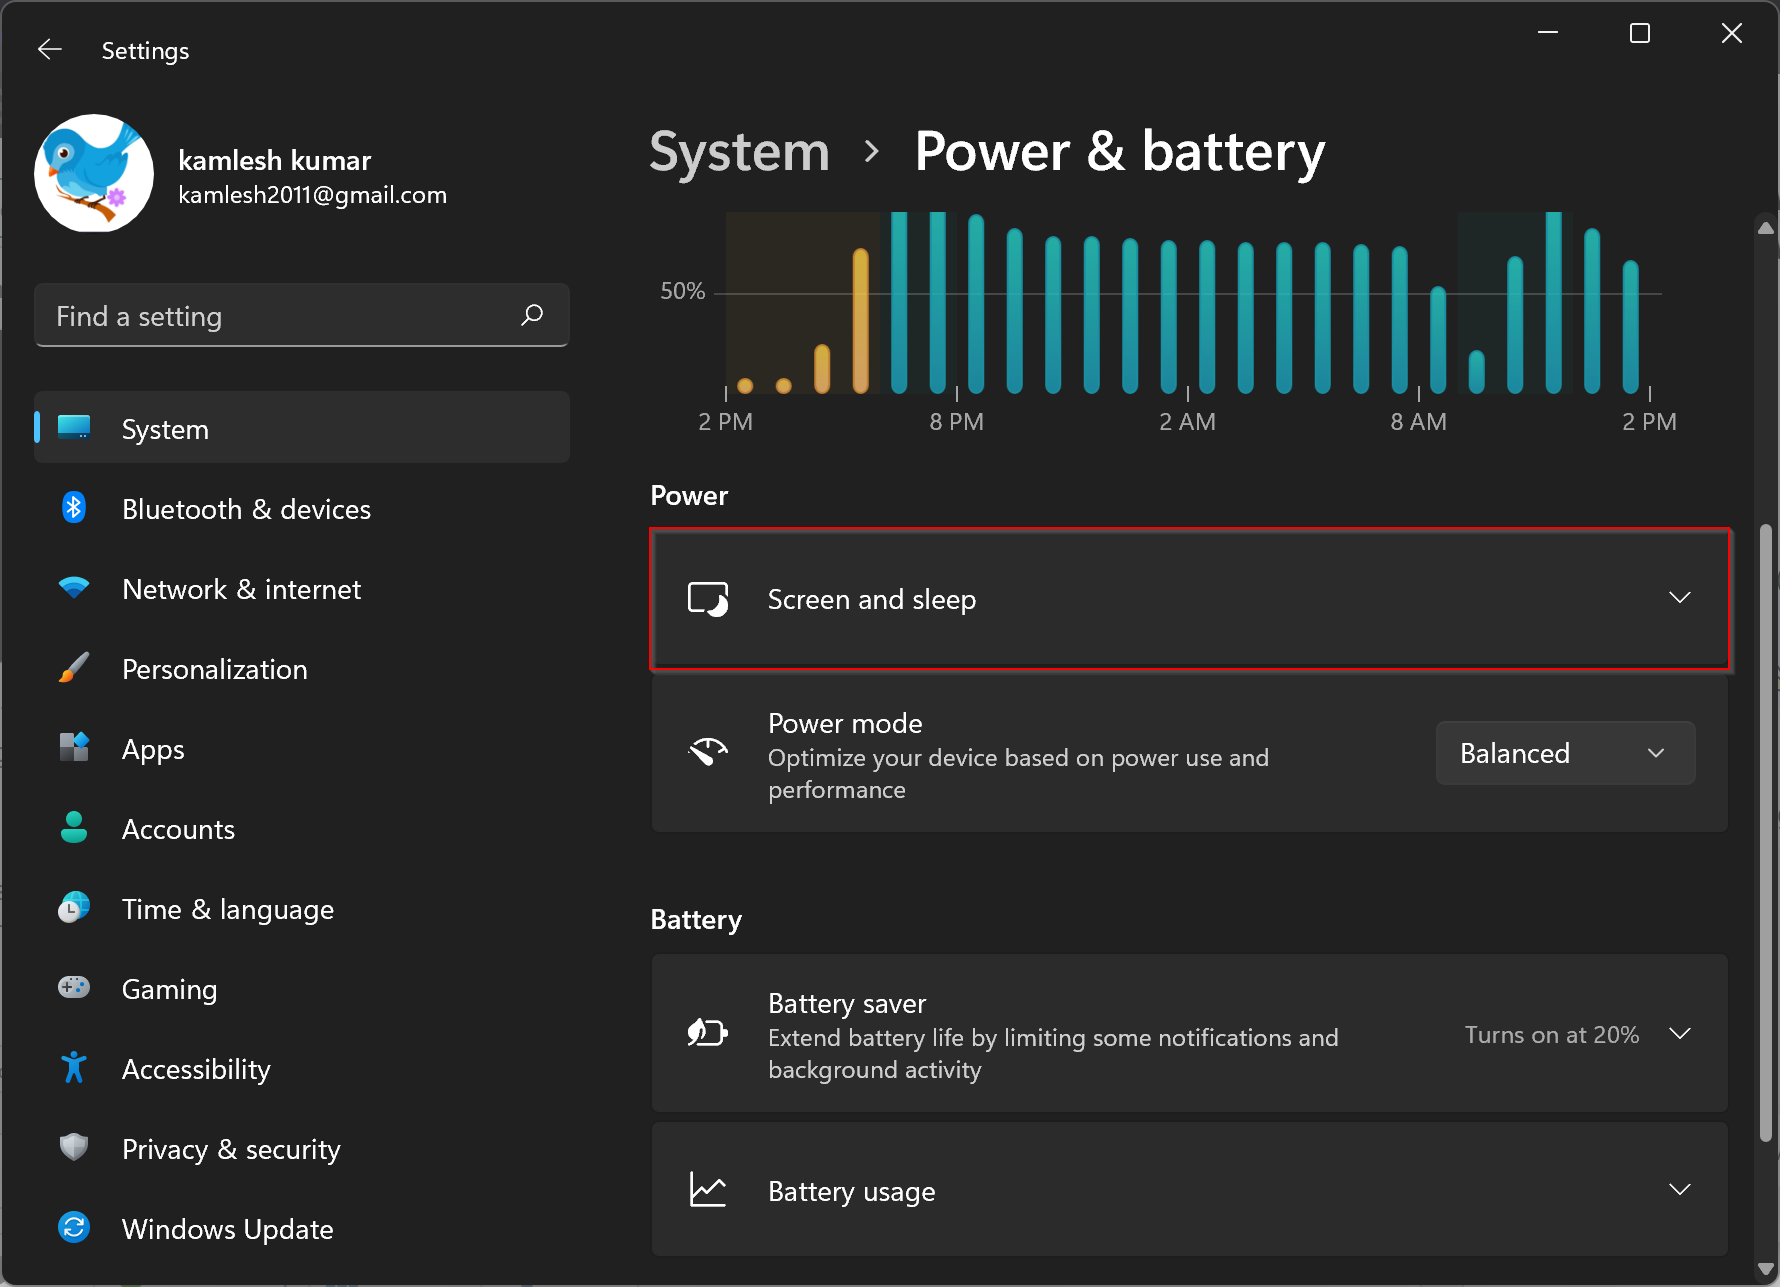
Step 4. Click the Screen and sleep tile to expand.
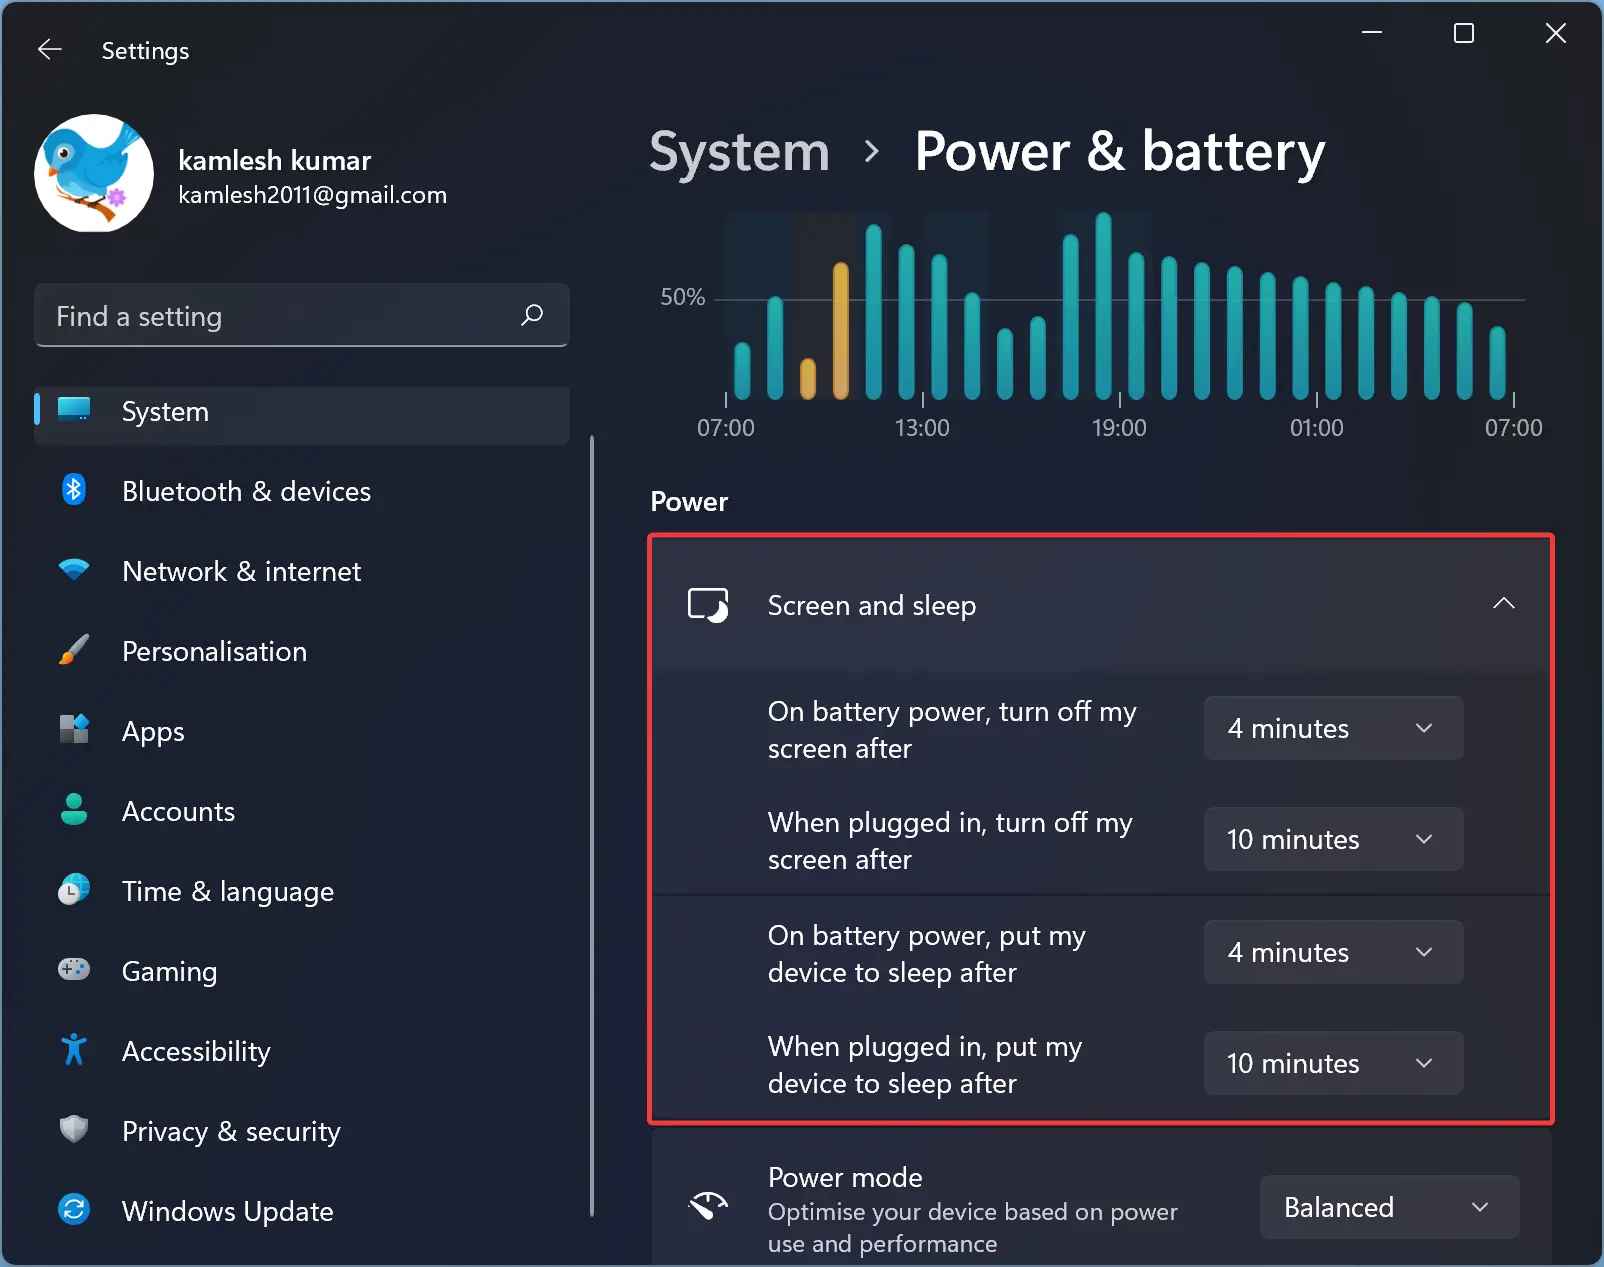
Step 5. If an inbuilt battery powers your device, you should have four options. There will only be two options on other devices, such as a desktop PC.
Now, you need to select how long it takes for your laptop to go to sleep. To do that, click the dropdown menus next to “On battery power, put my device to sleep after” and “When plugged in, put my device to sleep after” and adjust the length of time your PC goes to sleep.
Here, you can also manage when Windows 11 turns off your screen. To do this, adjust the dropdown menus next to “On battery power, turn off my screen after” and “When plugged in, turn off my screen after.”
Once you complete the above steps, your desktop or laptop will go into sleep mode or turn off the screen according to your configuration.
How to Stop Windows 11 from Sleeping?
If you want to prevent the Windows 11 computer and screen from going to sleep automatically, use these steps:-
Step 1. Open Settings.
Step 2. Click System in the left sidebar.
Step 3. Click the Power & battery tab on the right sidebar.
Step 4. Click the Screen and sleep tile to expand.
Step 5. If an inbuilt battery powers your device, you should have four options. There will only be two options on other devices, such as a desktop PC.
Now, use each drop-down menu under “Screen and sleep” and select the Never option.
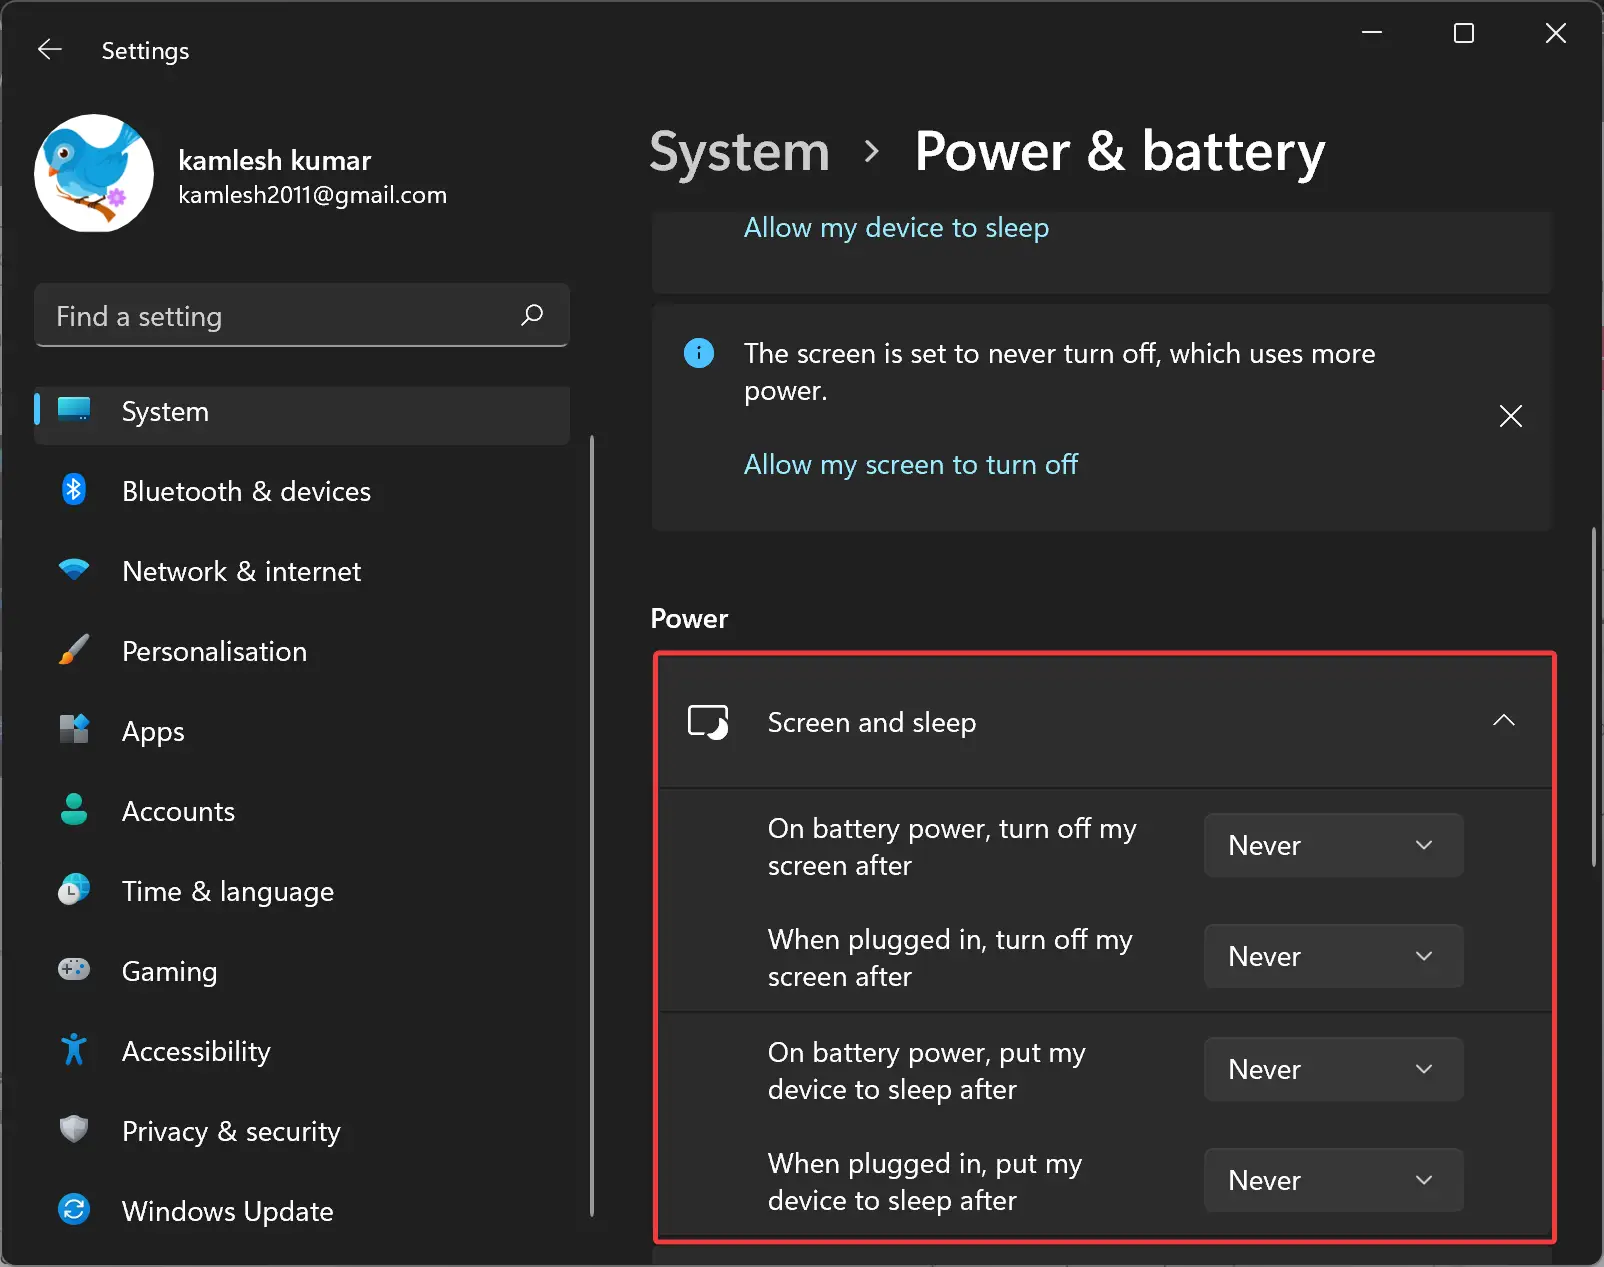
Once you complete the above steps, your desktop or laptop will no longer go into sleep mode or turn off the monitor.
Conclusion
In conclusion, Windows 11 offers a convenient way to manage sleep times to control when your device goes into sleep mode or turns off the screen. With a few simple steps in the Settings app, you can adjust the sleep times based on your preferences and save energy while extending your device’s battery life. Additionally, if you want to prevent your computer and screen from going to sleep automatically, you can disable this feature using the same Settings app. These options provide users with more control over their device’s power management, making it easier to customize their experience and save energy.