Windows 10 lets you easily create a shortcut to another drive or folder shared on your network by mapping that location. Once the mapping is done, it will appear as a new drive under “This PC” in the “File Explorer.” So that next time, you can quickly access that shared folder just like you do for your local hard drive.
In this gearupwindows article, we will guide you on mapping a network drive in Windows 10.
How to Enable Network Discovery on Windows 10?
To map a network drive on your Windows 10 PC, you’ll first need to turn on network discovery. To do so, use the following steps:-
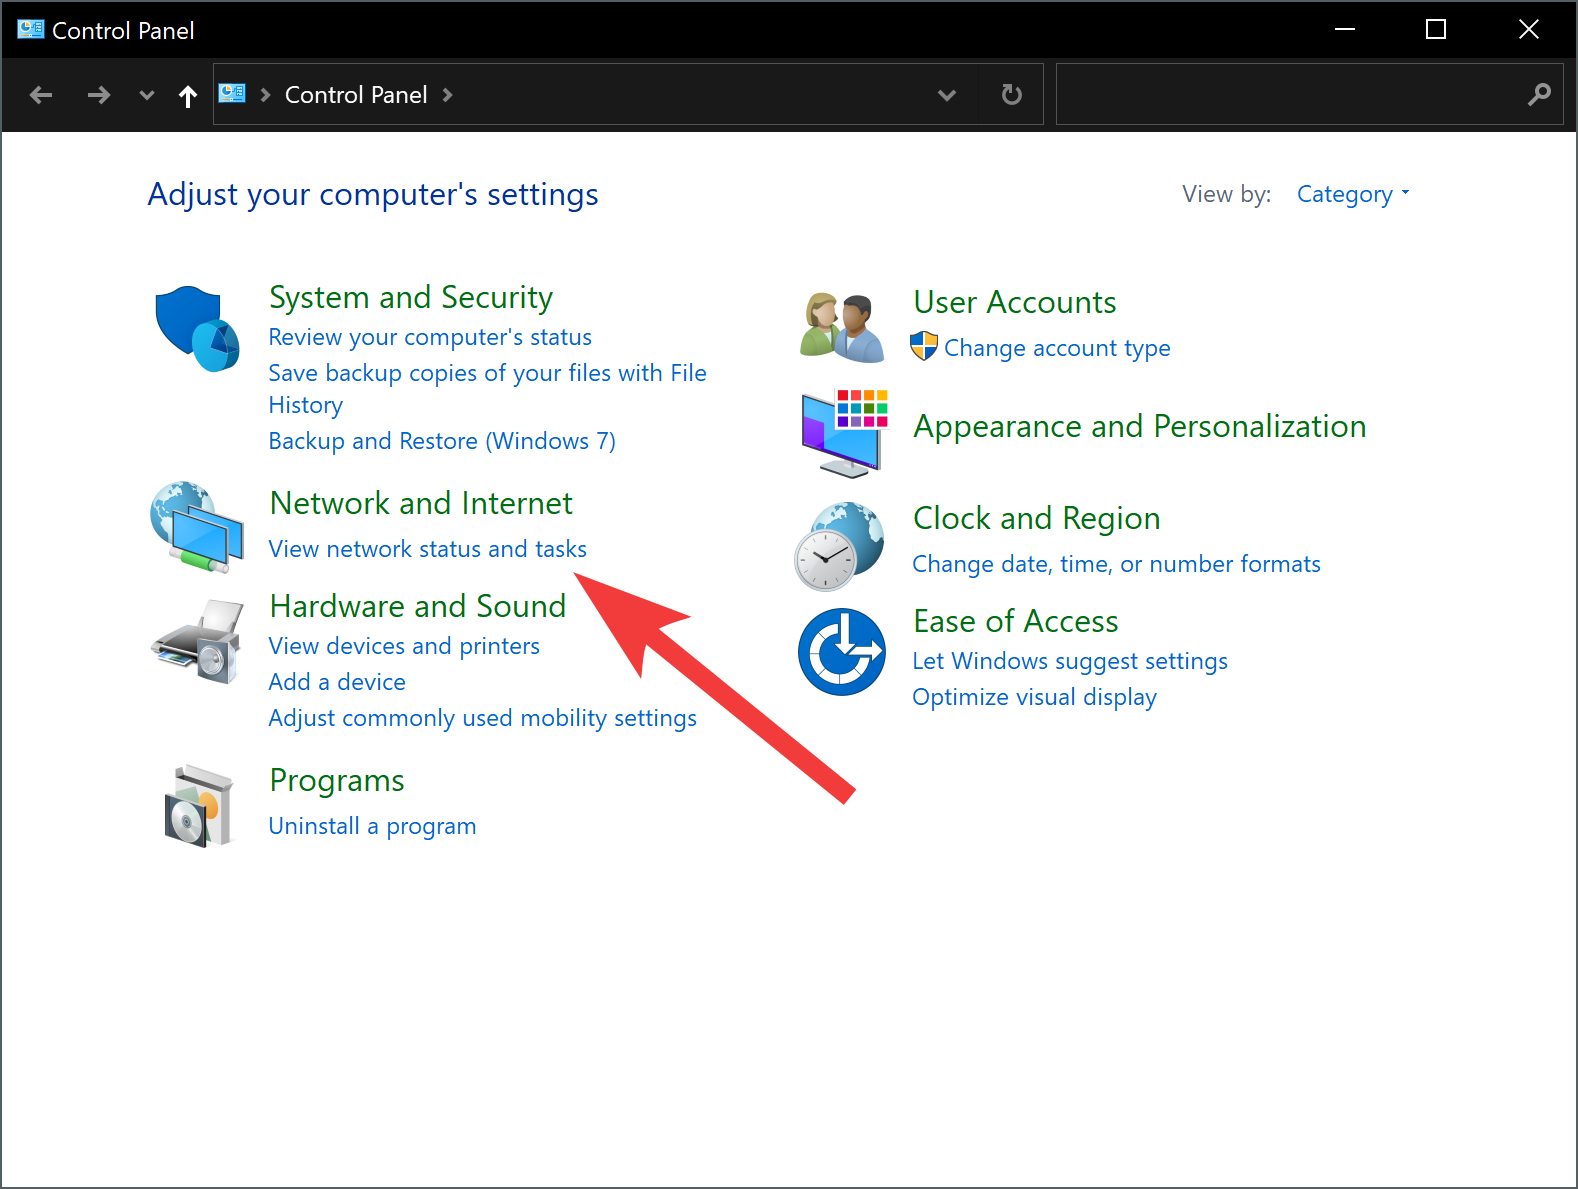
Step 1. First, open Control Panel.
Step 2. Then, click the View Network Status and Tasks under the “Network and Internet” category.
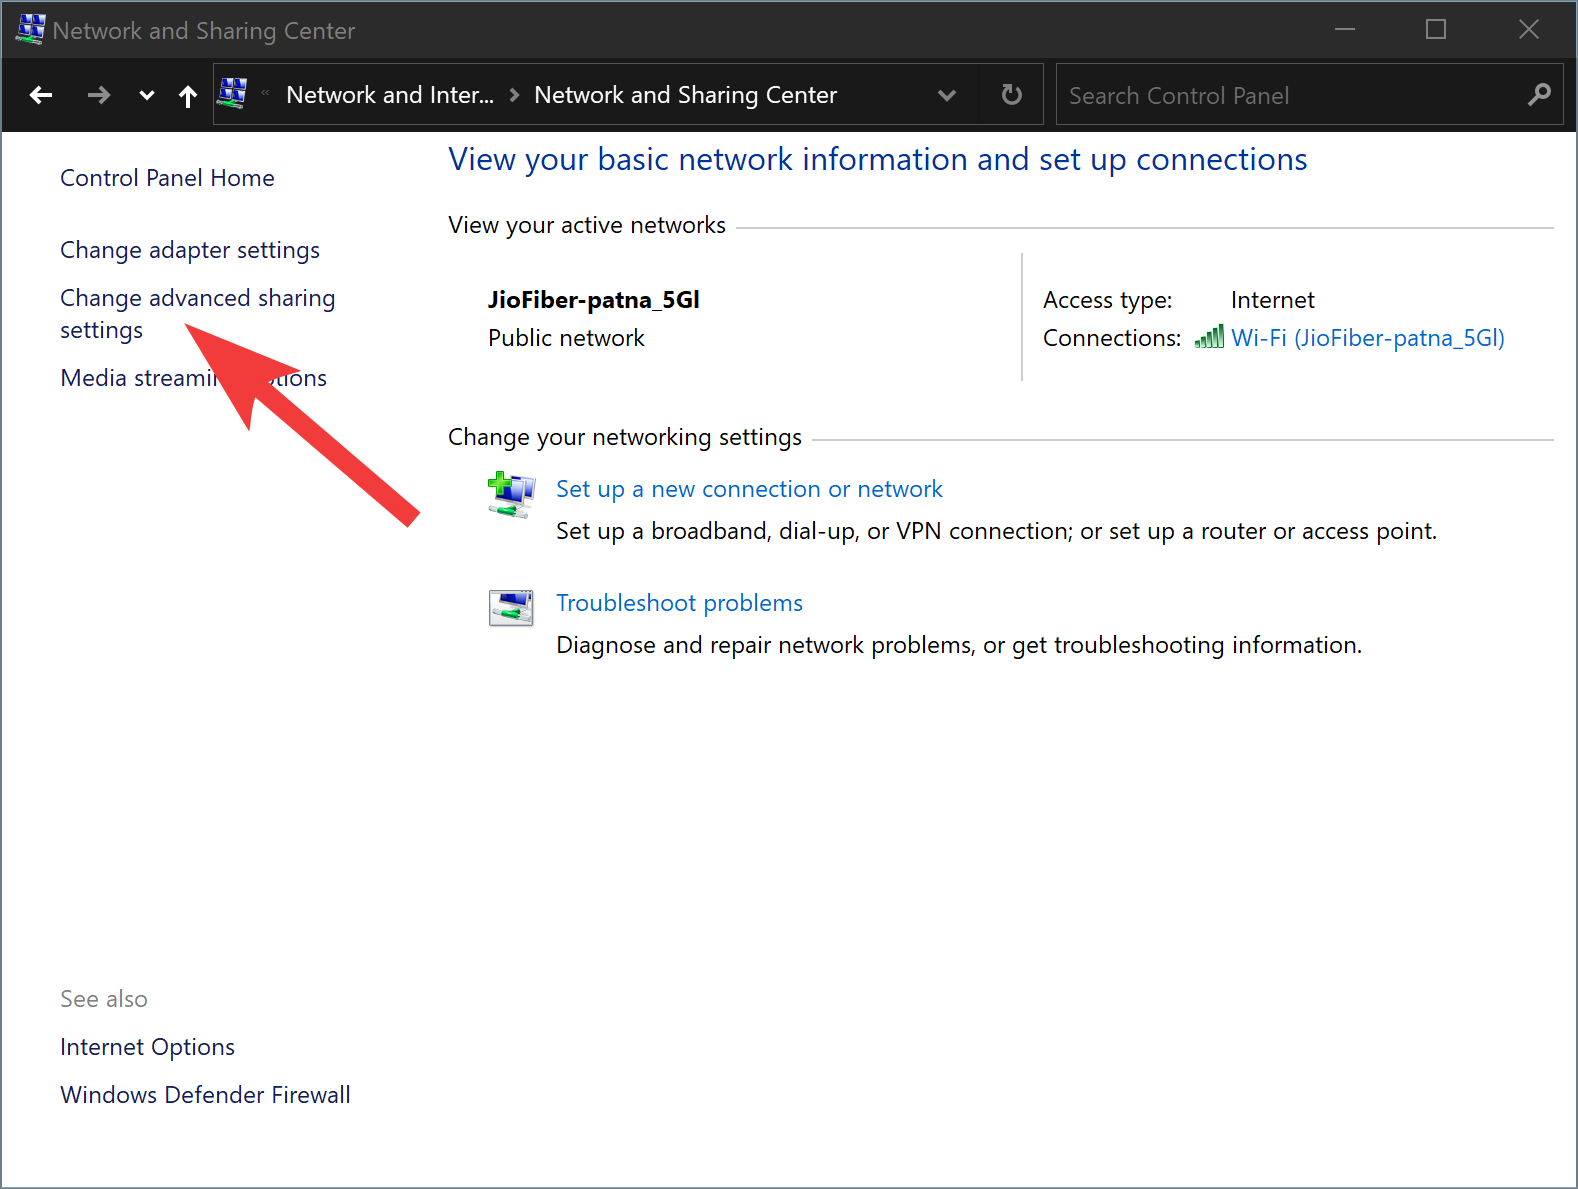
Step 3. In the following screen, click Change advanced sharing settings in the left-hand pane.
Step 4. Next, under the Private profile, select Turn on network discovery option and check the checkbox “Turn on automatic setup of network connected devices.”
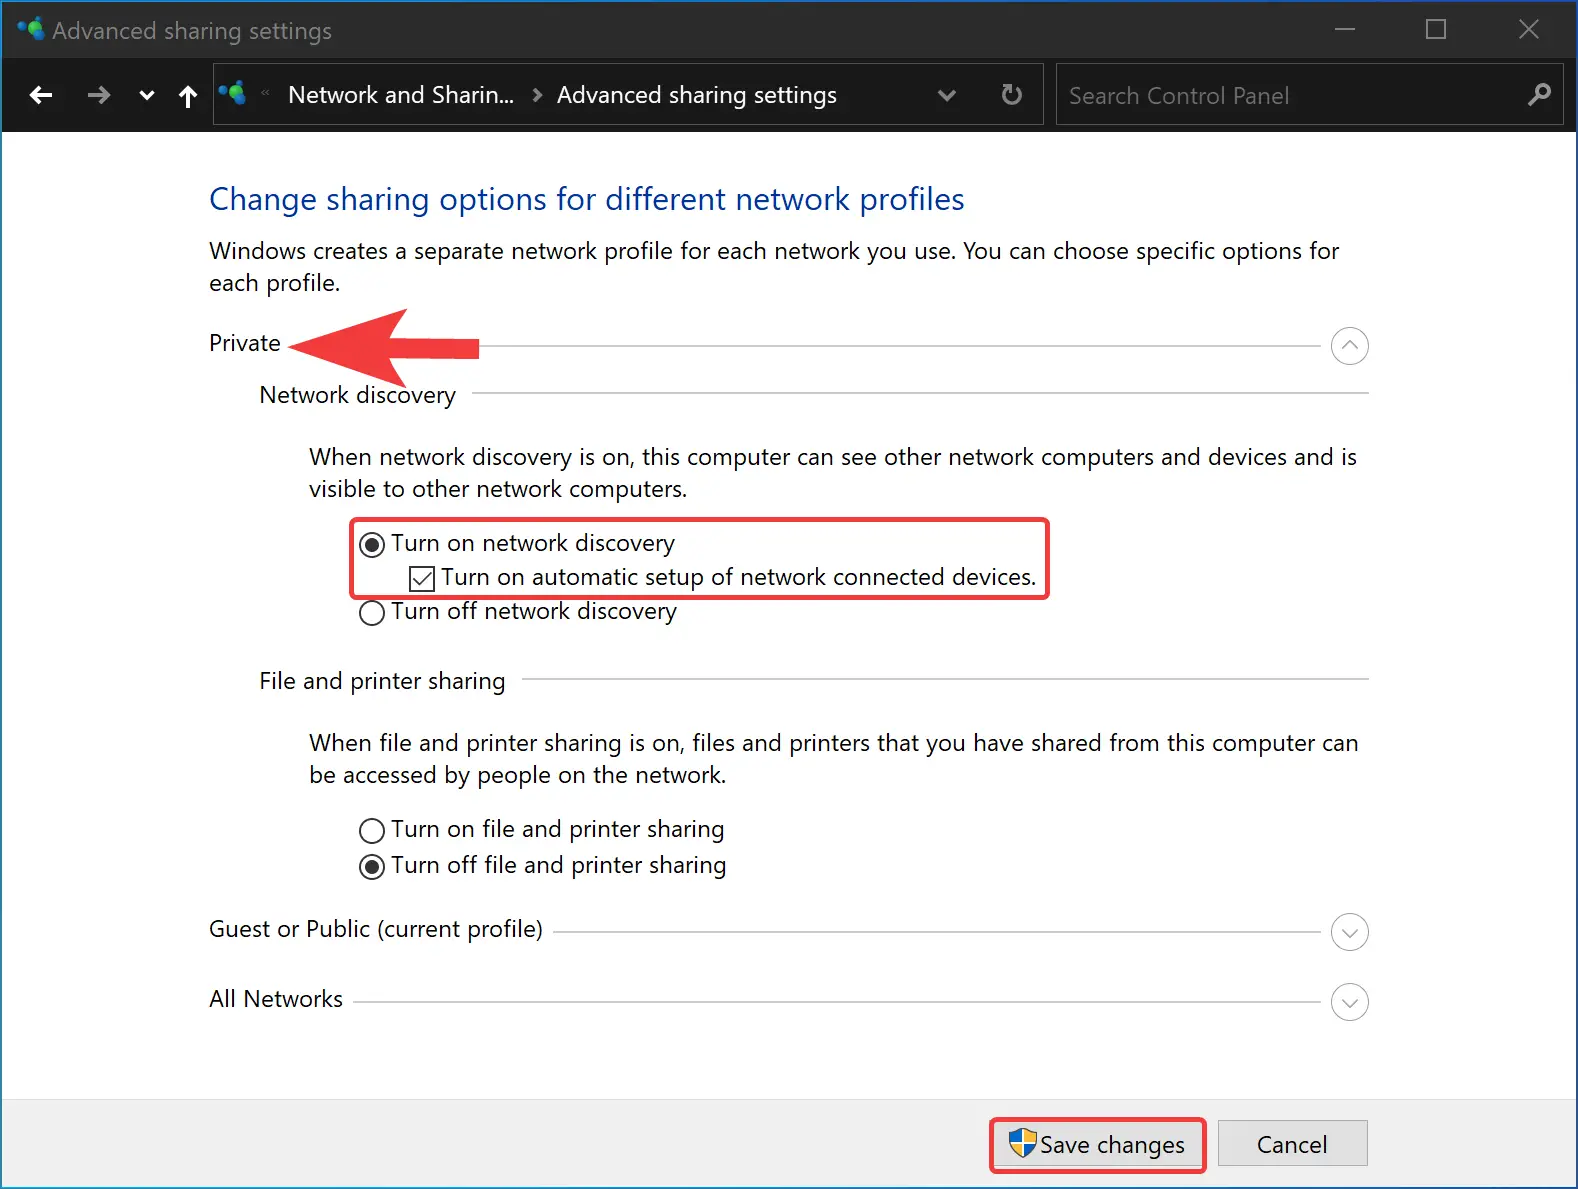
Step 5. At last, click the Save changes button.
Once you complete the above steps, network discovery is enabled on your Windows 10 system.
How to Map a Network Drive in Windows 10?
Once you turn on the network discovery, use the following steps to map a network drive on Windows 10 PC:-
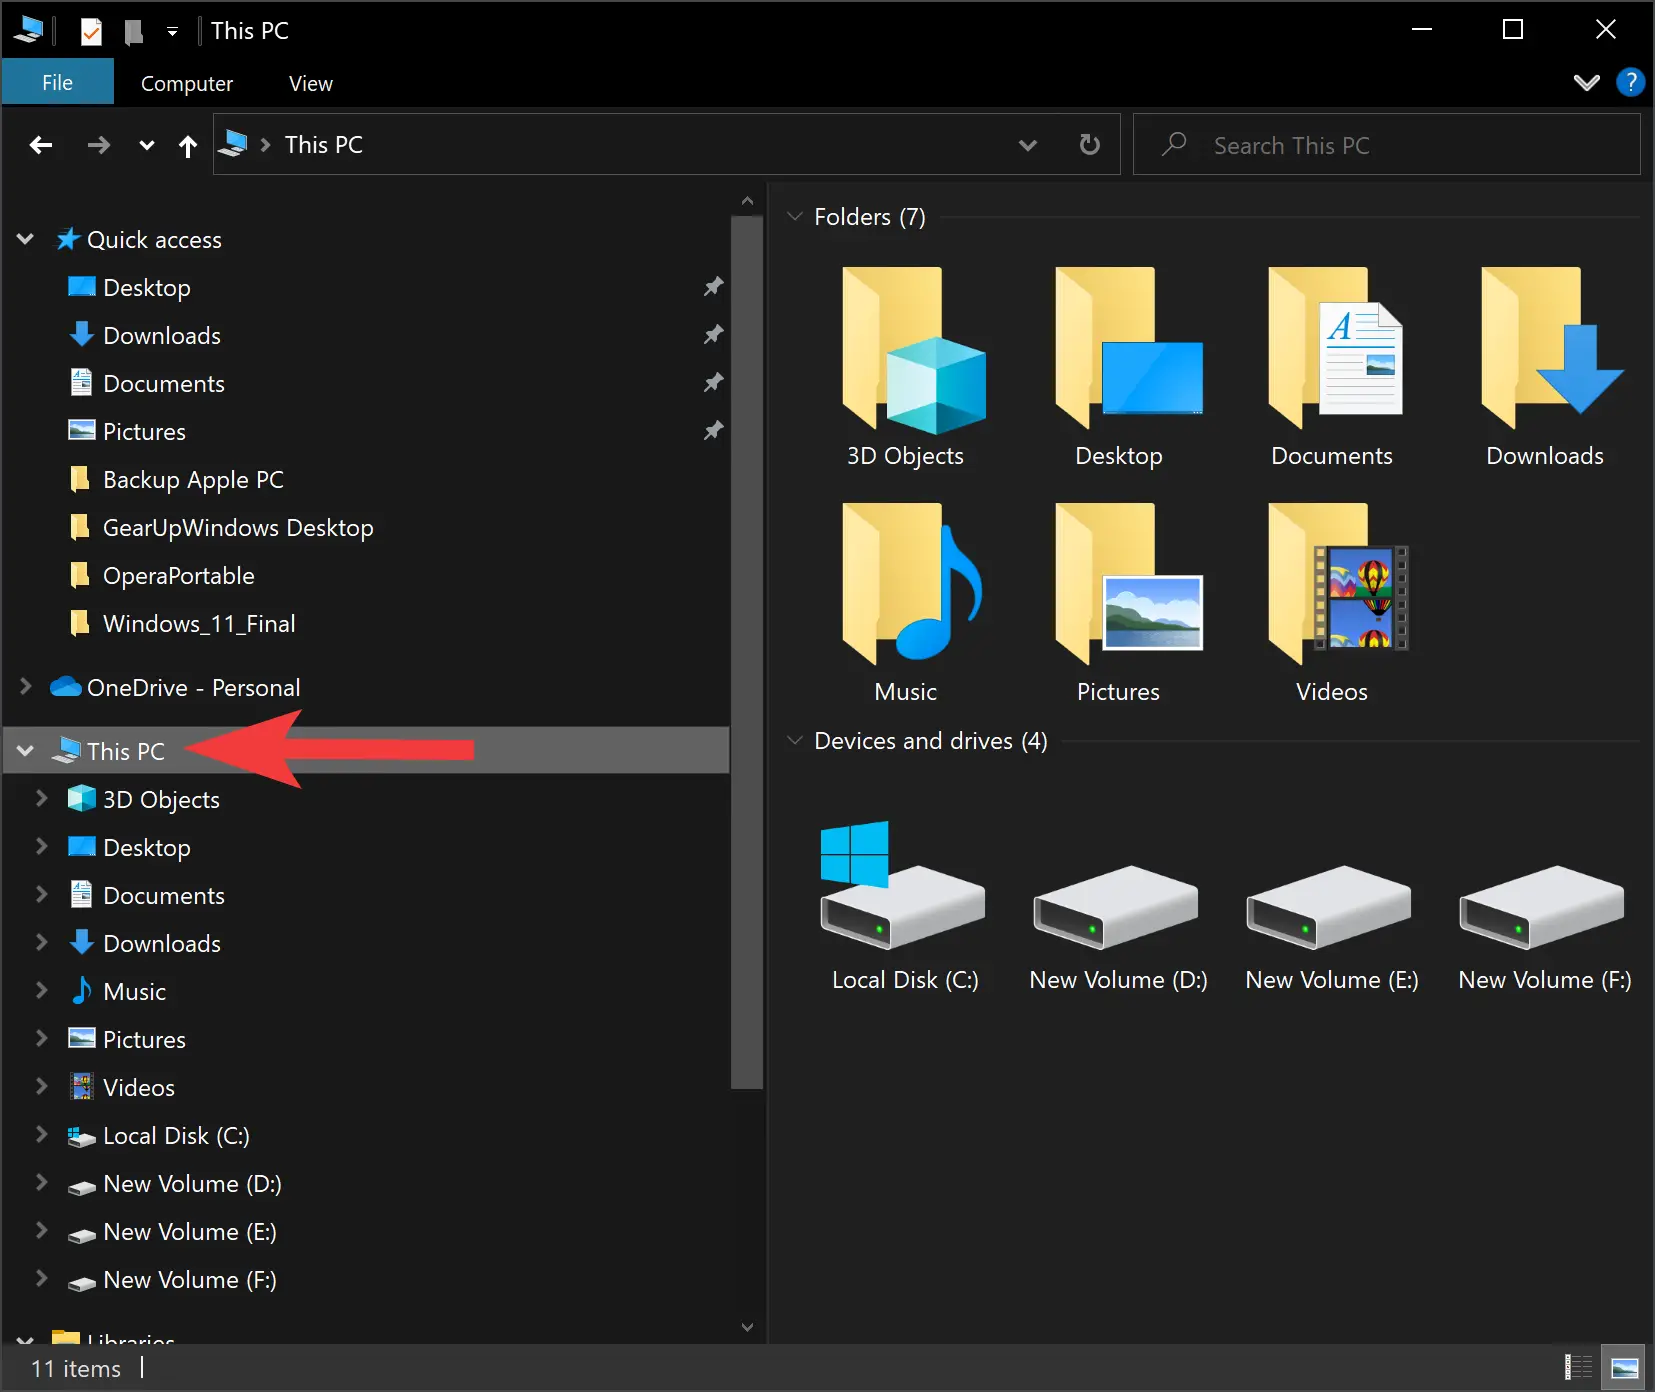
Step 1. First, open File Explorer.
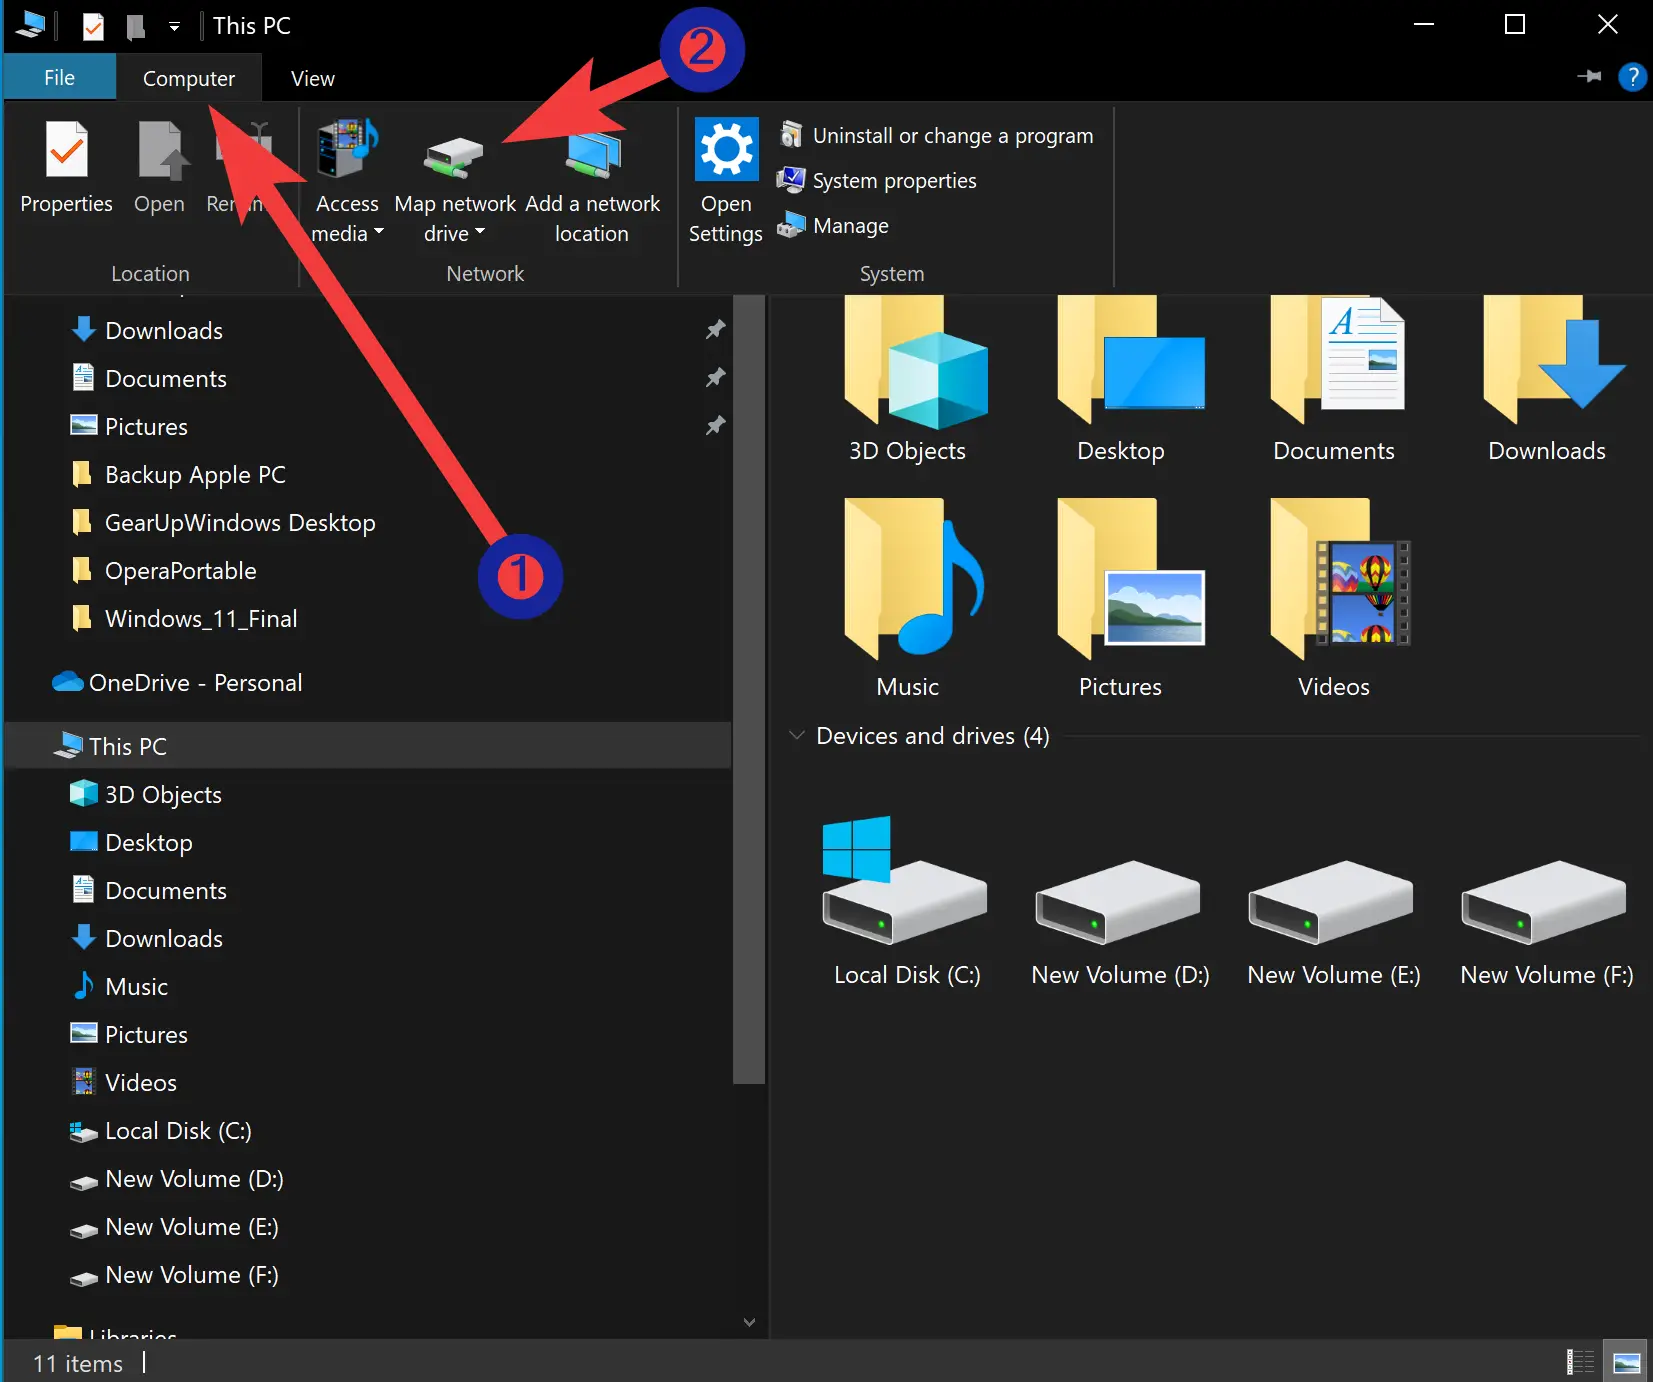
Step 2. Then, click This PC in the left-side navigation pane.
Step 3. Next, select the Computer tab. Then, click Map network drive in the Network group.
Step 4. When you’re done, the “Map Network Drive” window will appear. In the drop-down menu “Drive,” select a drive letter that you’d like to use. You can use any letter that is not currently in use on your PC. Next, type the folder or computer path in the “Folder” text box, or click the Browse button and choose the network drive or folder from the pop-up that appears. You can also select “Reconnect at Sign-in” if you’d like to connect the network drive each time you log in to your device.
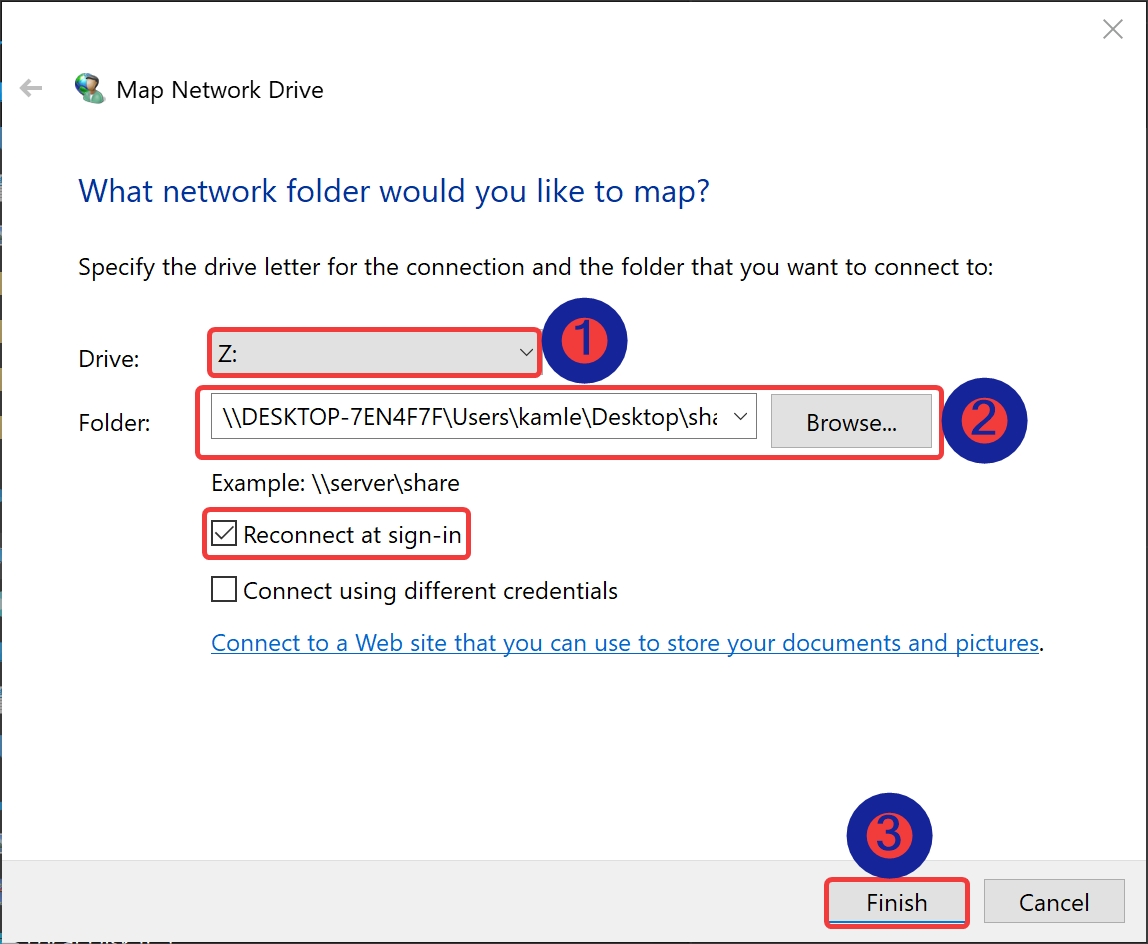
Step 5. Finally, click the Finish button.
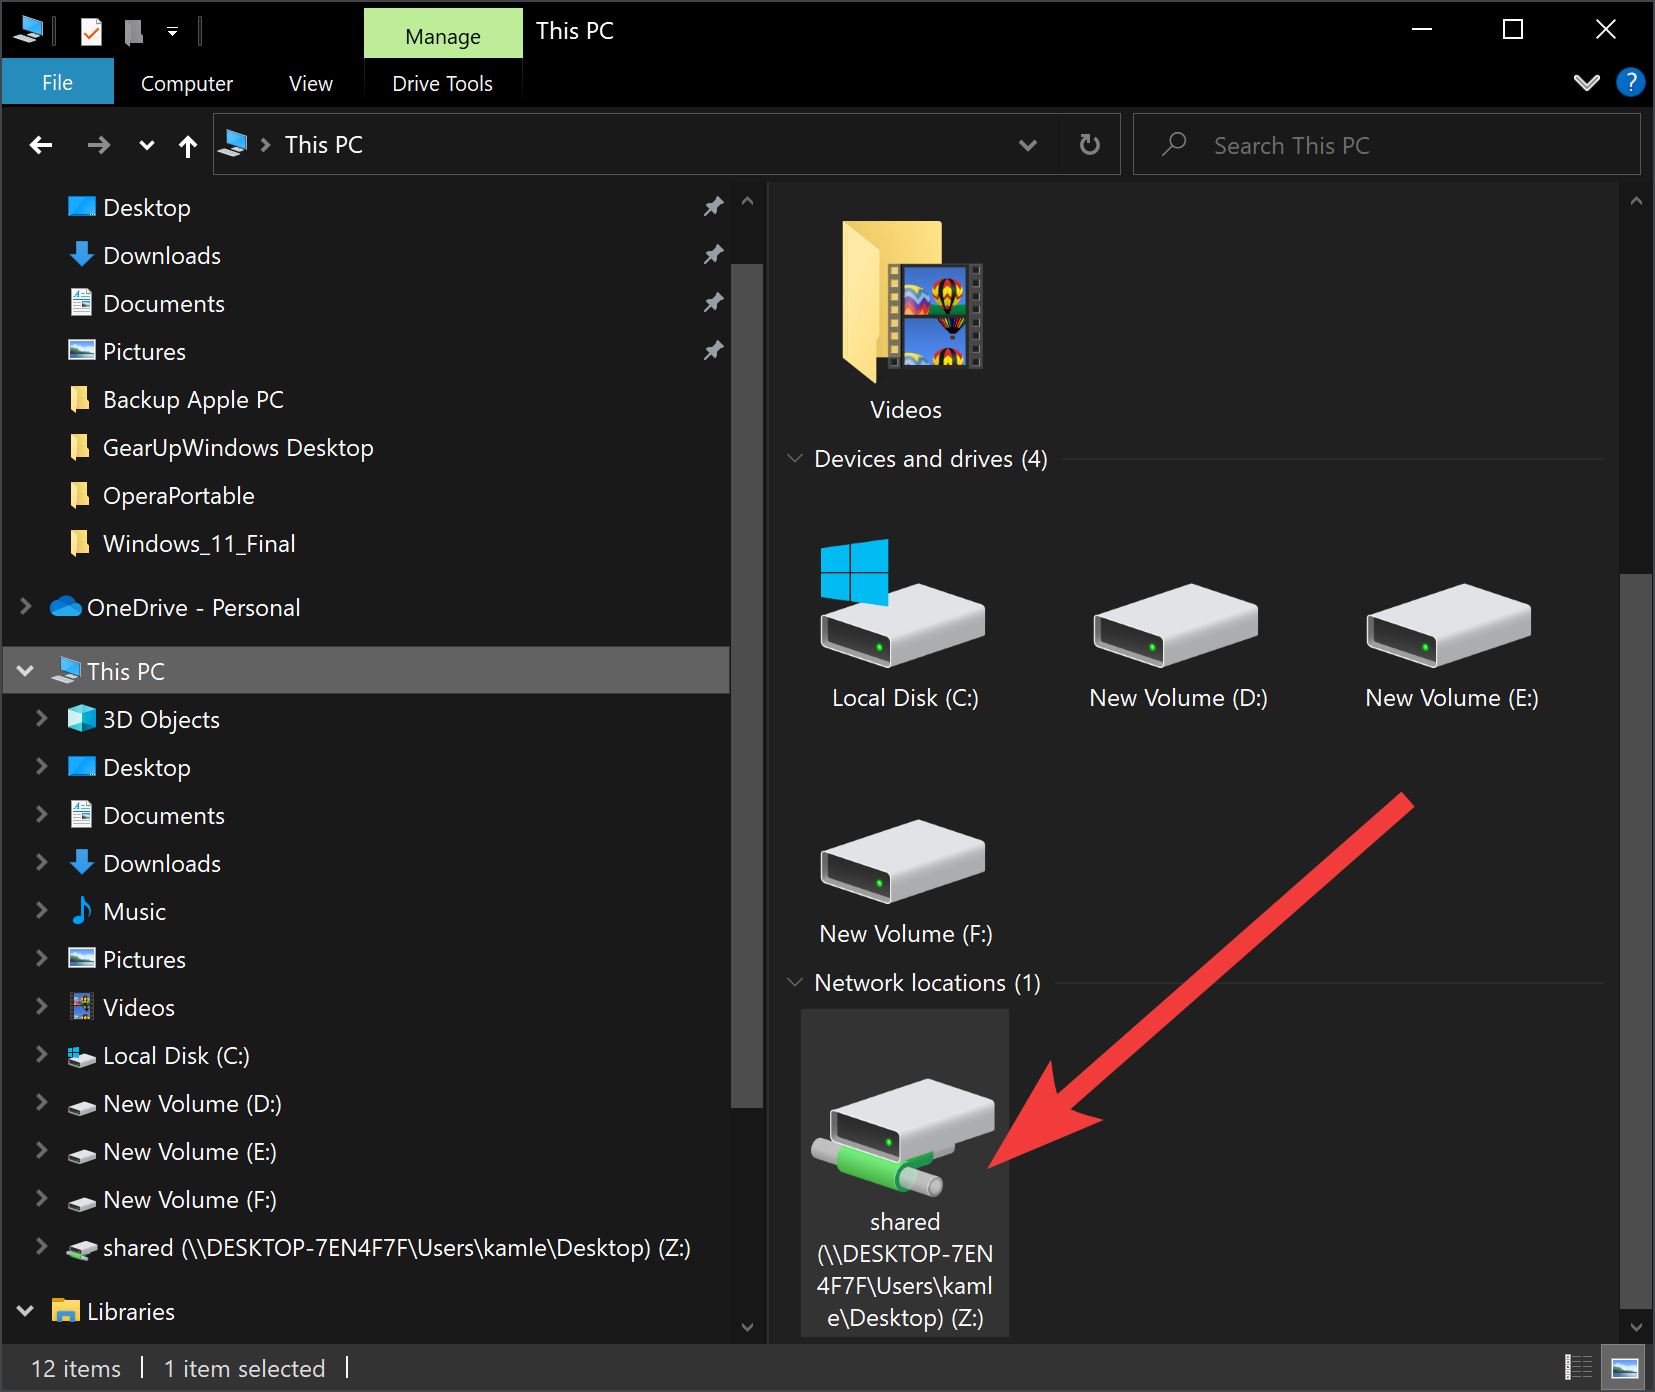
Once done, open the File Explorer on This PC to find your mapped network drive.
How to Disconnect a Mapped Network Drive from Windows 10?
Once you’ve done with the mapped network drive and want to disconnect from your Windows 10 machine, use the following steps:-
Step 1. First, open File Explorer.
Step 2. Then, click This PC in the left-side navigation pane.
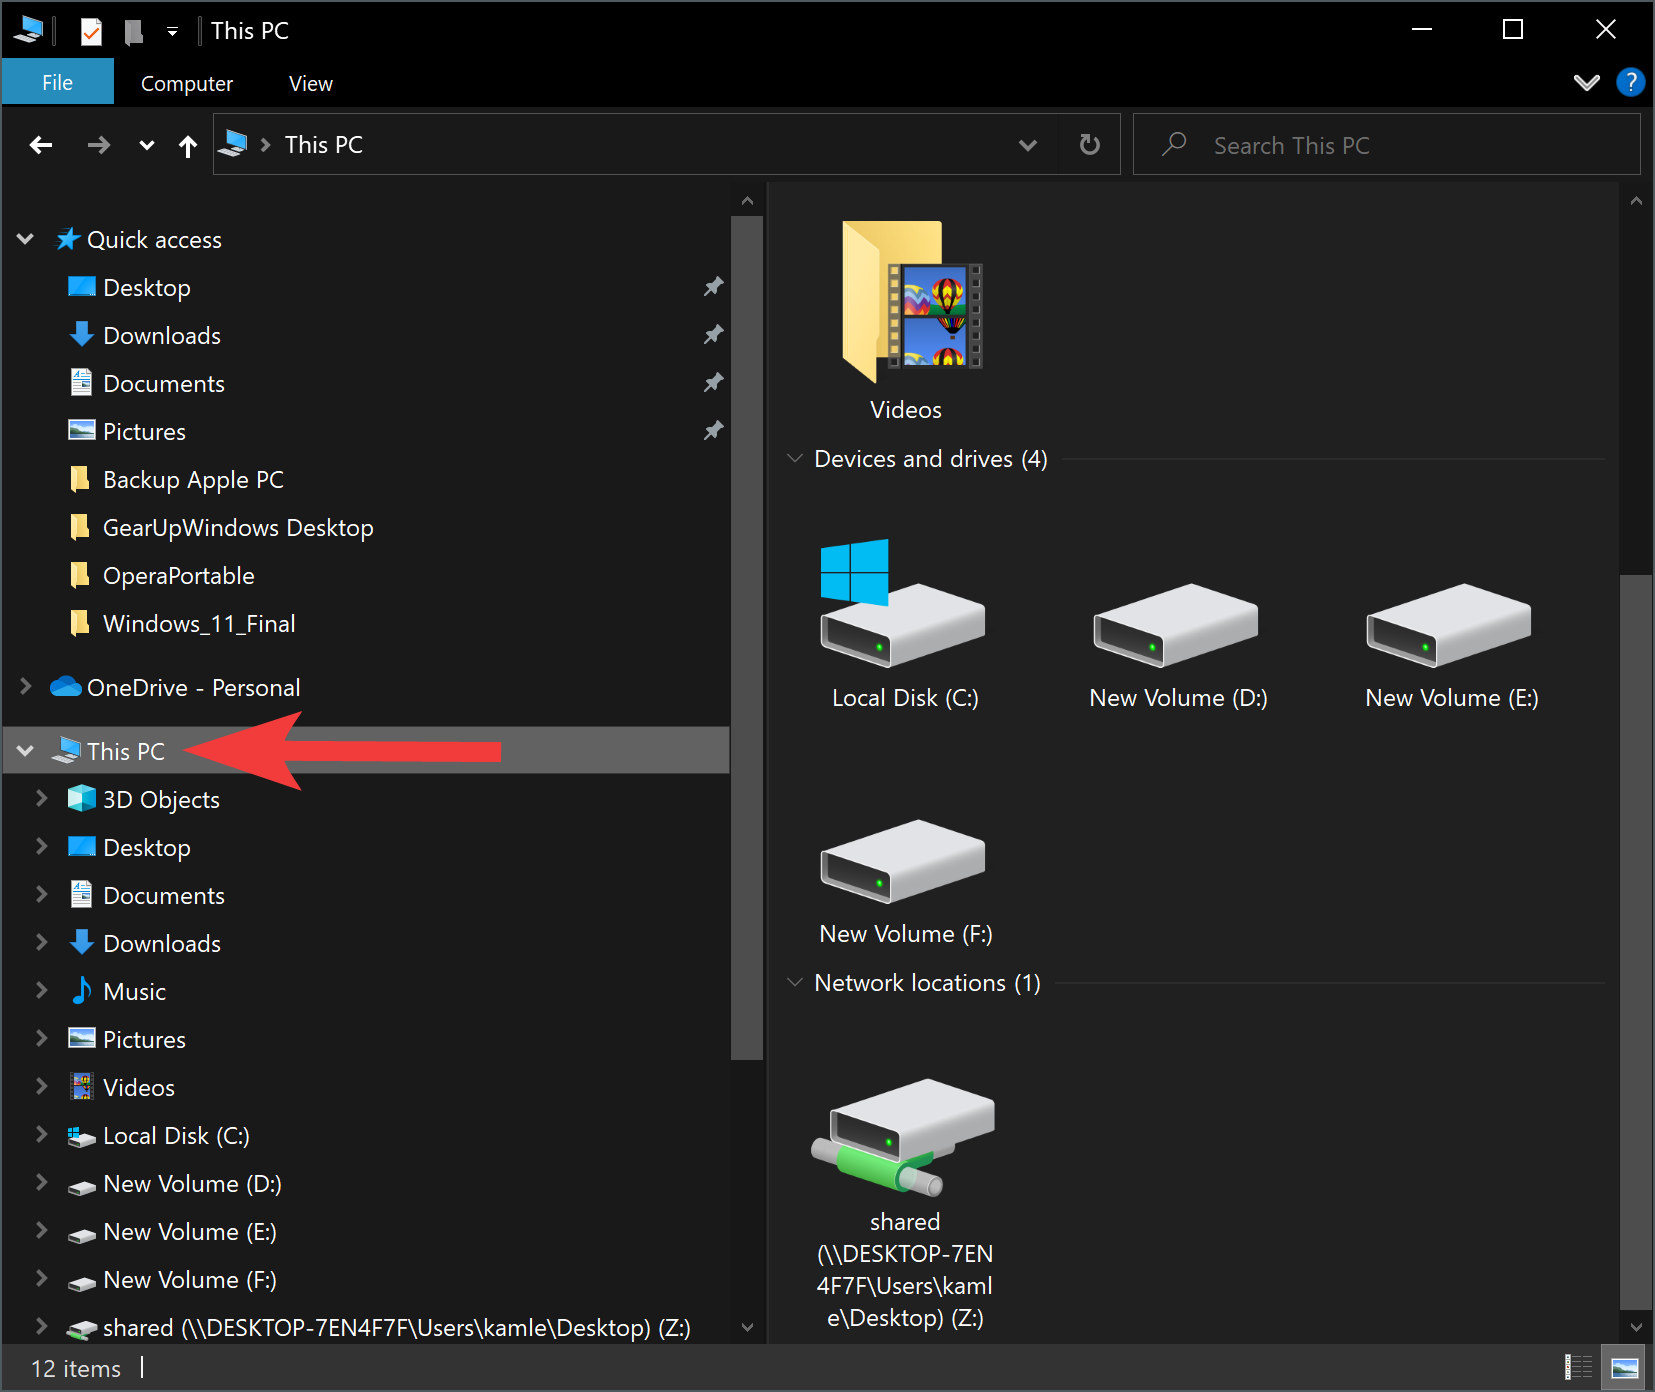
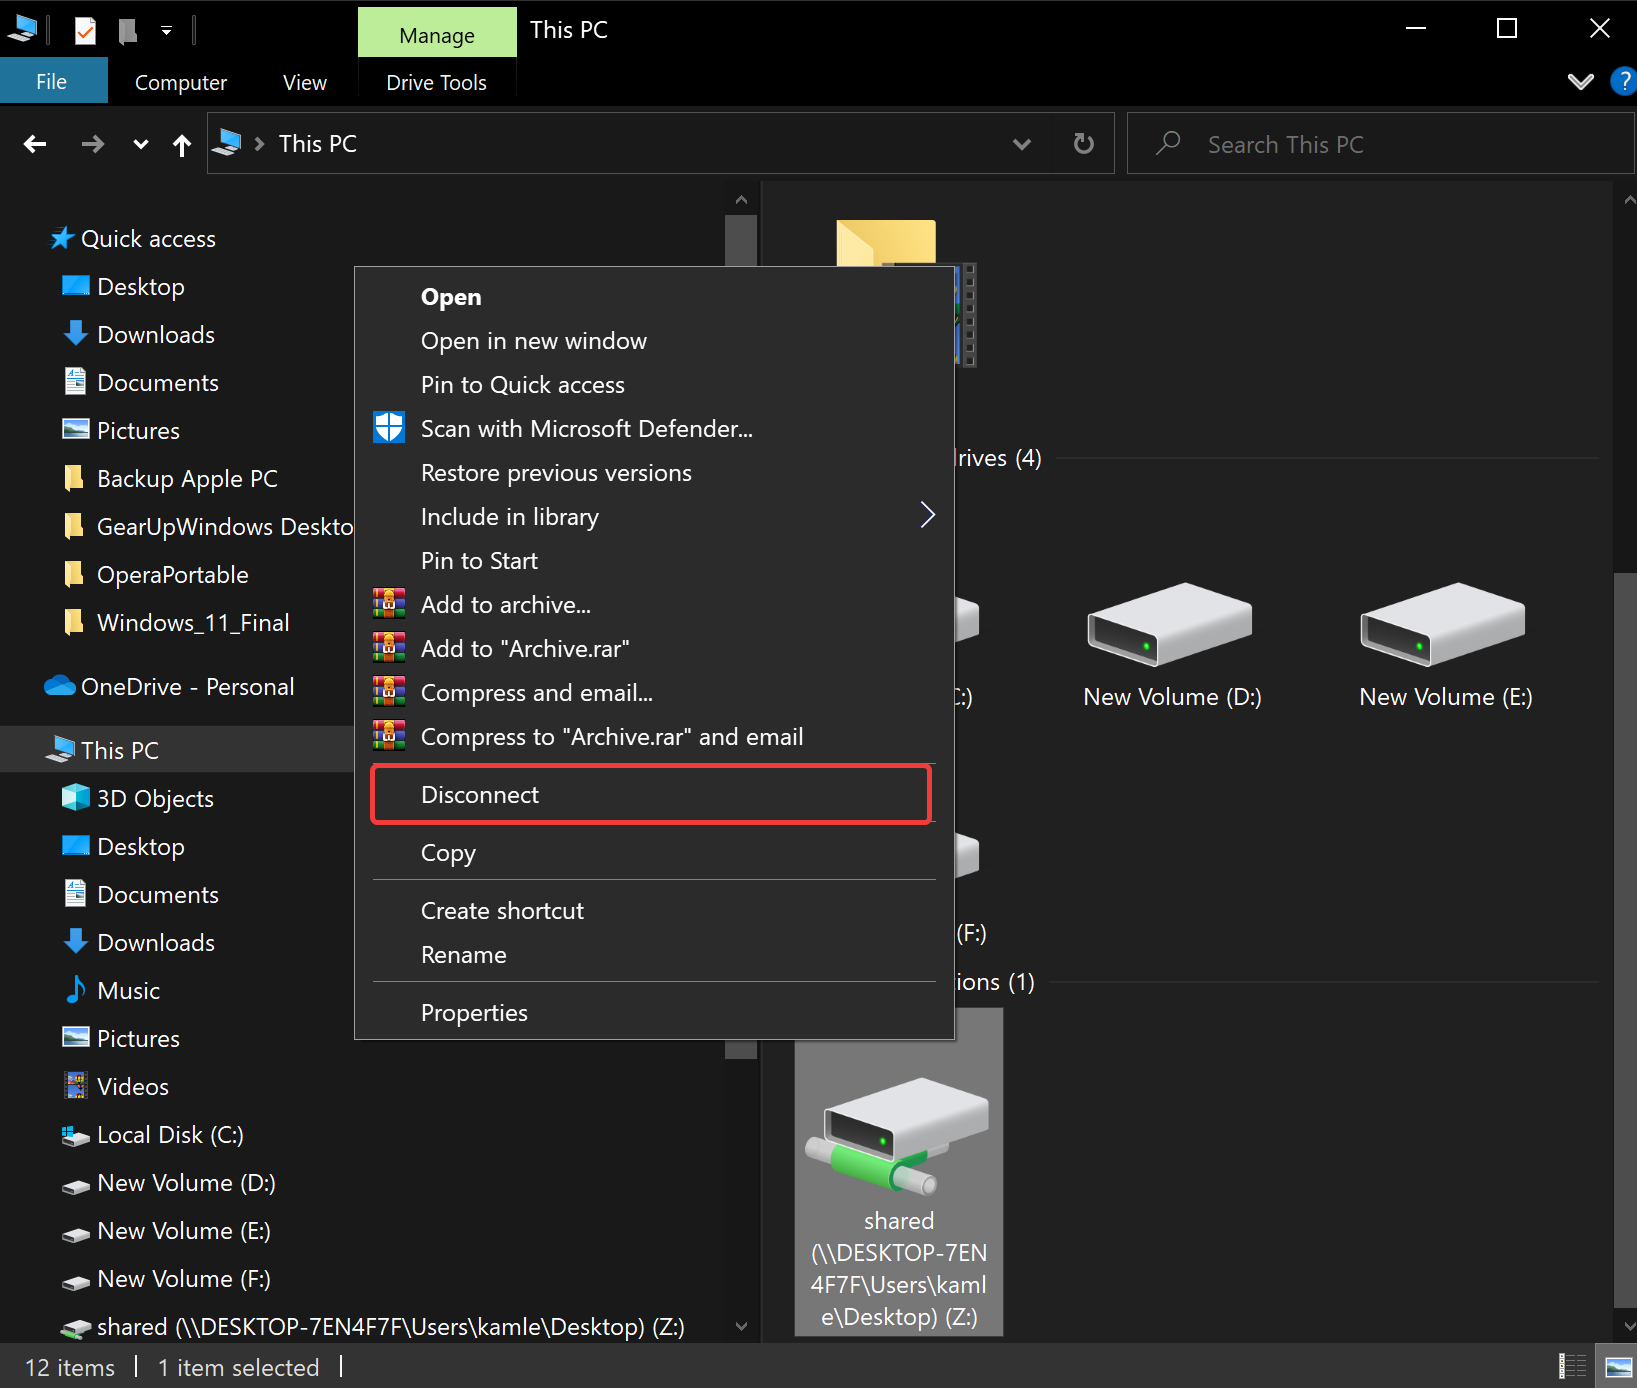
Step 3. Next, right-click on the network drive on the right side pane that you want to detach and select the Disconnect option.
Conclusion
In conclusion, mapping a network drive on your Windows 10 PC is an excellent way to access shared folders or files quickly. The process is relatively simple and involves enabling network discovery, selecting a drive letter, and entering the path to the shared folder. Once the mapping is done, the shared folder will appear as a new drive under “This PC” in the “File Explorer.” This means that you can access the shared folder just like any other local drive on your system. And, if you ever need to disconnect the mapped network drive, you can easily do so by following a few simple steps. So, whether you’re working in a team or collaborating with someone remotely, mapping a network drive can be a great way to make file sharing more efficient and convenient.