Disk Management is a built-in utility on Windows 11 that manages internal and external hard drives. Using this built-in tool, you can even manage your USB flash drive. That means whatever external hard drives are possible to connect to your PC can be partitioned, formatted, or deleted.
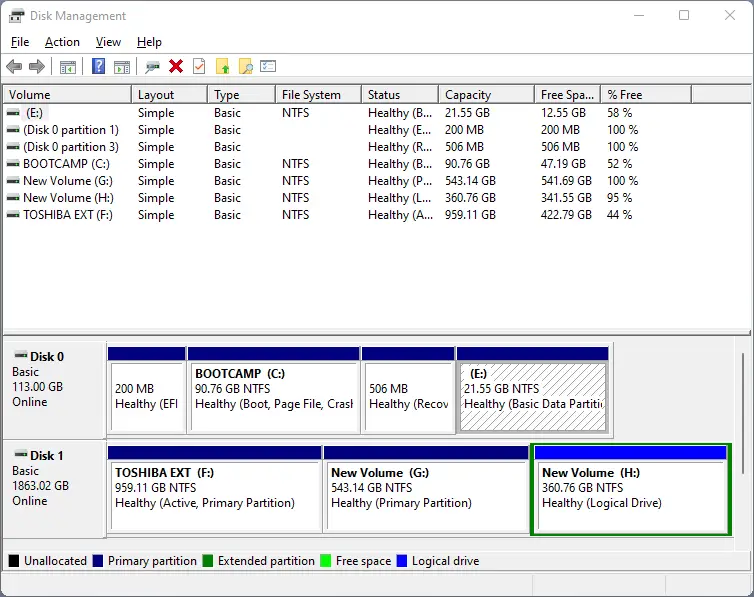
This tool also allows you to extend or shrink an existing partition. You can change the drive letter easily using built-in Disk Management. Now you understand the importance of the Disk Management tool, let me proceed with some of the easy steps through which you can access it on Windows 11.
How to Open Disk Management using Quick Access Menu?
To open the Disk Management tool using the Quick Access menu, do the following:-
Step 1. Perform a right-click on the Start button on the taskbar or press the Windows + X keyboard shortcut to launch the Quick Access menu.
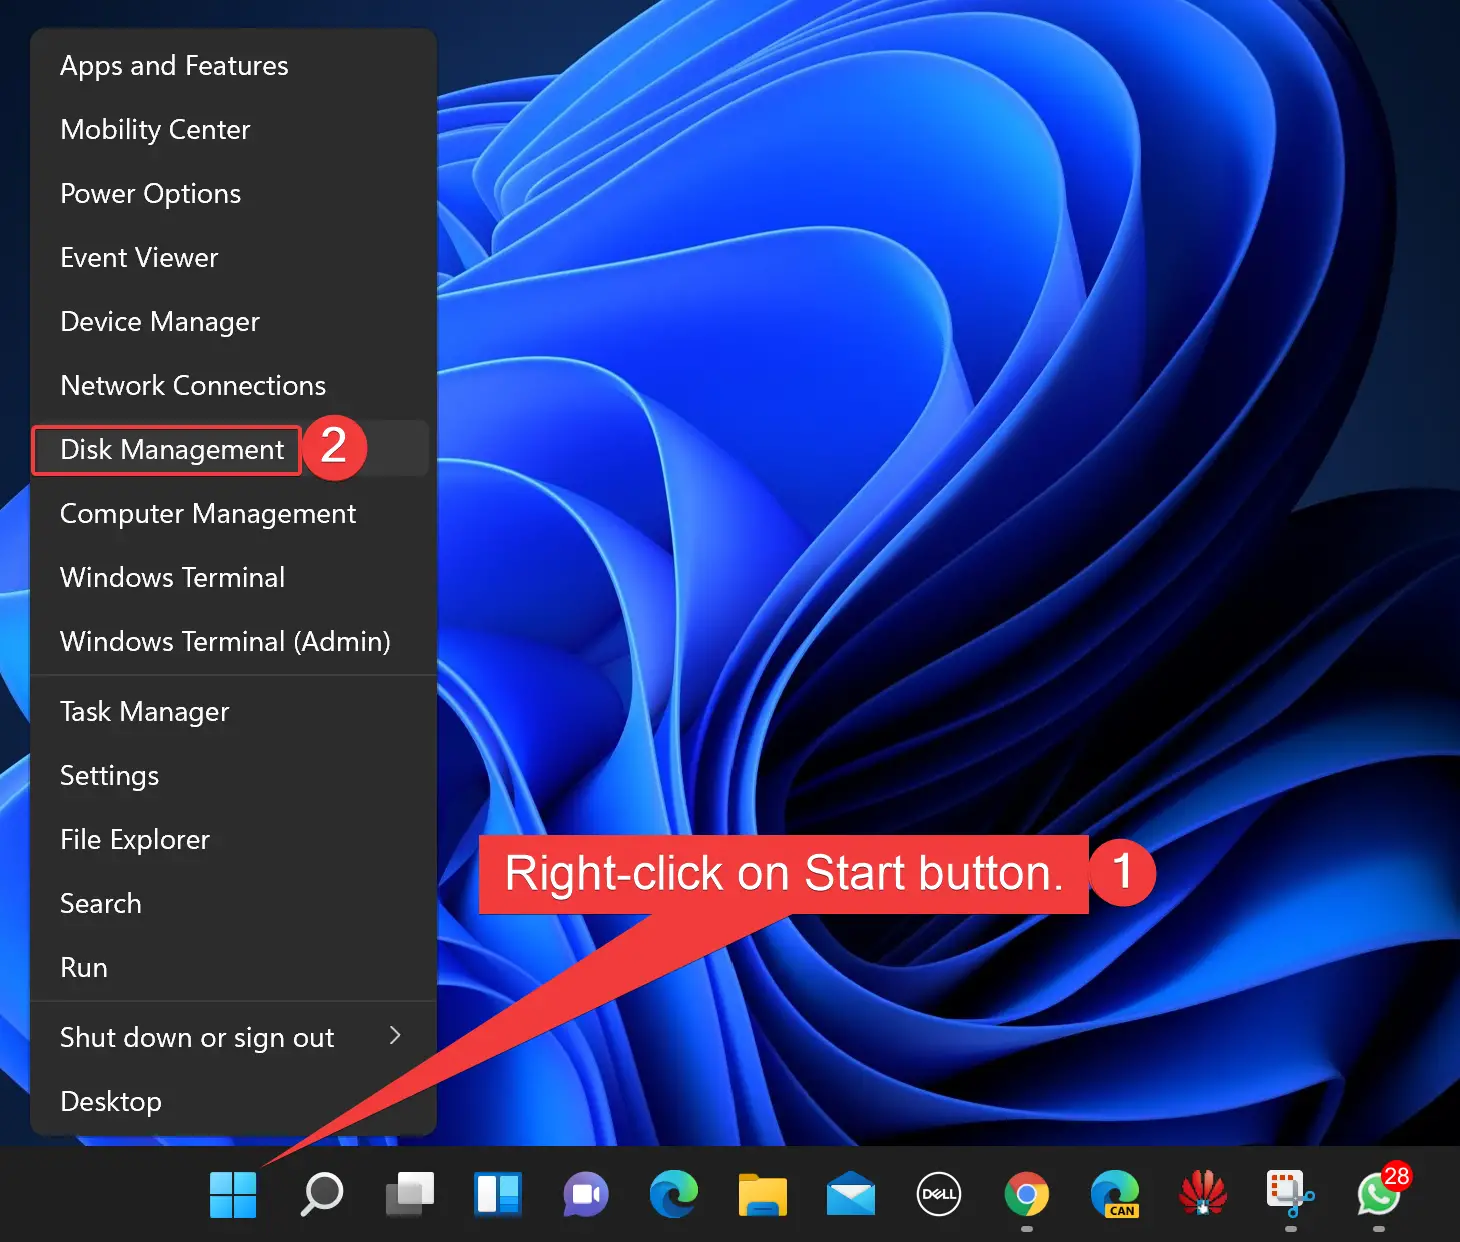
Step 2. Select Disk Management from the pop-up menu to open it.
How to Launch Disk Management from Windows Search?
To launch the Disk Management tool from the Windows Search menu, do the following:-
Step 1. Click the Search button to open the taskbar’s Search menu.
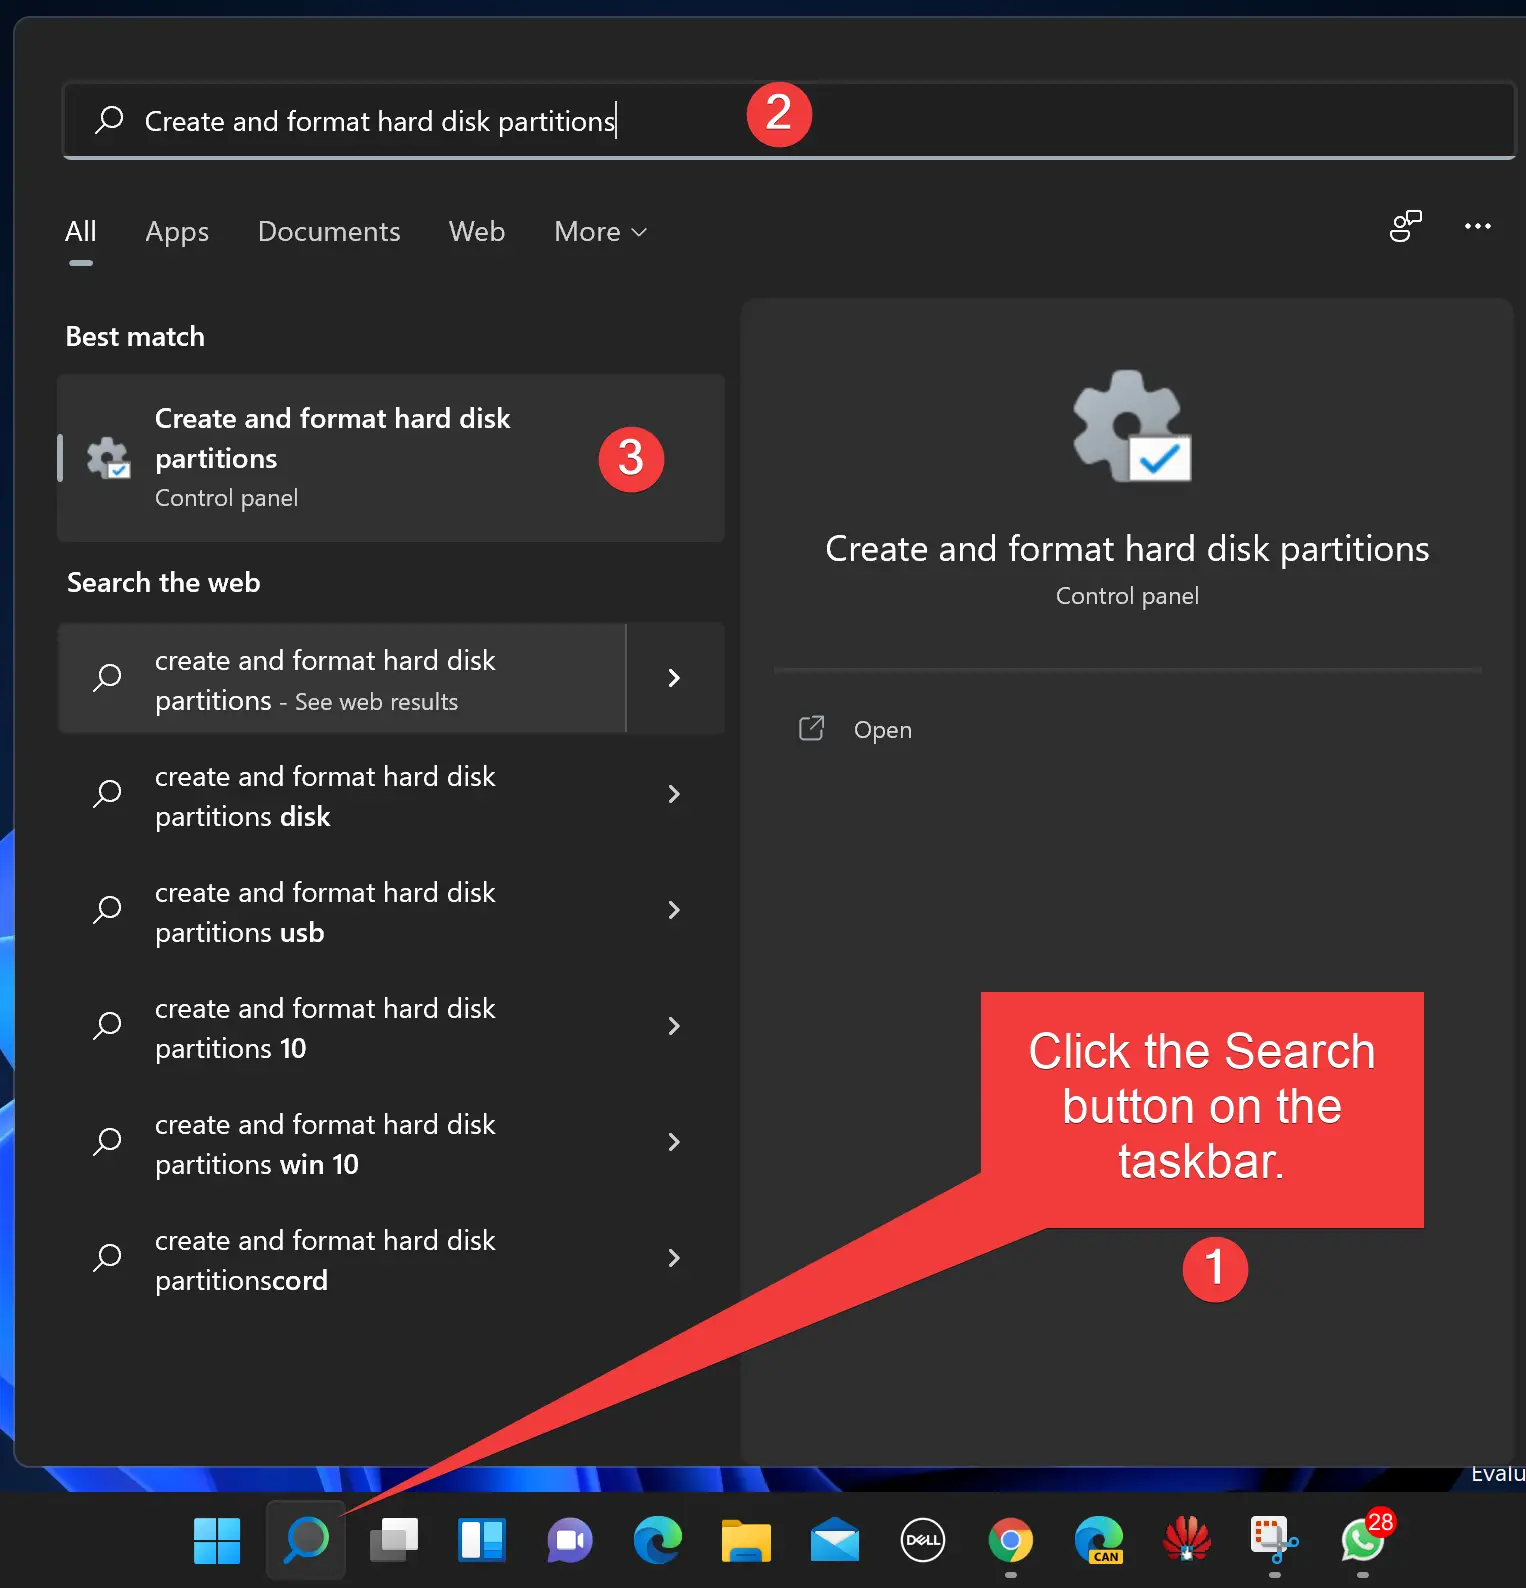
Step 2. Now, type Create and format hard disk partitions in the text field at the top, and then click on the relevant search result to open it.
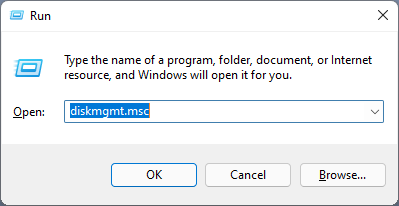
How to Open Disk Management using Run Command?
To open the Disk Management tool using the Run command, do the following:-
Step 1. Press Windows + R keys from the keyboard to open the Run dialog box.
Step 2. In the Run dialog box, type the following and hit Enter from the keyboard:-
diskmgmt.msc
Now, Disk Management will open.
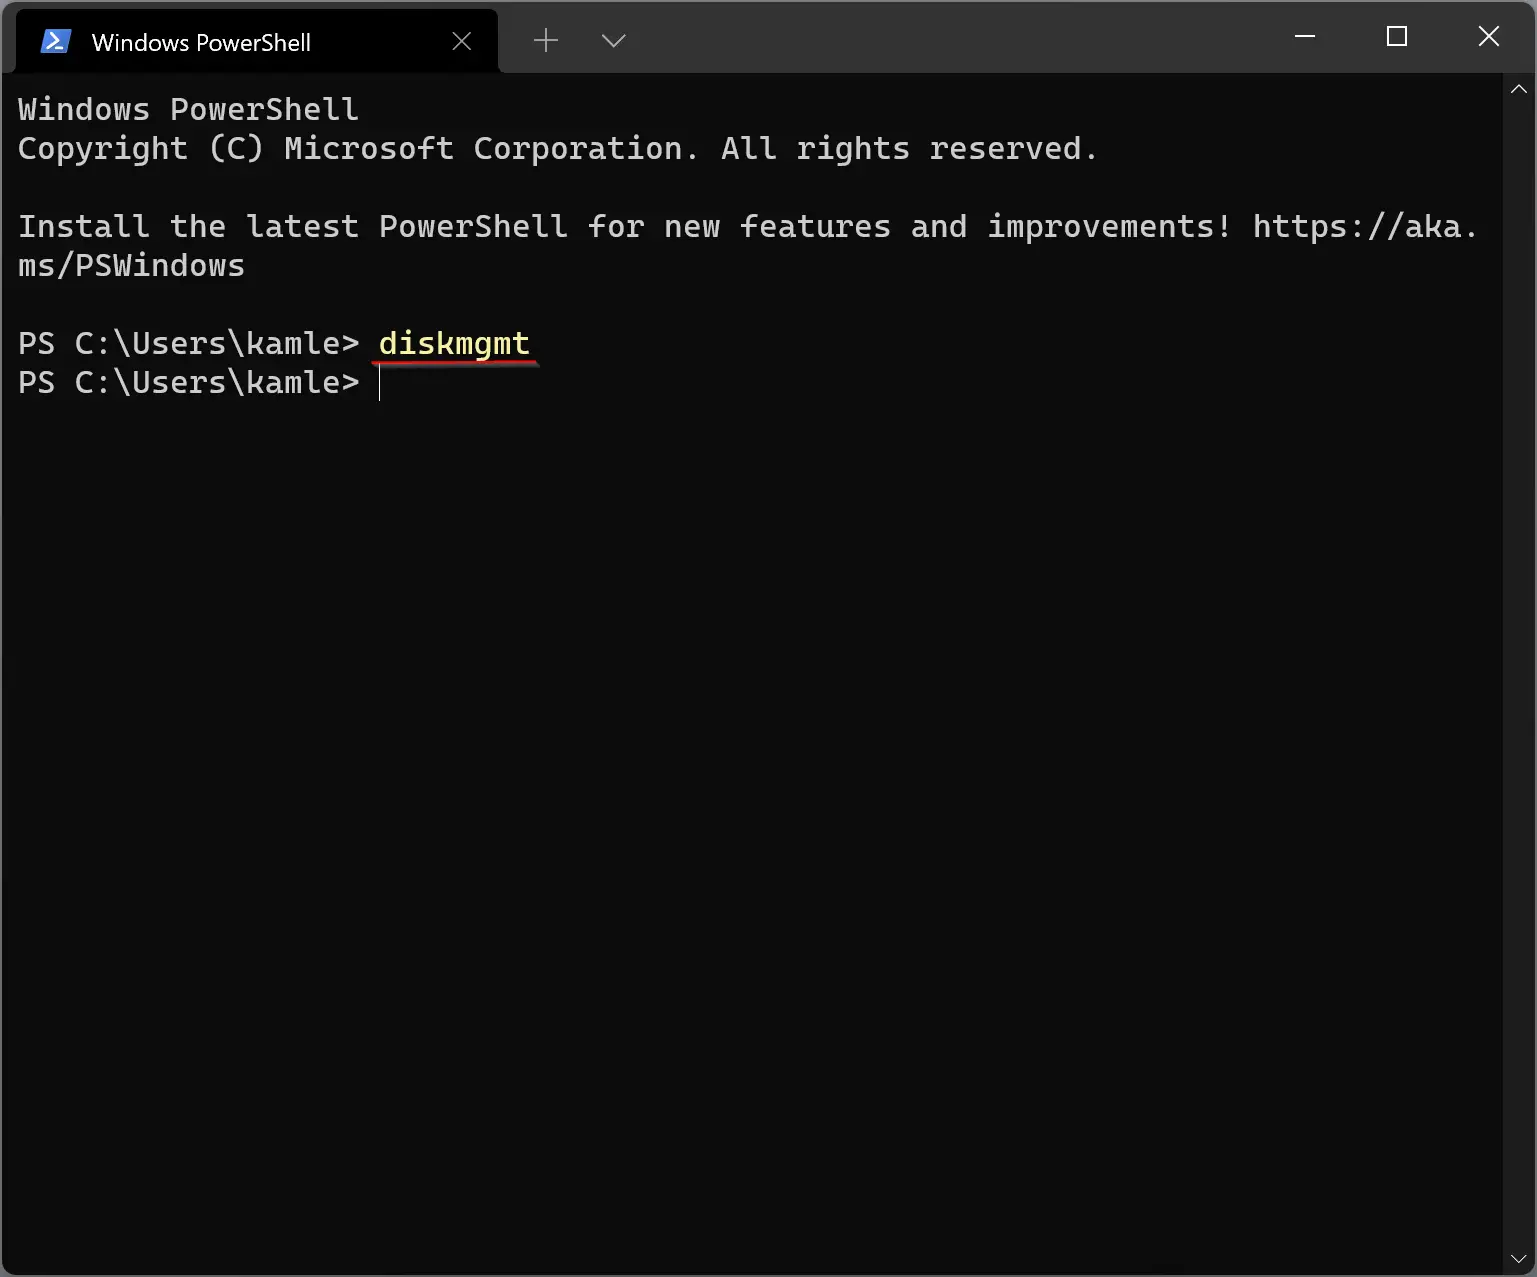
How to Open Disk Management using PowerShell or Command Prompt?
Step 1. Open Windows Terminal, PowerShell, or Command Prompt, whatever you prefer to use.
Step 2. On the prompt, type the following and then hit Enter from the keyboard:-
diskmgmt
How to Open Disk Management in Windows 11 Using Start Menu?
To launch Disk Management in Windows 11 through Start Menu, do these steps:-
Step 1. Click on the Start button located on Windows 11 taskbar. Alternatively, press the Windows key on your keyboard to open the Start menu.
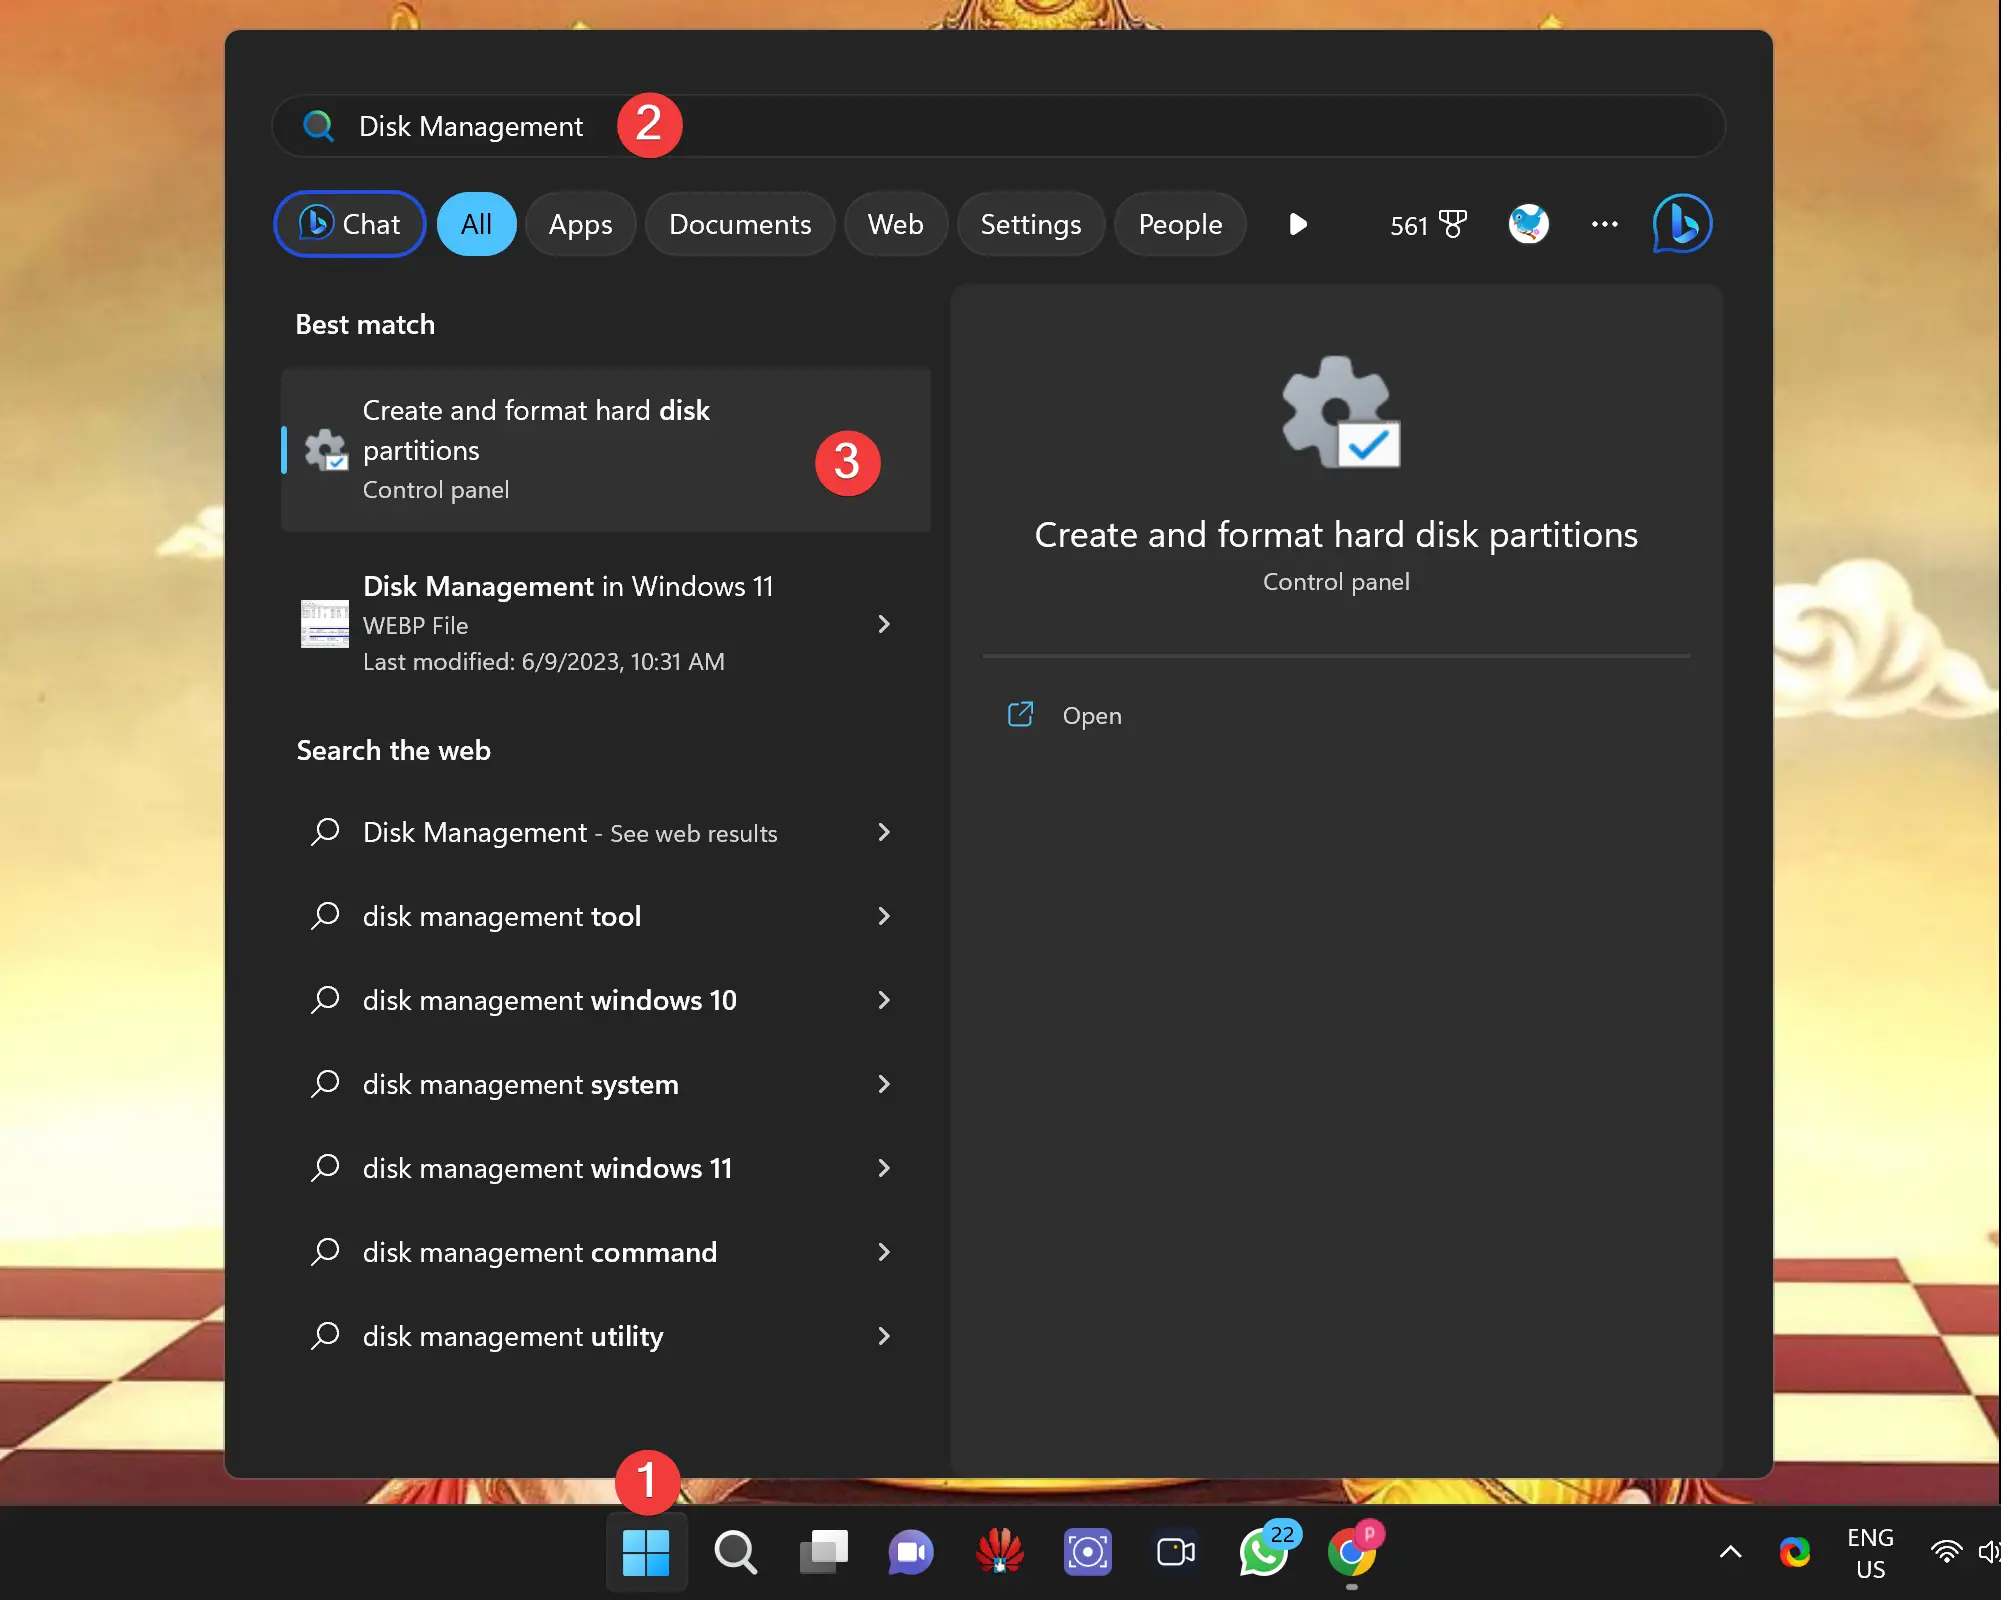
Step 2. In the Start menu, type “Disk Management” into the search bar. As you type, you will notice that the search results start populating.
Step 3. Click on “Create and format hard disk partitions” to open the Disk Management tool.
How to Access Disk Management on Windows 11 through Computer Management?
To launch Disk Management on Windows 11 through Computer Management, use these steps:-
Step 1. Right-click on the Start button and choose “Computer Management” from the context menu.
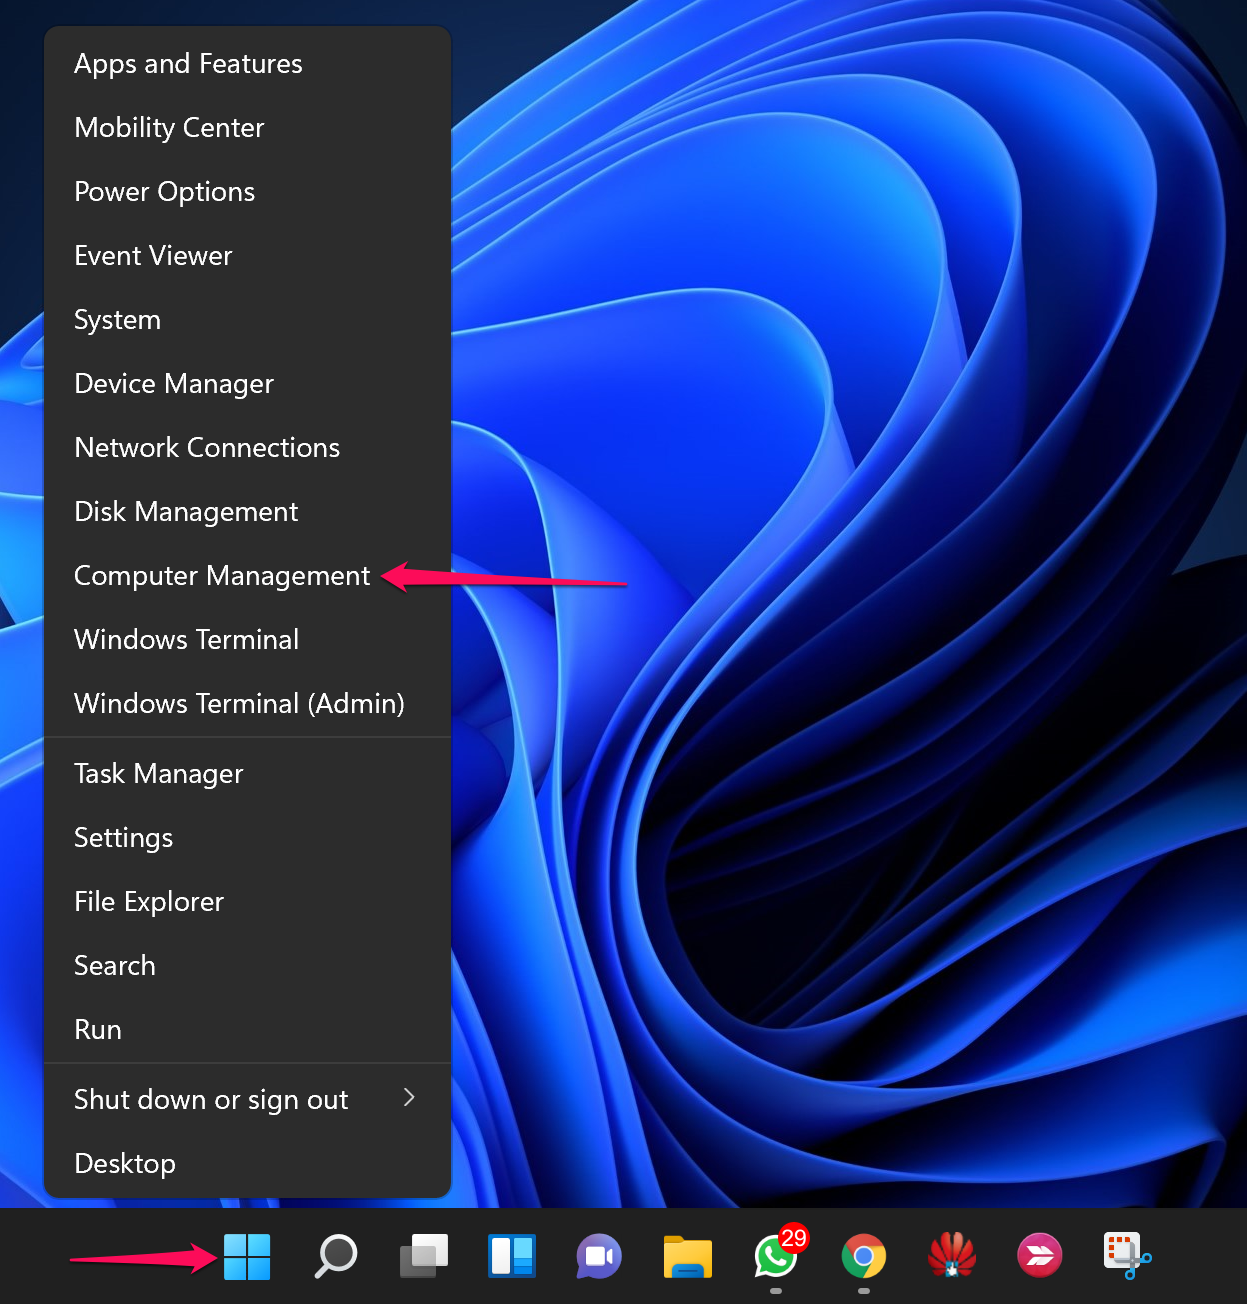
Step 2. In the Computer Management window, click on “Disk Management” under the “Storage” section.
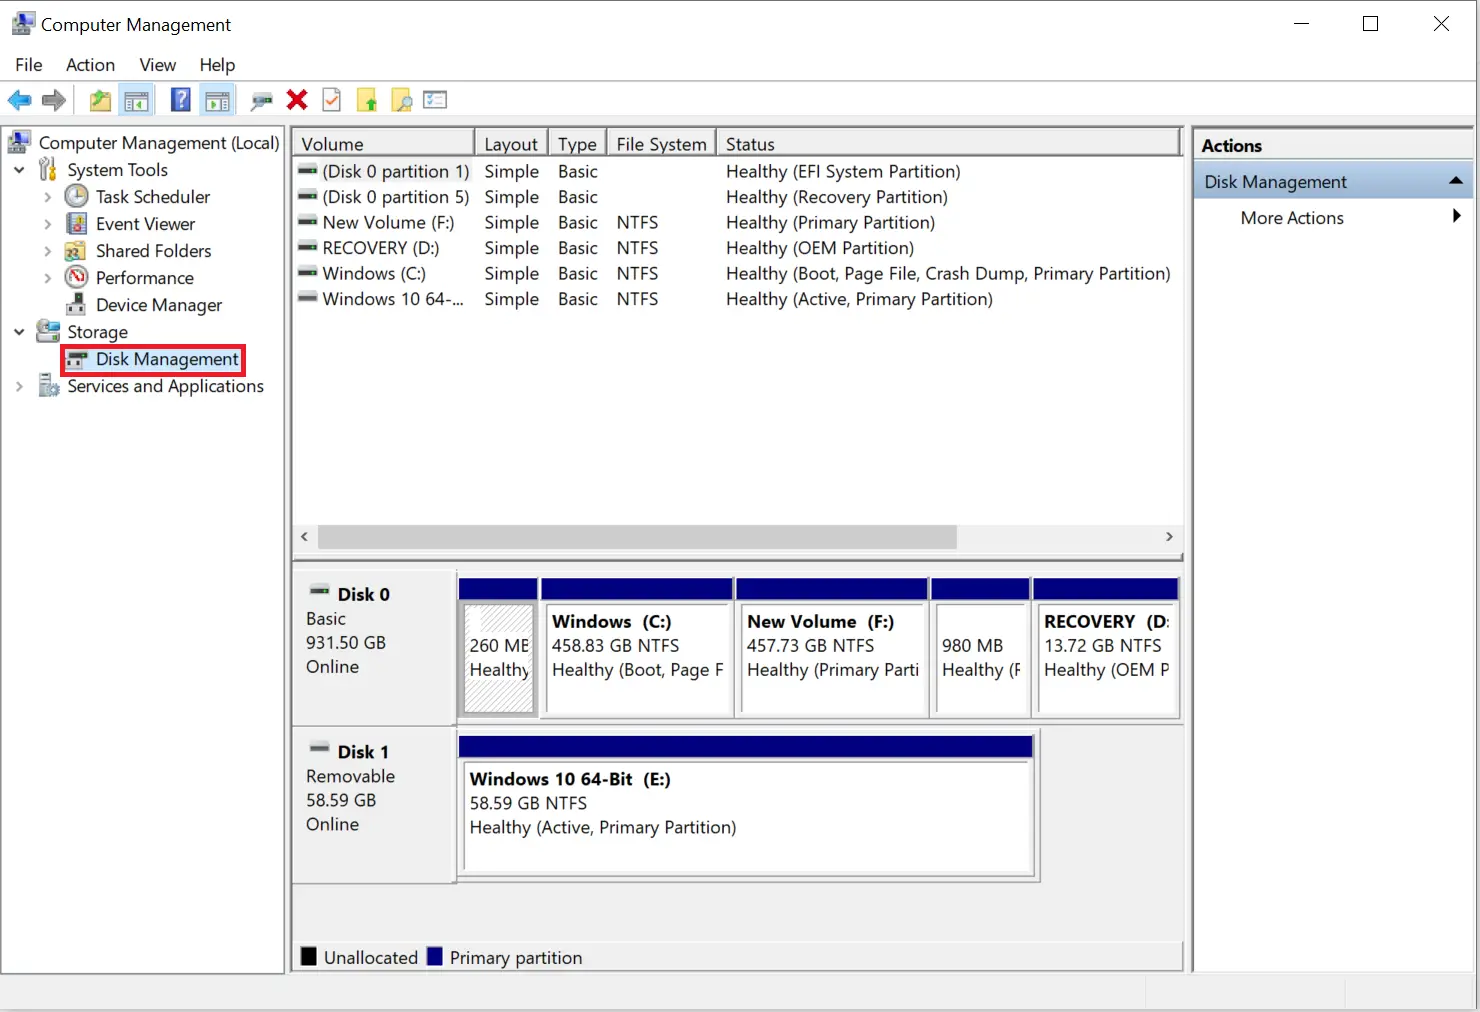
Disk Management is now open!
Conclusion
In conclusion, Disk Management is a vital utility in Windows 11 that enables you to manage both internal and external hard drives, including USB flash drives. With this built-in tool, you can partition, format, delete, extend, shrink, and change drive letters for your storage devices. By following the easy steps outlined in this guide, you can access Disk Management through various methods, such as the Quick Access menu, Windows Search, Run command, PowerShell or Command Prompt, Start Menu, and Computer Management. Take control of your storage management tasks in Windows 11 by utilizing the powerful features of Disk Management.