How do I password-protect USB thumb drives in Windows 11? Security is everybody concerned. All of us want to keep our data behind a password so that no one can steal it. Do you secure your Windows user account with a password? If your answer is yes, why not secure a USB thumb drive or pen drive with a password? Isn’t storing data on your USB flash drive not important? I think your answer should be; it is important for me. I hope you have now understood the security of your USB flash drive data.
Windows 11 comes with an inbuilt security feature, BitLocker. Using the same BitLocker, you can protect your external drive, which means there is no need to download and install a third-party tool to secure your sensitive data. BitLocker is enough to give protection to your USB thumb drive.
BitLocker application of Windows 11 is quite easy to use and secures your sensitive data. Using the same BitLocker application, you can secure your internal hard drive also. In case somebody steals your computer or laptop, they will be unable to access your data. Similarly, if you have encrypted your USB flash drive with a password if someone steals your device, they will not be able to access its data.BitLocker helps protect data on your device so only authorized users with a valid password can access it. If someone tries to access your BitLocker-enabled device without authentication, access will be denied.
Are you ready to encrypt your USB drive with a password? Go ahead with these steps.
How to Encrypt Thumb Drives with Password in Windows 11?
The settings app is a centralized place to configure system settings. Let it be creating a new user account on your PC or manually updating Windows. All you can do is through the Settings app.
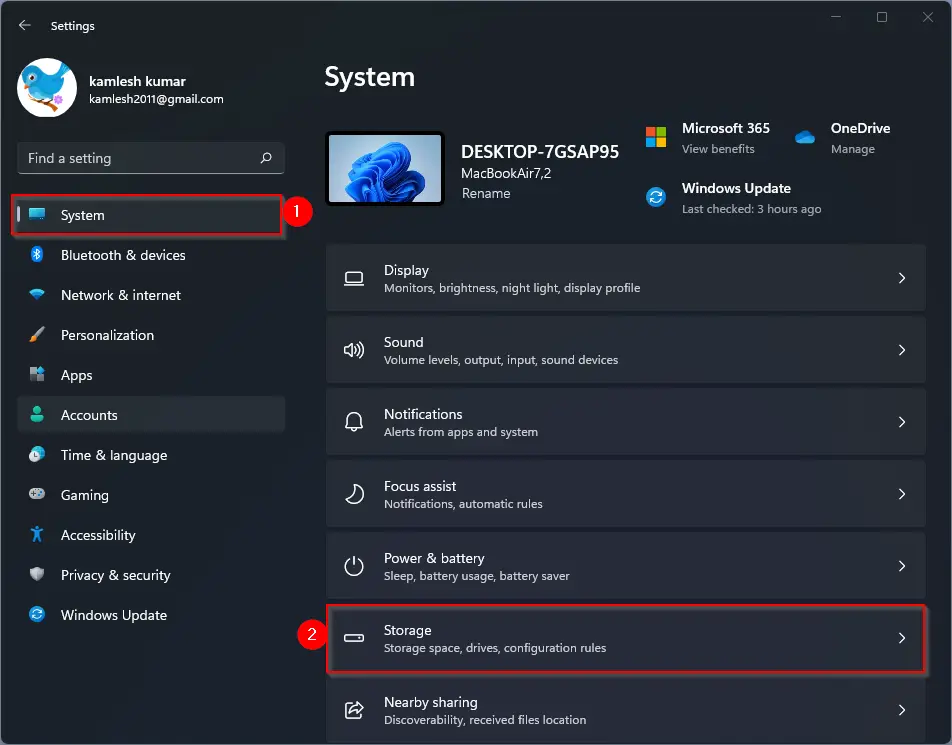
Step 1. Open the Settings app by pressing the Windows + I keys or any other method.

Step 2. Click on the System category from the left side pane. On the right side pane, click on the Storage tab.
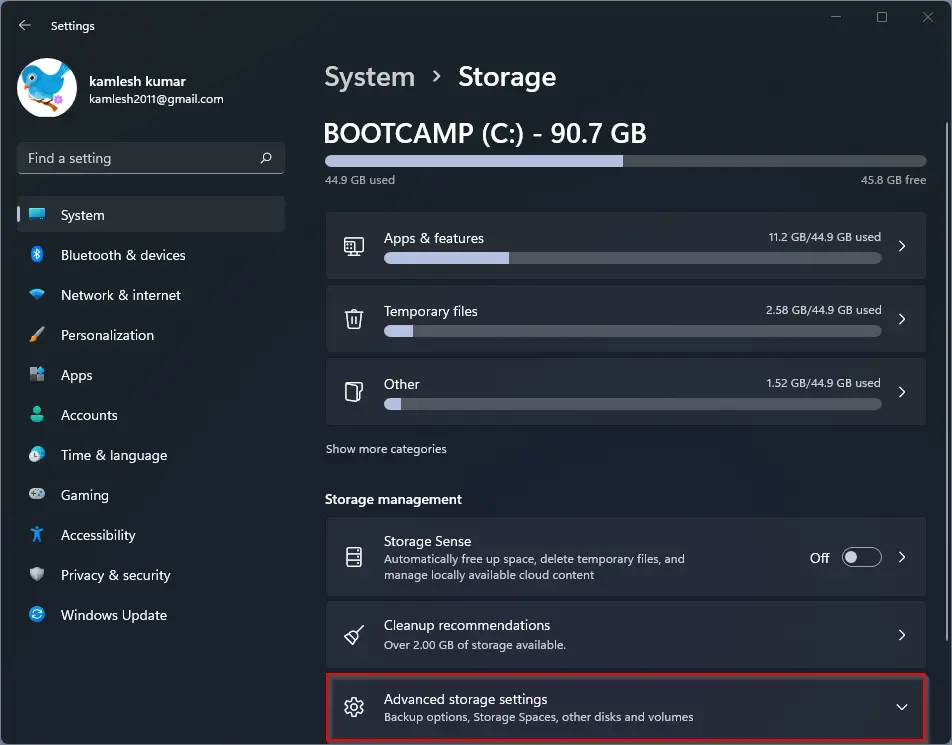
Step 3. On the Storage settings, click on the Advanced storage settings.
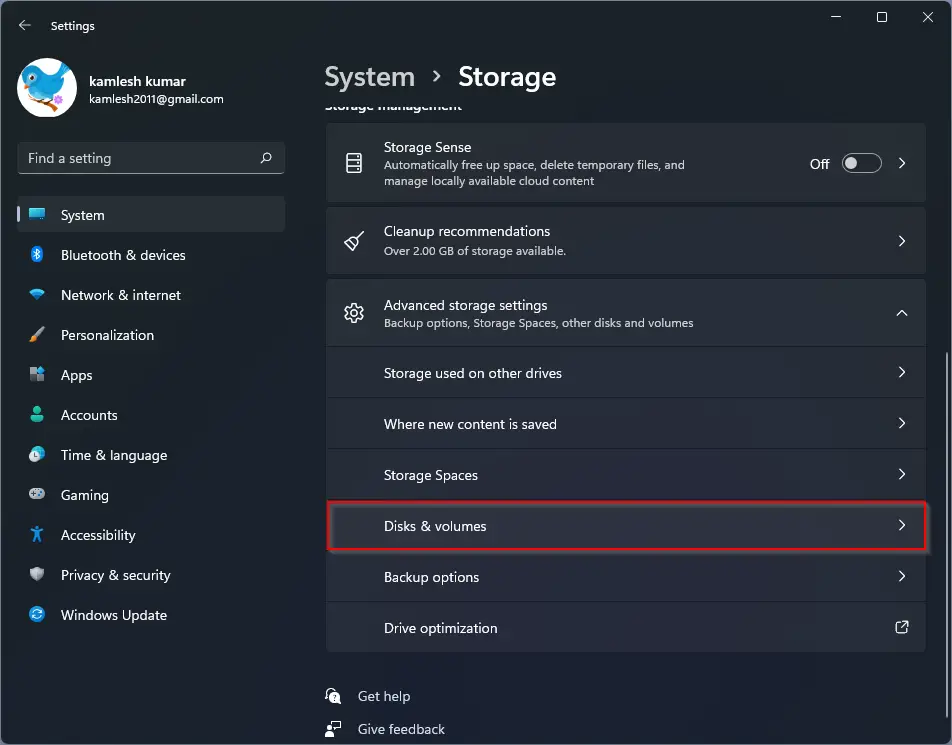
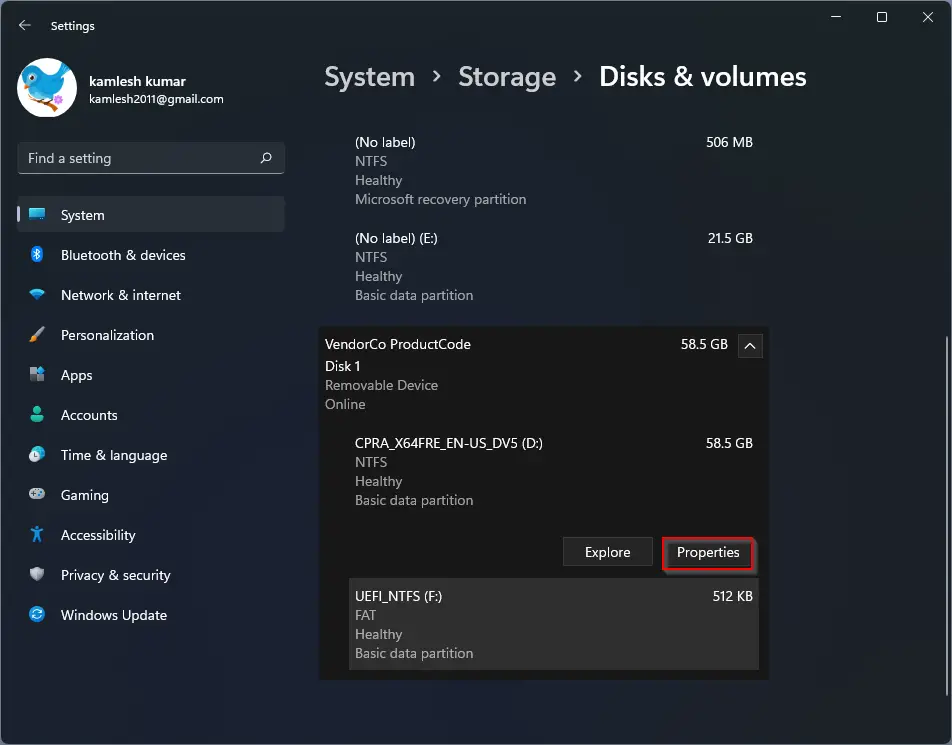
Step 4. Now, click on the Disks & volumes option.
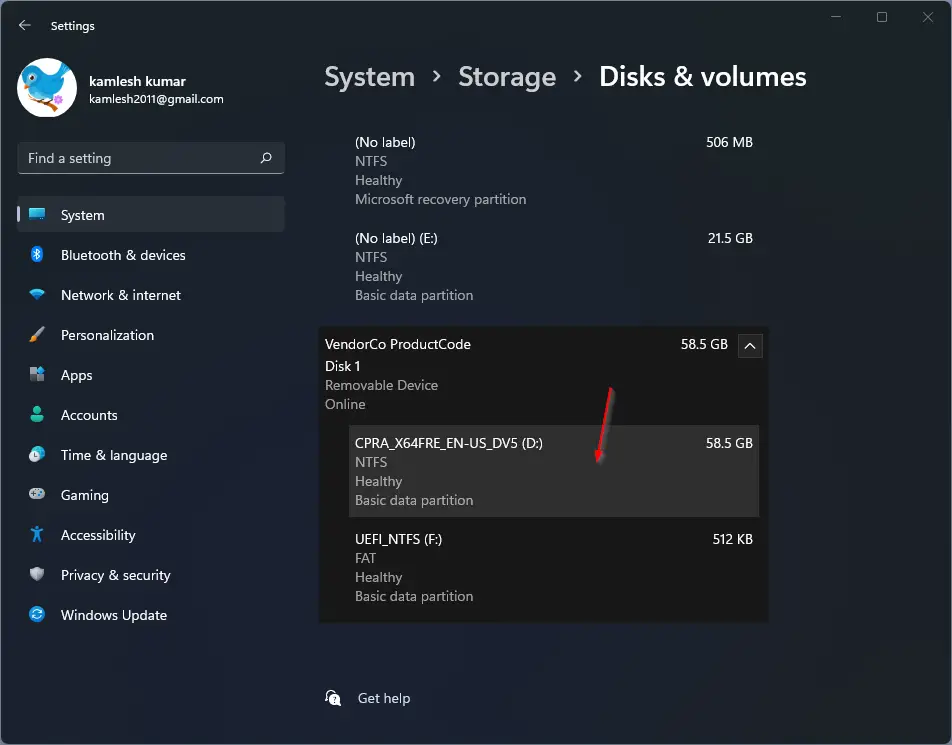
Step 5. On the Disks & volumes settings pane, both internal and external drives will be listed. Click on the drive that you would like to encrypt.
Step 6. Now, click on the Properties button.
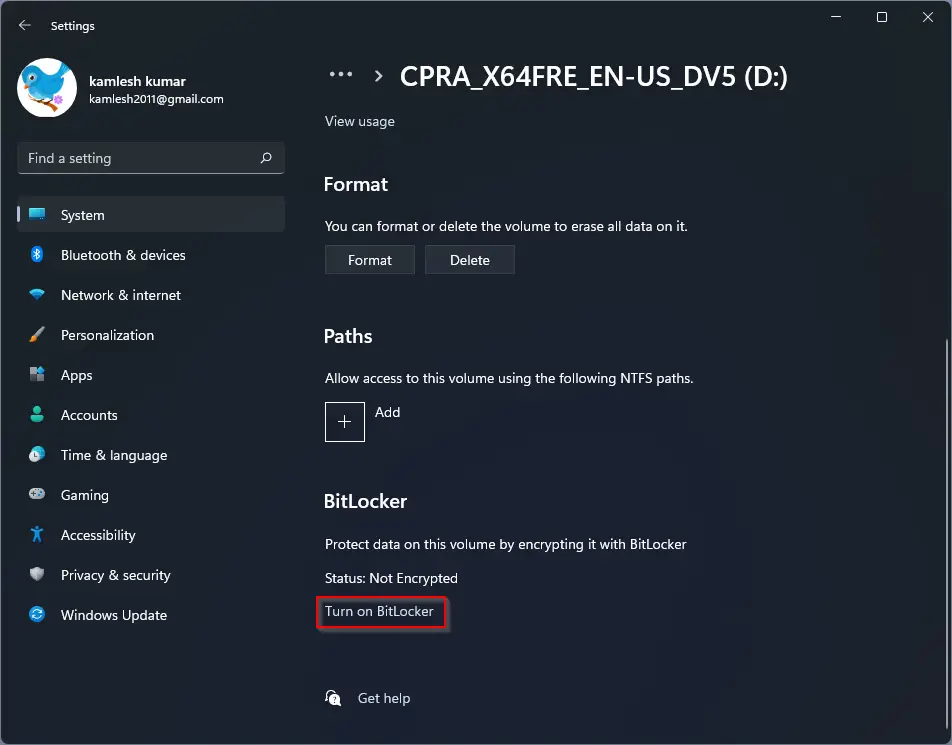
Step 7. On the next window, scroll down to see the BitLocker section. Now, click on the link Turn on BitLocker as highlighted below.
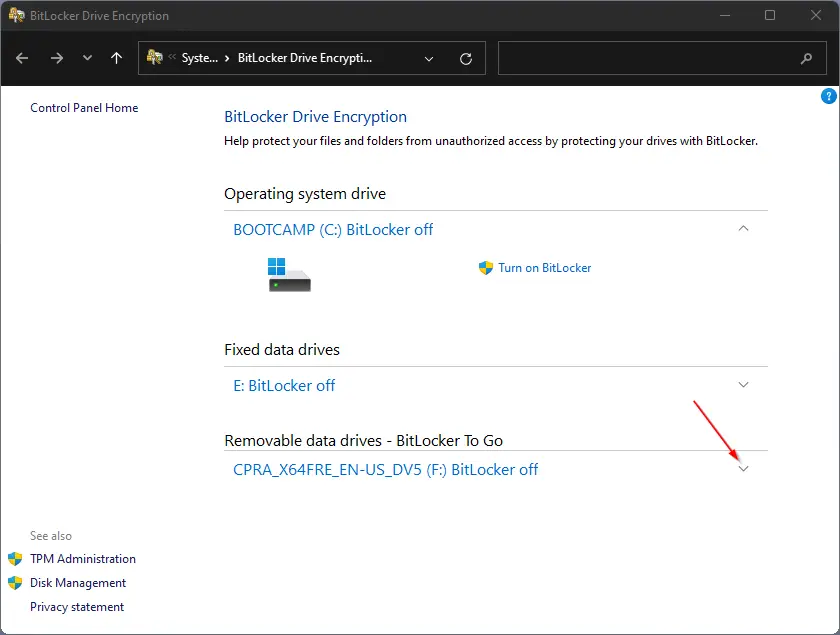
Step 8. Once you complete the above steps, the BitLocker Drive Encryption window will open up. Click on the down arrow to expand the external drive that you want to encrypt.
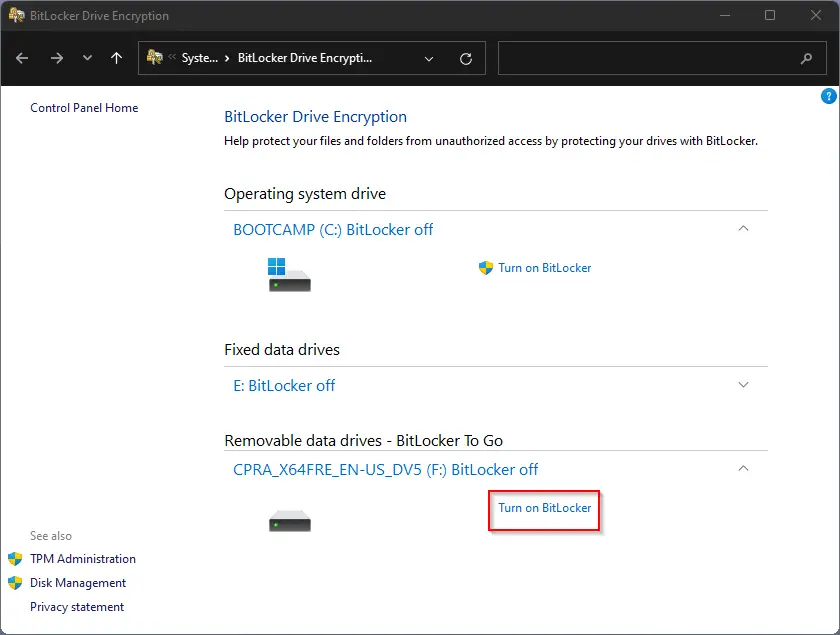
Step 9. Now, click the link labeled Turn on BitLocker.
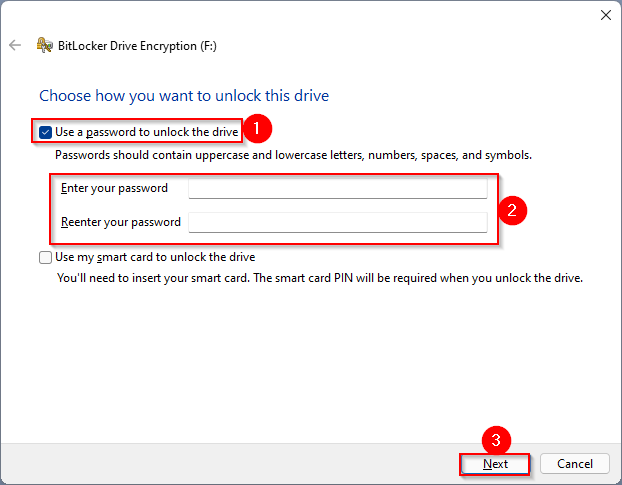
Step 10. In the next window, check the checkbox labeled Use a password to unlock the drive. Enter your password and then confirm the password. Finally, click on the Next button.
Step 11. Now, you’ll be prompted to back up the BitLocker recovery key so that you can restore your data when you don’t remember the password. Select any one method from the following options:-
- Save to your Microsoft account
- Save to a file
- Print the recovery key
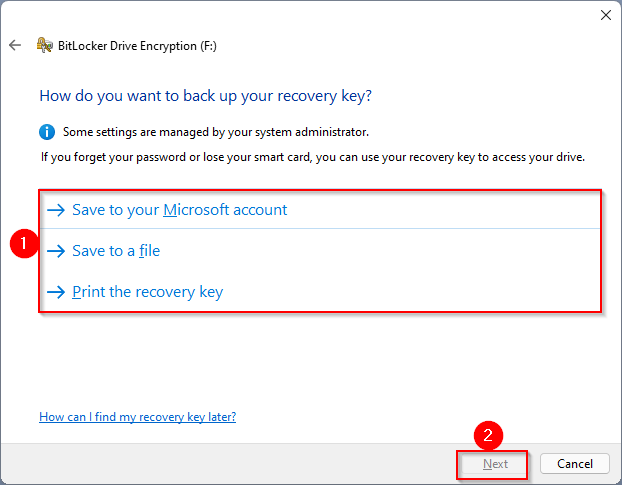
Step 12. Click Next.
Step 13. Now select from the following options that suit best to you:-
- Encrypt used disk space only (faster and best for new PCs and drives)
- Encrypt entire drive (slower but best for PCs and drives already in use)
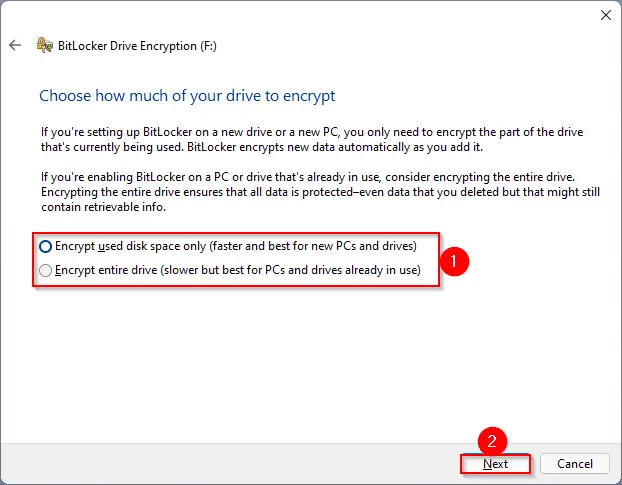
Step 14. Click Next.
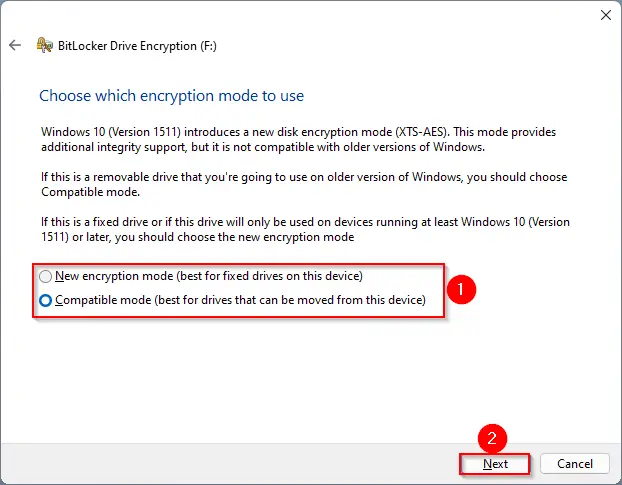
Step 15. On the next window, you will be greeted with the following options:-
- New encryption mode (best for fixed drives on this device)
- Compatible mode (best for drives that can be moved from this device)
Select an option that suits you and click on the Next button.
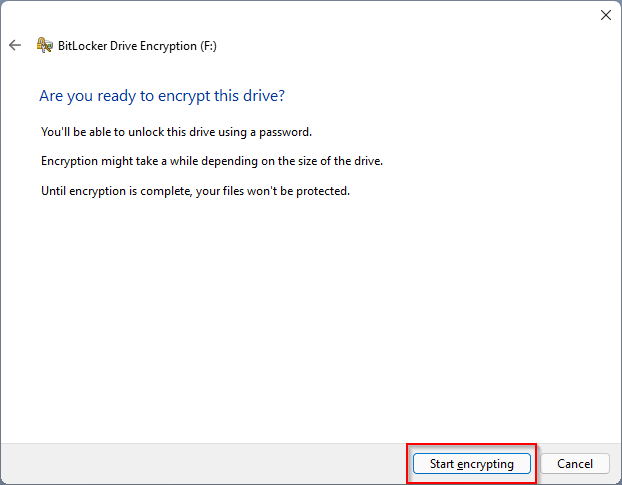
Step 16. Finally, click the Start encrypting button.
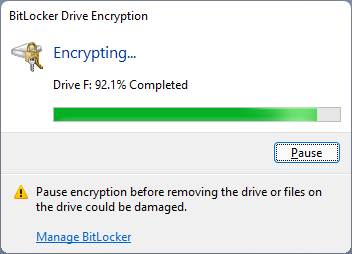
Now, the encrypting process will start immediately. Depending upon the encryption method and size of the drive, it may take a while. Between, you can see the progress.
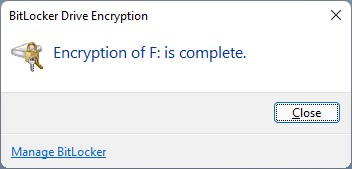
Wait until you see a message that the encryption is complete.
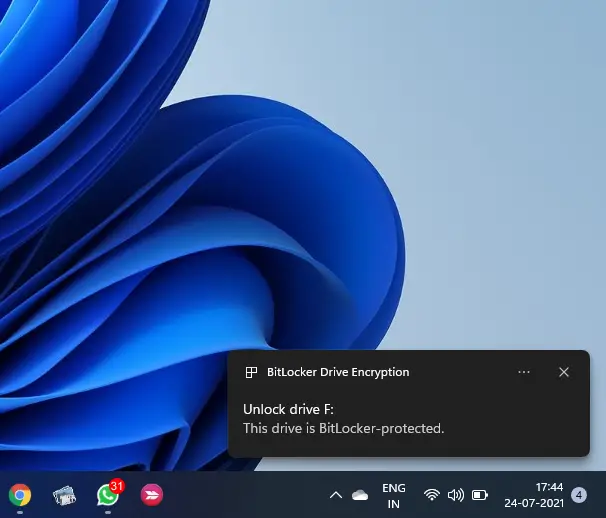
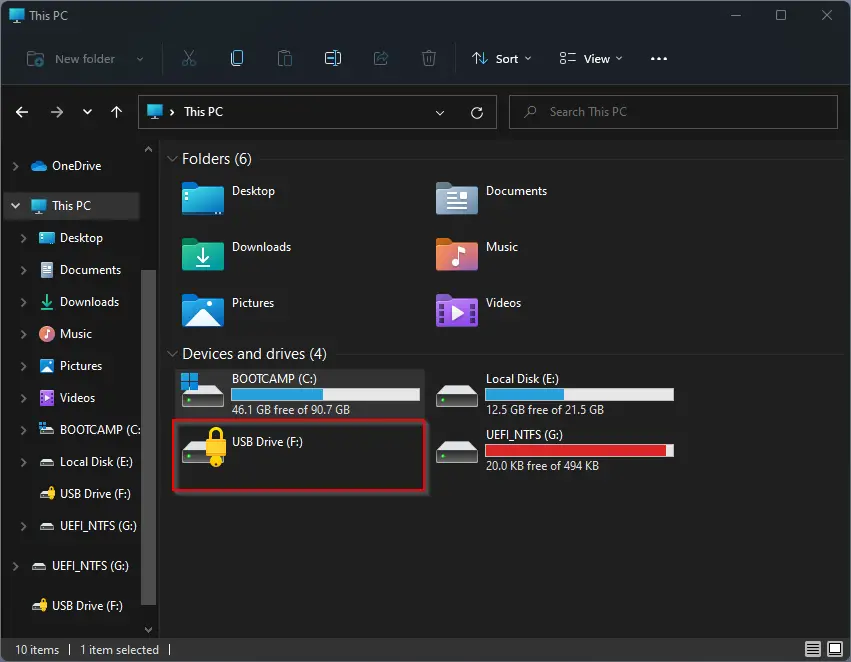
When you plug your USB drive into your PC, you will see a message on the right-corner bottom screen; this drive is BitLocker-protected.
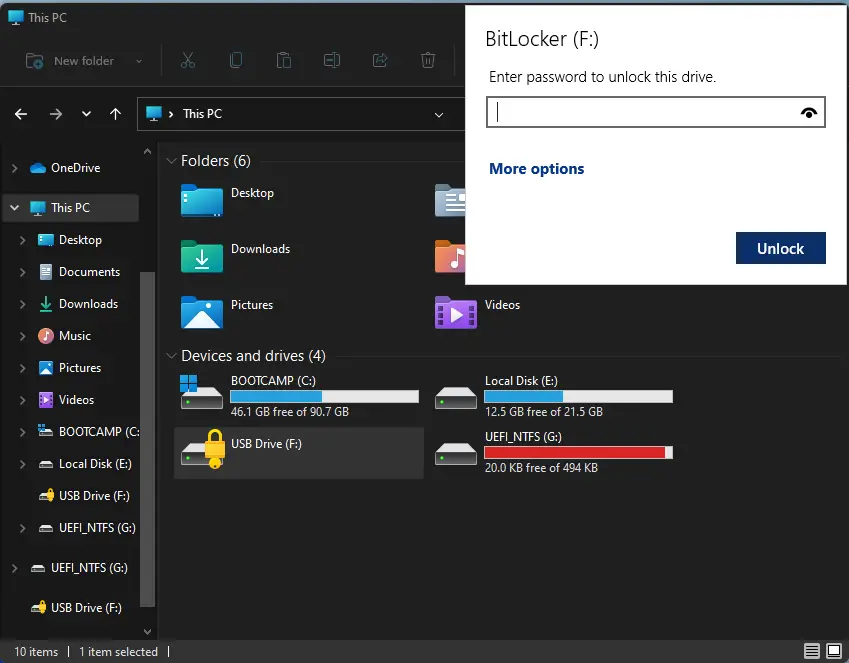
When you try to open it, you will be prompted for a password. Also, when you open File Explorer/This PC, you will notice a lock icon on the drive.
Double-clicking on the encrypted drive, you will be prompted for a password. Enter the correct password and then click on the Unlock button to access the encrypted USB flash drive data.
How to Recover BitLocker Password?
If you have forgotten the encryption password, click on the More options link.
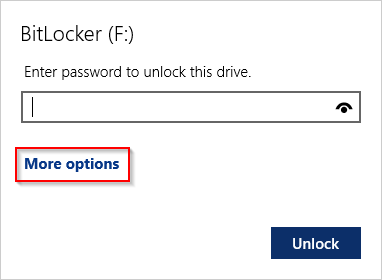
Now click the link Enter recovery key.
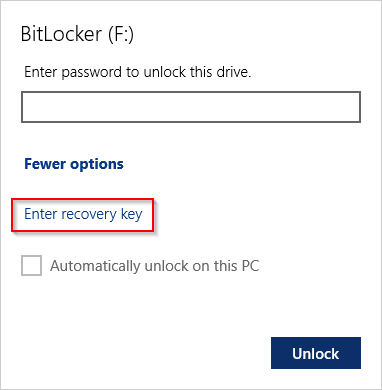
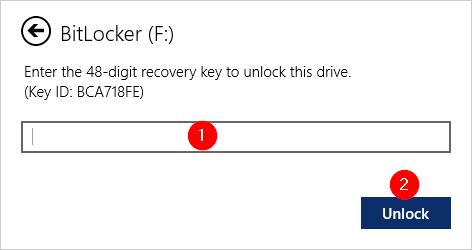
Now, enter the 48-digit recovery key to unlock the drive you have already backed up, and then click the Unlock button.
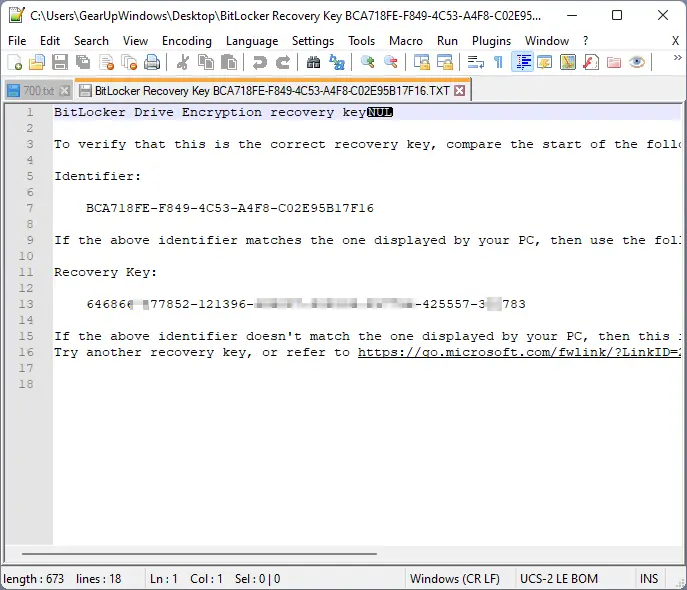
You can find the BitLocker Recovery Key on the backup file that you have during the setup of BitLocker.
If you have lost the backup file, you can’t recover data from your USB flash drive. You need to format your USB flash drive.
That’s all.
Conclusion
In conclusion, securing sensitive data is crucial to protect it from potential theft or unauthorized access. Windows 11 offers a built-in security feature, BitLocker, that allows users to password-protect their external drives, including USB thumb drives, without the need for third-party tools. The BitLocker application is easy to use and provides strong security, ensuring that only authorized users with a valid password can access the data on the device. By following the step-by-step guide outlined in this article, users can easily encrypt their USB flash drives with a password using BitLocker. Remember to back up the recovery key to restore data in case the password is forgotten. With BitLocker, users can rest assured that their sensitive data is secure and protected from potential threats.
Hi! I’m having a problem where I get to Step 8, and nothing but the C;\ drive is available. I don’t know what I can do to get the External Drive to appear in the list. It’s a Samsung SSD, and It used to be Bitlocker Encripted, but after a Format, the drive appears, but it will not turn up in the list to be Encrypted. Any help would be awesome.
Dear Cian,
First, assign a letter to your USB drive, then repeat the above steps; it should appear. If you don’t know how to do it, pls refer https://gearupwindows.com/how-to-change-drive-letter-on-windows-11/
Thank you, Pammi for trying. Your solution still does not populate the drive in Bitlocker.