Microsoft Defender is a built-in antivirus program on Windows 11 and is enabled and configured by default. However, if you need, you can turn off Microsoft Defender on Windows 11 completely or suspend it.
Also, when you install a third-party antivirus in Windows 11, the built-in Microsoft Defender Antivirus is automatically disabled. If it doesn’t happen automatically, you need to disable Microsoft Defender manually.
How to Permanently Disable Microsoft Windows Defender Antivirus in Windows 11 using Local Group Policy Editor?
It’s generally not recommended to permanently disable Microsoft Windows Defender Antivirus, as it protects against malware and other security threats. However, if you have another antivirus program installed on your device and want to disable Windows Defender Antivirus, you can follow these steps:-
Step 1. First, open Local Group Policy Editor.
Step 2. In the Local Group Policy Editor window, navigate to the following path:-
Computer Configuration > Administrative Templates > Windows Components > Microsoft Defender Antivirus
Step 3. On the right, double-click on the “Turn off Microsoft Defender Antivirus” policy settings.
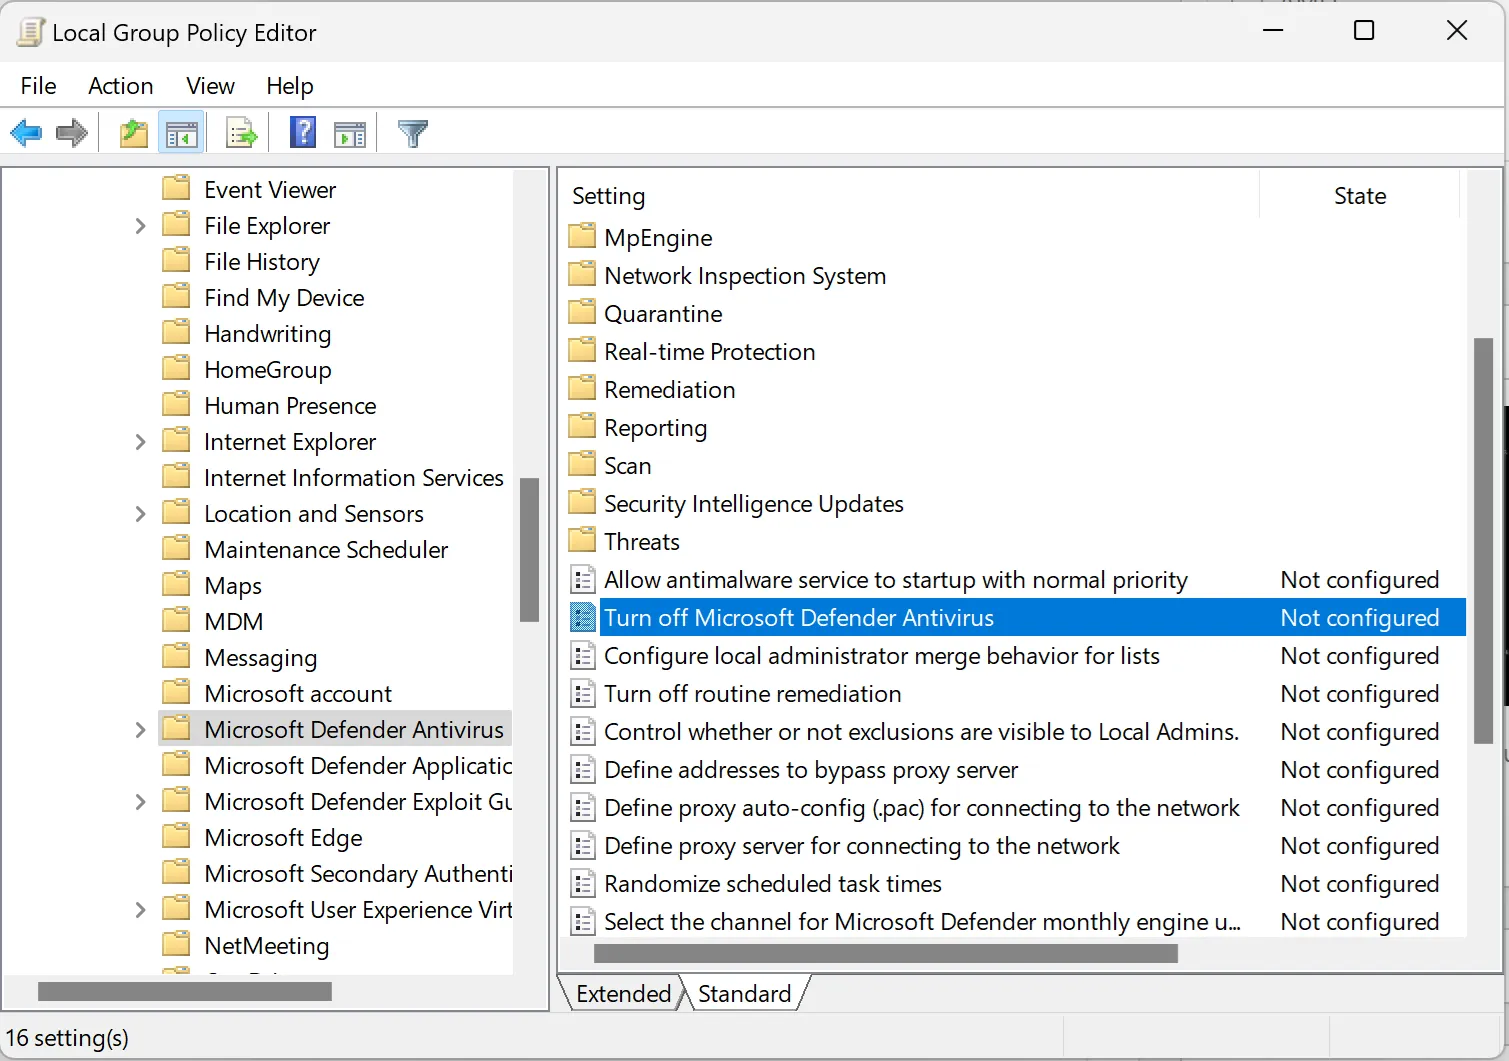
Step 4. Here, select the “Enabled” option and click “Apply,” and then “OK” to save the changes.
Step 5. Finally, reboot your device to apply the changes.
After completing these steps, Microsoft Defender Antivirus should be permanently disabled on your device.
If you decide to re-enable Windows Defender Antivirus, go back to the “Turn off Microsoft Defender Antivirus” policy in the Local Group Policy Editor and select the “Not Configured” or “Disabled” option.
How to Permanently Disable Microsoft Windows Defender Antivirus in Windows 11 using Registry Editor?
To permanently turn off Microsoft Windows Defender Antivirus on Windows 11 through Registry Editor:-
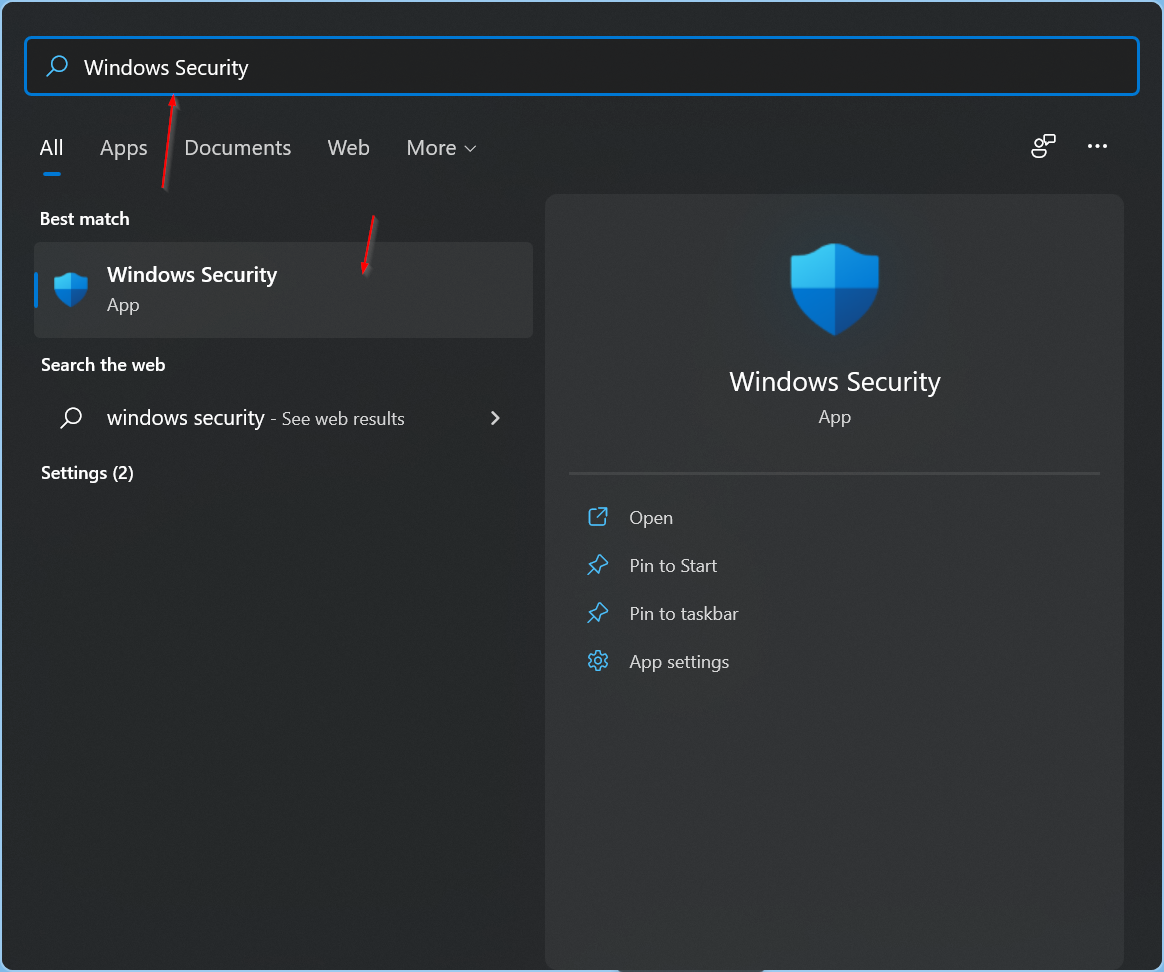
Step 1. Click on the Start button and type Windows Security.
Step 2. In the search results, click on the Windows Security to open it.
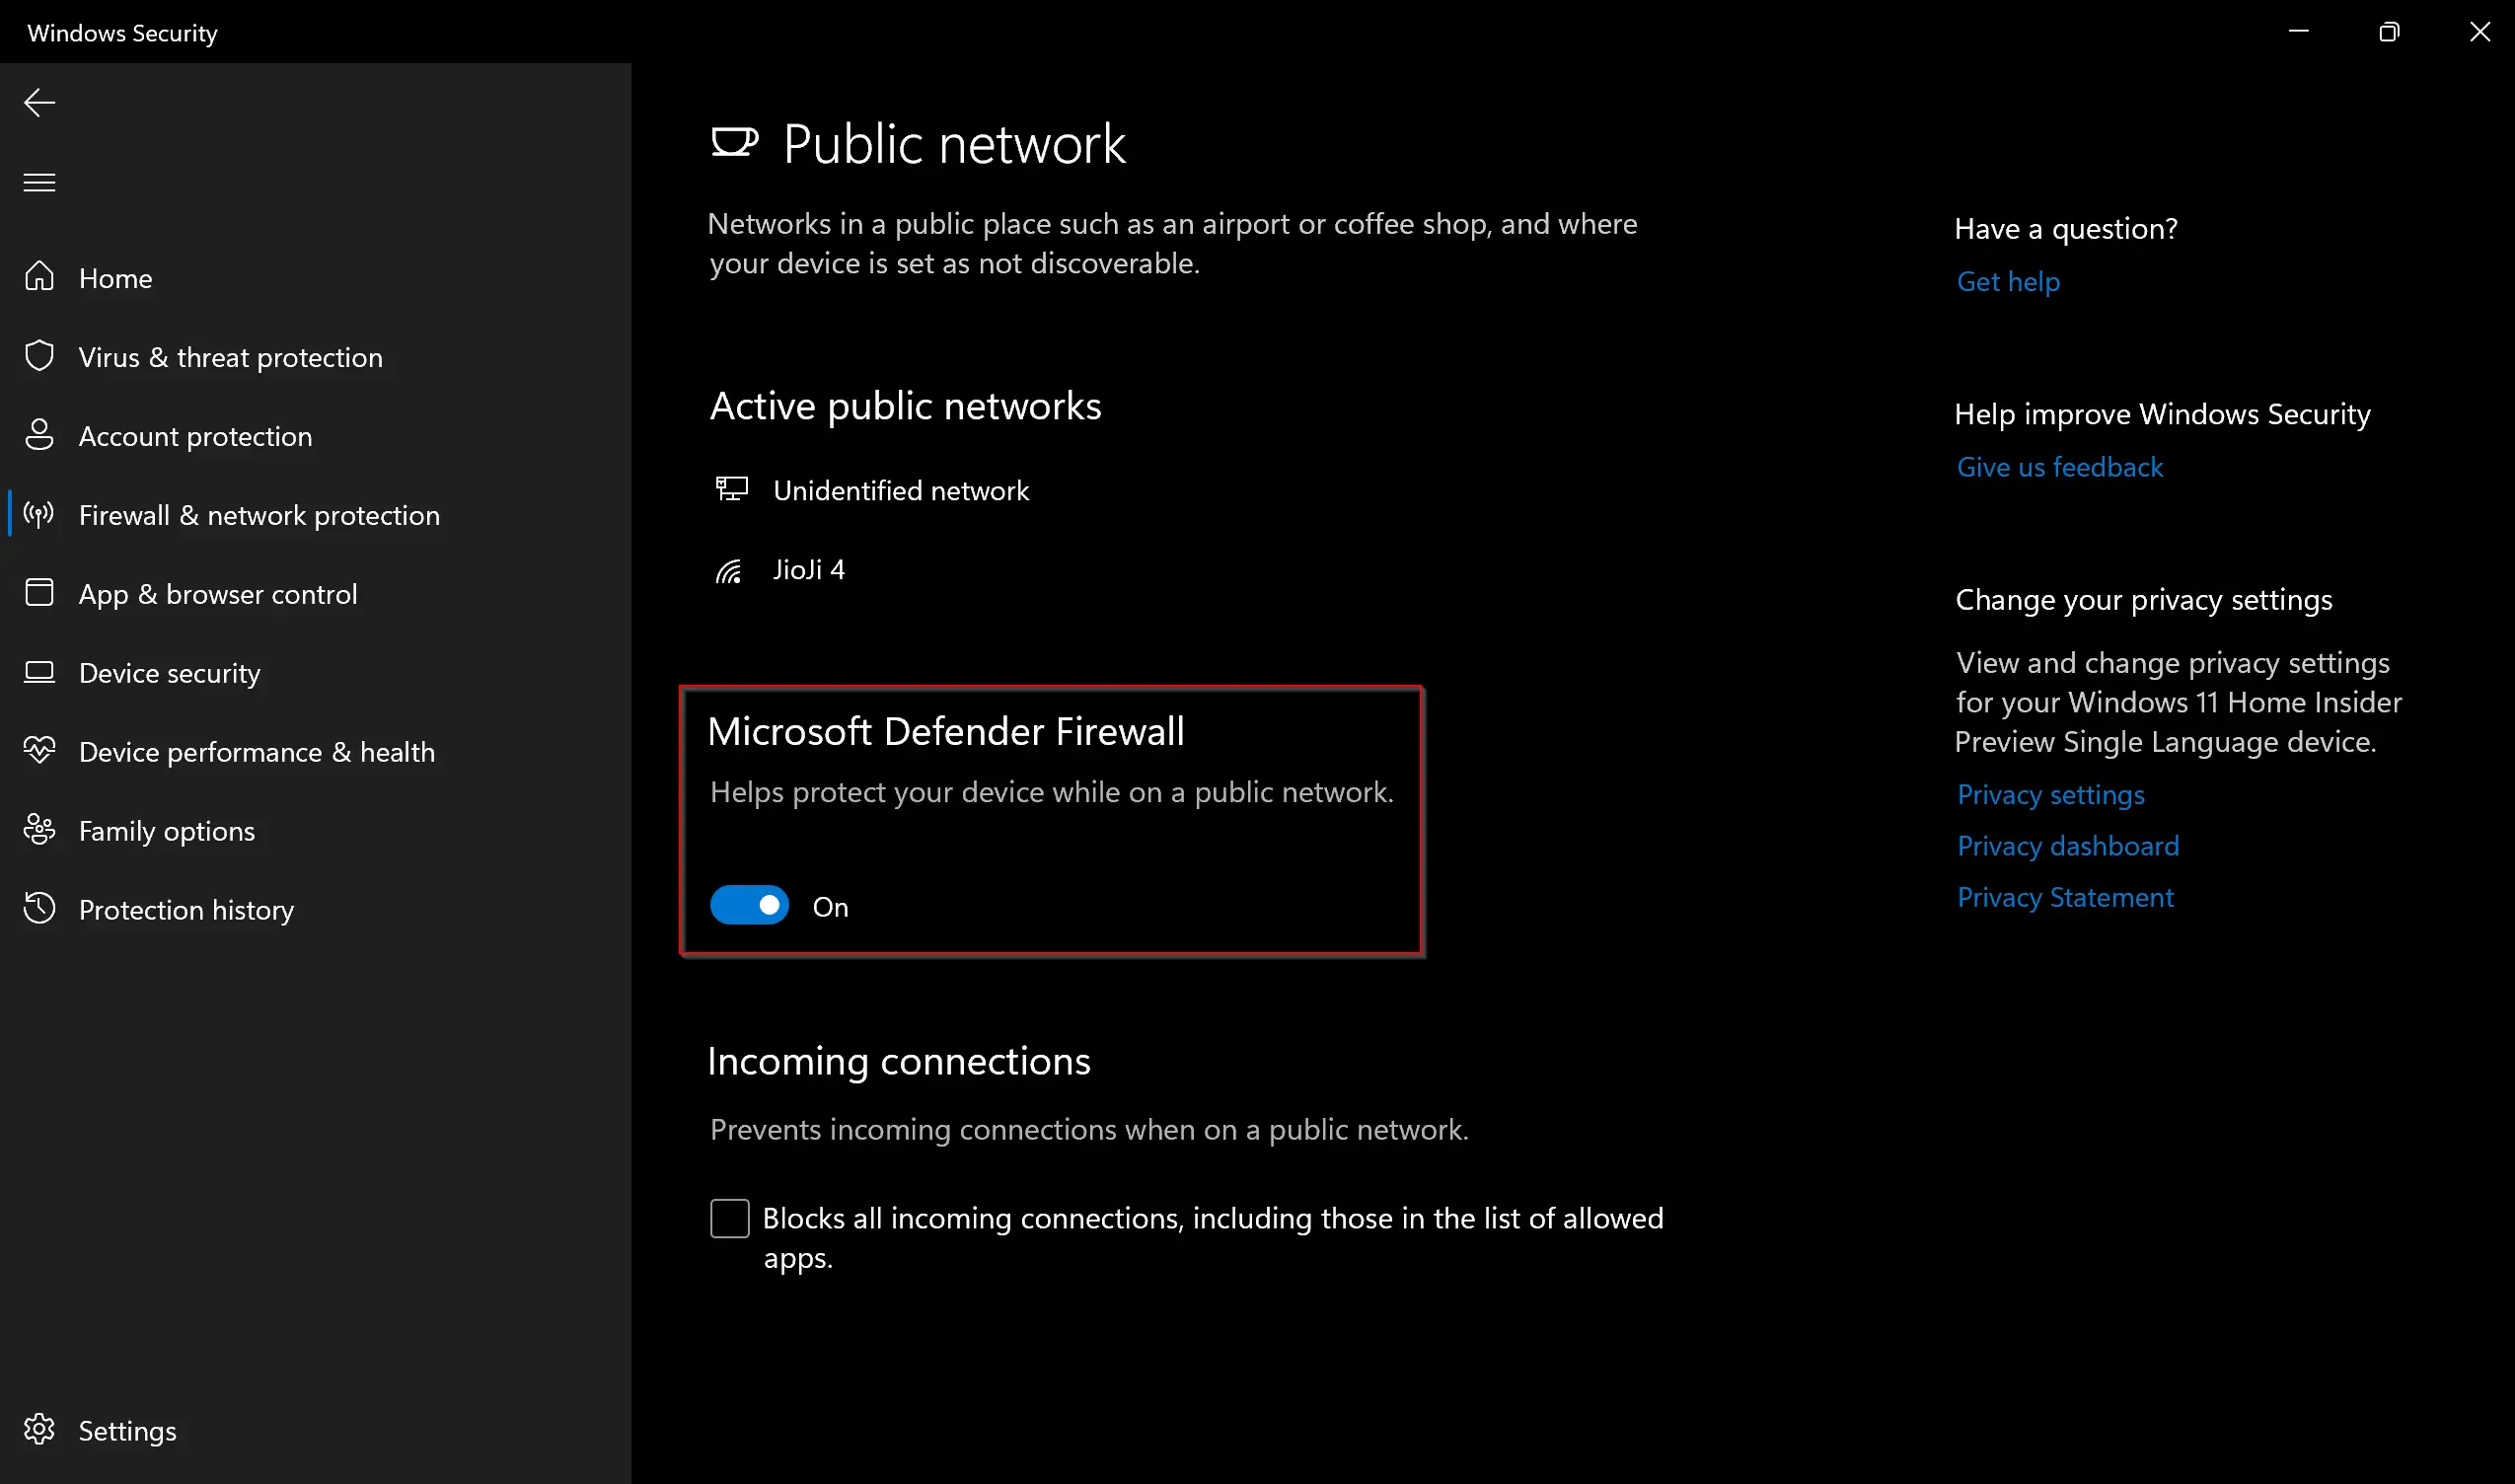
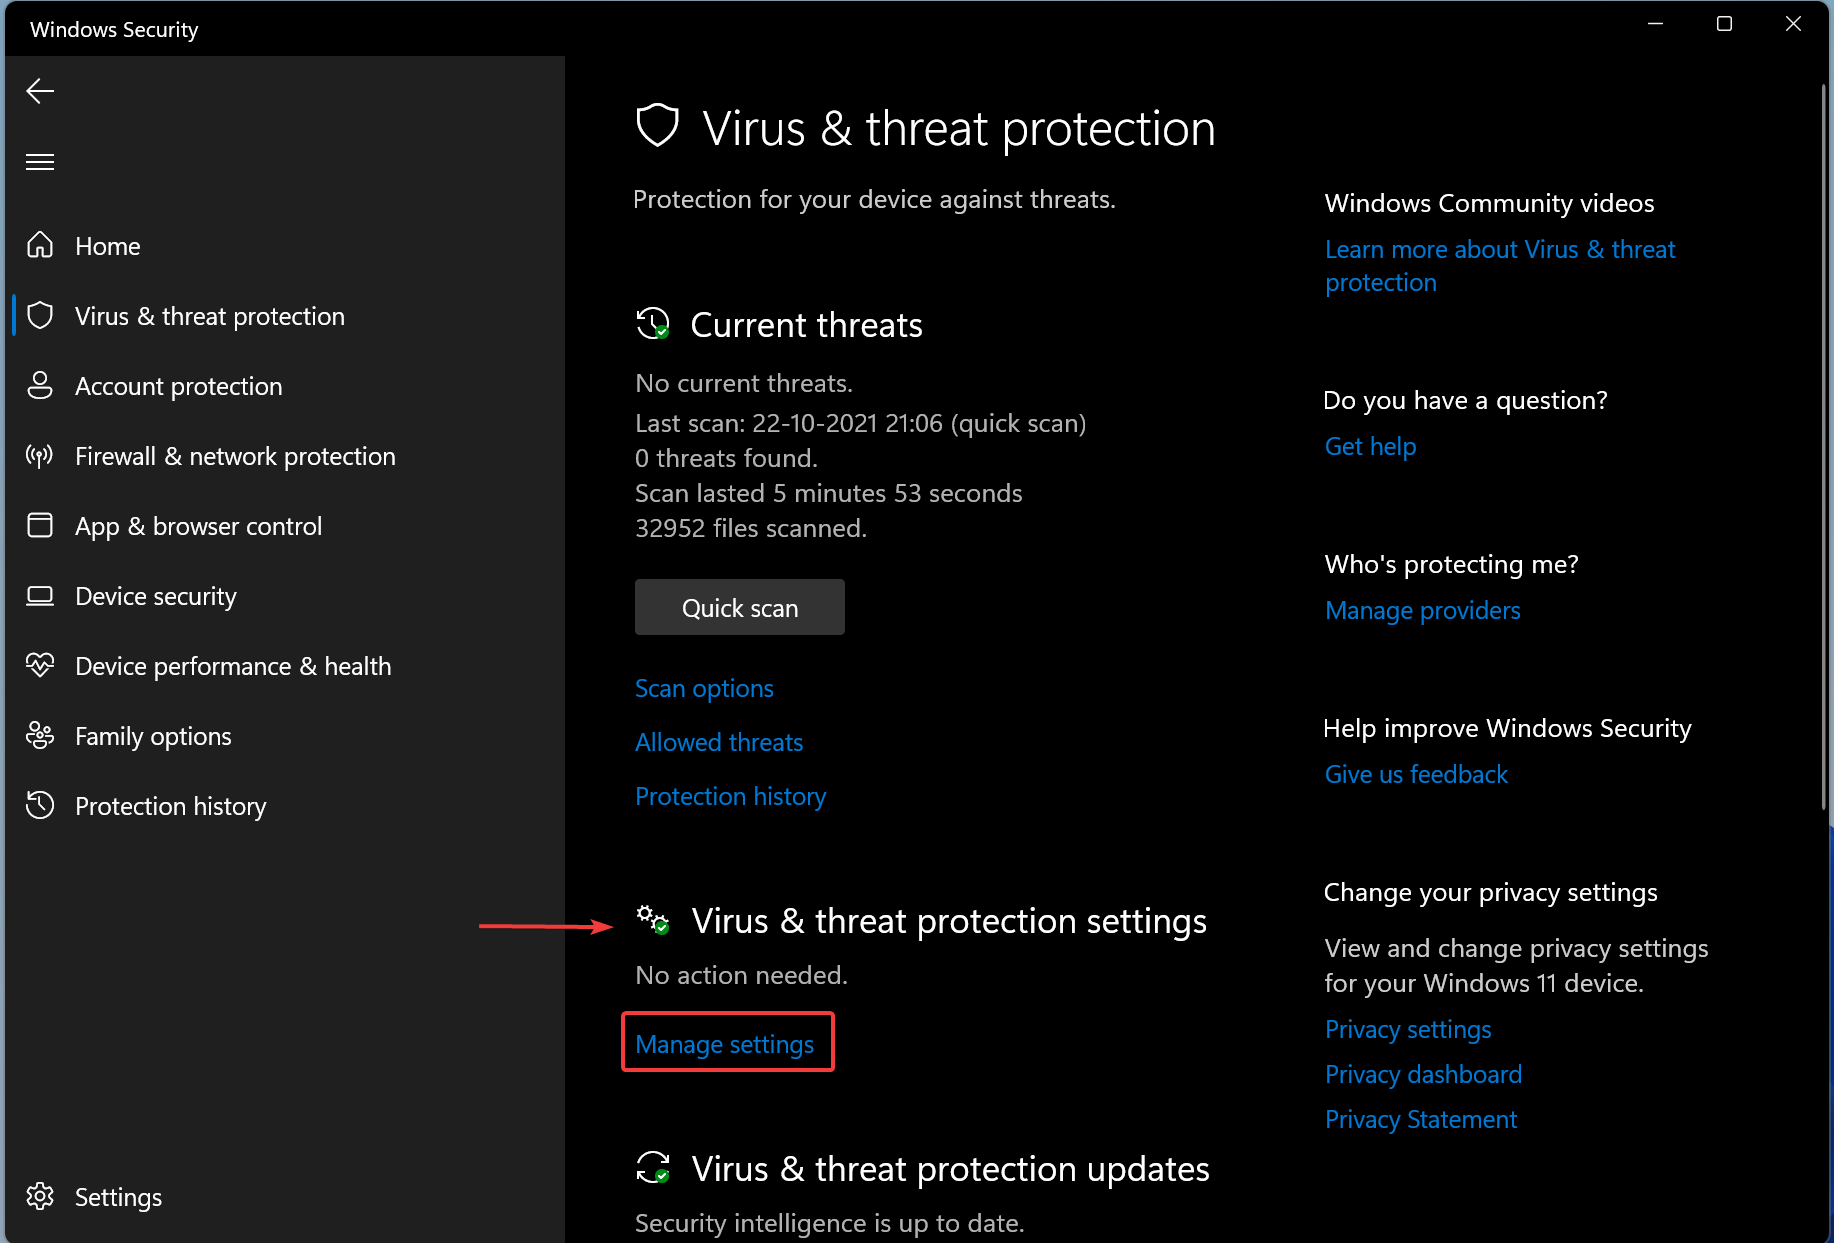
Step 3. Click on “Virus & threat protection.”
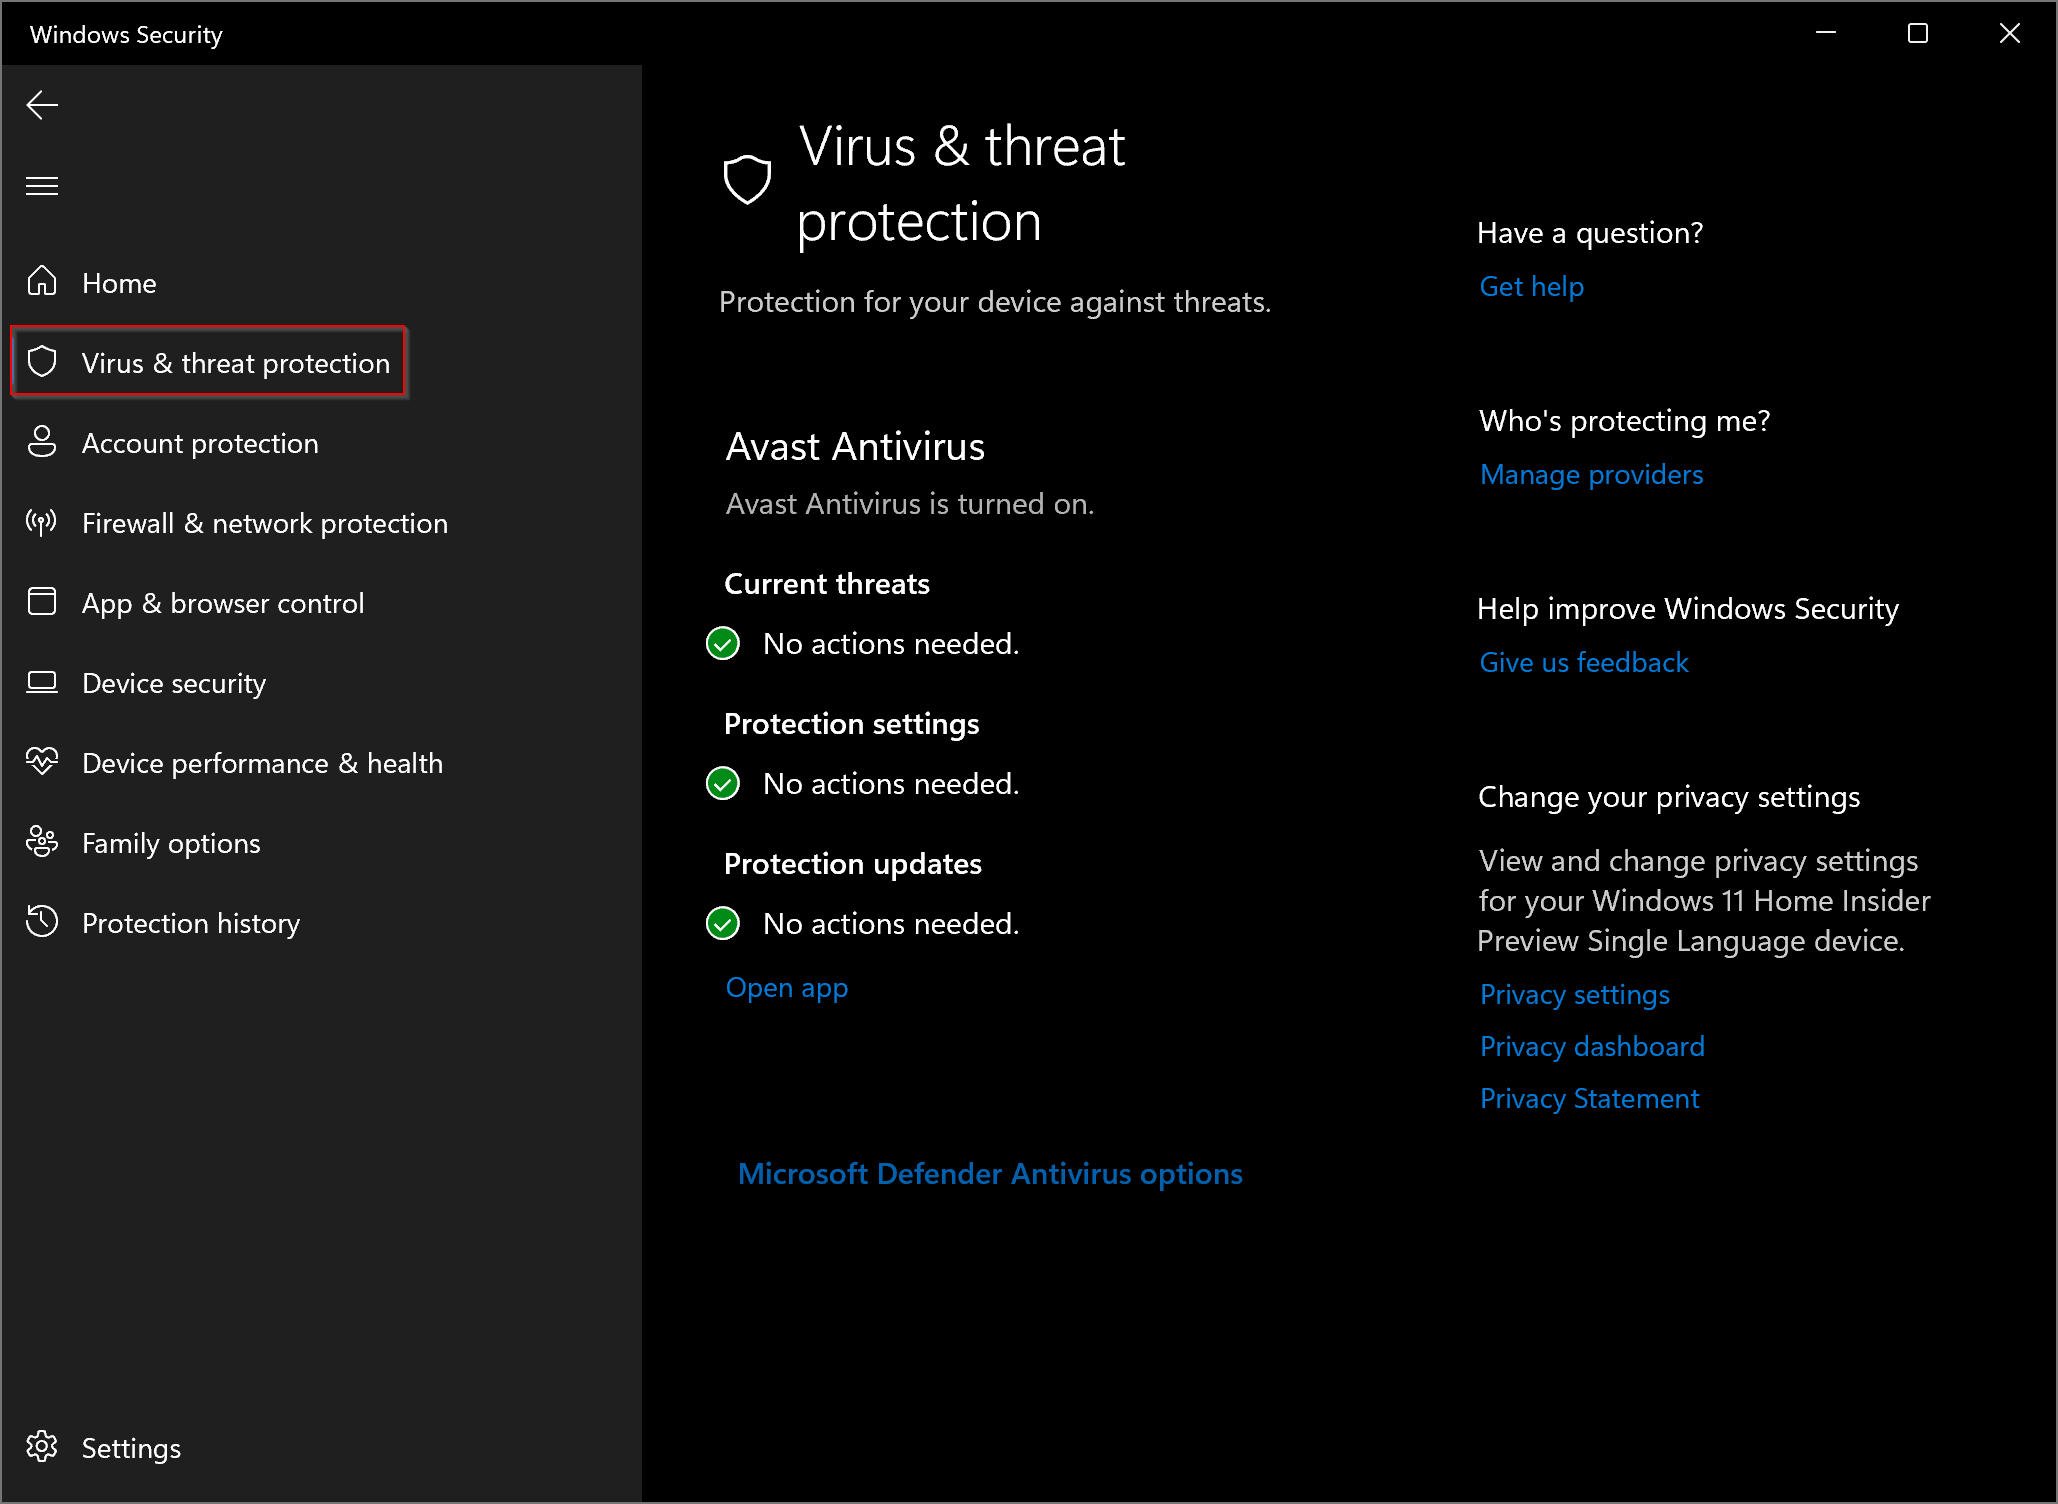
Step 4. Click on “Manage settings.”
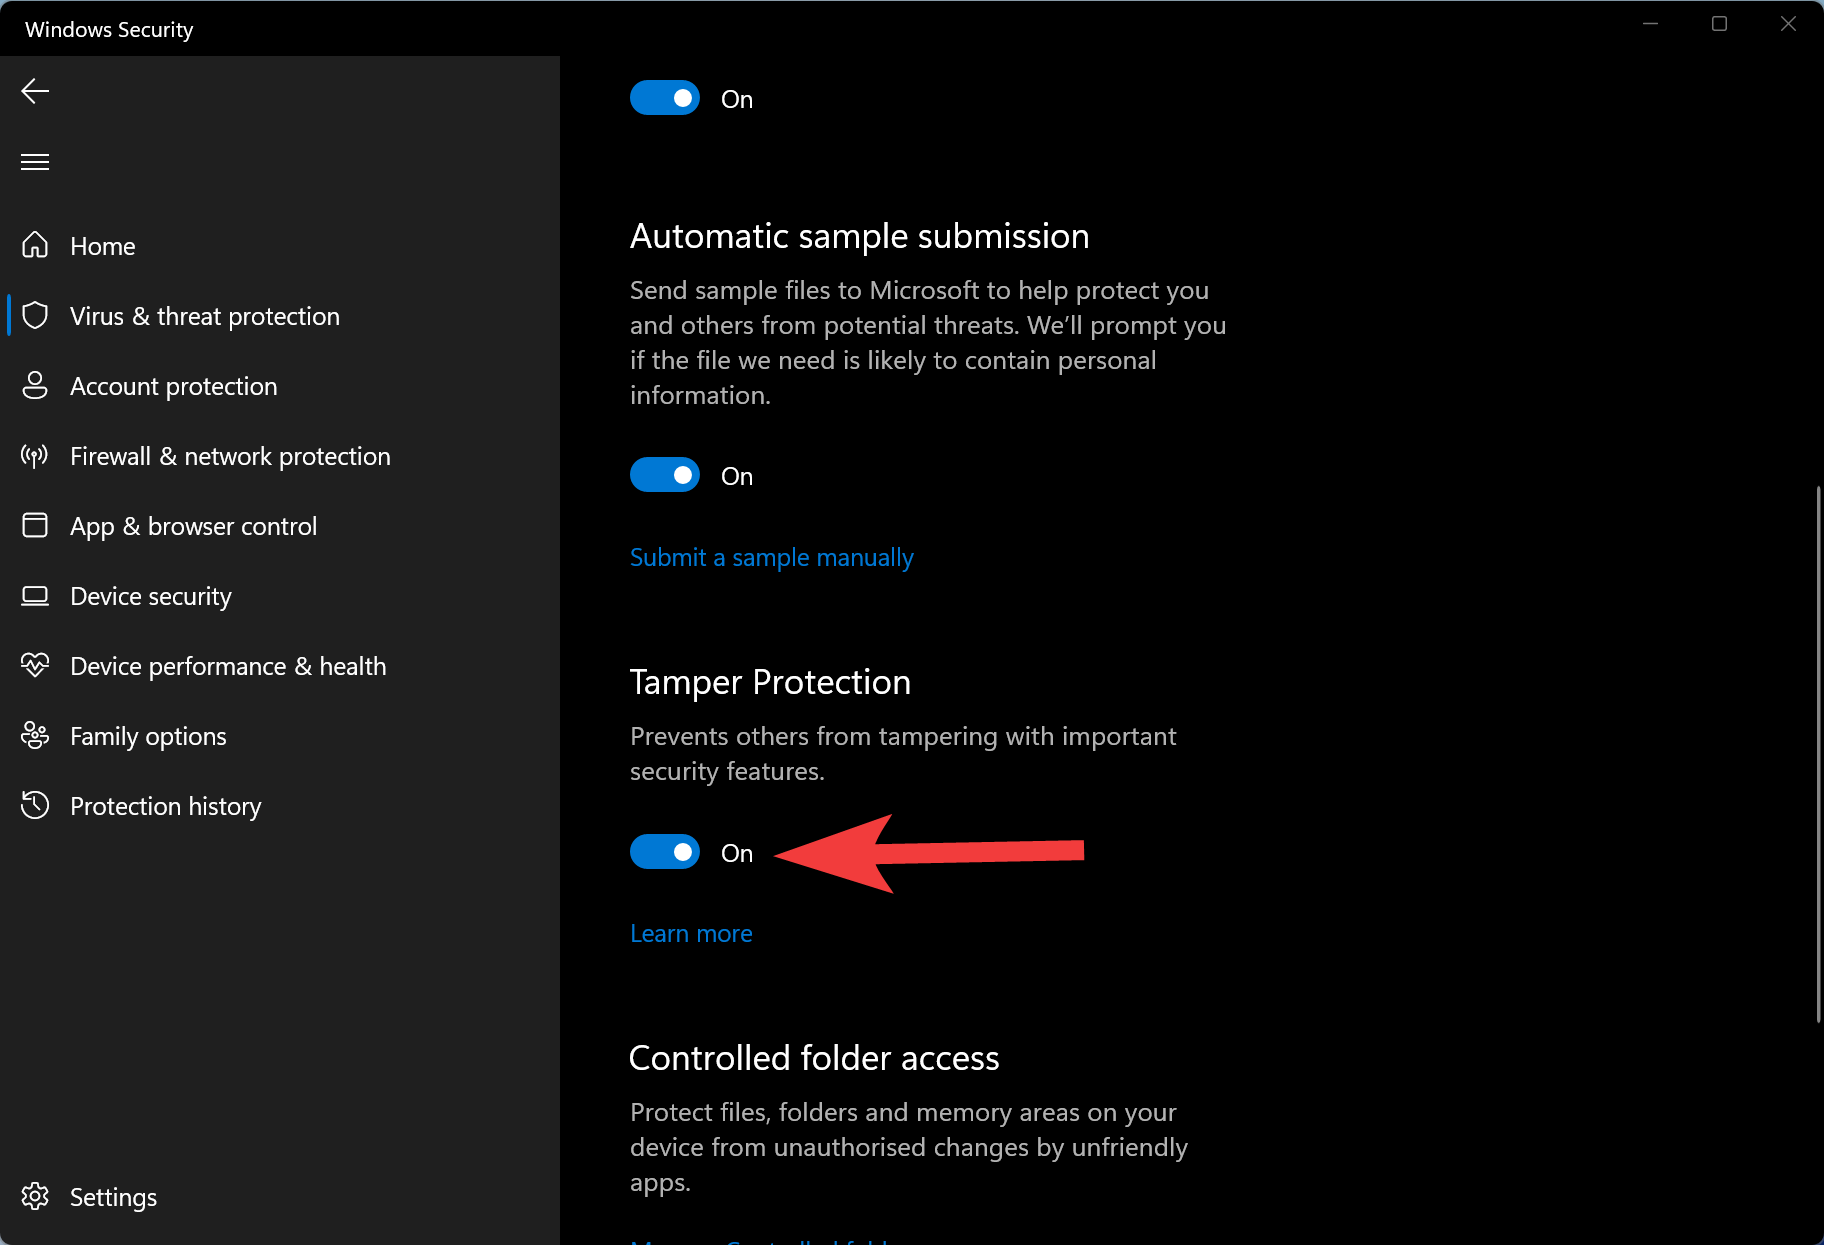
Step 5. Turn off “Tamper Protection.”
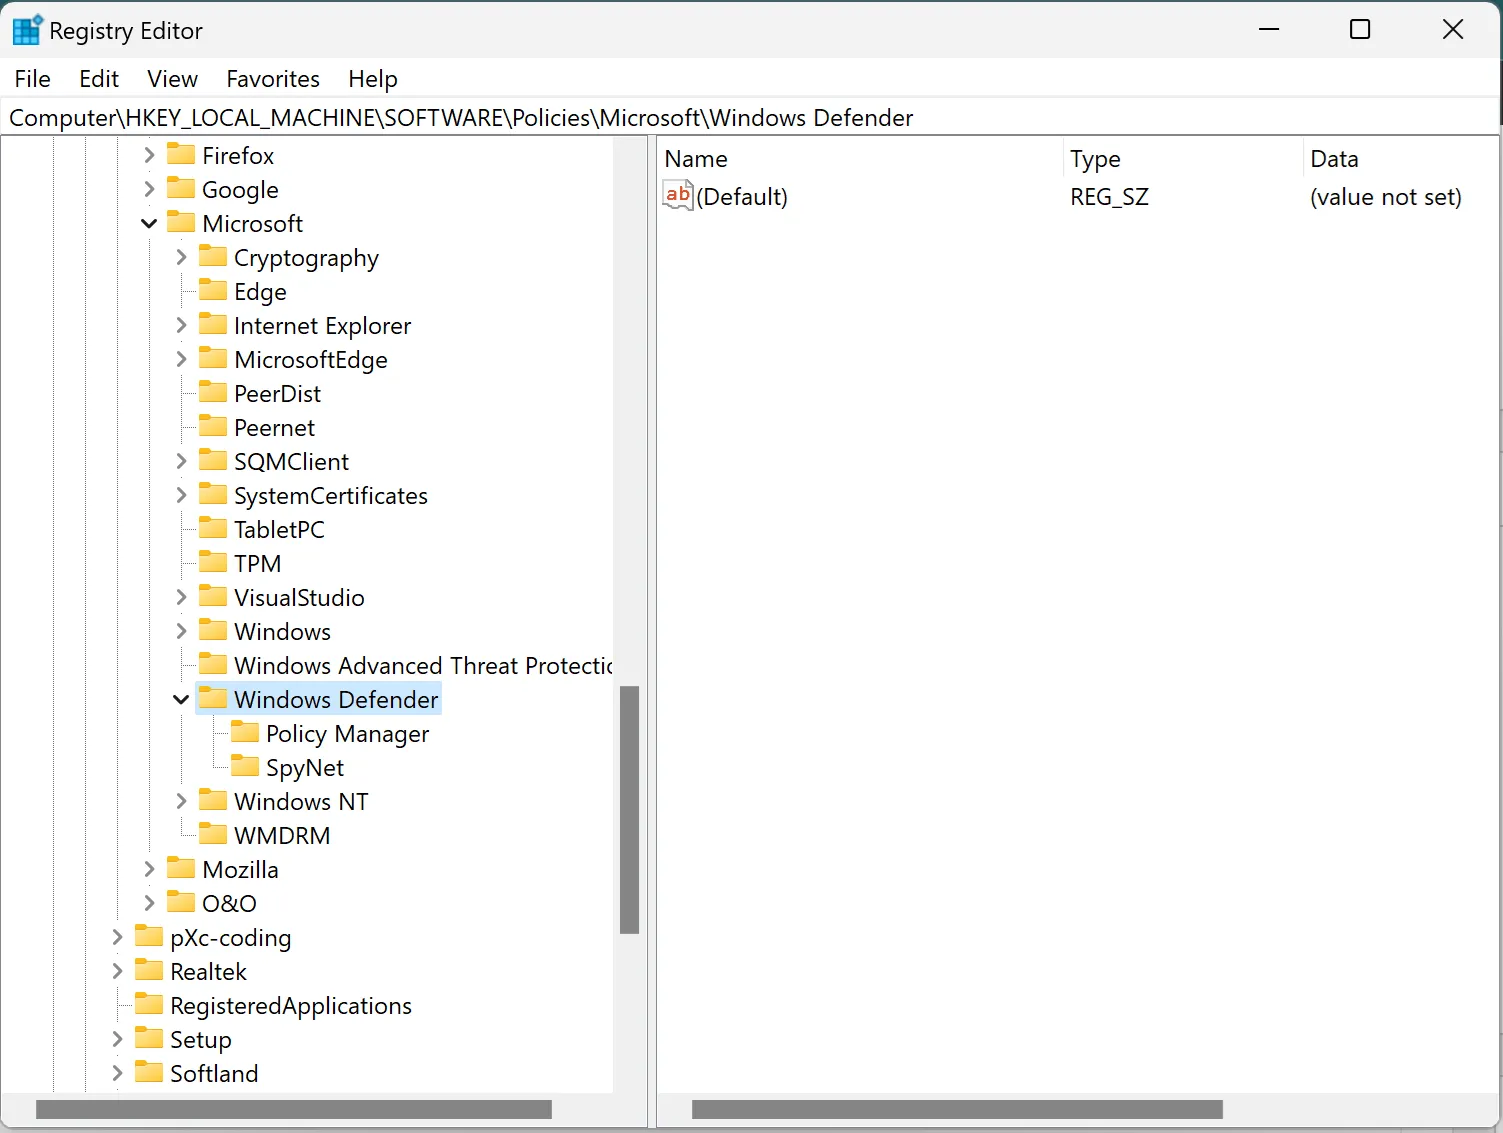
Step 6. Now, open Registry Editor.
Step 7. Then, navigate to the following path:-
HKEY_LOCAL_MACHINE\SOFTWARE\Policies\Microsoft\Windows Defender
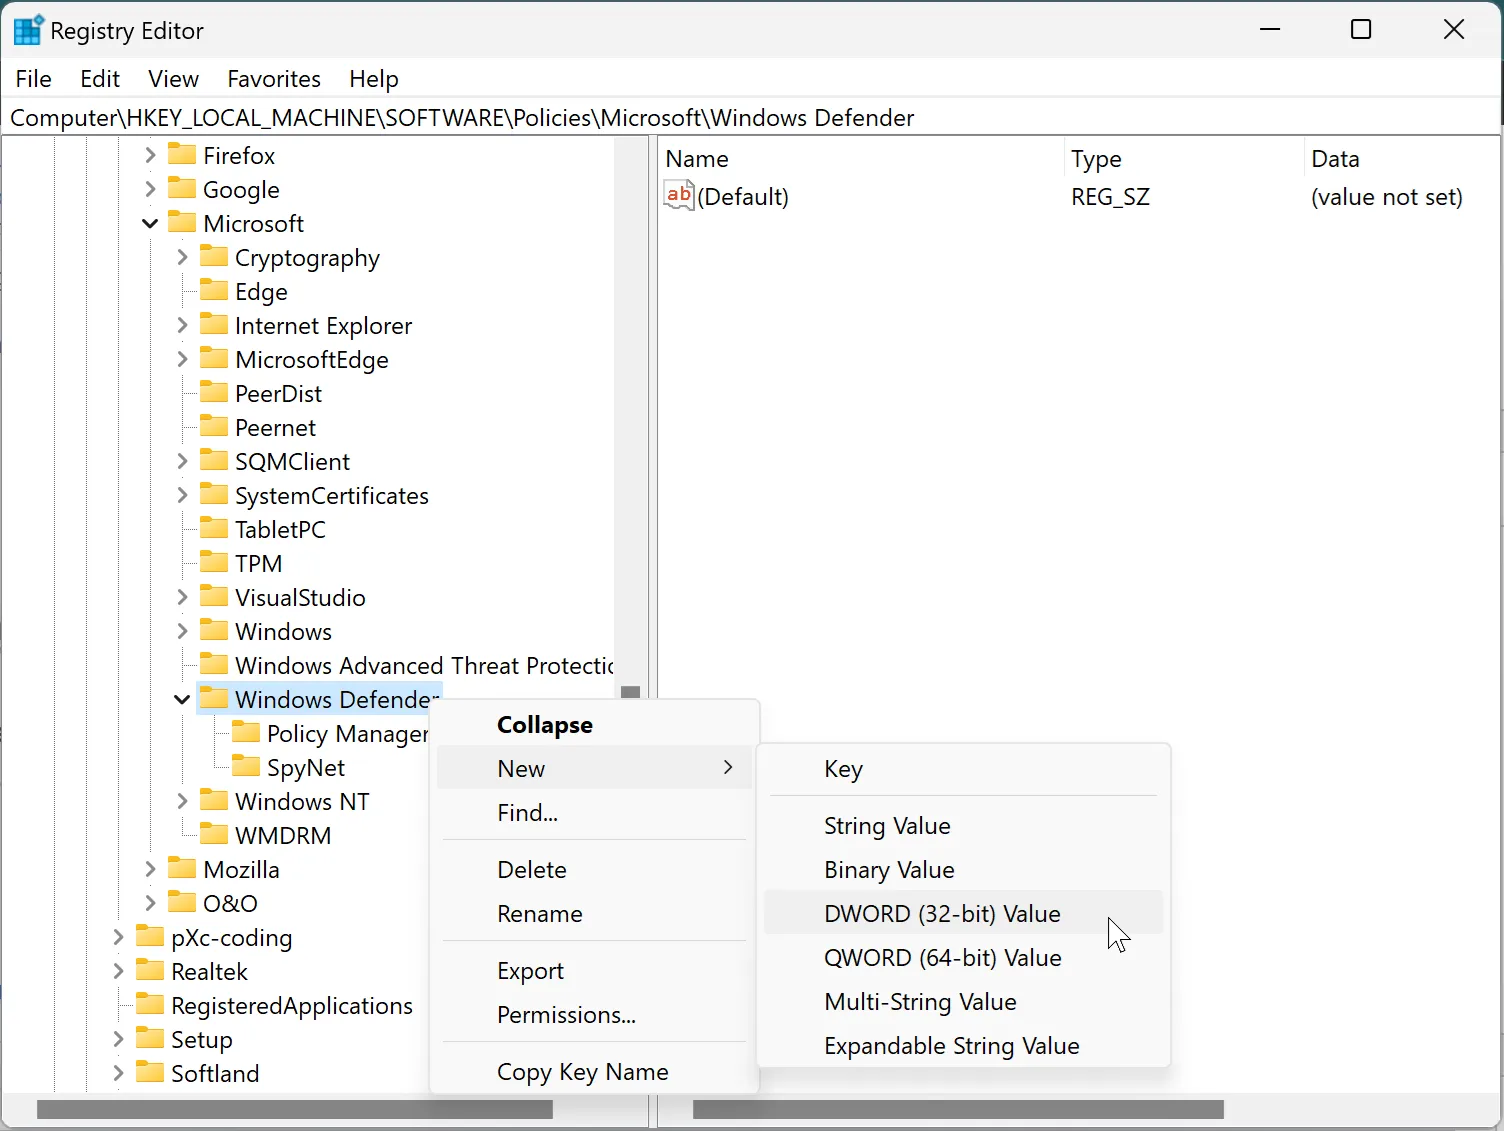
Step 8. Next, right-click the “Windows Defender” key, select New, and then choose the “DWORD (32-bit) Value” option.
Step 9. Name the newly created REG_DWORD to DisableAntiSpyware and press Enter.
Step 10. Then, double-click the newly created REG_DWORD and change the “Value data” from 0 to 1.
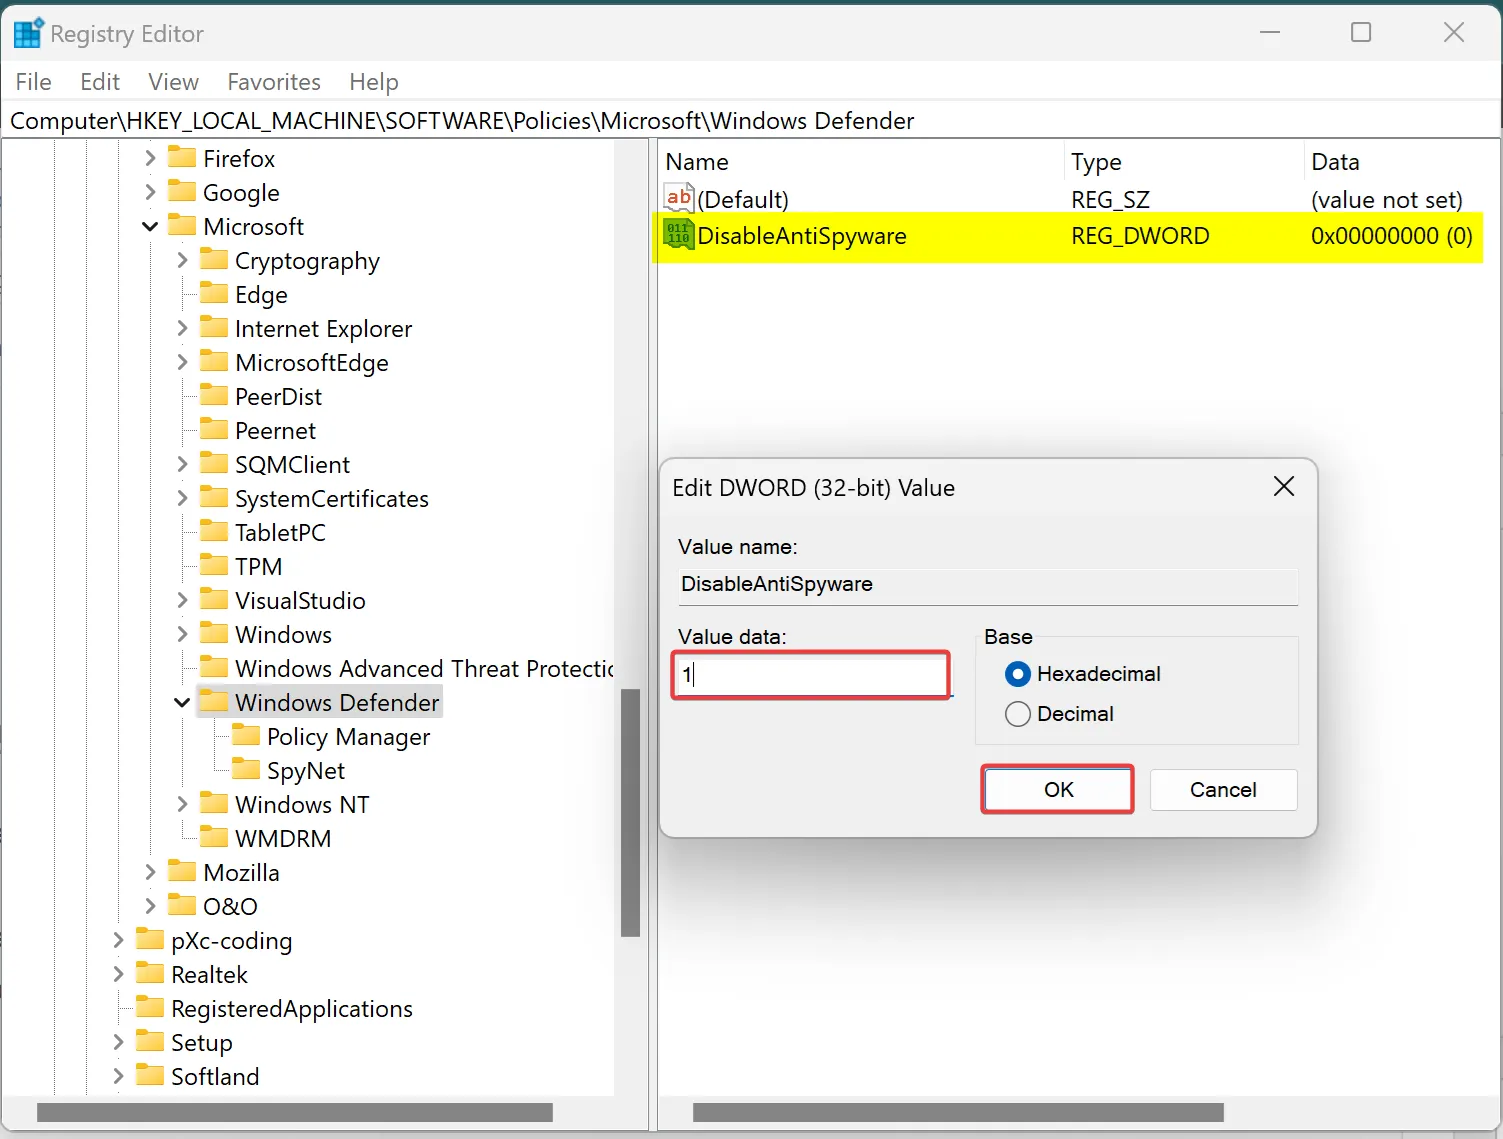
Step 11. Click OK to save the changes.
Step 12. Again, right-click the “Windows Defender” key, select New, and then choose the “DWORD (32-bit) Value” option.
Step 13. Name the newly created REG_DWORD DisableRealtimeMonitoring and press Enter.
Step 14. Double-click the newly created REG_DWORD and change the “Value data” from 0 to 1.
Step 15. Click OK to save the changes.
Step 16. Again, right-click the Windows Defender key, select New, and then choose the “DWORD (32-bit) Value” option.
Step 17. Name the newly created REG_DWORD DisableAntiVirus and press Enter.
Step 18. Double-click the newly created REG_DWORD and change the “Value data” from 0 to 1.
Step 19. Click OK to save the changes.
Step 20. Again, right-click the Windows Defender key, select New, and choose the “DWORD (32-bit) Value” option.
Step 21. Name the newly created REG_DWORD to DisableSpecialRunningModes and press Enter.
Step 22. Double-click the newly created REG_DWORD and change the “DisableSpecialRunningModes” Value data from 0 to 1.
Step 23. Click the OK button to save the changes.
Step 24. Again, right-click the Windows Defender key, select New, and then choose the “DWORD (32-bit) Value” option.
Step 25. Name the new REG_DWORD DisableRoutinelyTakingAction and press Enter.
Step 26. Double-click the newly created REG_DWORD and change the “DisableRoutinelyTakingAction” Value data from 0 to 1.
Step 27. Click the OK button to save the changes.
Step 28. Double-click the Windows Defender key, select New, and choose the “DWORD (32-bit) Value” option.
Step 29. Name the REG_DWORD ServiceKeepAlive and press Enter.
Step 30. Double-click the newly created REG_DWORD and change the “ServiceKeepAlive” Value data from 0 to 1.
Step 31. Click the button to save the changes.
Step 32. Double-click the Windows Defender key, select New, and choose the “Key” option.
Step 33. Name the key “Real-Time Protection” and press Enter.
Step 34. Right-click the “Real-Time Protection” key, select New, and choose the “DWORD (32-bit) Value” option.
Step 35. Set the name DisableBehaviorMonitoring and press Enter.
Step 36. Right-click the newly created REG_DWORD and change the “DisableBehaviorMonitoring” Value data from 0 to 1.
Step 37. Click the OK button to save the changes.
Step 38. Right-click the “Real-Time Protection” key, select New, and choose the “DWORD (32-bit) Value” option.
Step 39. Name the new REG_DWORD DisableOnAccessProtection and press Enter.
Step 40. Double-click the newly created REG_DWORD and change the “DisableOnAccessProtection” value data from 0 to 1.
Step 41. Click the OK button to save the changes.
Step 42. Again, right-click the “Real-Time Protection” key, select New, and choose the “DWORD (32-bit) Value” option.
Step 43. Name the REG_DWORD DisableScanOnRealtimeEnable and press Enter.
Step 44. Right-click the newly created REG_DWORD and change the “DisableScanOnRealtimeEnable” value from 0 to 1.
Step 45. Click the OK button to save the changes.
Step 46. Right-click the “Real-Time Protection” key, select New, and choose the “DWORD (32-bit) Value” option.
Step 47. Name the REG_DWORD DisableRealtimeMonitoring and press Enter.
Step 48. Double-click the newly created REG_DWORD and change the “DisableRealtimeMonitoring” value data from 0 to 1.
Step 49. Click the OK button to save the changes.
Step 50. Again, right-click the Windows Defender key, select New, and then choose the “Key” option.
Step 51. Name the newly created key “Signature Updates” and press Enter.
Step 52. Right-click the “Signature Updates” key, select New, and then choose the “DWORD (32-bit) Value” option.
Step 53. Name the new REG_DWORD ForceUpdateFromMU and press Enter.
Step 54. Double-click the newly created REG_DWORD and change the “ForceUpdateFromMU” value data from 0 to 1.
Step 55. Click the OK button to save the changes.
Step 56. Again, right-click the “Windows Defender” key, select New, and then choose the “Key” option.
Step 57. Name it Spynet and press Enter.
Step 58. Right-click the “Spynet” key, select New, and choose the “DWORD (32-bit) Value” option.
Step 59. Name the new REG_DWORD DisableBlockAtFirstSeen and press Enter.
Step 60. Double-click the newly created REG_DWORD and change the “DisableBlockAtFirstSeen” value data from 0 to 1.
Step 61. Click the OK button to save the changes.
Step 62. Finally, restart the computer.