By default, when you select text and start typing, Microsoft Word replaces the selected text. However, it is possible to stop Word from deleting the selected text when you type. You can enable or disable this setting using Word Options, Local Group Policy Editor, or Registry Editor.
When you configure Microsoft Word setting to stop removing selected text when typing, you need to press the Backspace or Delete button after selecting the text to delete it.
In this gearupwindows article, we will guide you on enabling and disabling Word from deleting selected text as you type.
How to Stop Microsoft Word from Removing Selected Text as You Type in Word Options?
To make Microsoft Word stop deleting selected text as you type in Word Options, use these steps:-
Step 1. Open the Microsoft Word document.
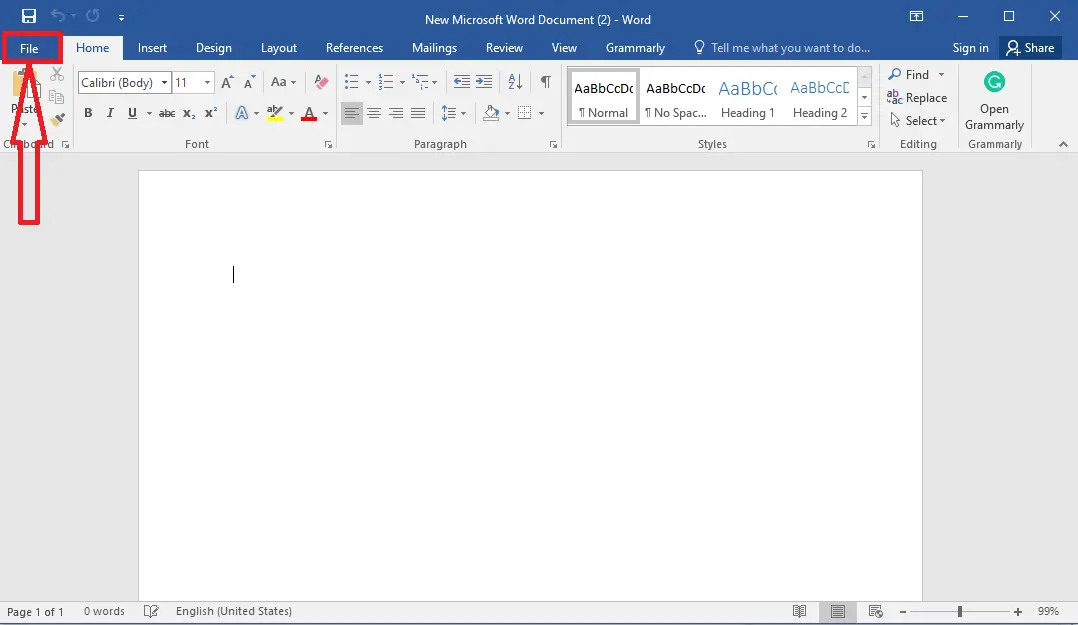
Step 2. Click on the File menu.
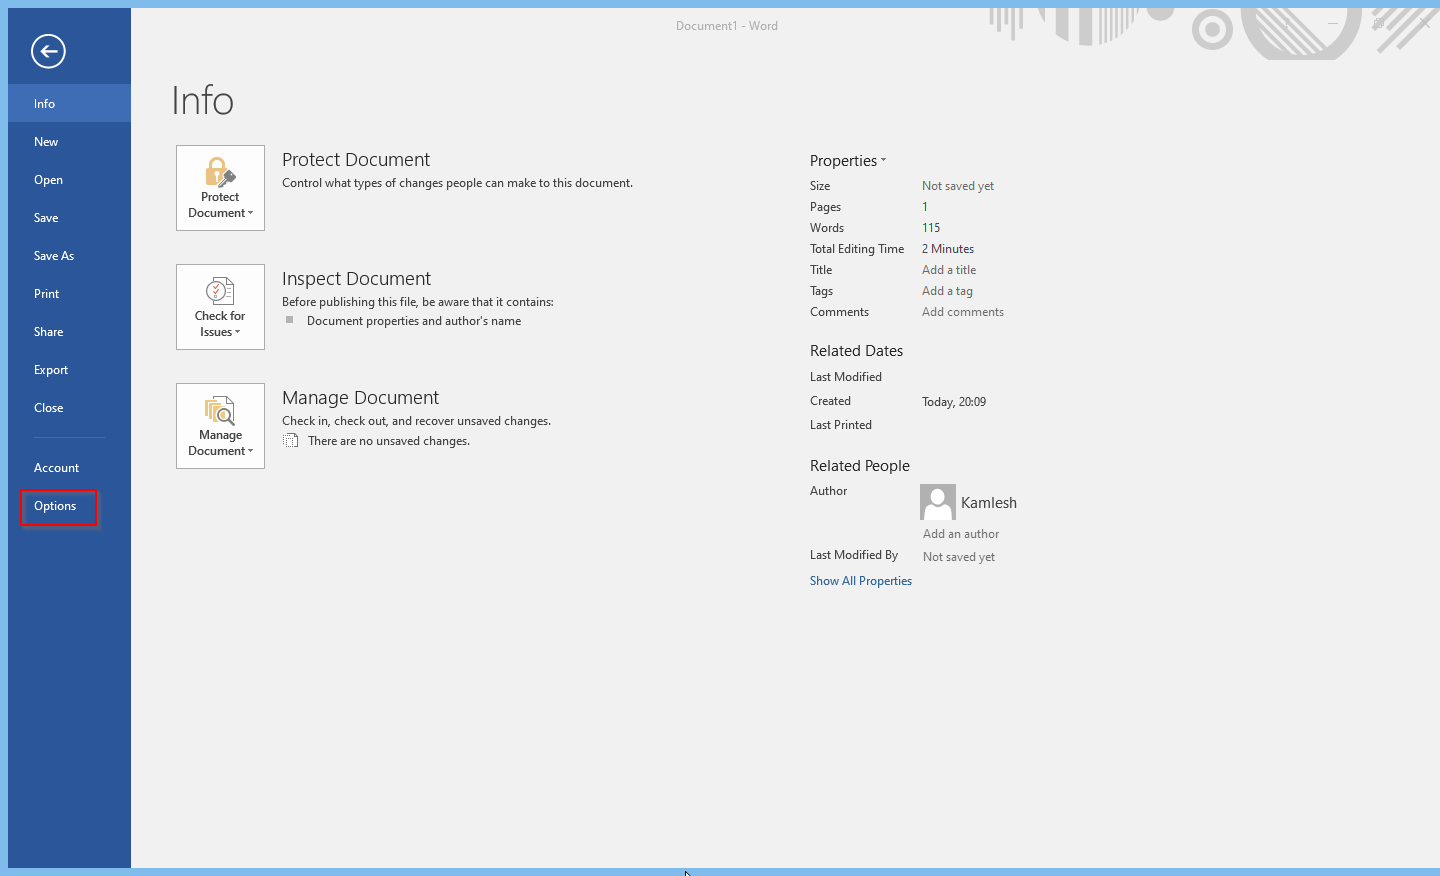
Step 3. Select Options in the left sidebar.
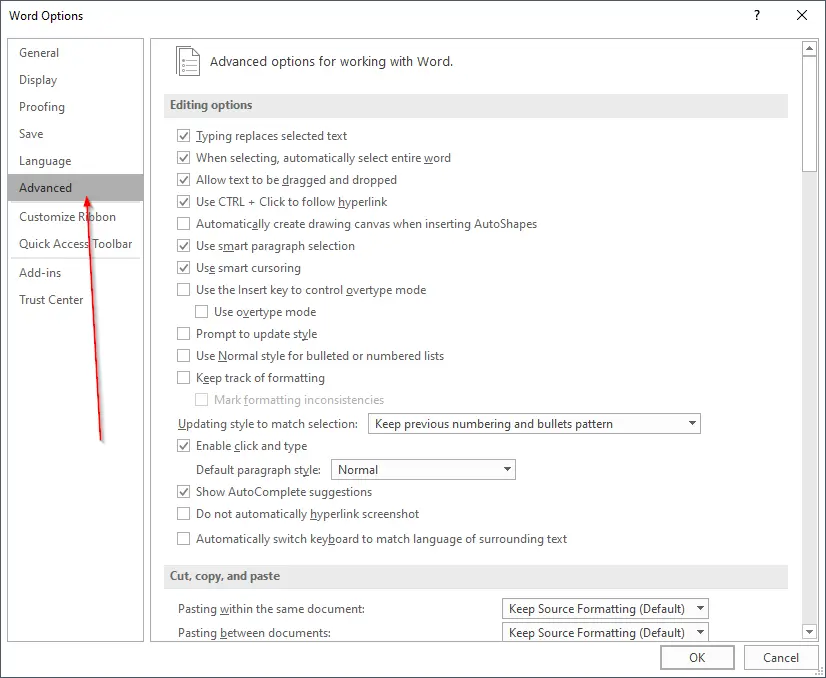
Step 4. In the Word Options panel, switch to the Advanced tab.
Step 5. Uncheck the option Typing replaces selected text under the “Editing options” section to block replacing selected text while typing.
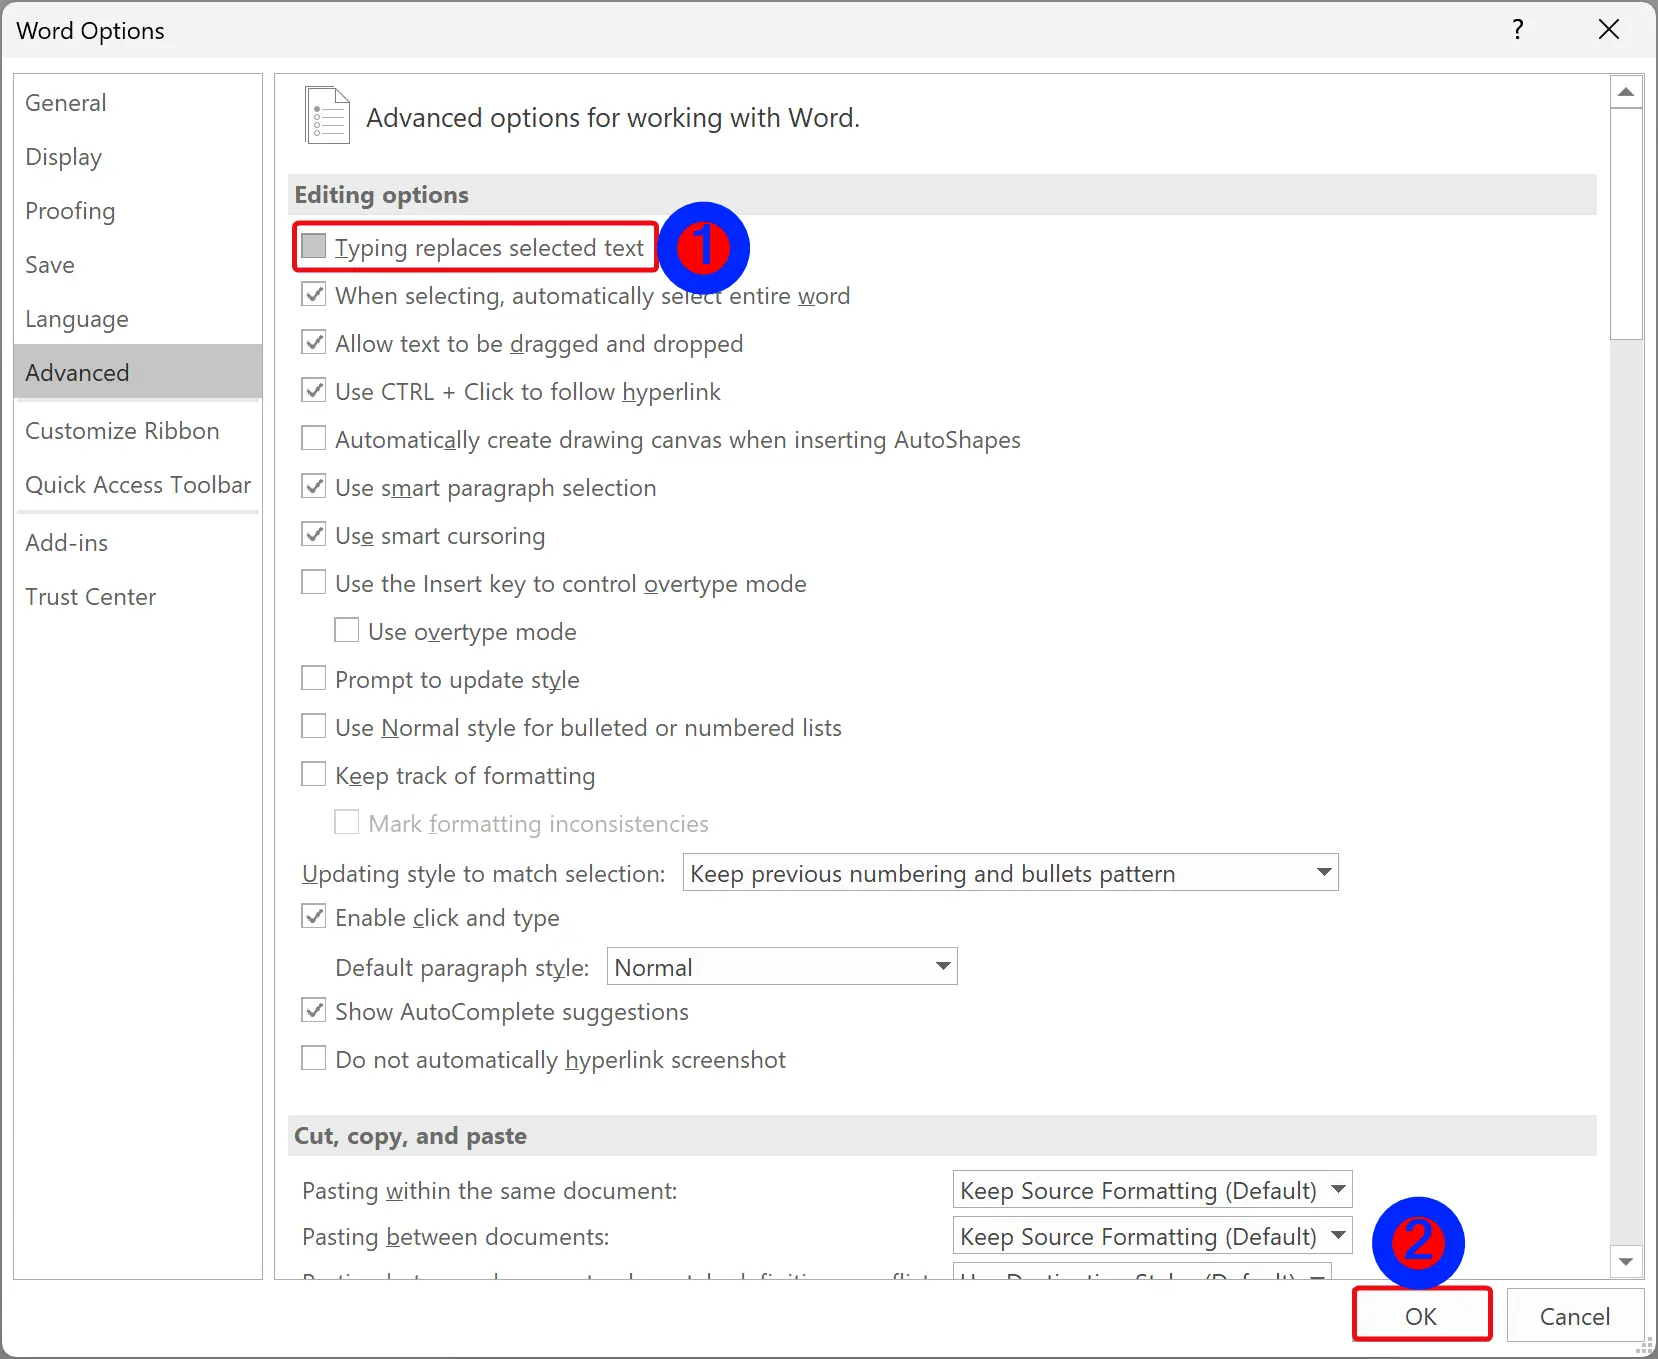
Quick Note: Check the option Typing replaces selected text under the “Editing options” section if you want to allow replacing selected text while typing.
Step 6. Click the OK button.
How to Prevent Microsoft Word from Removing Selected Text as You Type using Group Policy Editor?
If you want to block Microsoft Word from deleting selected text as you type using Windows 11/10 Local Group Policy Editor, do the following:-
Step 1. Open Local Group Policy Editor.
Step 2. Then, navigate or browse to the following path in the left sidebar:-
User Configuration > Administrative Templates > Microsoft Word 2016 > Word Options > Advanced
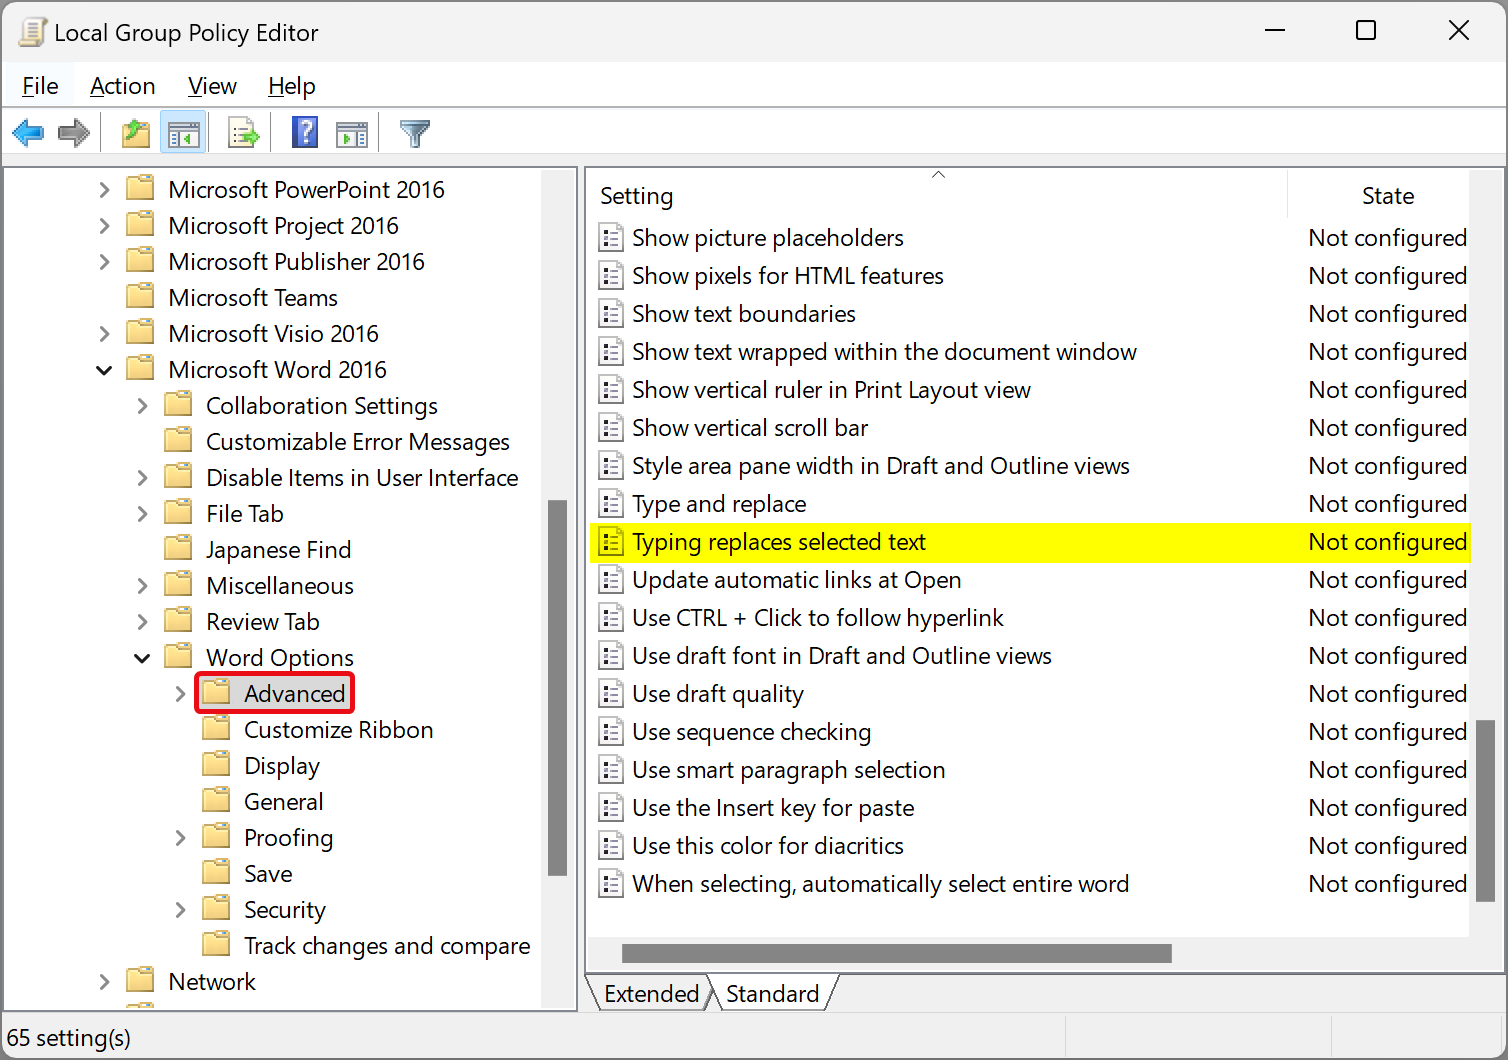
Step 3. On the right sidebar of the “Advanced” folder, double-click on the policy name Typing replaces selected text.
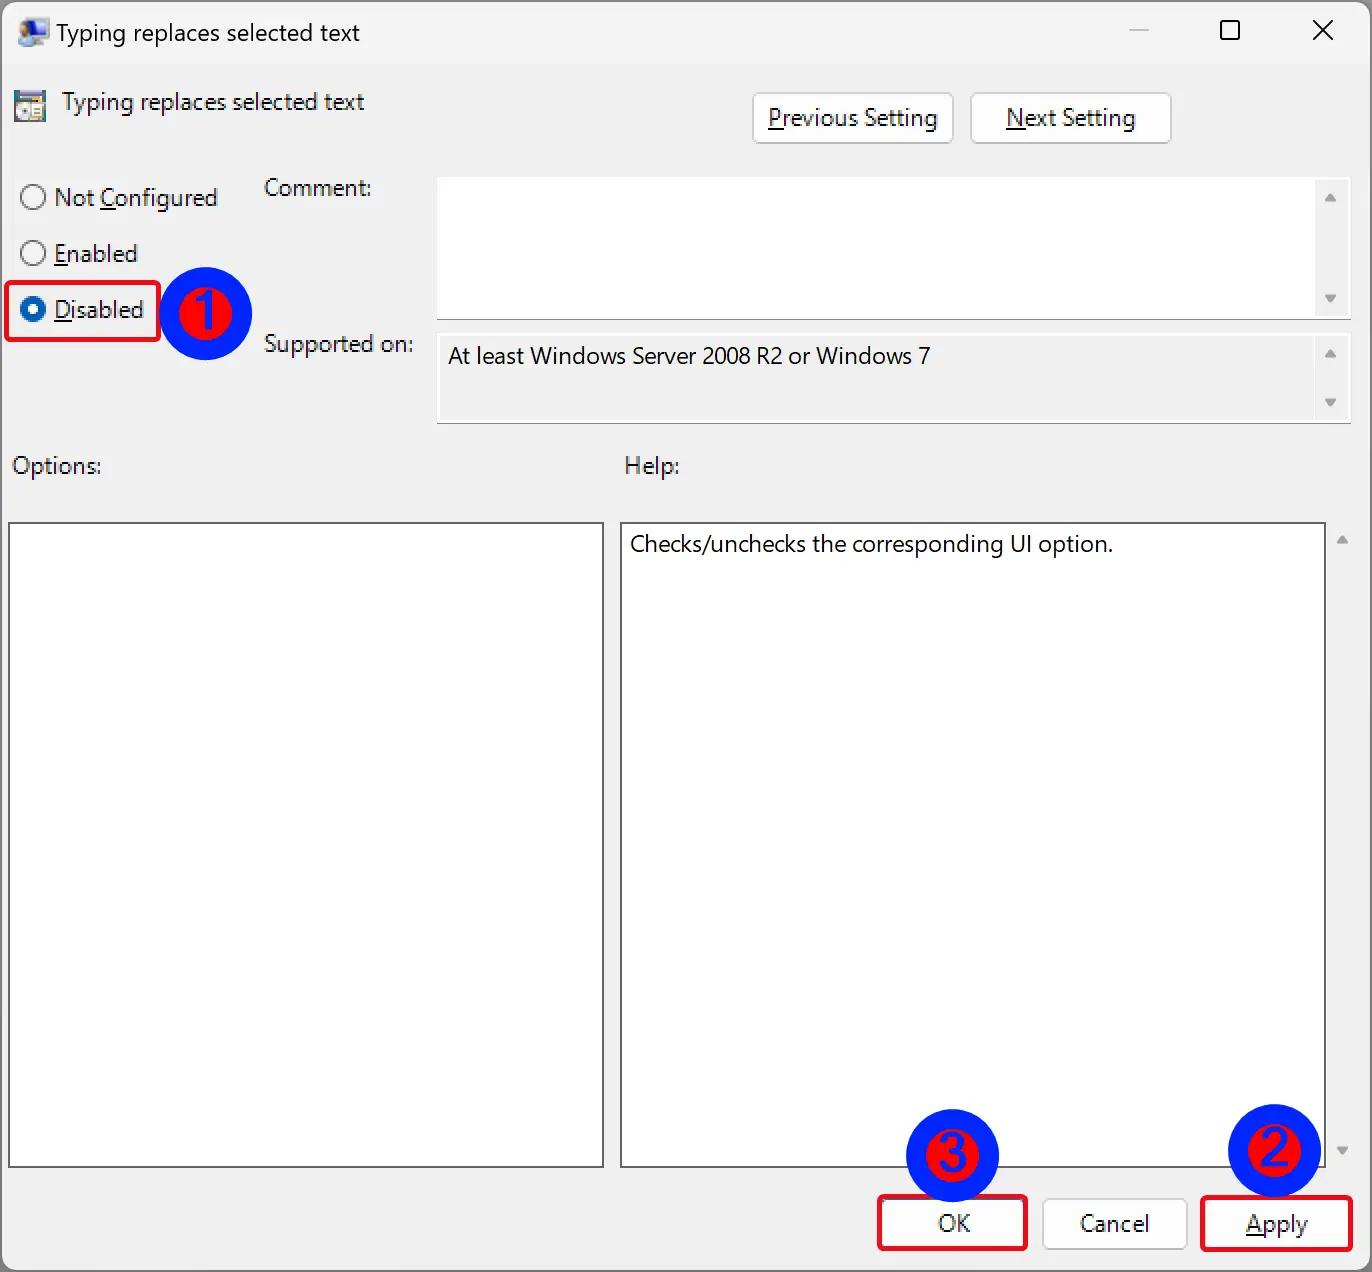
Step 4. Select Disabled to block removing the selected text while typing in Word.
Quick Note: Choose the Enabled option if you want to allow deleting the selected text while typing in Word.
Step 5. Click Apply.
Step 6. Click OK.
Step 7. At last, restart your PC to apply the changes.
How to Enable or Disable Removing Selected Text when Typing in Word using Registry Editor?
To turn on or off deleting selected text while typing in Word using Windows 11/10 Registry Editor, do these steps:-
Step 1. Open Registry Editor.
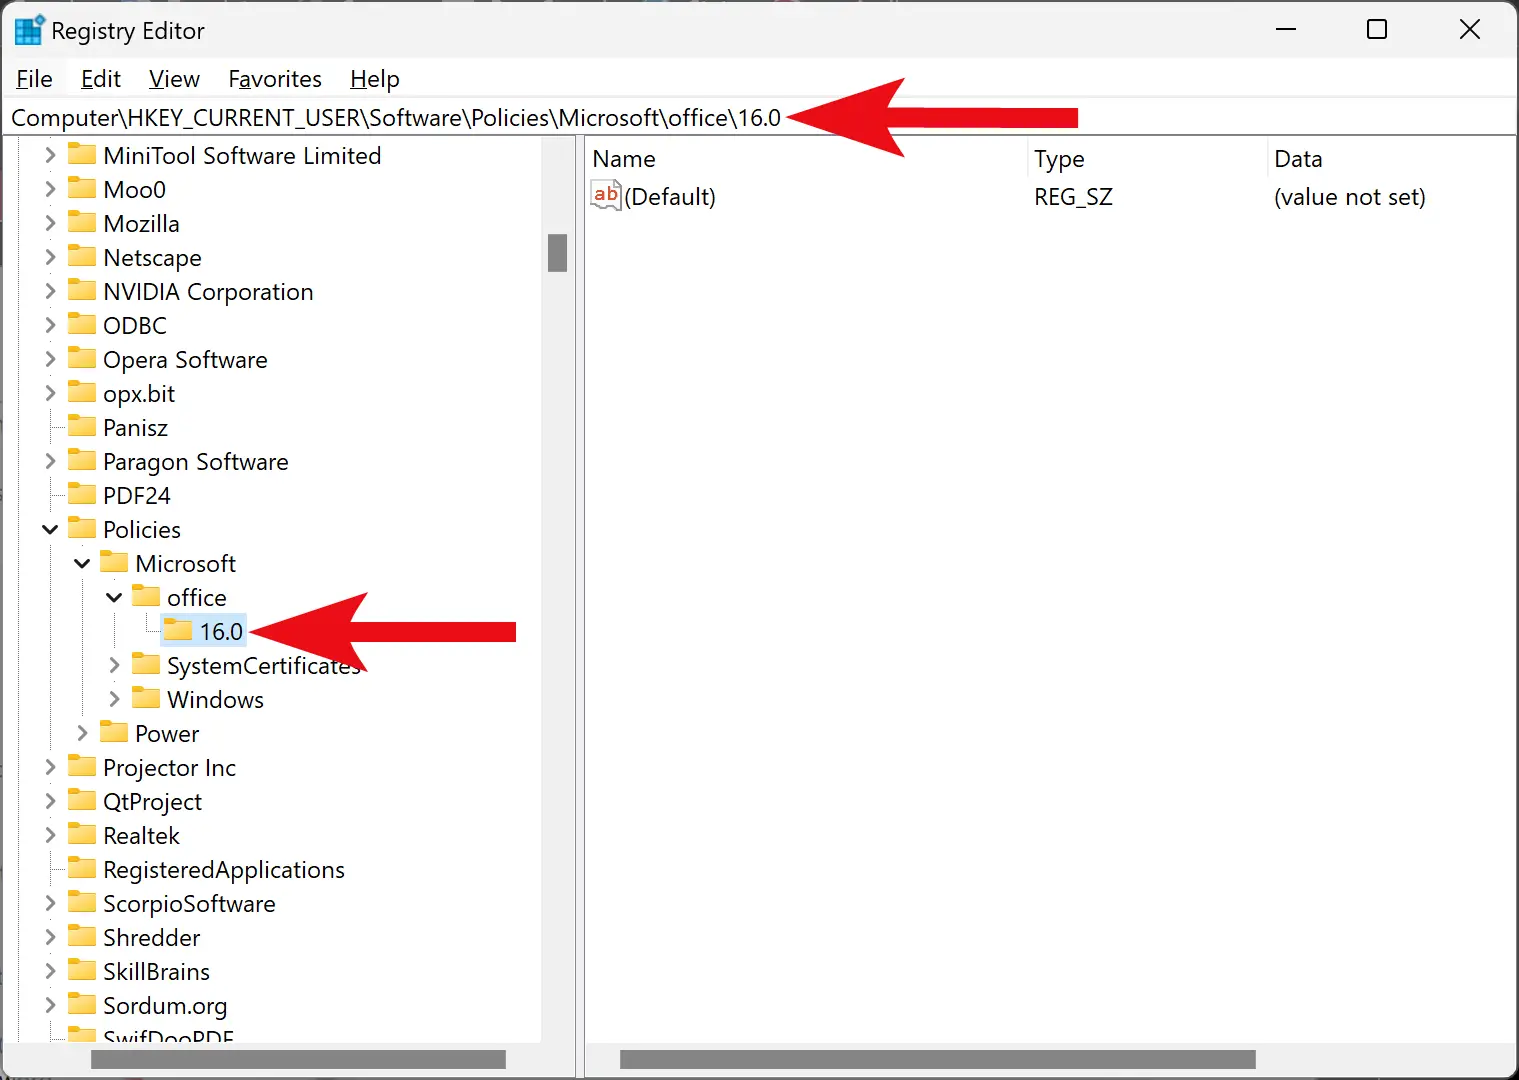
Step 2. Then, browse or navigate to the following key in the left sidebar of Registry Editor:-
HKEY_CURRENT_USER\Software\Policies\Microsoft\office\16.0
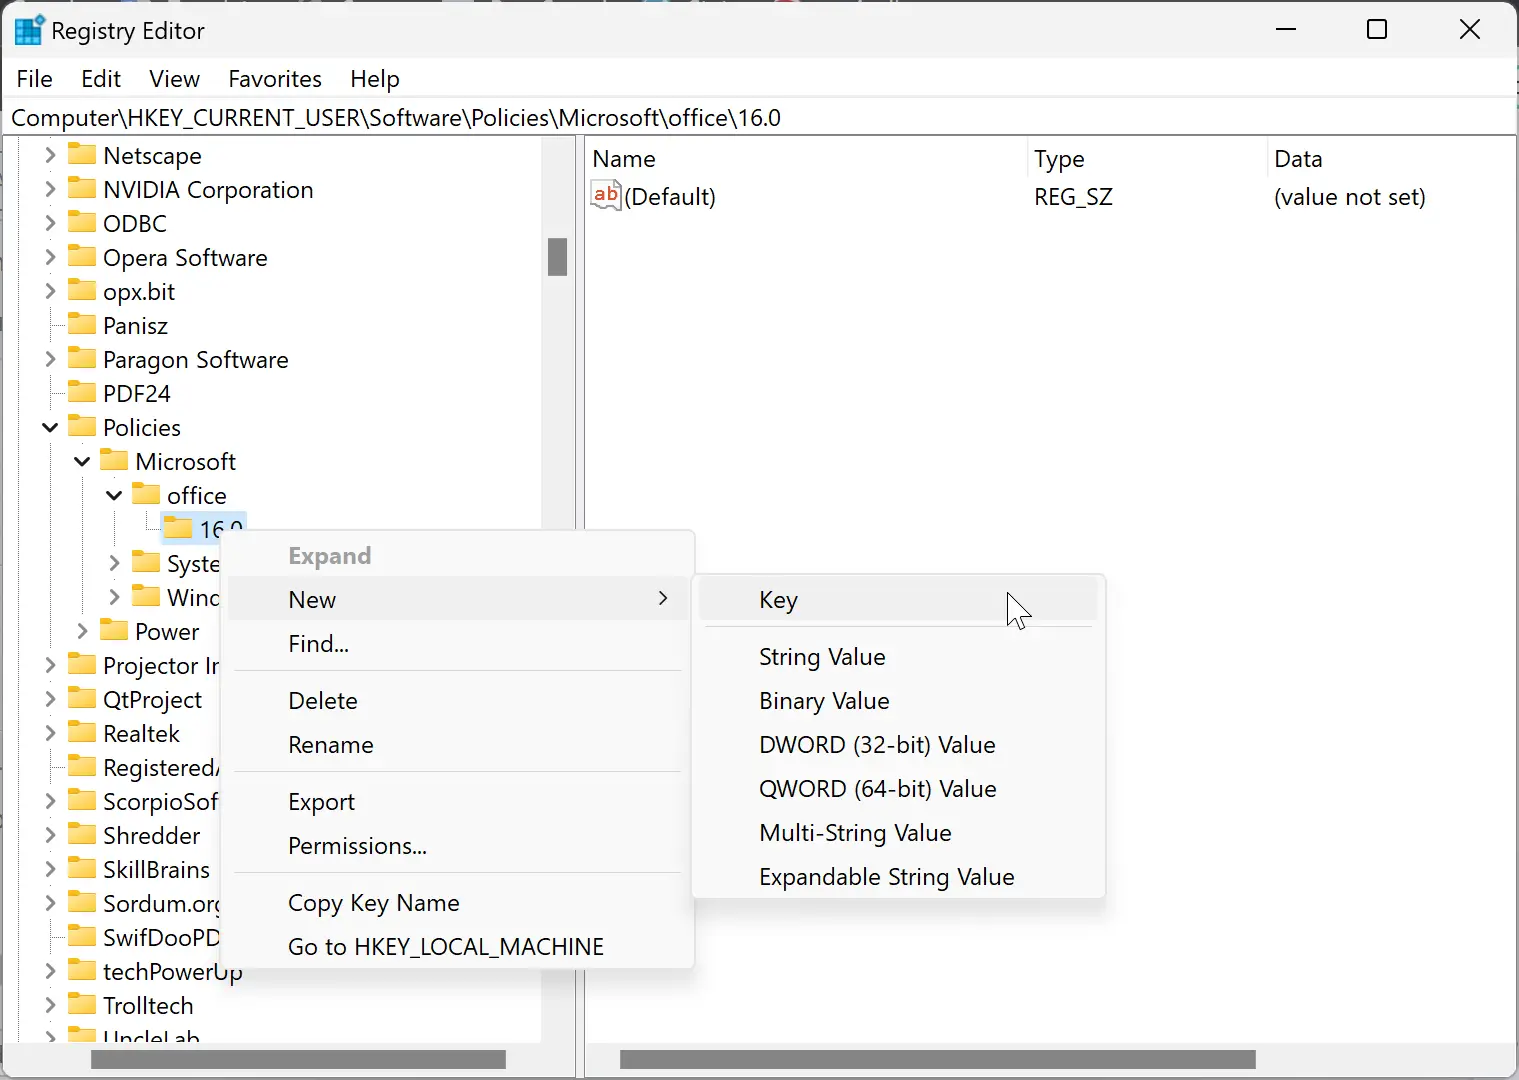
Step 3. Next, right-click on the 16.0 folder and select New > Key.
Step 4. Name this new key word.
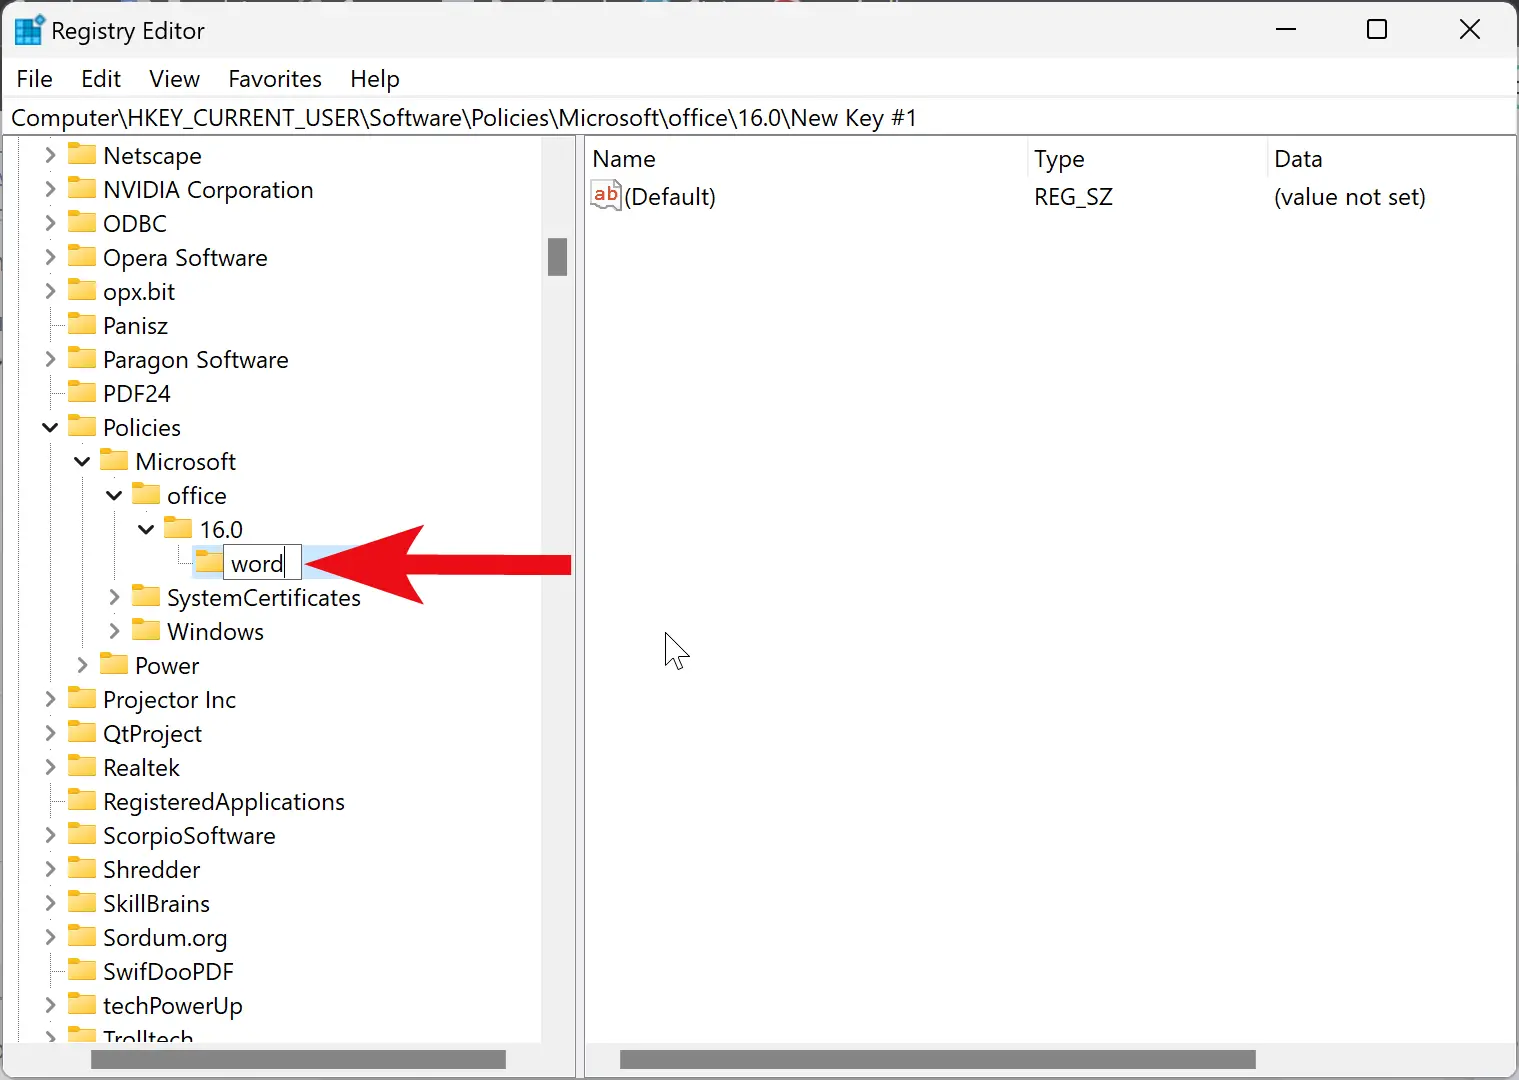
Step 5. Now, right-click on the word folder and choose New > Key.
Step 6. Name the newly created key as options.
Step 7. After that, right-click on the options folder and select New > DWORD (32-bit) Value.
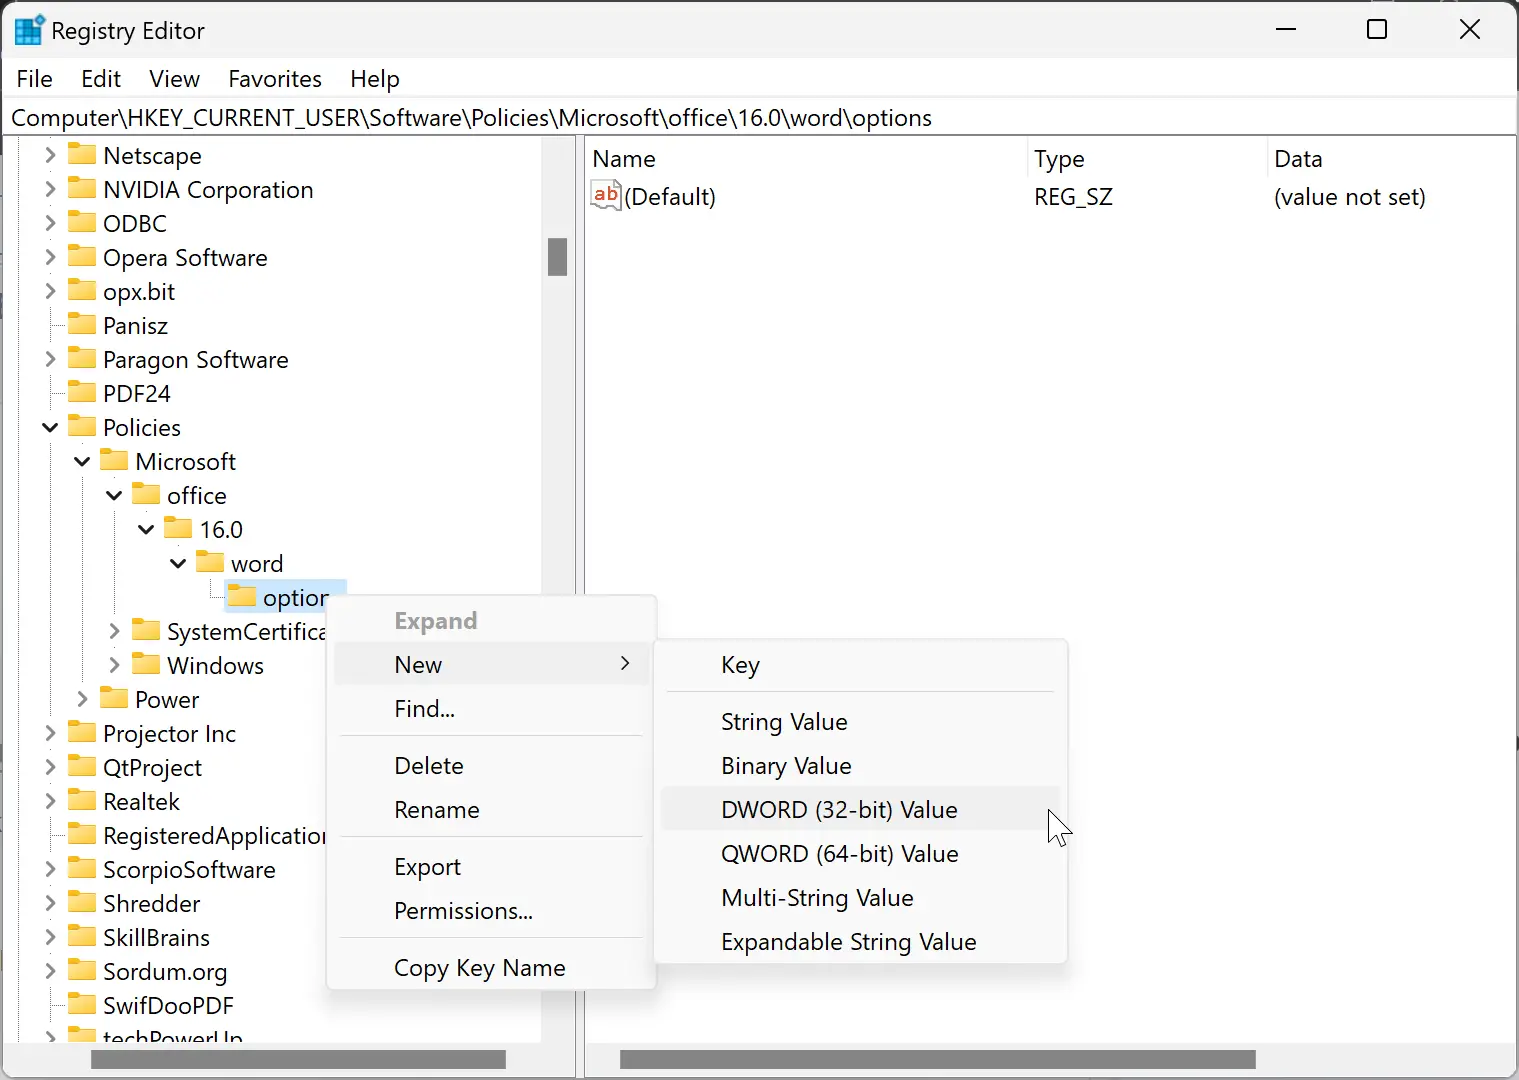
Step 8. Name the newly created REG_DWORD as autotextdelete.
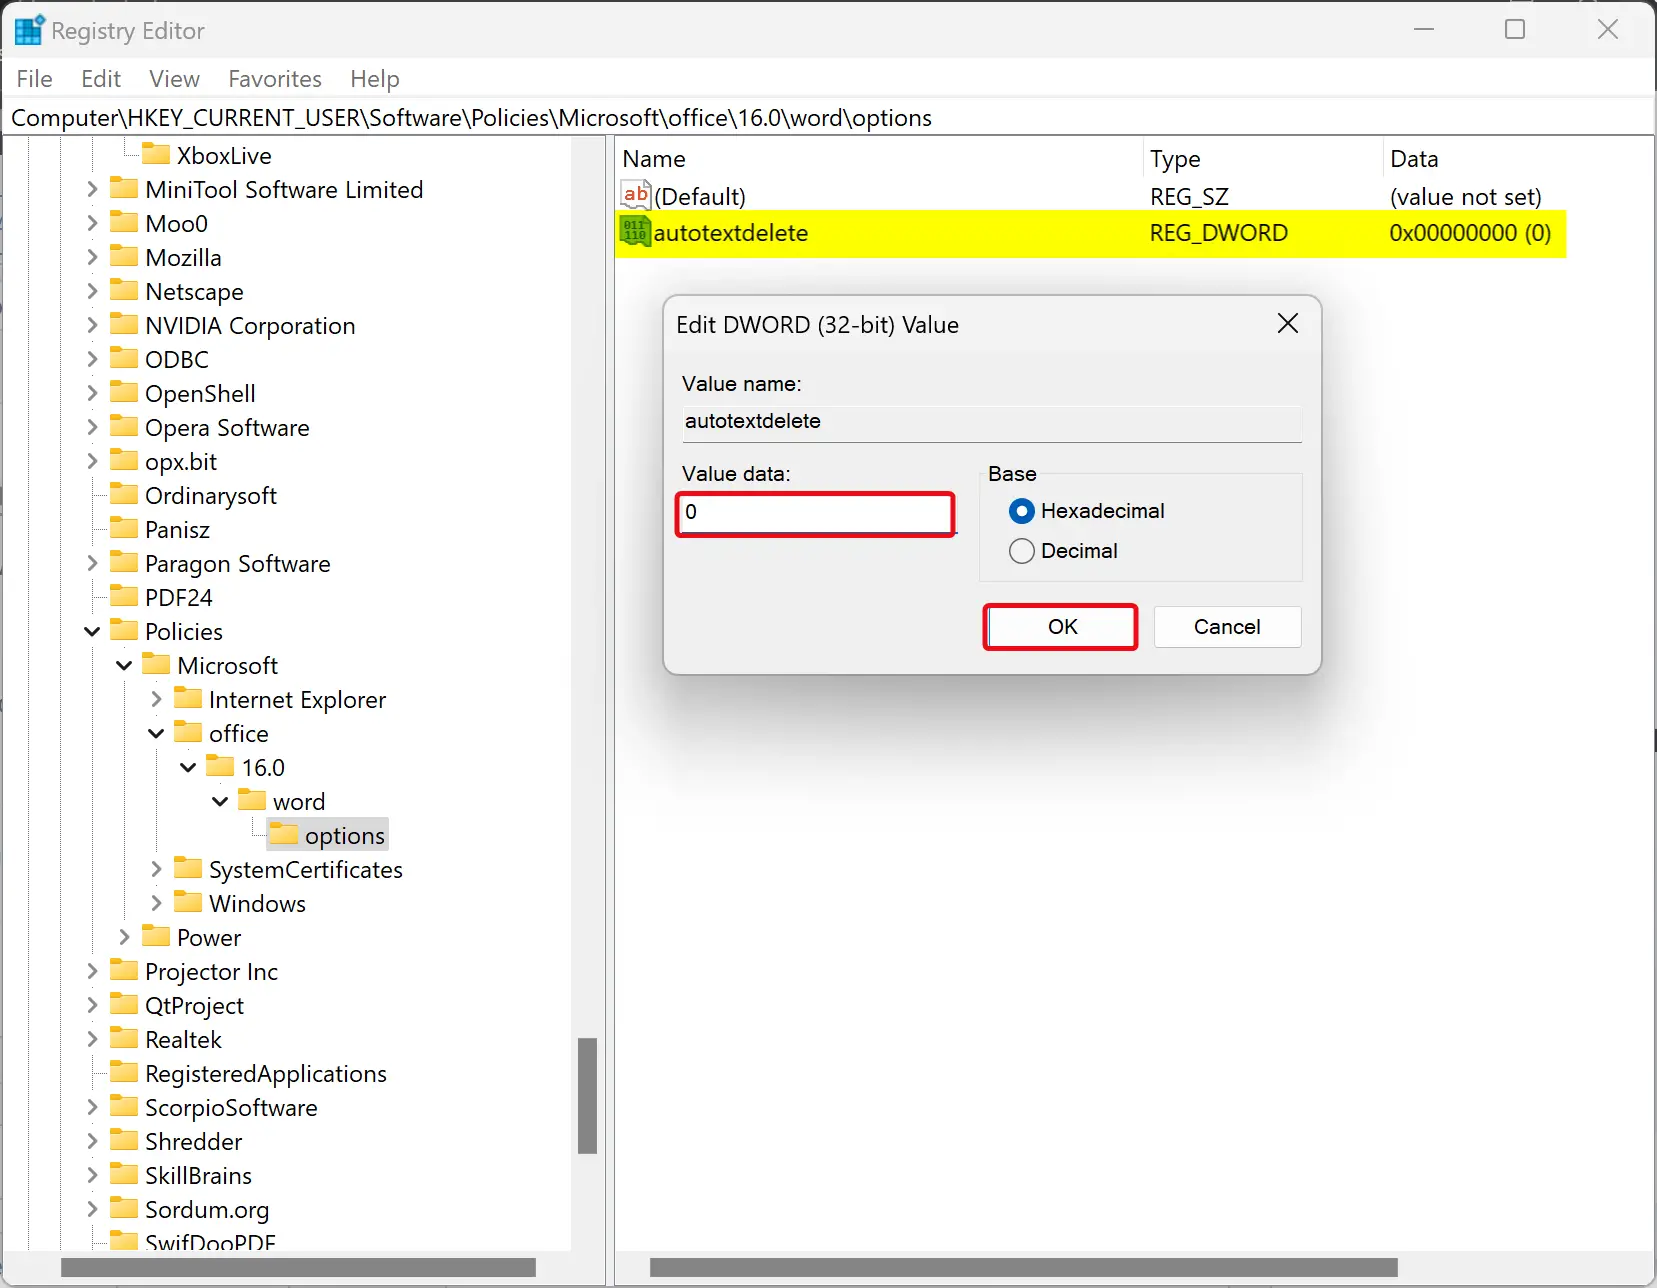
Step 9. Now, double-click on the autotextdelete REG_DWORD and set its “Value data” to the following:-
- 0: Block removing the selected text while typing.
- 1: Allow deleting the selected text while typing.
Step 10. Click OK.
Step 11. At last, reboot your PC to apply the changes.
Conclusion
In conclusion, Microsoft Word’s default setting is to replace selected text when typing. However, users may want to prevent Word from deleting selected text when typing, and it is possible to configure this setting using Word Options, Local Group Policy Editor, or Registry Editor. In this article, we have discussed in detail how to enable or disable this setting using each method. Users can choose the method that best suits their needs and follow the step-by-step instructions provided to modify the setting in Microsoft Word.