In the fast-paced world of technology, our Windows 11 PCs often host numerous applications running in the background. However, these apps can consume valuable system resources and drain battery life. Luckily, Windows 11 offers a convenient feature called Sleep Mode, which allows you to put apps to sleep, conserving resources and optimizing performance. In this user-friendly guide, we will walk you through the steps to put apps to sleep in Windows 11, ensuring a more efficient computing experience.
What is Sleep Mode in Windows 11?
Sleep Mode is a power-saving feature that puts your computer and apps to sleep after a period of inactivity. By utilizing Sleep Mode, you can reduce resource consumption and extend battery life, ultimately improving the overall performance of your Windows 11 PC.
Where are the Sleep Settings in Windows 11?
To access the Sleep settings in Windows 11, press the Windows key + I to open the Settings app. Within the Settings app, navigate to System and click on “Power & battery” in the right sidebar. On the right side, expand the “Screen and sleep” menu.
How to Customize Sleep Options in Windows 11?
Once you have accessed the “Screen and sleep” menu, follow these steps to customize Sleep options on Windows 11:-
Step 1. Use the “On battery power” drop-down menus and set the sleep time to your desired duration for when your PC is running on battery.
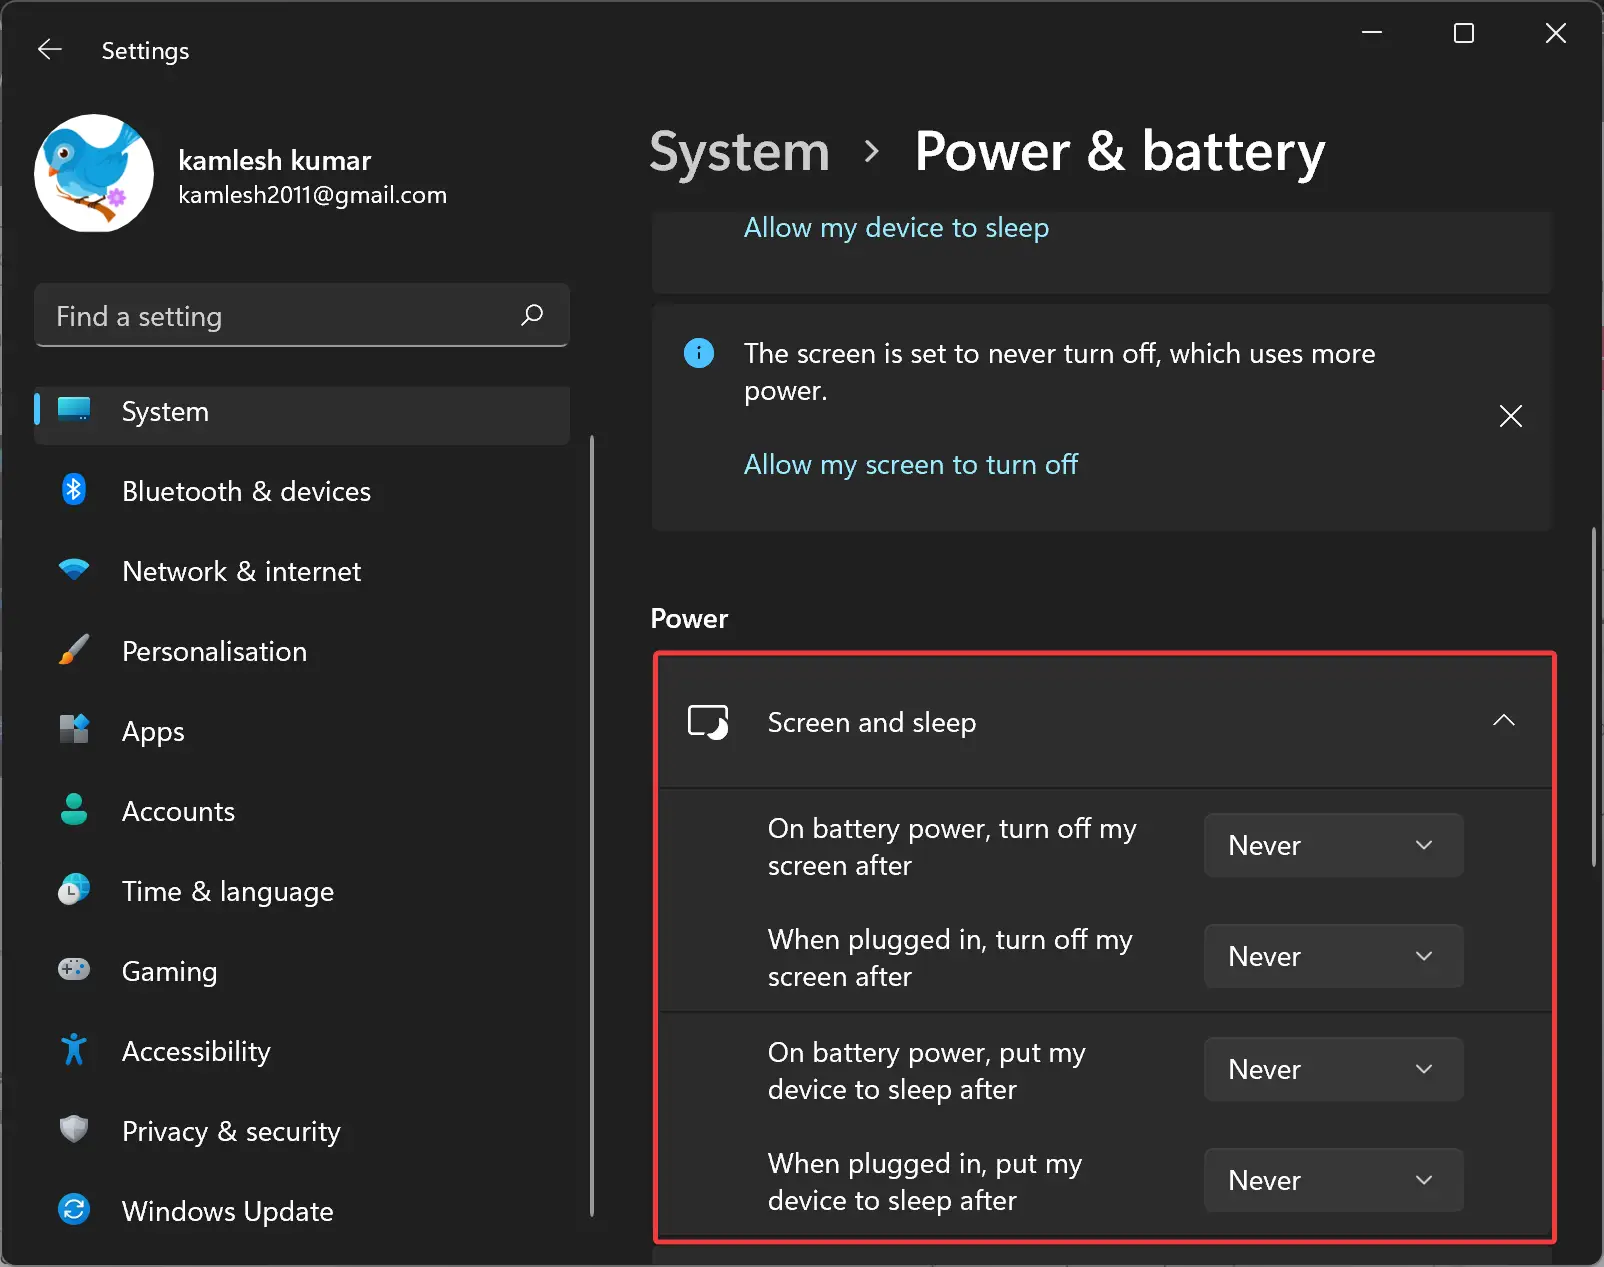
Step 2. Similarly, under the “When plugged in” drop-down menus, specify the sleep time when your PC is connected to a power source.
By adjusting these settings, Windows 11 will automatically put your PC to sleep after the specified time of inactivity.
How to Put Apps to Sleep Mode in Windows 11?
Follow these easy steps to put apps to Sleep mode in Windows 11:-
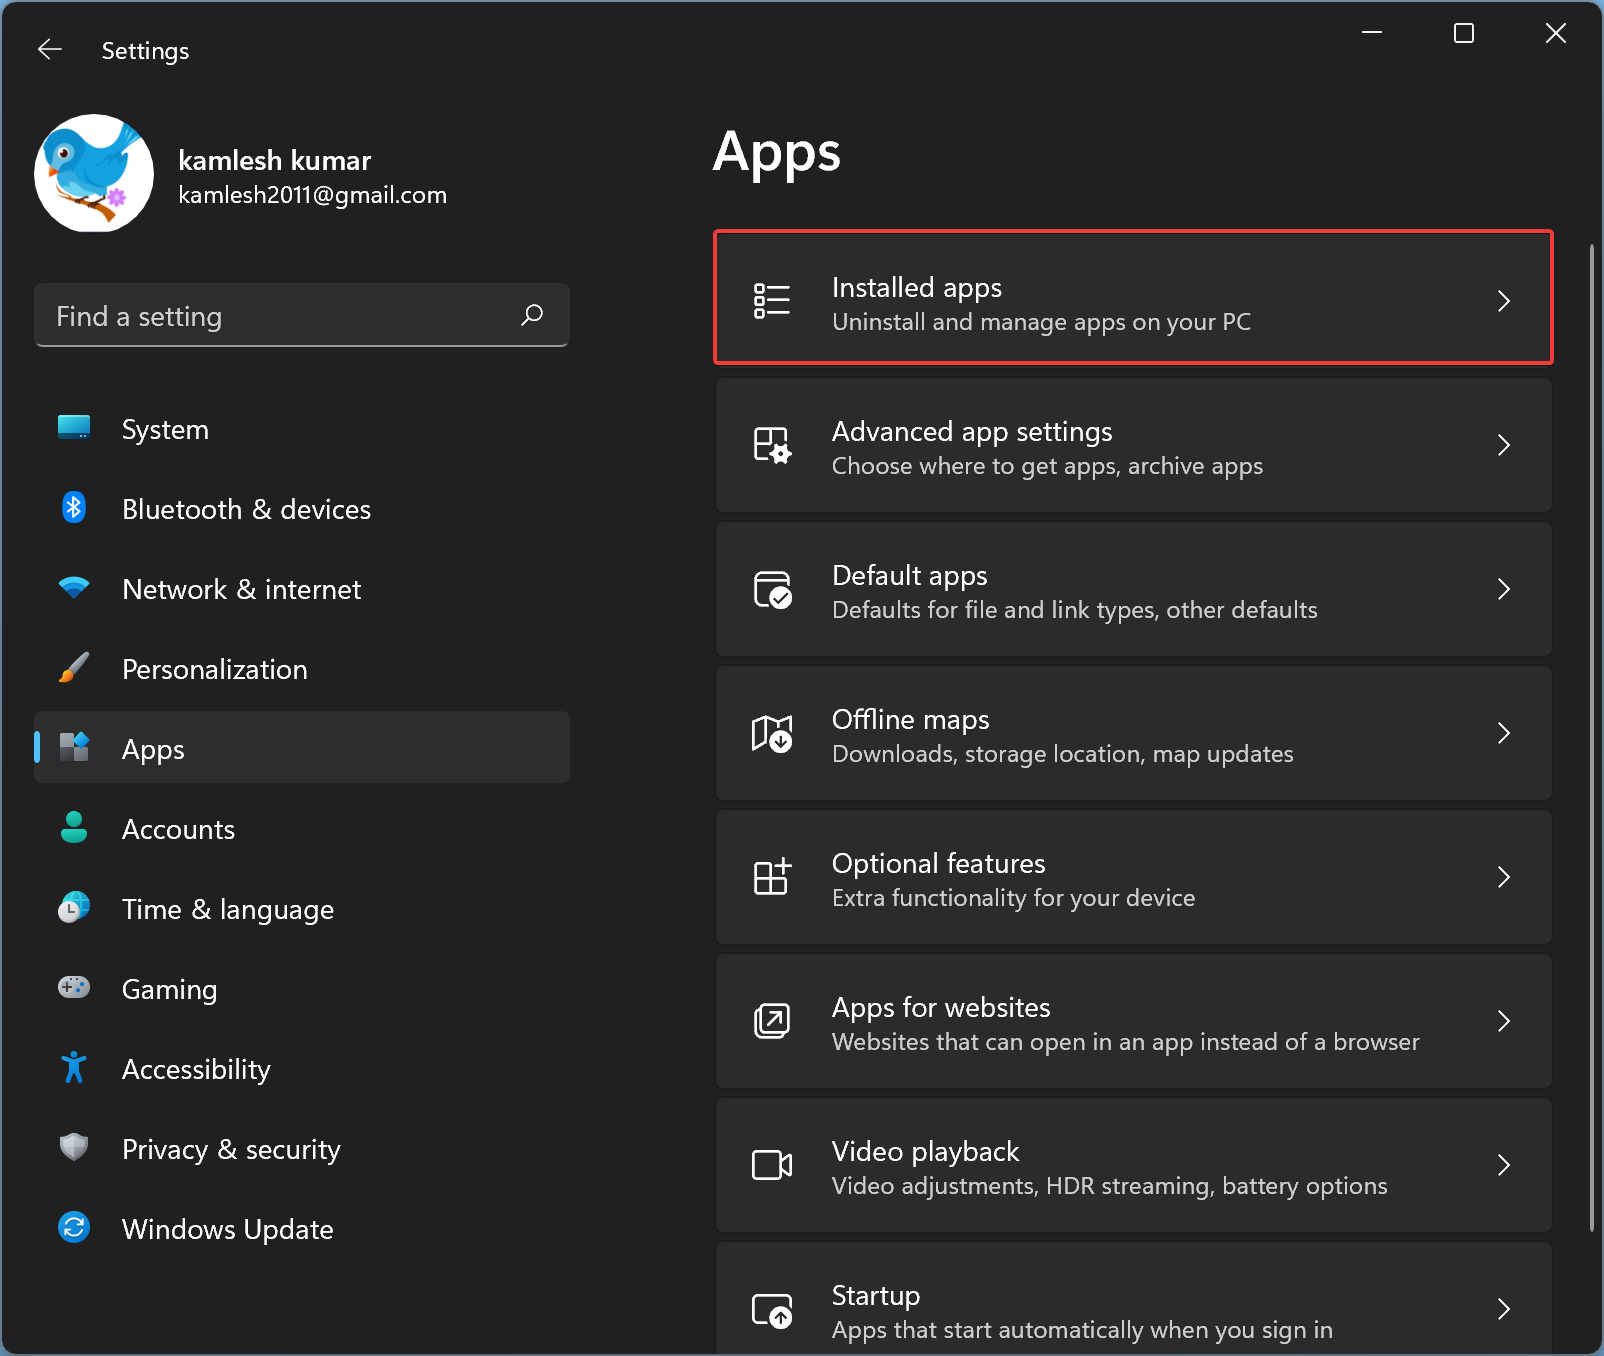
Step 1. Open the Settings app on your Windows 11 PC.
Step 2. Click on “Apps” in the left sidebar and select “Installed apps” from the right-sidebar submenu.
Step 3. Locate the app you wish to put to sleep and click on the three-dots menu beside it.
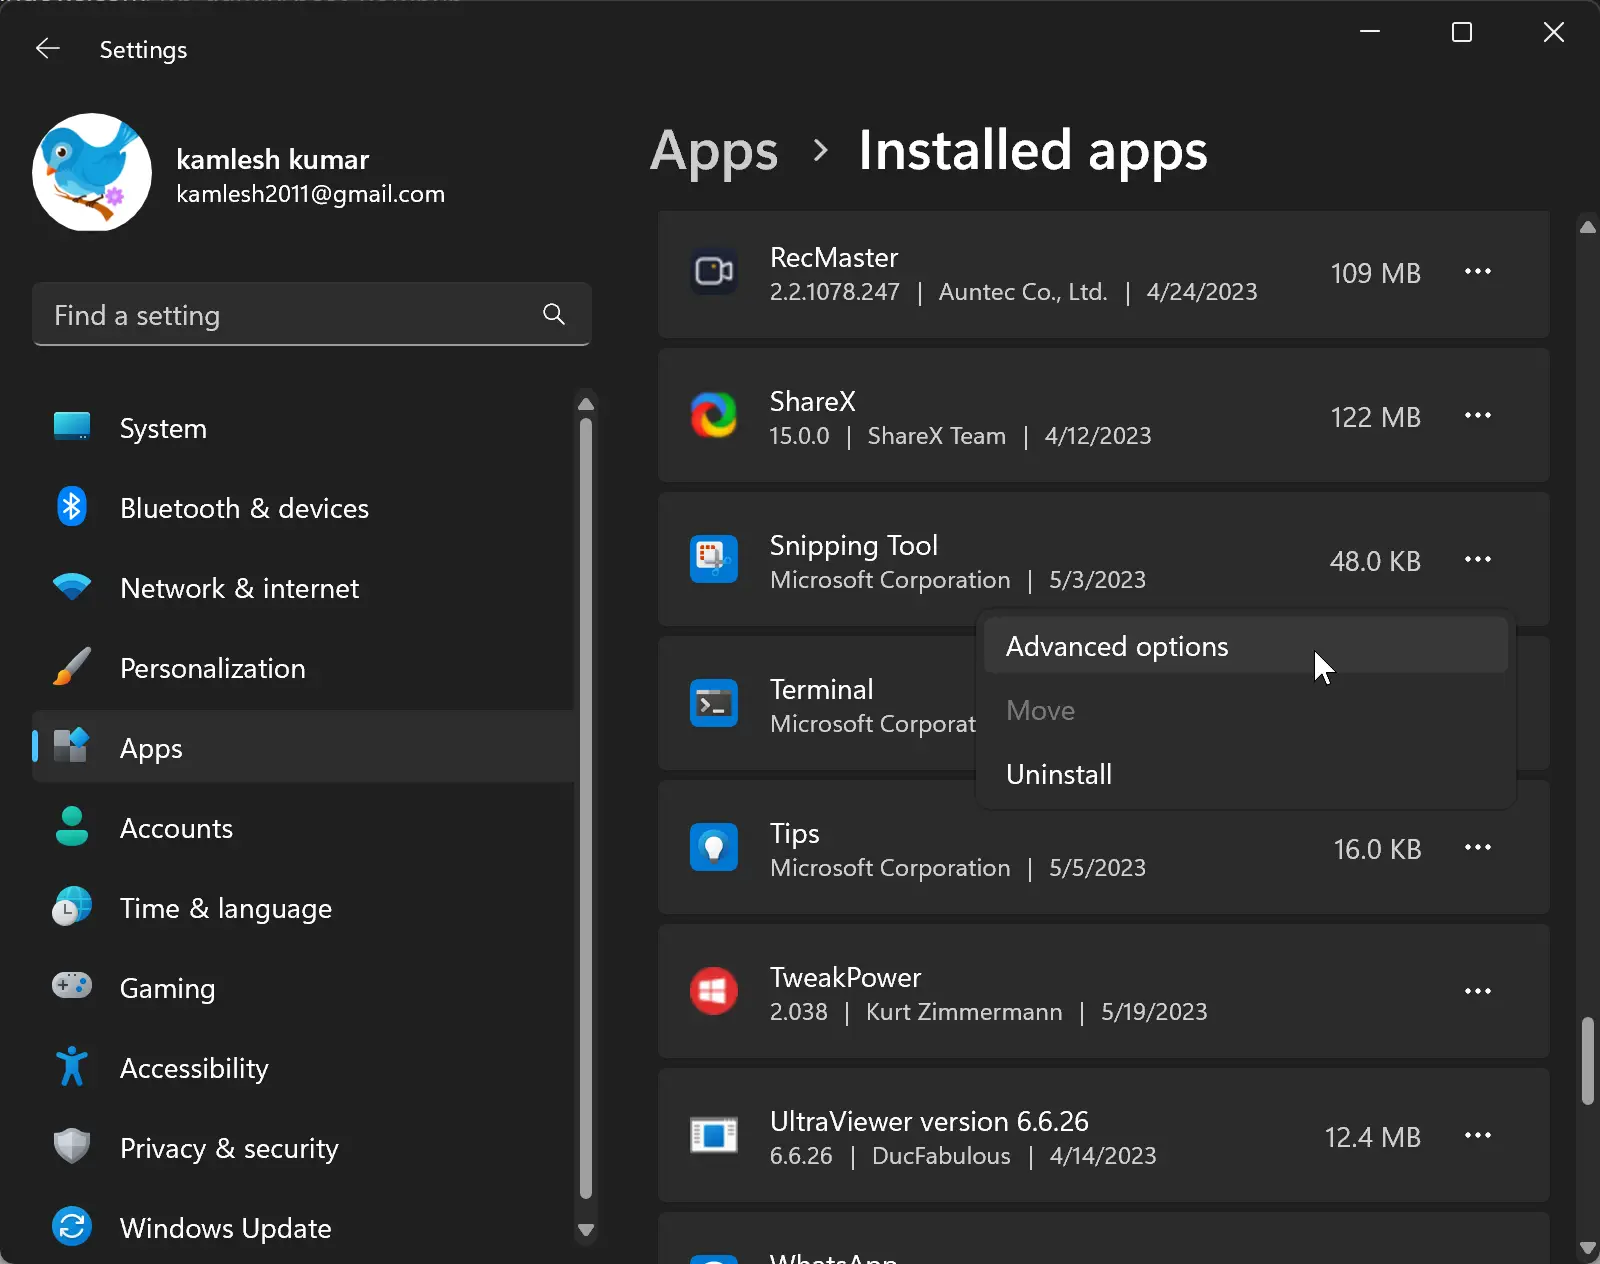
Step 4. From the available options, choose “Advanced options.”
Step 5. Scroll down to find the “Let this app run in the background” setting and select “Never.”
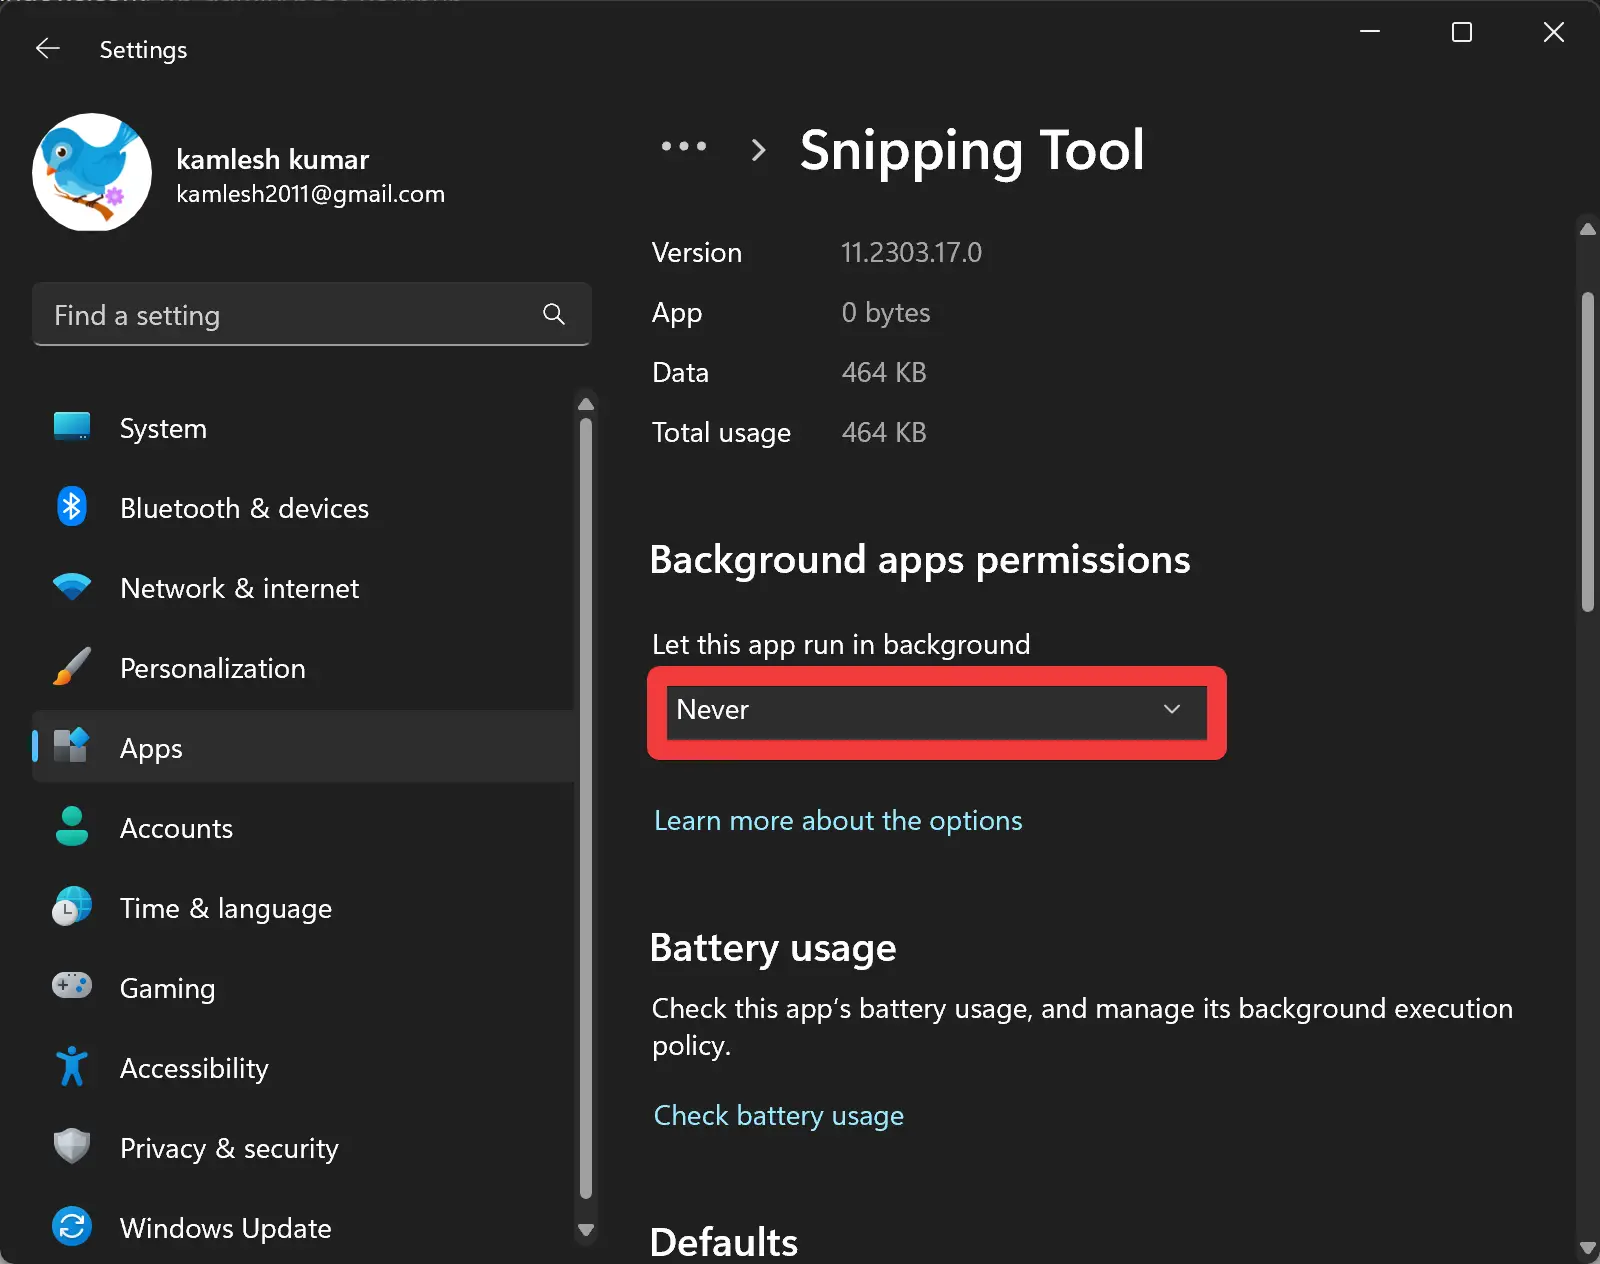
By selecting “Never,” the app will be prevented from running in the background, optimizing system resources and saving battery life.
Putting Additional Apps to Sleep
To put more apps to sleep, repeat steps 3-5 for each app you wish to manage. By selectively putting apps to sleep, you can customize your PC’s performance based on your preferences and needs.
Conclusion
By leveraging Sleep Mode in Windows 11, you can effectively manage app activity, conserve resources, and improve the efficiency of your PC. Putting apps to sleep ensures that they no longer run in the background, optimizing performance and extending battery life. Whether you want to maximize productivity or simply enhance your computing experience, these user-friendly steps will help you harness the power of Sleep Mode in Windows 11. Embrace the benefits of app management and enjoy a more efficient and streamlined PC usage experience.
Remember, by taking control of your app activity and utilizing Sleep Mode effectively, you can unlock the full potential of your Windows 11 PC while ensuring a longer-lasting battery and smoother performance.