Screen recording can be a handy tool for various purposes, whether you want to create a tutorial, share a gameplay video, or simply capture an important moment on your screen. With Windows 11, the Snipping Tool has received an exciting new feature: screen recording. In this article, we will guide you through the process of using the Snipping Tool to record your screen effortlessly.
How to Record Your Screen in Windows 11 Using the Snipping Tool?
To record your screen in Windows 11 through the Snipping Tool, follow these steps:-
Step 1. To get started, search for the Snipping Tool in the Windows 11 search bar. Once you find it, click on the app to launch it.
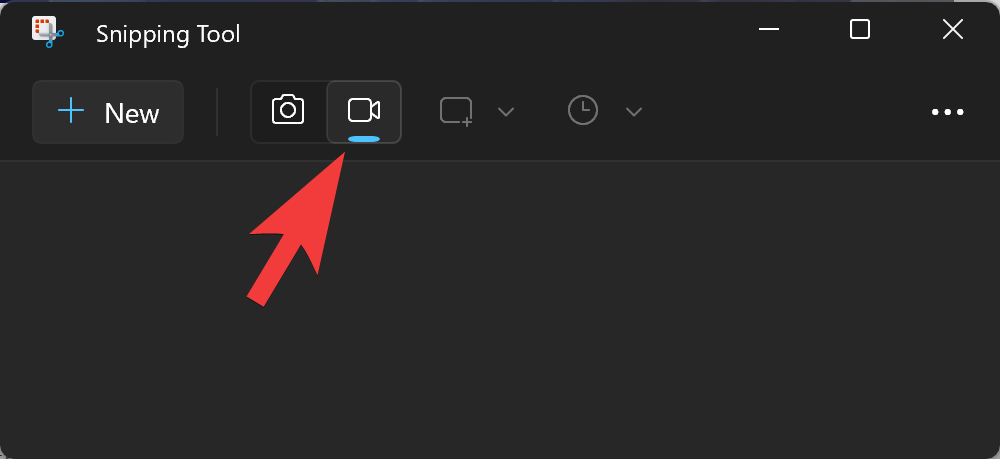
Step 2. In the Snipping Tool window, click on the Record button. This will change the Snipping Tool’s mode to screen recording.
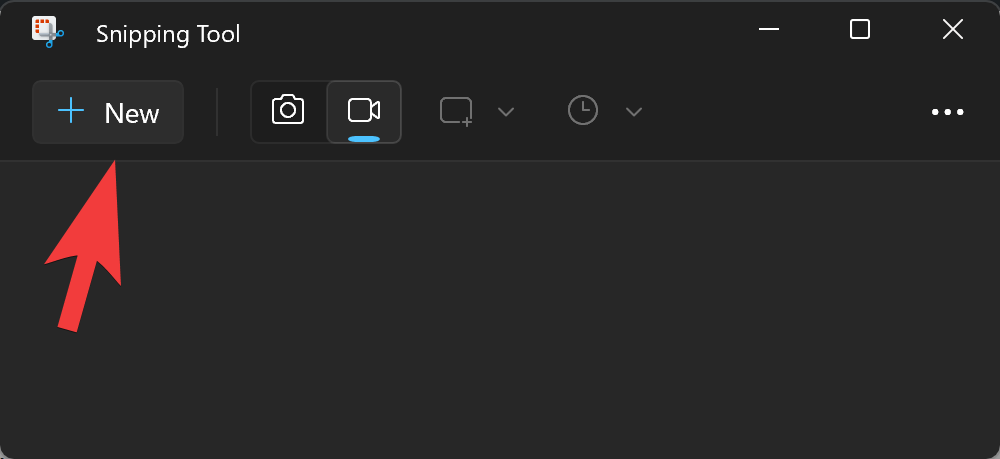
Step 3. Click on the “New” button located in the Snipping Tool’s toolbar. This will prompt the tool to prepare for the screen recording.
Step 4. Now, you need to choose whether you want to record the entire screen or a specific portion. Click and drag your cursor to select the desired area you wish to record. The selected area will be highlighted.
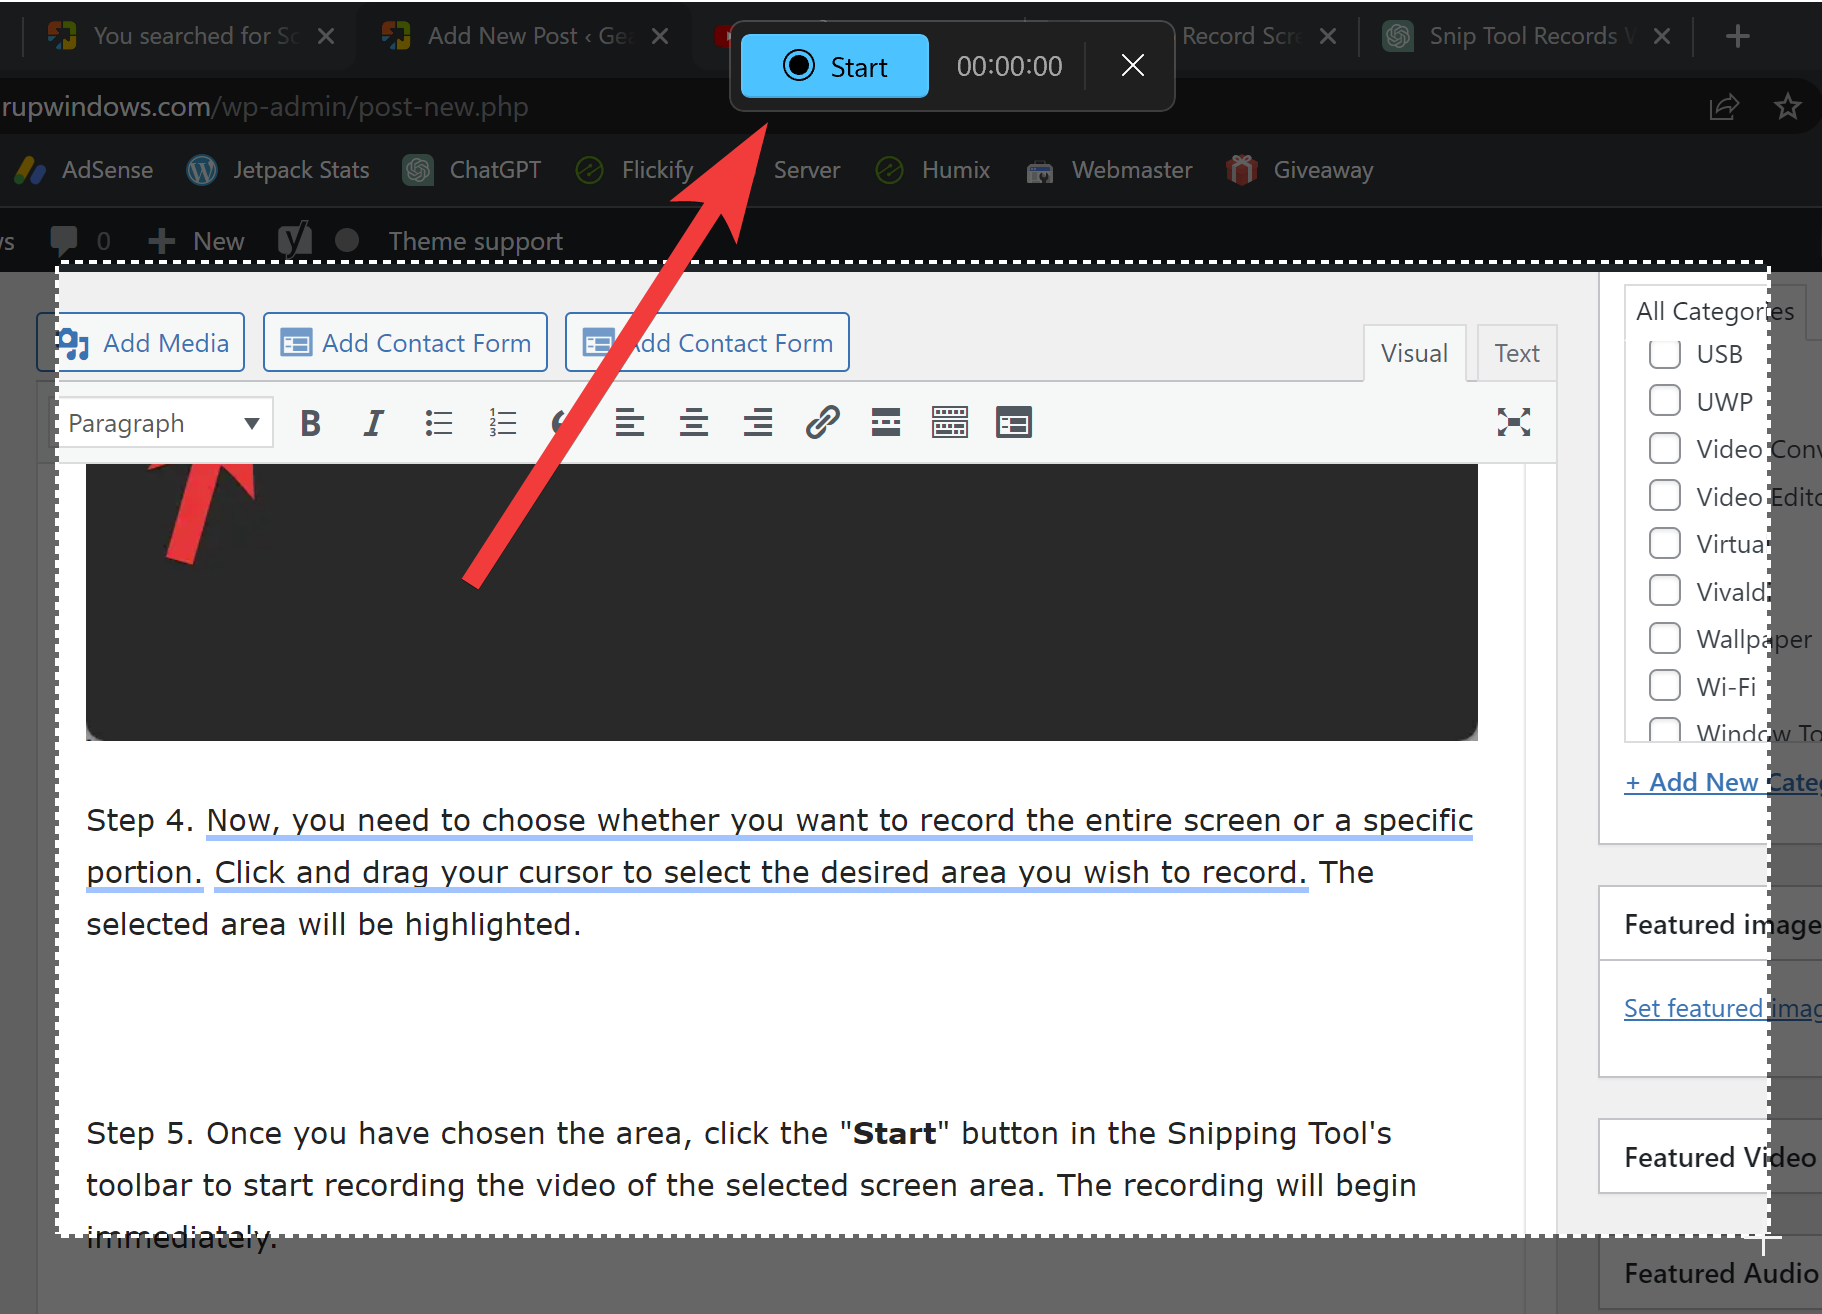
Step 5. Once you have chosen the area, click the “Start” button in the Snipping Tool’s toolbar to start recording the video of the selected screen area. The recording will begin immediately.
Step 6. If you need to pause the recording at any point, you can click the pause button in the Snipping Tool’s toolbar. This can be helpful if you want to gather your thoughts or make any necessary adjustments. To resume the recording, simply click the resume button.
Step 7. To finish the screen recording, click the red “Stop” button in the Snipping Tool’s toolbar. The Snipping Tool will automatically stop recording and save the video.
Step 8. After stopping the recording, the Snipping Tool will display the recorded video. To review the video, click the play button. If you are satisfied with the recording, click the “Save” button. Choose a location on your computer to save the video file, provide a name for the video, and click “Save.”
That’s it. Your recorded video will be saved in the MP4 format.
Conclusion
Recording your screen in Windows 11 has become more accessible with the newly added screen recording feature in the Snipping Tool. By following the simple steps outlined in this guide, you can effortlessly capture and save your screen activities in video format. Whether you’re creating tutorials, sharing exciting moments, or documenting important information, the Snipping Tool in Windows 11 makes screen recording a breeze.
Remember to explore the various possibilities and use this tool to enhance your productivity and creativity in Windows 11!