Windows 11 comes with a built-in printer, Microsoft Print to PDF. Microsoft also allows deleting a printer that is not required. Even you can delete this inbuilt Microsoft Print to PDF printer. It is a good feature that allows you to print any document in a PDF file. This is a handy feature for many of us. One can quickly print any document as a PDF and store it on their PC for future reference or share it with someone.
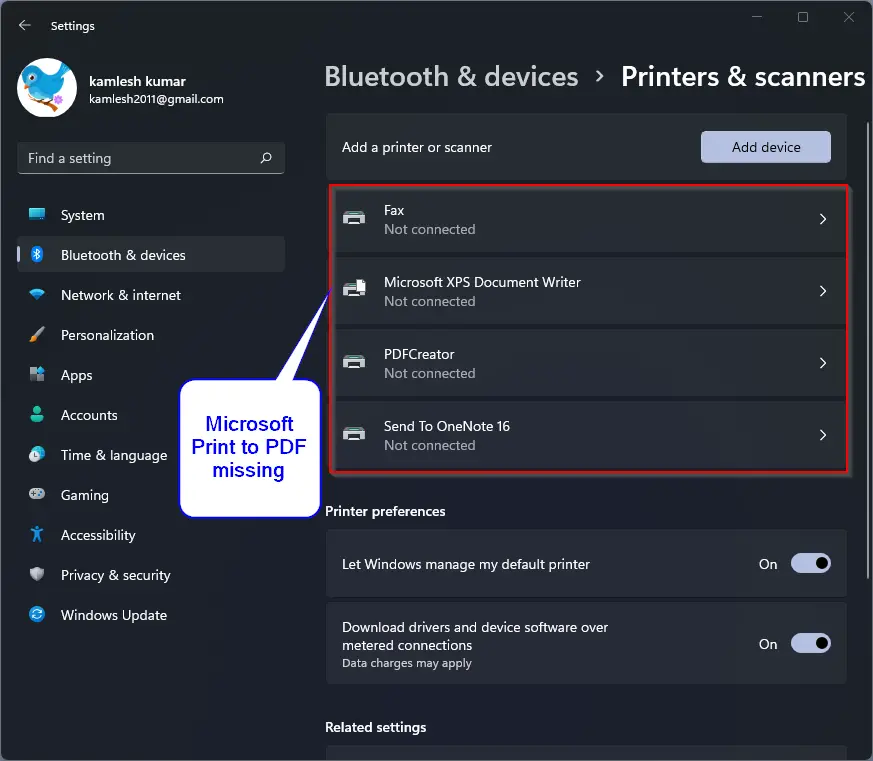
However, if you deleted it by mistake or due to some reason, Microsoft Print to PDF printer is missing on Windows 11, you can get it back by running commands. Using a few commands, you can easily reinstall it on your computer or laptop.
How to reinstall Microsoft Print to PDF printer in Windows 11?
Follow these steps to reinstall Microsoft Print to PDF printer in Windows 11:-
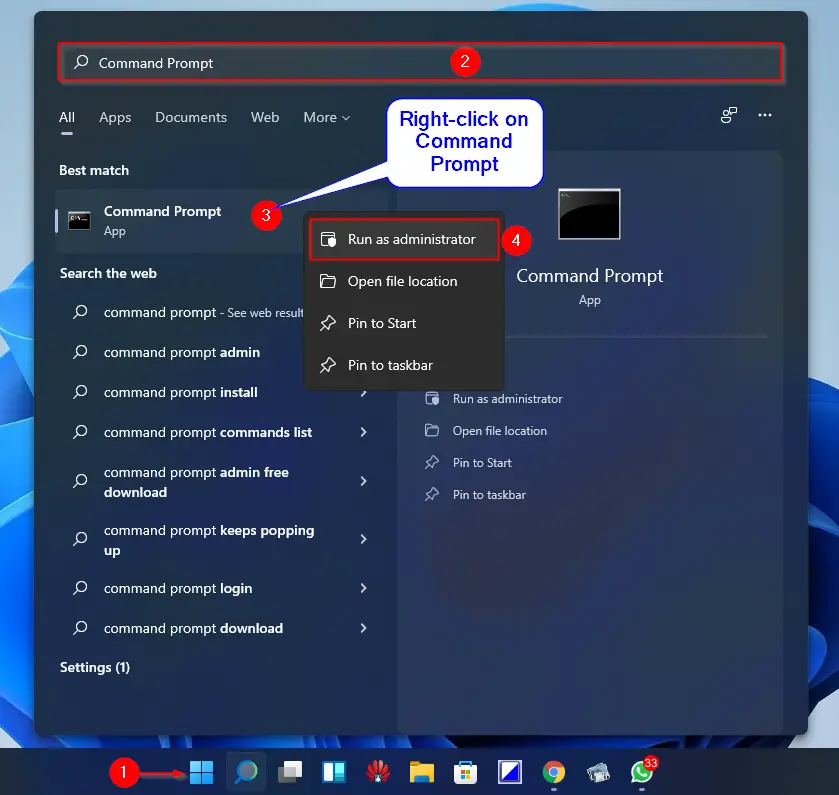
Step 1. Open Command Prompt with administrator rights.
To do that, click on the Start button on the taskbar and then type Command Prompt in the search box. Right-click on the Command Prompt in the search results and select the Run as administrator option.
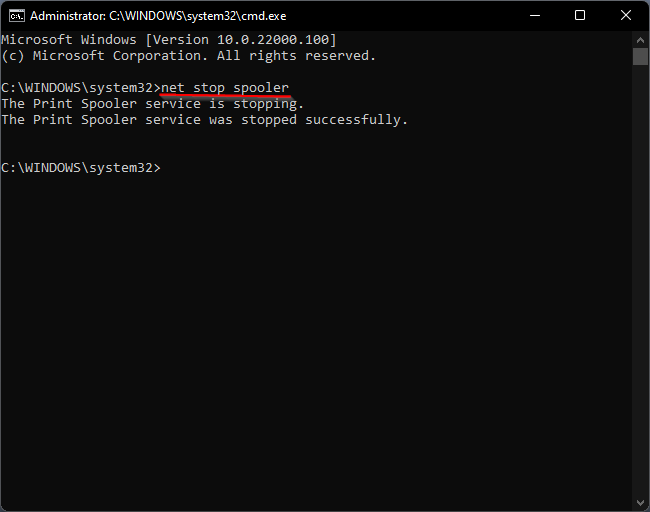
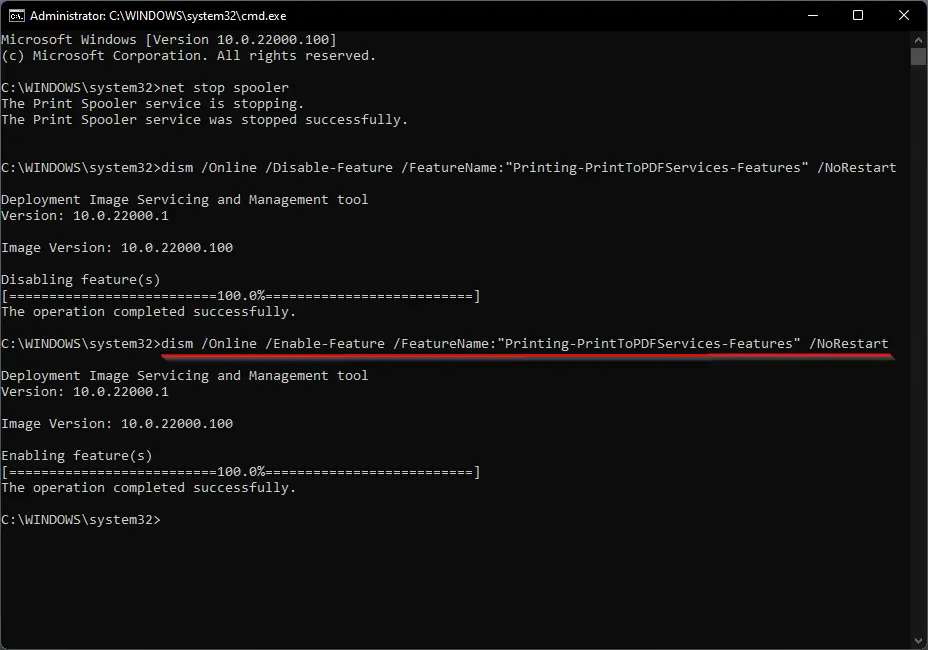
Step 2. In the elevated command prompt window, type the following and hit Enter from the keyboard to stop print spooler service:-
net stop spooler
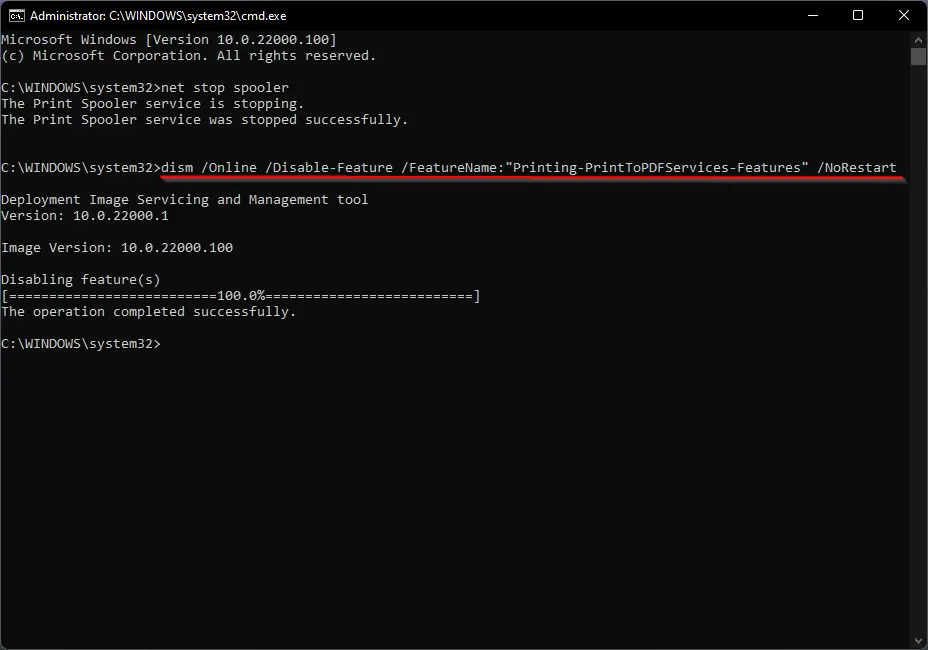
Step 3. Now execute the following command to uninstall or disable the PDF printer feature:-
dism /Online /Disable-Feature /FeatureName:"Printing-PrintToPDFServices-Features" /NoRestart
Step 4. The above command will remove the Microsoft Print to PDF from your Windows 11 PC. To reinstall it on your PC, copy and paste the following text on the command prompt window and hit Enter from the keyboard:-
dism /Online /Enable-Feature /FeatureName:"Printing-PrintToPDFServices-Features" /NoRestart
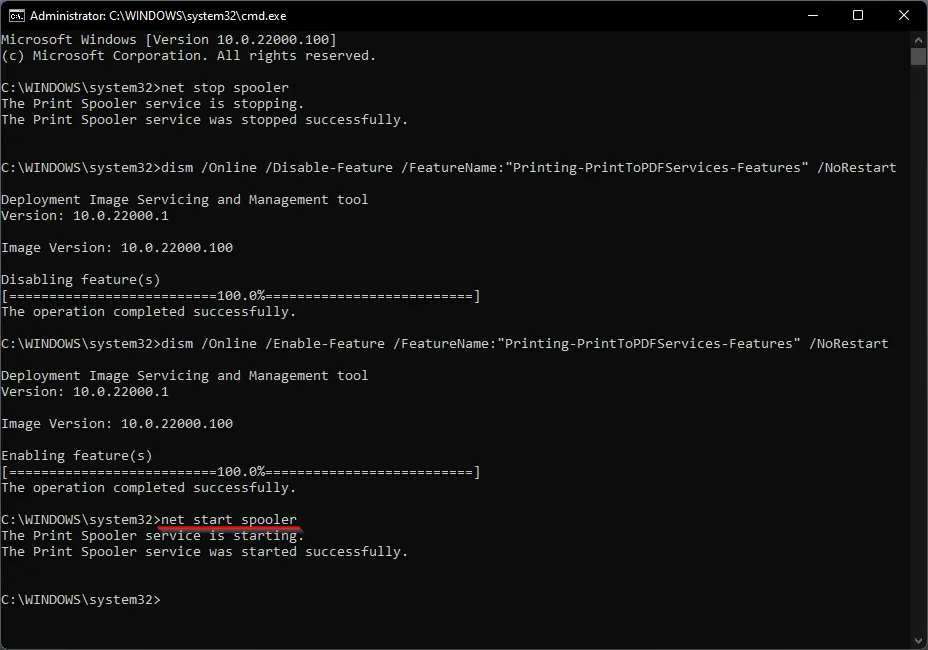
Step 5. That’s all. Now you have reinstalled the Microsoft Print to PDF printer on your PC. Now, it’s time to start the print spooler service. Without this service, you can’t print any document virtually or physically. To do that, copy and paste the following texts and then hit Enter from the keyboard to execute the command:-
net start spooler
That’s all. Now Microsoft Print to PDF printer will appear in your printers list. You can use this printer to print any document as a PDF. Just press Ctrl + P from the keyboard, select Microsoft Print to PDF printer from the list, and then click on the Save button to get the desired document in a PDF file.
Conclusion
In conclusion, Microsoft Print to PDF is a valuable built-in feature in Windows 11 that allows users to print any document as a PDF file, which can be saved or shared for future reference. While it is possible to delete this feature accidentally, it can be easily reinstalled using a few simple commands in the Command Prompt window. Following the steps outlined in this guide, users can quickly reinstall the Microsoft Print to PDF printer and resume using it to print any document as a PDF file.
Also Read: Fix “Microsoft Print to PDF” is missing from Printer Selection.
THANK YOU SO MUCH FOR THE ADVISE. IT WAS HELPFUL. THANKS AGAIN