On a Windows 11 PC, when you right-click a known or unknown file and select Open with > Choose another app, the pop-up dialog lets you change the default app or pick up the “Look for an app in the Microsoft Store” option.
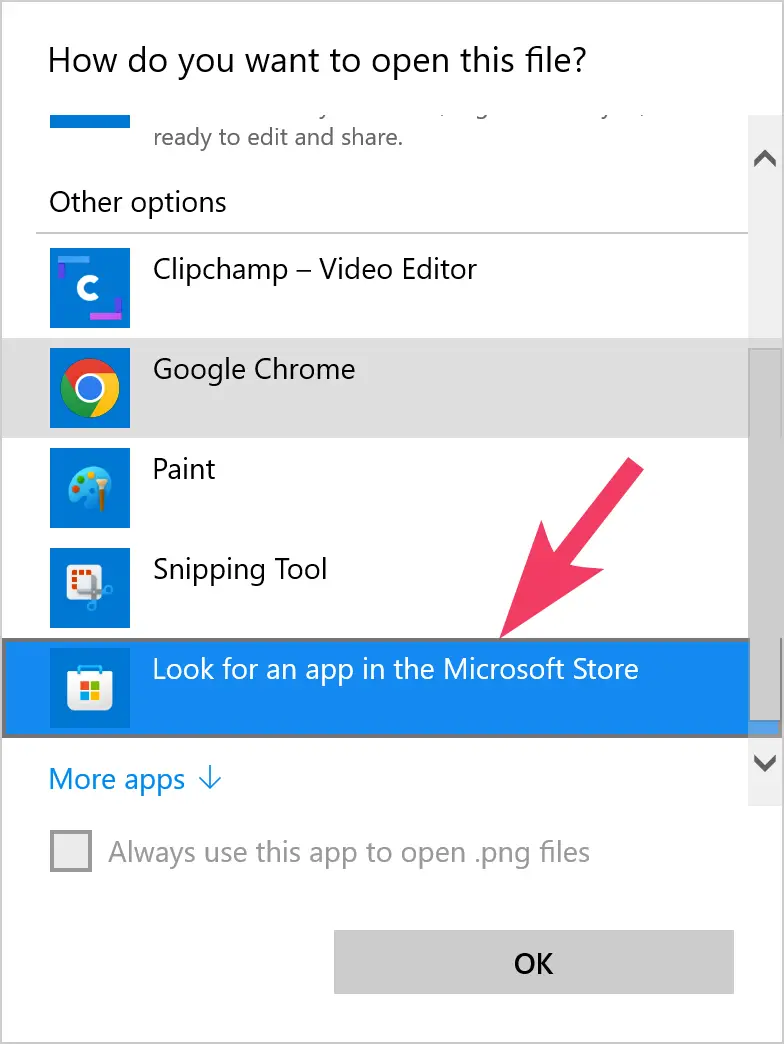
If you select “Look for an app in the Microsoft Store” and click the OK button, the Microsoft Store app will open up on your computer and suggest a few apps that you can download and install to open that type of file.
Although the “Look for an app in the Microsoft Store” option is handy, you can also manually search the Microsoft Store app for the same thing. If you think that this option is useless and it should not exist on your computer, you can hide or remove it.
In this gearupwindows article, we will guide you on removing or hiding the “Look for an app in the Microsoft Store” context menu in Windows 11.
You can accomplish this task on Windows 11 using two methods:-
- Through Registry Editor, and
- Using Local Group Policy Editor.
Let me delve into depth.
How to Add or Remove the “Look for an app in the Microsoft Store” Context Menu in Windows 11 using Registry Editor?
To hide or add the “Look for an app in the Microsoft Store” context menu in Windows 11 through Registry Editor, use these steps:-
Step 1. First, open the Registry Editor.
Step 2. Then, navigate to the following path in the Registry Editor window:-
HKEY_LOCAL_MACHINE\SOFTWARE\Policies\Microsoft\Windows
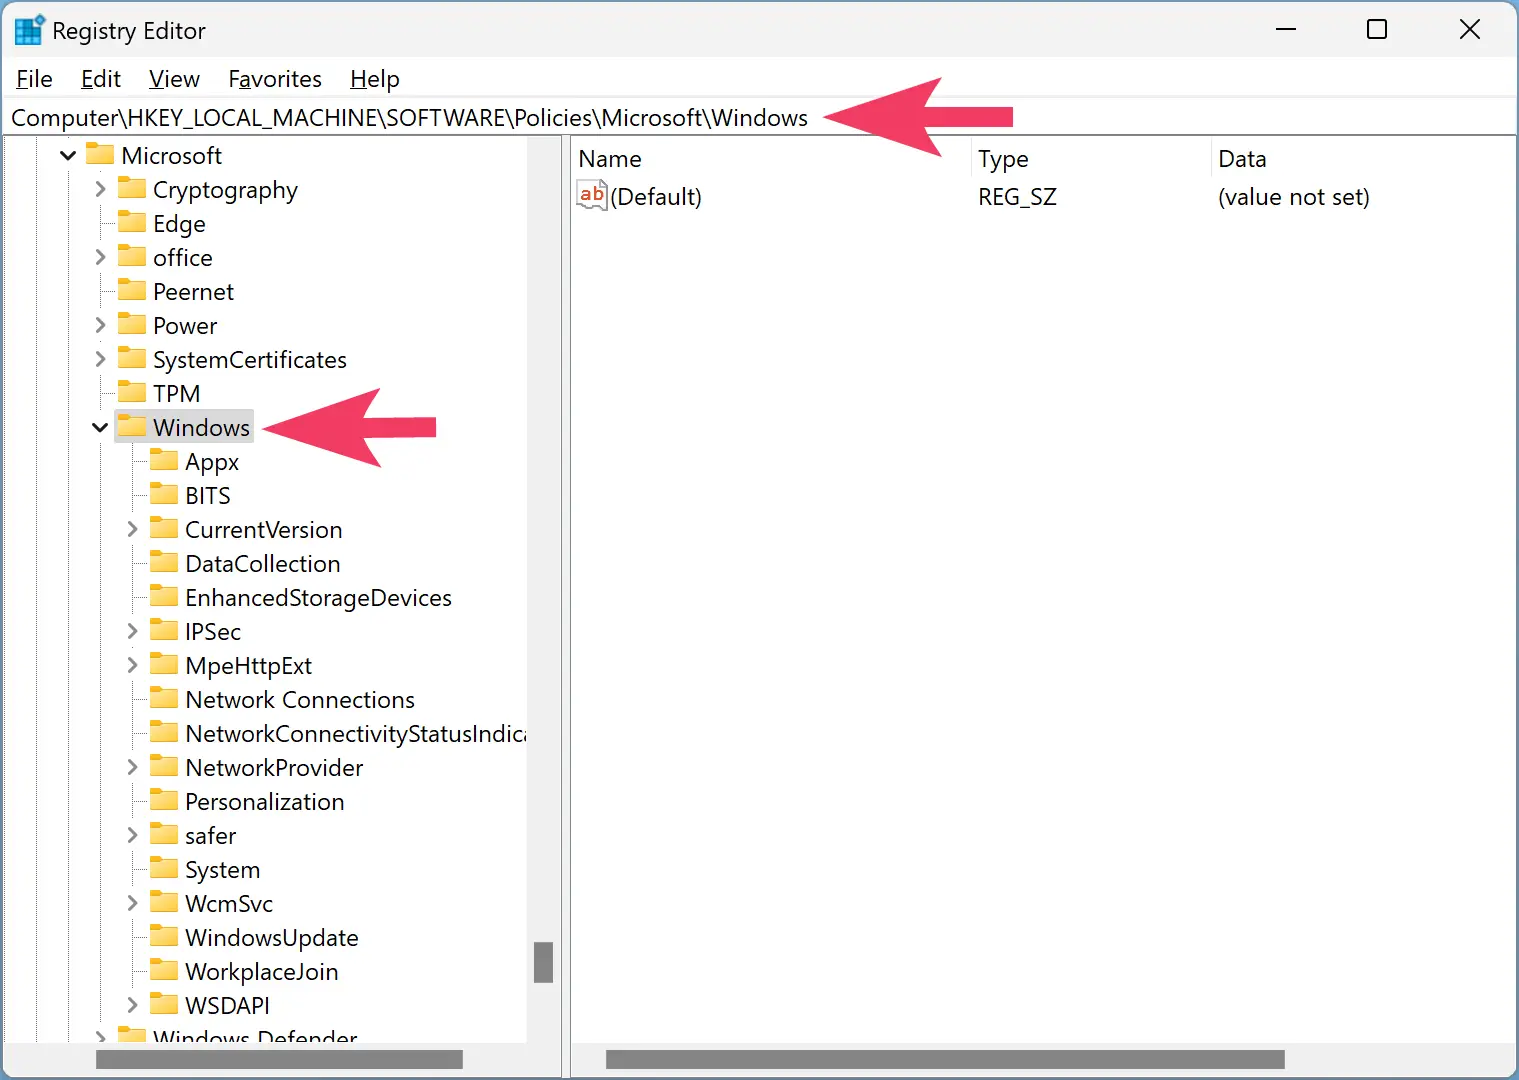
Step 3. After that, right-click on the Windows folder and select New > Key.
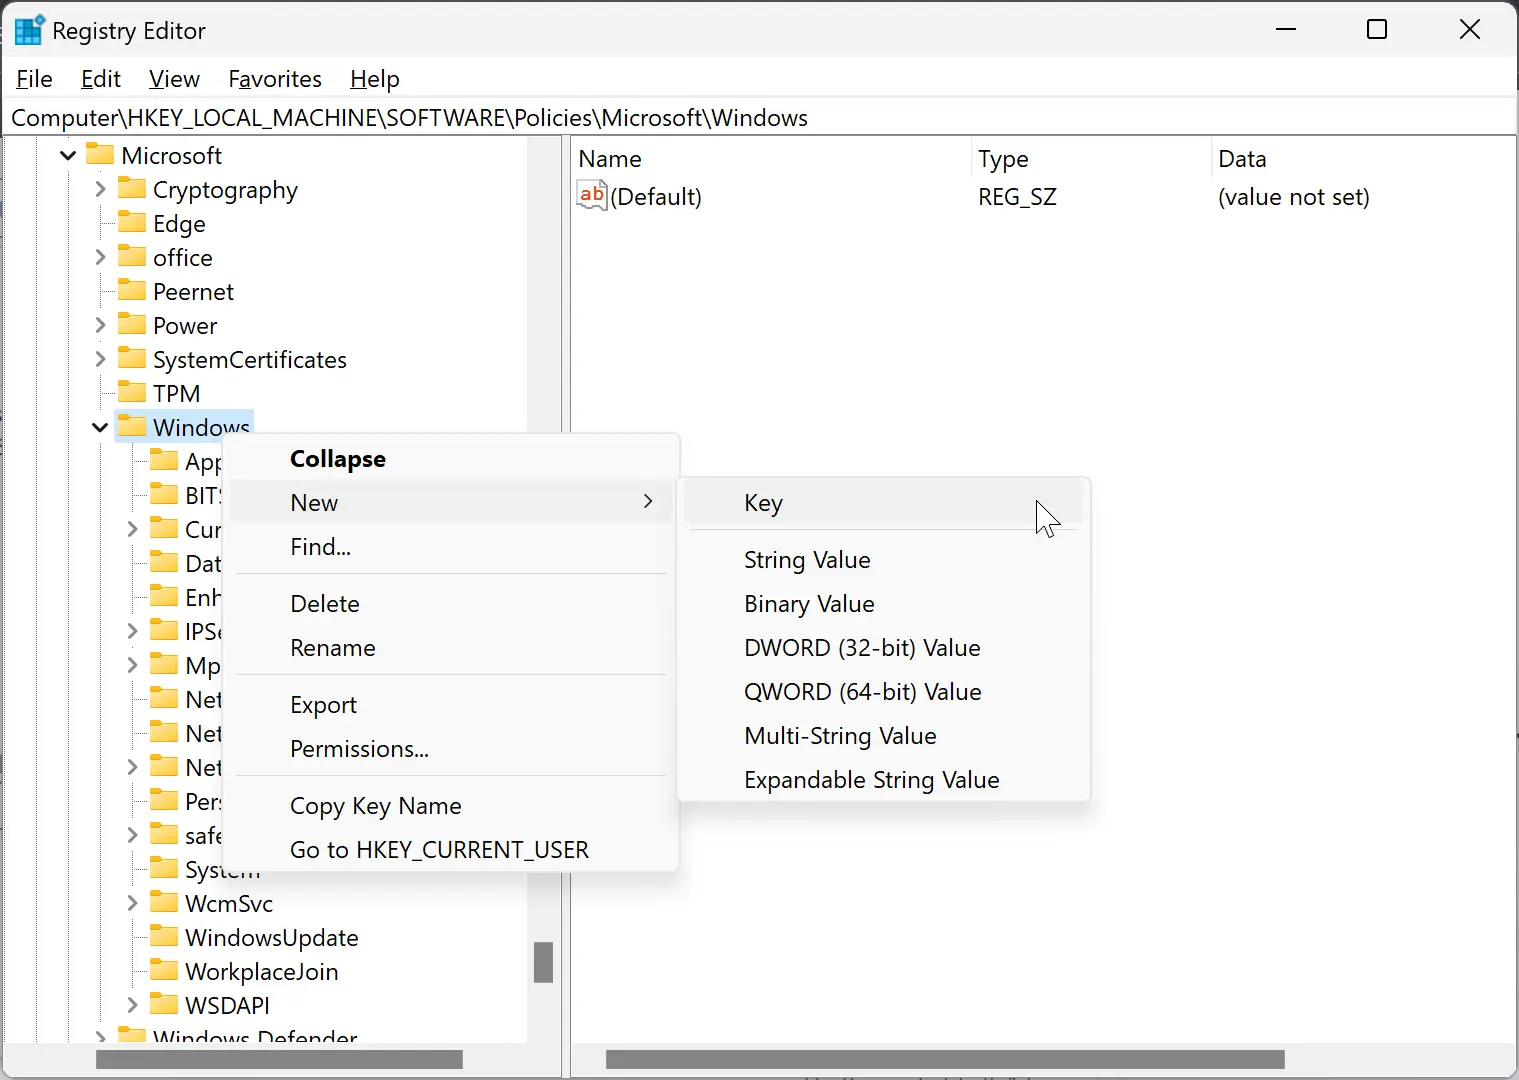
Step 4. Name the newly created key Explorer.

Step 5. Now, right-click on the Explorer folder and select New > DWORD (32-bit) Value.

Step 6. Name the newly created REG_DWORD as NoUseStoreOpenWith.
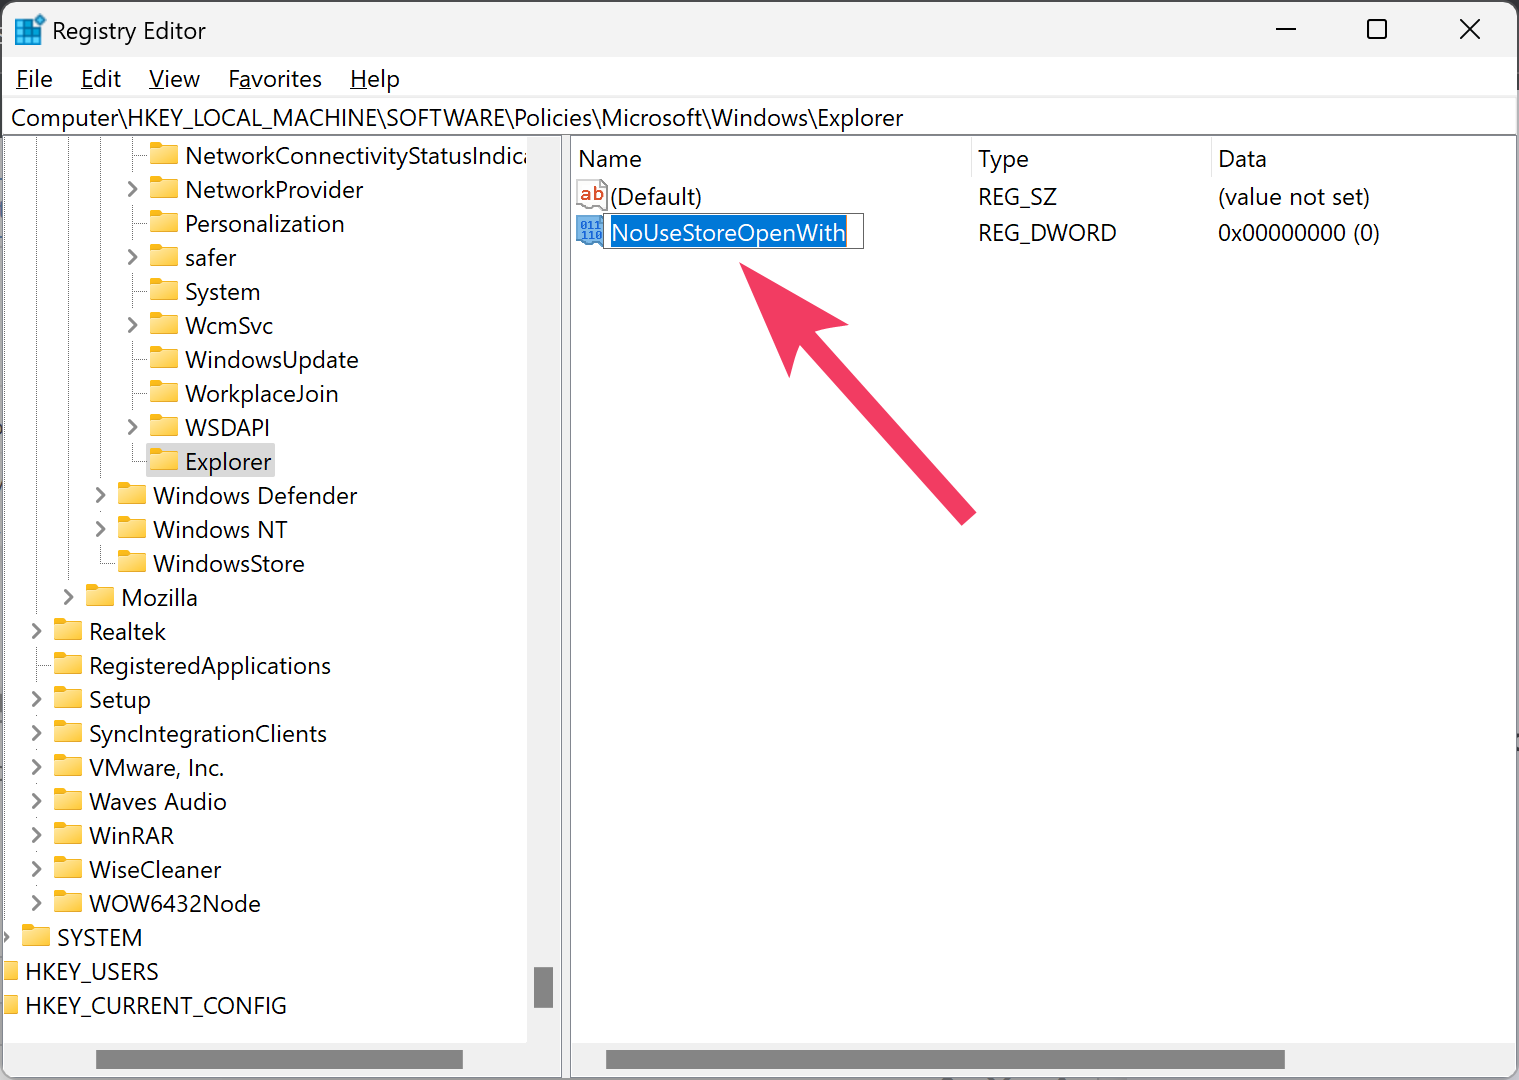
Step 7. Next, double-click on the NoUseStoreOpenWith REG_DWORD and set its Value data to 1 to remove the “Look for an app in the Microsoft Store” context menu item.
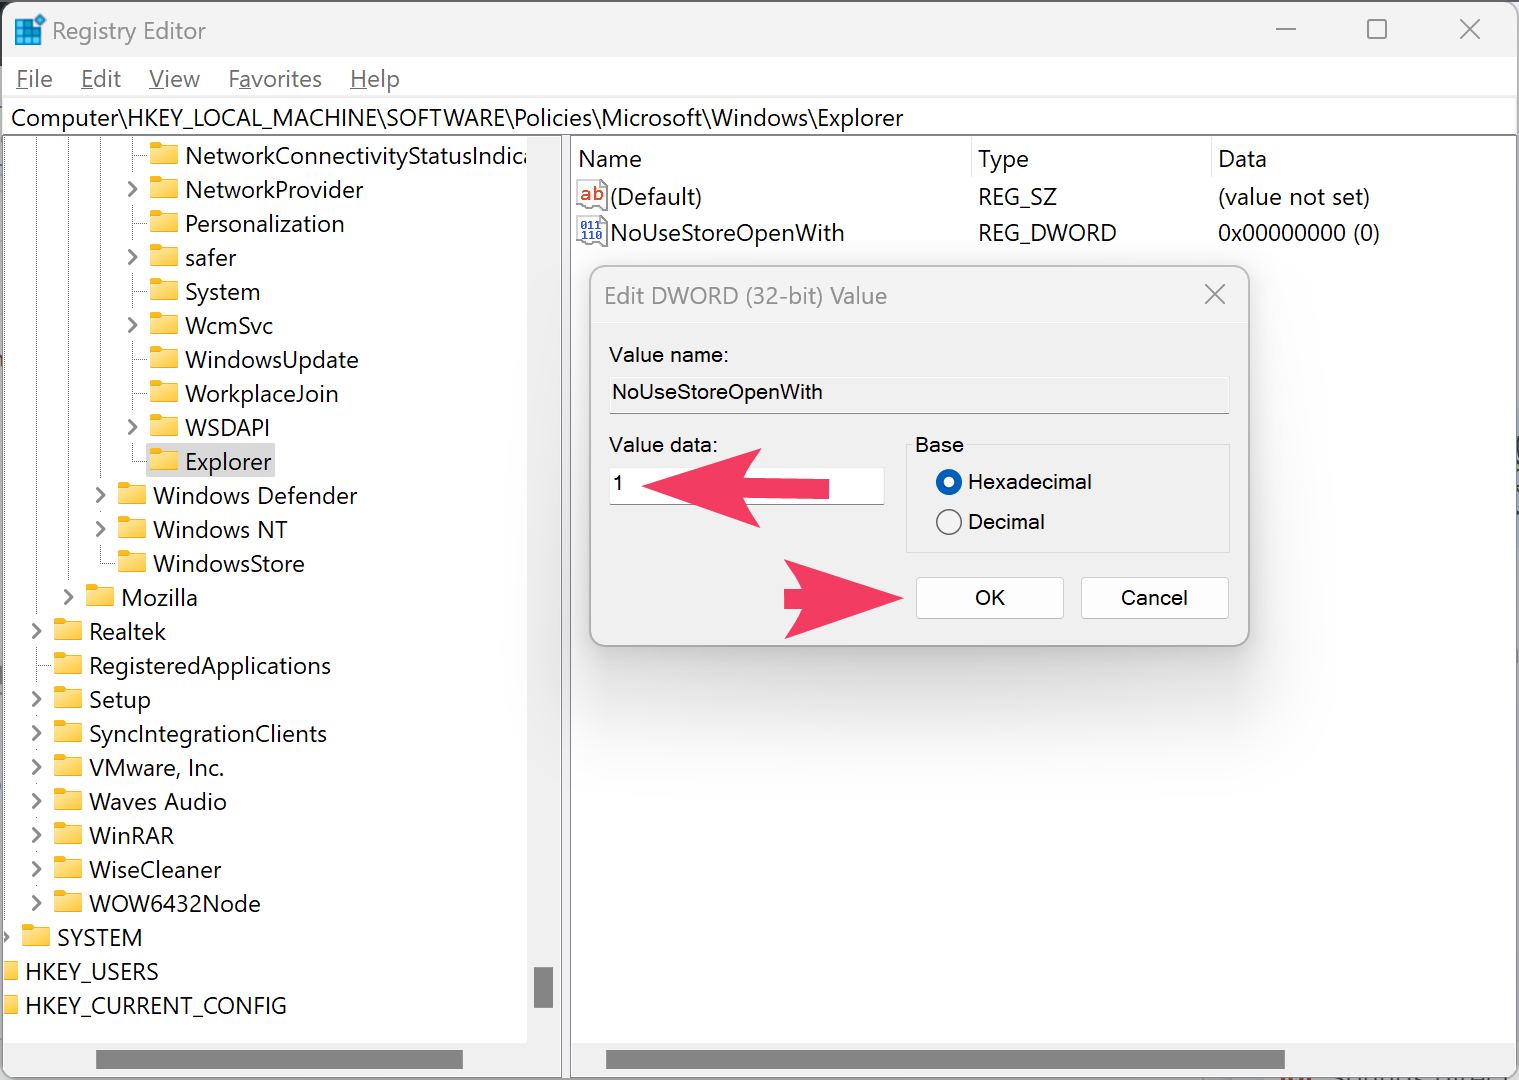
Step 8. Click the OK button.
Step 9. Finally, reboot your computer to apply the changes.
To add the “Look for an app in the Microsoft Store” Context Menu in Windows 11, navigate to the following path in the Registry Editor:-
HKEY_LOCAL_MACHINE\SOFTWARE\Policies\Microsoft\Windows\Explorer
On the right side of the Explorer folder, right-click on NoUseStoreOpenWith REG_DWORD and select the Delete option. When prompted, click the Yes button.
How to Add or Hide the “Look for an app in the Microsoft Store” Context Menu in Windows 11 through Local Group Policy Editor?
To add or remove the “Look for an app in the Microsoft Store” context menu in Windows 11 using Local Group Policy Editor, do the following:-
Step 1. At first, open Local Group Policy Editor.
Step 2. When the Local Group Policy Editor window appears on your computer, navigate to the following path in the left sidebar:-
Computer Configuration > Administrative Templates > System > Internet Communication Management > Internet Communication settings
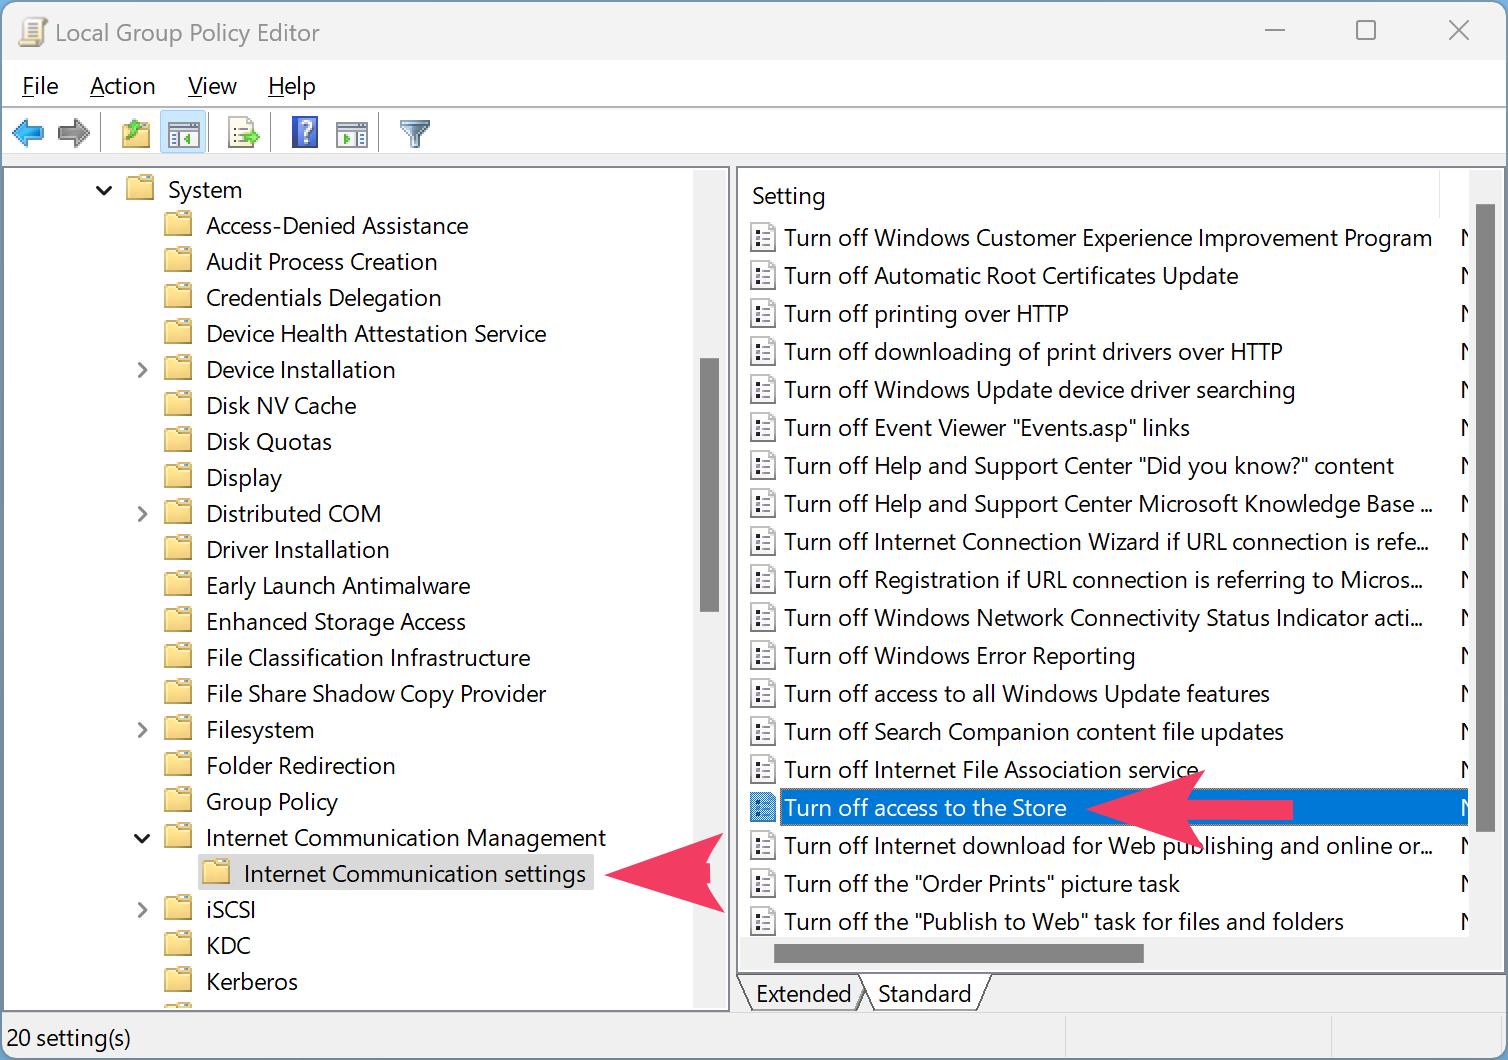
Step 3. On the right-side pane of the “Internet Communication settings” folder, double-click on the policy name that says Turn off access to the Store.
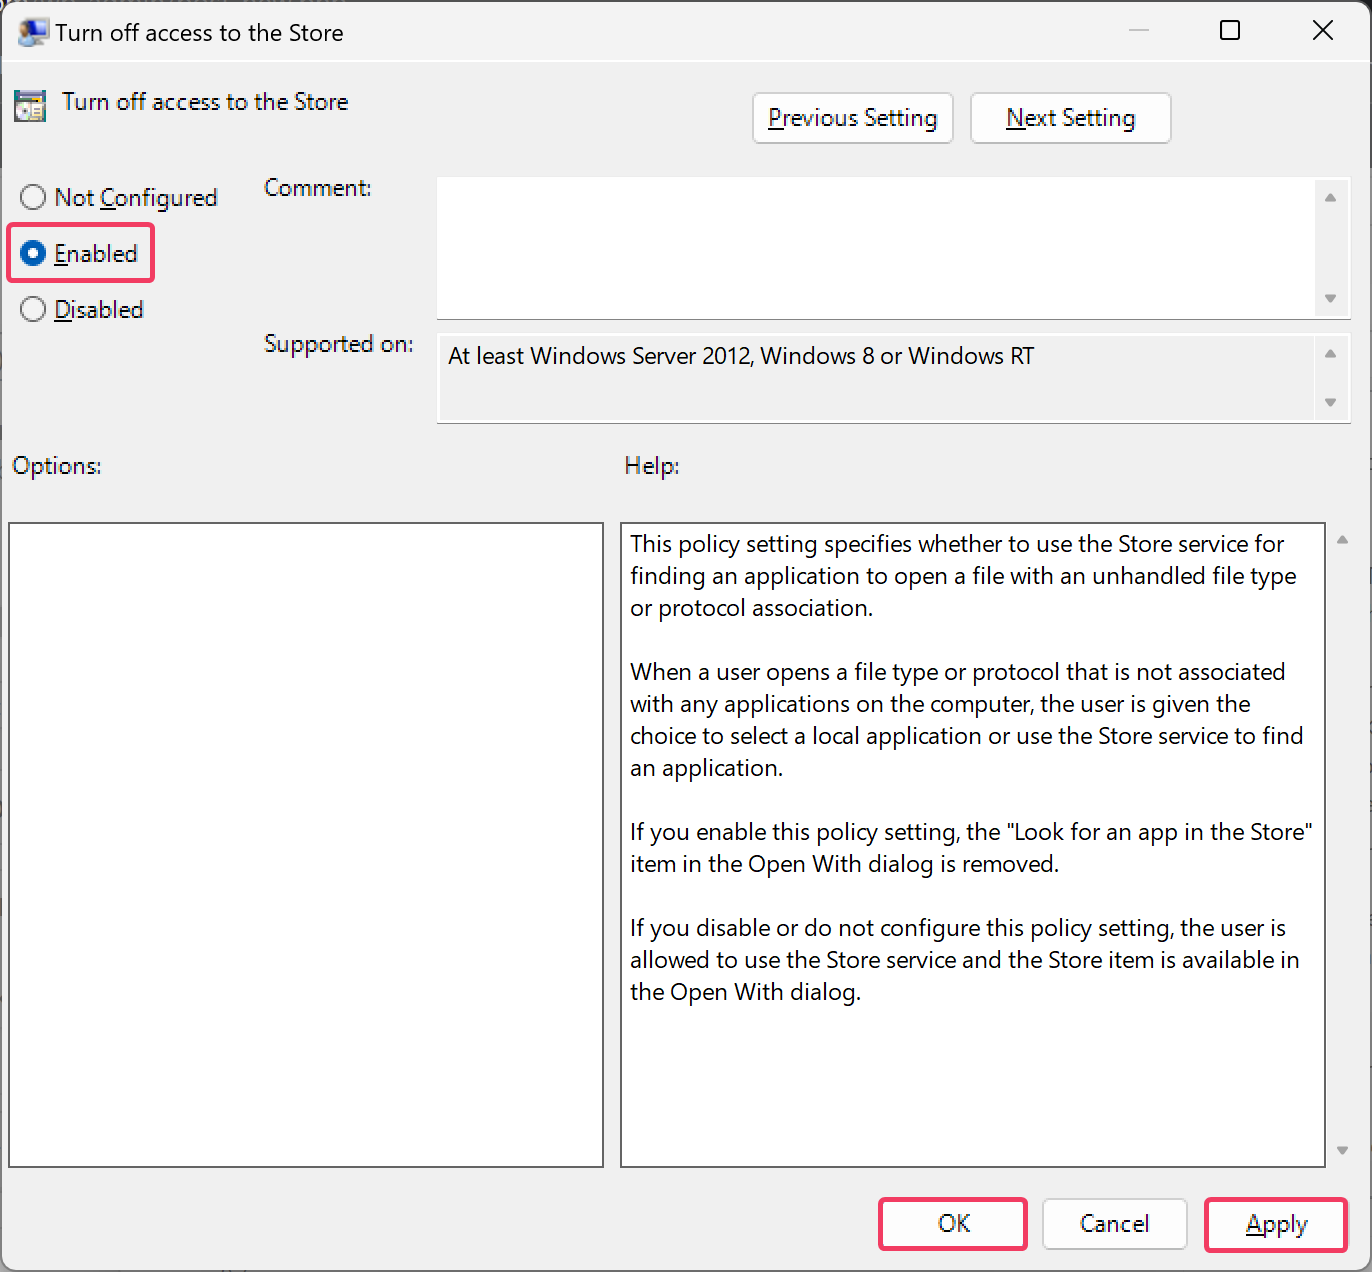
Step 4. Select the Enabled or Not Configured option to remove or add the “Look for an app in the Microsoft Store” context menu, respectively.
Step 5. At last, restart your computer to see the changes.
Conclusion
In conclusion, changing the default app or selecting the “Look for an app in the Microsoft Store” option when opening a file is a handy feature in Windows 11. However, if you find the option useless and want to hide it, you can do so using Registry Editor or Local Group Policy Editor. Through Registry Editor, you need to create a new key and DWORD value and set its Value data to 1 to remove the context menu item. Using Local Group Policy Editor, you need to navigate to the “Internet Communication Management” folder and enable or disable the “Turn off access to the Store” policy. After making the changes, restart your computer to apply the settings.