While installing Windows 11 on a computer, Microsoft insists you link your PC with a Microsoft account. Also, to install Windows 11 Home Edition, you need to sign in with a Microsoft Account to complete the setup. Most Windows users do not want to login into their PC with a Microsoft account and then want to remove it from their computer after completing the Windows 11 setup.
Login into Windows PC using a Microsoft account has its own advantages. By login into your Windows PC with Microsoft account, you will get additional features, such as OneDrive, Microsoft Store, and the availability of sync service. All these features are handy; however, it is also possible to remove the Microsft account from Windows 11.
By removing the Microsoft account from your PC, your Windows PC will not sync your PC with the cloud. Many Windows users store sensitive data on their PC and don’t want to upload their personal stuff online. If you are also a privacy concern and don’t want to get synced your PC with Microsoft Account, there is a provision to remove this account from your computer.
All you need to do is add a local account to your computer and then log into your PC with that account. Then you can easily remove your Microsoft Account from your computer. Otherwise, the option to remove the Microsoft account will be greyed out because your computer needs at least one administrator account to login into your PC.
To remove Microsoft Account from your PC, it is mandatory to have a local administrator account. Hence in this gearupwindows article, we will first add an administrator account and then show the process to eliminate Microsoft Account from your PC.
How to Create a Local Administrator Account on Windows 11?
To create a Local Administrator Account on Windows 11, use these steps:-
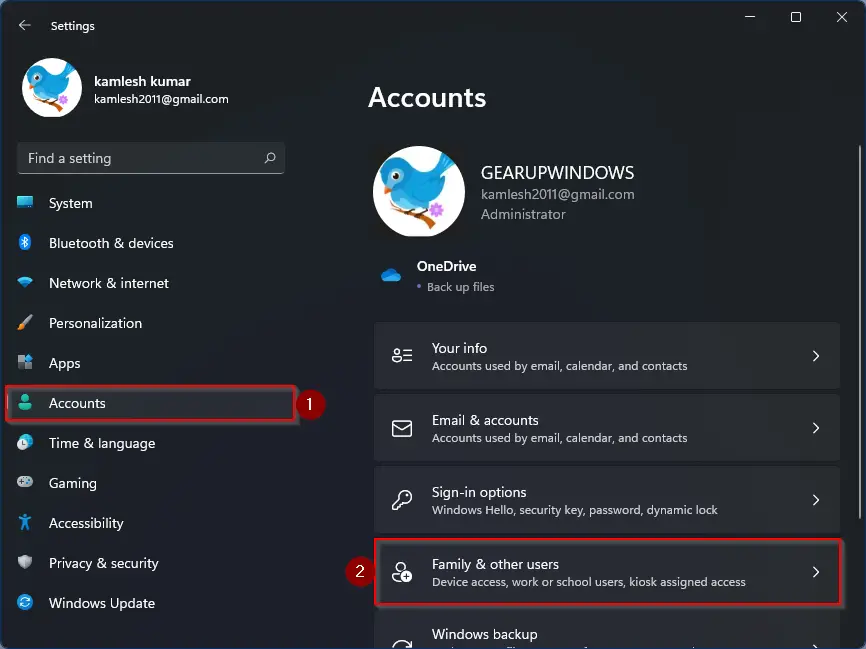
Step 1. Open the Settings app and then click on the Accounts category from the left side pane. On the right of Accounts, click on the Family & other users tab.
Step 2. Now, click on the Add account button under the Other users section.

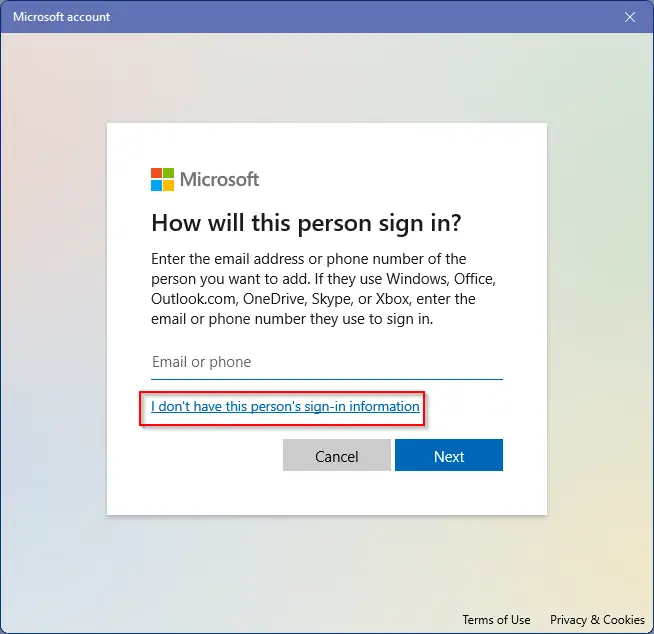
Step 3. On the pop-up window that appears, click the link labeled with I don’t have this person’s sign-in information.
Step 4. On the next window, click on the link Add a user without a Microsoft account.

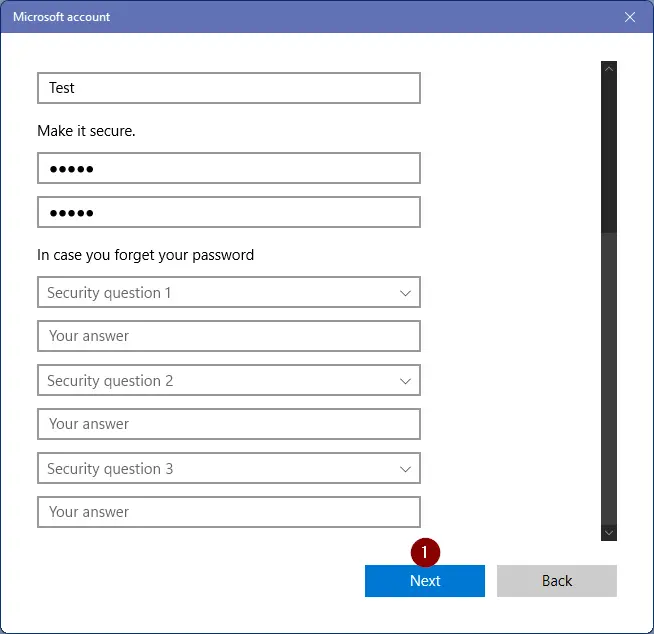
Step 5. Now, type an account name in the User Name box. Enter a secured password in the password box and then reconfirm with the same password in the next box. Now scroll down and select the security questions and reply to them. Finally, click the Next button.
Step 6. Finally, you should see the newly created account under the “Other users” section.
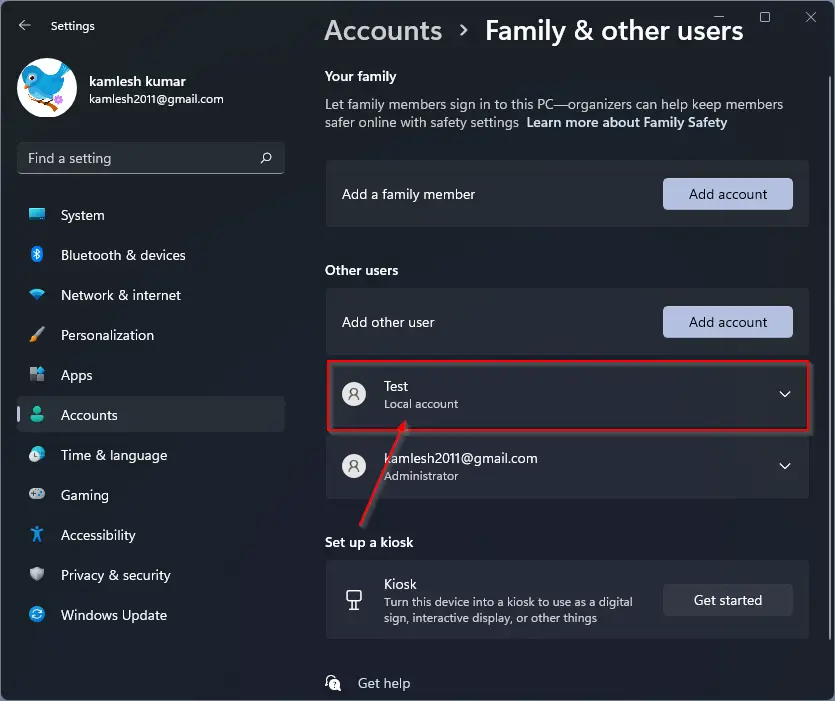
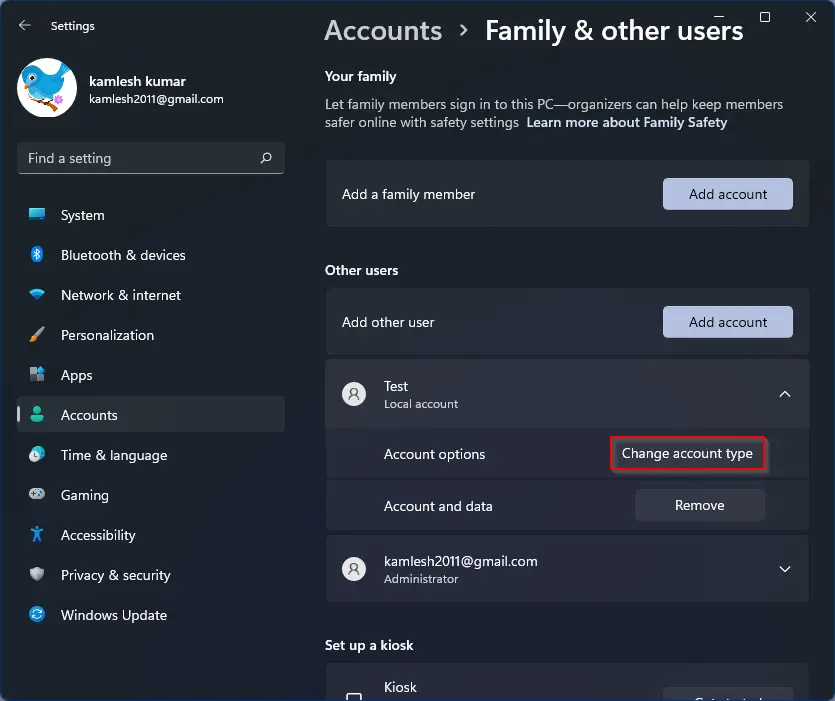
Step 7. Although you have created a local account on your PC, it has limited rights, which means it does not have administrative power. To remove your Microsoft Account from your computer, you need an administrator account. So, we need to provide administrator power to the newly created account on Windows 11. For that, click anywhere on the newly created user account to expand it and then click on the Change account type button.
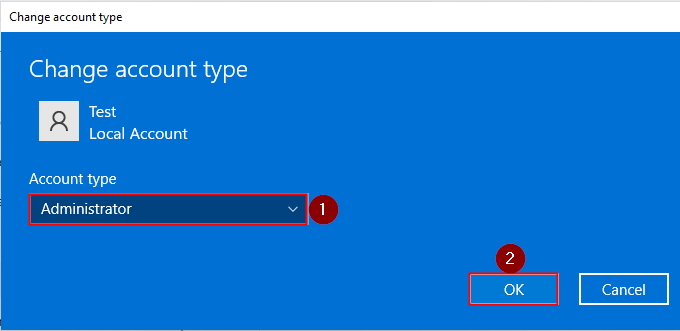
Step 8. Now, a new pop-up window will open “Change account type.” From the drop-down menu of “Account type,” select the Administrator option. Finally, click on the OK button to make it administrator of your Windows 11 PC.
Now, you have a local user account on your Windows 11 PC with administrative rights. You can kick out any user account from your PC as well as your cloud account.
How to Remove Your Microsoft Account from Windows 11?
Follow these steps to remove your Microsoft Account from Windows 11:-
Step 1. Log in to your Windows 11 machine with your local administrator account.
Step 2. Open the Settings app by pressing the Windows + I keys. Click on the Accounts category from the left side pane, and on the right of it, select the Family & other users tab.
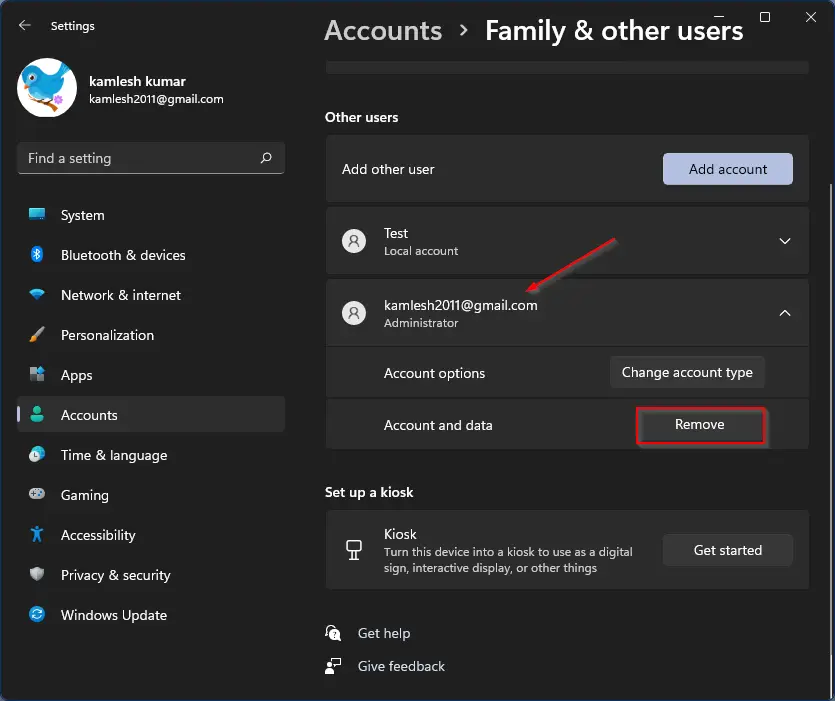
Step 3. Here, you will find all your account is listed, including the Microsoft Account that you added during the installation of Windows 11. Click anywhere on the cloud account to expand it, and then click on the Remove button.
Step 4. Next, click the Delete account and data button on the pop-up window.
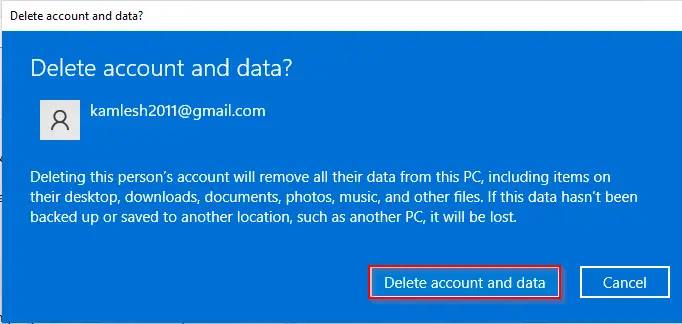
Once you perform the above steps, your Microsoft account and associated profile data are deleted from your PC.
Conclusion
In conclusion, while installing Windows 11, Microsoft requires you to link your PC with a Microsoft account. Although there are benefits to using a Microsoft account, some users may have privacy concerns and want to remove the account from their computer after completing the setup. To do so, it is necessary to first create a local administrator account on Windows 11 and then remove the Microsoft account. This article has provided a step-by-step guide on how to create a local administrator account and how to remove a Microsoft account from Windows 11. By following these instructions, users can easily manage their accounts and maintain the privacy of their personal data.