Windows 11 and 10 automatically assign a name to a network adapter based on the type (Wi-Fi or Ethernet). Sometimes, you might want to change the default name manually.
Windows allows you to change the name of a Wi-Fi or Ethernet network adapter through several methods. You can either use the Settings app, Control Panel, or Windows PowerShell to do the same.
In this gearupwindows article, you will learn to rename a network adapter on Windows 11 and 10.
How to Change the Name of the Network Adapter on Windows 11 through the Settings app?
To rename the Wi-Fi or Ethernet adapter’s name using the Settings app, do these steps:-
Step 1. Open Settings.
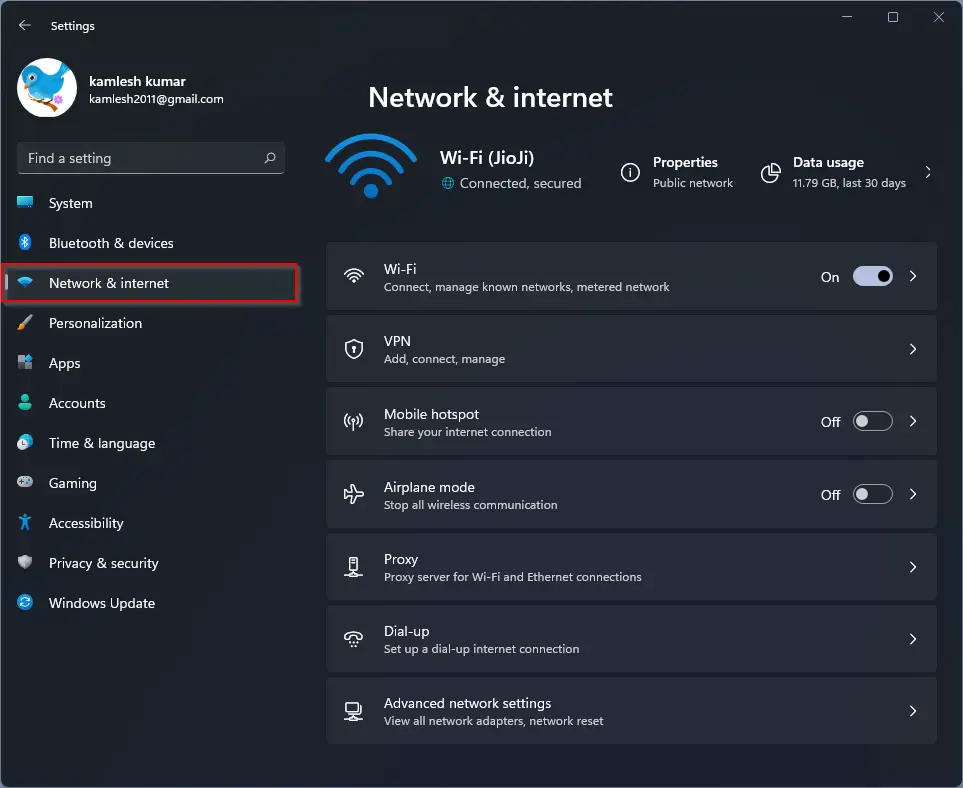
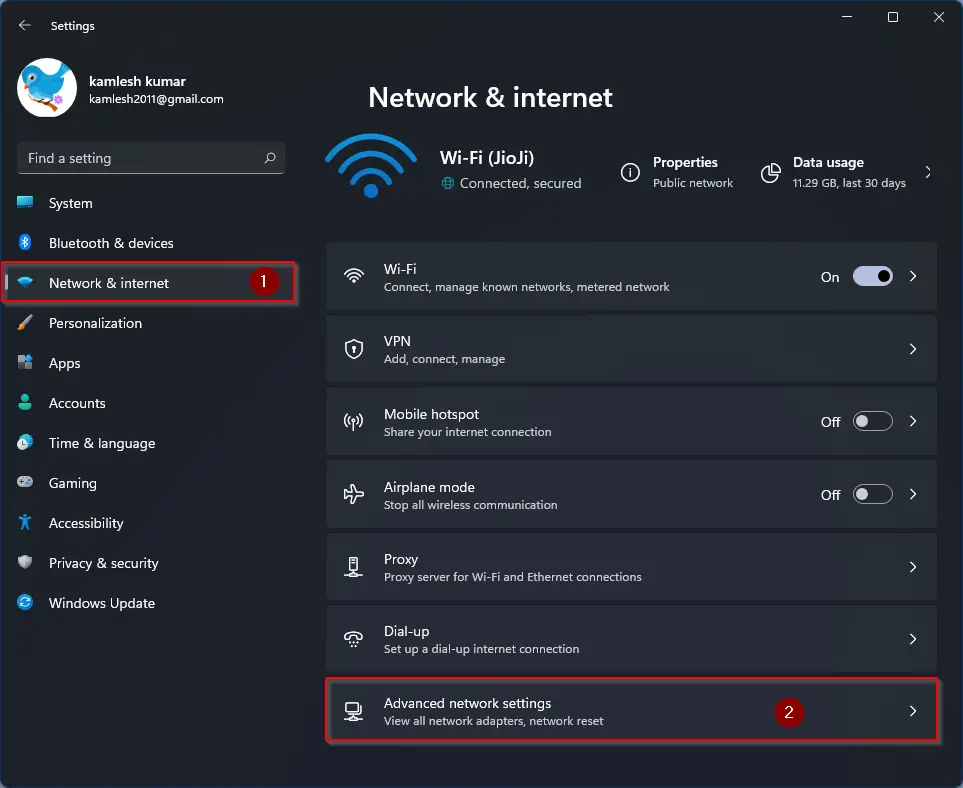
Step 2. Select Network & internet in the left sidebar.
Step 3. On the right sidebar, click the Advanced network settings tab.
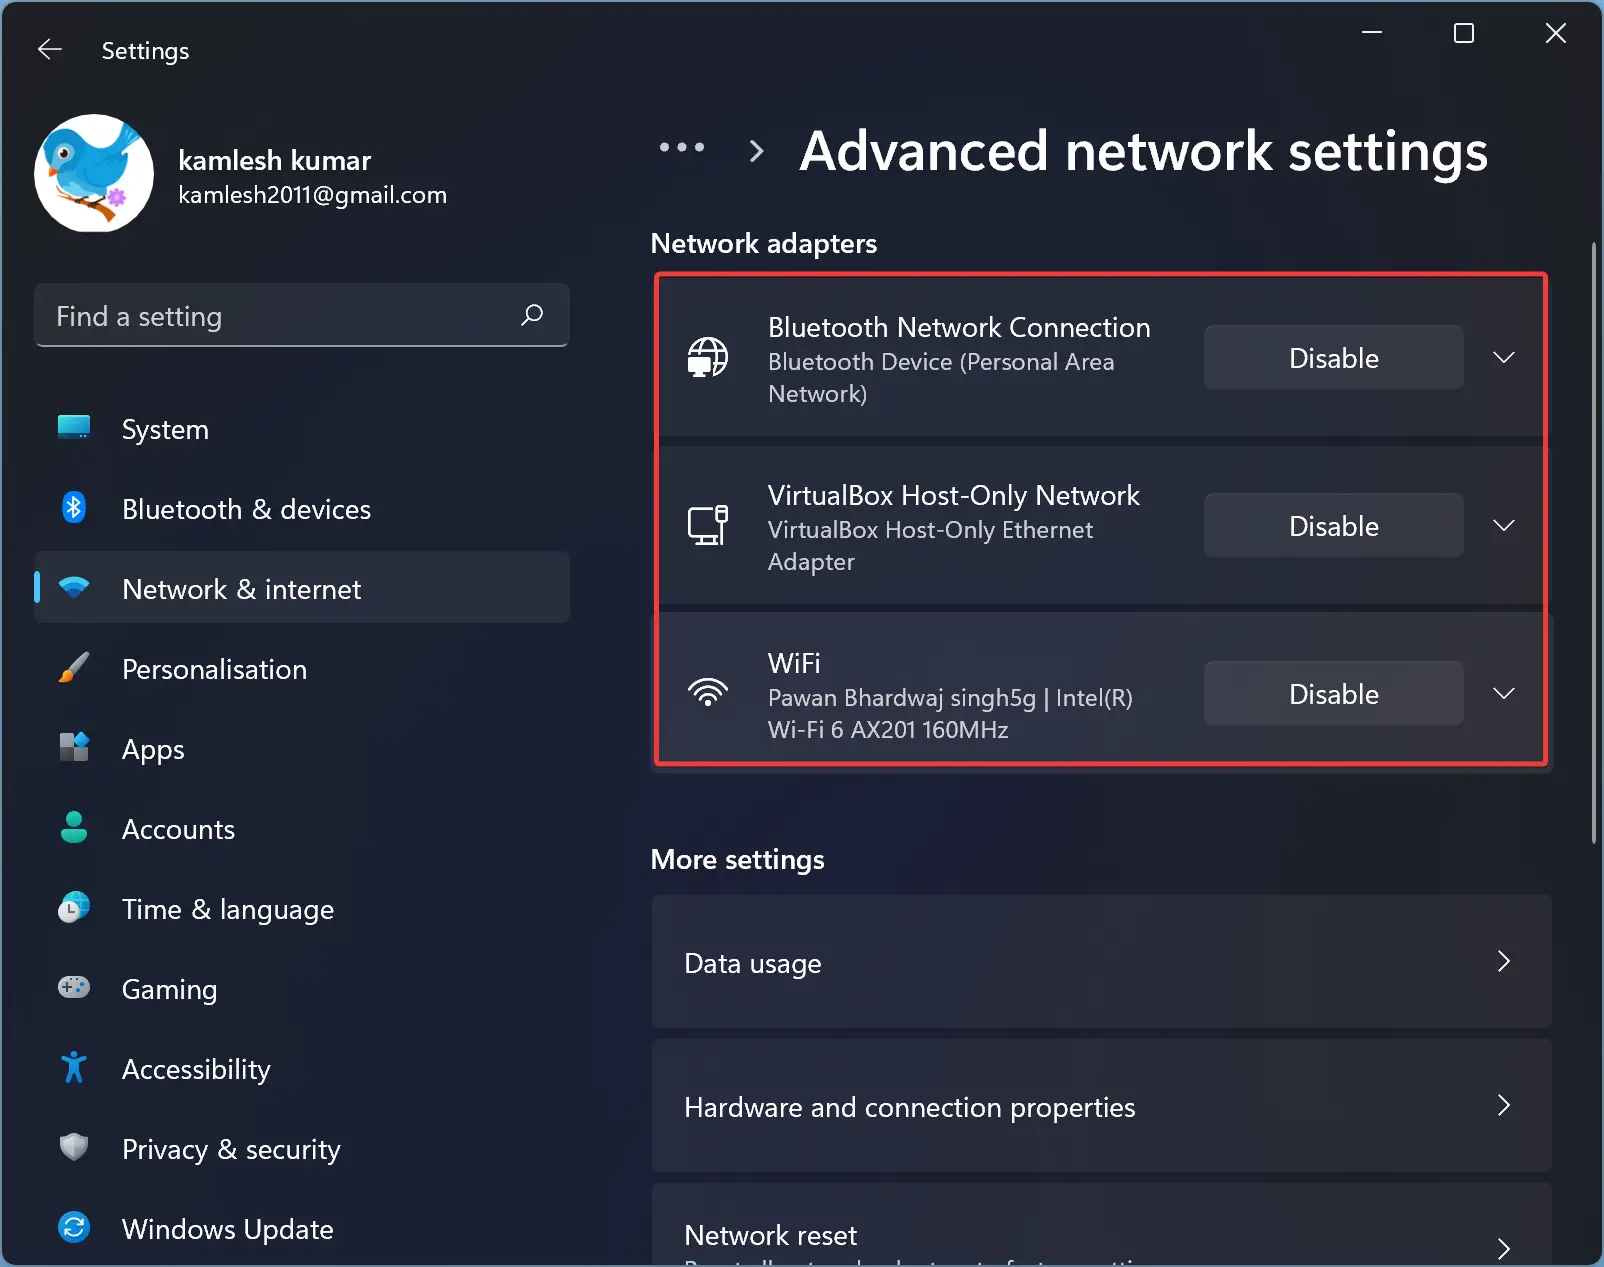
Step 4. Under the “Network adapters” section, expand the Wi-Fi or Ethernet adapter you want to rename.
Step 5. Click the Rename button beside the “Rename this adapter” option.
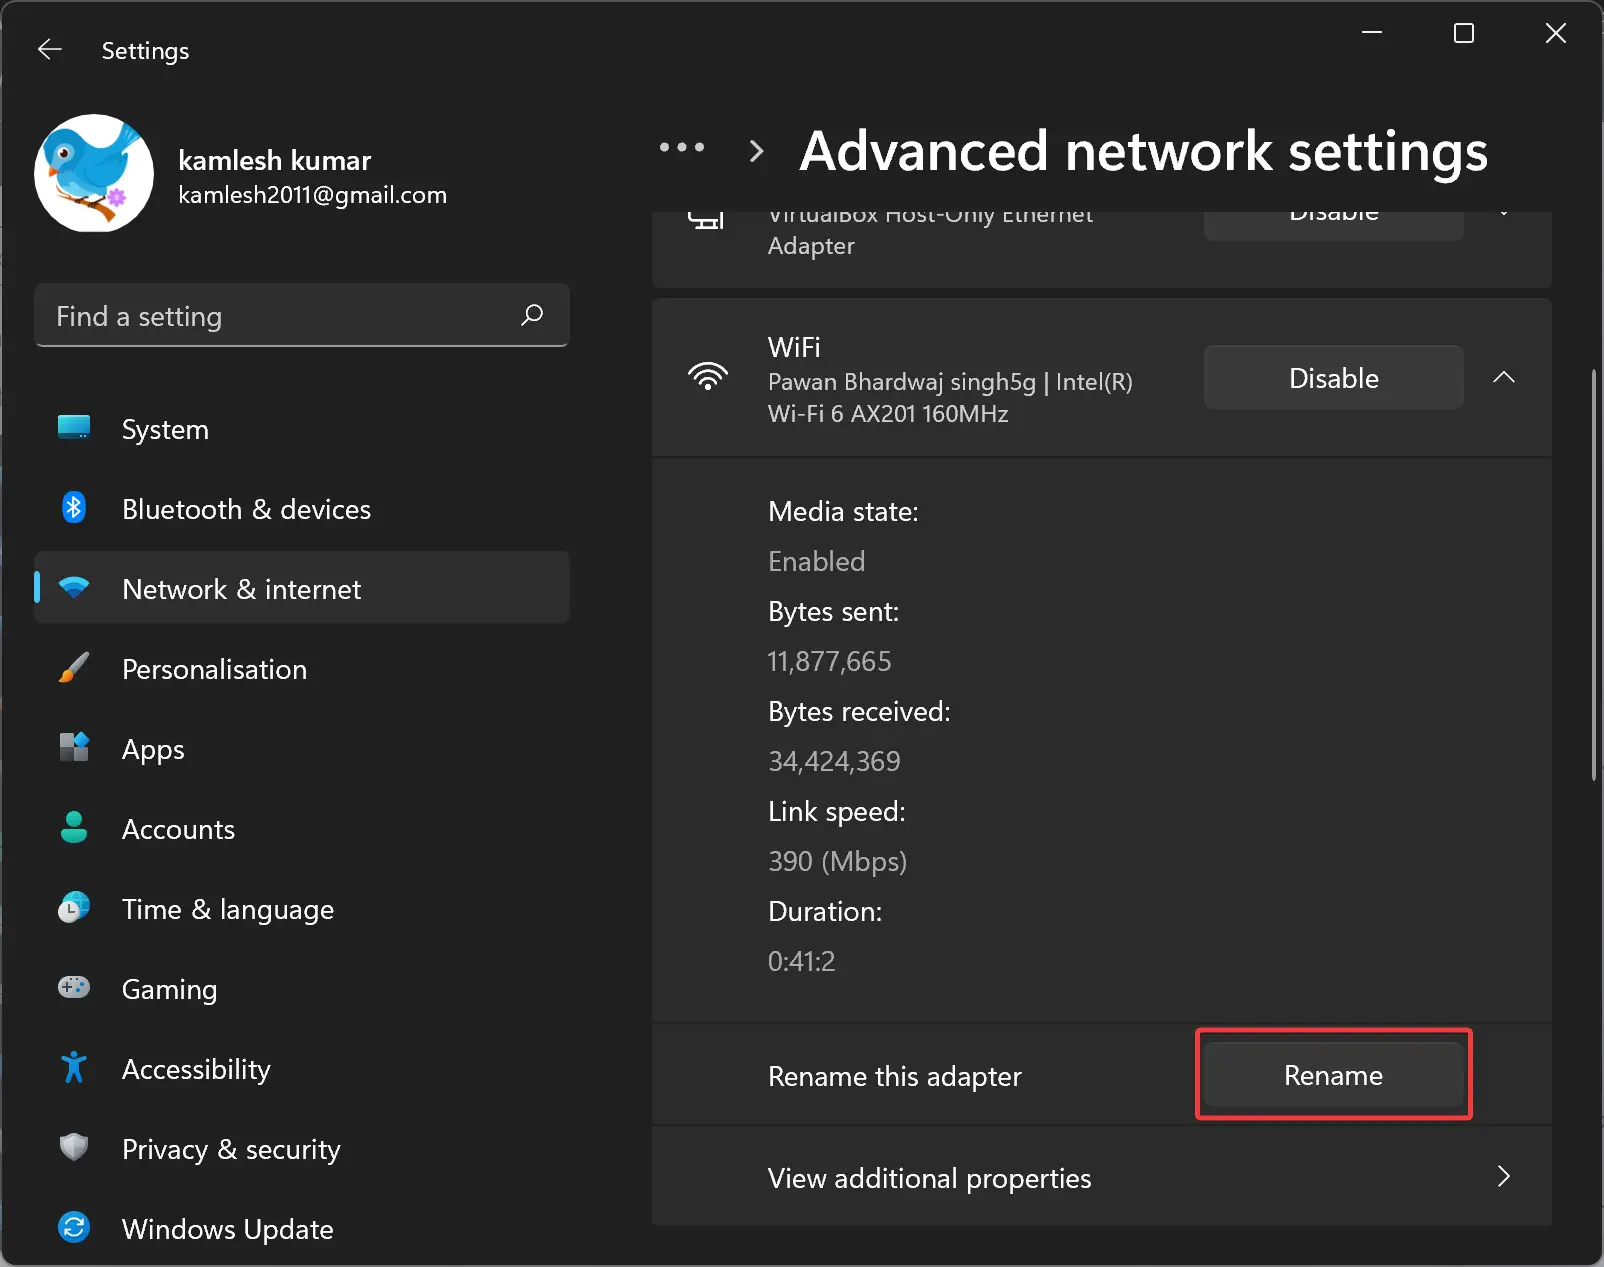
Step 6. Set a new name for your network adapter.
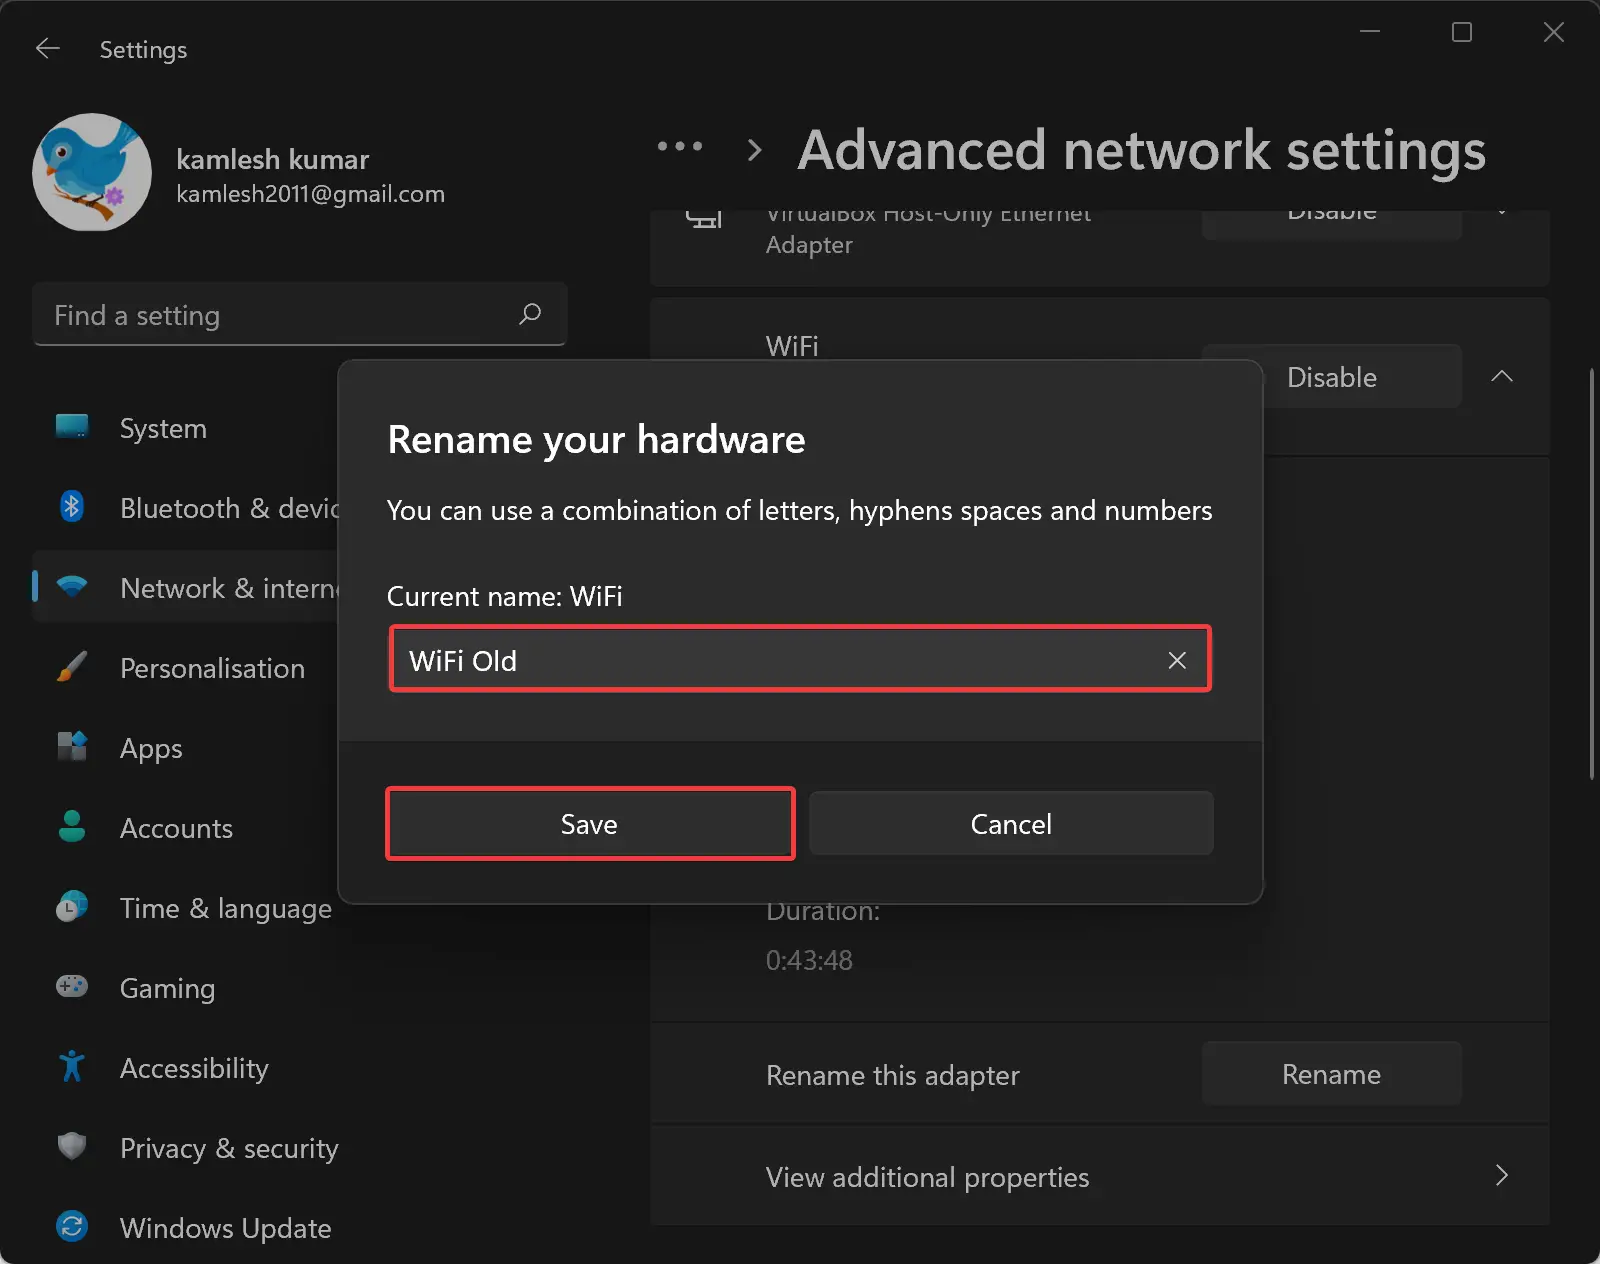
Step 7. Finally, click the Save button.
How to Rename Network Adapter on Windows 11 or 10 from Control Panel?
To change the name of a network adapter in Windows 11 or 10 from Control Panel, use these steps:-
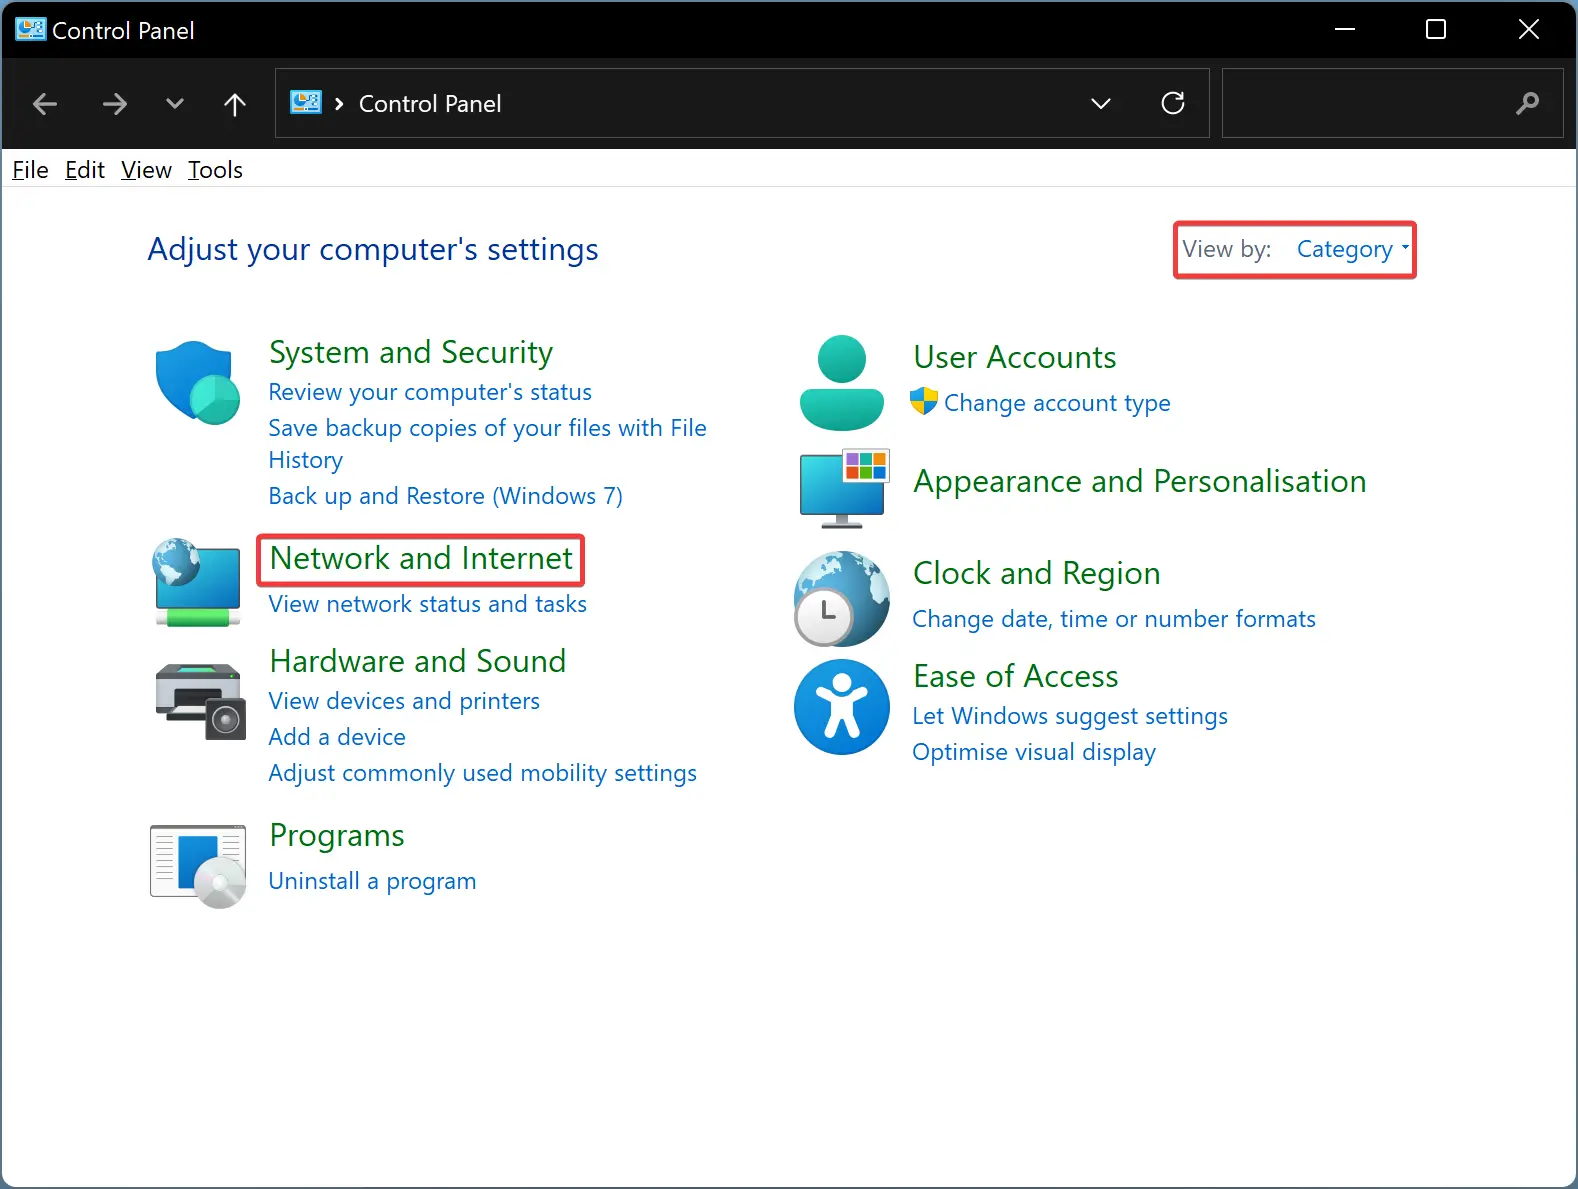
Step 1. First, open Control Panel.
Step 2. Set “View by” to Category and click Network and Internet.
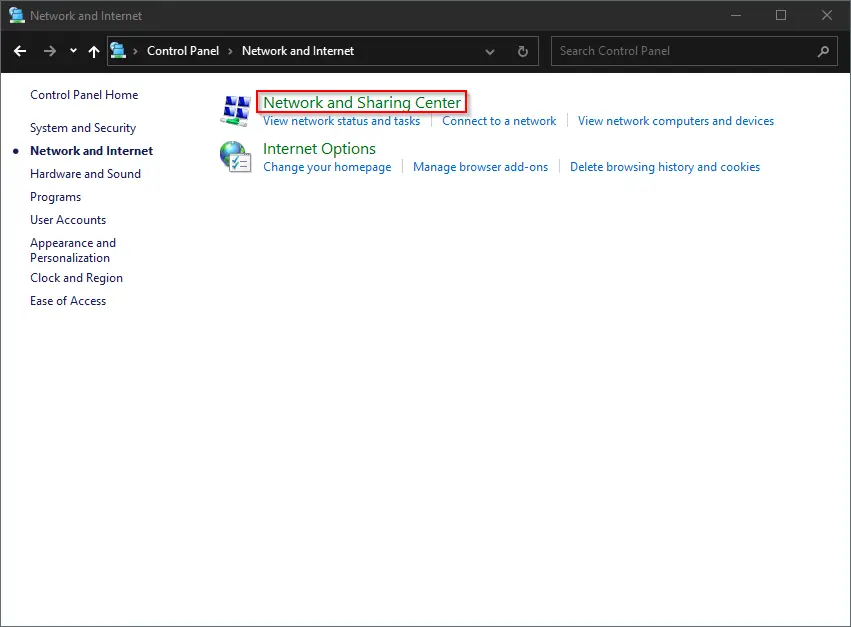
Step 3. Next, click on Network and Sharing Center.
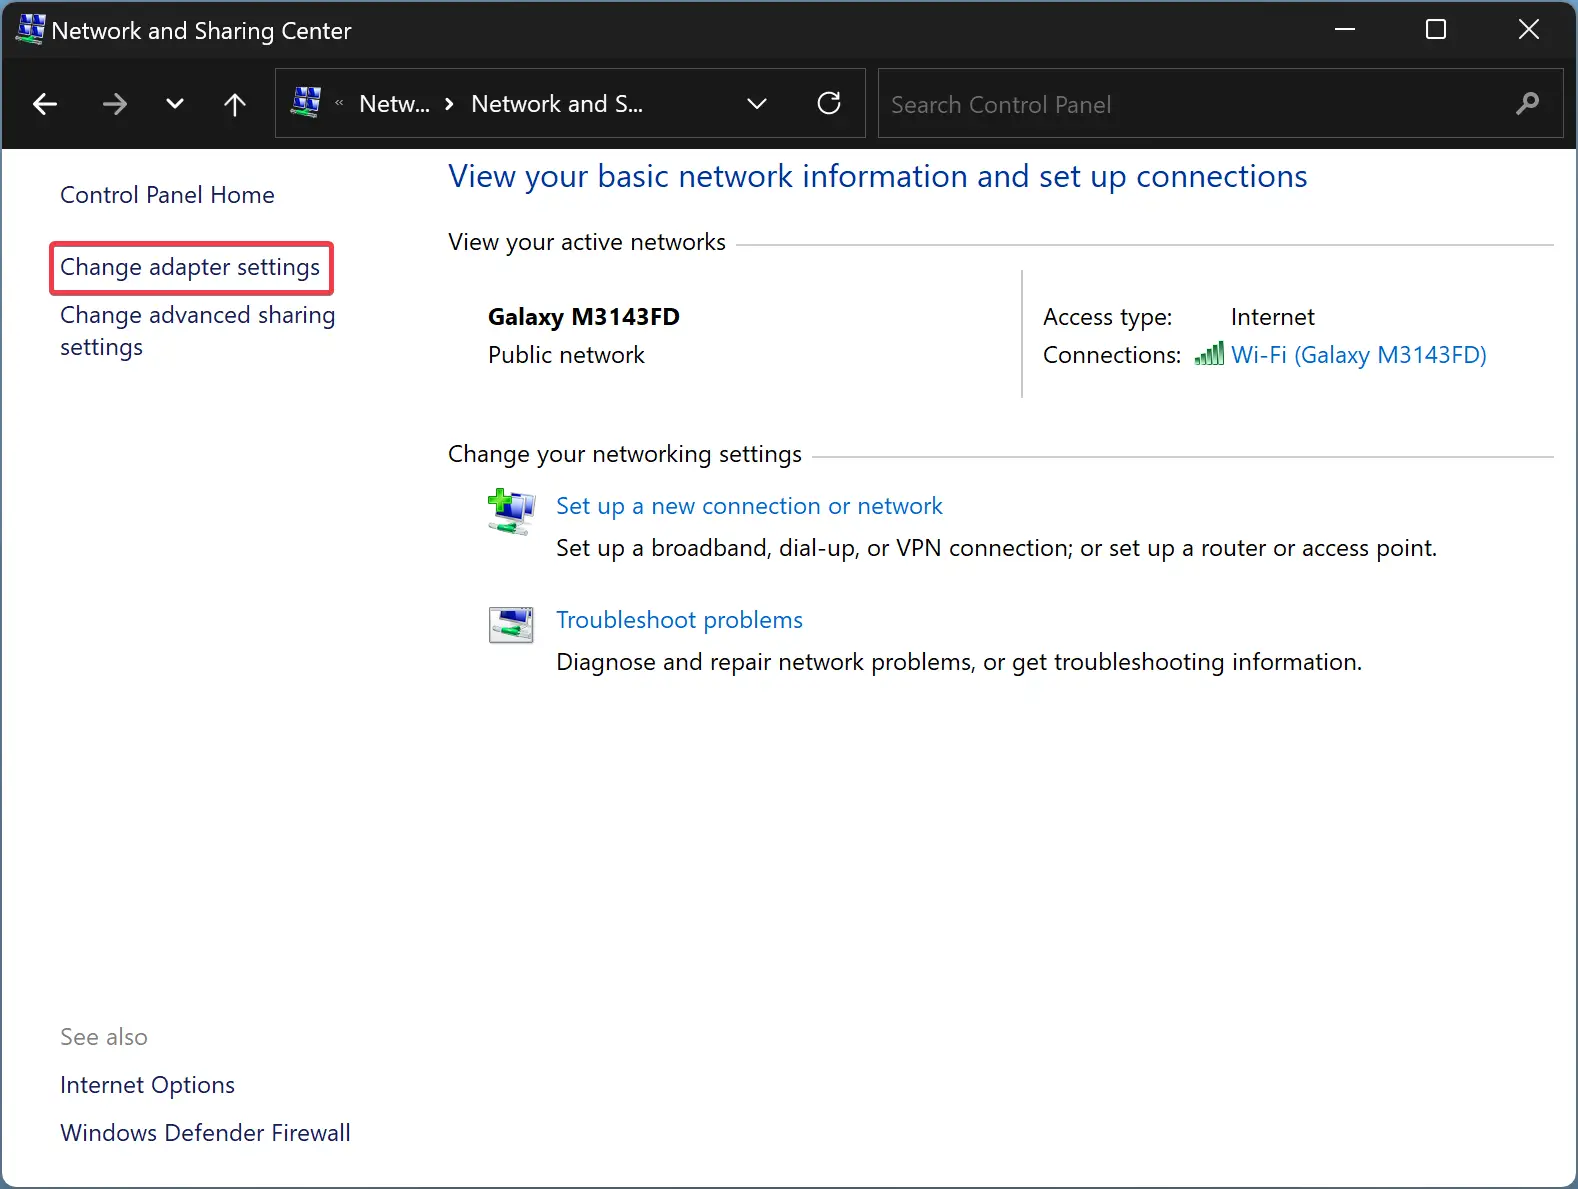
Step 4. Then, click on Change adapter settings in the left navigation pane to open the “Network Connections” window.
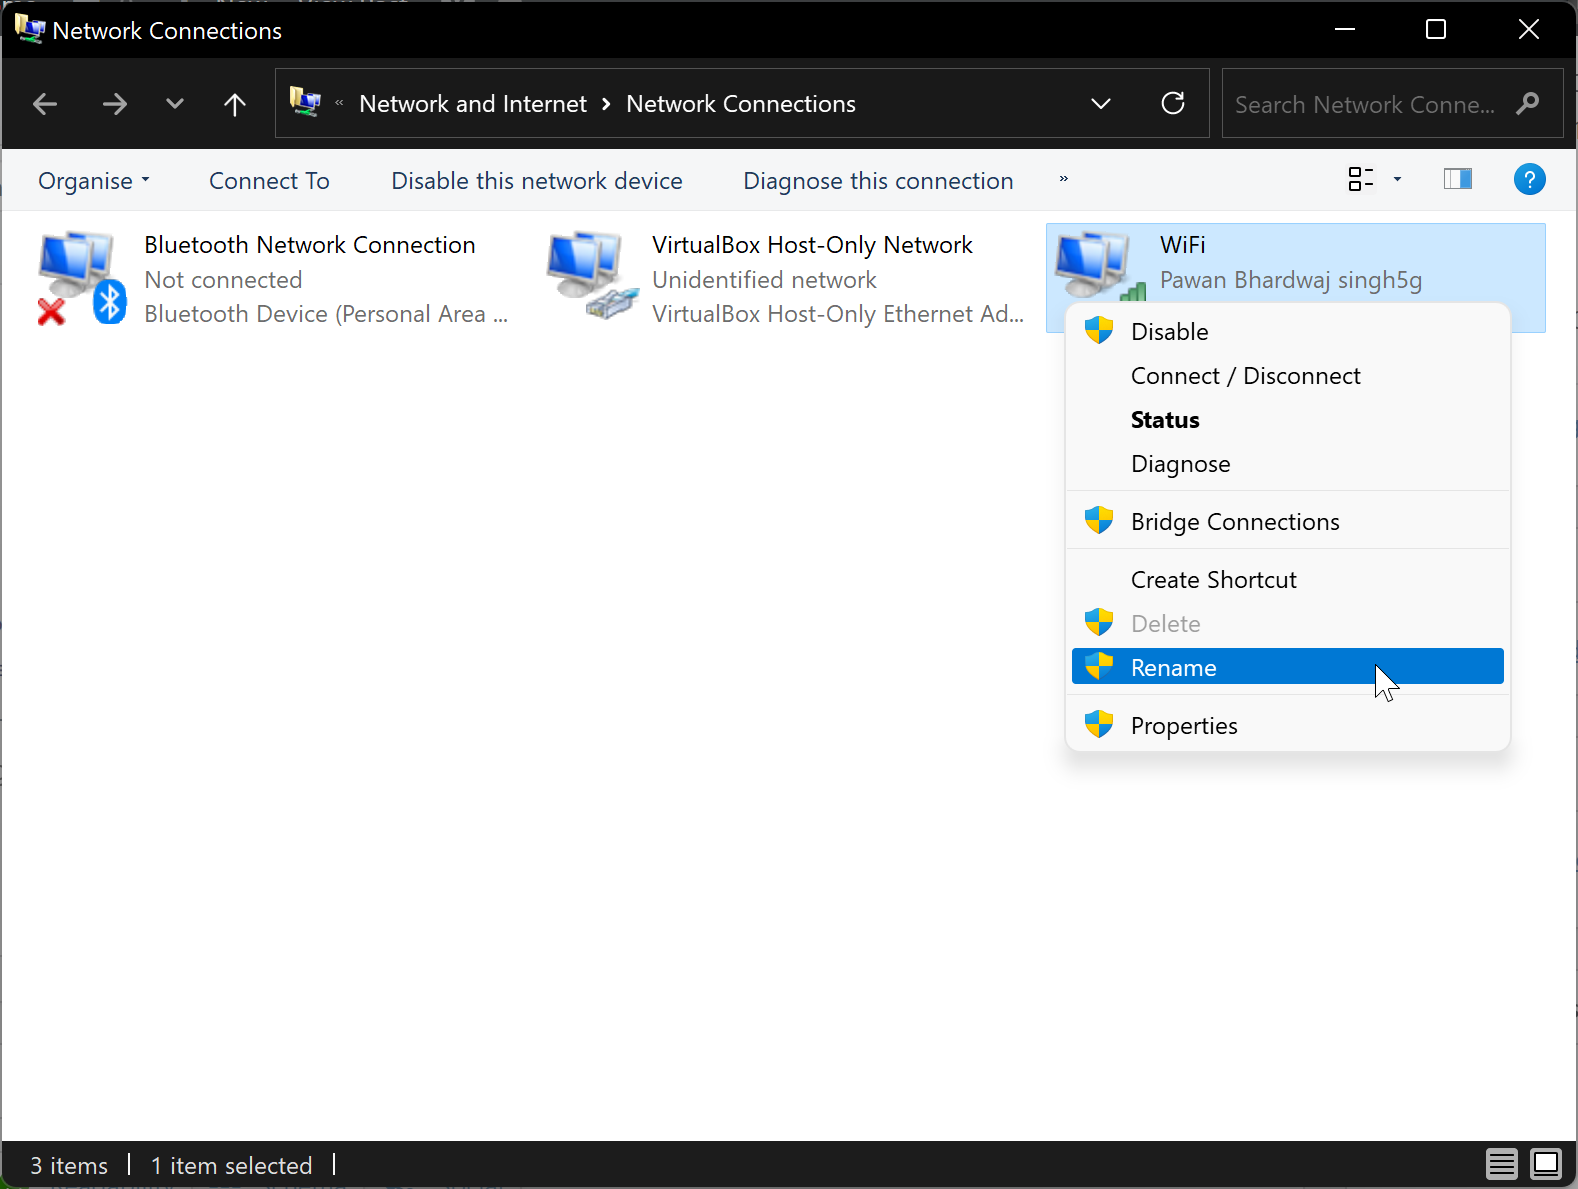
Step 5. Now, right-click the Wi-Fi or Ethernet adapter and select the Rename option.
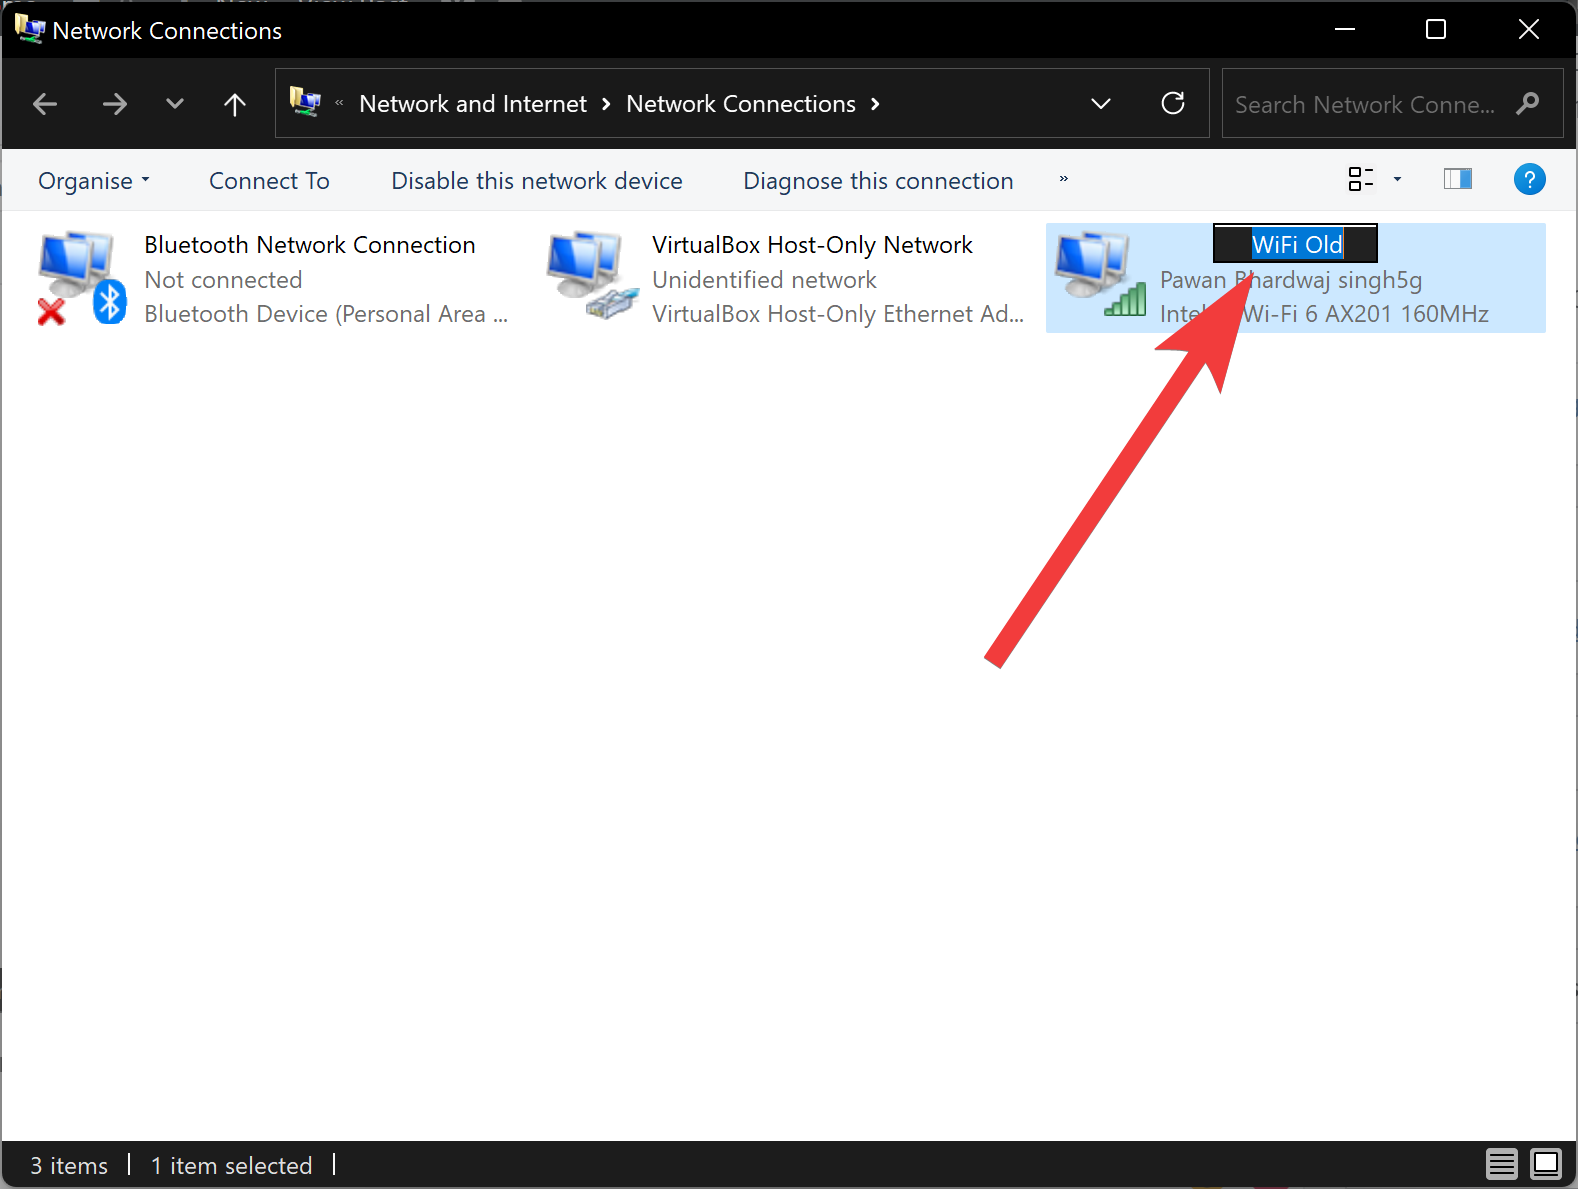
Step 6. Type a new name for the adapter and press Enter on the keyboard.
How to Rename Network Adapter on Windows 11 or 10 using PowerShell?
To change the network adapter’s name on Windows 11 or 10 using PowerShell, do these steps:-
Step 1. Open PowerShell with administrative privilege.
Step 2. Then, type the following command and hit the Enter key on the keyboard to view all the network adapters on your computer:-
Get-NetAdapter | Format-List -Property Name
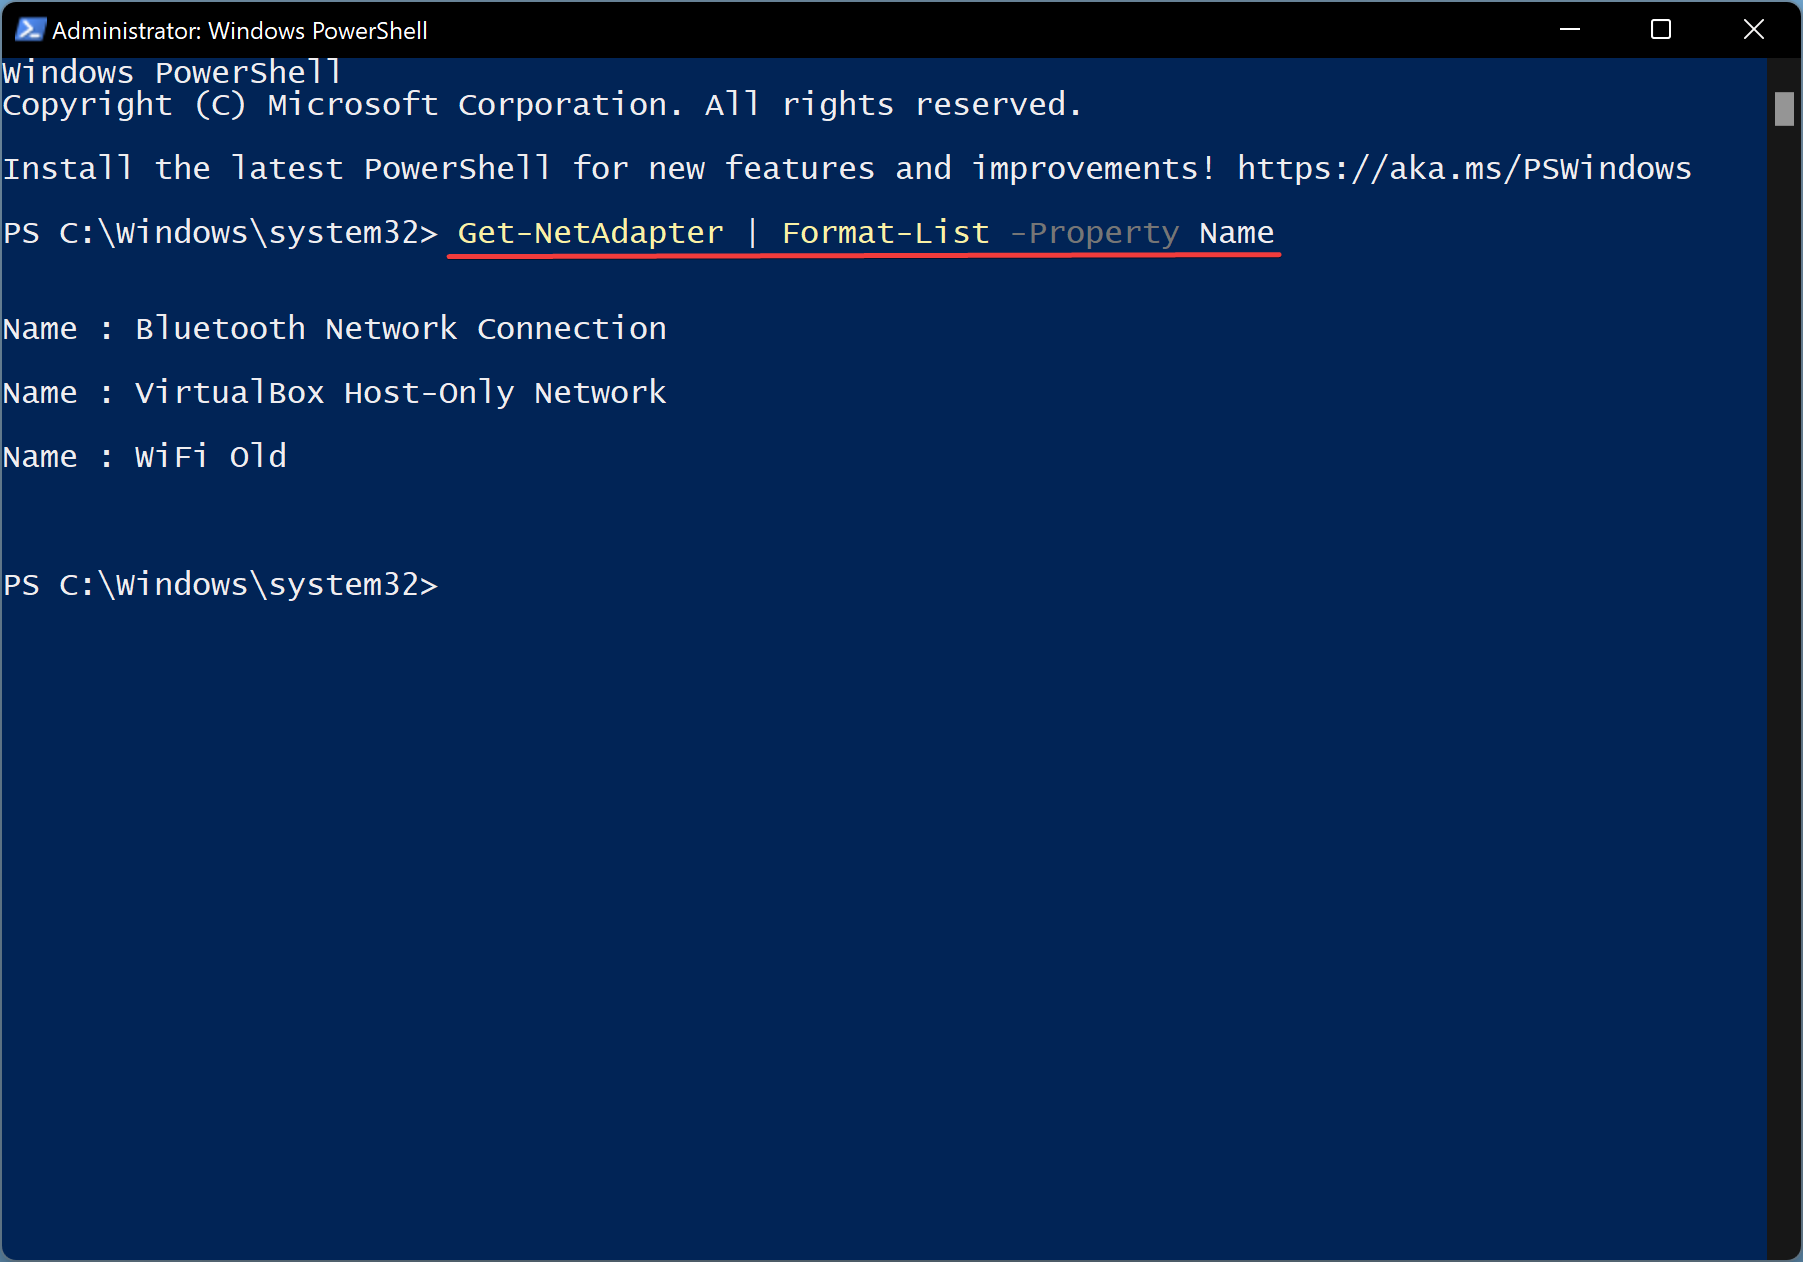
Step 3. Note down the adapter name.
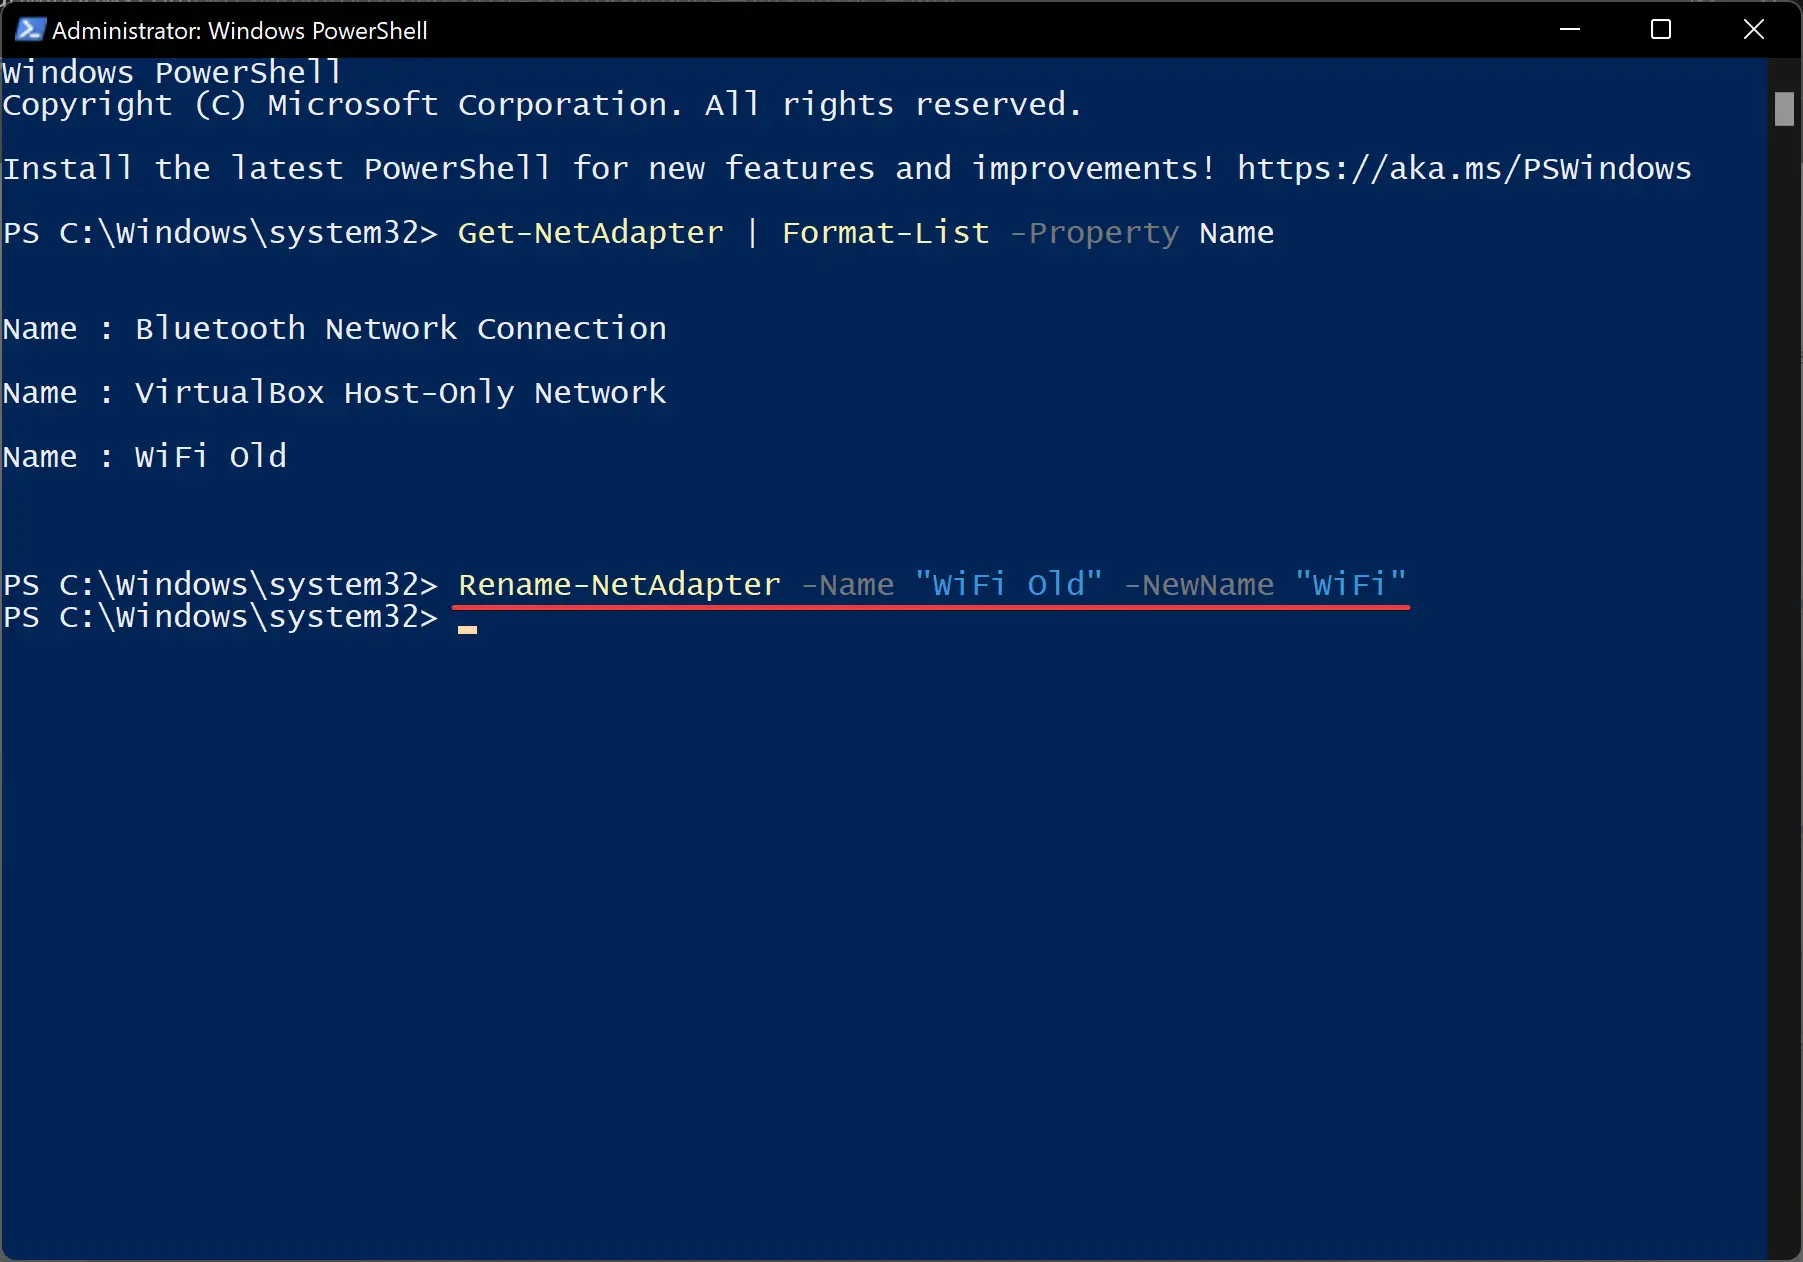
Step 4. Now, type the following command and press the Enter key on the keyboard to rename the Wi-Fi or Ethernet adapter:-
Rename-NetAdapter -Name "OLD-NAME" -NewName "NEW-NAME"
Note: In the above command, replace “OLD-NAME” with the current name and the “NEW-NAME” with the new name you want to assign your Wi-Fi or Ethernet adapter. For instance, the following command will rename “WiFi Old” to “WiFi”:-
Rename-NetAdapter -Name "WiFi Old" -NewName "WiFi"
How to Change Network Adapter Name in Windows 11 or 10 through Command Prompt?
To rename the network adapter name on Windows 11 or 10 using Command Prompt, use these steps:-
Step 1. Open an elevated Command Prompt.
Step 2. Then, type the following and hit the Enter key on the keyboard to display all network adapters on your PC:-
netsh interface show interface
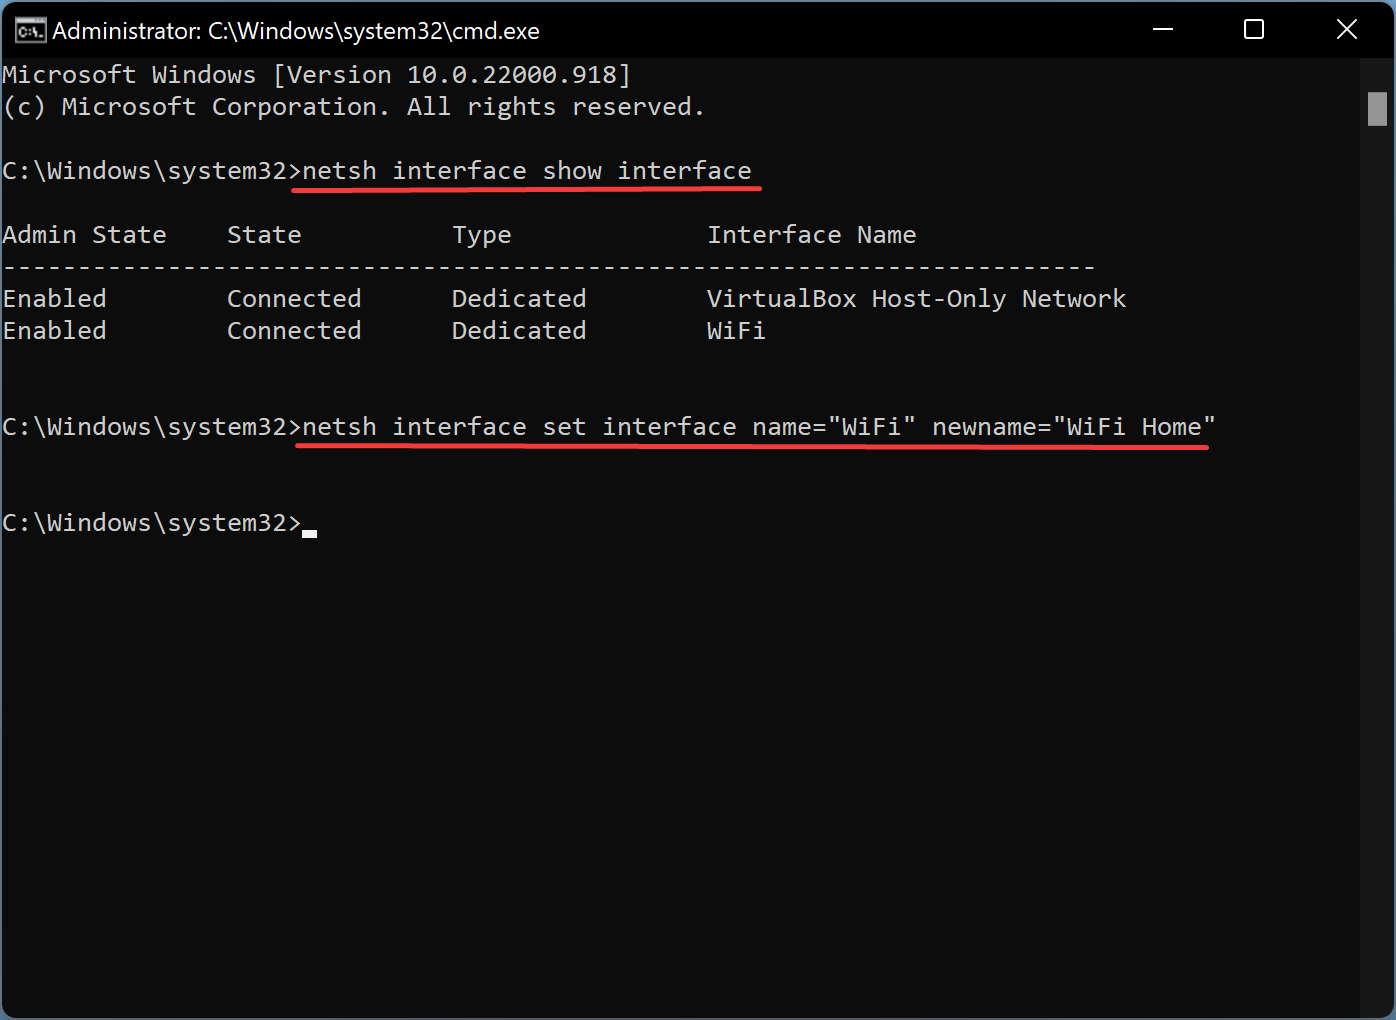
Step 3. Next, note down the interface name you want to rename.
Step 4. Now, type the following command and press Enter on the keyboard to rename the adapter name:-
netsh interface set interface name="OLD-NAME" newname="NEW-NAME"
Note: In the above command, replace “OLD-NAME” with the current name and the “NEW-NAME” with the new name you want to assign your Wi-Fi or Ethernet adapter. For example, the following command will rename “WiFi” to “WiFi Home”:-
netsh interface set interface name="WiFi" newname="WiFi Home"
Conclusion
In conclusion, changing the name of a network adapter in Windows 11 and 10 is a simple task that can be done using different methods such as the Settings app, Control Panel, PowerShell, and Command Prompt. By following the steps outlined in this gearupwindows article, users can easily rename their Wi-Fi or Ethernet adapter with their preferred name. Whether you prefer using the graphical interface of the Settings app or Control Panel, or the command-line interface of PowerShell or Command Prompt, Windows provides flexibility to accomplish the task.