Are you not happy with the current name of your PC and want to rename your computer to Windows 11? It is always a better idea to give a meaningful name to your computer. If, during the installation of Windows 11, you have not decided on a proper name or assigned a random one and now you want to change its name, it is possible on Windows 11 PC.
It is challenging to find out if you have used random names, especially if you have many PCs over the network. It is harder to find a needed computer when you share files between PCs using Wi-Fi or any other method. You might prefer to rename Windows 11 PCs after setup so that you can easily recognize them—for example, GearUpWindows-PC, Pammi-PC, etc.
In this gearupwindows article, we will guide you on renaming your PC name in Windows 11.
Renaming your computer name is quite easy, and there are several ways to do this. You can use any long name you want. In the PC name, you can include Latin letters, numbers, and hyphens. However, spaces and symbols (except hyphens) are not allowed. That means we can not name my PC GearUpWindows-PC-1 or GearUpWindows PC 1. When I try to rename my PC as GearUpWindows-PC-1 or GearUpWindows PC 1, Windows 11 will not accept it.
How to Rename your PC in Windows 11 using the Settings app?
Follow these steps to rename your PC in Windows 11 using the Settings app:-
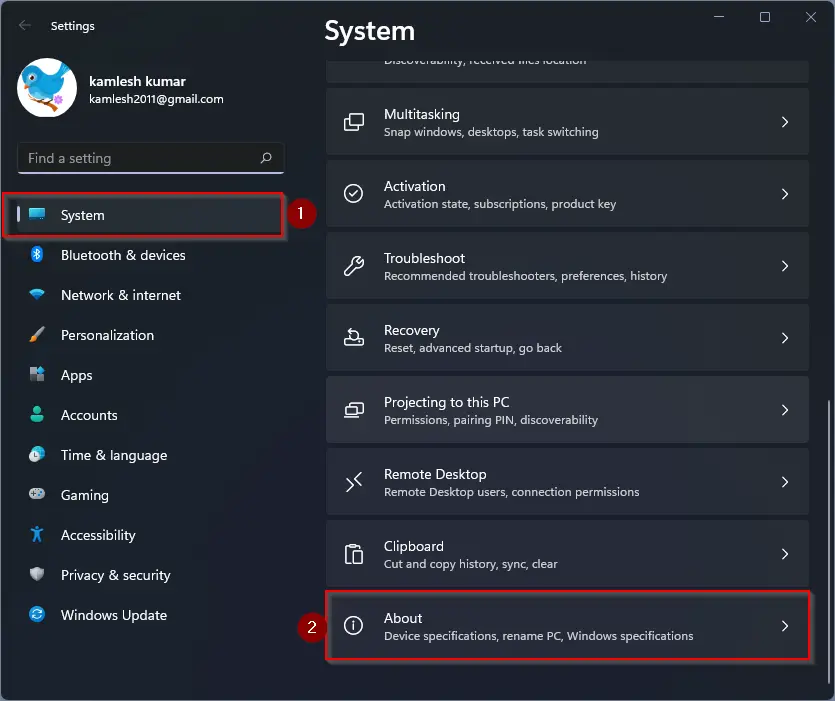
Step 1. Launch the Settings app by pressing the Windows + I keys or any other method and then select the System category from the left side pane.

Step 2. Now, please scroll down on the right-side pane of System and then click on the About tab.
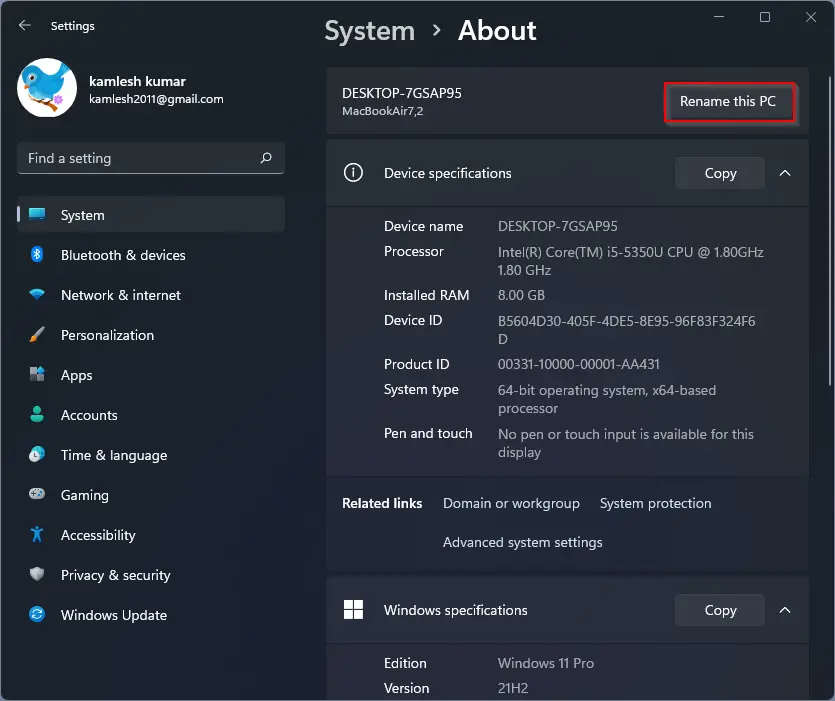
Step 3. Click the Rename this PC button on the About page.
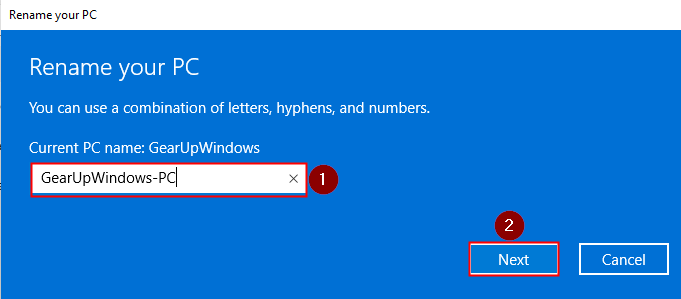
Step 4. In the “Rename your PC” pop-up window, write the new name of your PC in the text field and then click the Next button.
Step 5. When prompted, click on the Restart now button to apply the changes.

If you wish to reboot your computer later, click on the Restart later button on the above step. You should also note that without restarting your computer, you can not change your PC name again.
How to Rename your PC in Windows 11 using Control Panel?
Control Panel is still part of Windows 11, and you can use it to rename your PC.
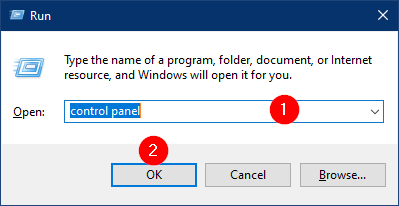
Step 1. Open Control Panel.
To launch the Control Panel, invoke the Run dialog box by pressing the Windows + R keys. In the Run box, type Control Panel and hit Enter from the keyboard.
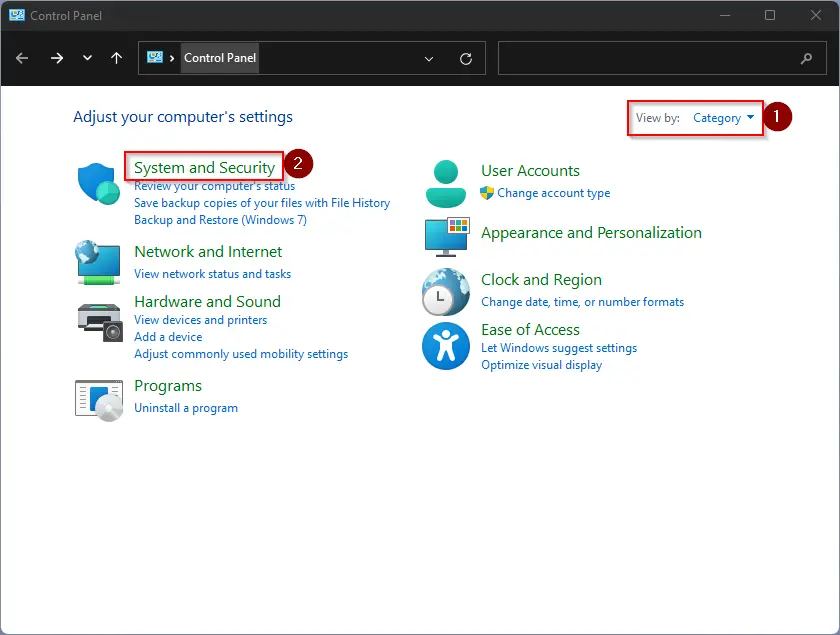
Step 2. In the Control Panel window, set “View by” to Category, and then click on the System and Security category.
Step 3. On the System and Security window, click on the link labeled Allow remote access.

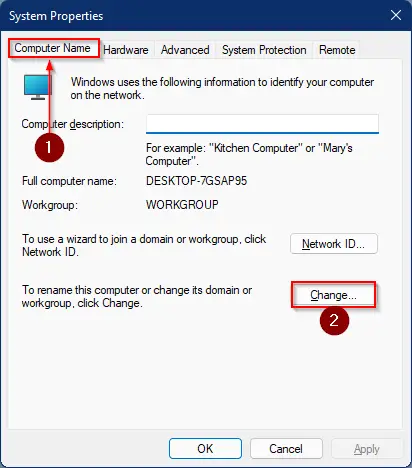
Step 4. Now “System Properties” windows will open. Select the “Computer Name” tab and then click on the Change button.
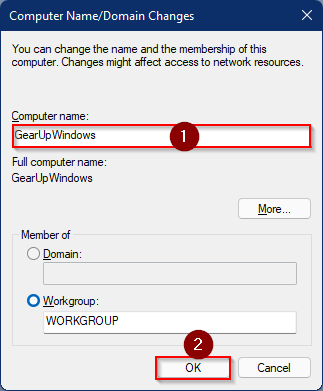
Step 5. On the new pop-up “Computer Name/Domain Changes” window, write your new PC name under the “Computer name” box. Once done, click on the OK button.
Finally, reboot your computer to apply the changes.
How to Rename your PC in Windows 11 using PowerShell?
To rename your PC in Windows 11 through PowerShell, follow these steps:-
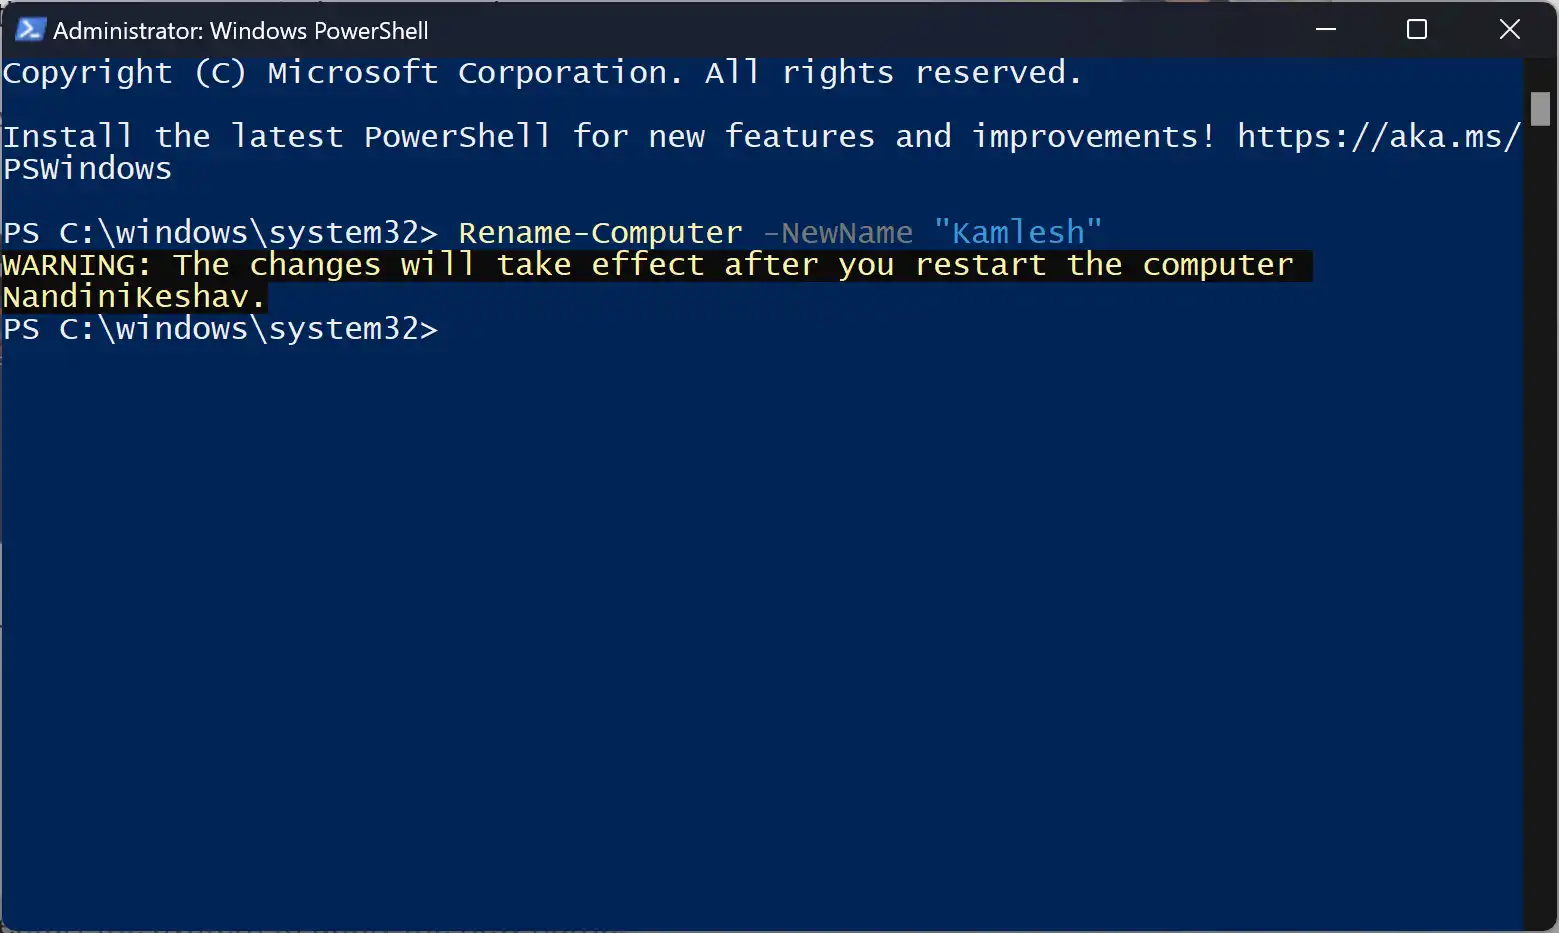
Step 1. First, open Windows PowerShell as an administrator.
Step 2. Next, enter the following command and press Enter:-
Rename-Computer -NewName "NEW_PC_NAME"
Step 3. Finally, enter the following command and press Enter to restart the device:-
Restart-Computer
Once you complete the above steps, Windows 11 will restart to apply the new name.
Conclusion
In conclusion, renaming your PC to a meaningful name in Windows 11 is a simple and easy process. It is always a good idea to give a descriptive name to your PC to easily identify it on your network or when sharing files. You can rename your computer using either the Settings app or Control Panel. While renaming your computer, keep in mind that spaces and symbols (except hyphens) are not allowed in the PC name. Once you have renamed your computer, make sure to restart it for the changes to take effect.