Windows 11 firewall is very useful in many cases, for instance, stopping a program from accessing the internet. By configuring the Windows firewall, you encountered several problems where some or all apps are not communicating or accessing internet connections as expected. There is only one solution, resetting the Windows firewall to its default state. Am I right?
Resetting any app, for example, the Settings app, will restore its settings to default. All the changes made by you will no longer exist, which means you can set up the program from scratch.
Due to several reasons, you might want to reset the Windows 11 firewall to its default. It may happen due to a malware or viruses attack; you want to reset the firewall app, or you have made some changes and are unable to figure out what made your Windows unstable. In these situations, resetting or restoring the Firewall to default settings might help you.
How to Restore or Reset Firewall Settings to Default in Windows 11?
Due to network connectivity issues or some other reason, if you want to restore the Windows firewall to default, please perform the following steps:-
Step 1. Open the Settings app by pressing Windows + I keys from the keyboard.
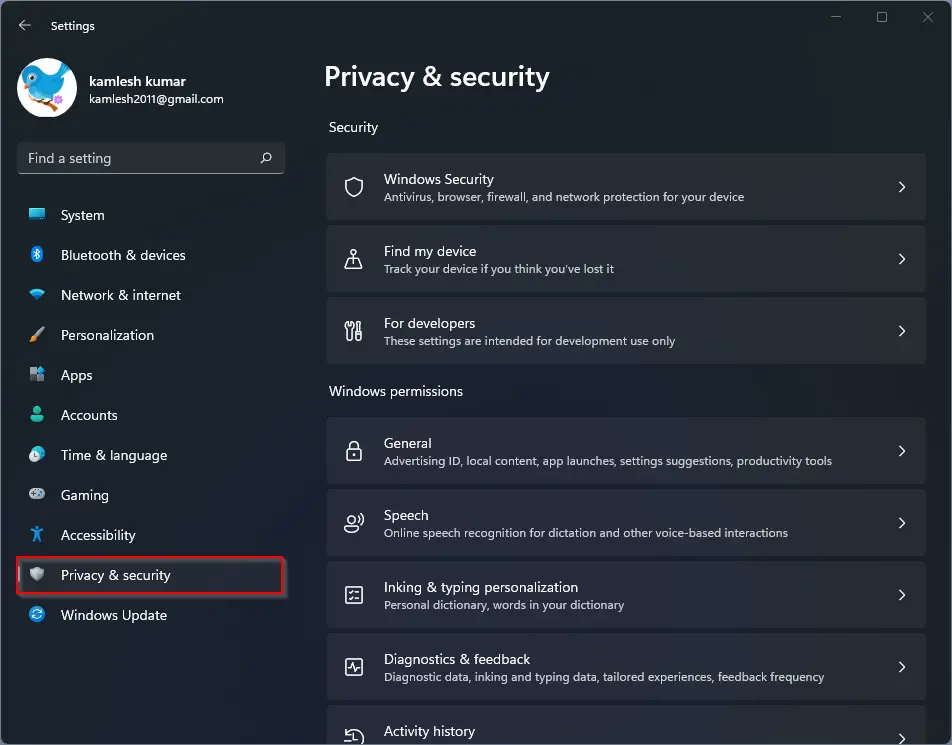
Step 2. Select the Privacy & security category from the left sidebar in the Windows Settings that opens.
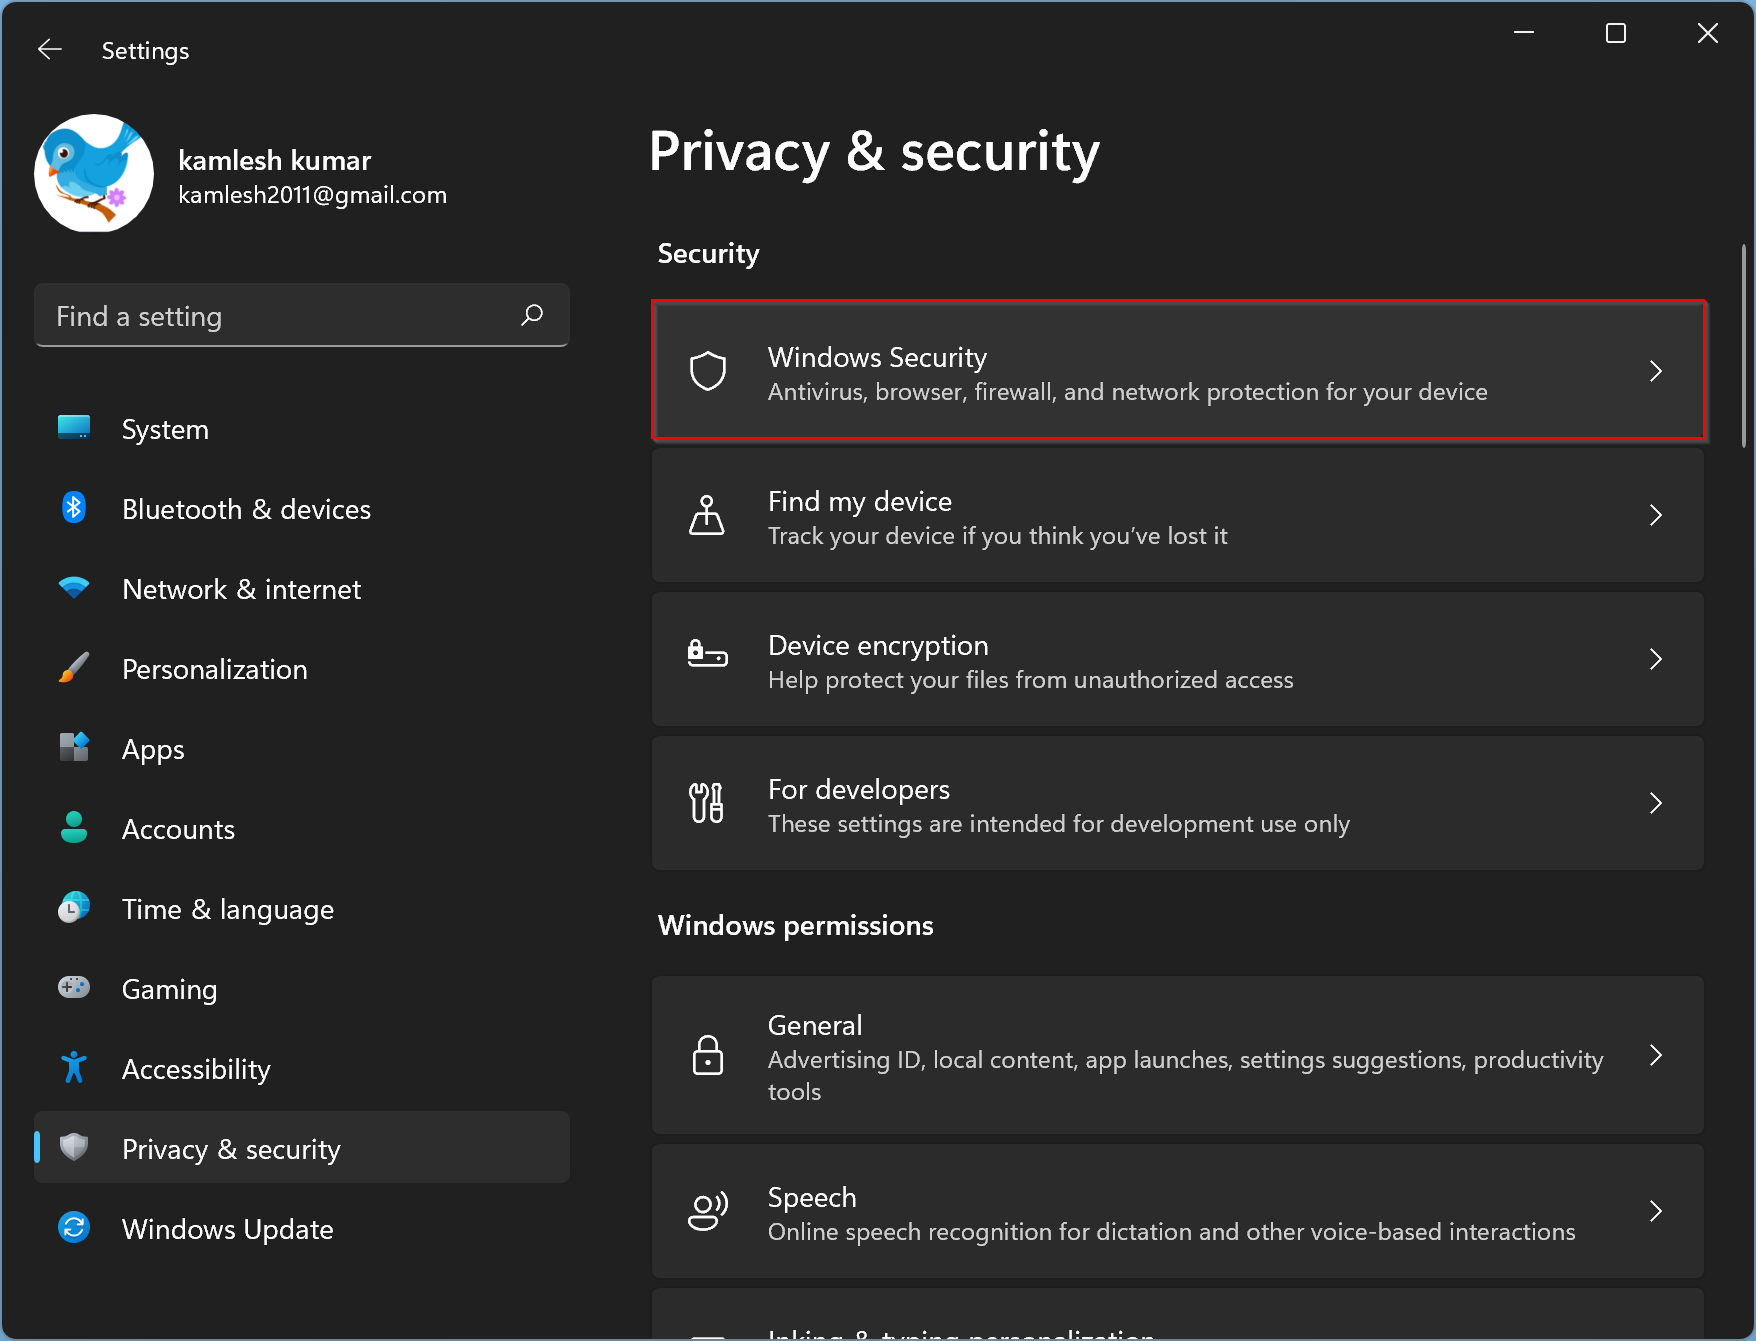
Step 3. On the right sidebar, click the Windows Security tab on the top under the Security section.
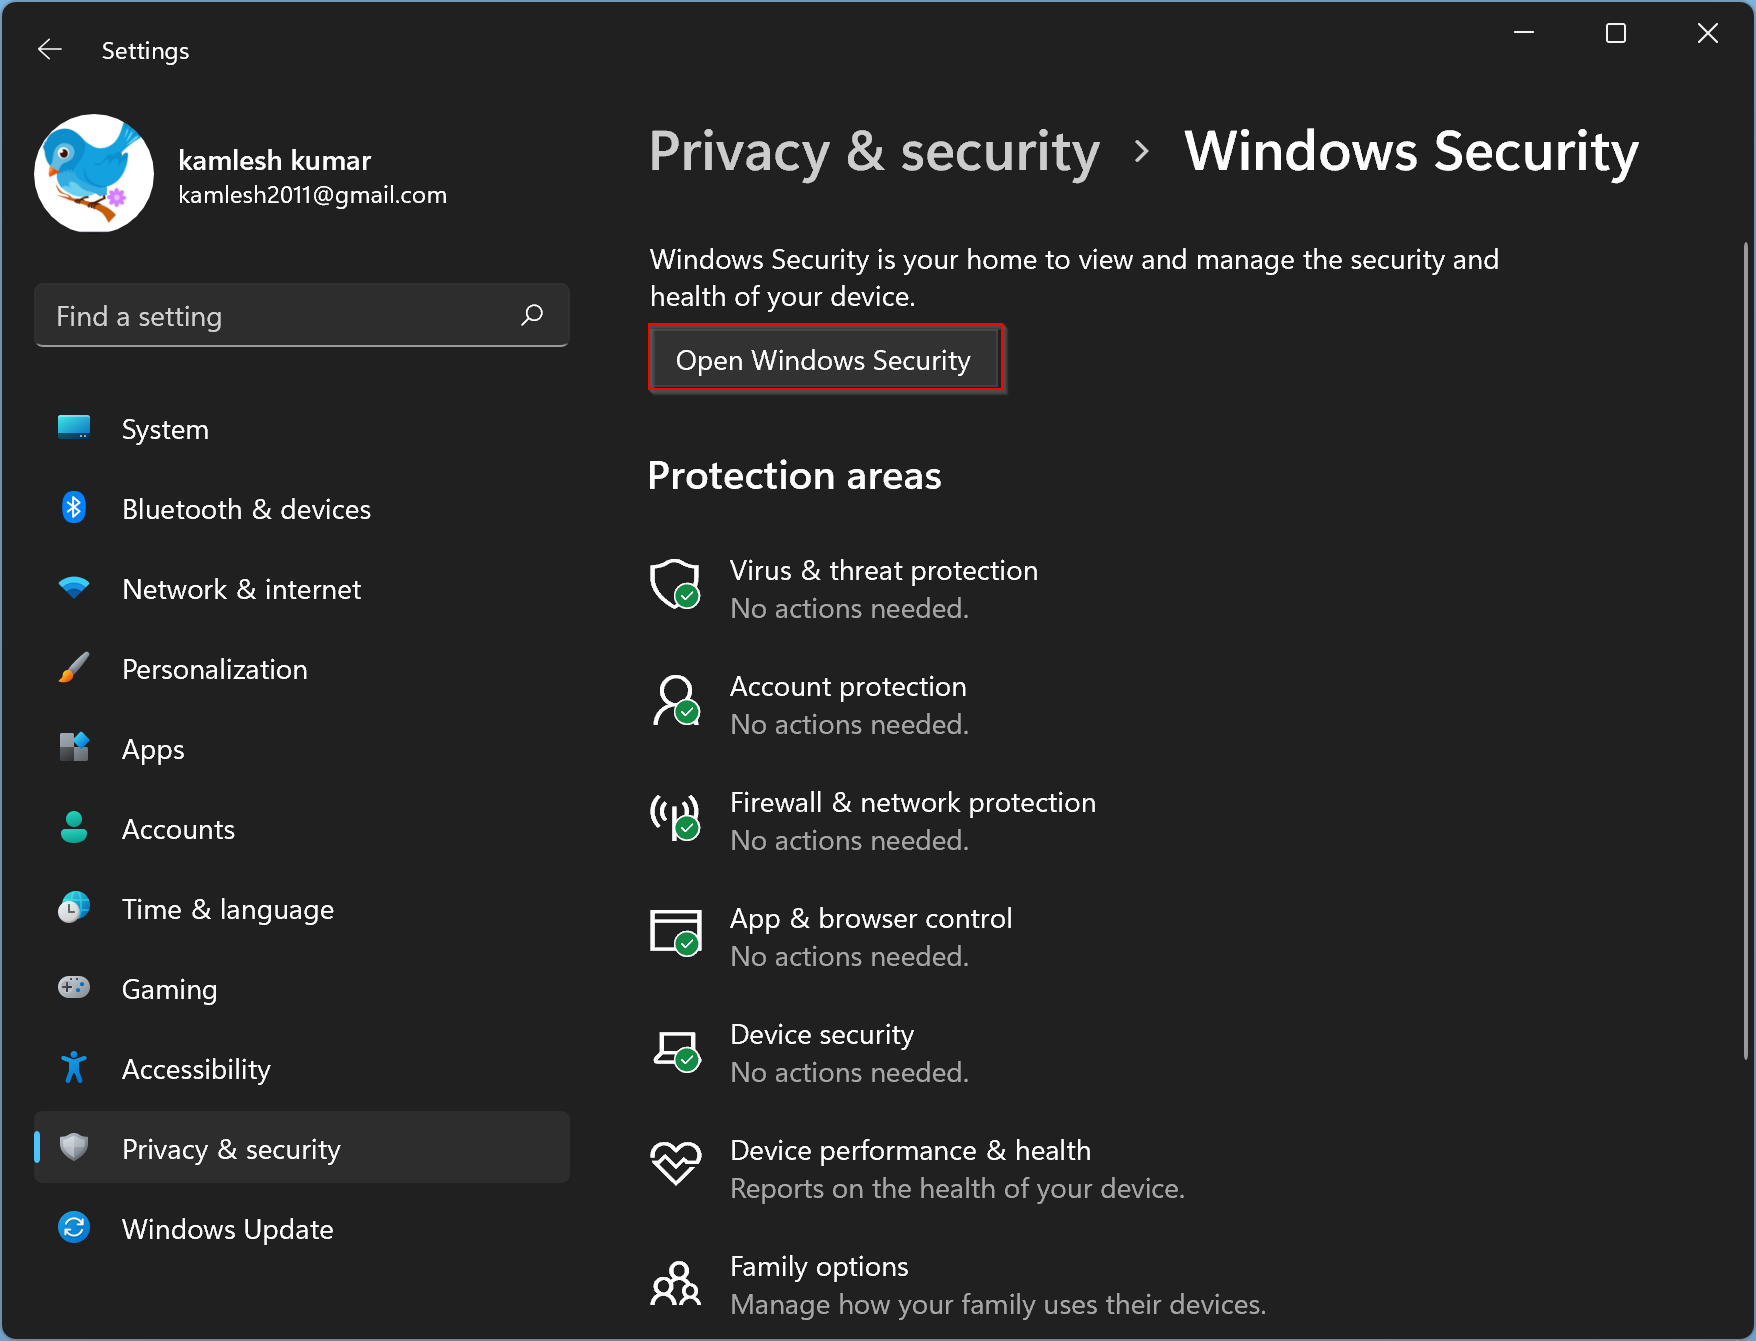
Step 4. Then click the Open Windows Security button to open the “Windows Security” window.
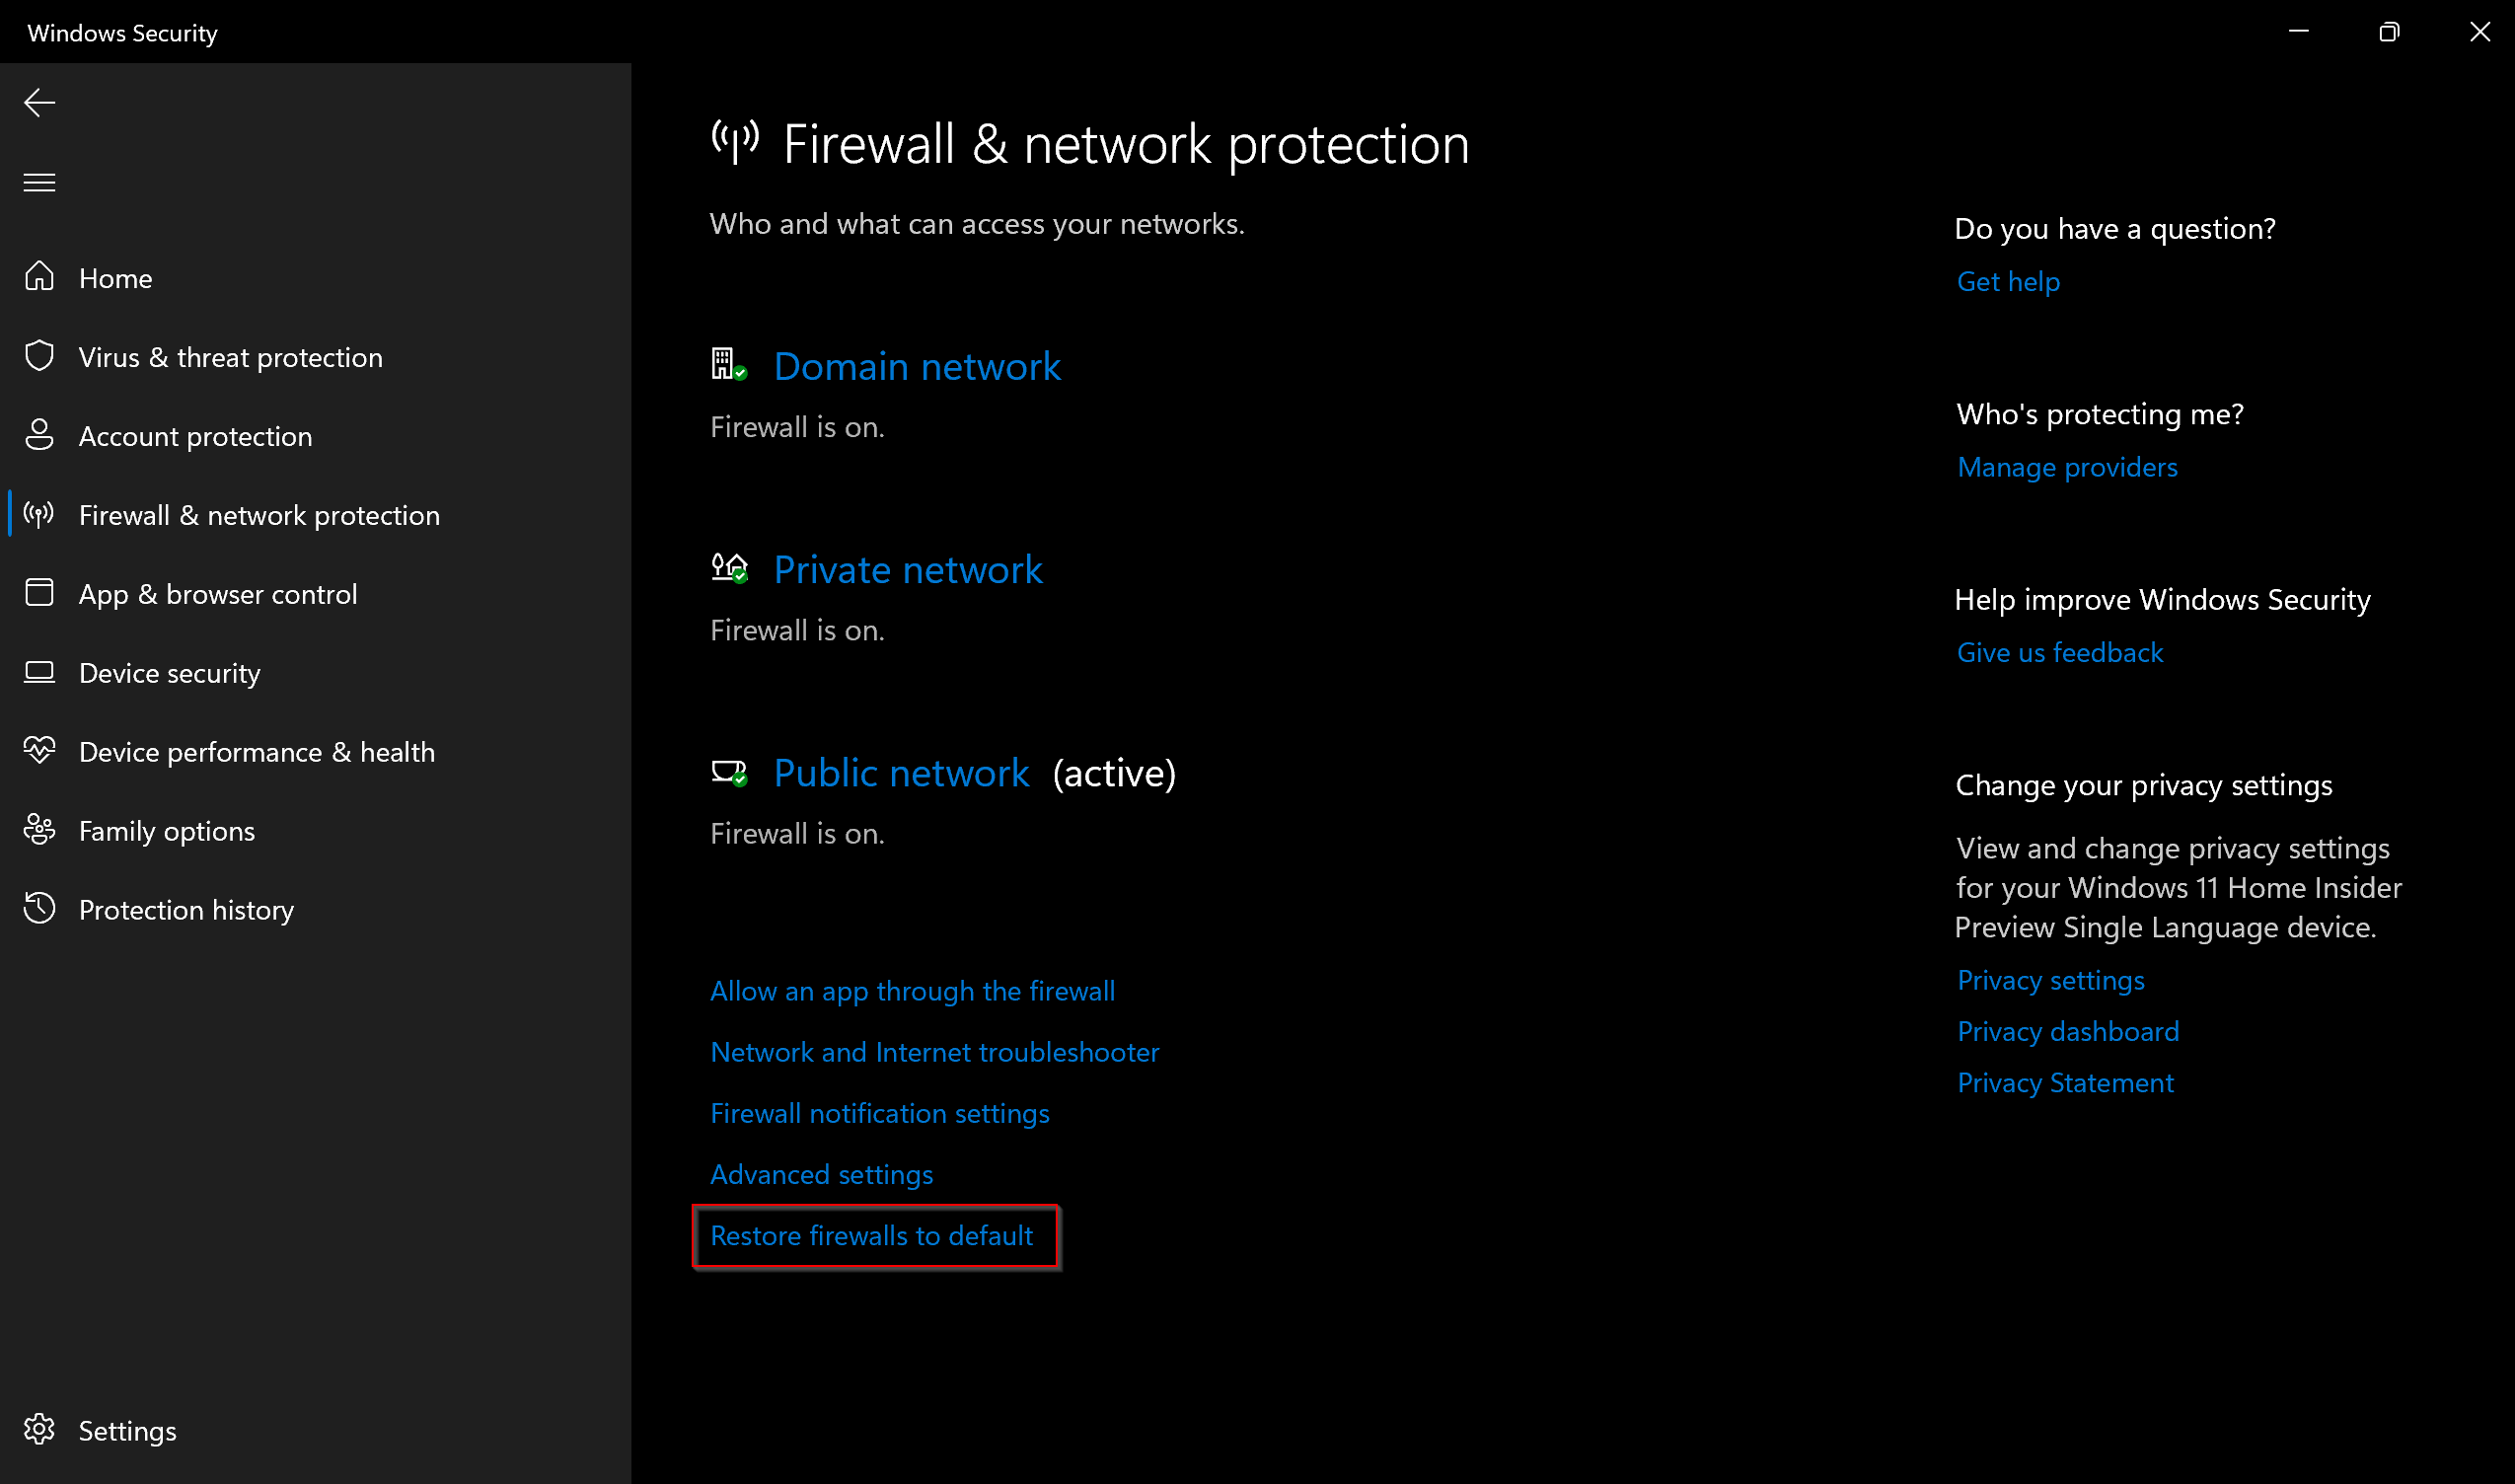
Step 5. When “Windows Security” opens, select Firewall & network protection from the left sidebar.
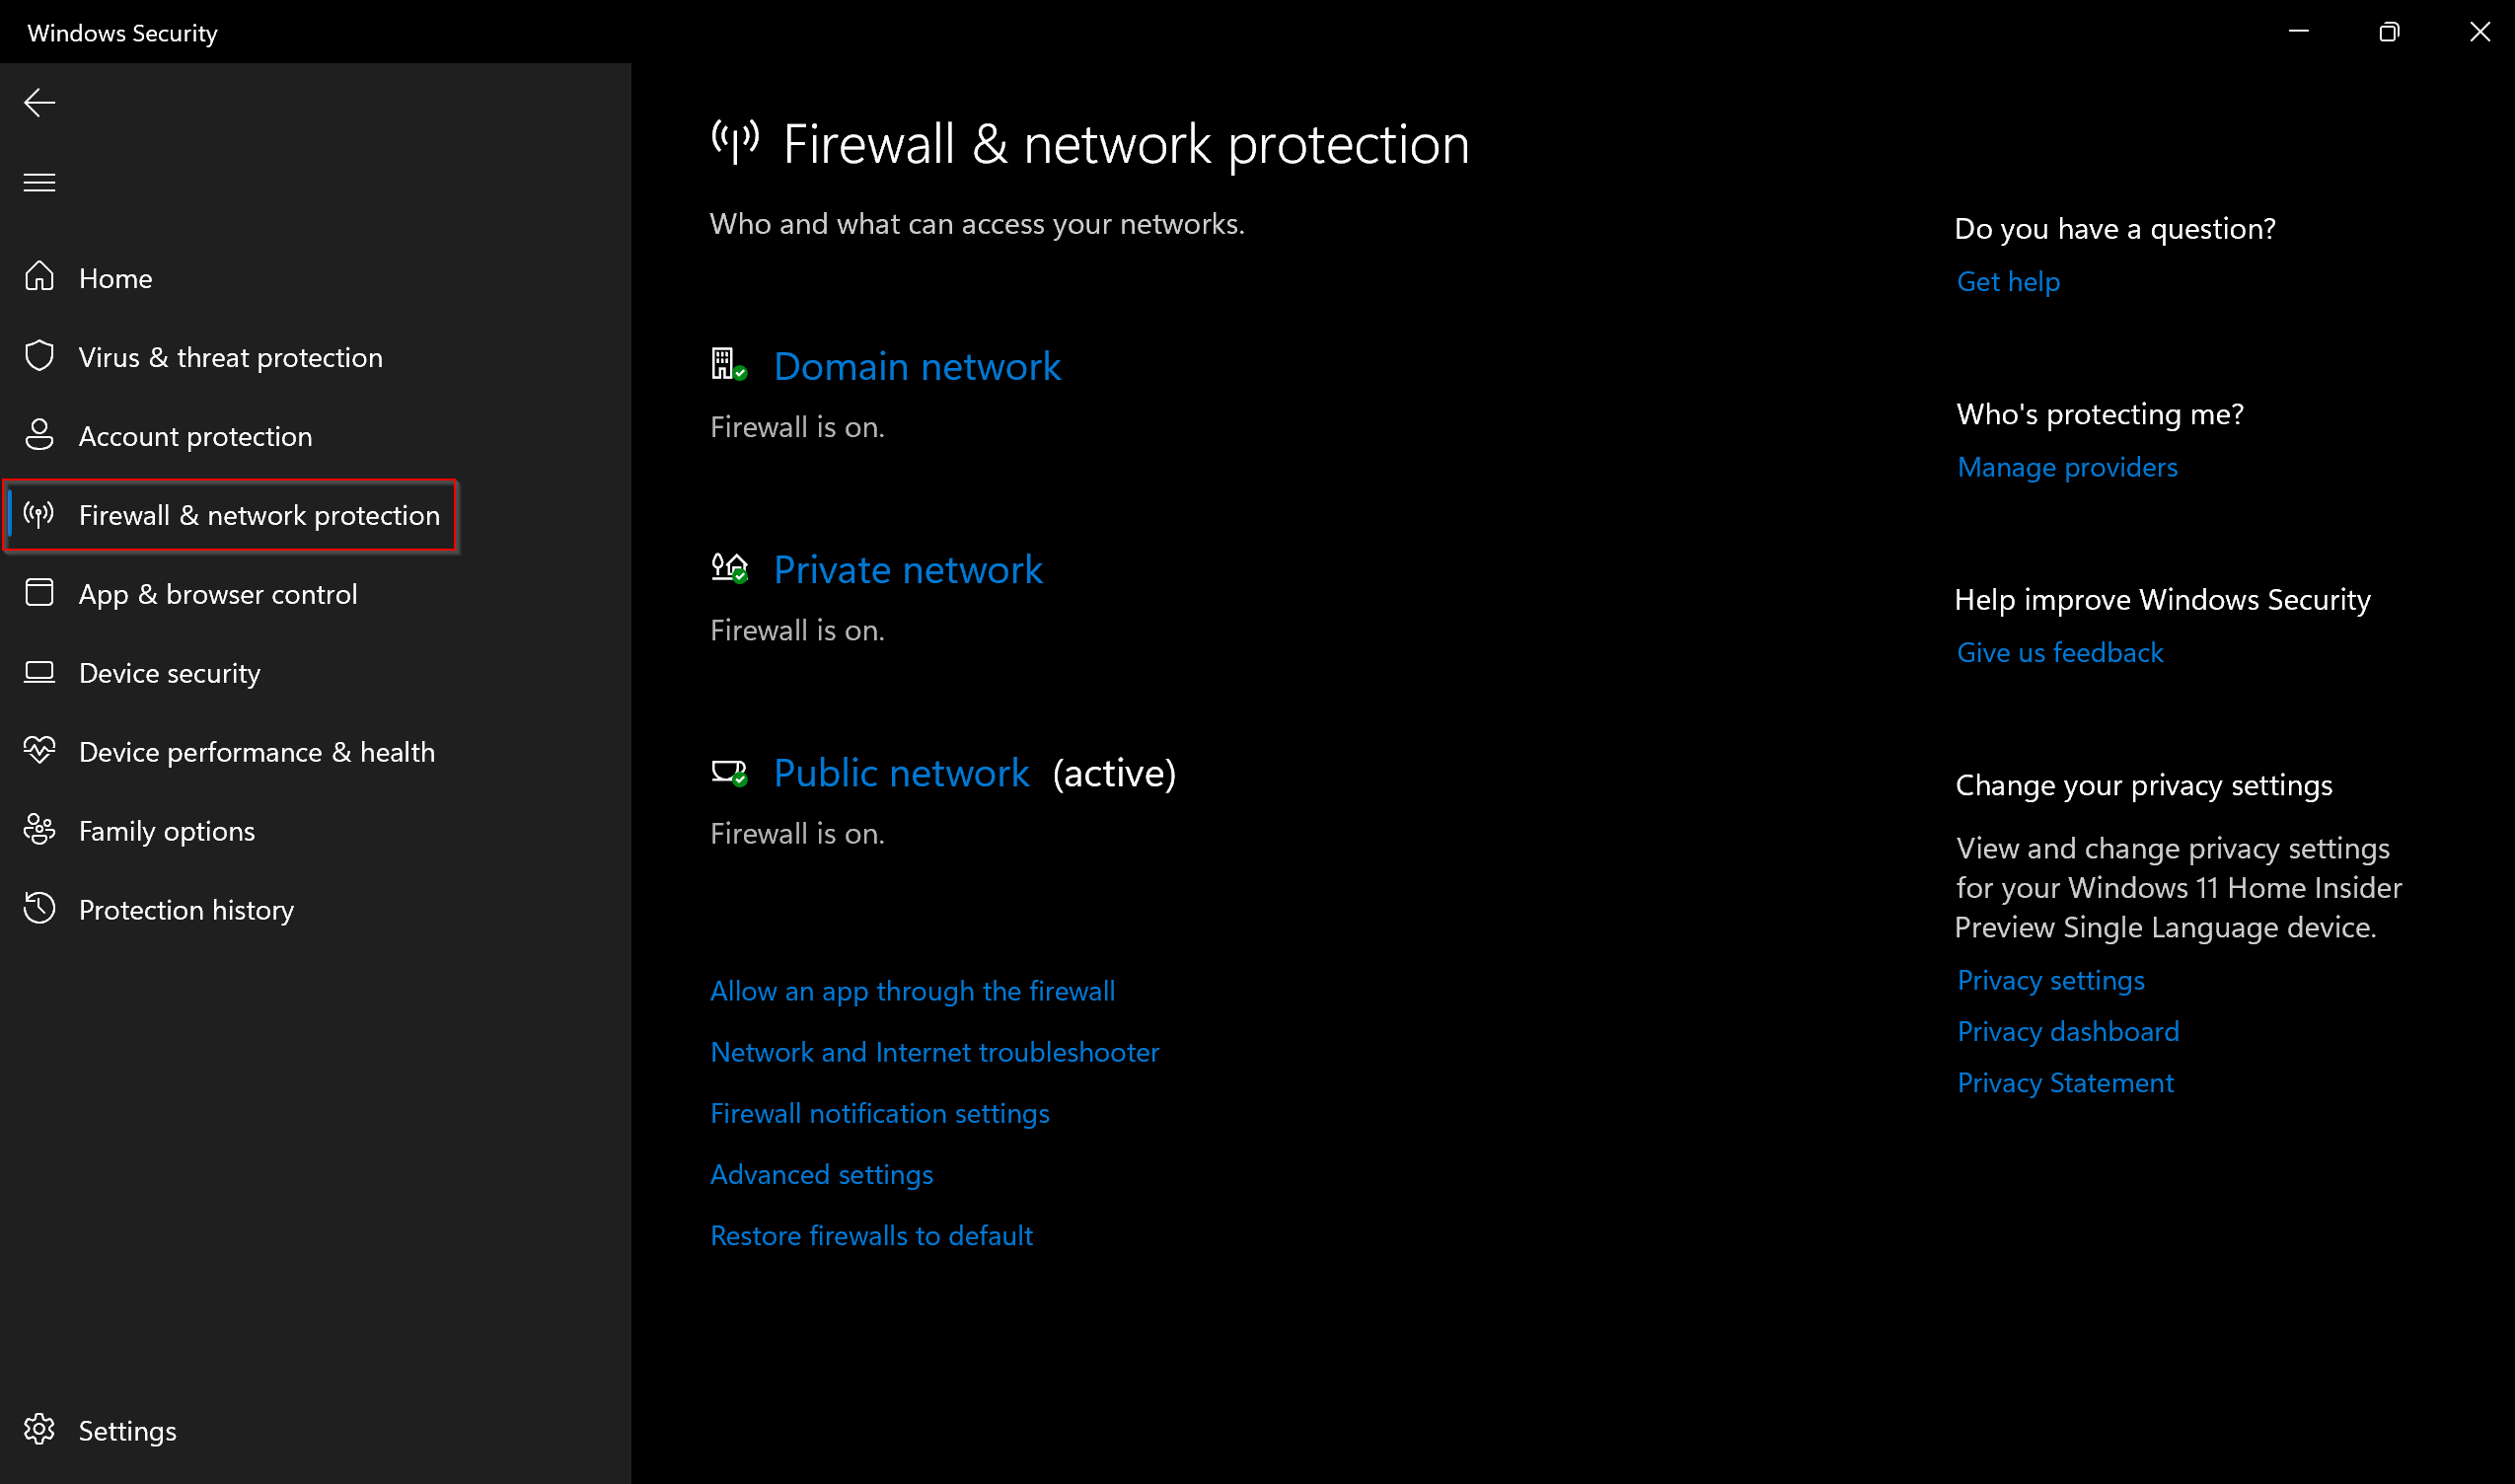
Step 6. At the bottom of the page, click the link Restore firewalls to default on the right sidebar.
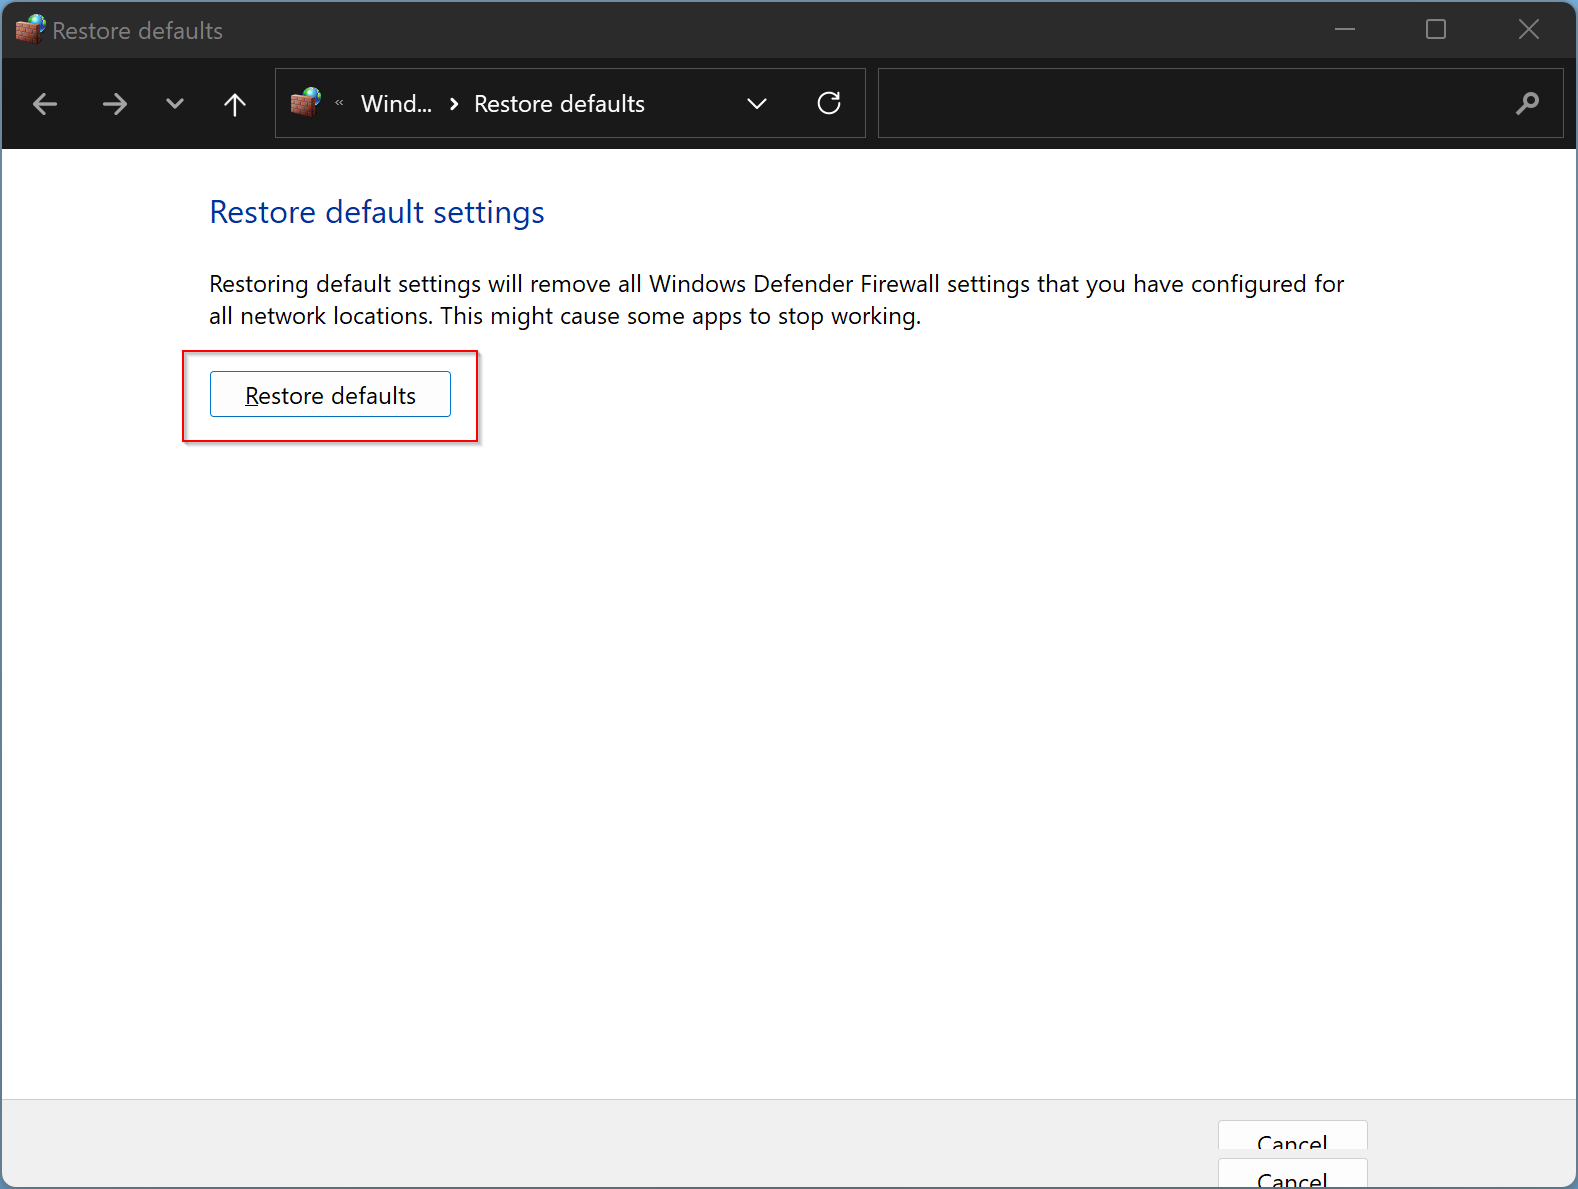
Step 7. After that, a new pop-up window, “Restore defaults,” will open. Click the Restore defaults button under that window.
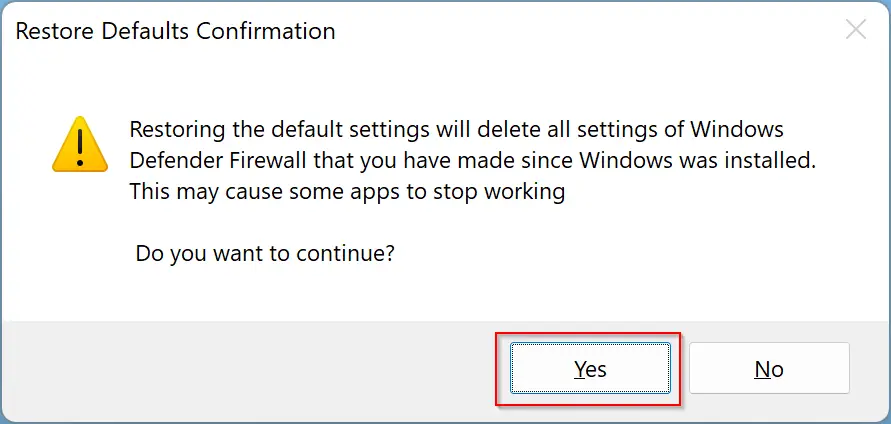
Step 8. Read the description on the “Restore Defaults Confirmation” dialog and then click select the Yes button.
Step 9. That’s it. Close all opened windows and reboot your computer.
Windows 11 firewall is reset to default, and its related issues should be solved.
Conclusion
In conclusion, resetting the Windows 11 firewall to its default state is a simple yet effective solution to many network connectivity problems. It can help restore the firewall’s settings to their original state and fix issues caused by malware, viruses, or other factors that may have destabilized the firewall. By following the steps outlined in this guide, you can quickly reset the Windows 11 firewall to default and eliminate any issues you might be experiencing. Remember to reboot your computer after resetting the firewall to ensure the changes take effect.