Drivers are an essential part of any computer system that helps the operating system communicate with the hardware components. Sometimes, updated drivers may cause issues or incompatibilities with the system, and in such cases, rolling back the driver to the previous version can be a useful solution. In this gearupwindows article, we will guide you through the steps to roll back any driver on Windows 11/10 to fix the issues.
How to Roll Back Any Driver to Fix Issues on Windows 11 or 10?
Here’s how you can roll back any driver on Windows 11 or 10:-
Step 1. Press the Windows key + X key and select “Device Manager” from the menu. This will open Device Manager.
Step 2. In the Device Manager window, locate the device whose driver you want to roll back and double-click on it.
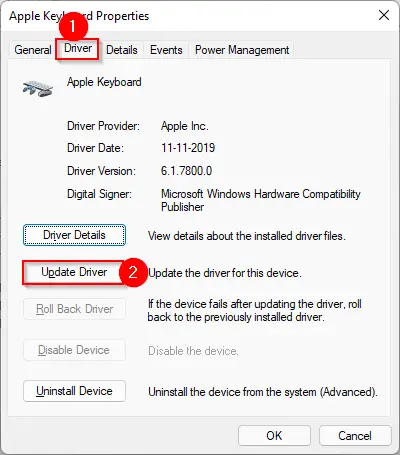
Step 3. In the Properties window of the device, click on the “Driver” tab.
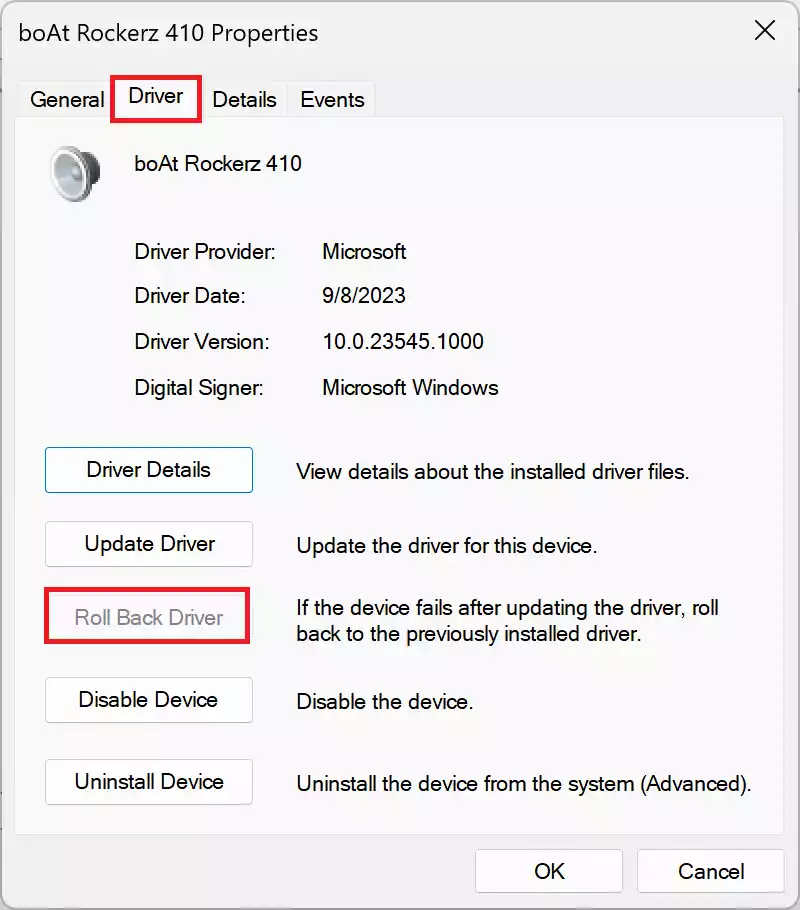
Step 4. Click on the “Roll Back Driver” button.
Step 5. In the “Why are you rolling back?” window, select the appropriate reason for rolling back the driver and click “Yes” to confirm.
Step 6. Wait for the system to roll back the driver to the previous version.
Step 7. Restart your computer for the changes to take effect.
Note: If the “Roll Back Driver” button is greyed out, it means that there are no previous versions of the driver installed on your system, or the current driver was installed more than ten days ago, and the rollback option is no longer available.
Rolling back drivers can help resolve issues related to hardware compatibility or conflicts with other drivers. However, it’s important to note that rolling back a driver may not always be the best solution, and in some cases, updating the driver may be necessary to fix the issue.
Conclusion
Drivers are vital for seamless communication between your operating system and hardware components. When you encounter problems or incompatibilities after a driver update on Windows 11/10, rolling back the driver to a previous version can often be a quick and effective solution. By following the steps outlined in this article, you can resolve hardware compatibility issues and conflicts with ease. Keep in mind that while rolling back drivers is a valuable tool, it’s not always the ultimate fix, as sometimes updating drivers is the key to resolving issues. Always choose the method that best suits your specific situation.