When you open an app, you see an app name on the top of that window, which is called the Title Bar. By default, Windows 11 doesn’t show accent color on title bars and borders. So, all program windows will default have uninteresting white or black title bars.
However, it is possible to tweak the Title Bars and set a custom color of your choice. Windows 11 allows users to set both active and inactive (background window) title bars. Selecting a custom color for a title bar will also be visible on the windows borders.
In this gearupwindows article, you will learn to customize custom colors for active and inactive Title Bars in Windows 11.
How to Choose a Color for the Active Title Bar in Windows 11 Settings?
To set a color for the active title bar in Windows 11 using the built-in Settings app, use these steps:-
Step 1. Open Settings.
Step 2. Select Personalization in the left sidebar.
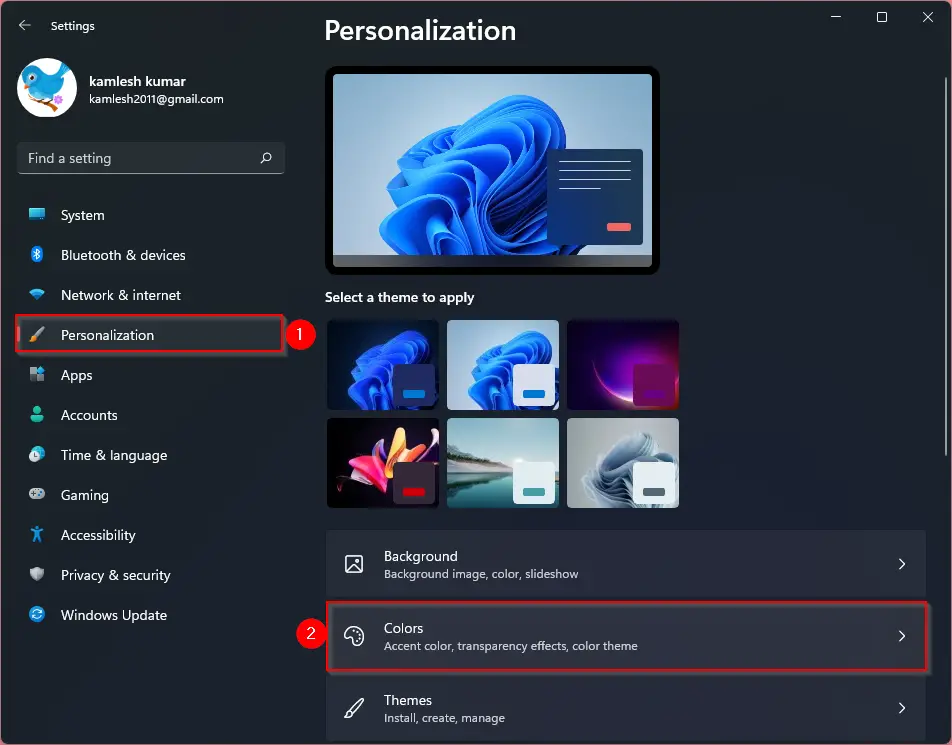
Step 3. On the right sidebar, click on Colors.
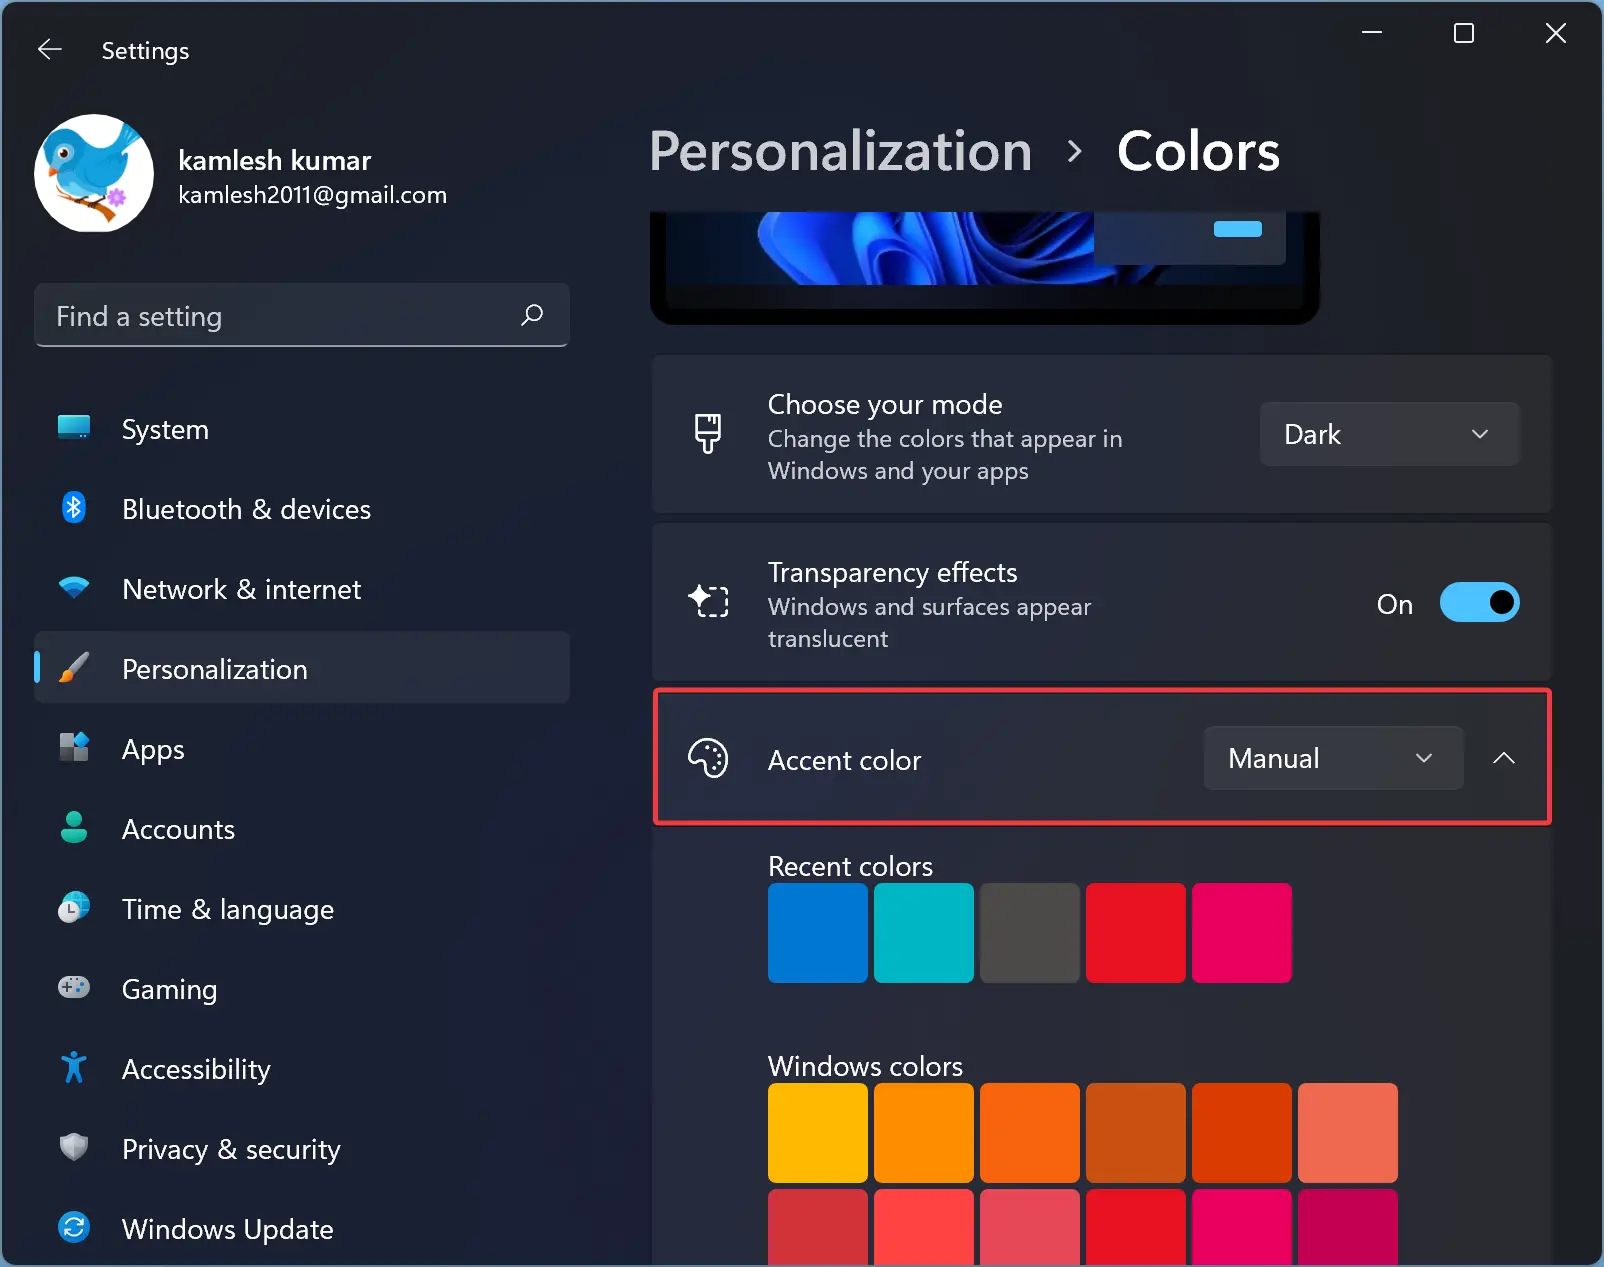
Step 4. Use the drop-down menu “Accent color” and select Manual option.
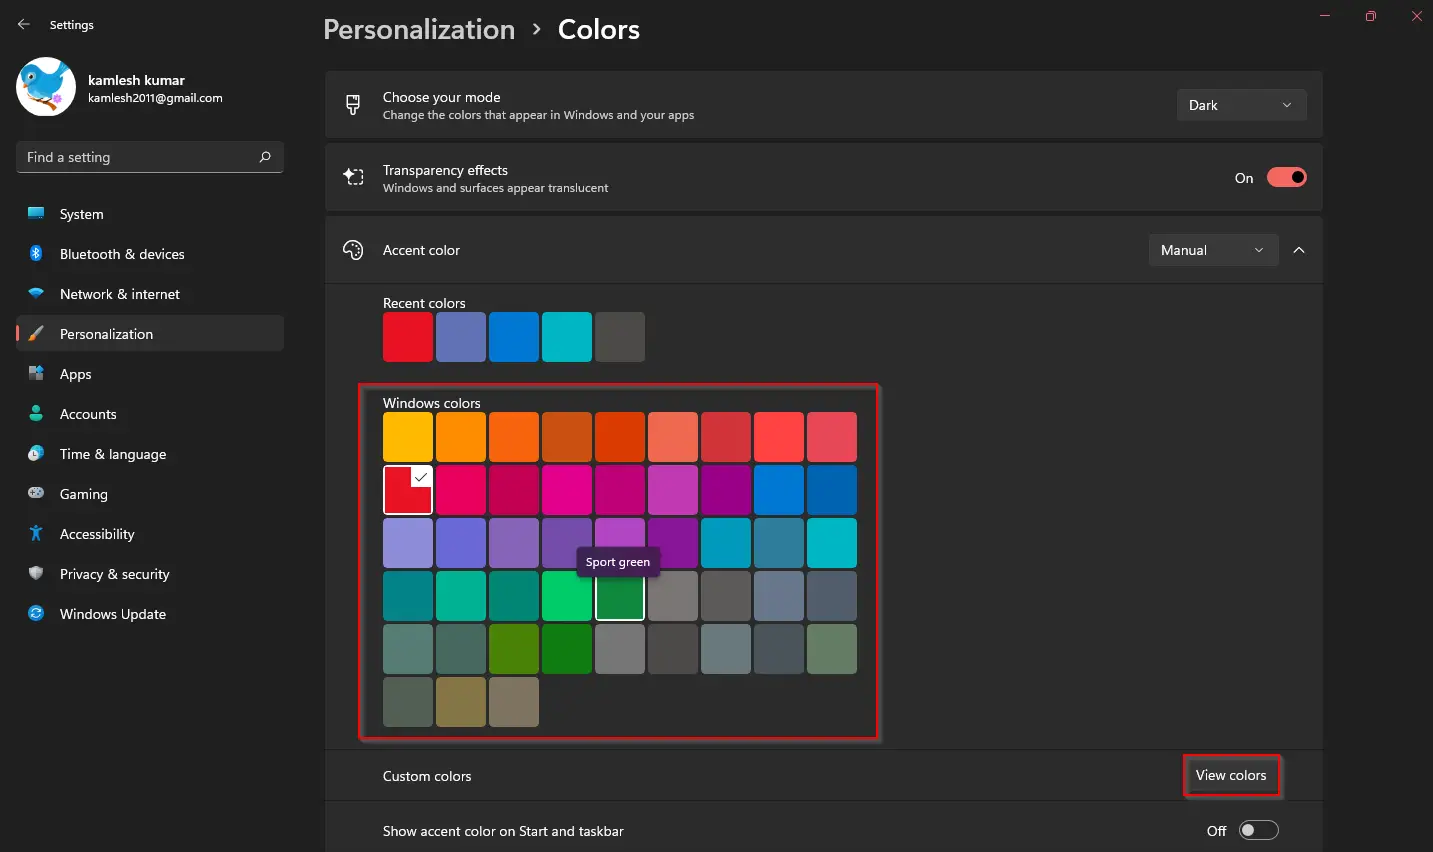
Step 5. Click on the desired color you want to see on window borders and title bars. If you don’t like to use any default available colors, click on the View colors button beside the “View colors” option and pick the desired color from the palette.
Step 6. Now, scroll down and turn On the toggle switch “Show accent color on title bars and windows borders.”
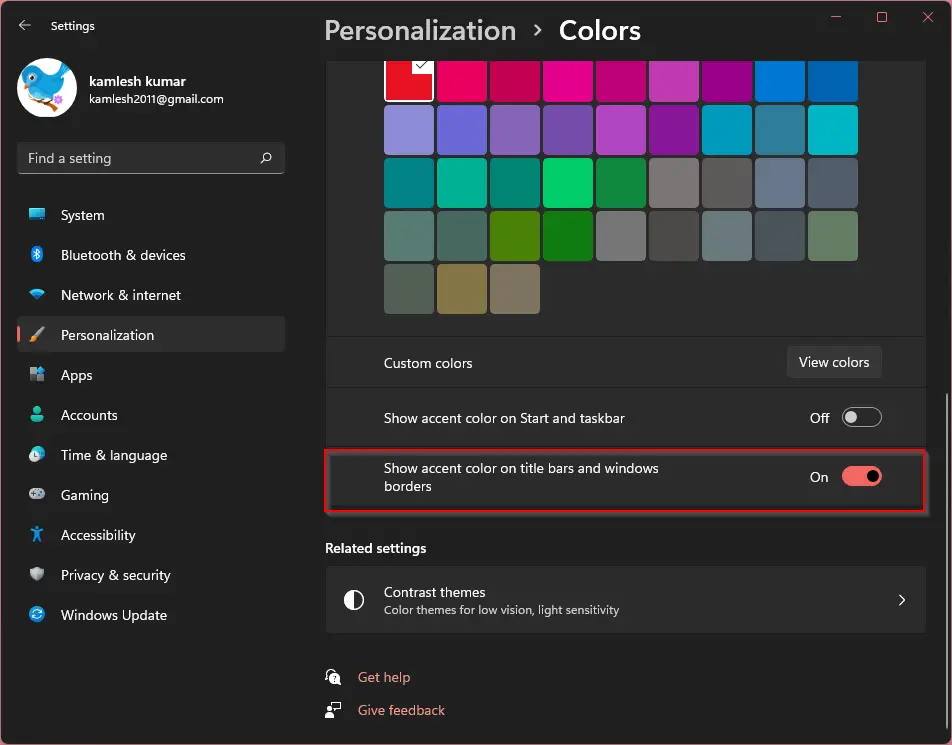
Once you complete the above steps, the active window’s title bar and border color will be changed.
How to Use Registry Editor to Set the Color for Inactive Title Bars on Windows 11?
Windows 11 does not offer settings to set the color for inactive title bars. So, you need to change it manually by tweaking the Registry. However, it is a complicated process, but using a trick, this can be made simple.
To set the color for inactive title bars on Windows 11, use these steps:-
Step 1. Open Registry Editor.
Step 2. Then, browse to the following key in the left sidebar of Registry Editor:-
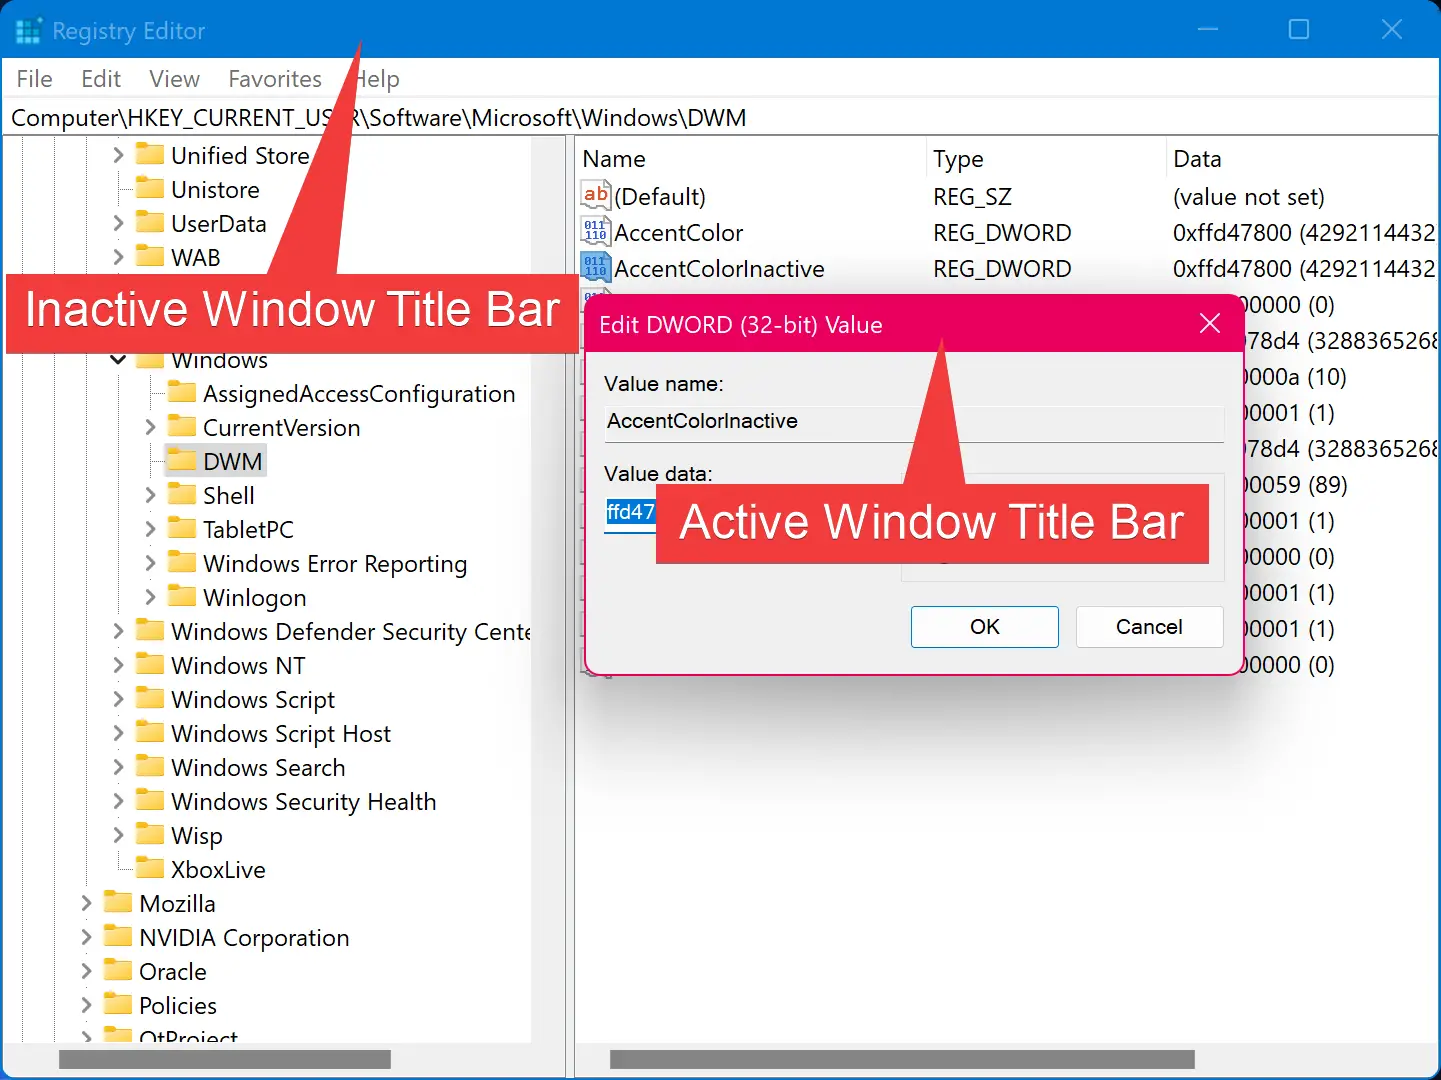
HKEY_CURRENT_USER\Software\Microsoft\Windows\DWM
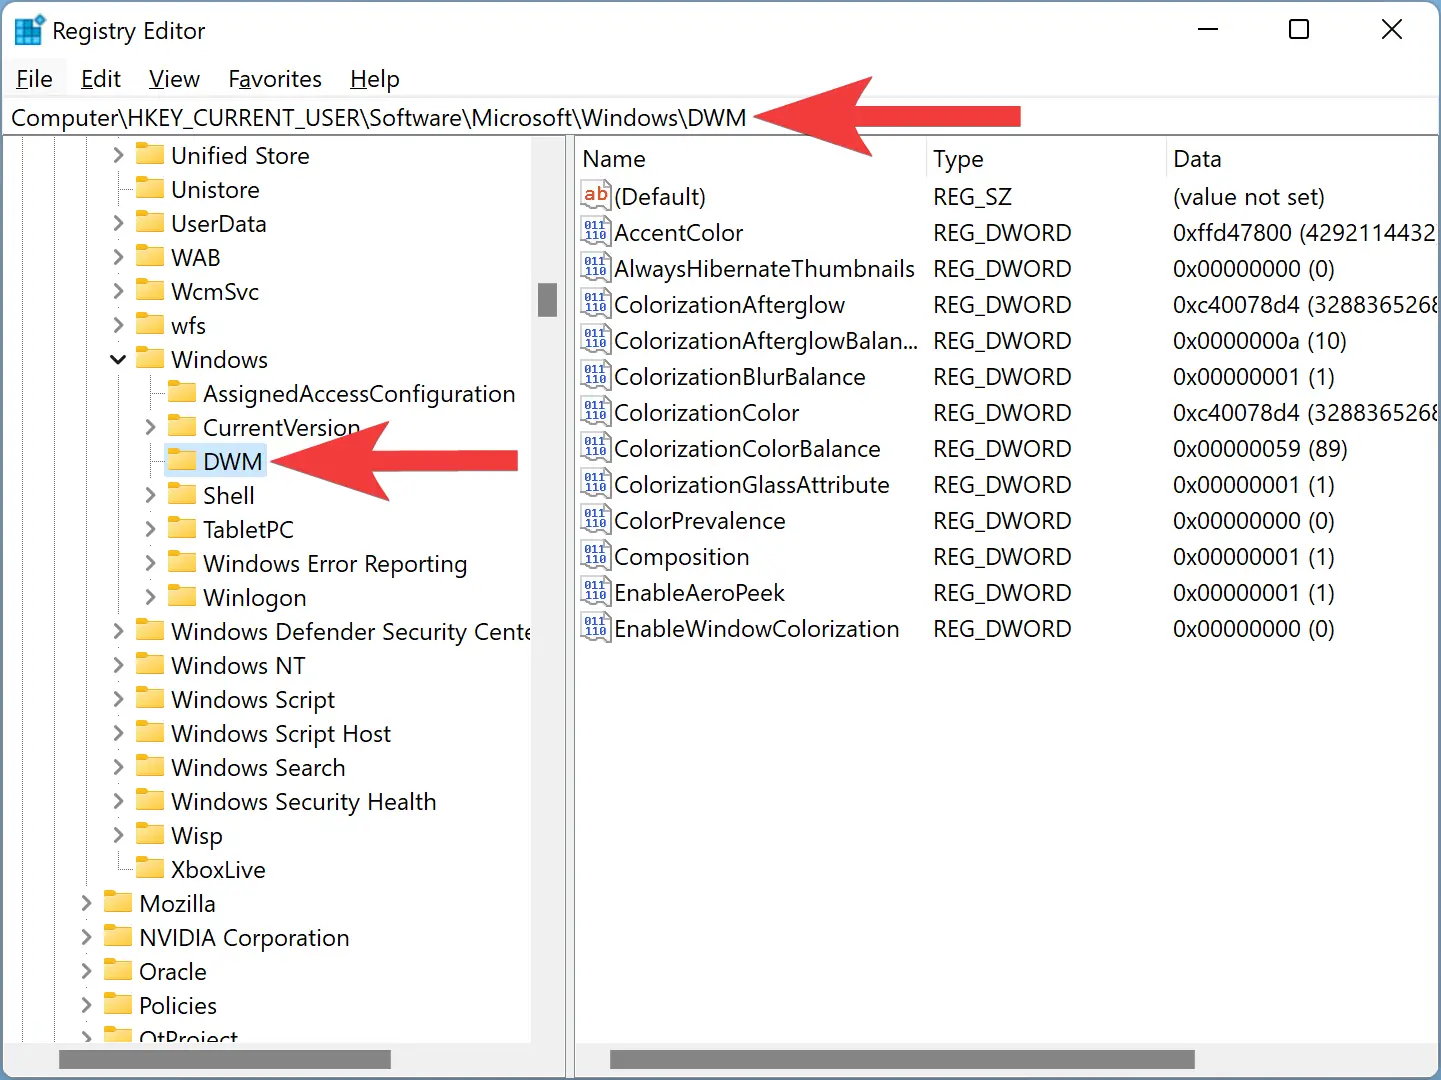
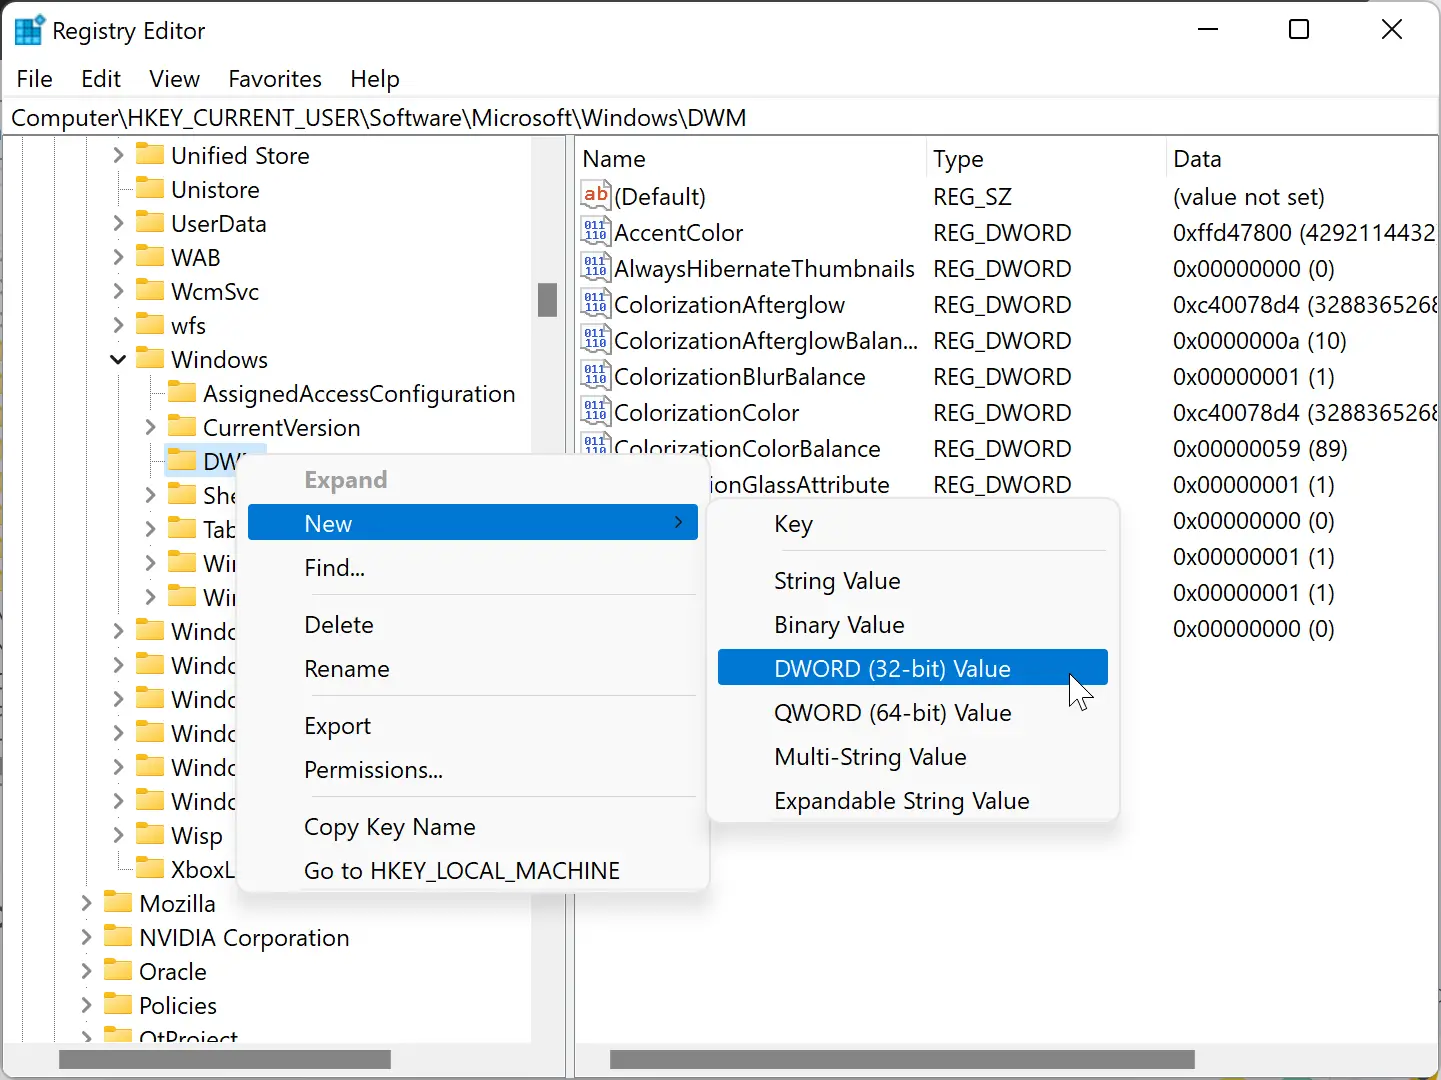
Step 3. Next, right-click on the DWM key and select New > DWORD (32-bit) Value.
Step 4. Name the newly created REG_DWORD to AccentColorInactive.
Step 5. Once you complete the above steps, you will find AccentColor and AccentColorInactive REG_DWORDs on the right sidebar. All you need to do is, copy AccentColor REG_DWORD “Value data” and paste it into AccentColorInactive REG_DWORD. After that, set a different color for an Accent color in Windows 11 Settings.
So, double-click on the AccentColor REG_DWORD and copy its “Value data.”
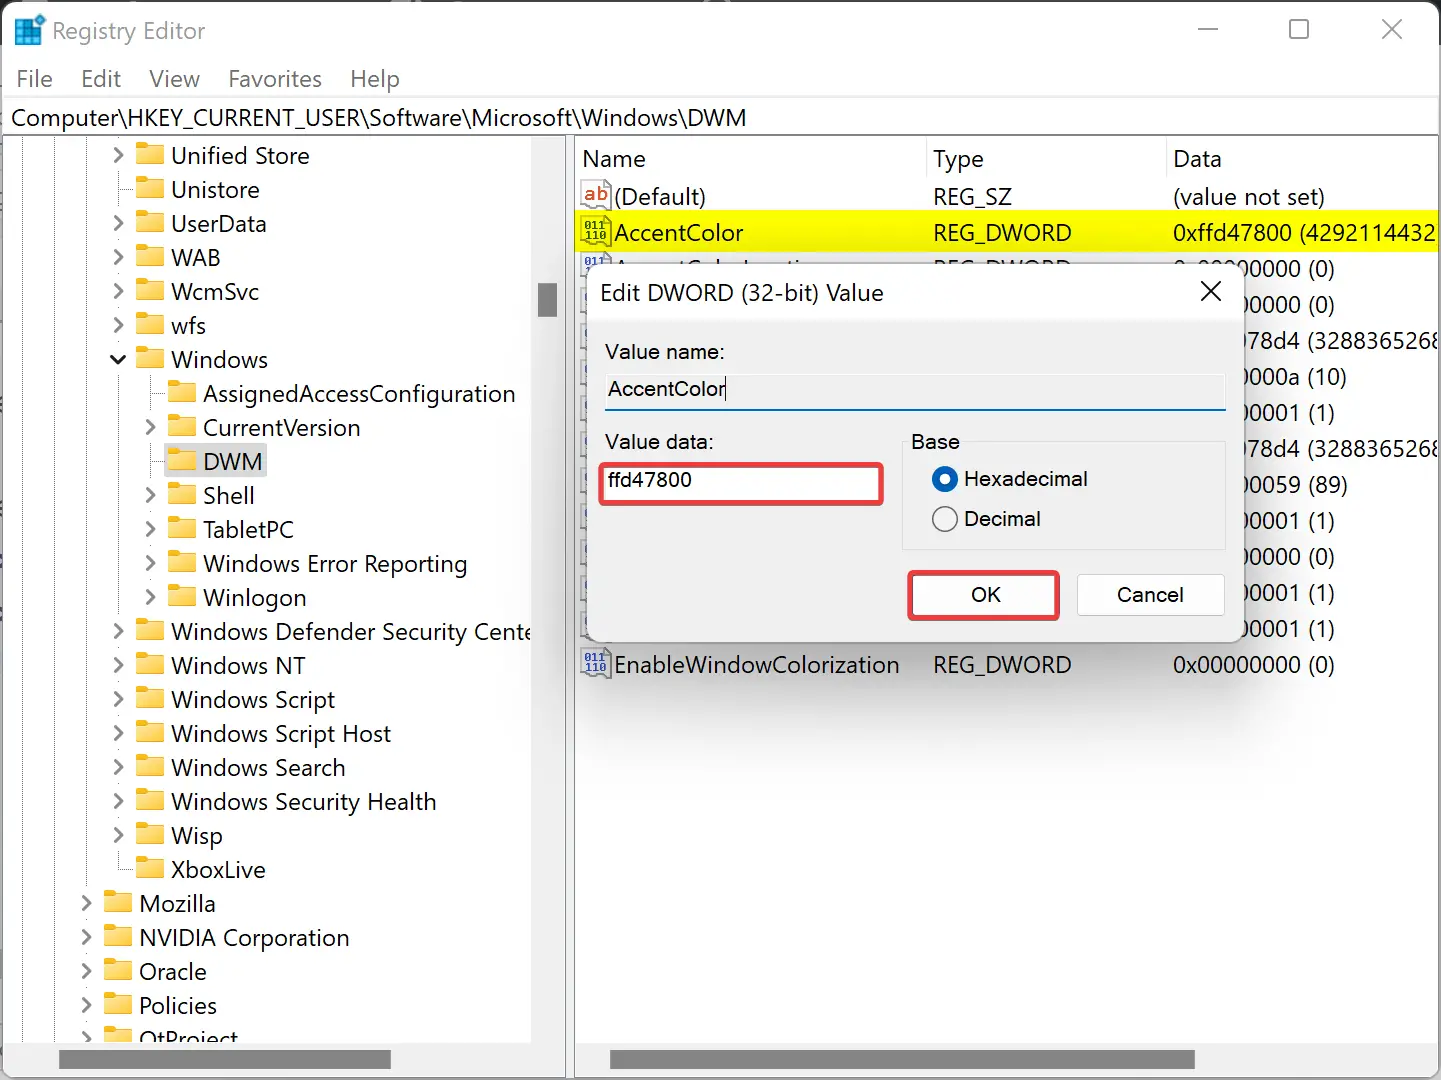
Step 6. Click OK.
Step 7. Now, double-click on AccentColorInactive REG_DWORD and paste the copied color code.
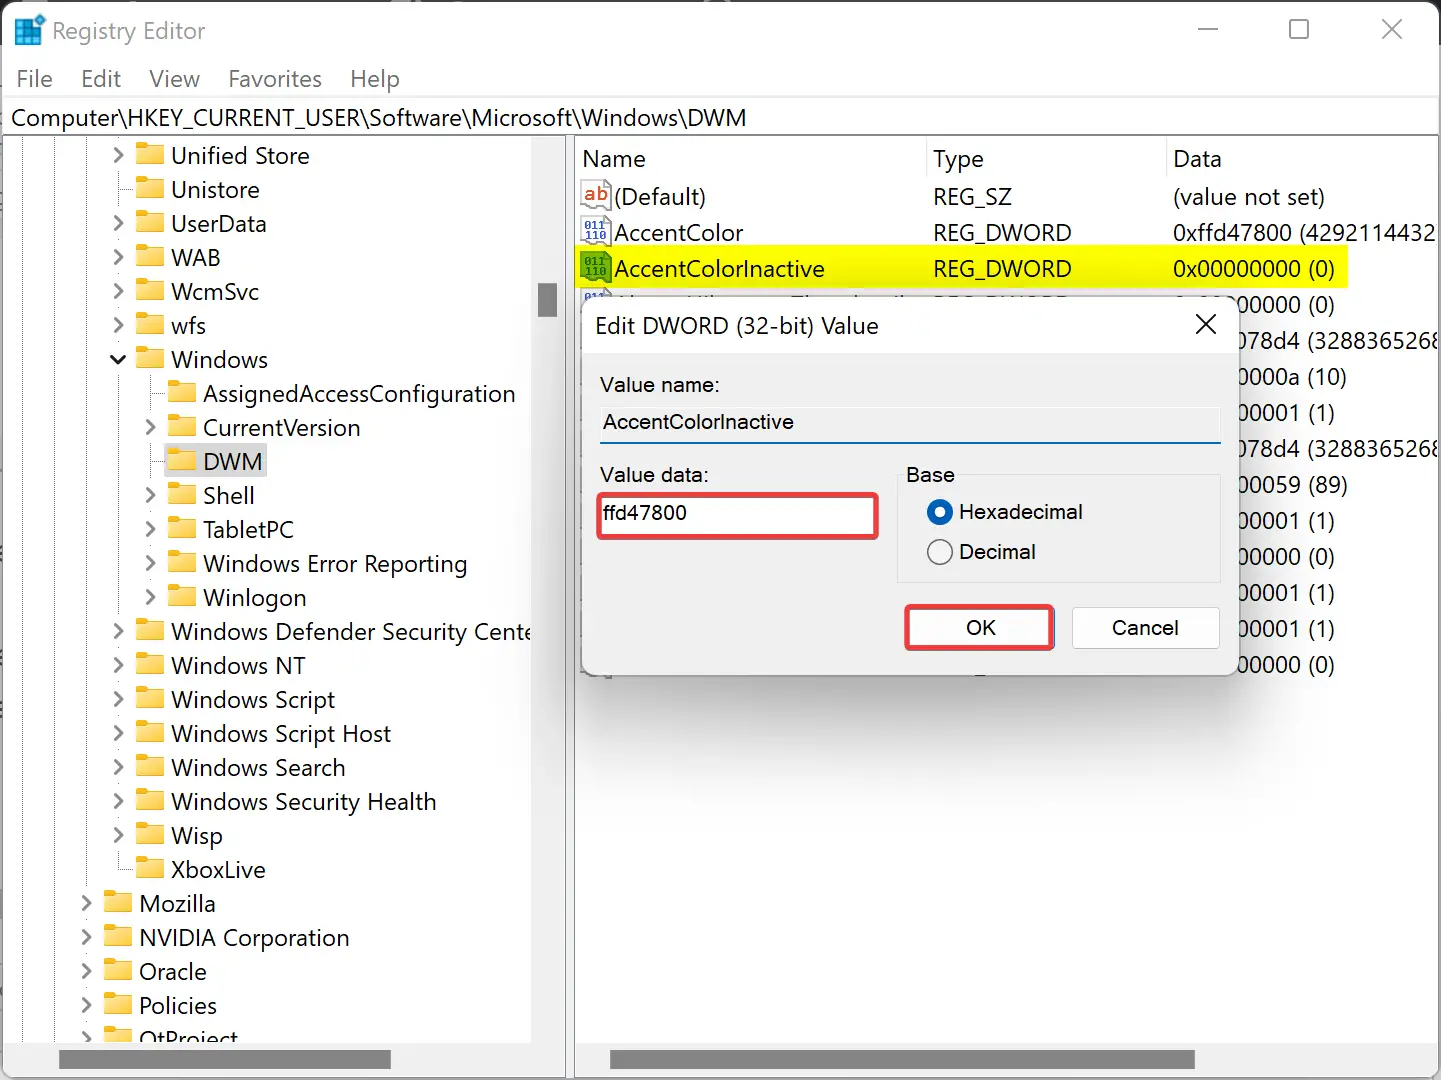
Step 8. Click OK.
Step 9. Now, set a new Accent color from Windows 11 Settings.
Once you complete the above steps, you will find different colors for active and inactive window title bars.
Conclusion
In conclusion, customizing the Title Bars in Windows 11 can add a touch of personalization to the overall user experience. By following the steps outlined in this gearupwindows article, users can easily set a custom color for both active and inactive Title Bars. While changing the active Title Bar color can be done through the Settings app, setting a color for the inactive Title Bar requires editing the Registry Editor. Although the process for changing the inactive Title Bar color may seem complicated, the trick outlined in this article makes it much simpler to do. Overall, with a bit of tweaking, users can make their Windows 11 experience more enjoyable by customizing the Title Bars to their liking.