If you share your PC with others, it may be frustrating moments when you run out of storage because they’re taking up too much space. Fortunately, Microsoft has provided an easy way to deal with this.
Windows 11/10 lets you set quotas for disk space so that each member will have their share of disk space. Once they fully occupy their share, they can’t store any more data on their internal or external hard drive. This means you’ll always have more control over your storage space.
In this gearupwindows article, we will guide you through the steps to control users’ data on your PC by setting up disk quota limits. Before proceeding with the steps, you should note that the Windows Quota Management tool only works on drives formatted using the NTFS file system.
How to Configure the Disk Quota on Windows 11 or 10 using File Explorer?
If you want to set disk quota on Windows 11 or 10 using File Explorer, use these steps:-
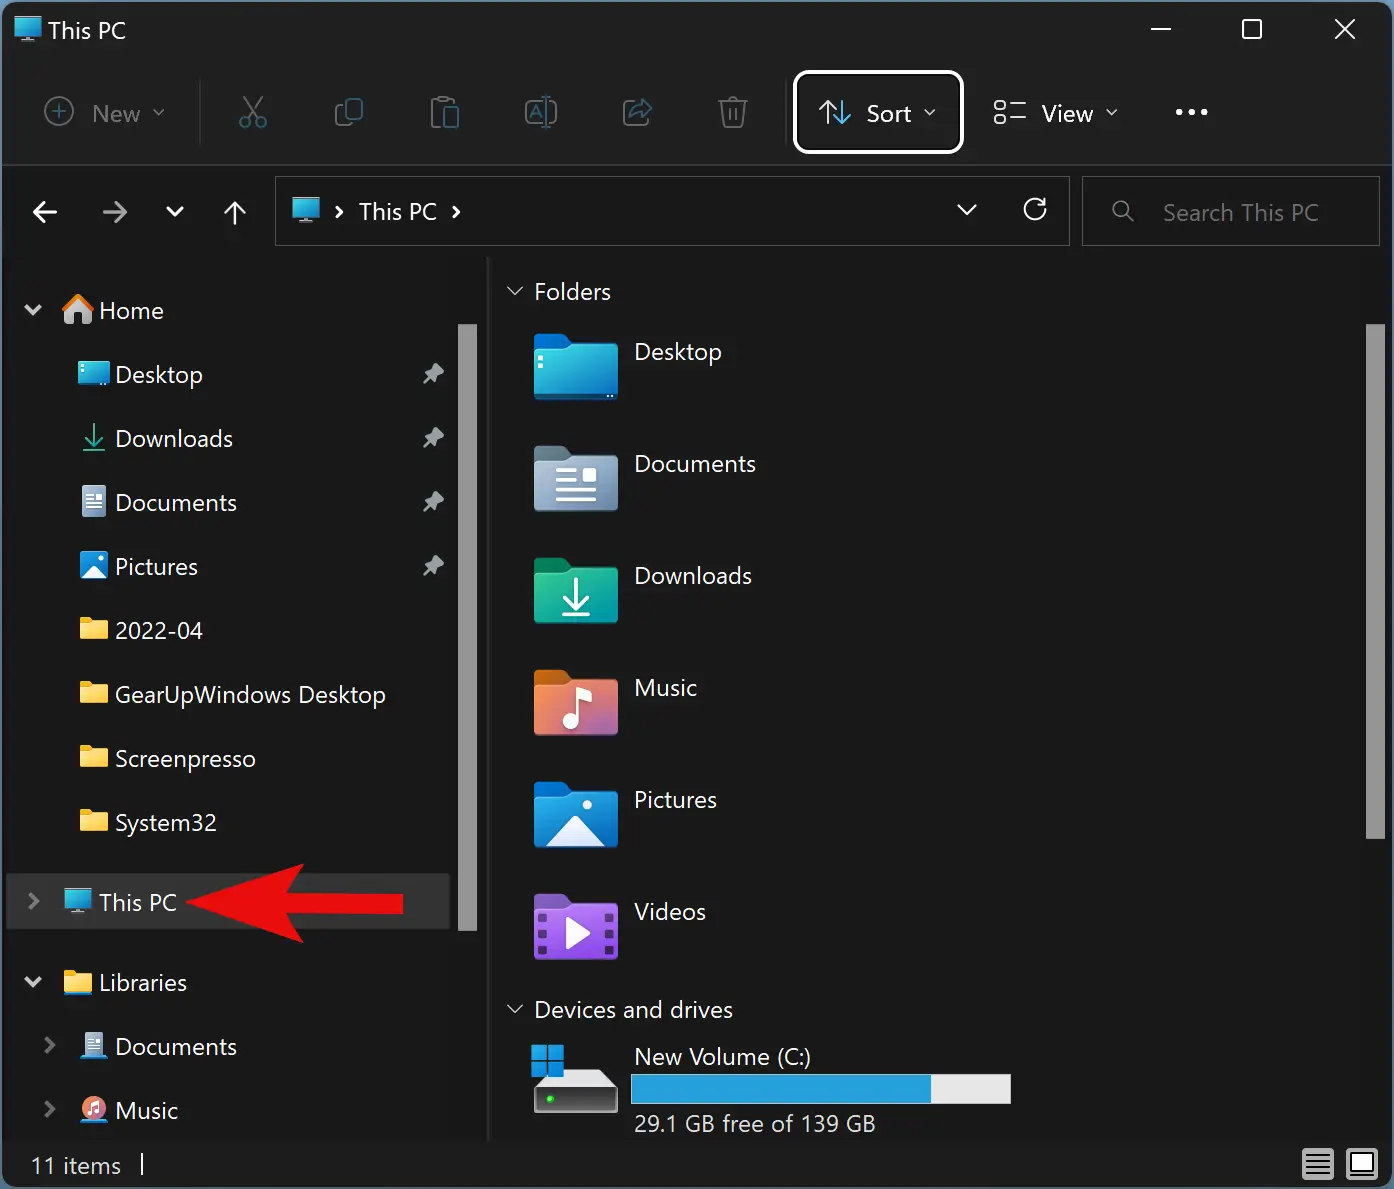
Step 1. First, open File Explorer.
Step 2. Then, click on This PC in the left side navigation pane.
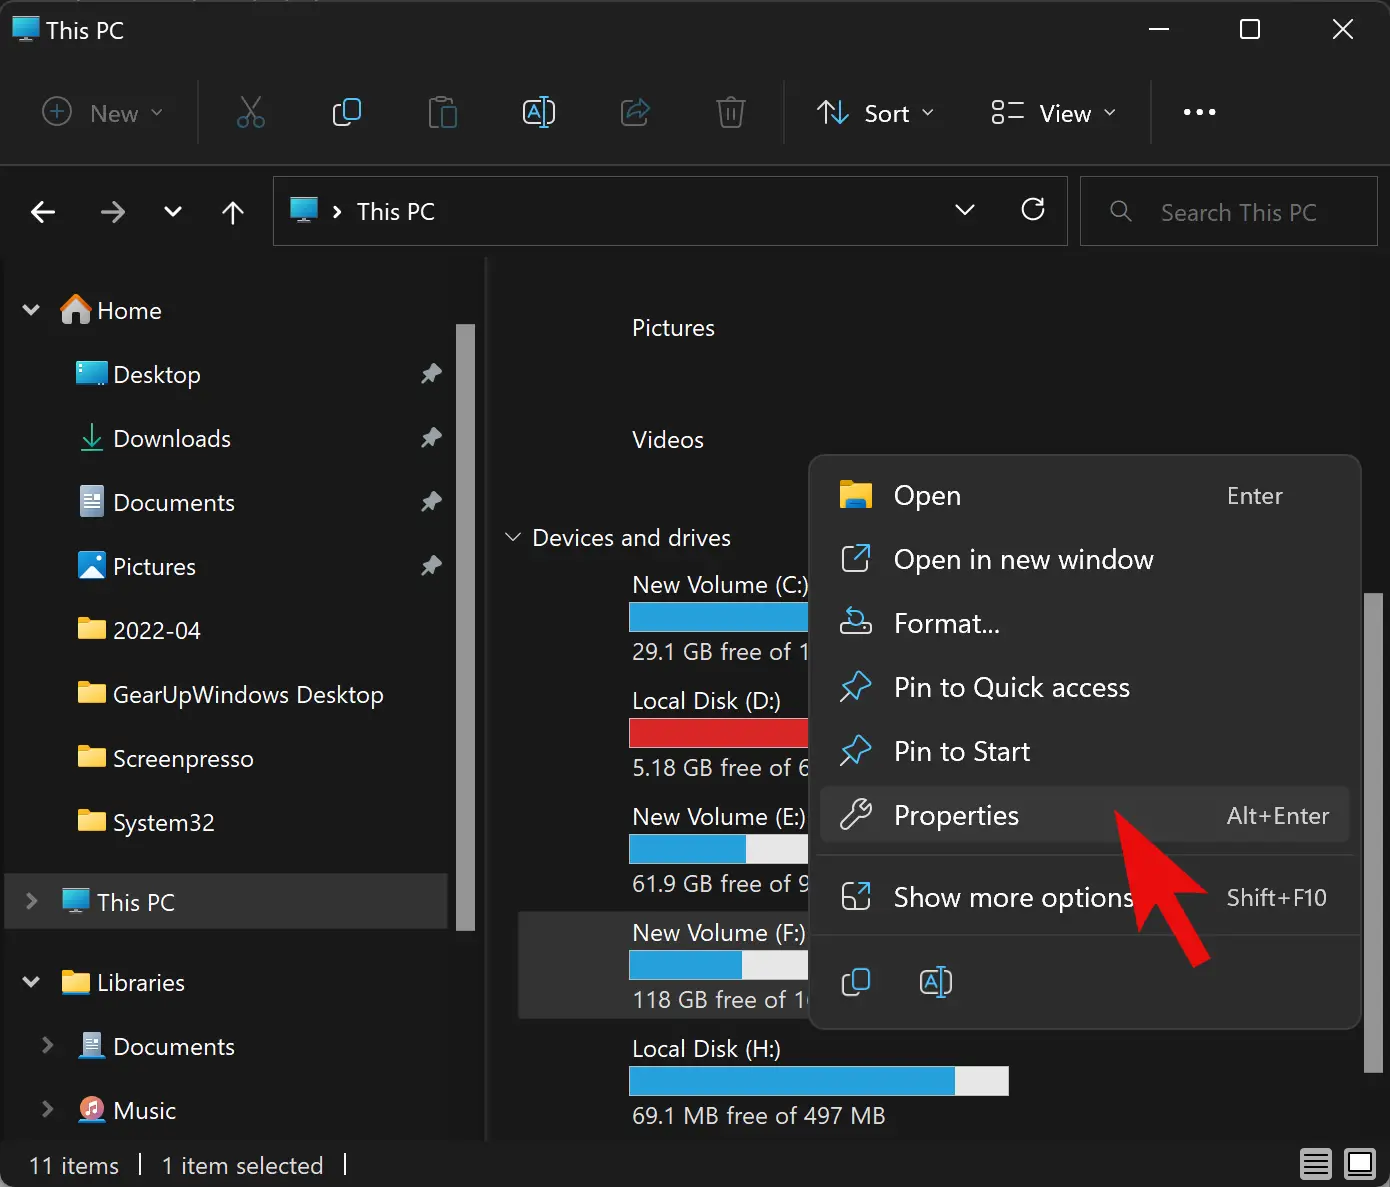
Step 3. Next, right-click on the disk you want to limit and select Properties.
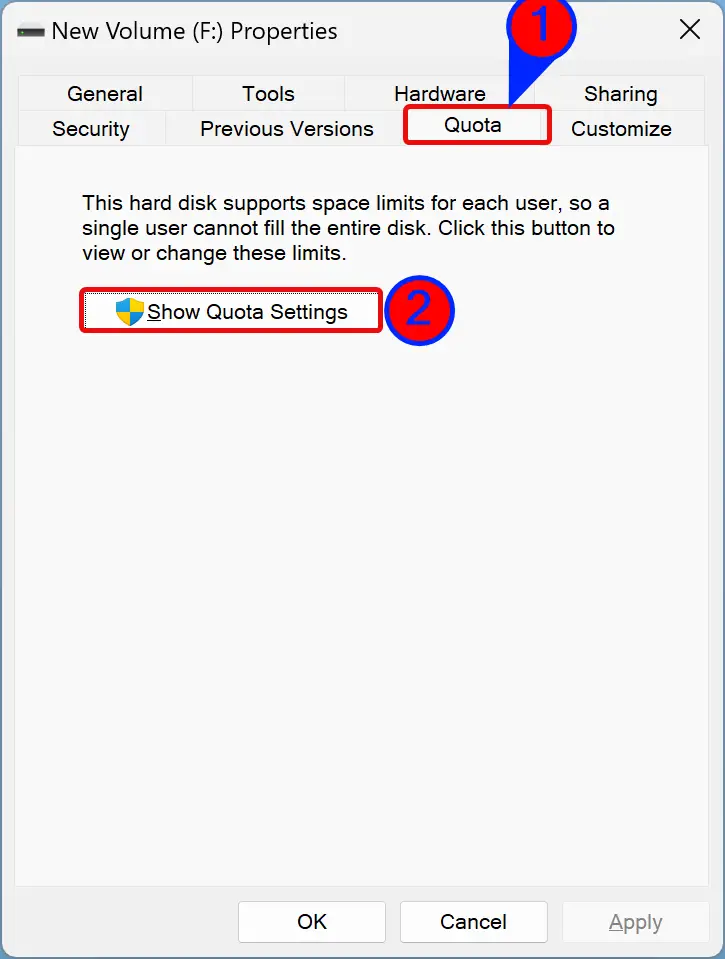
Step 4. Then, switch to the Quota tab and click the Show Quota Settings.
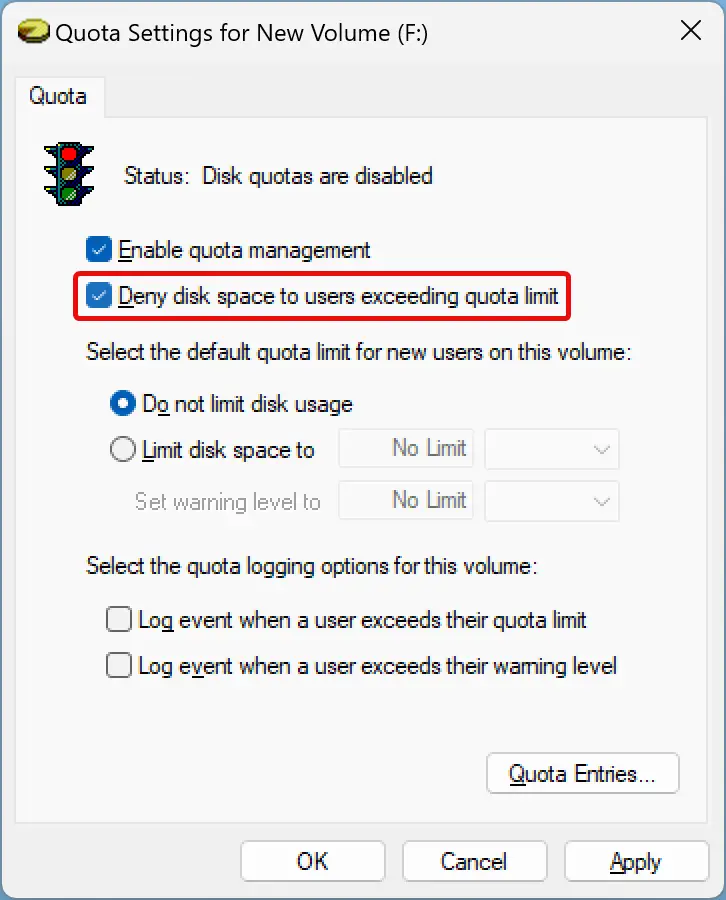
Step 5. In the next window, check the box Enable quota management. This will enable disk quota management for your selected drive.
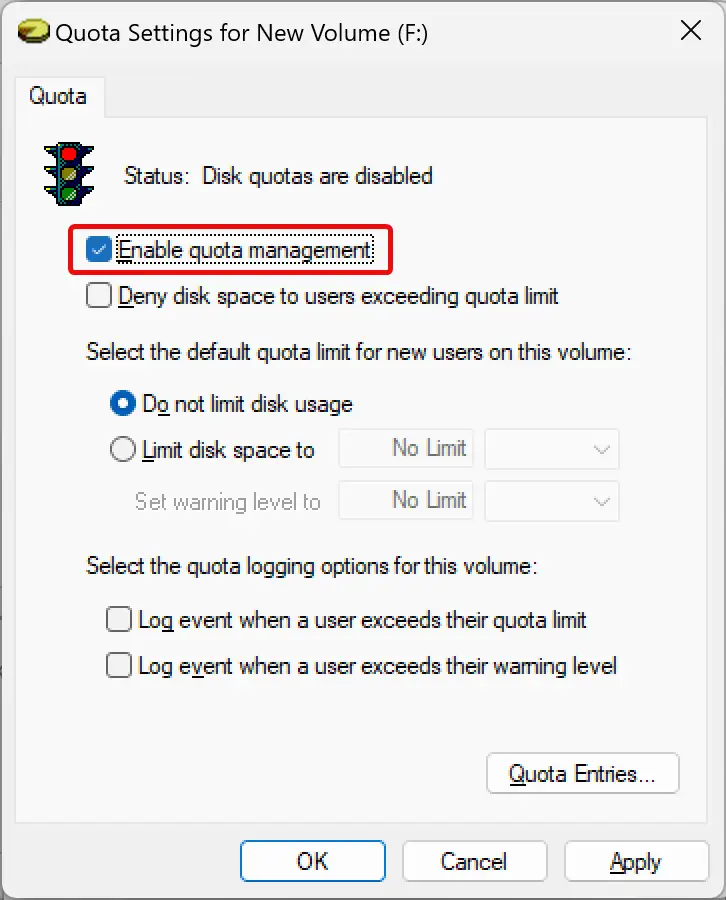
Step 6. Next, check the “Deny disk space to users exceeding quota limit” option. This enforces the limitation and ensures any user who reaches the quota limit can no longer write data to the disk.
Step 7. Then, choose Limit disk space to the radio button and set the disk limit. Suppose you want to put a 10GB disk quota, enter 10 in the first box and select the storage unit (GB) in the adjacent drop-down.
After that, set a warning level slightly lower than the disk limit. For instance, we want to set a 10GB disk limit for users so that we can set the warning level at 9GB. When users exceed the warning limit, Windows will send a reminder that they’re close to exhausting the disk space allocated to them.
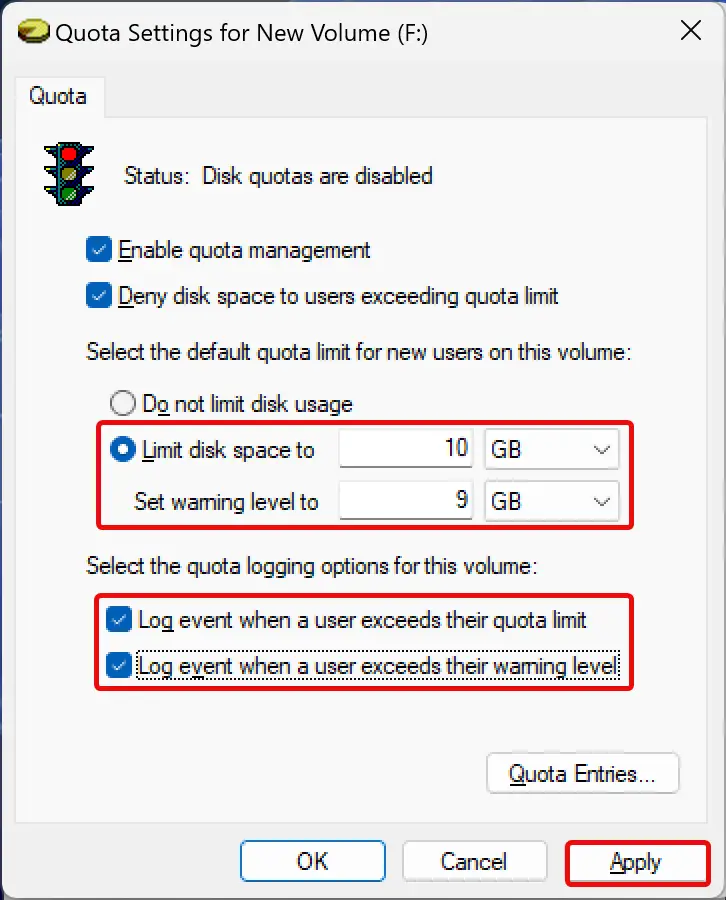
Step 8. If you want Windows to record an event log when users exceed their disk quotas, check the checkboxes “Log event when a user exceeds their quota limit” and “Log event when a user exceeds their warning level.”
Step 9. Next, click Apply.
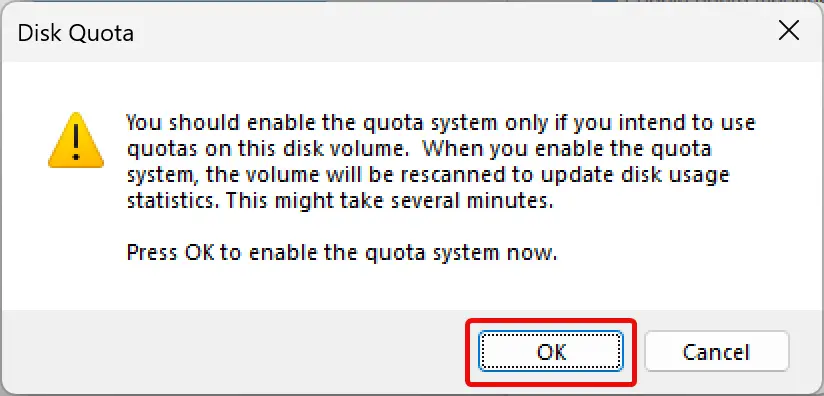
Step 10. When you see a “Disk Quota” warning, click OK.
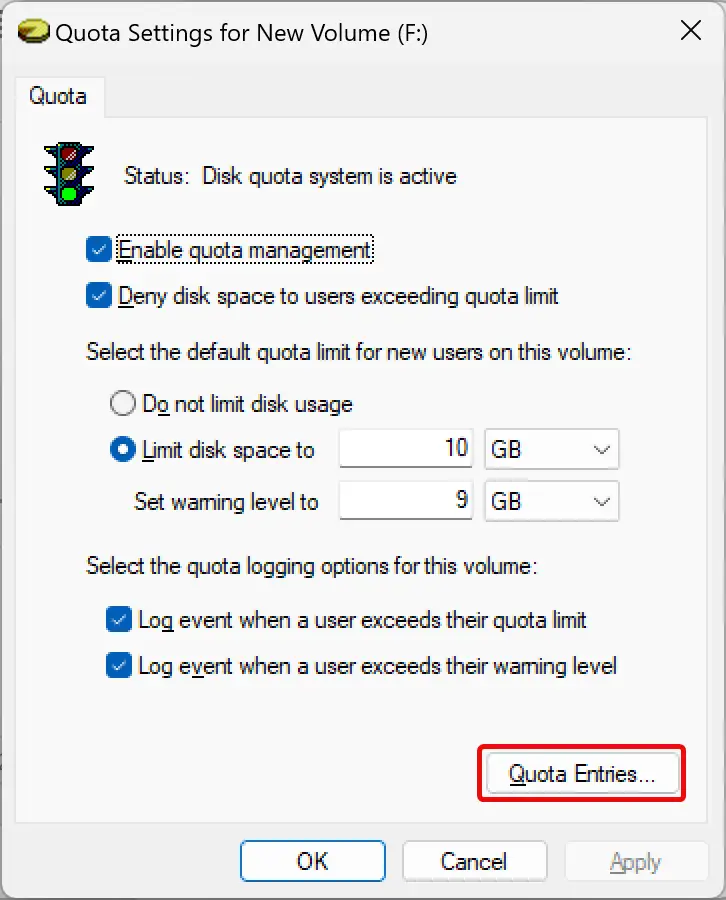
Step 11. Click OK in the Quota Settings window.
Step 12. Again, click OK.
Note: You should note that disk quota configurations are drive-specific. If your PC has multiple disk partitions, you need to repeat the above steps for all your local disks if you want to set a limitation on storing data on all drives.
How to View and Adjust Disk Quota Limit?
When you set a storage quota limit for disk, Windows applies the limit to all users on your computer. If you wish, you can adjust or disable the disk quota limit for specific users. Also, you can check the current disk space usage for all user accounts against the set quota.
To view and adjust the disk quota limit in Windows 11 or 10, use these steps:-
Step 1. First, open File Explorer.
Step 2. Then, click on This PC in the left side navigation pane.
Step 3. Next, right-click on the disk you want to view and manage disk limit, and select Properties.
Step 4. Then, switch to the Quota tab and click the Show Quota Settings.
Step 5. In the next window, click the Quota Entries button.
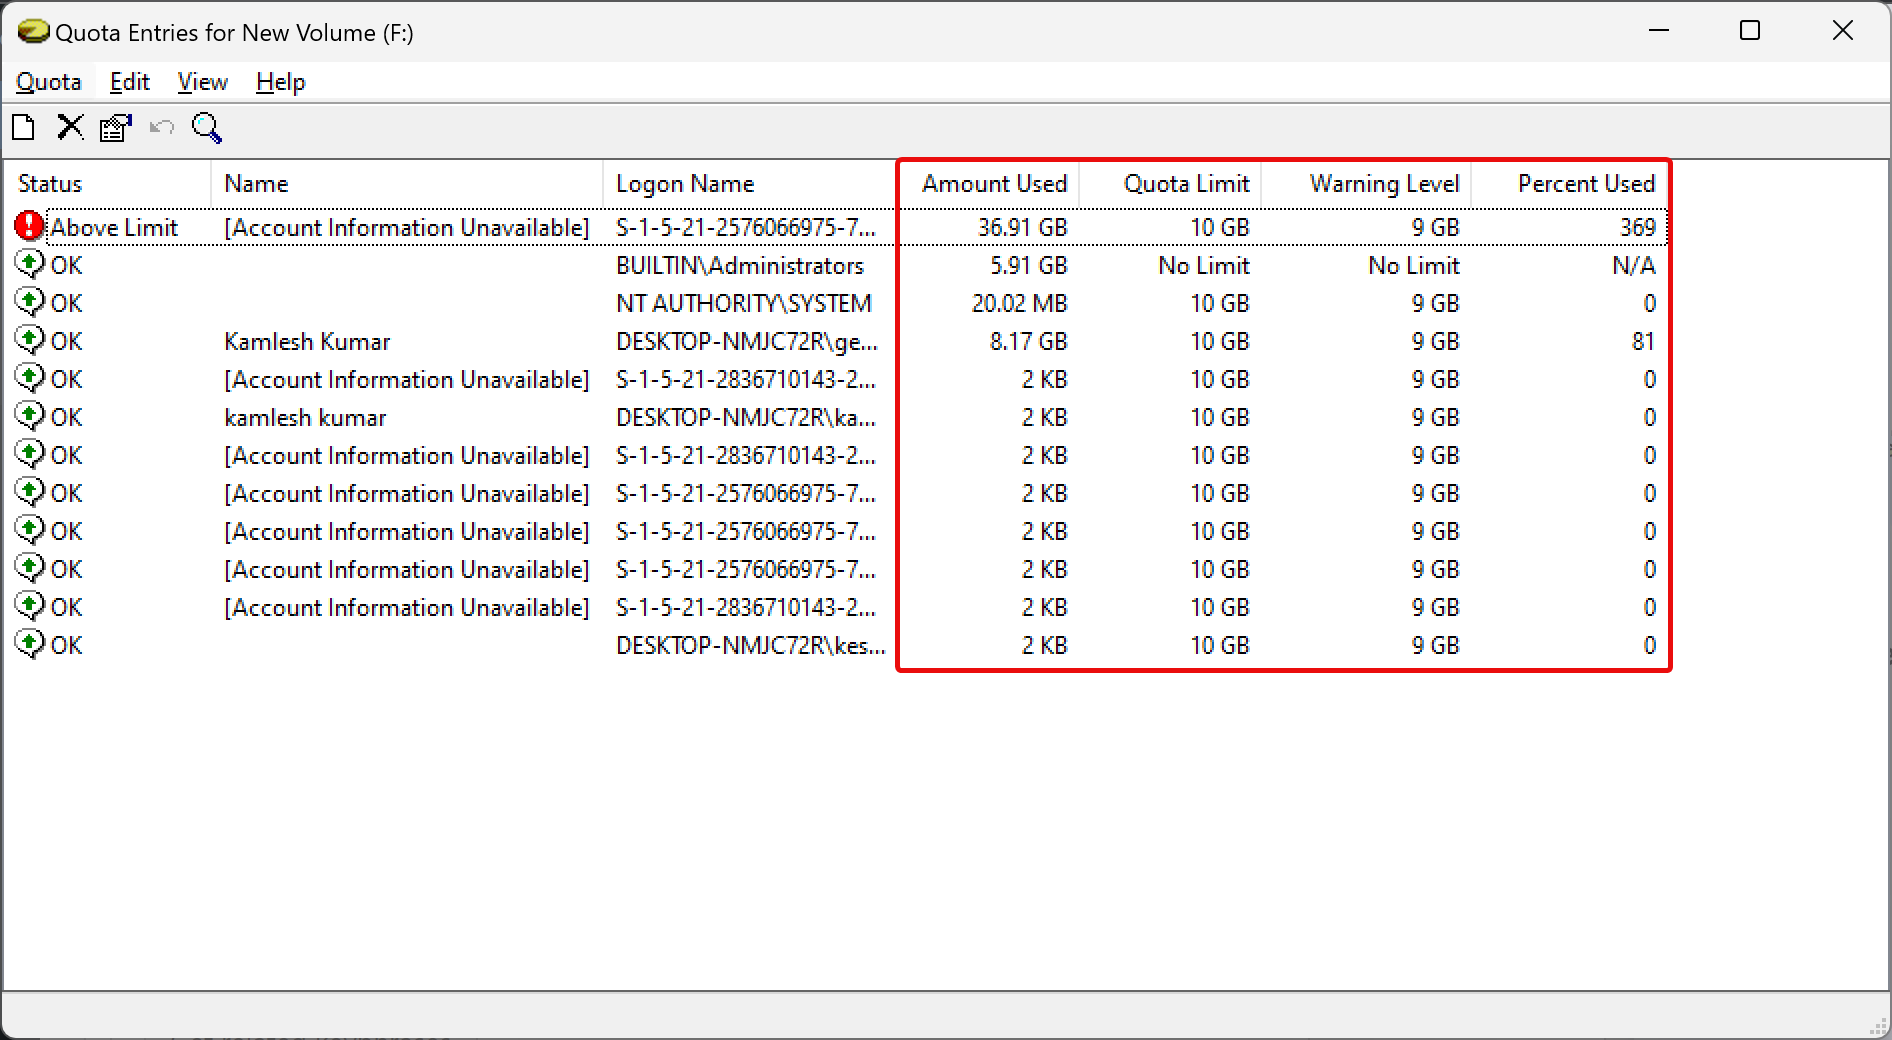
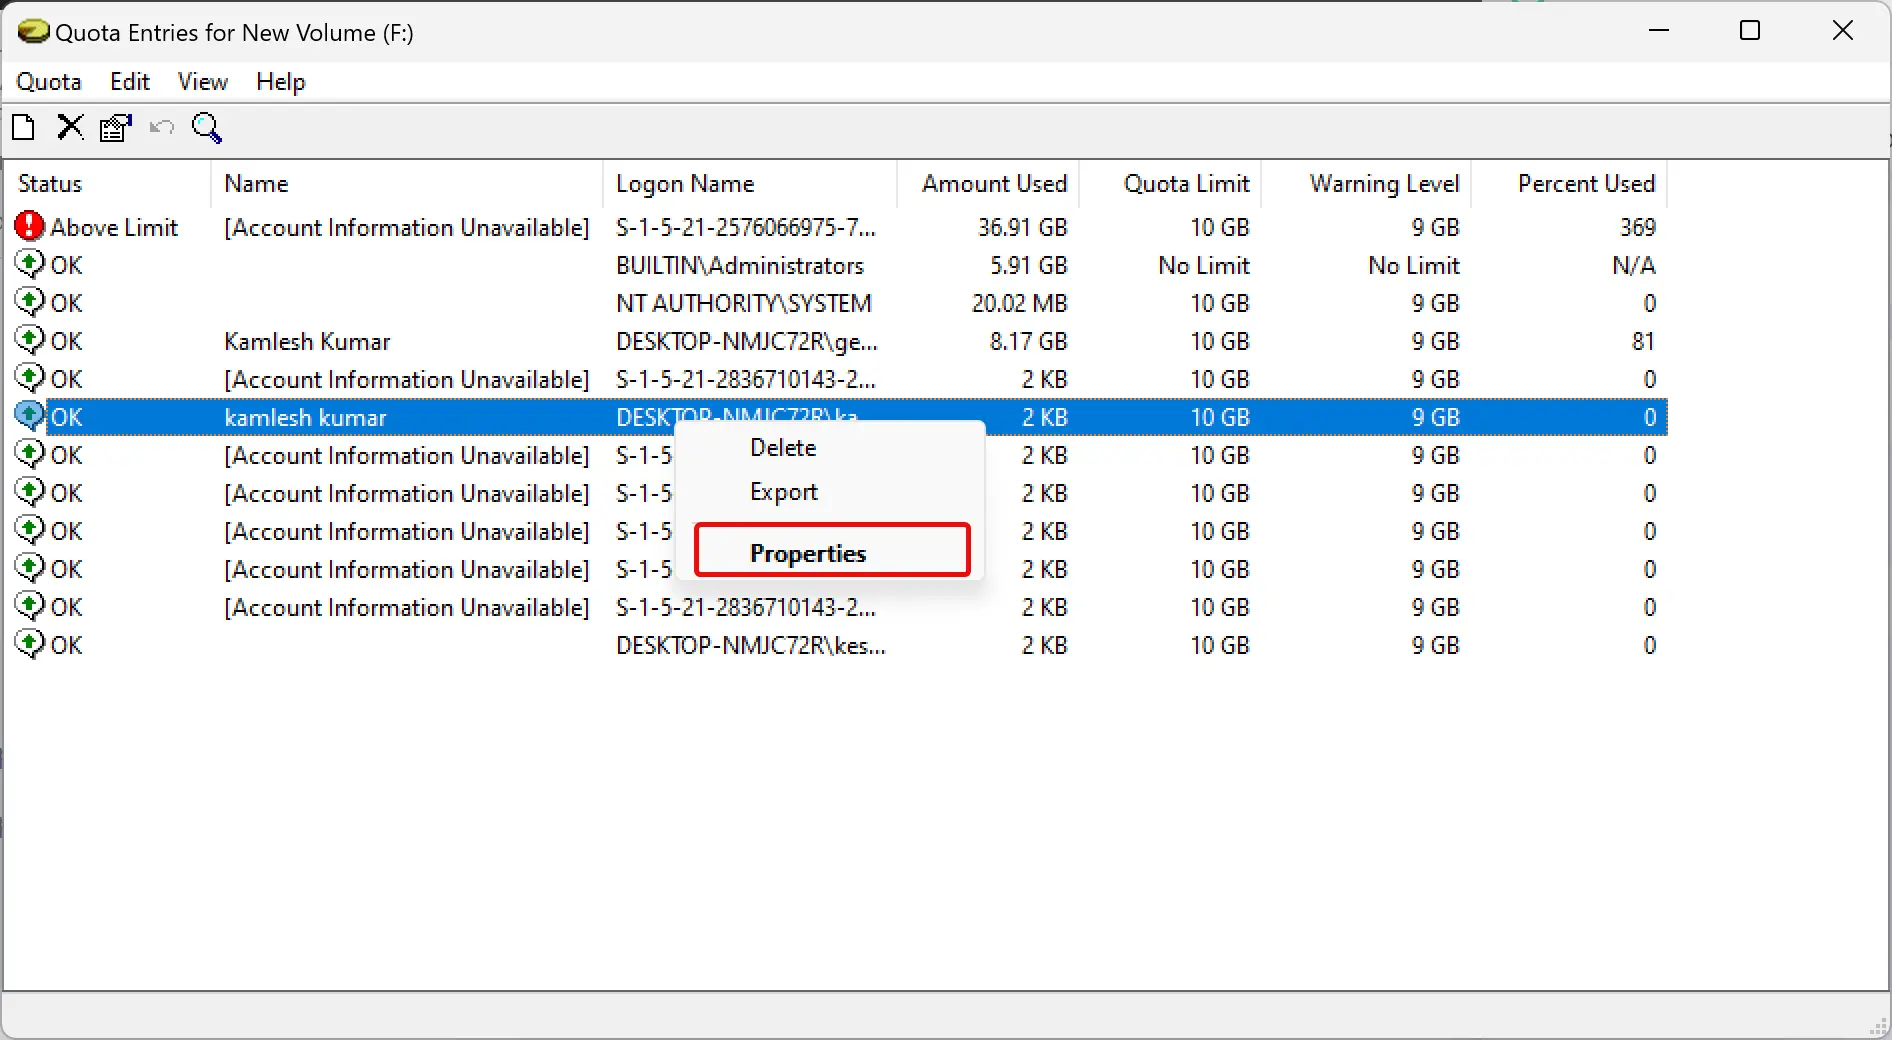
Step 6. Once you click the “Quota Entries” button, a new window will open where you can see a list of users available on your PC. Against each user, you can view the “Amount Used” and “Quota Limit” columns that show how much disk space a user has consumed against their allotted quota limit.
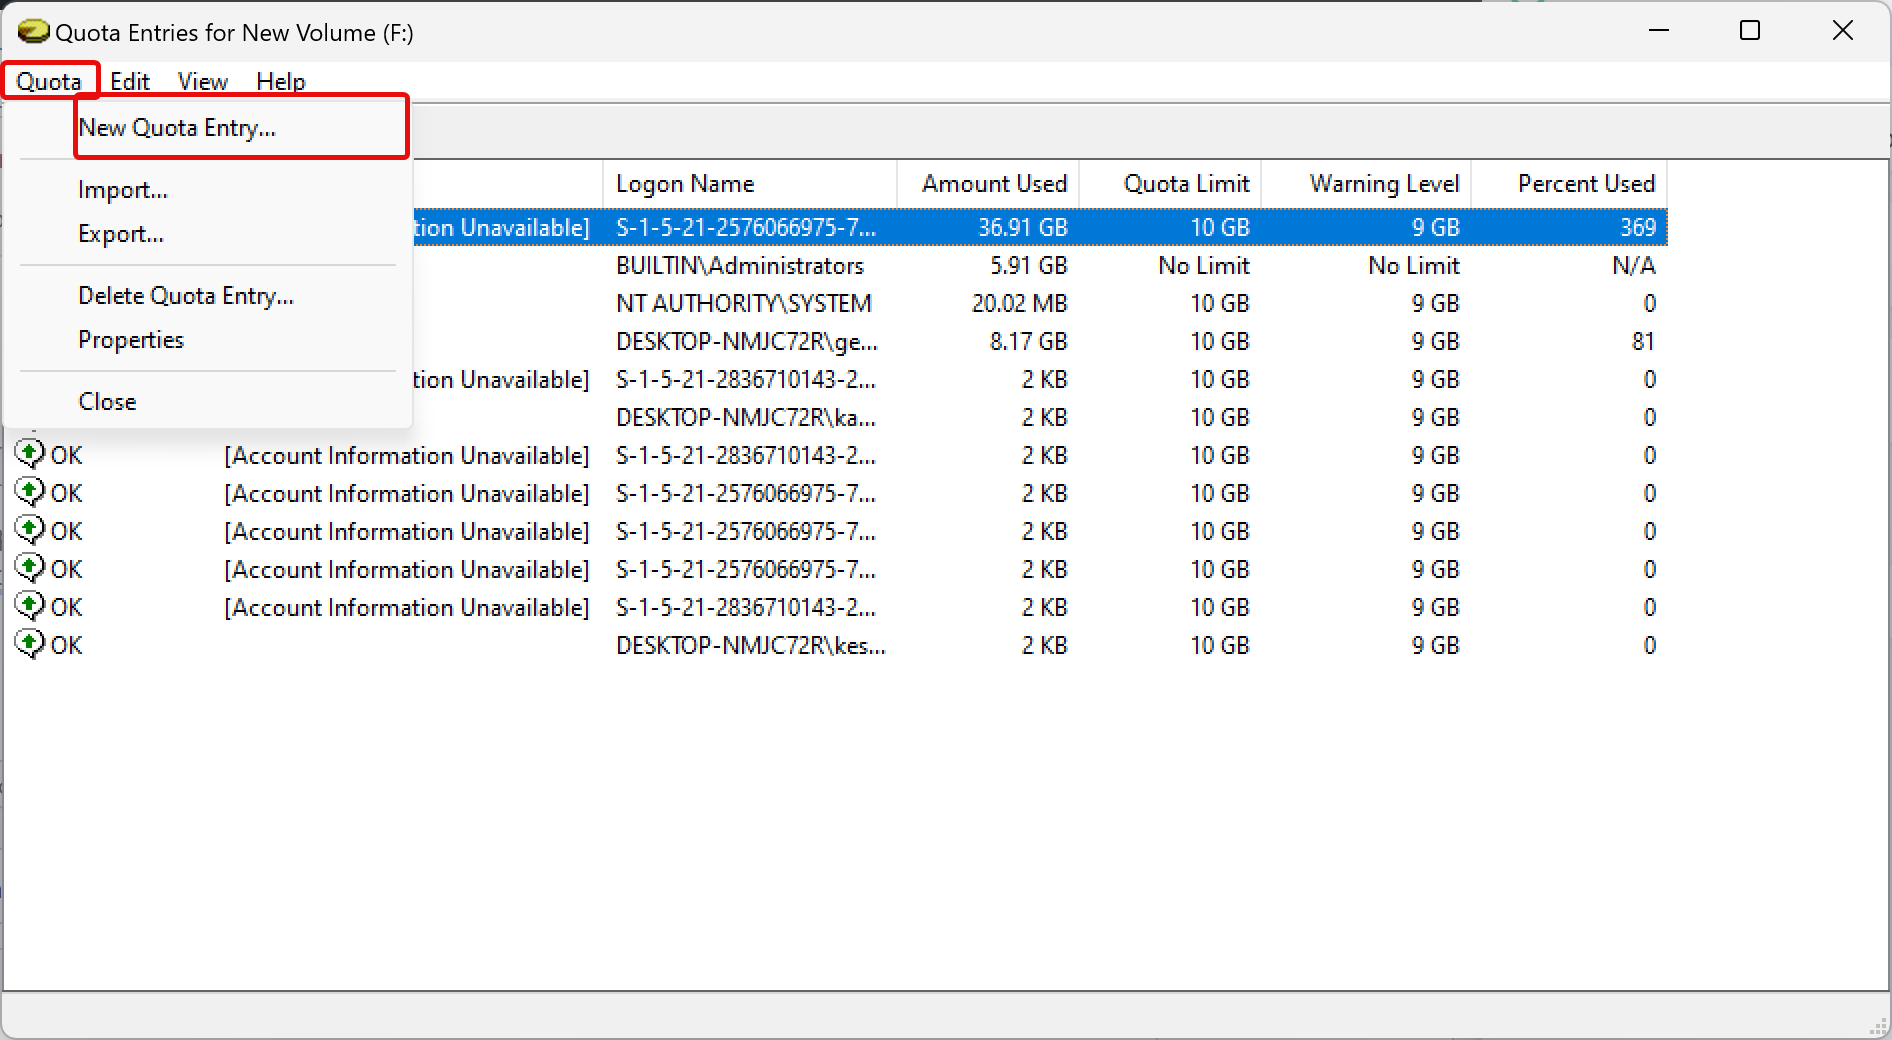
Step 7. If you don’t find a user account in the “Name” or “Logon Name” columns, you can add them manually. For that, click Quota on the menu and select New Quota Entry.
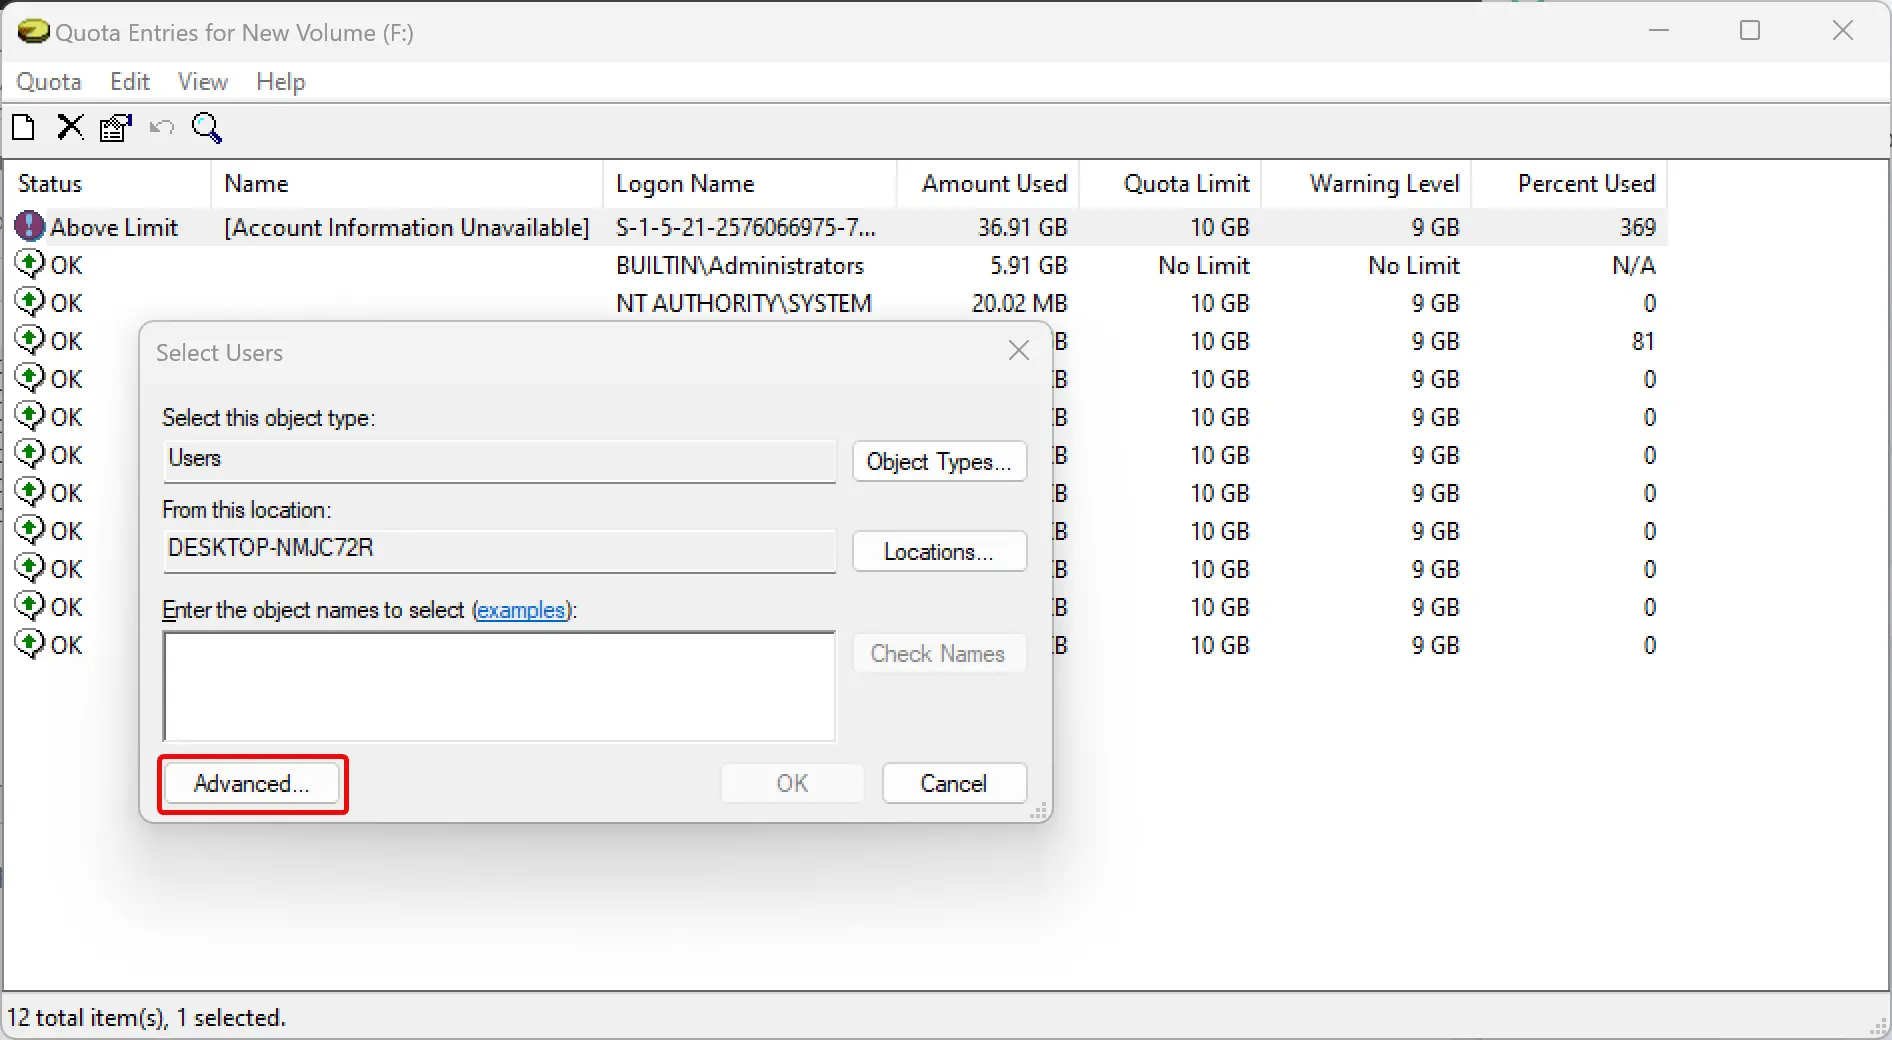
Step 8. Click Advanced in “Select Users” window.
Step 9. Click the Find Now button.
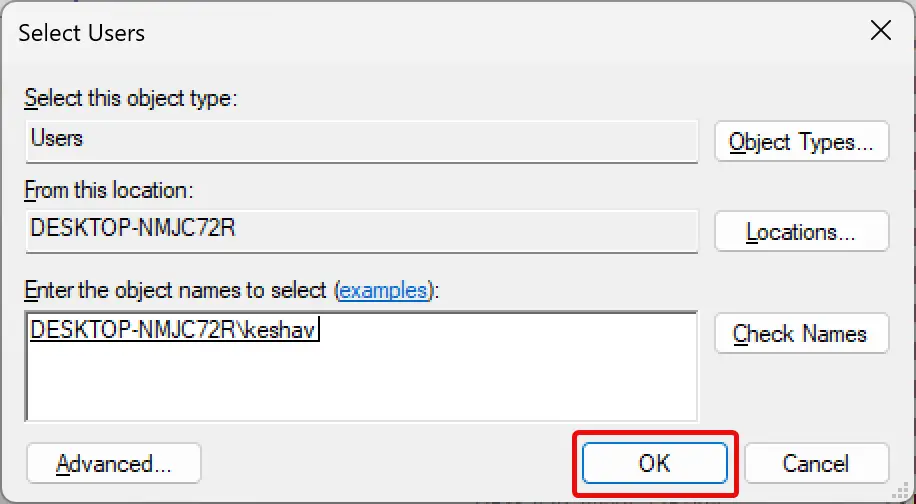
Step 10. Select the account you want to include in the storage quota limitation.
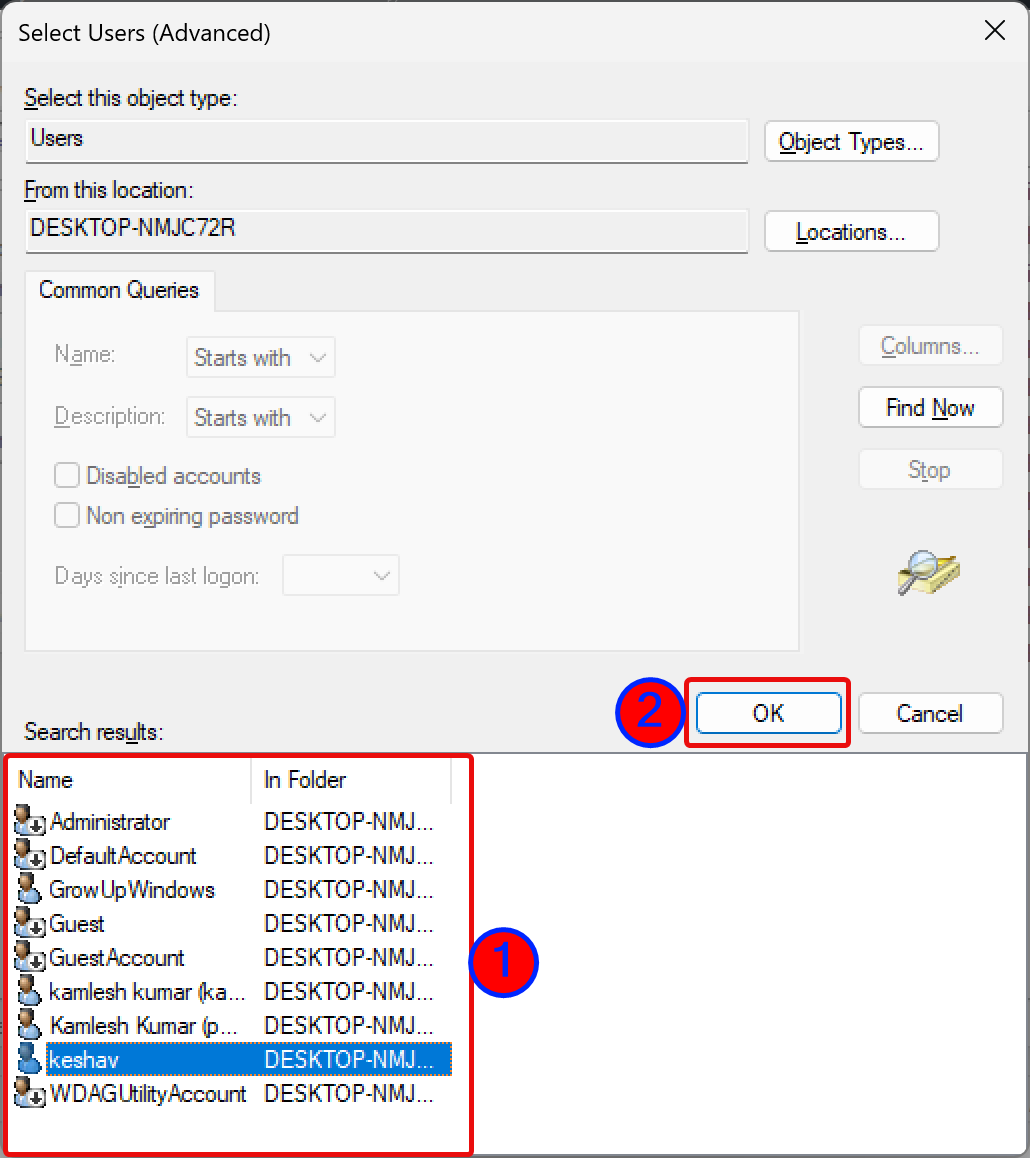
Step 11. Click OK.
Step 12. Again, click OK.
Step 13. If you wish, set or remove the disk quota limit and warning level for the user.
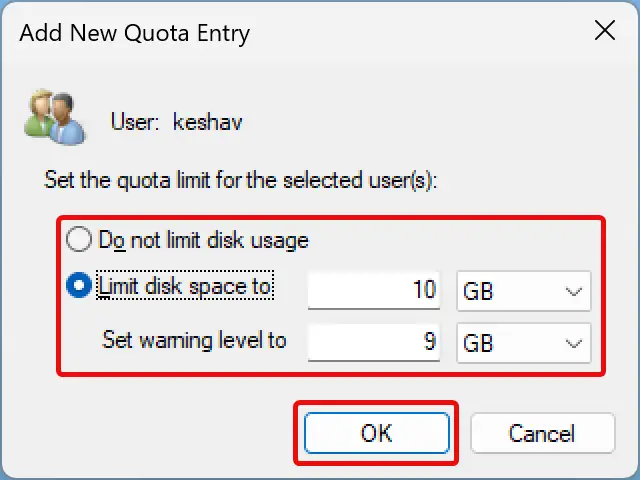
Step 14. Click OK.
Step 15. Here, you can also adjust the quota limit for a specific user if you wish. To do that, right-click on the user name and select Properties.
Step 16. Enter a new limit and warning level.
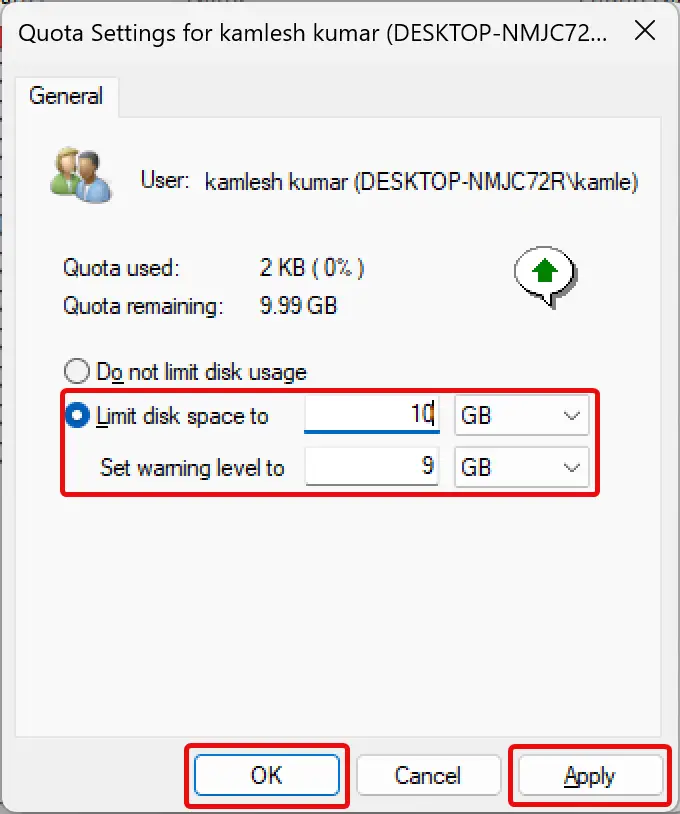
Quick Note: To delete or remove the quota limit, you need to select the option Do not limit disk usage.
Step 17. Click Apply.
Step 18. Click OK.
How to Configure the Disk Quota using Local Group Policy Editor in Windows 11 or 10?
If you fail to set Disk Quota using the File Explorer, you can also use the Group Policy Editor to configure it. However, you should note that this method will only work if you’re running Windows 11/10 Pro, Education, and Enterprise. If you’re on the Windows 11/10 Home edition, you need to tweak the registry to apply the policy.
To set the Disk Quota using Local Group Policy Editor in Windows 11 or 10, use these steps:-
Step 1. Open Local Group Policy Editor.
Step 2. Then navigate to the following path in the left sidebar:-
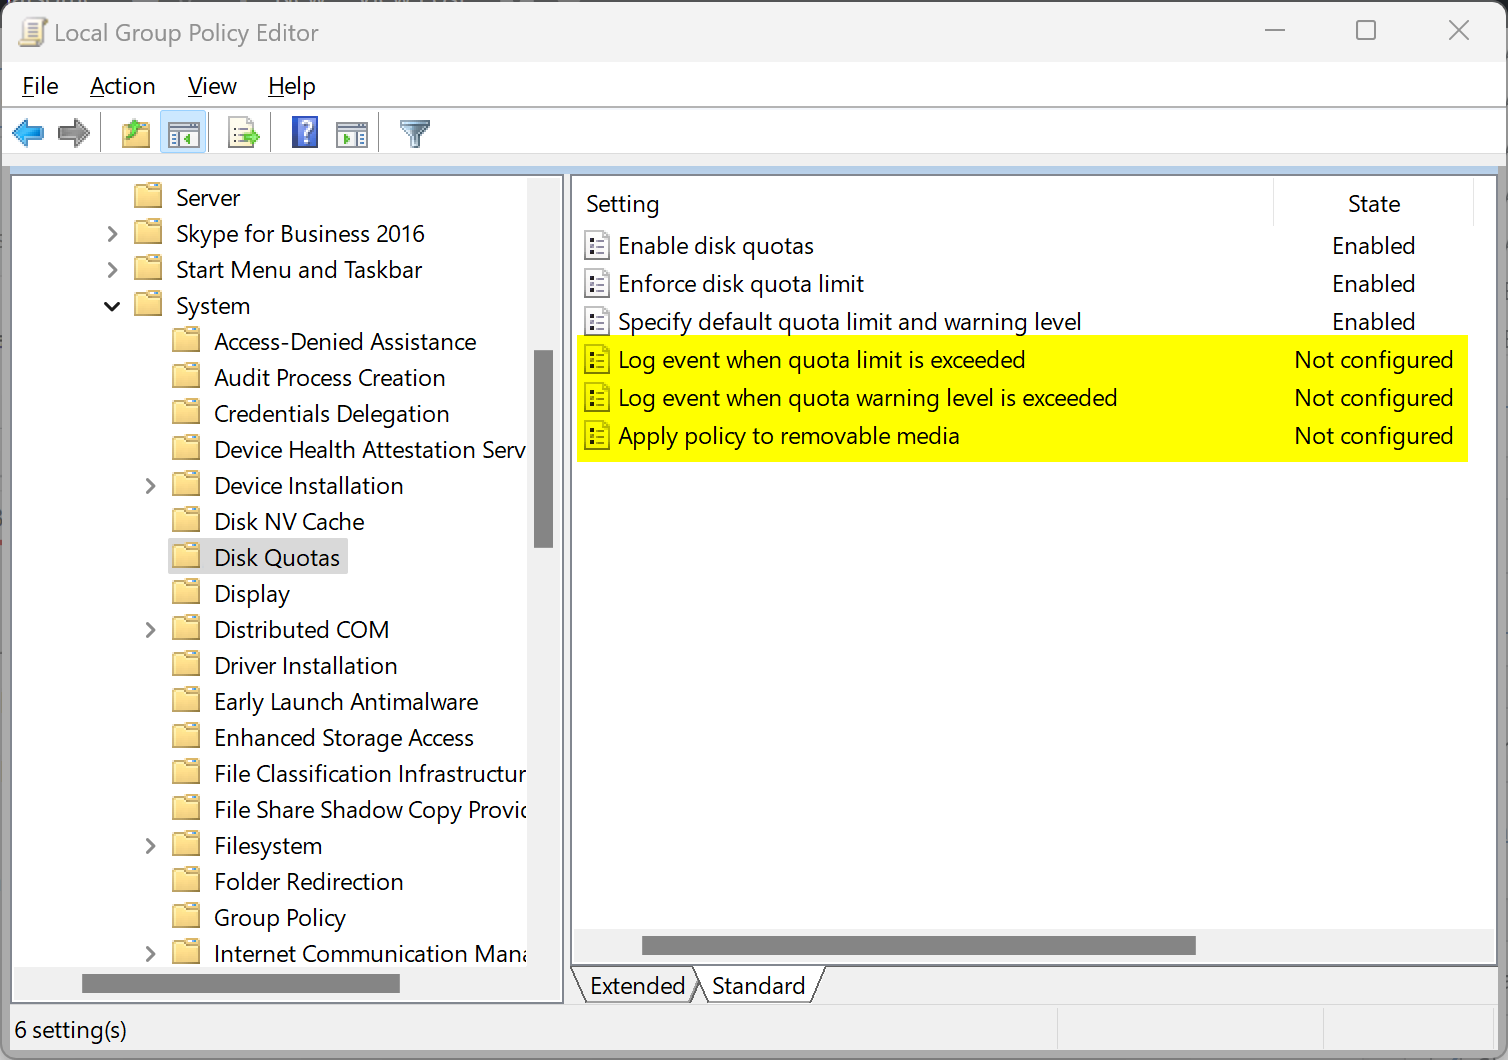
Computer Configuration > Administrative Templates > System > Disk Quotas
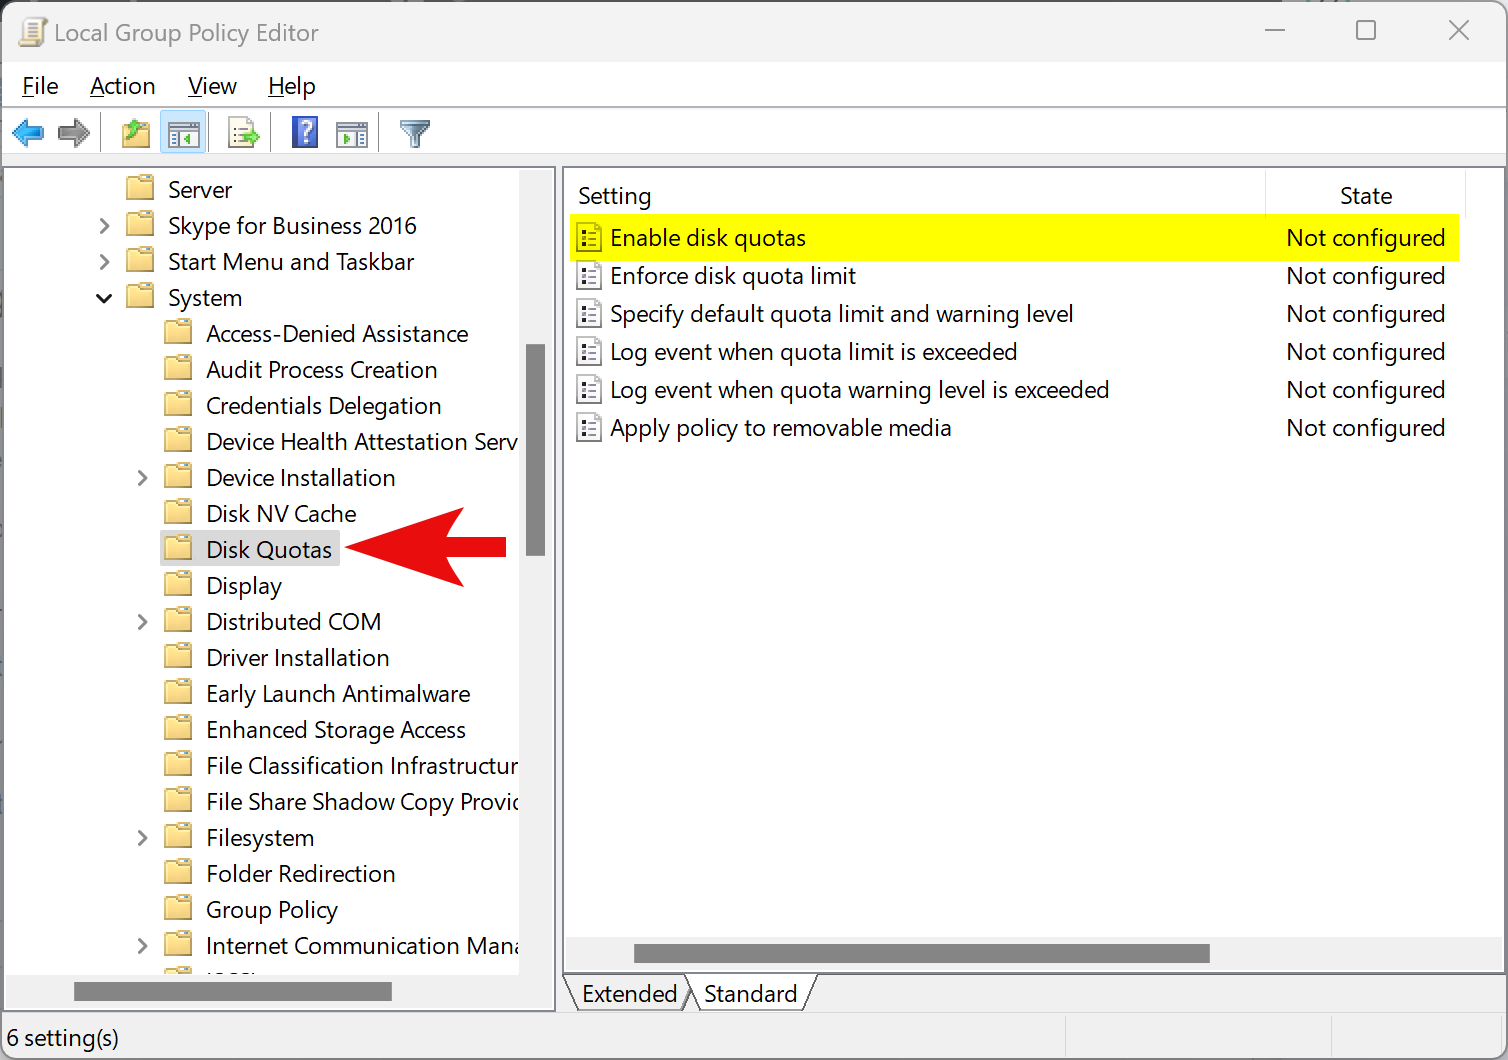
Step 3. On the right side of the “Disk Quotas” folder, double-click the policy name Enable disk quotas.

Step 4. Select Enabled.
Step 5. Click Apply.
Step 6. Click OK.
Step 7. Next, double-click Enforce disk quota limit.
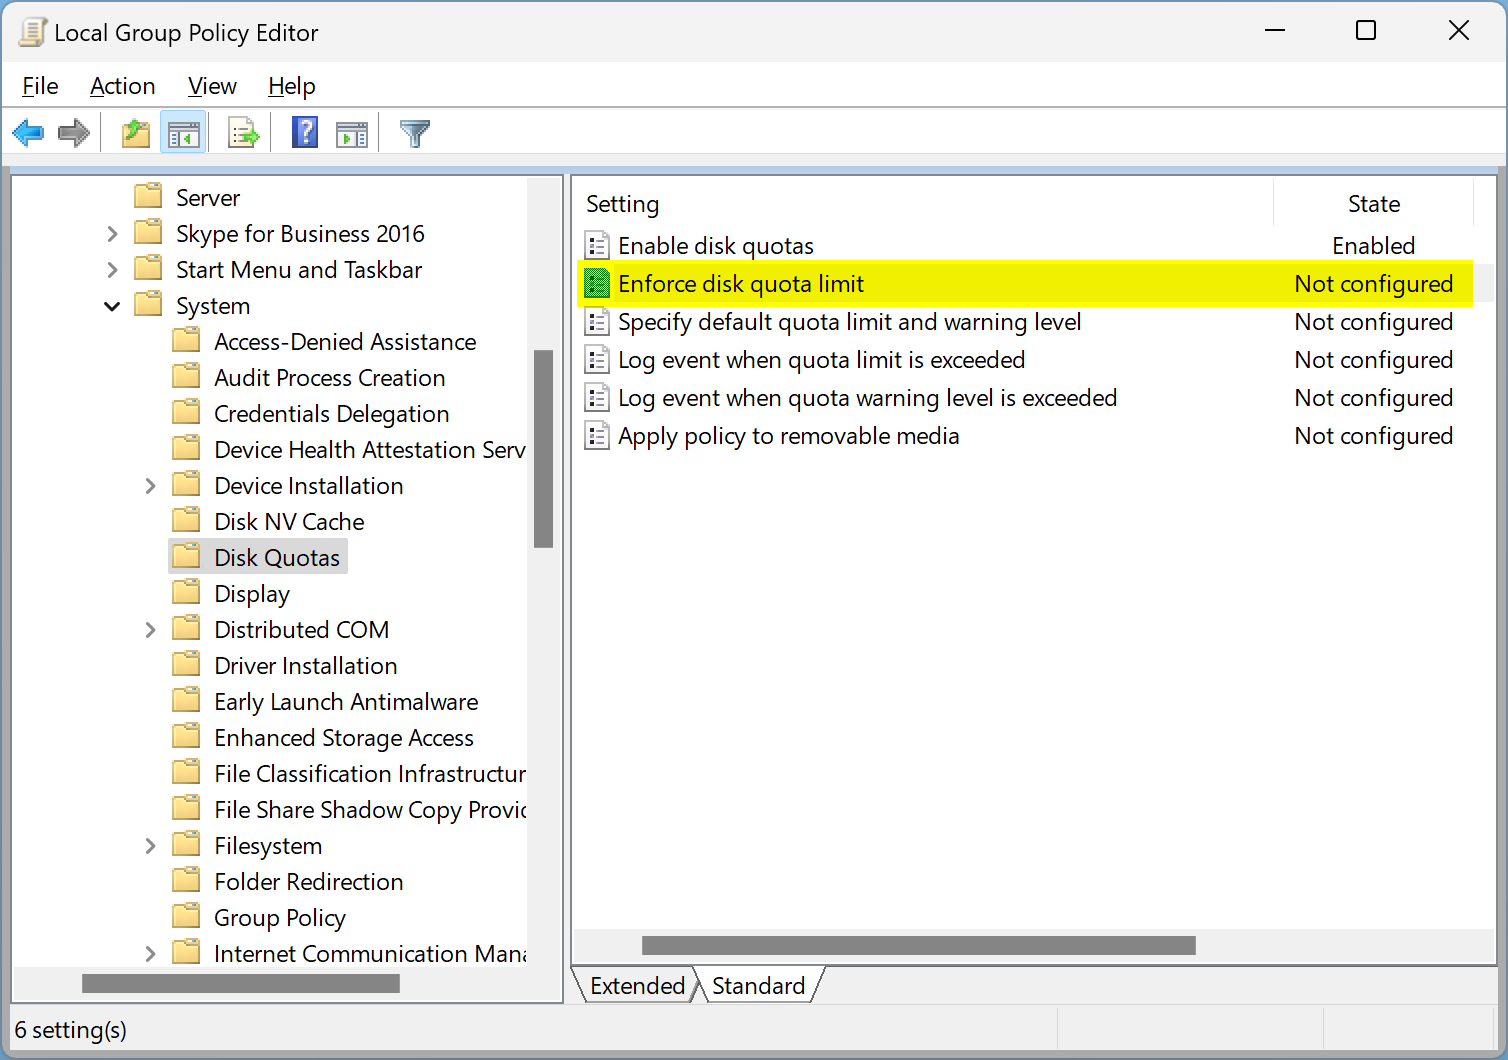
Step 8. Select Enabled.

Step 9. Click Apply.
Step 10. Click OK.
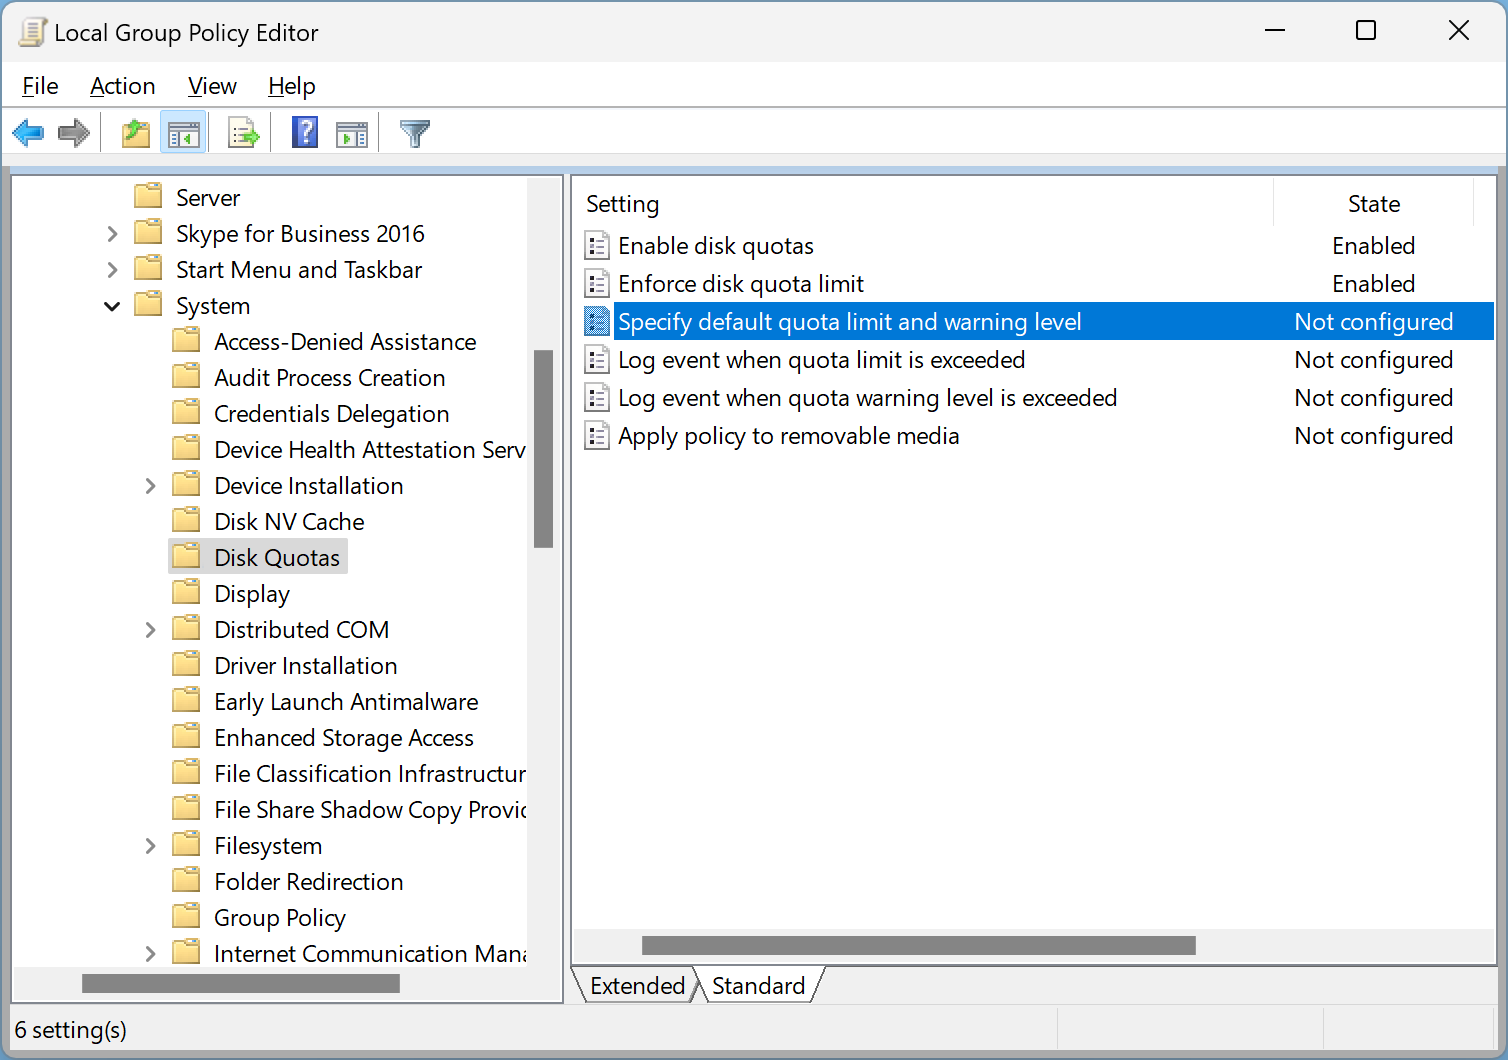
Step 11. Next, double-click the policy name Specify default quota limit and warning level.
Step 12. Select Enabled.
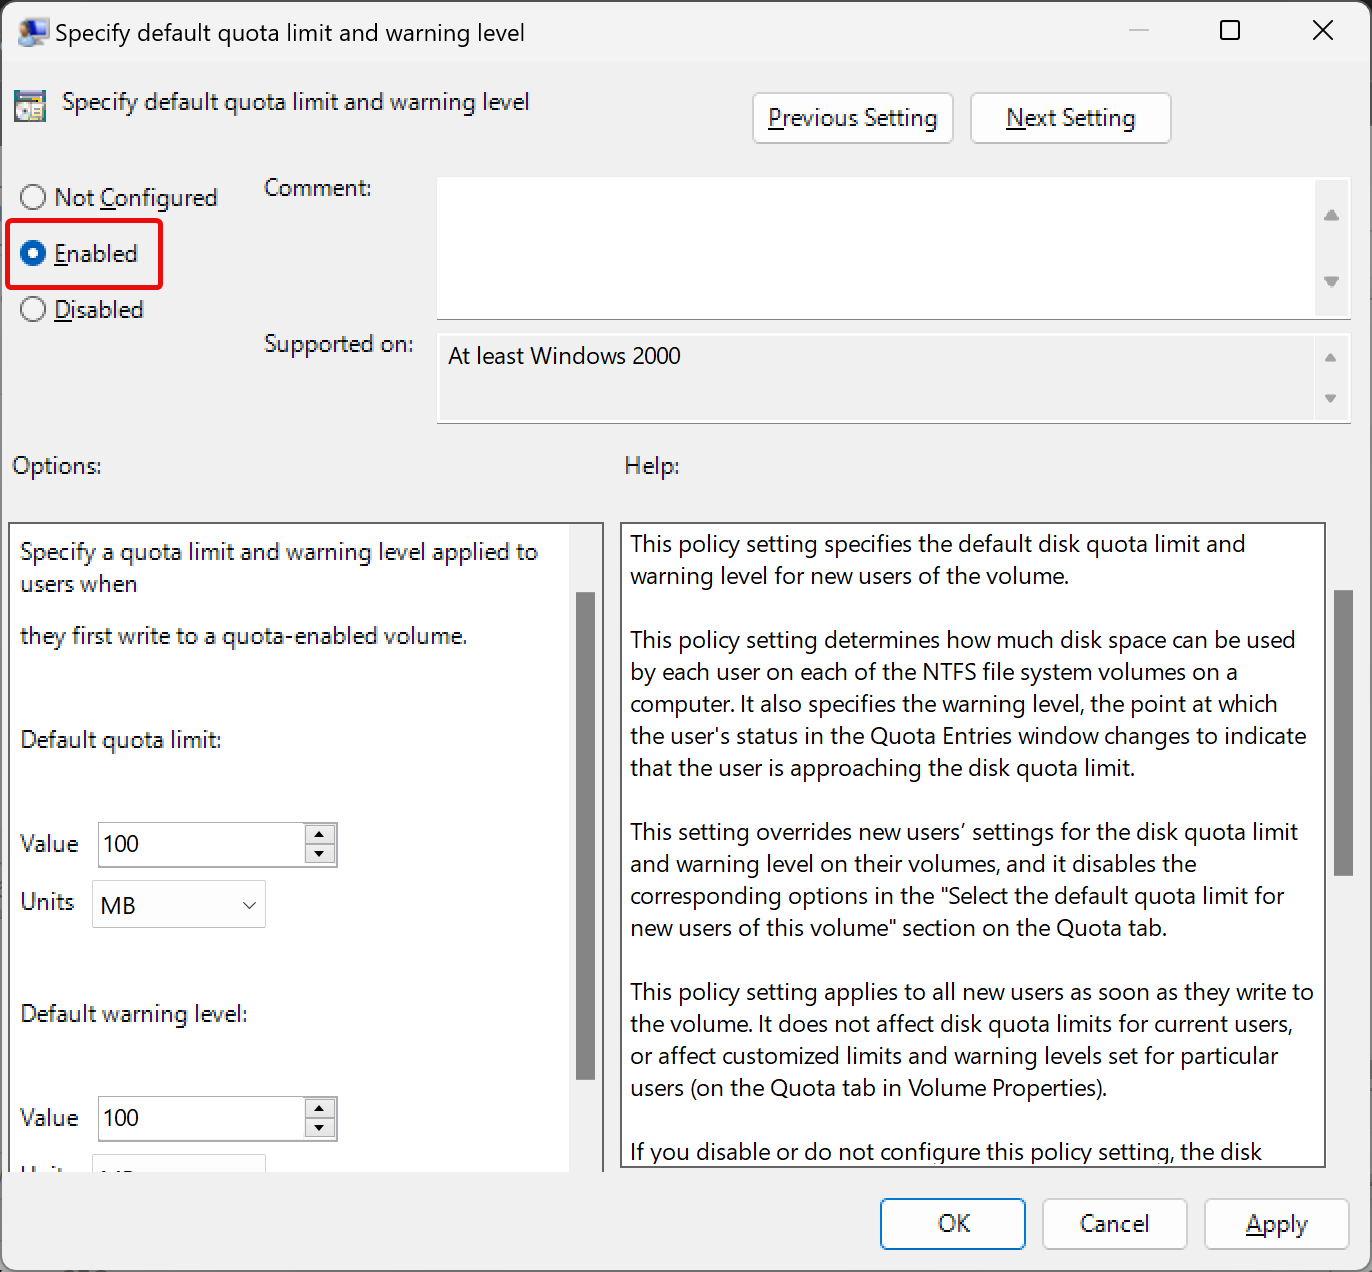
Step 13. Enter the quota limit and warning levels “Value” and “Units.”
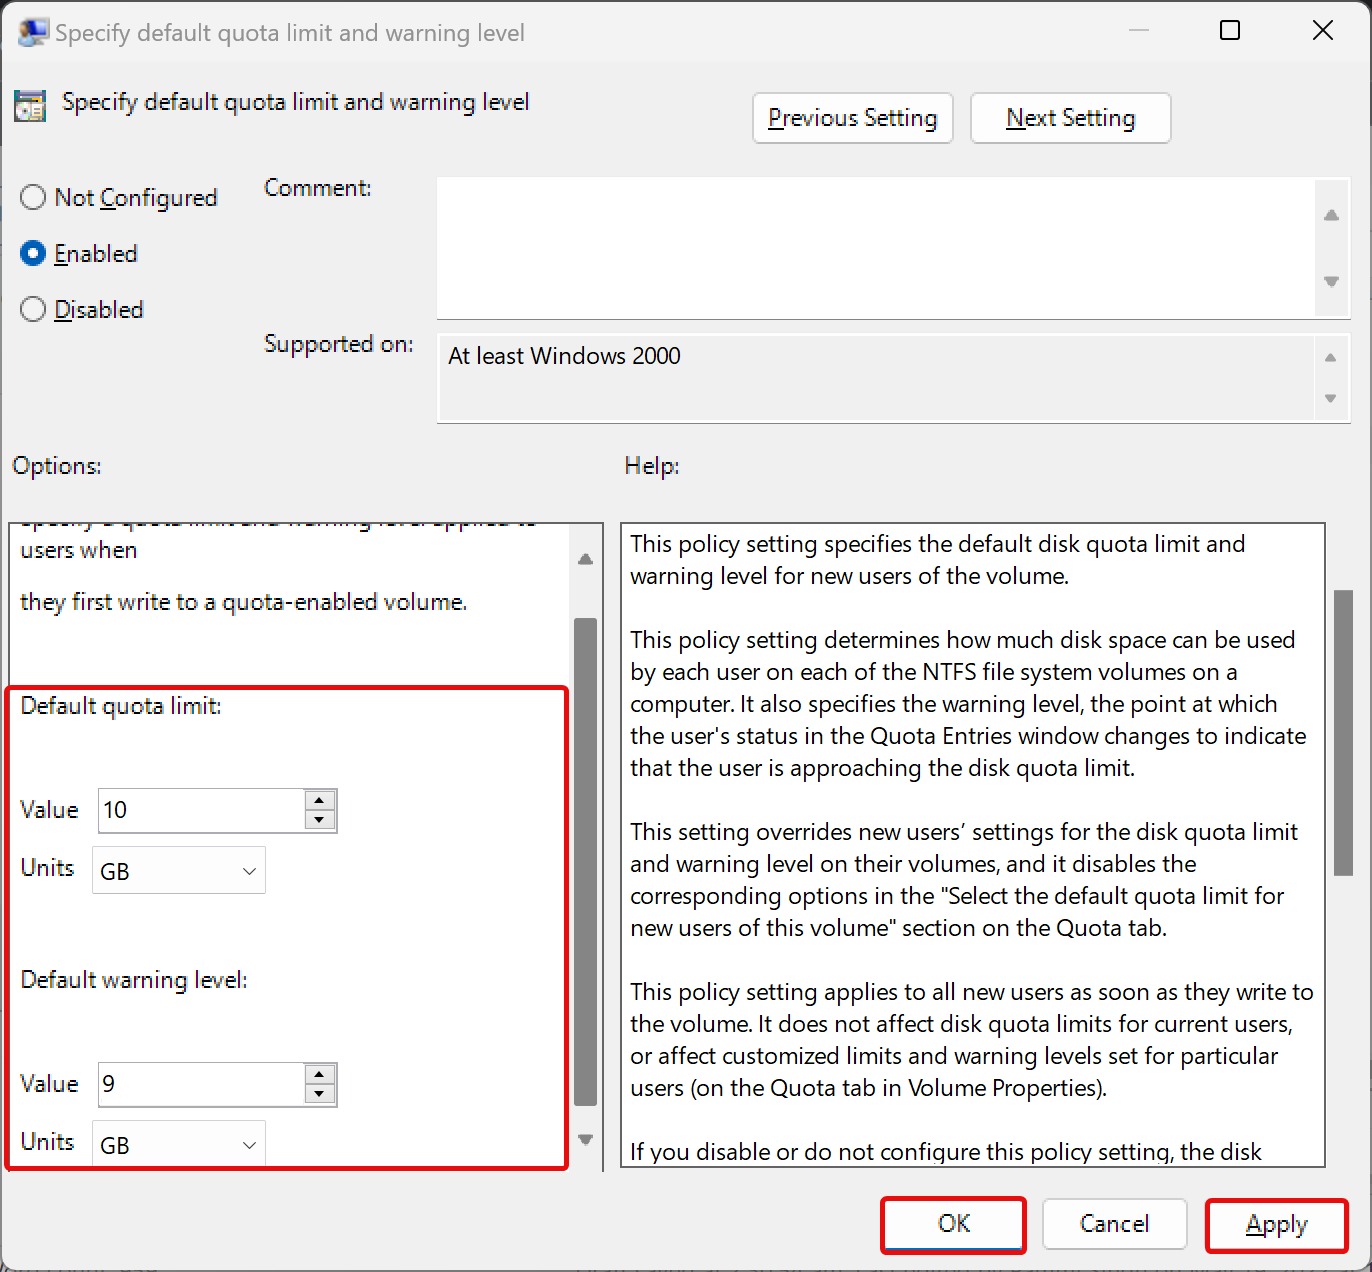
Step 14. Click Apply.
Step 15. Click OK.
Step 16. If you want the disk quota settings to be applied to removable or external drives also, double-click the policy name Apply policy to removable media.
Step 17. Select Enabled.
Step 18. Click Apply.
Step 19. Click OK.
Step 20. Similarly, you can configure the policies “Log event when quota limit is exceeded” and “Log event when quota warning level is exceeded.”
Step 21. At last, reboot your computer to apply the changes.
How to Set the Disk Quota through Registry Editor on Windows 11 or 10?
If you use Windows 11/10 Home edition or due for some reason, if you want, you can use the Registry Editor to force-enable a disk quota limit.
To set the Disk Quota through Registry Editor on Windows 11 or 10, use these steps:-
Step 1. Open Registry Editor.
Step 2. Then, navigate to the following path on the left side of Registry Editor:-
HKEY_LOCAL_MACHINE\SOFTWARE\Policies\Microsoft\Windows NT\DiskQuota
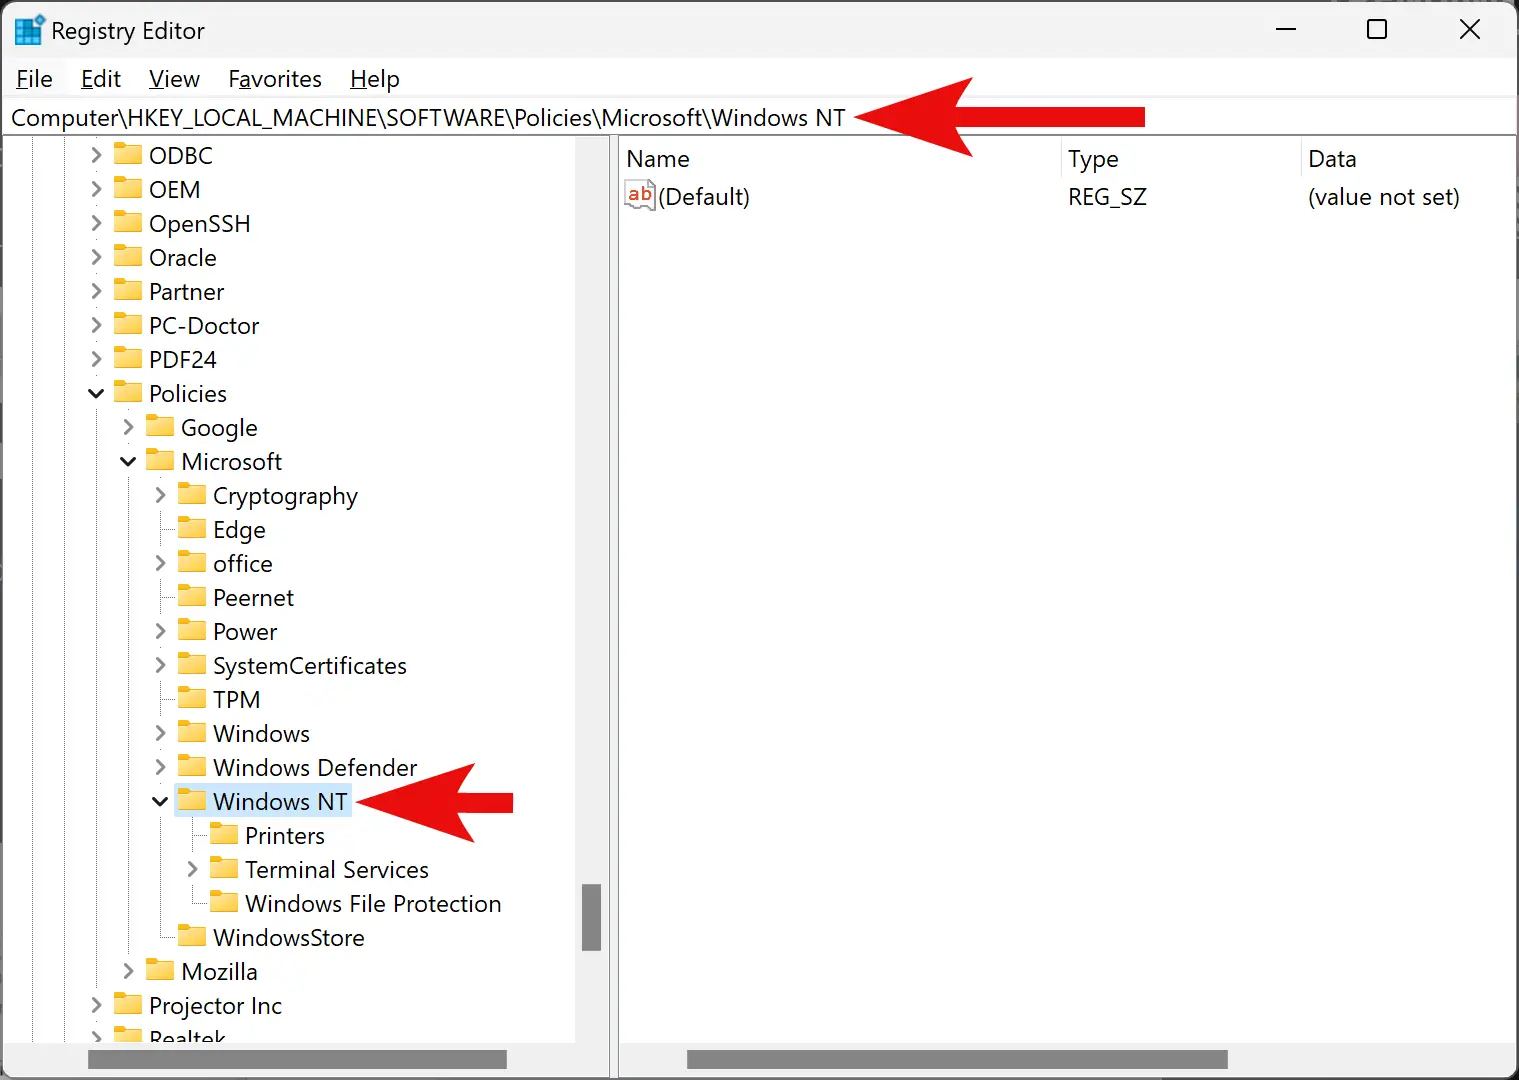
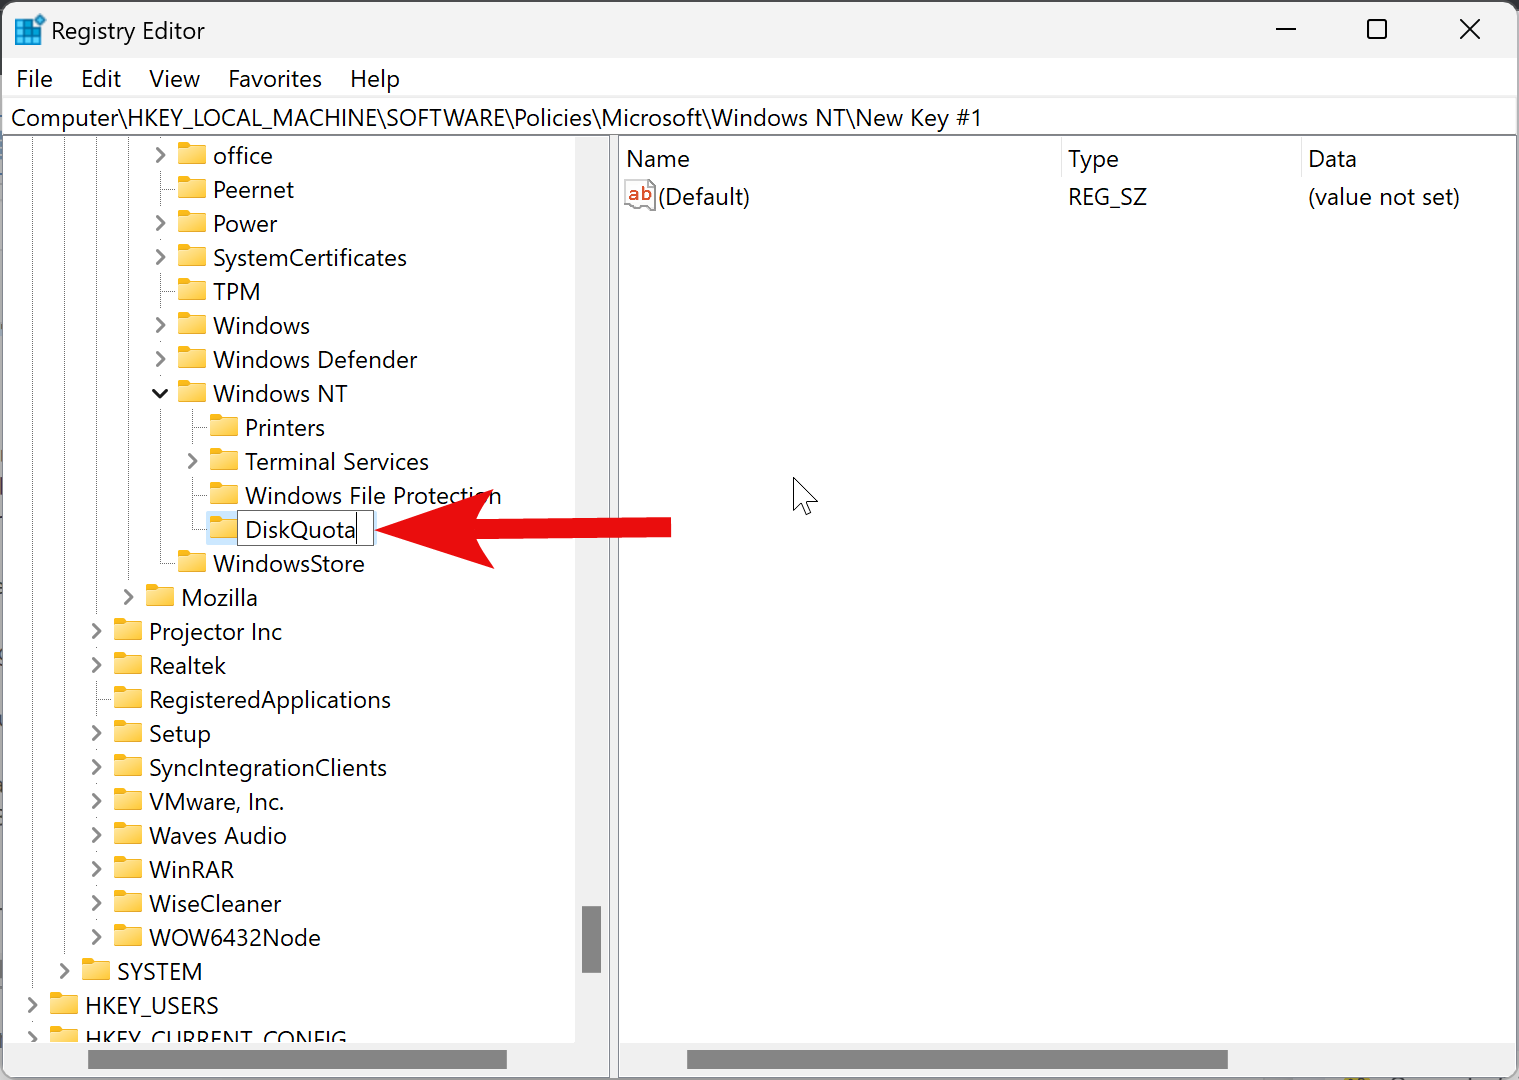
Step 3. Now, right-click on the “Windows NT” folder and select New > Key.
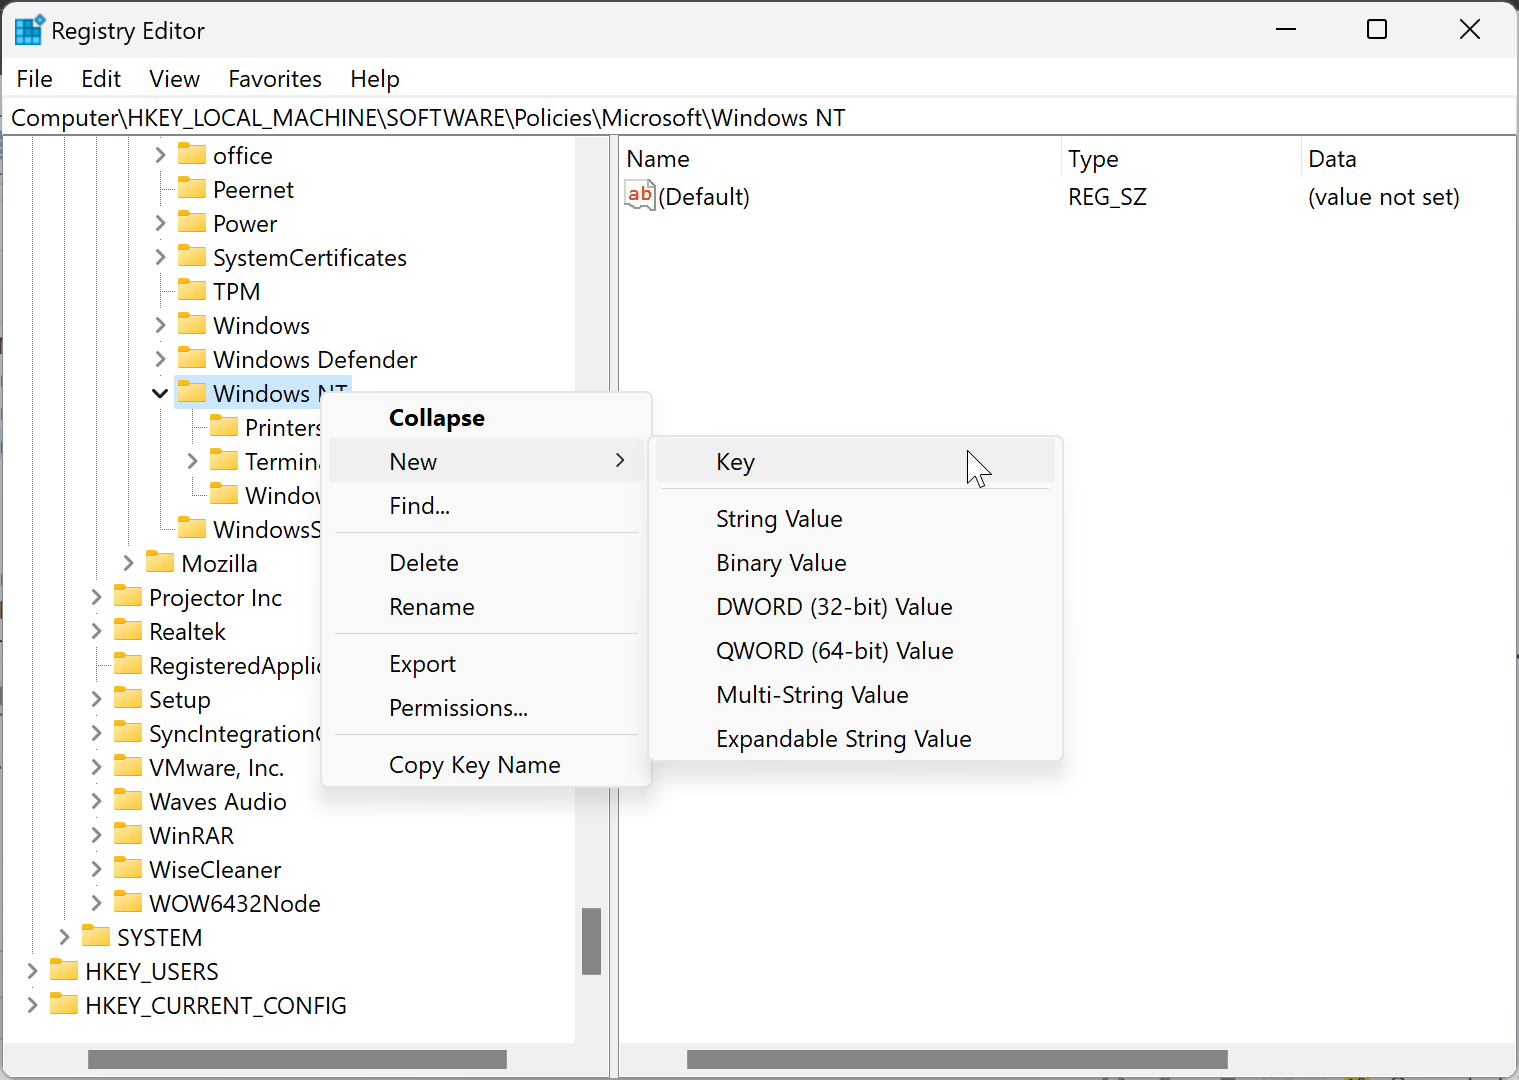
Step 4. Name the newly created key as DiskQuota.
Step 5. Now, right-click on the DiskQuota folder and select New > DWORD (32-bit) Value.
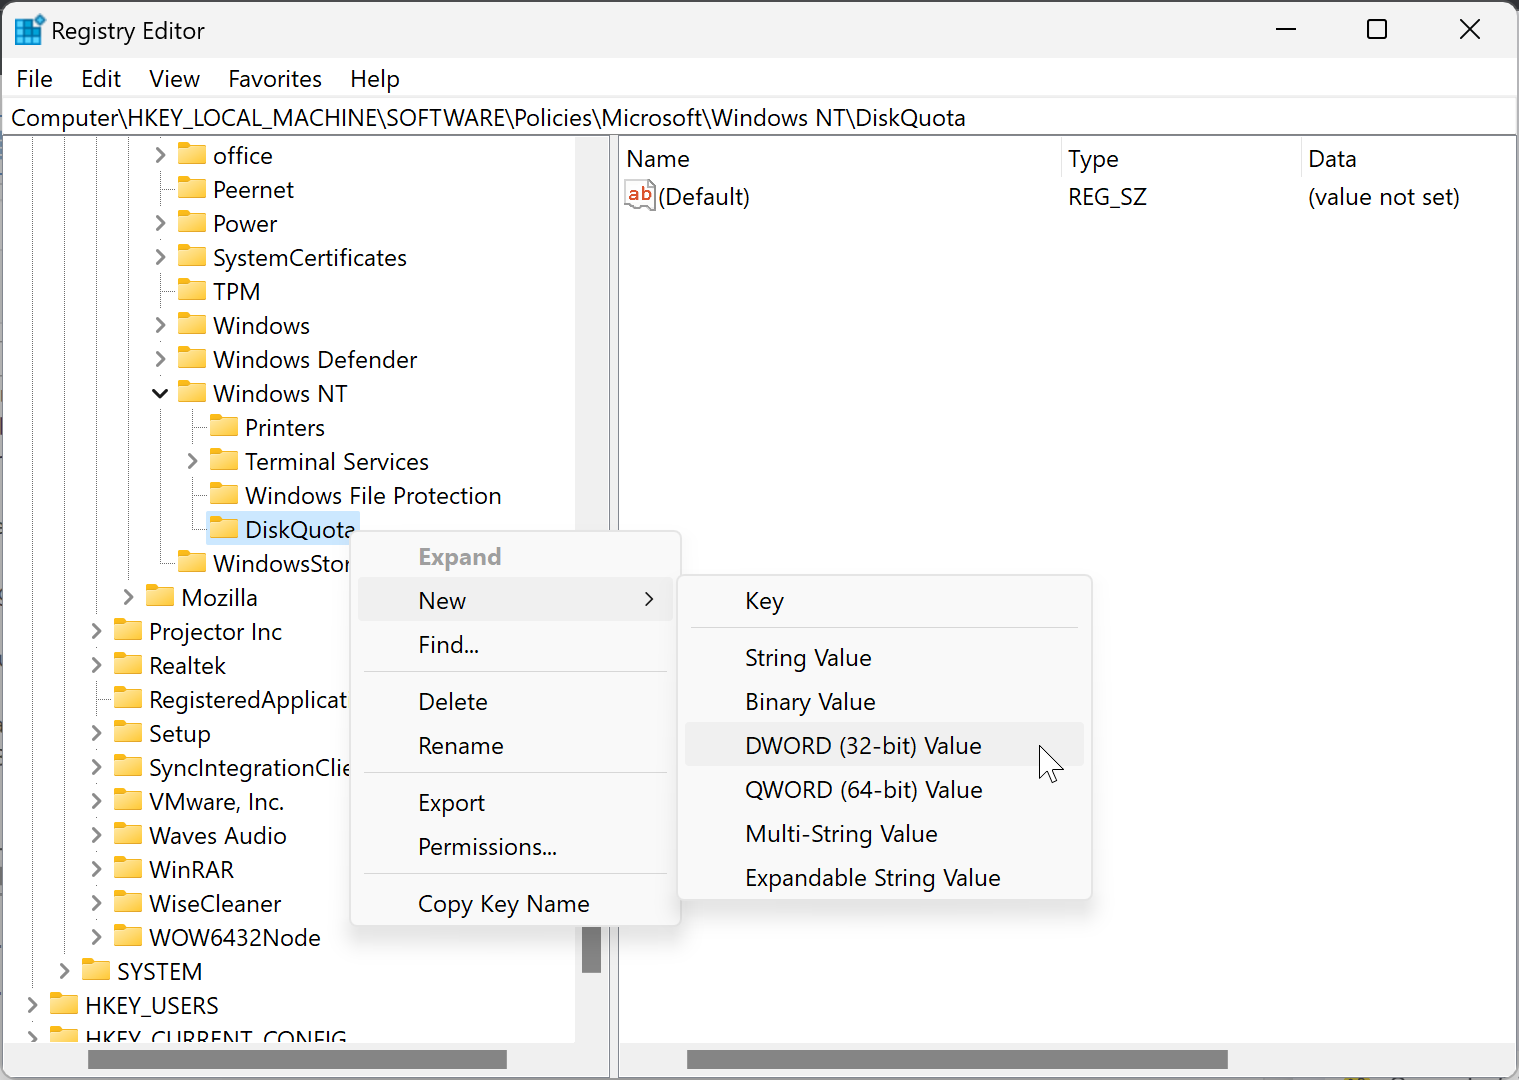
Step 6. Name this newly created REG_DWORD as Enable.
Step 7. Double-click on the Enable REG_DWORD and set its “Value data” to 1.

Step 8. Click OK.
Step 9. Again, right-click on the DiskQuota folder and select New > DWORD (32-bit) Value. Name it Enforce. Double-click on it and set its “Value data” to 1.
Step 10. To limit the disk quota, right-click on the DiskQuota folder and select New > DWORD (32-bit) Value. Name it as Limit. Double-click on it and select Base as Decimal. Then, type a number (ex: 10) in the “Value data” field for how many KB, MB, GB, TB, or EB you want to set for a default quota limit.
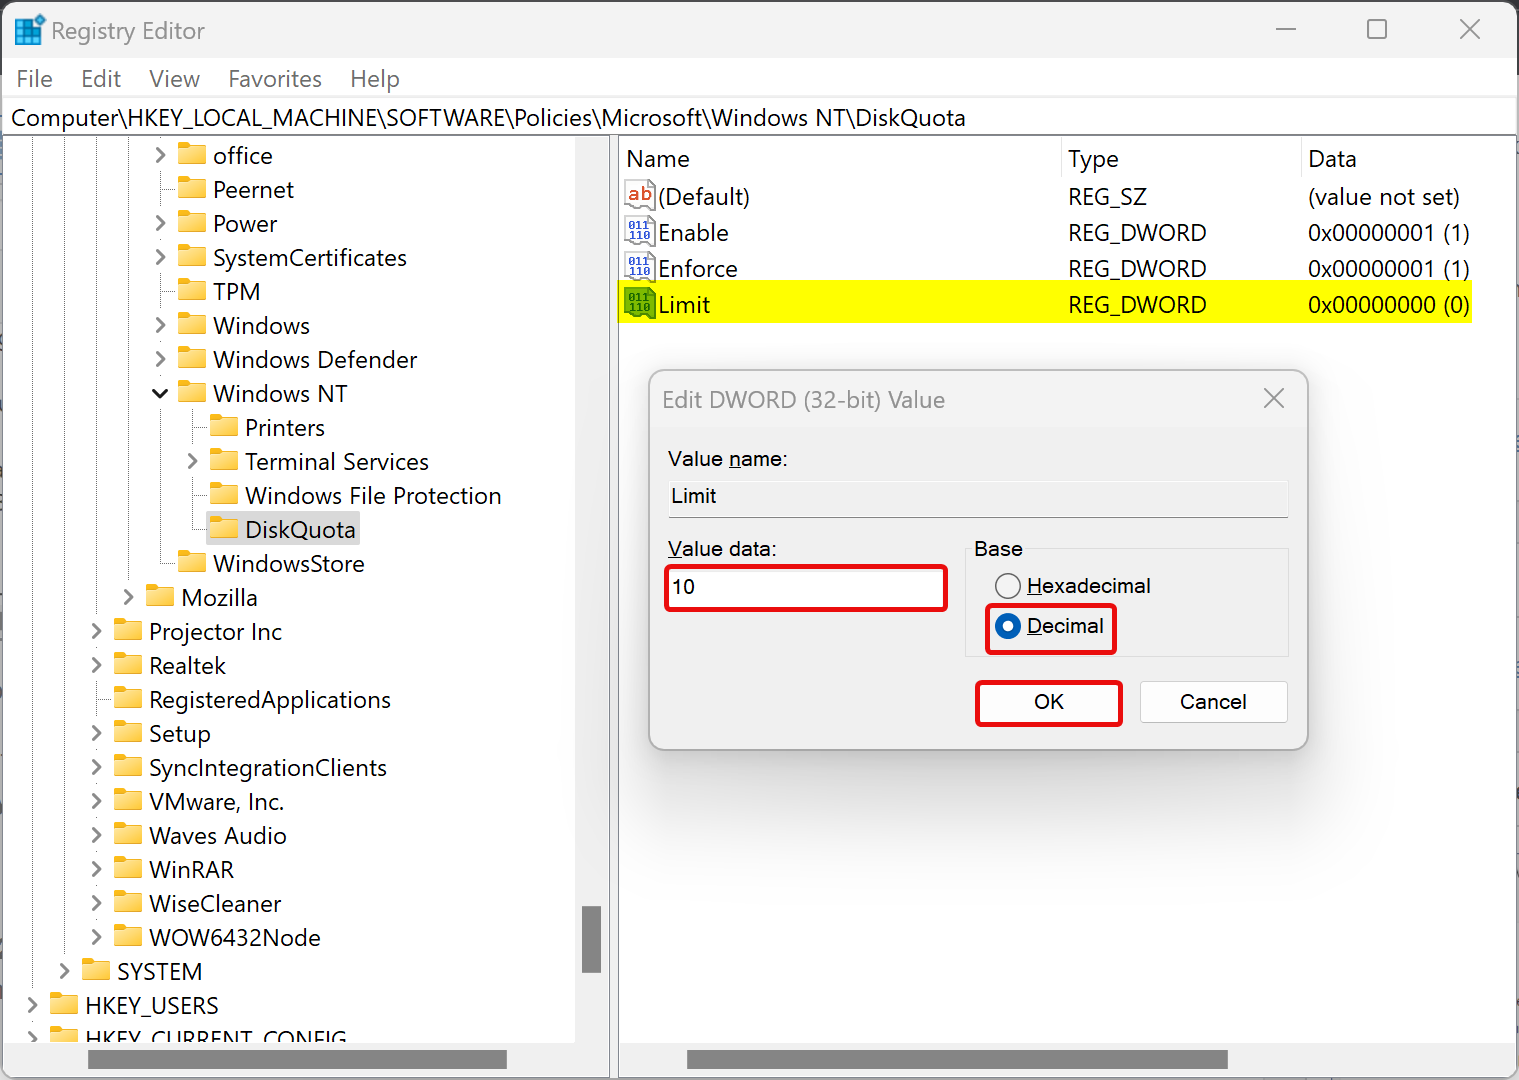
Step 11. Click OK.
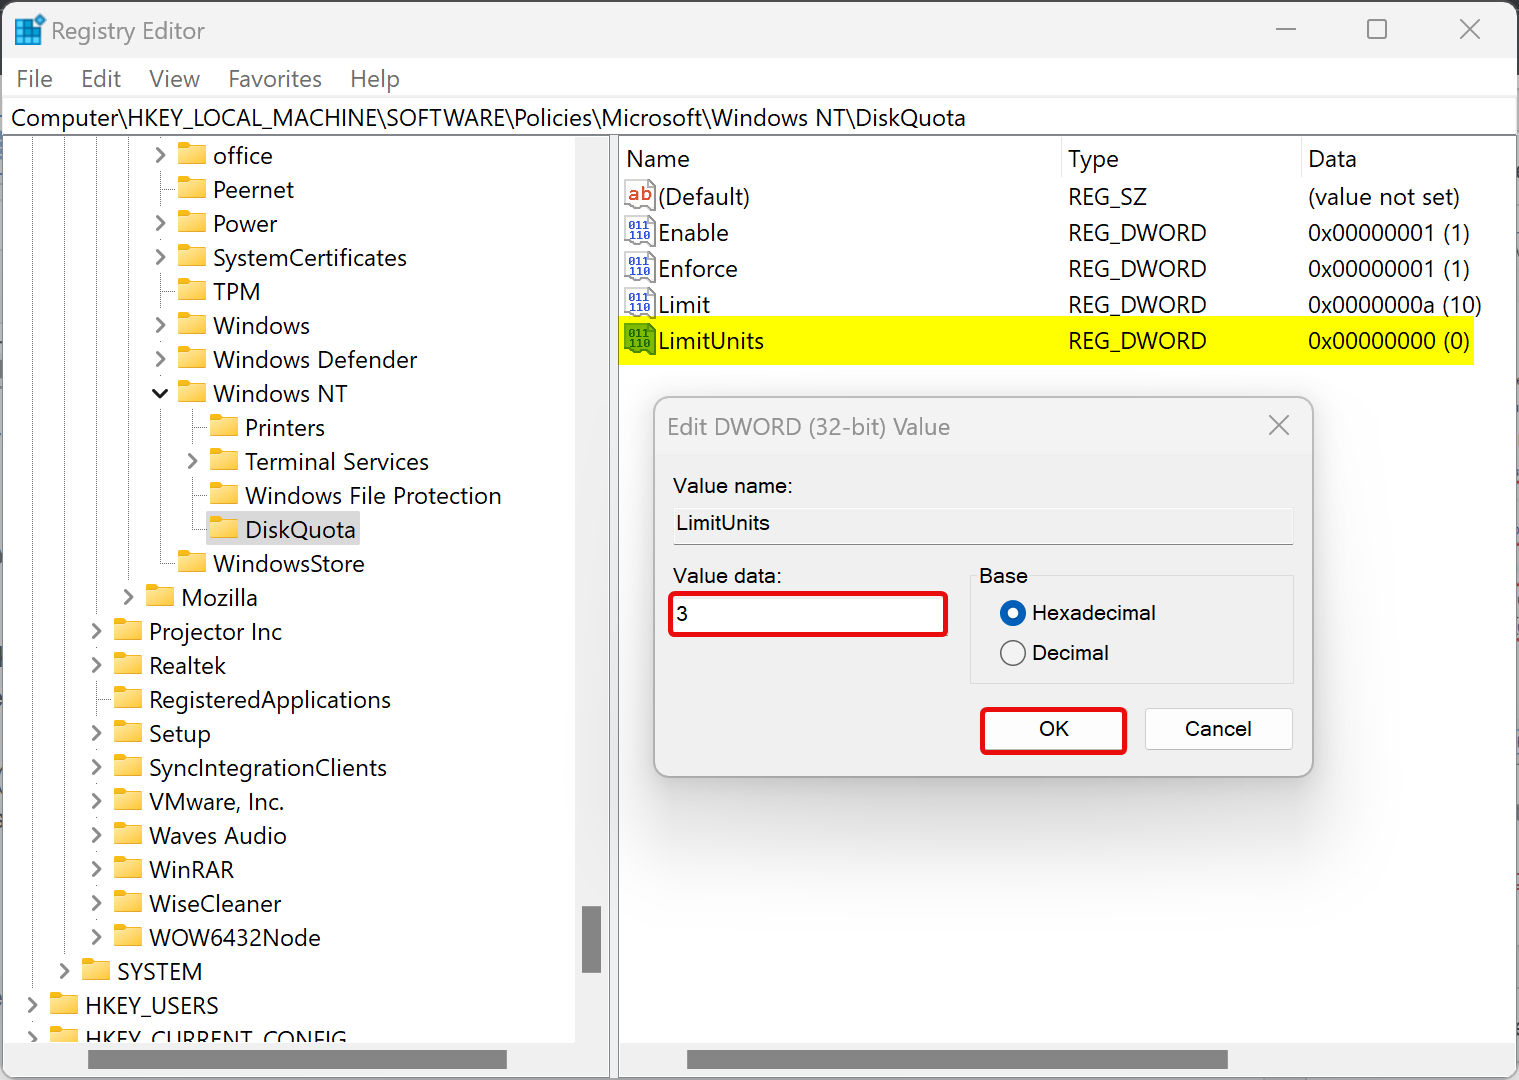
Step 12. Again, right-click on the DiskQuota folder and select New > DWORD (32-bit) Value. Name it as LimitUnits. Double-click on it and set its “Value data” to the following:-
- 1: Kilobyte (KB)
- 2: Megabyte (MB)
- 3: Gigabyte (GB)
- 4: Terabyte (TB)
- 5: Petabytes (PB)
- 6: Exabytes (EB)
Step 13. Click OK.
Step 14. To set a warning when the disk quota is about to exhaust, right-click on the DiskQuota folder and select New > DWORD (32-bit) Value. Name it as Threshold. Double-click on it and select Base as Decimal. Then, type a number (ex: 9) in the “Value data” field for how many KB, MB, GB, TB, or EB you want to set for a default warning level.
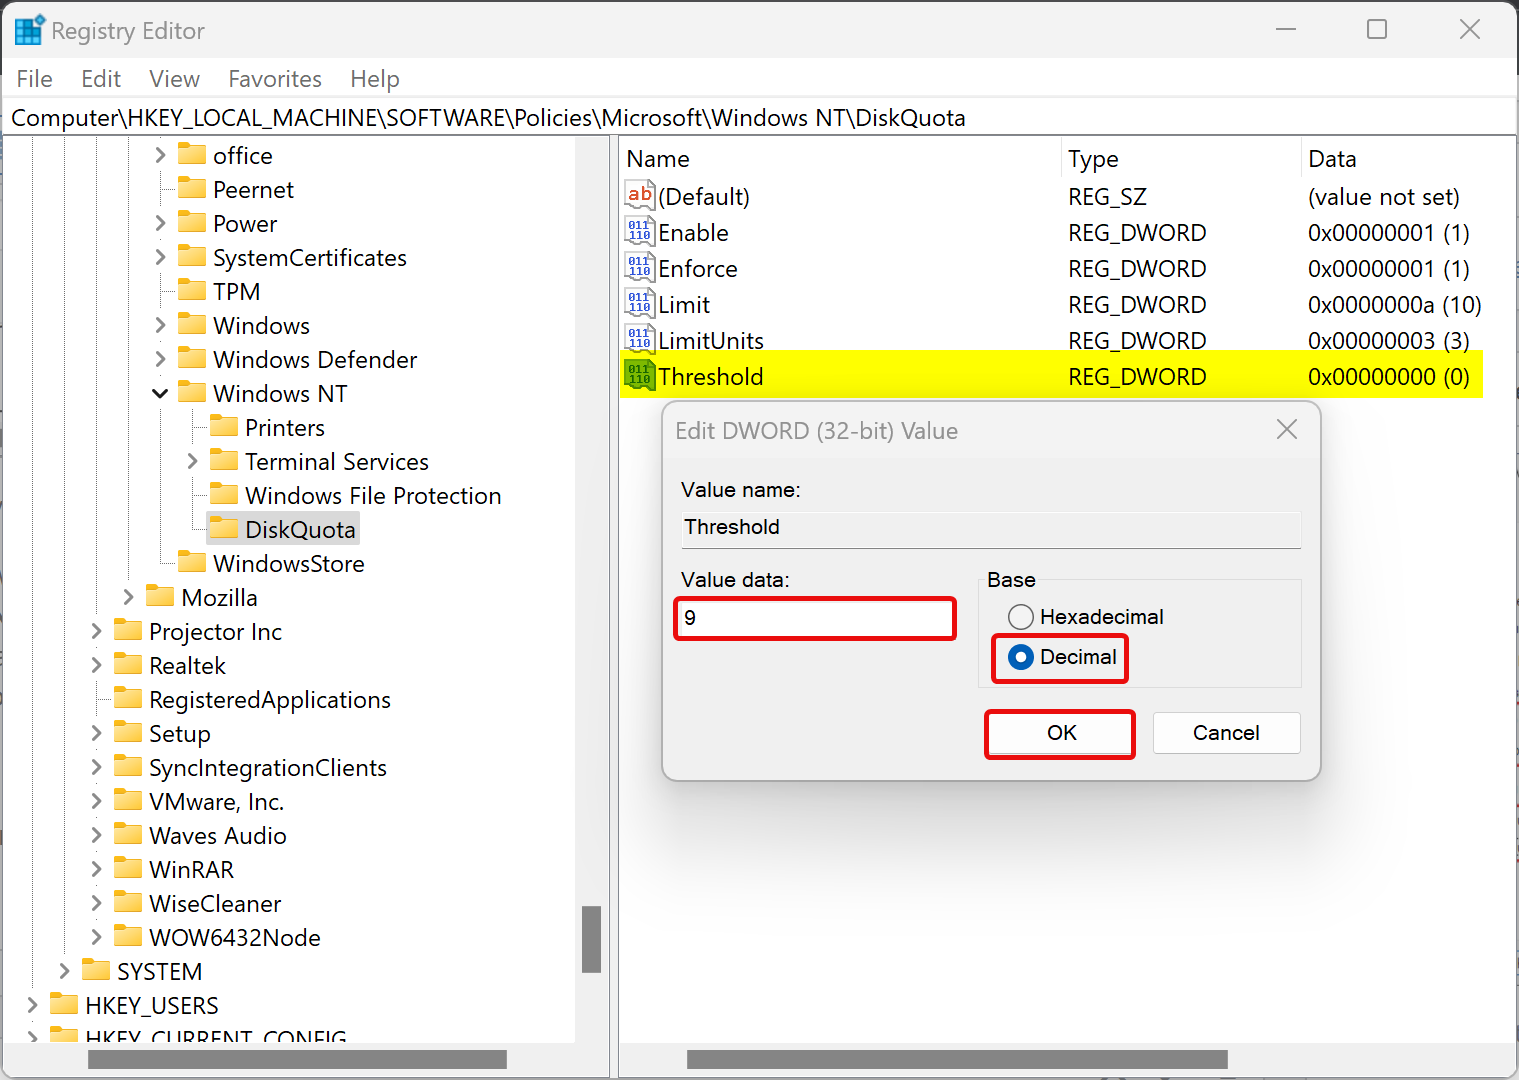
Step 15. Click OK.
Step 16. Again, right-click on the DiskQuota folder and select New > DWORD (32-bit) Value. Name it as ThresholdUnits. Double-click on it and set its “Value data” to the following:-
- 1: Kilobyte (KB)
- 2: Megabyte (MB)
- 3: Gigabyte (GB)
- 4: Terabyte (TB)
- 5: Petabytes (PB)
- 6: Exabytes (EB)
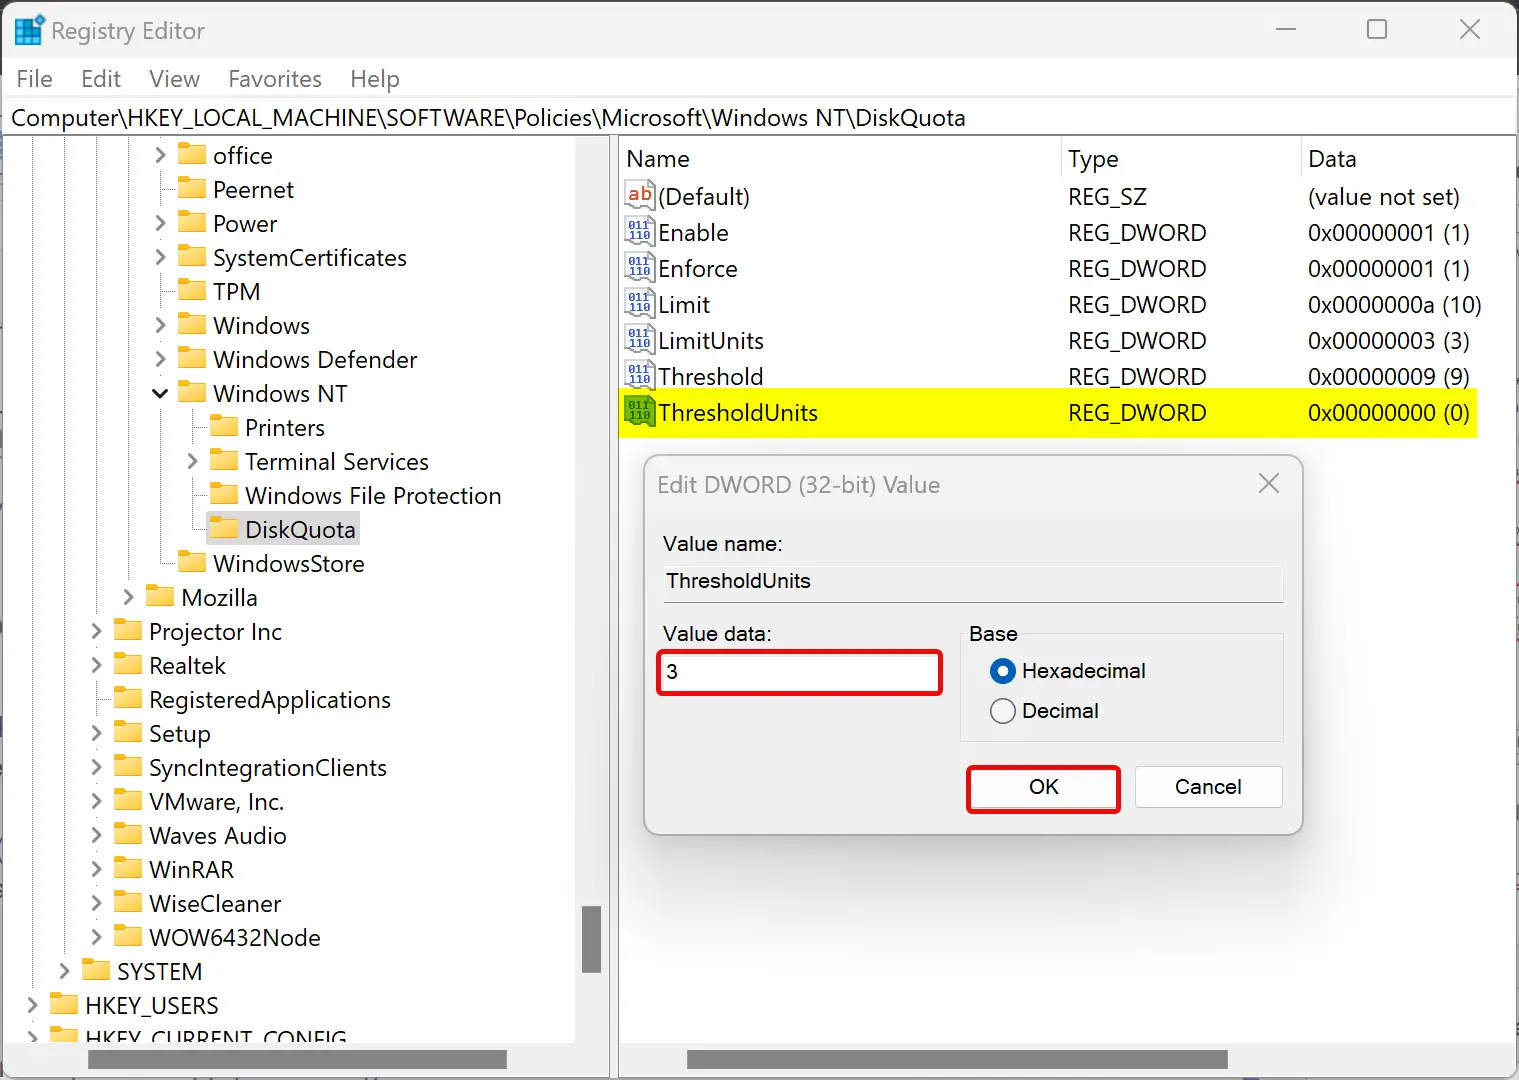
Step 17. Click OK.
Step 18. Finally, reboot your computer to apply the changes.
Conclusion
In conclusion, sharing a PC with others can be frustrating when you run out of storage space. However, with Windows 11/10, you can easily set quotas for disk space and ensure that each user has their share of disk space. By limiting their disk space, you can have more control over your storage space. Windows Quota Management tool works on drives formatted using the NTFS file system.
In this article, we have provided step-by-step instructions to help you control users’ data on your PC by setting up disk quota limits. We have also explained how to view and adjust the disk quota limit for specific users. If you’re unable to set a disk quota using File Explorer, you can use the Group Policy Editor to configure it. However, note that this method only works for Windows 11/10 Pro, Education, and Enterprise editions. If you’re on the Windows 11/10 Home edition, you need to tweak the registry to apply the policy. By following these steps, you can easily manage disk space on your PC and ensure that each user has their fair share of storage space.