When you start typing in a Microsoft Word document, you see only the contents you type. Besides these specific contents, Word also uses several special characters you don’t see on the screen. Such as characters to indicate the end of a line or a paragraph, tabs, spaces, etc.
Word refers to these special characters as non-printing characters. These special characters help you to understand the spacing and layout of your document when these special characters are displayed. For instance, you can tell when you have used two spaces between words or added tabs. But there may be times when you want to hide these characters to view your document as how it will look after printing.
In this gearupwindows article, you will learn how to show or hide Non-Printing Characters in Word.
How to Always Hide or Unhide Non-Printing Characters in Word?
To always display or hide the non-printing characters in a Microsoft Word document, use these steps:-
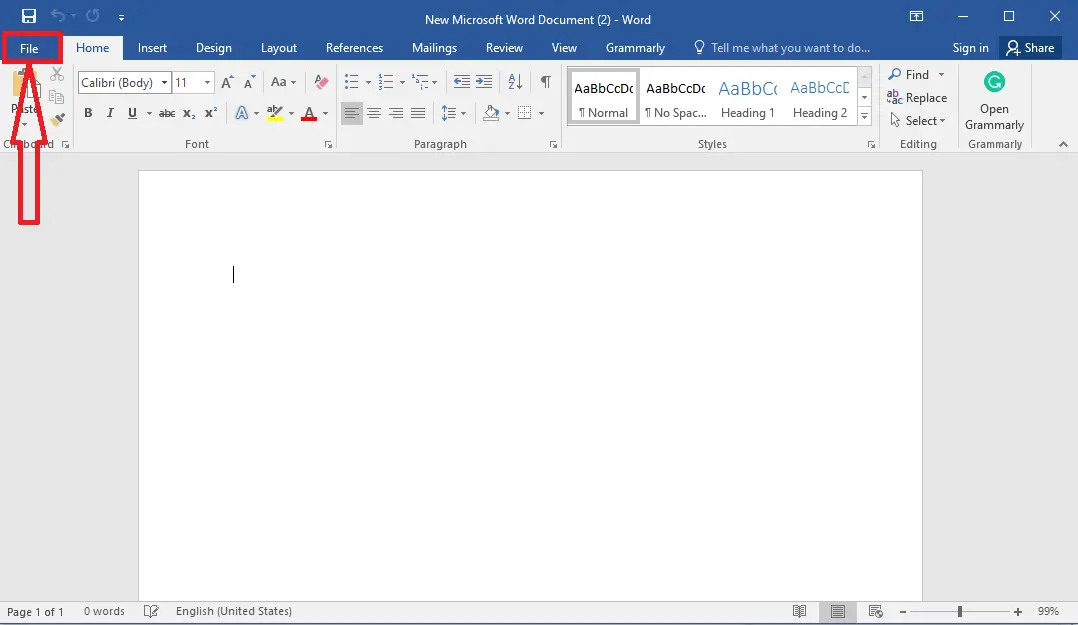
Step 1. Open your Word document in which you want to show or hide the non-printing characters.
Step 2. Click the File menu.
Step 3. On the backstage screen, select Options in the left sidebar.
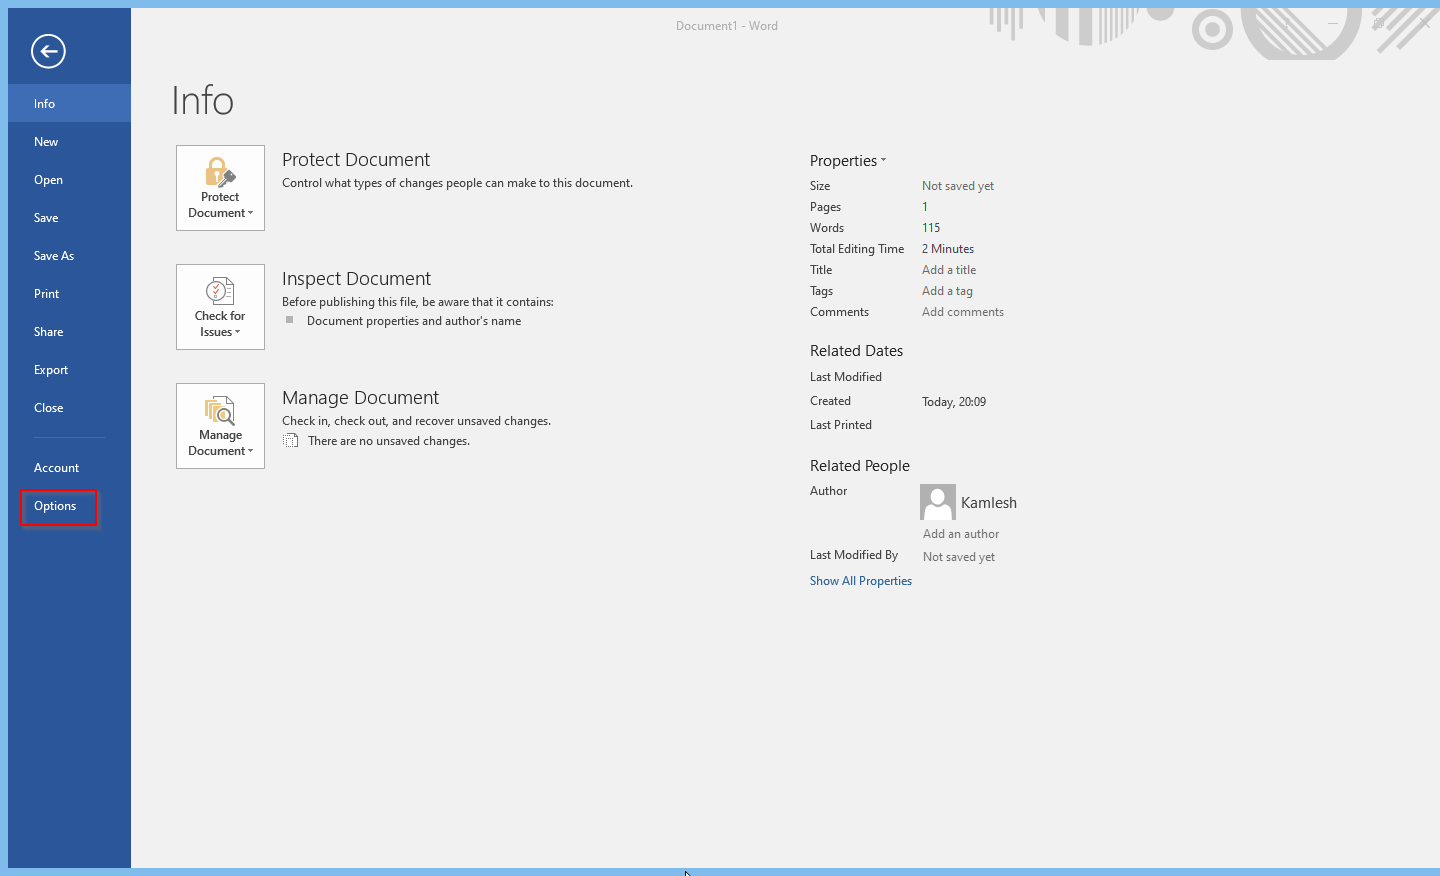
Step 4. Once done, the “Word Options” panel will open. Here, select the Display tab in the left sidebar.

Step 5. In the right pane, scroll down to the “Always show these formatting marks on the screen” section. Here, check the checkboxes that you always want to display in your document:-
- Tab characters
- Spaces
- Paragraph marks
- Hidden text
- Optional hyphens
- Object anchors
- Show all formatting marks
Quick Note: If you don’t want to see special characters on your document, uncheck all these checkboxes.
Step 6. Click OK.
Once you complete the above steps, Word will always display your chosen non-printing characters.

How to Temporarily Show or Hide the Non-Printing Characters in Word?
If you are working on a Word document and want to show or hide the non-printing characters temporarily, use these steps:-
Step 1. Open your Word document in which you want to show or hide the non-printing characters.
Step 2. Click the Home tab.

Step 3. Click on the Pilcrow icon in the “Paragraph” group, which looks like a backward capital P.
Once you complete the above steps, non-printing special characters will appear on your document. To hide the special characters, click the Plicrow icon again in the Home tab.
Conclusion
In conclusion, non-printing characters in a Word document are essential in understanding the layout and spacing of your content. Microsoft Word provides options to either always show or hide these special characters. You can also temporarily show or hide them using the Pilcrow icon in the Paragraph group. Knowing how to manipulate these non-printing characters can help you ensure that your document looks just the way you want it to.