As a rule, line spacing is the distance between two lines of text in a document. There are differences in line spacing between different versions of MS Word. Microsoft redesigned Word 2007 templates in order to make the text easier to read. One of the changes was to add 15 percent more space between paragraphs, making it easier to read. To create more space between sections in Word 2003, you had to press the “Enter” key twice, and the space between paragraphs was a single space.
However, when Microsoft released Word 2007, the default line spacing was 1.5. Later versions reduced the default line spacing to 1.08.
Document spacing affects several factors, including the number of pages. The amount of space between the lines in your document can be controlled using several different options in Microsoft Word.
As far as line spacing in your documents is concerned, many schools and organizations have their own rules and preferences. You may be advised to use double spacing, but it’s entirely possible that they would prefer single spacing to reduce the number of pages in a document.
There are many formatting options available in Microsoft Word, including how much space exists between lines. If your current document is double-spaced, or if it appears to have more or less spacing than the single spacing you need, you may be trying to adjust that.
If you use a line spacing of 1.0 or single spacing, the lines are compressed and difficult to read. This value can be changed to 1.5 or even 2.0, depending on your requirements. Increasing the line spacing makes a document easier to read, but it will also increase the document’s length.
This gearupwindows article explains how to modify the line spacing in Microsoft Word.
How to Adjust the Line Spacing in a Word Document?
Using this method, you can adjust the spacing of lines within a paragraph or in a whole document. Here are the steps:-
Step 1. Select the paragraph or entire document (Ctrl+A) you want to change the line spacing. For this example, we have created a document with a line spacing of 1.0.
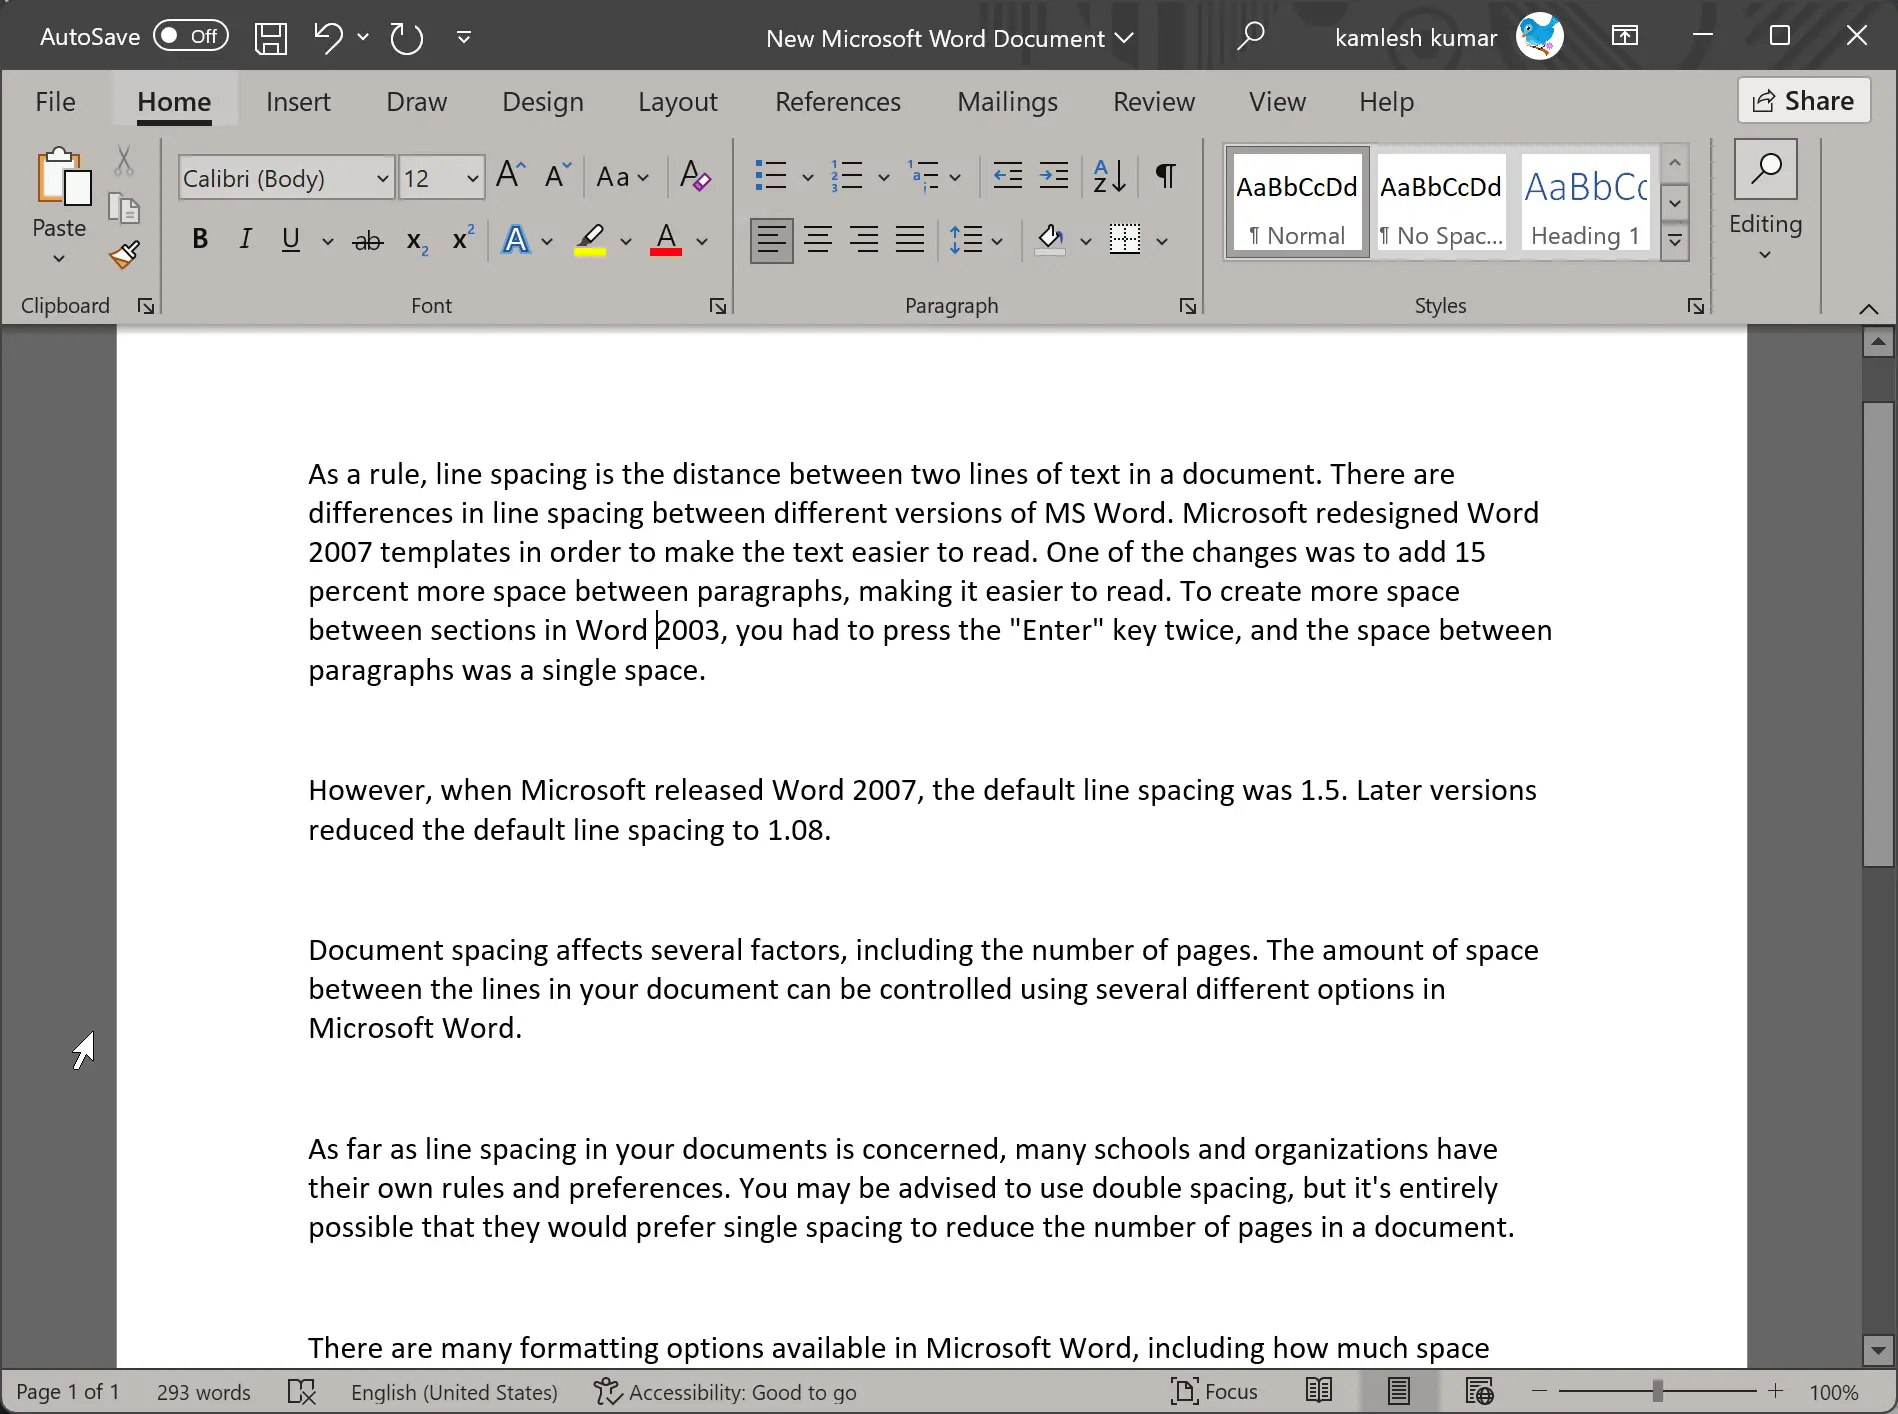
Step 2. Select the Home tab from the top menu bar.
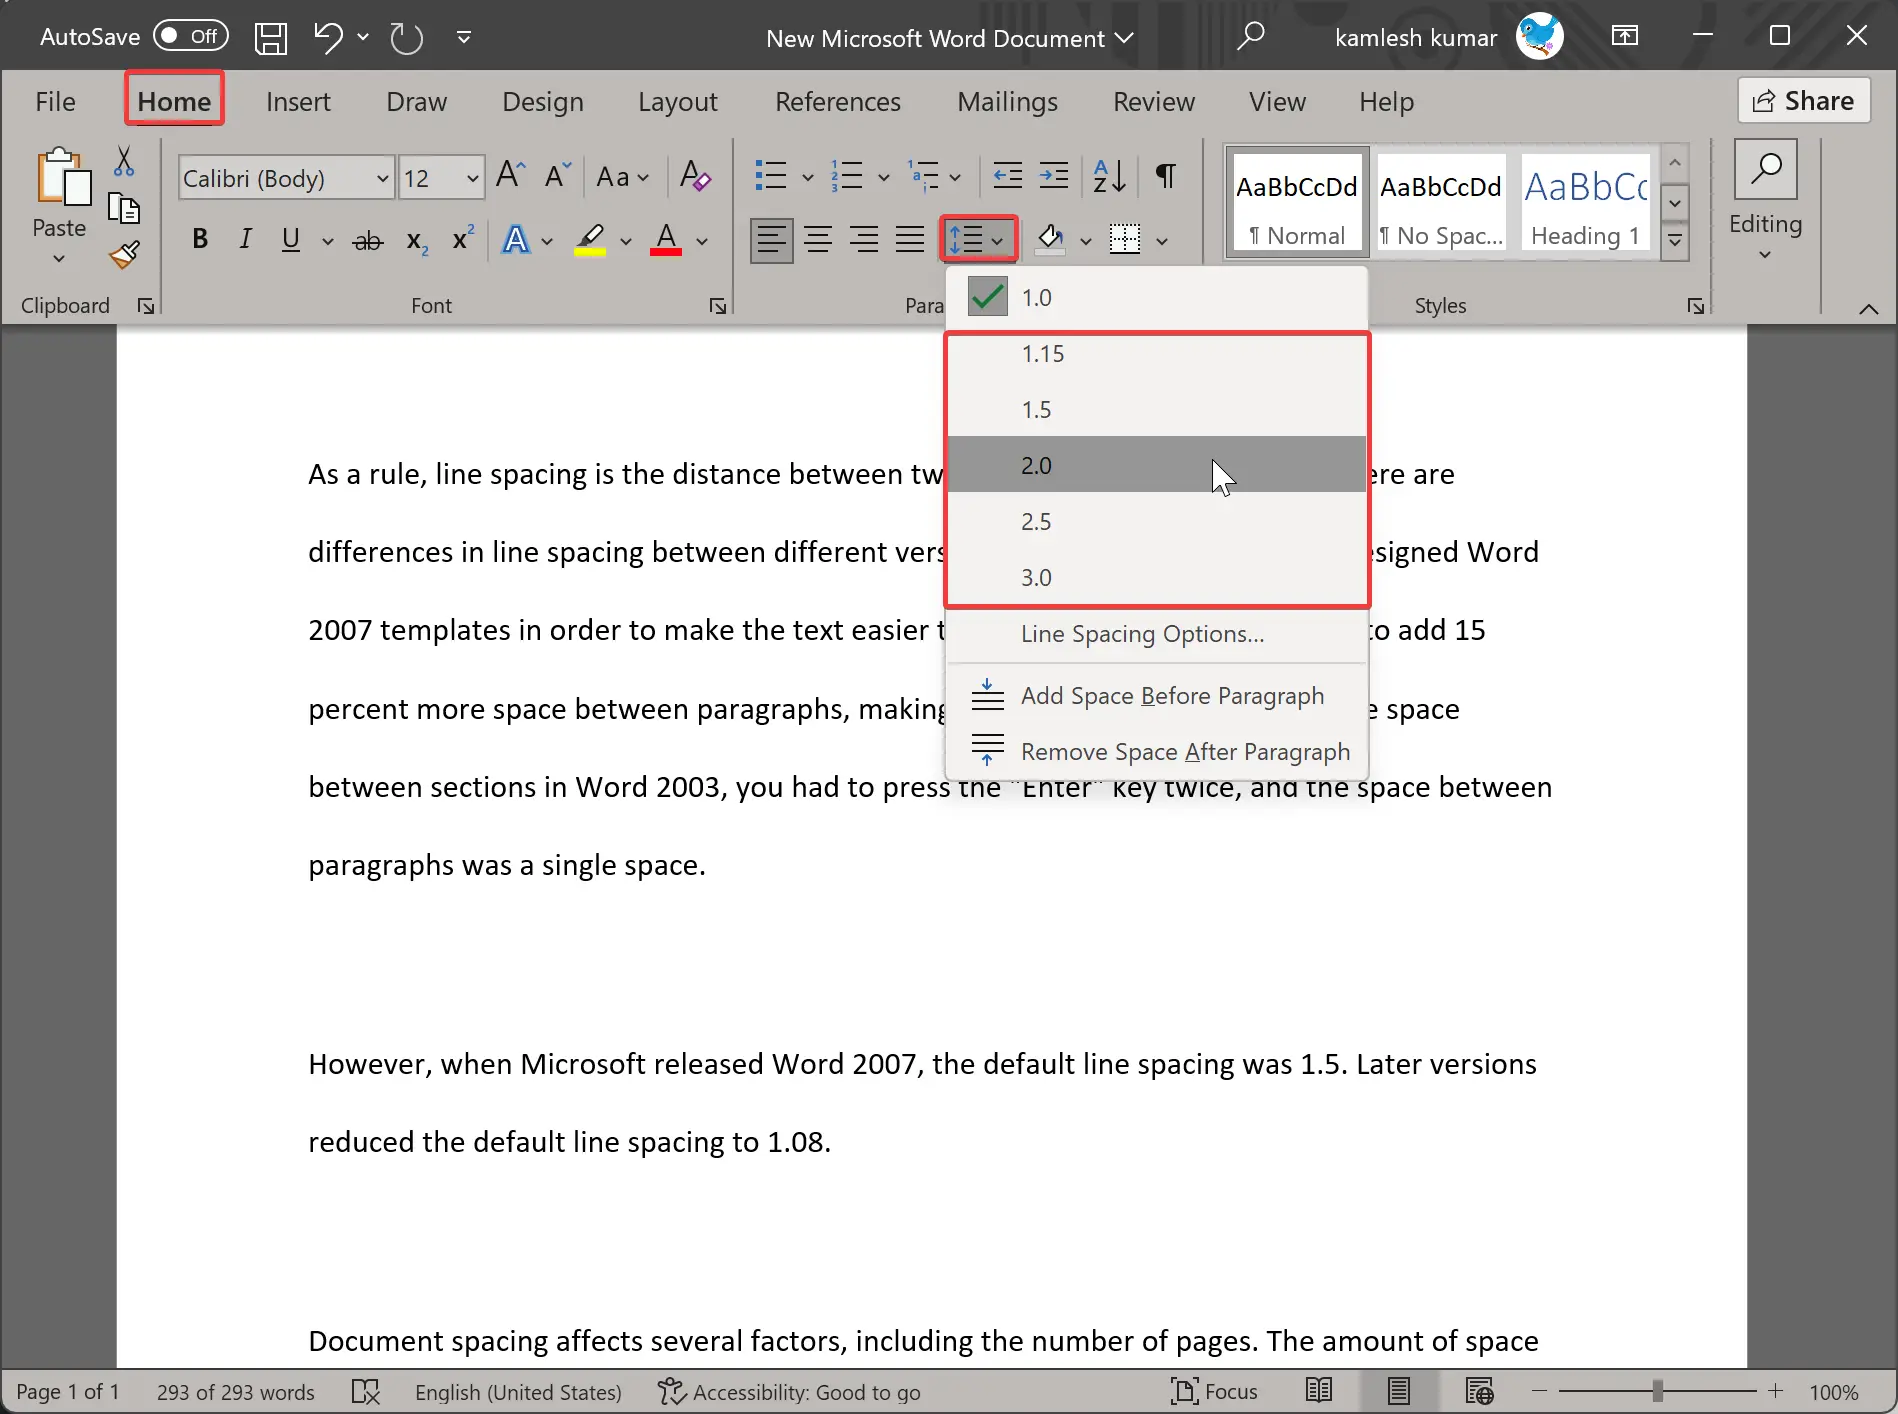
Step 3. Click on the Line and Paragraph Spacing button in the Paragraph group. You will see a menu listing various line spacing options.
Quick Note: By hovering the mouse pointer over any option in the drop-down menu “Line and Paragraph Spacing,” you can see the preview of your paragraph in your Word document.
Step 4. Choose 2.0 or another option for the line spacing you want to use. The selected paragraph will now be double-line spaced or the spacing you’ve chosen.
Using the steps above, you can single-space a document that is already double-spaced.
How to Set Single Spacing with Word Paragraph Settings?
This method is useful for setting line spacing within, as well as spacing before and after the paragraph. Follow these steps:-
Step 1. Open an existing or create a new Word document.
Step 2. Select the paragraph you want to change the line spacing for.
Step 3. Click the Home tab on the menu bar.
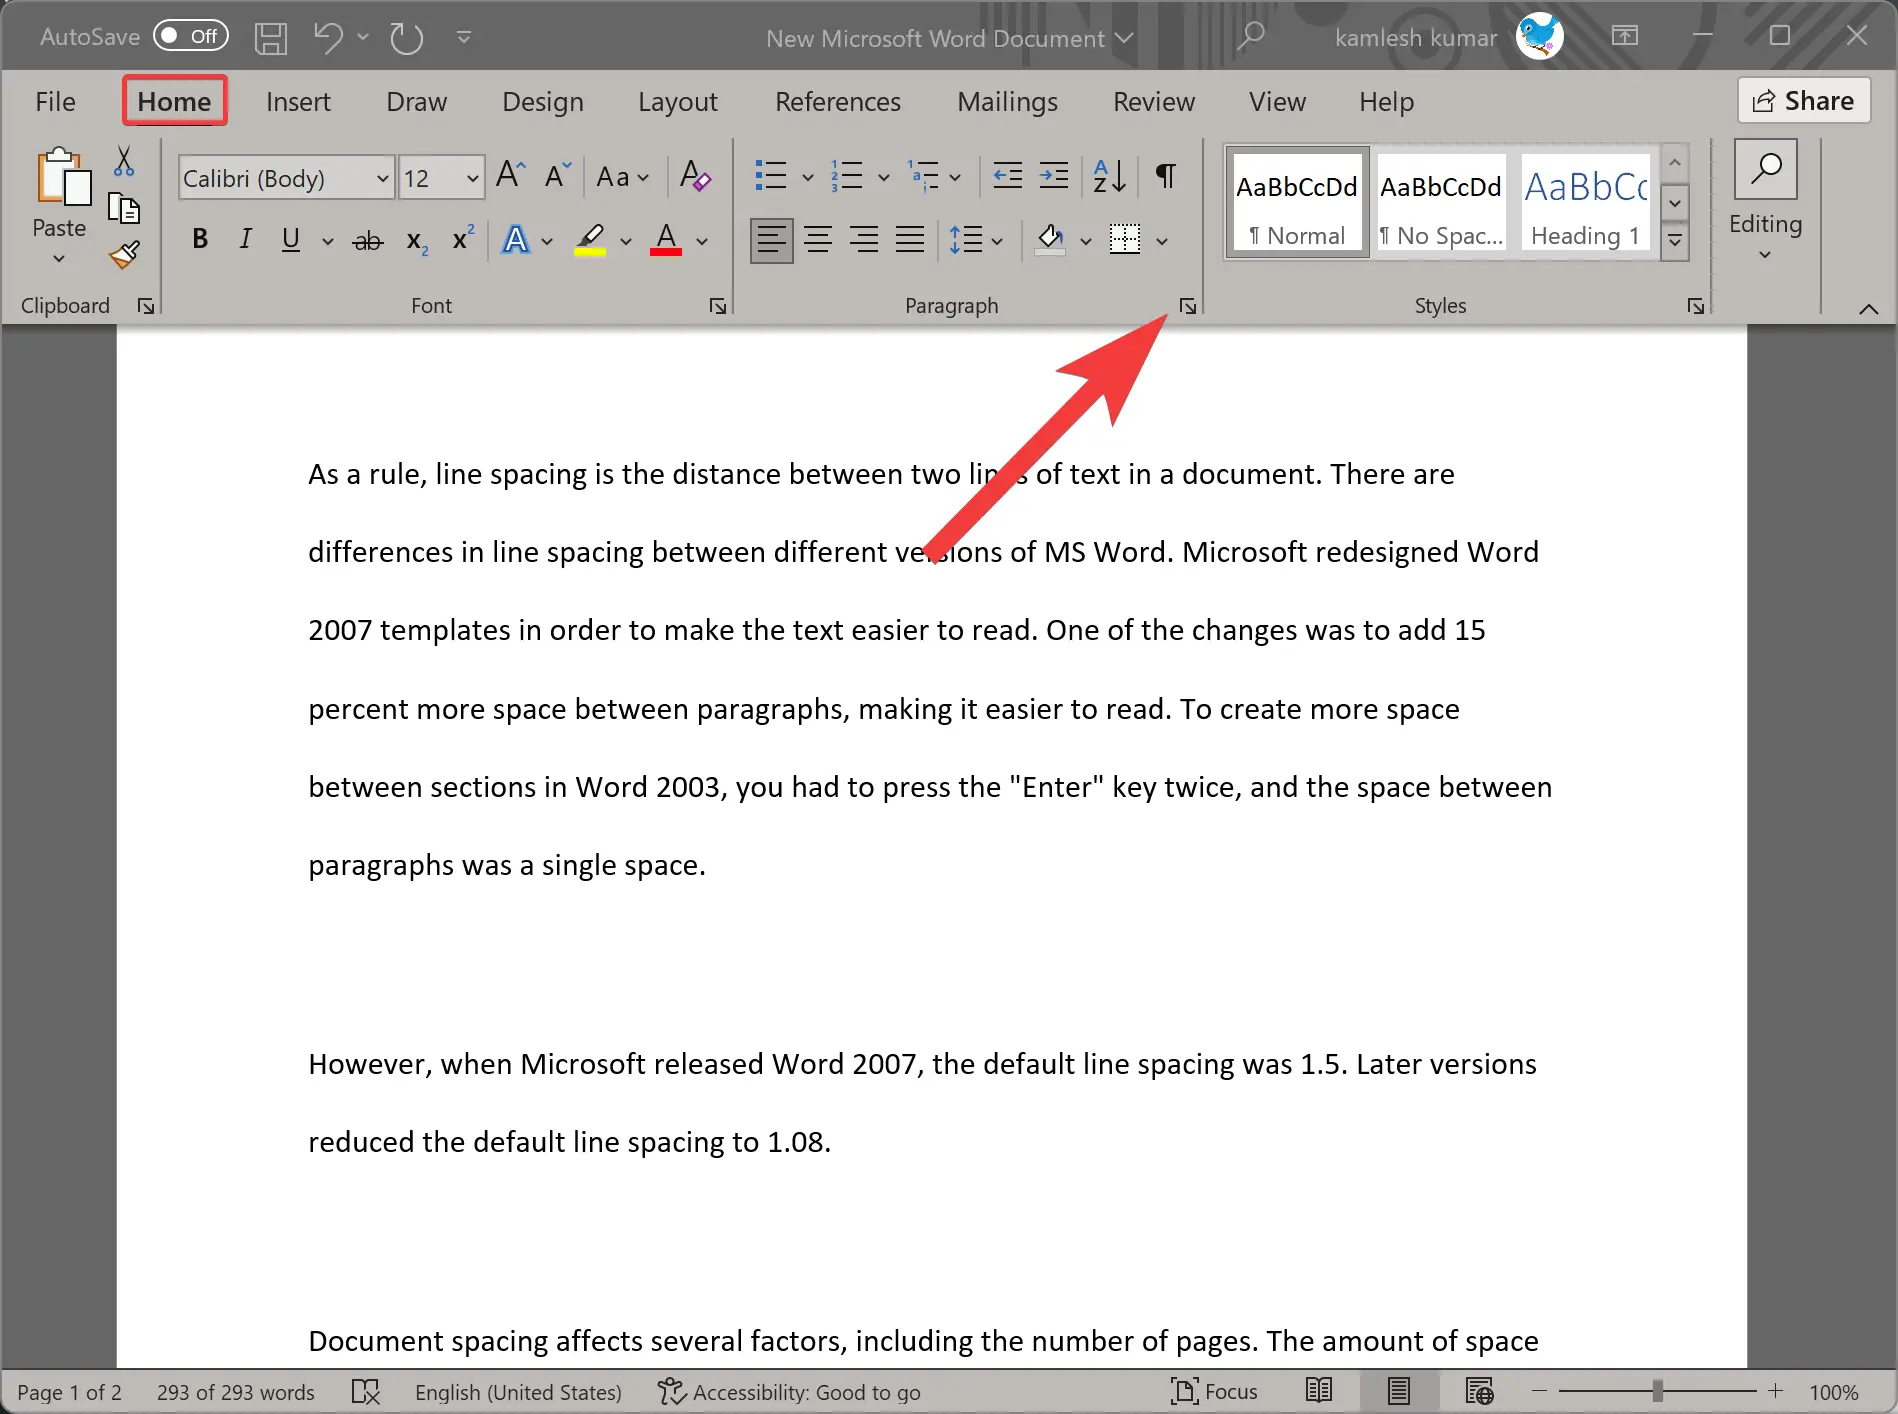
Step 4. Click the arrow icon on the bottom right side of the Paragraph group to open the Paragraph dialog box.
Step 5. Switch to the Indents and Spacing tab.
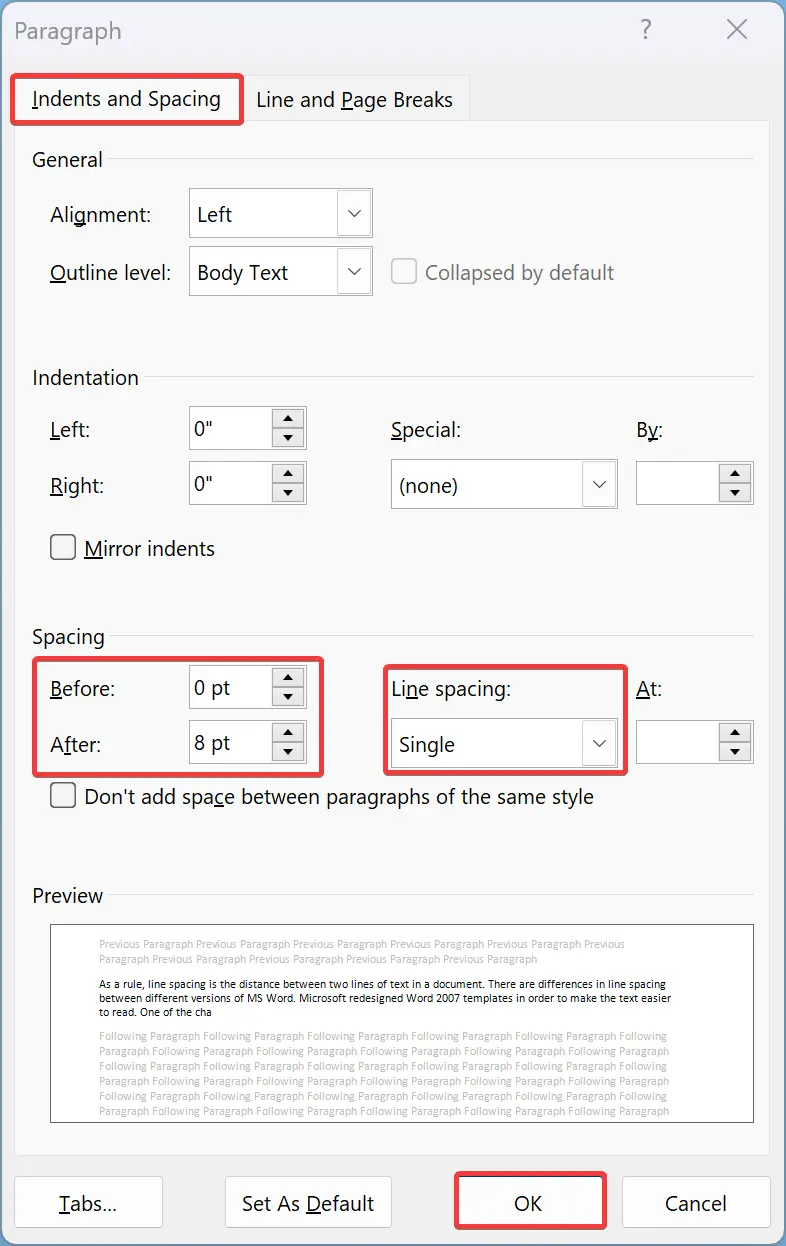
Step 6. Click on the drop-down menu under Line Spacing in the Spacing section and select Single from the menu.
Step 7. If you want to customize it further, enter the spacing value for Before and After the paragraph in the Spacing section.
Step 8. Click the OK button to exit the Paragraph dialog box.
It now has single-line spacing and other settings according to your preferences.
How to Set Default Line Setting for a New Document?
Using this method, you can set the default line setting and paragraph settings for a new document. Here are the steps:-
Step 1. Open a new Word document or an existing one.
Step 2. Click on the Home tab in the menu bar.
Step 3. Then, click on the arrow icon on the bottom right side of the Paragraph group to open the Paragraph dialog.
Step 4. Switch to the Indents and Spacing tab.
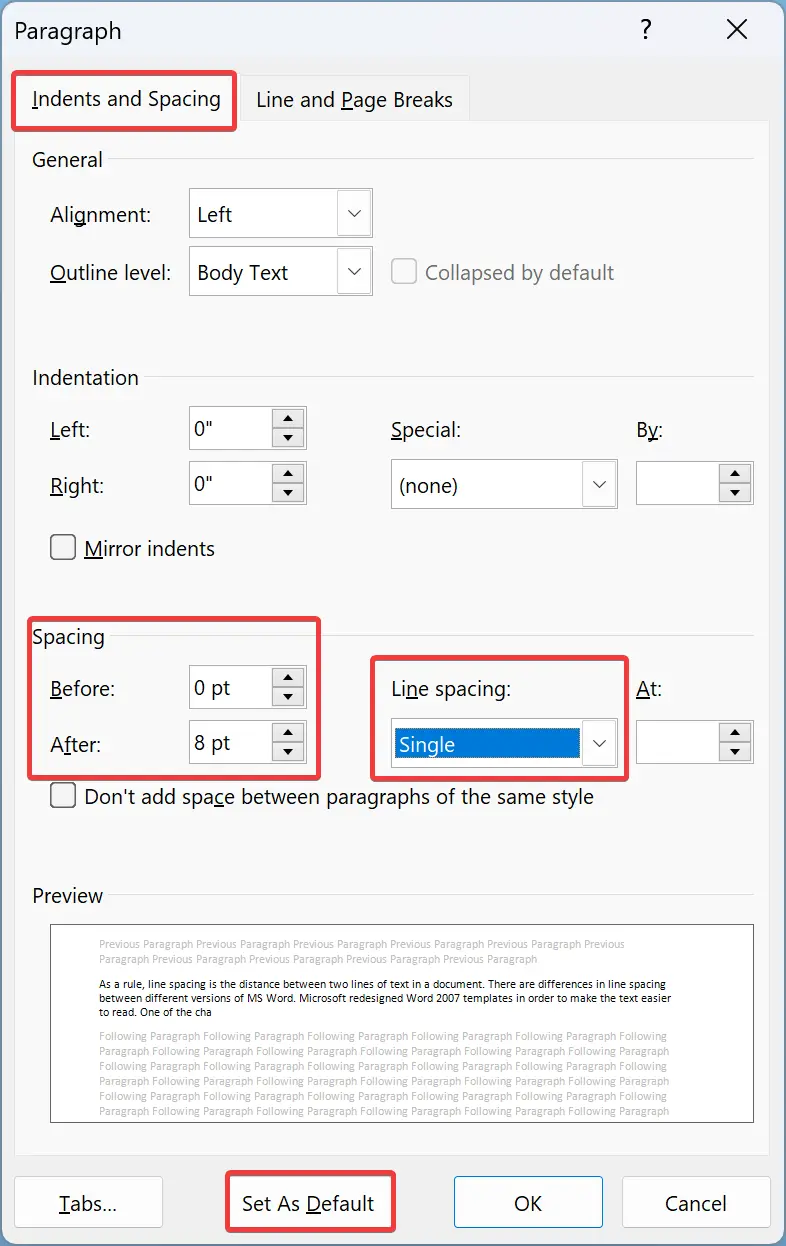
Step 5. Click on the drop-down menu under Line Spacing in the Spacing section and select the preferred line spacing that you want to apply for the whole document.
Step 6. If you want to customize it further, enter the spacing value for Before and After the paragraph in the Spacing section.
Step 7. Click the Set As Default.
Step 8. A new pop-up window will open. Here you will find these options:-
- This document only – This option will affect your current document only.
- All documents based on the Normal template – It will affect all new documents you open from now on because your chosen settings will change the Normal template.
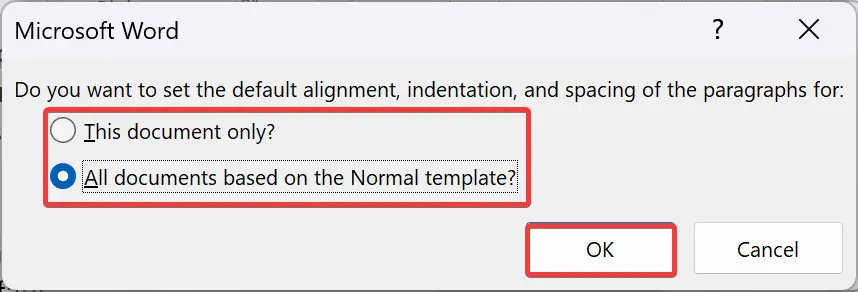
Step 9. Click the OK button to exit.
Conclusion
In conclusion, line spacing plays an important role in making a document more readable and professional. Microsoft Word provides various options to adjust line spacing, from 1.0 to 2.0 or even more, depending on the user’s preferences. Different organizations may have their own rules and preferences for line spacing. This article discussed three methods to adjust line spacing in a Word document, including adjusting line spacing for a selected paragraph, setting line spacing and paragraph settings for a new document, and changing default line settings for all documents based on the Normal template. By following these simple steps, users can make their Word documents look more polished and visually appealing.