On a Windows 11 computer, when you install the Skype app, it automatically starts every time you log in to the desktop. You can always close it by right-clicking its icon on the taskbar, but the next time you log in again, Skype will start automatically. If it burns and you don’t want the Skype app to start every time you boot into your desktop, this gearupwindows article will guide you to prevent this app from starting up.
For your information only, you can install Skype from either Microsoft Store or a traditional desktop app. Both types of programs can be prevented from a startup with Windows 11.
How to Disable Skype from Starting Automatically on Windows 11?
If you have installed Skype from the Microsoft Store, use the below steps to stop from auto-start when you sign in:-
Step 1. Click on the Start or Search button on the taskbar and type Skype to search within the installed programs.
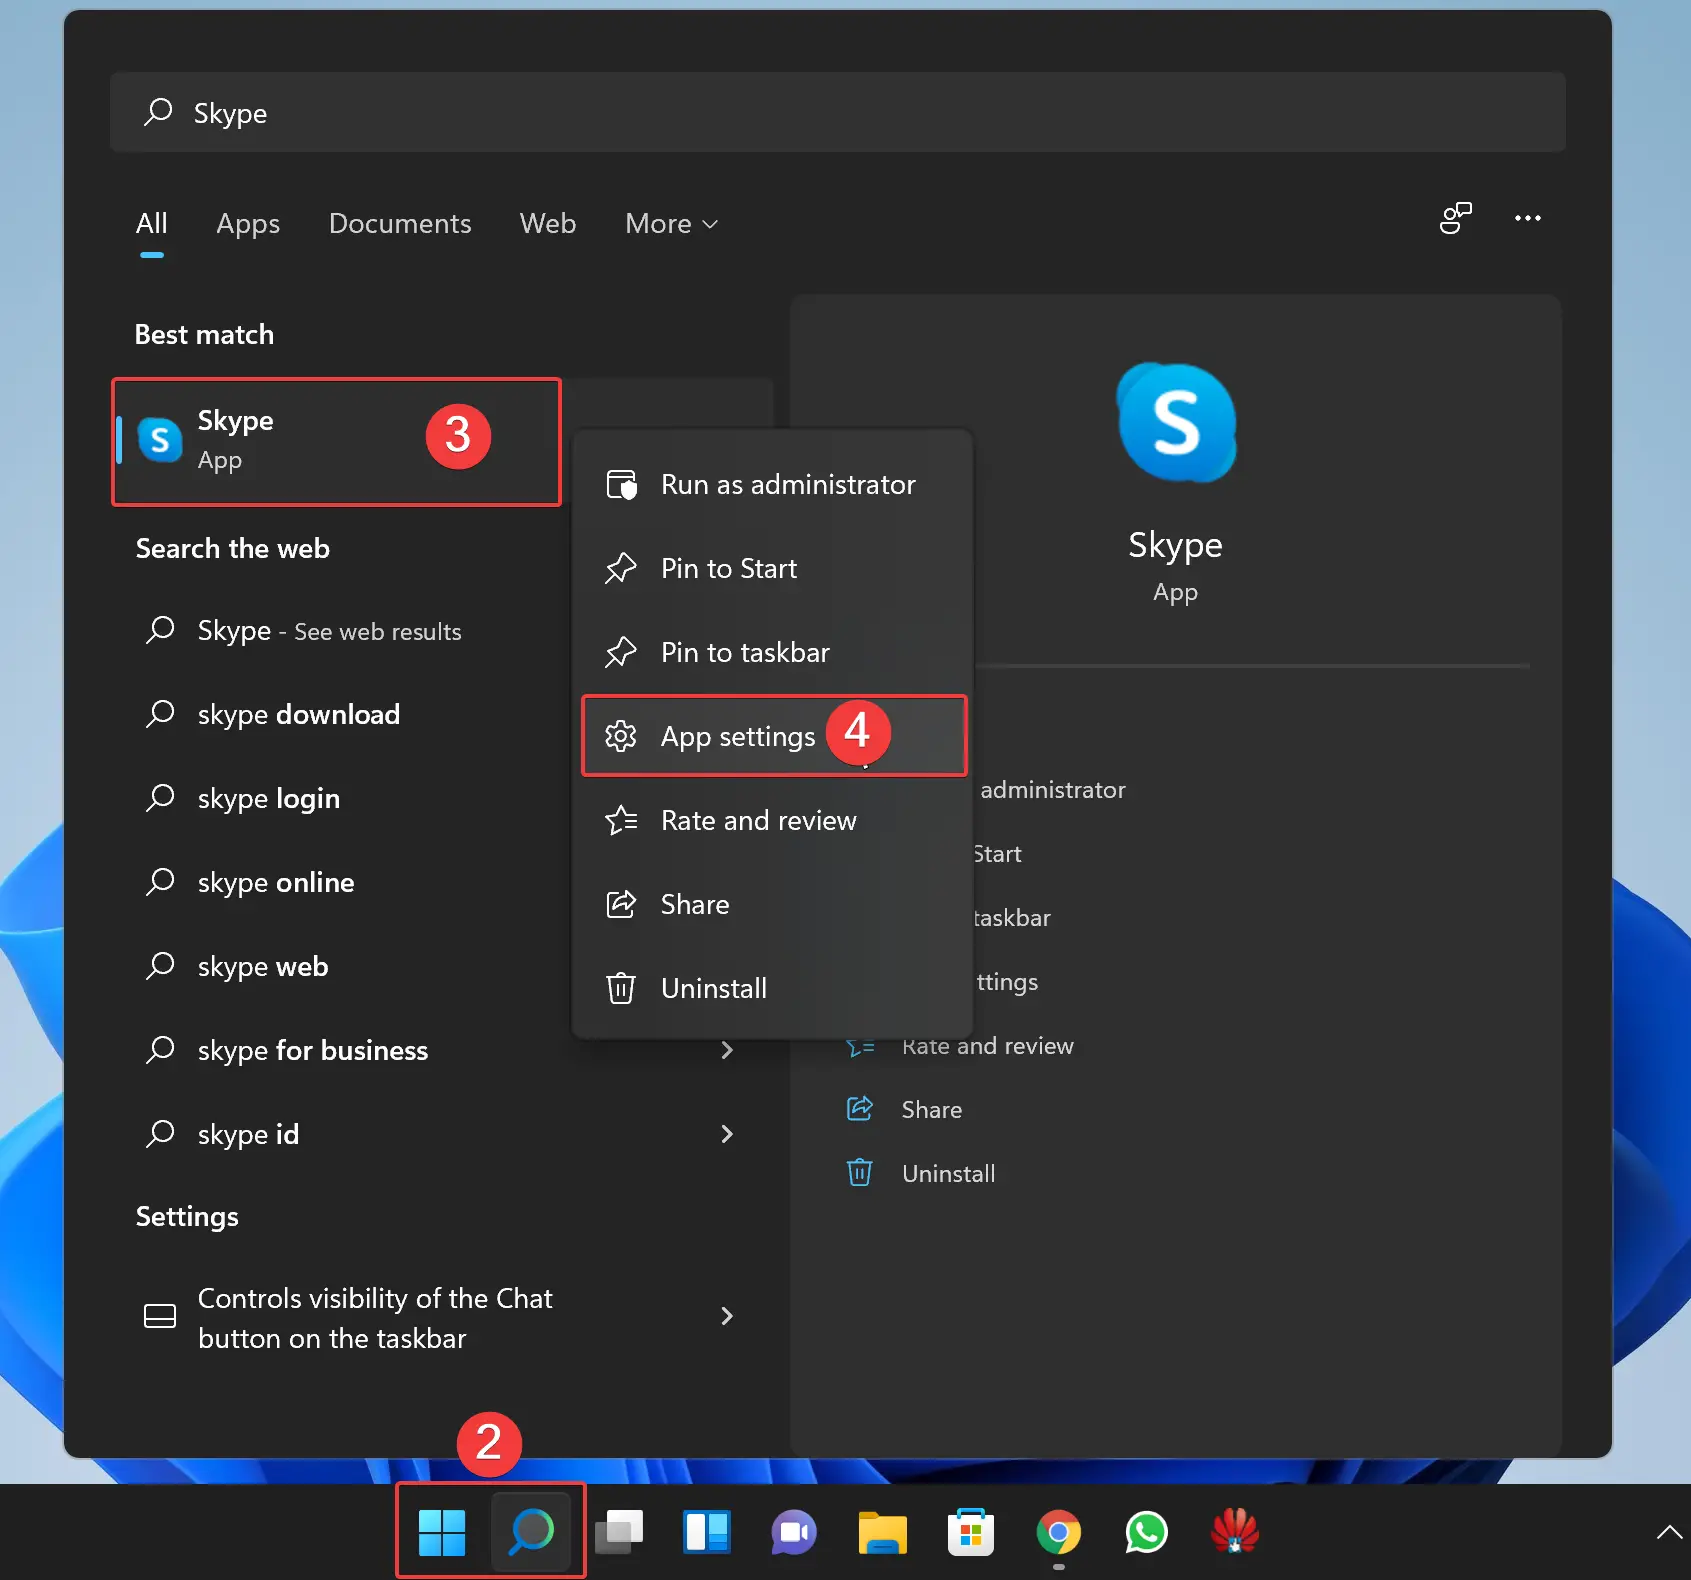
Step 2. Under “Best match,” right-click on the Skype app and then select App settings.
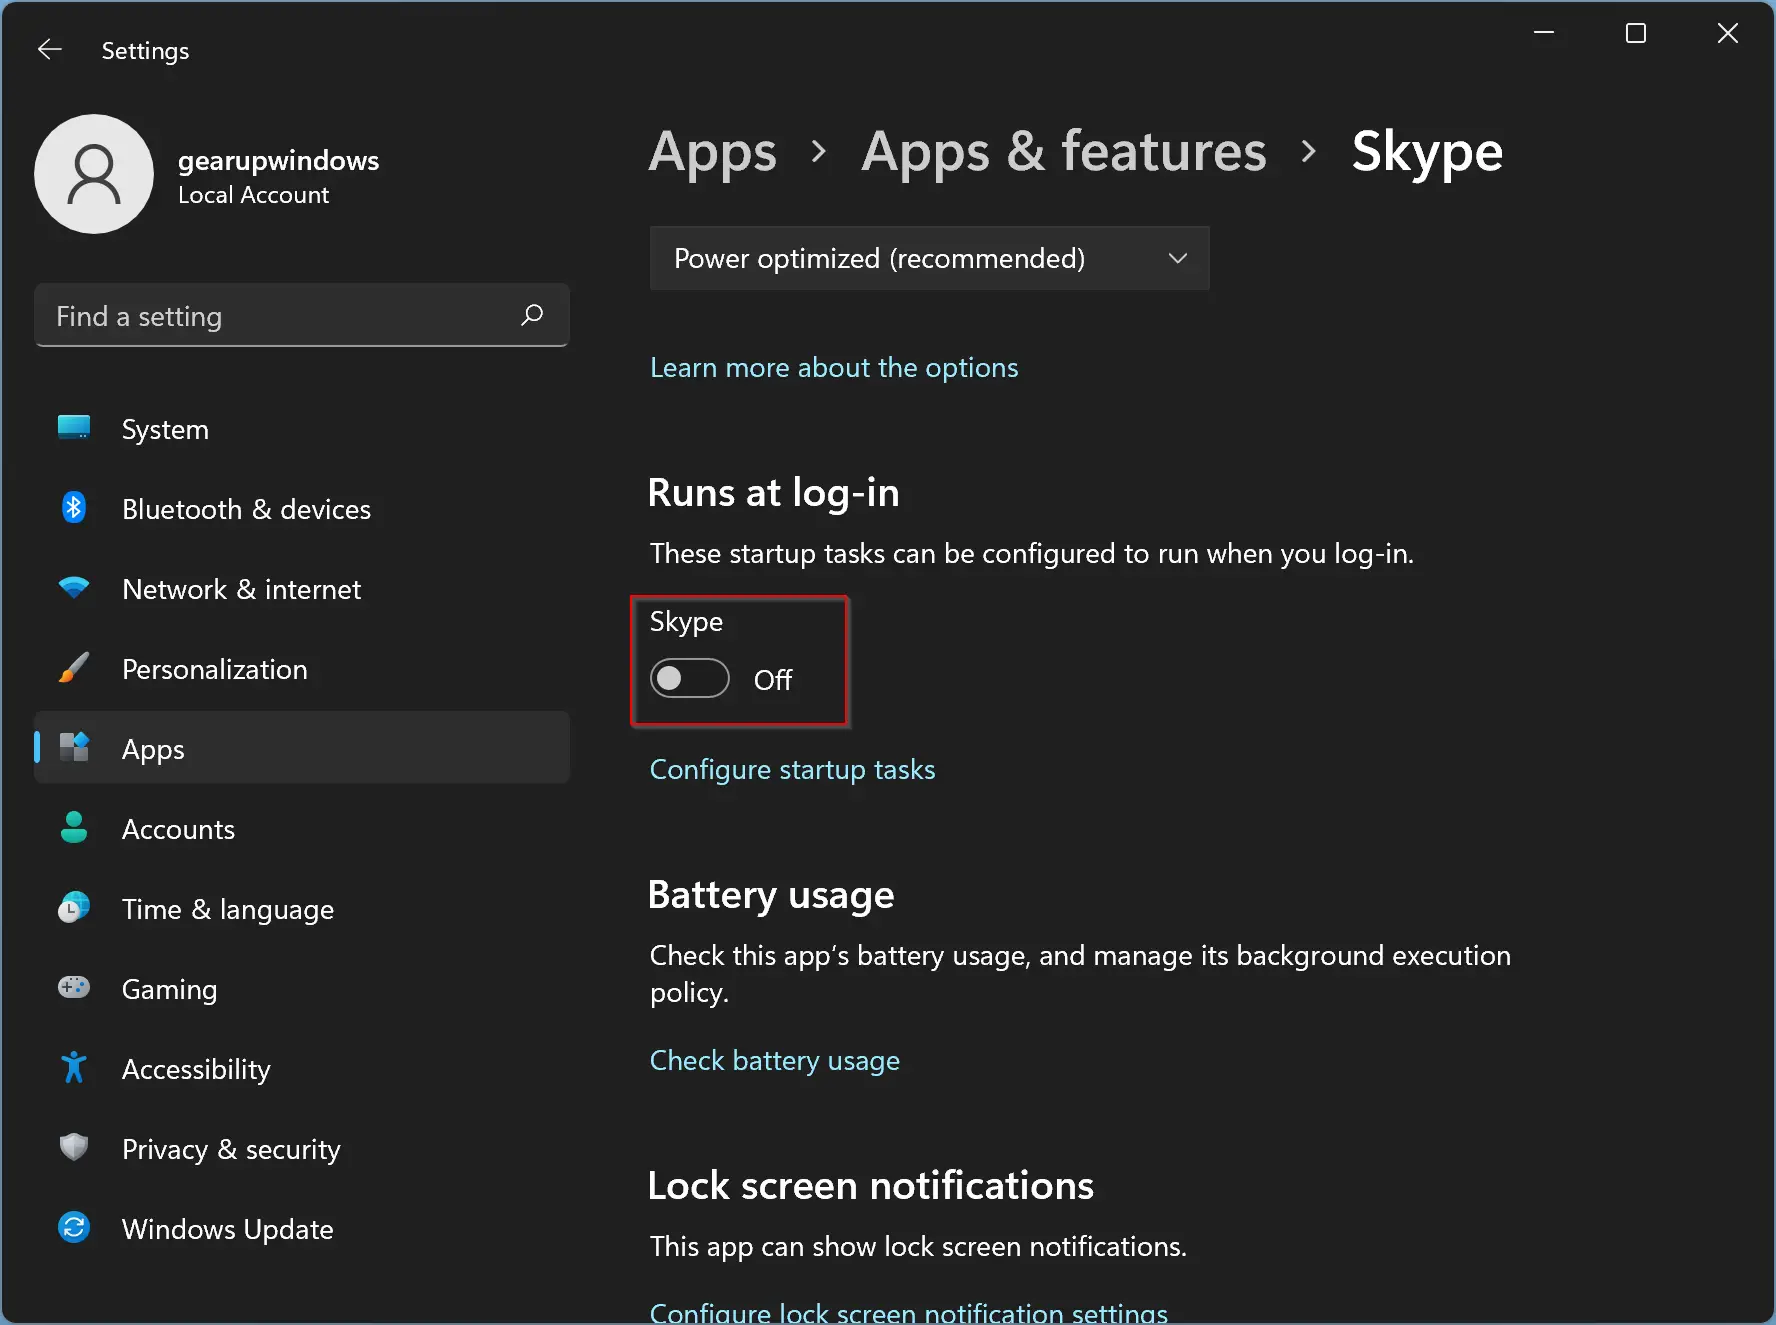
Step 3. When Skype settings open, scroll down a bit on the right sidebar. In the “Runs at log-in” section, toggle the button to the Off position to disable Skye from automatically starting up when you sign in to Windows 11.
How to Disable Skype Auto Start in Windows 11 using Task Manager?
If you have installed the traditional Skype app on your computer, then you can disable auto-start using Task Manager. To do that, use the following recommended steps:-
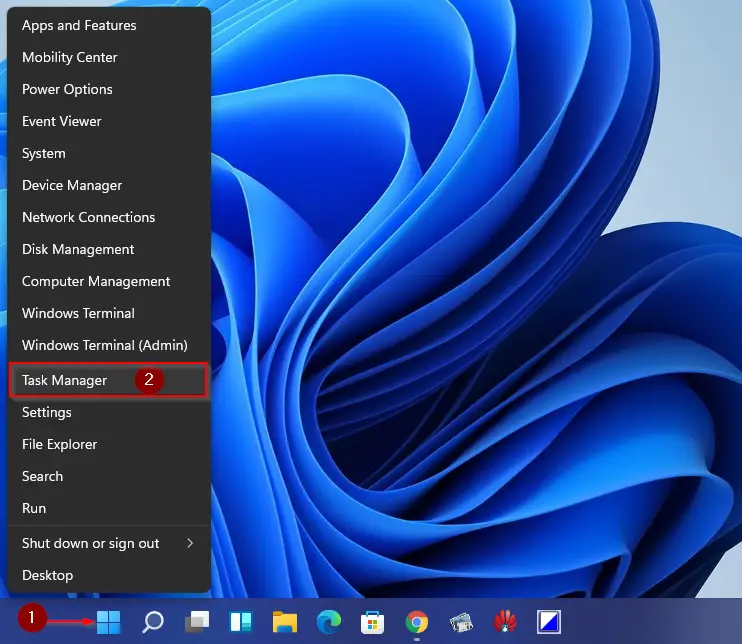
Step 1. Open the Task Manager.
To do that, right-click on the Start button on Windows 11 Taskbar and select Task Manager to launch it.
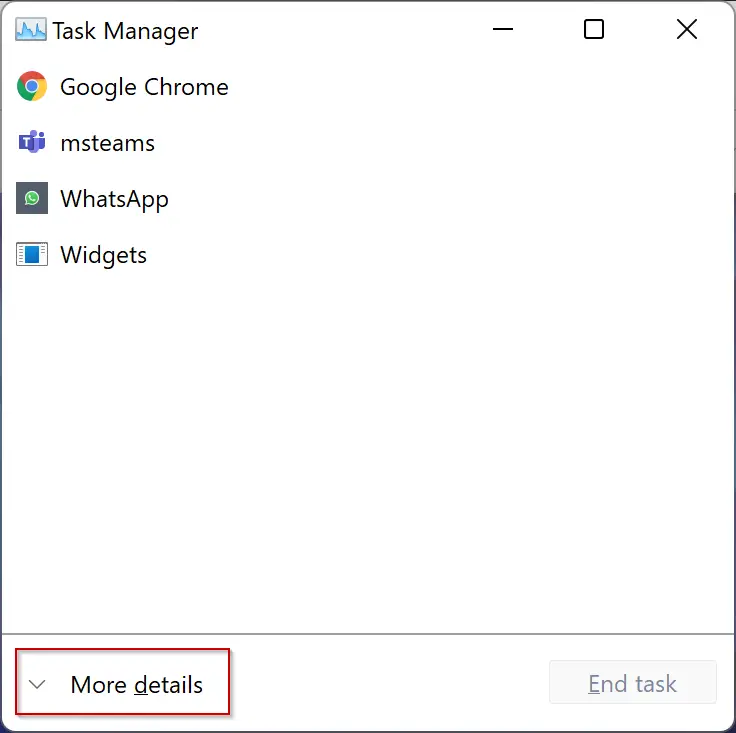
Step 2. When Task Manager opens, click on More details at the bottom if it opens compact mode.
Step 3. After that, in the Startup tab, scroll down and find Skype in the list. Then, right-click on it, and select Disable option.
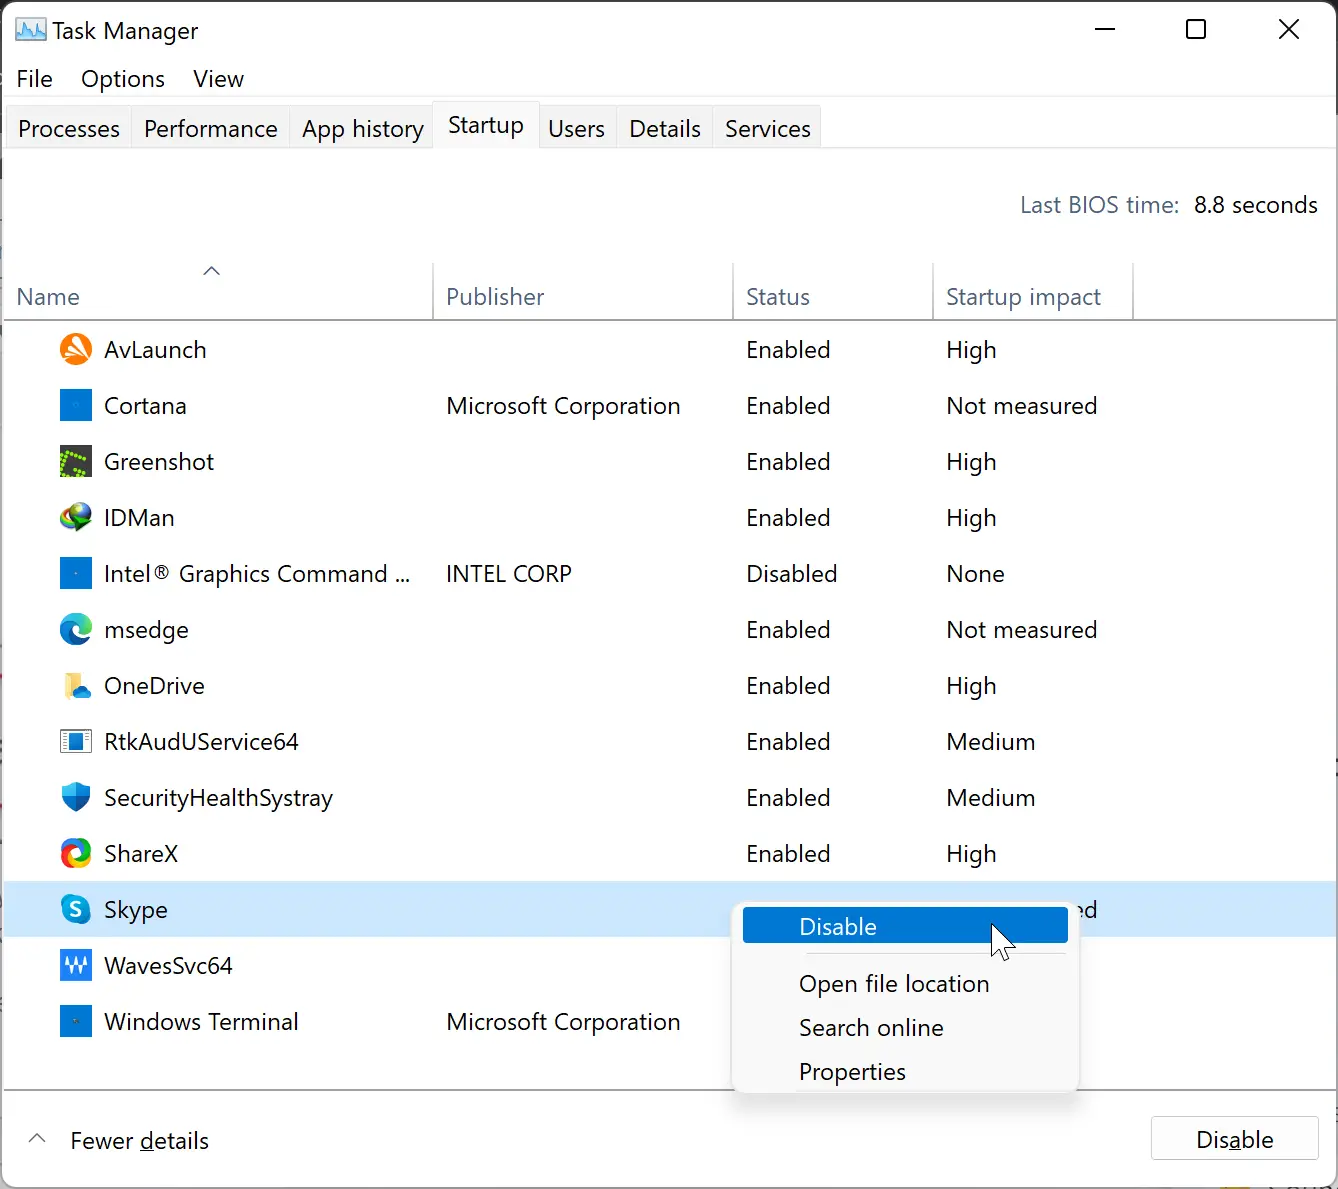
That’s it. Windows won’t open Skype automatically anymore when you sign in to your account.
How to Disable Skype Auto Start from the Program Settings?
Using the Skype app, you can configure it to not start with Windows startup automatically. To do that, use the following steps:-
Step 1. First, open the Skype app.

Step 2. After that, click the ellipse (three dots) and select Settings from the menu that appears.

Step 3. Select General on the left sidebar when the Skype Settings opens.
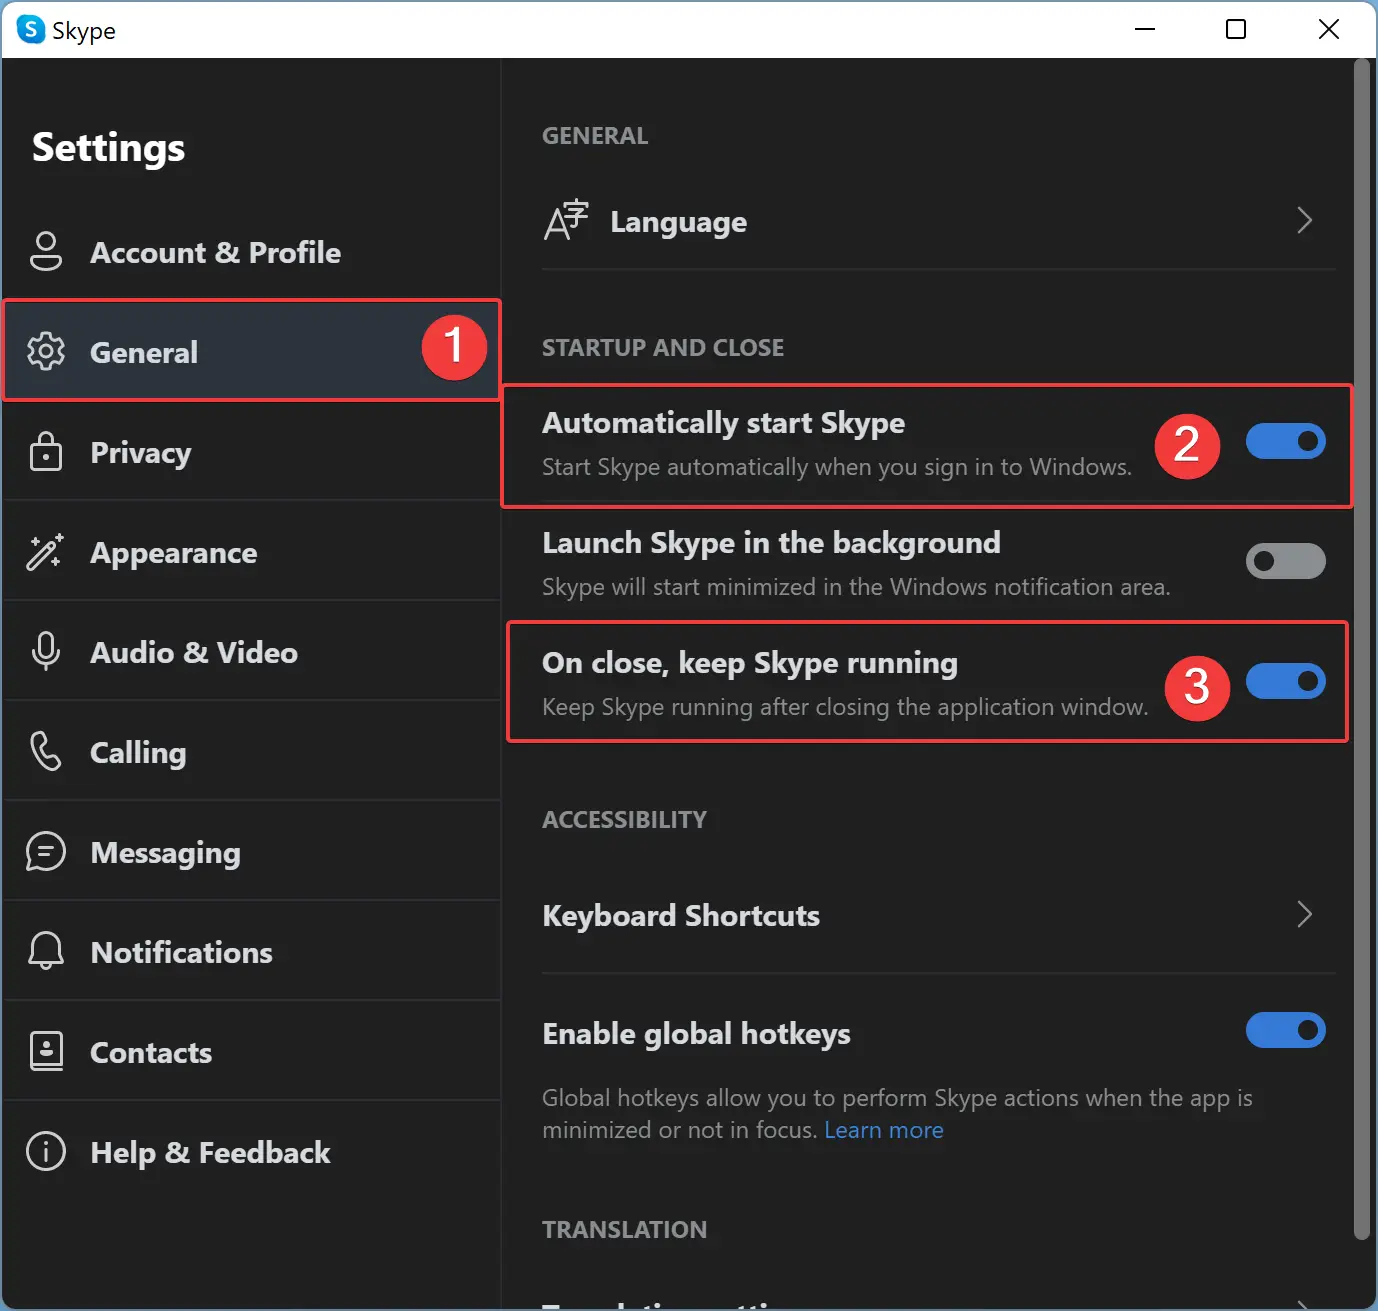
Step 4. Then on the right sidebar, toggle the following buttons to the Off position:-
- Automatically start Skype.
- On close, keep Skype running.
When you’re done, close the Skype Settings. Now, the Skype application will not automatically open up when you sign in to your account. Also, when you close the Skype app, it will not run in the background.
Conclusion
In conclusion, Skype is a popular communication application that is commonly used on Windows 11. However, many users may find it frustrating that the app automatically starts every time they log in to the desktop. Fortunately, there are several ways to prevent Skype from starting up automatically, including disabling the option from within the app’s settings or using the Task Manager. By following the steps outlined in this article, users can easily disable the Skype app from starting up with Windows 11, giving them greater control over their computer’s startup processes.