In today’s world of work and entertainment, we often switch between different audio devices, such as headphones and speakers. Whether you’re listening to music, watching a movie, or joining a video call, you may want to switch between these devices based on your preference or convenience. Fortunately, Windows 11 provides various ways to switch between headphones and speakers with ease.
The most common methods to switch between headphones and speakers in Windows 11 include using the Settings app, Quick Settings, and the Sounds applet. These built-in options allow you to easily toggle between your audio devices and customize your sound settings. Additionally, there are third-party tools like Audio Device Switcher, a freeware app that provides more advanced options for managing your audio devices. In this guide, we will explore each of these methods in detail and help you choose the one that works best for you.
How to Change the Default Sound Output Device Using the Settings App?
To change the default sound output device using the Settings app, do the following:-
Step 1. First, open the Settings app.
To do that, you can use the Windows + I shortcut keys.

Step 2. Then, select the System option on the left side of the Settings window.
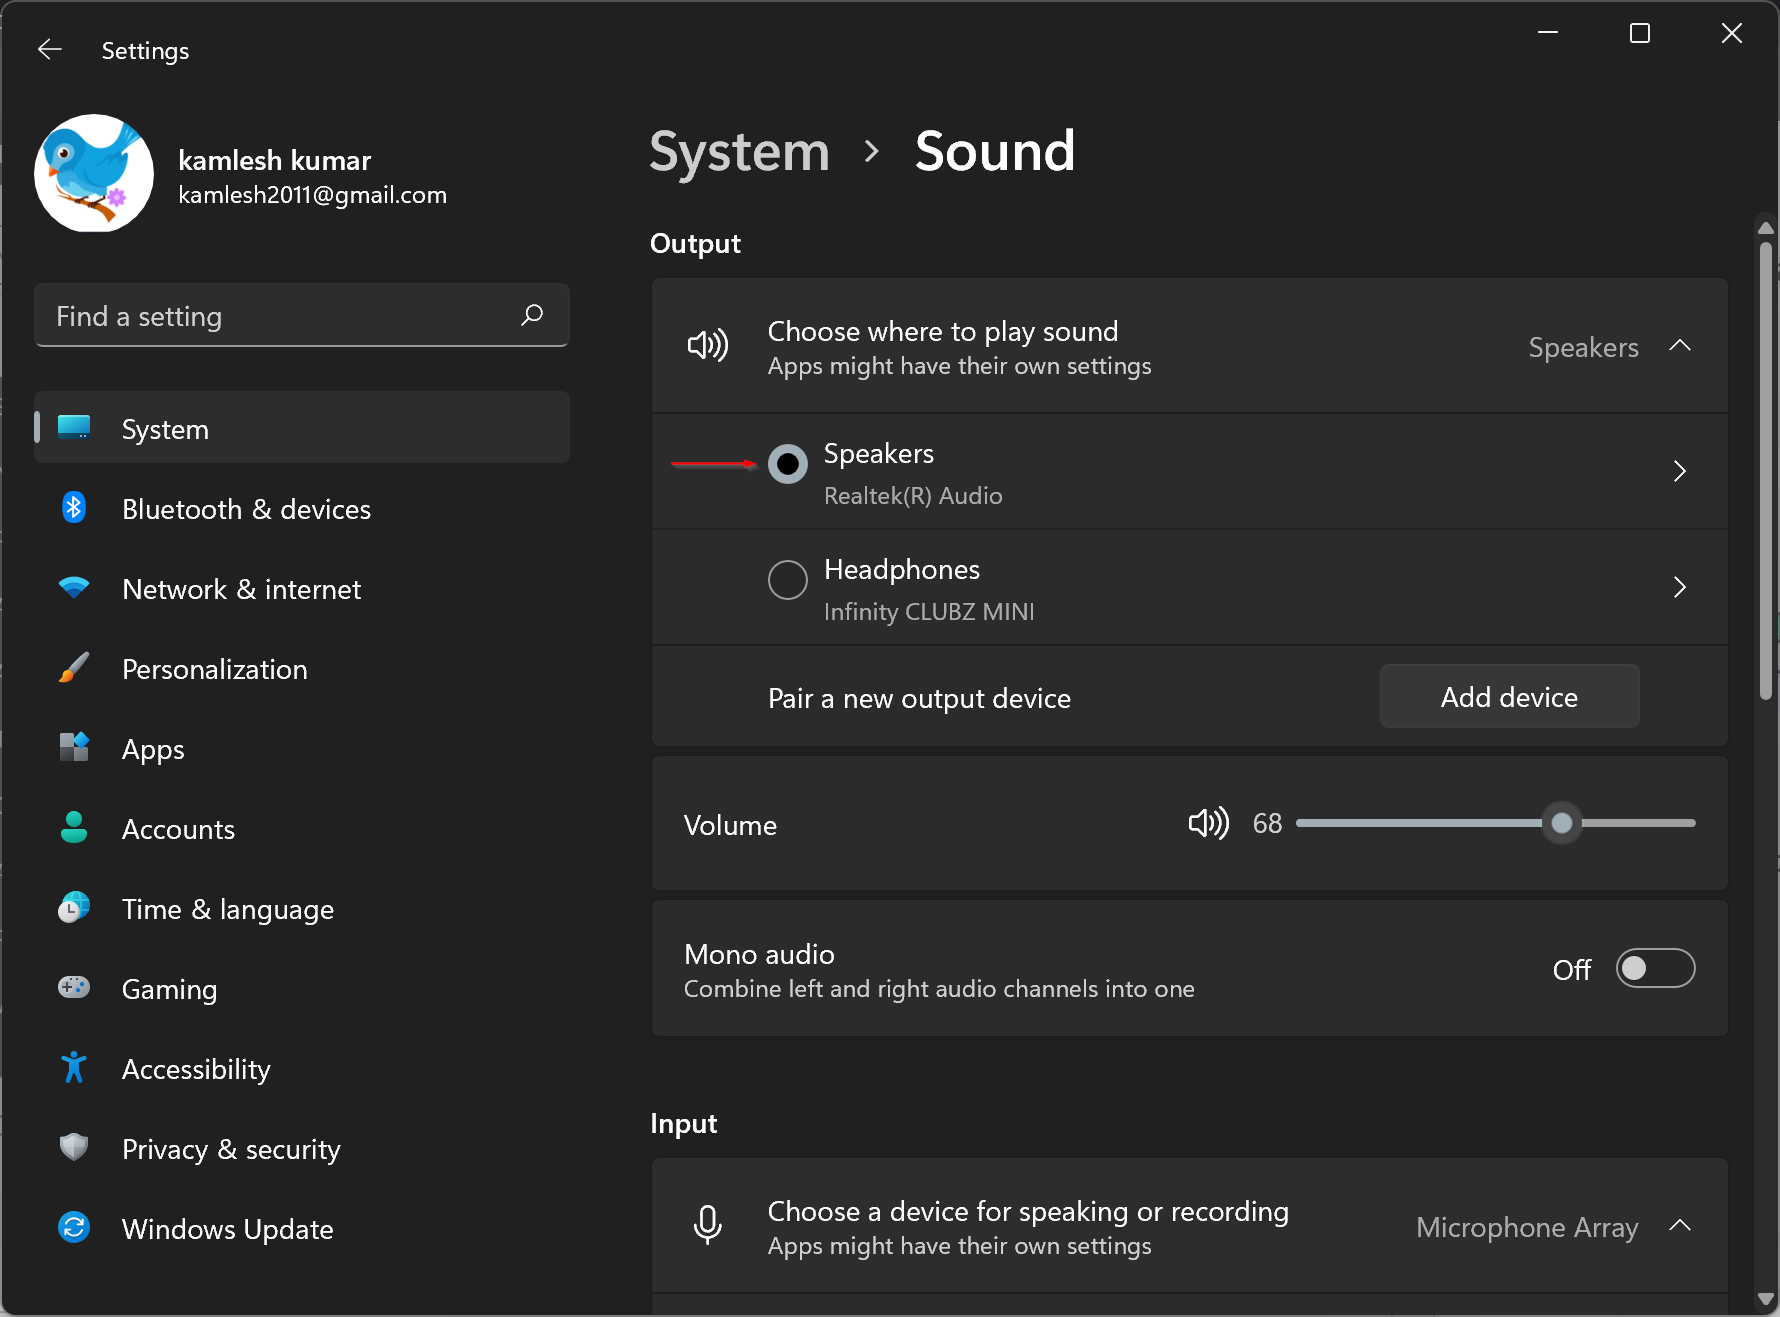
Step 3. On the right side pane of System, choose the Sound tile.
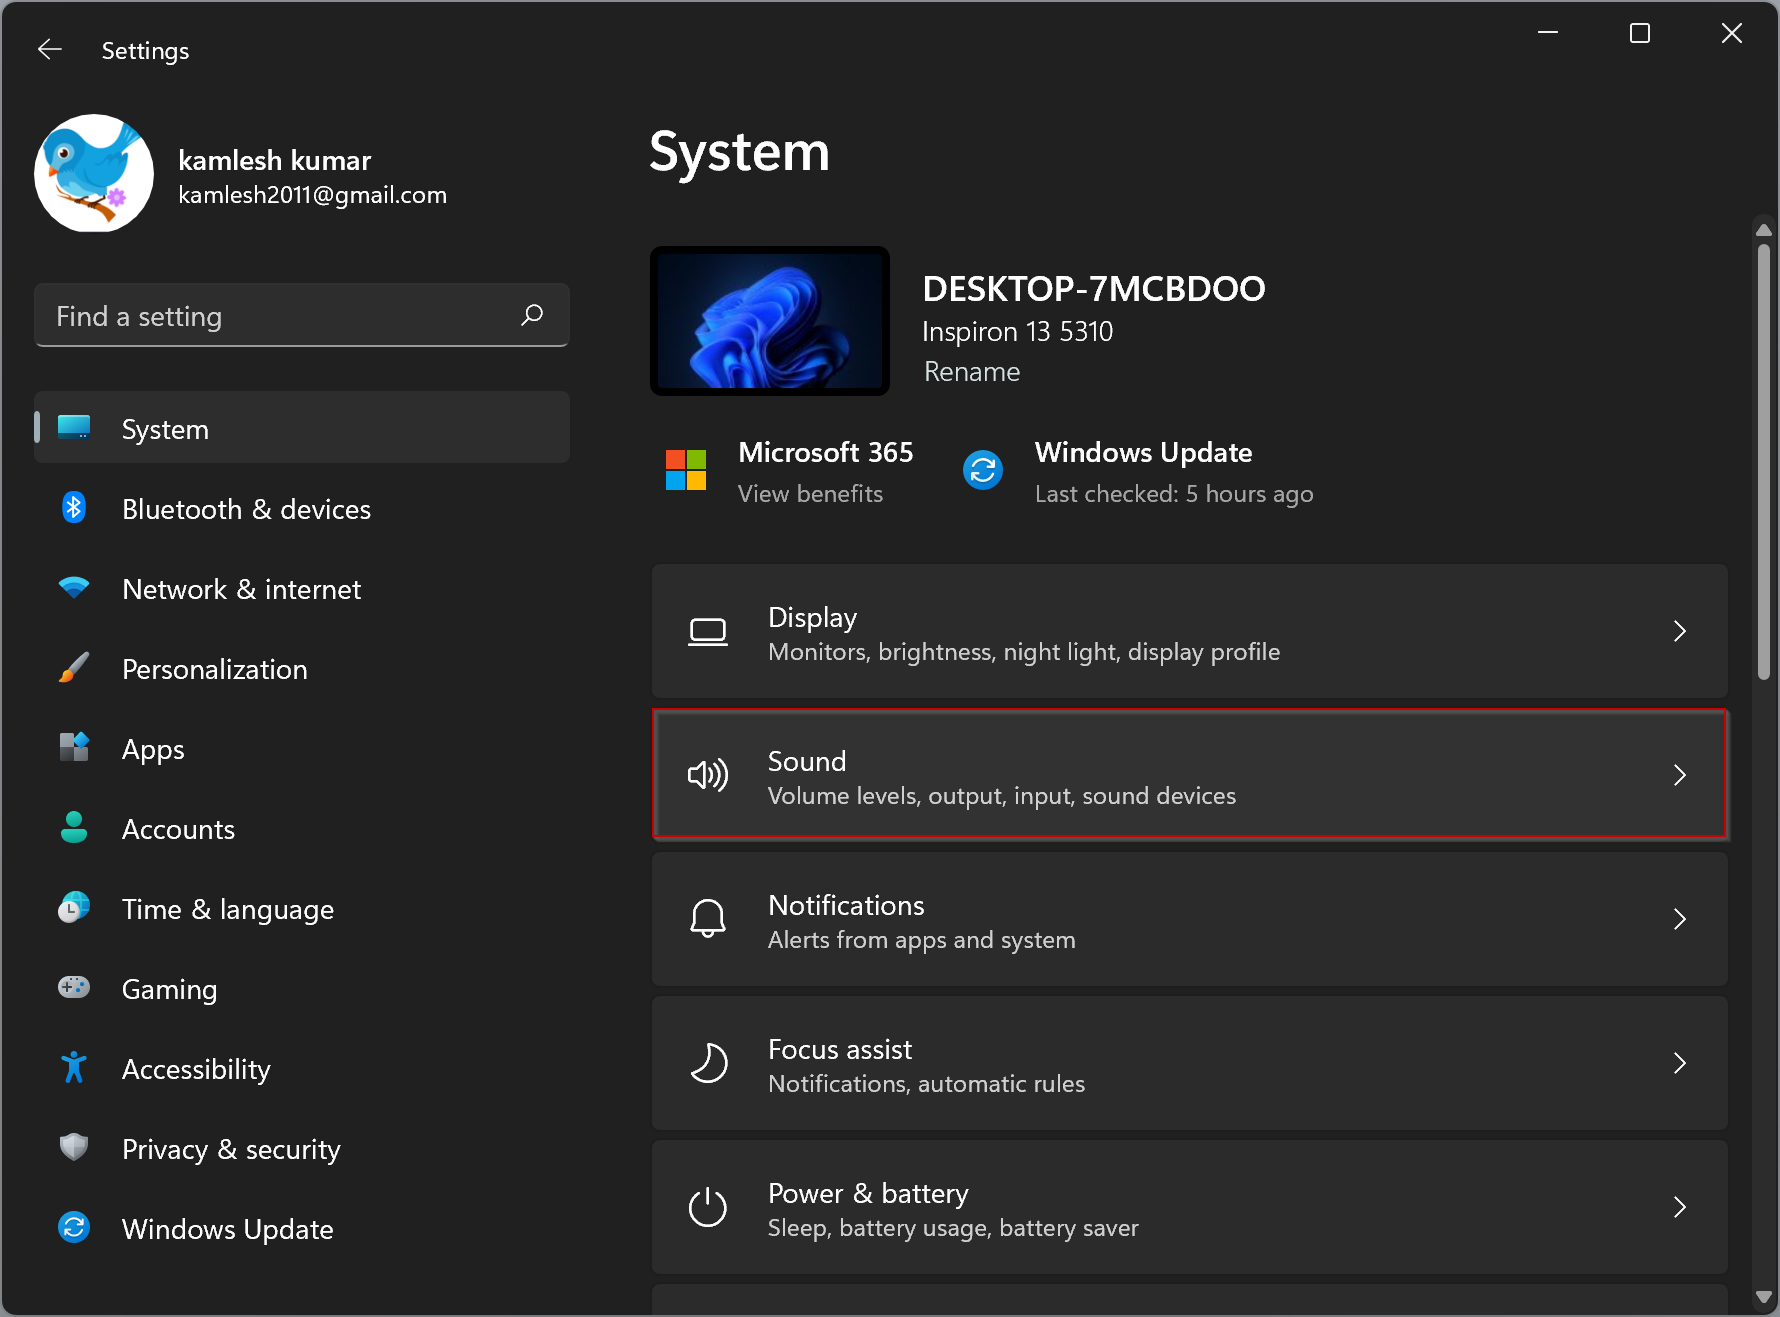
Step 4. Under the Output section, all connected audio devices will appear.

Step 5. Select any you want to use for sound output.
That’s all. Close the Settings page. The changes will be automatically saved.
How to Change the Default Sound Output Device from Quick Settings?
To select a default sound output device from the Quick Settings menu of Windows 11, use the following steps:-
Step 1. First, use the Windows + A keyboard shortcut to open the Quick Settings menu. Alternatively, click on the Quick Settings area on the taskbar.
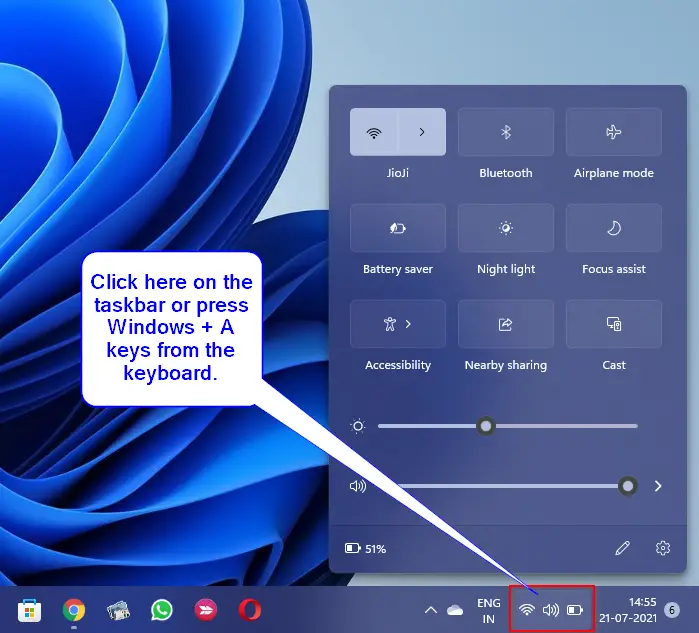
Step 2. On the Quick Settings menu, select the right-facing arrow (caret) beside the volume slider.
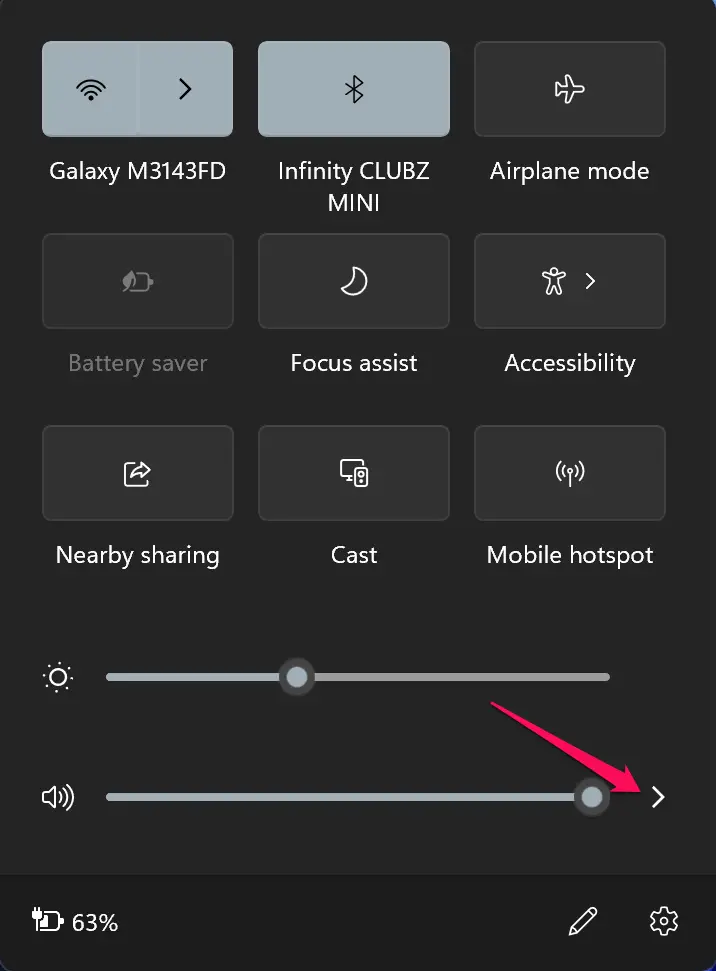
Step 3. Then, all the connected audio output devices will appear. Click on any to select and use.
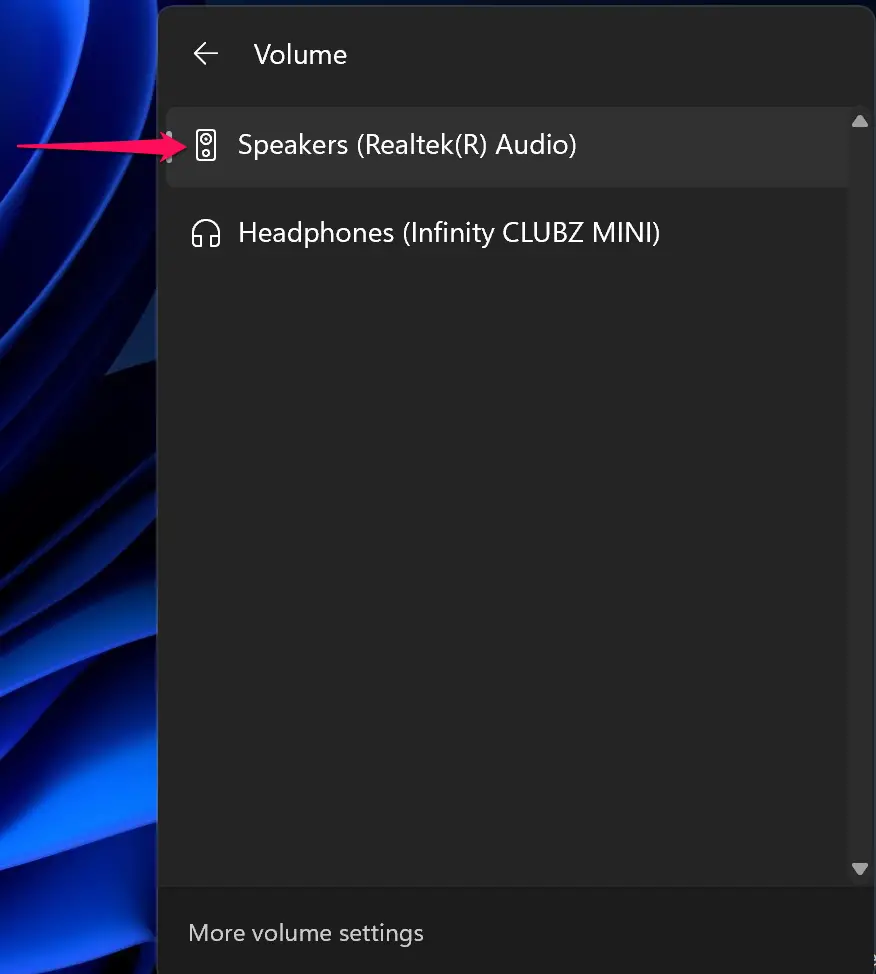
When you’re done, click anywhere outside the Quick Settings menu to close it.
How to Select the Default Audio Output Device from the Sounds Applet?
To choose a default audio output device using the Sounds applet, use these steps:-
Step 1. First, press Windows + R shortcut keys on the keyboard to open the Run dialog.
Step 2. Then, type the following and hit the Enter key on the keyboard to launch the classical Sounds applet:-
mmsys.cpl

Step 3. On the Sound window, switch to the Playback tab. Here, you’ll find all available audio playback devices. Select the desired output device in the list and click the Set Default button to switch between audio devices.
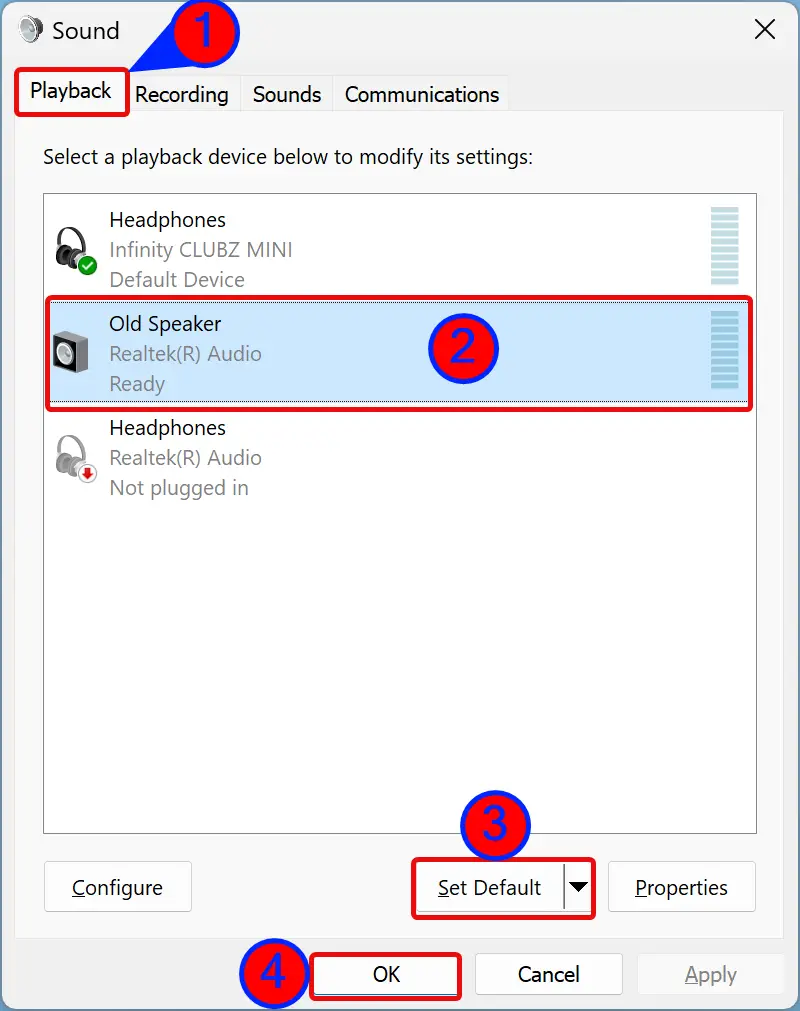
Step 4. Finally, click the OK button to exit.
How to Select the Default Audio Output Device from Audio Device Switcher?
Audio Device Switcher is a free app available on the Microsoft Store that enables you to quickly select an audio device without the hassle of navigating through various settings. With this software, you can easily select a device from the list and be done with it. Its simple user interface allows for easy configuration of options such as Dark theme, running in the background, running at startup, running at startup minimized, switching communication devices, and showing disabled devices. This app is a must-have for anyone who frequently switches between different audio devices and wants a convenient and customizable solution. Download Audio Device Switcher today and streamline your audio device management!
Conclusion
In conclusion, Windows 11 offers several ways to switch between headphones and speakers with ease. The built-in options include using the Settings app, Quick Settings, and the Sounds applet, while third-party tools like Audio Device Switcher offer more advanced options. By following the steps outlined in this guide, you can easily select your preferred audio output device based on your preference or convenience. Whether you’re listening to music, watching a movie, or joining a video call, Windows 11 makes it easy to switch between audio devices and customize your sound settings. Download Audio Device Switcher today to streamline your audio device management and enhance your overall experience.
Worth mentioning is also 3rd party software such as audioswitch app.
Also i have found the device audioswitch headphone stand that works similar way