Windows 11/10 allows you to link a Microsoft Account with a Local account. However, in this gearupwindows article, we will guide you on unlinking a Microsoft Account from your Local Account. Signing in to Windows 11/10 with a local account has its own advantages, such as you can remove the account password if you like. The good thing is that you will not lose any data while switching to a local account from Microsoft account.
How to Switch to a Local Account from Microsoft Account in Windows 11?
To switch back to a local account in Windows 11, use the following steps:-
Step 1. First, open Windows Settings by pressing Windows + I keys on the keyboard.
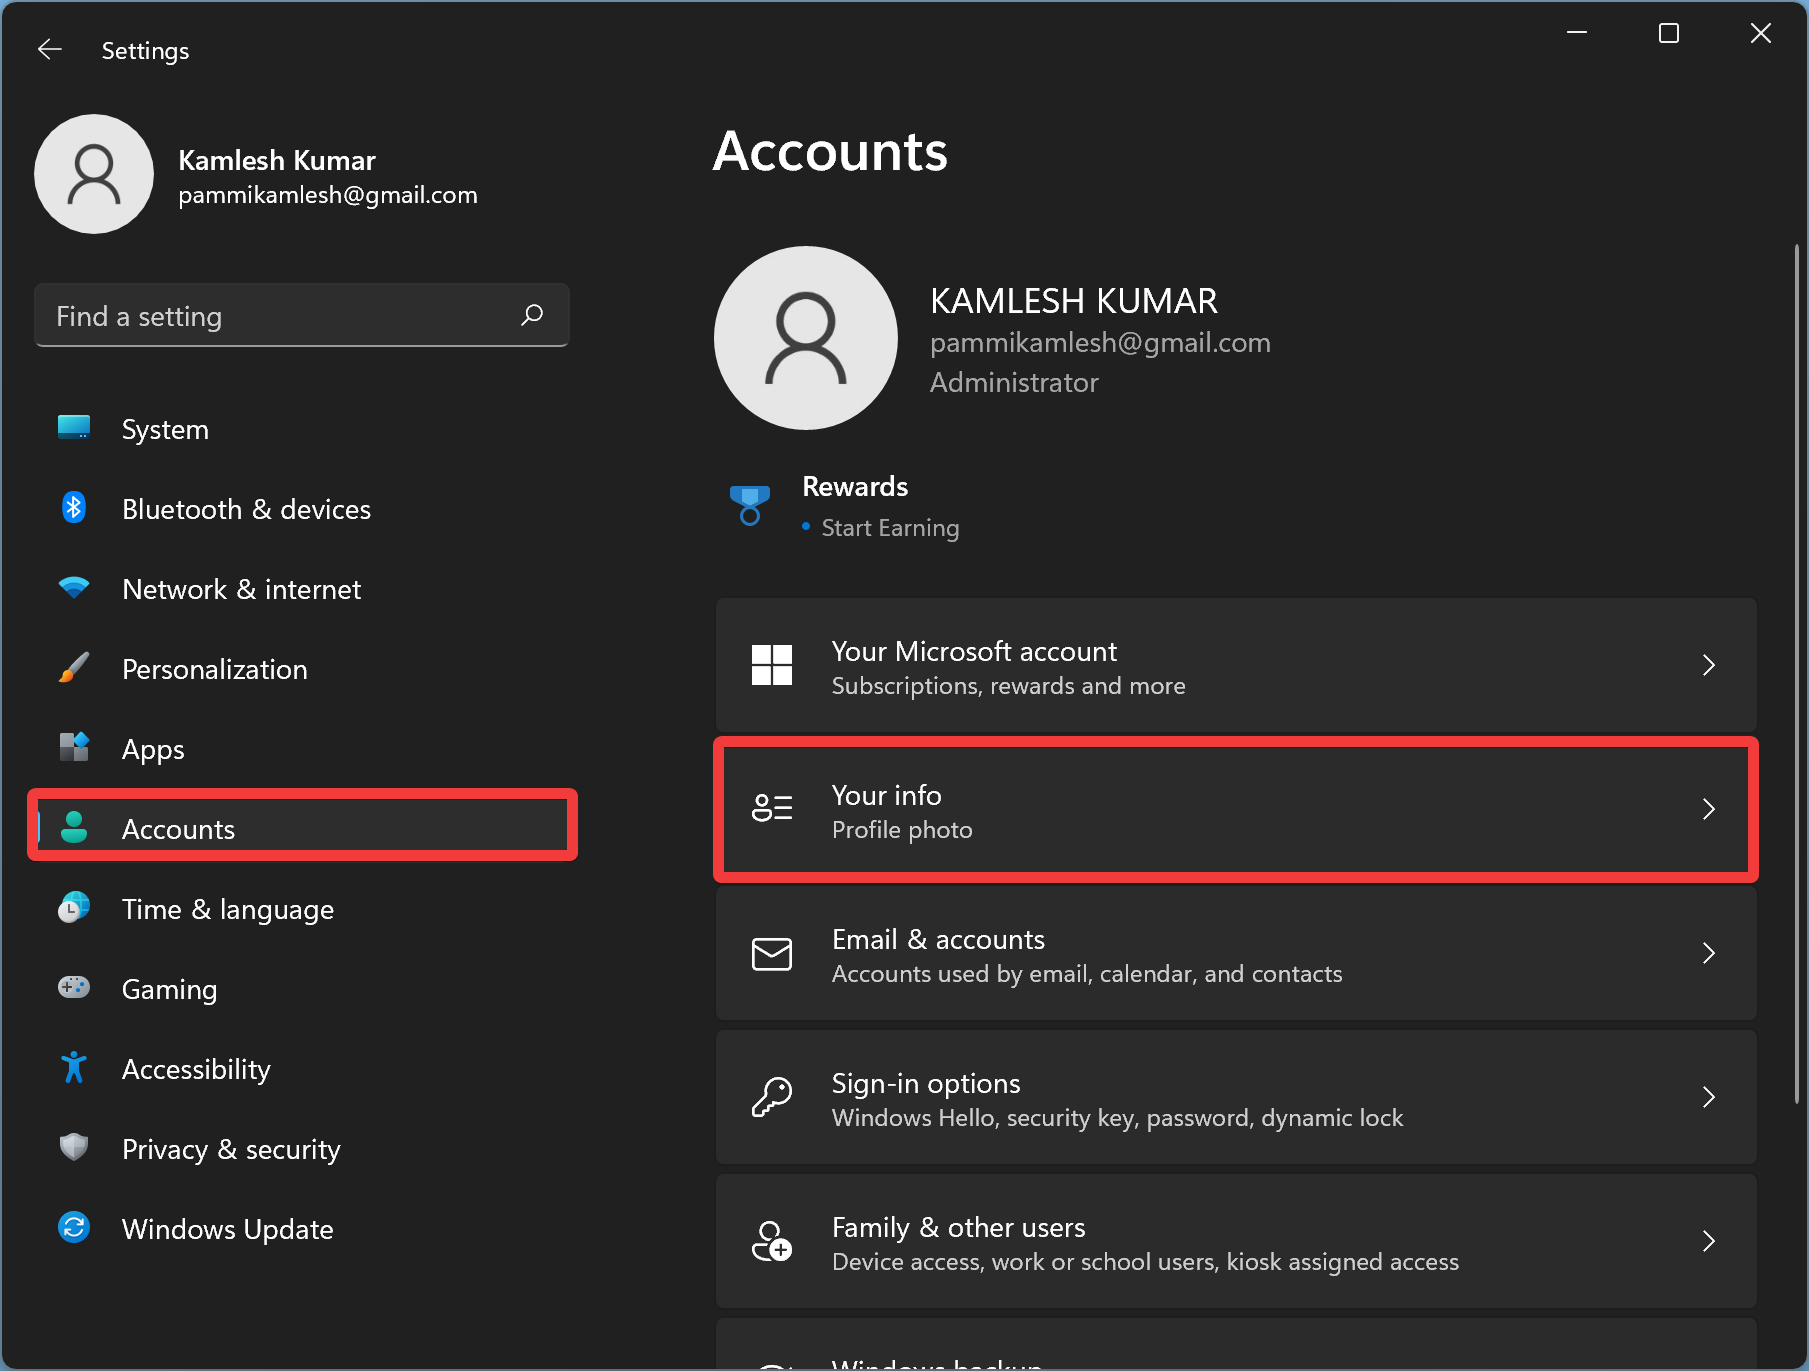
Step 2. Then, click on the Accounts category in the left sidebar.
Step 3. After that, select the Your info tile on the right side.
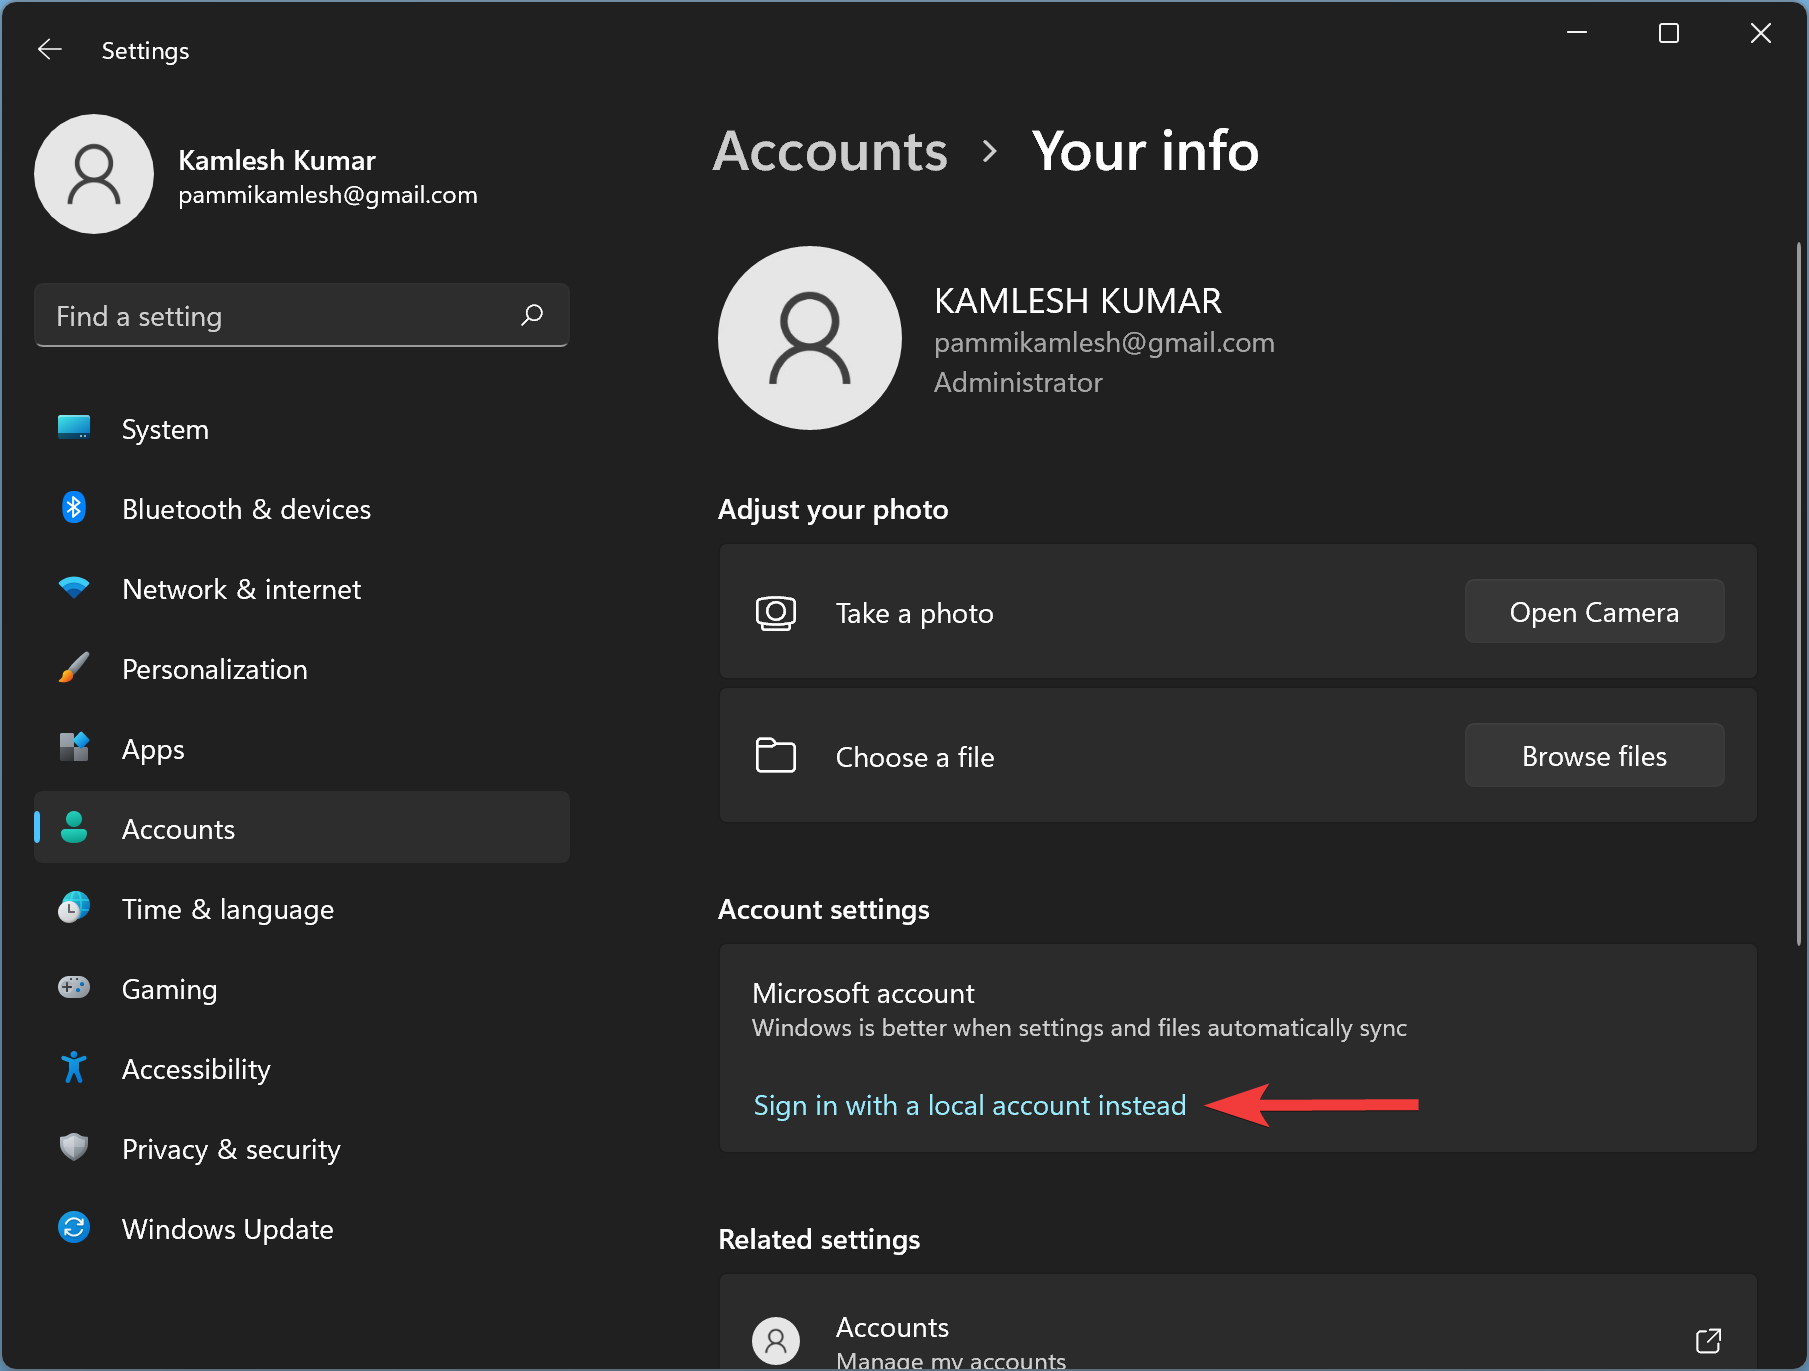
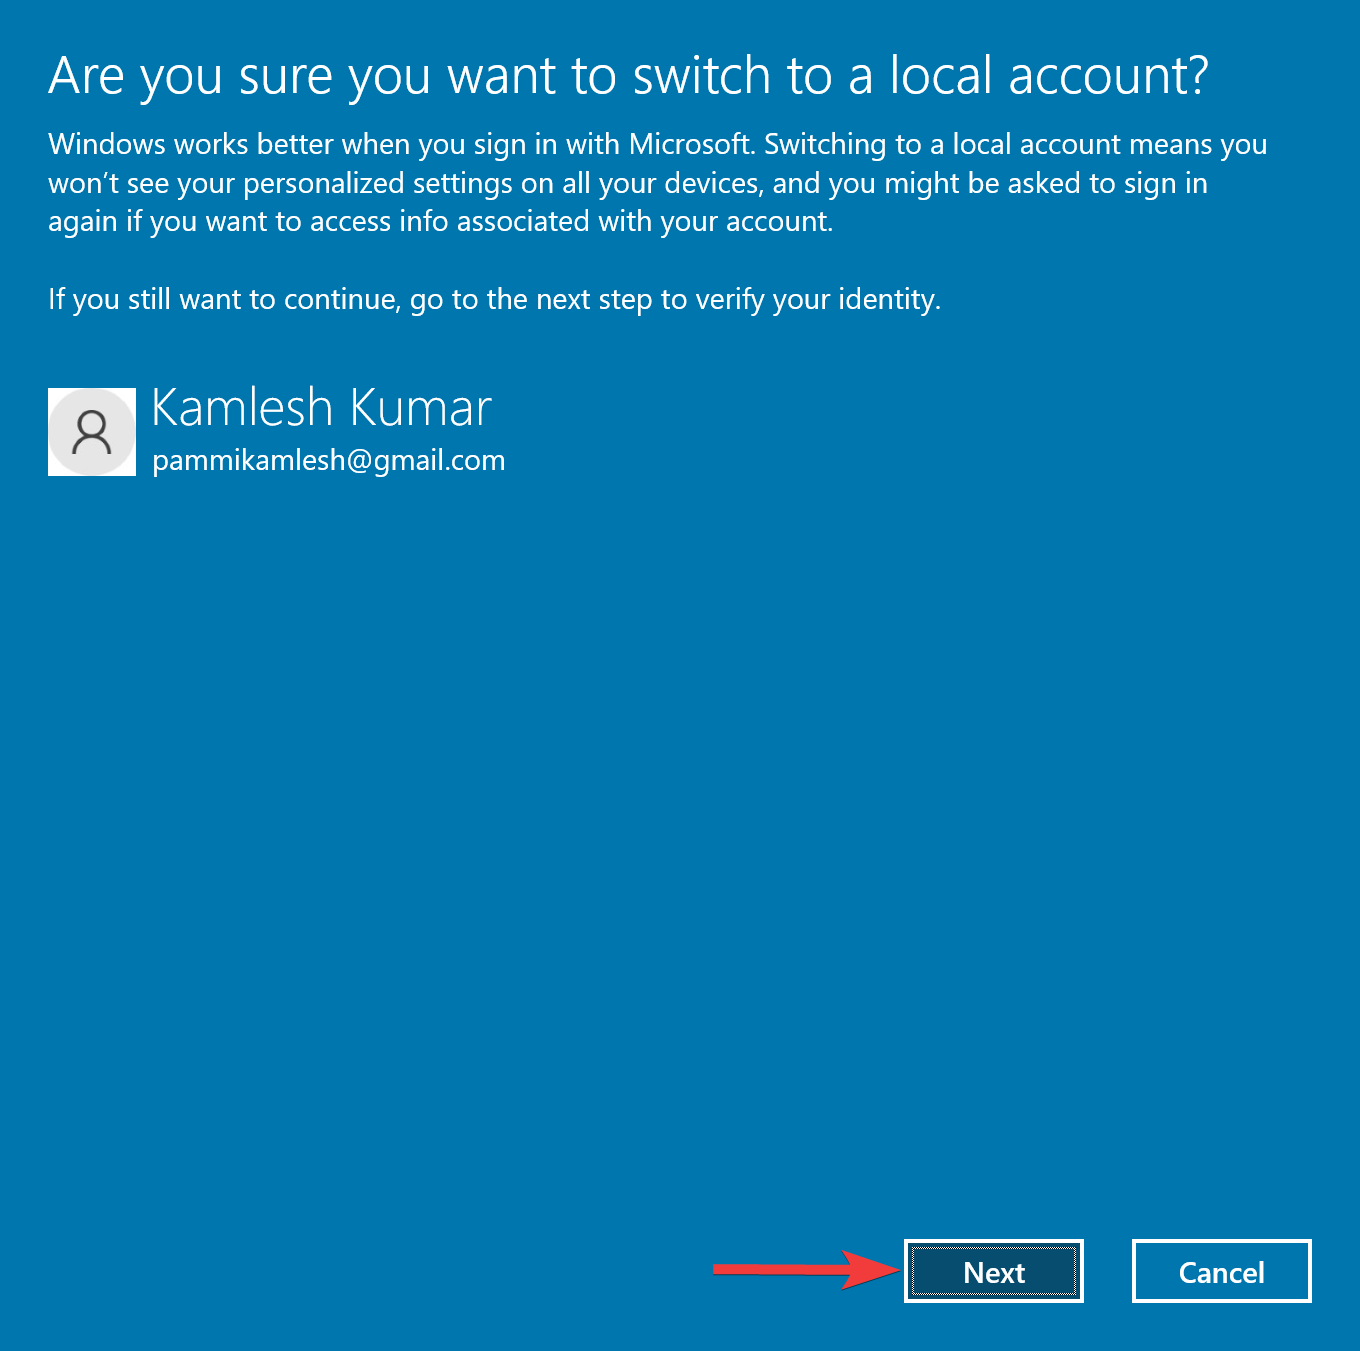
Step 4. On the right sidebar, under the “Account settings” section, click the Sign in with a Local account instead link.
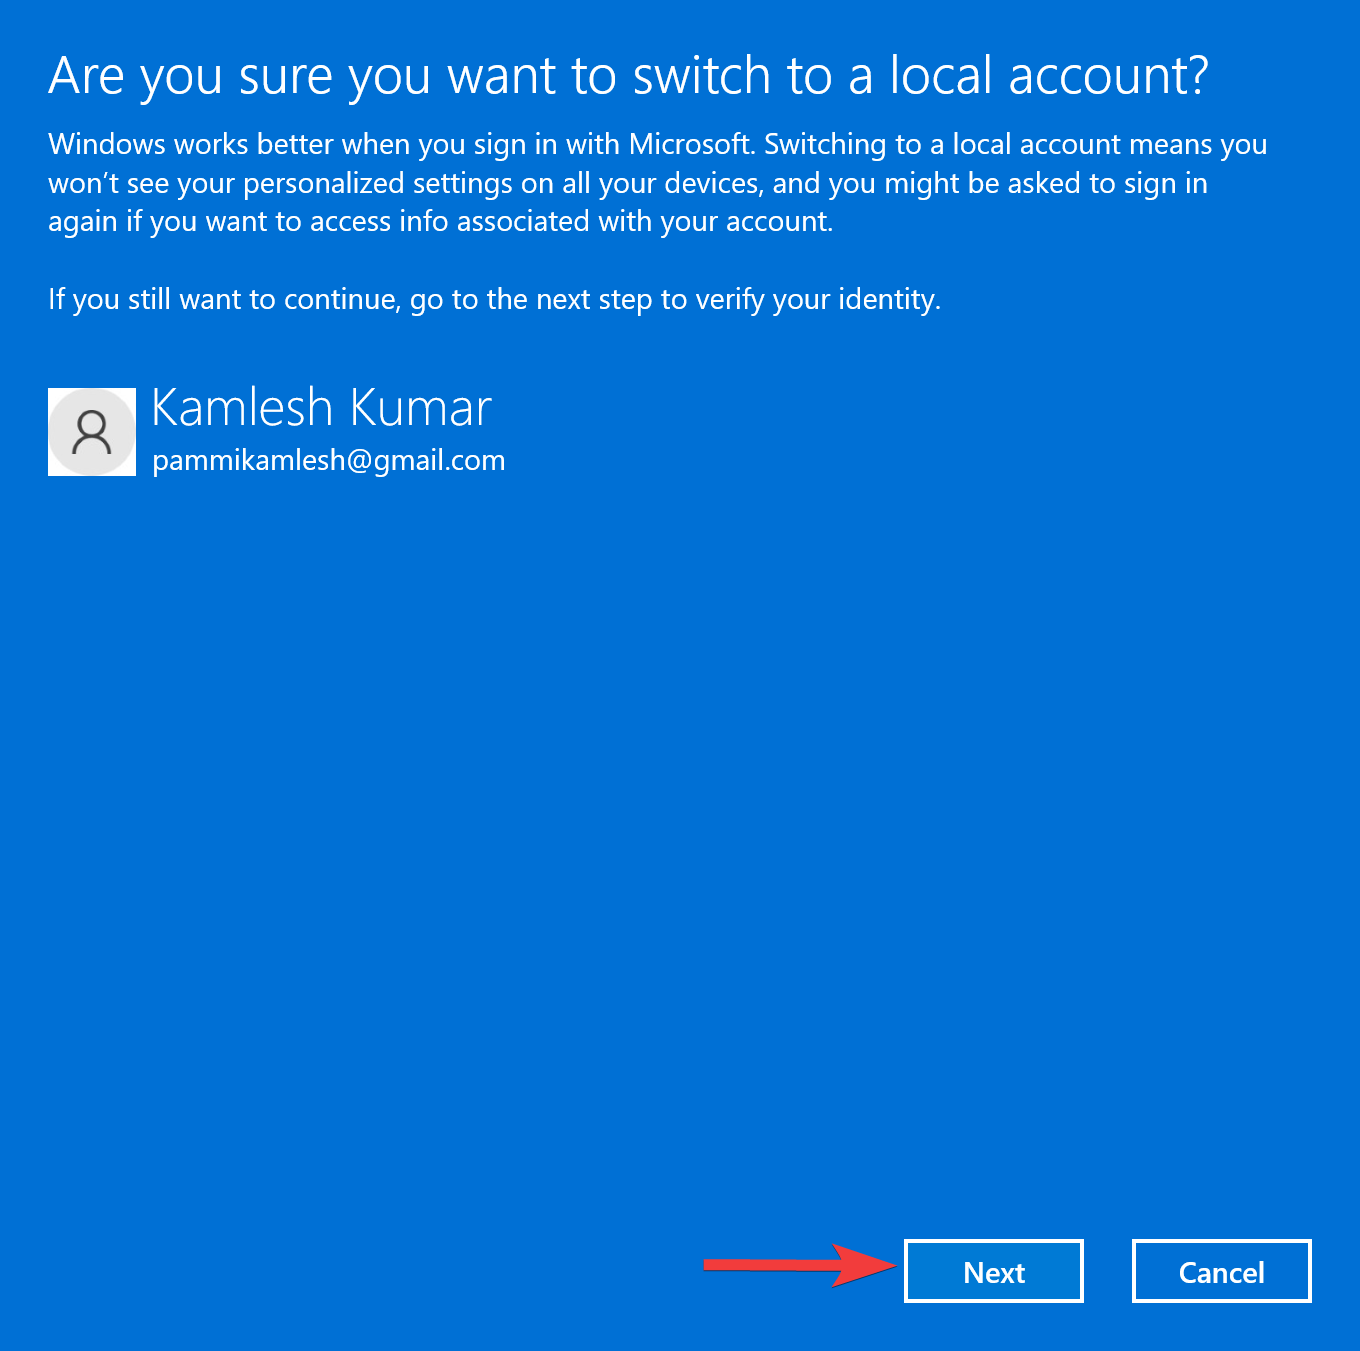
Step 5. Click on the Next button to confirm.
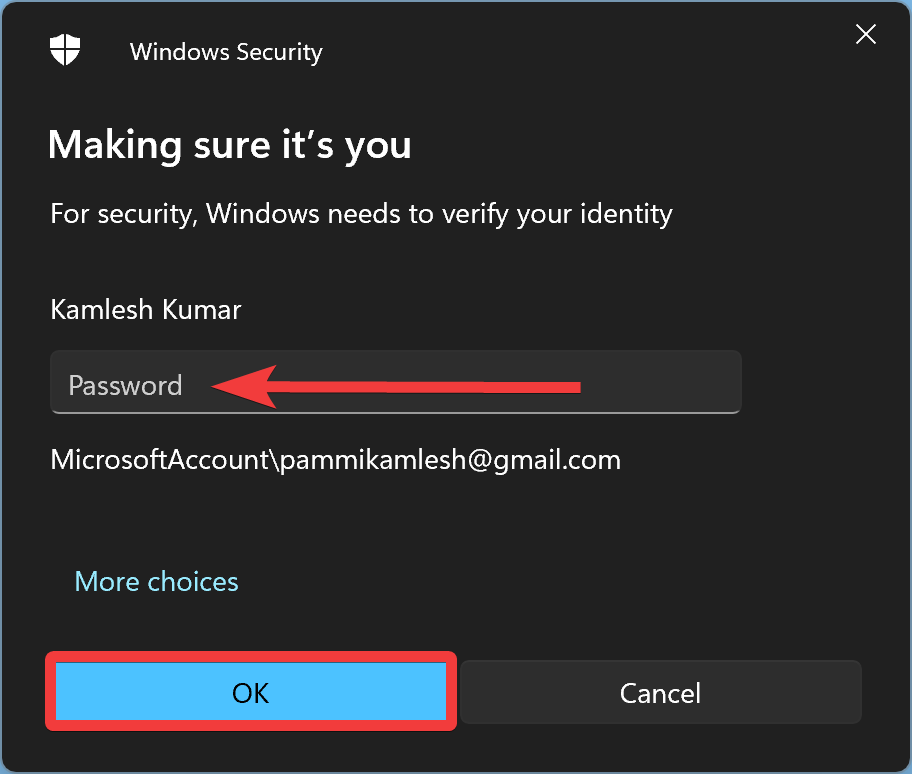
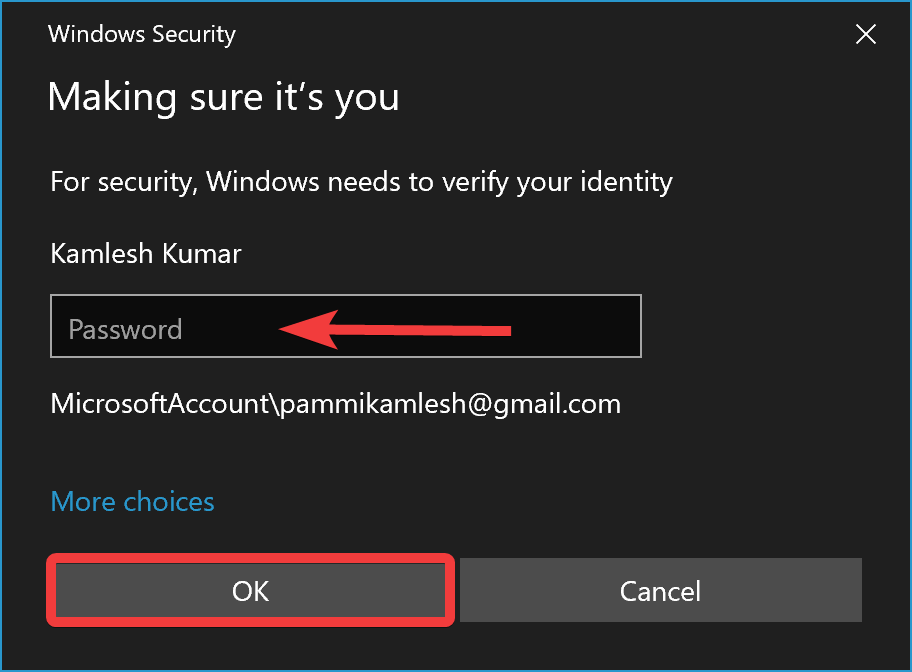
Step 6. When prompted with the “Windows Security” pop-up window, enter your current account password and click the OK button.
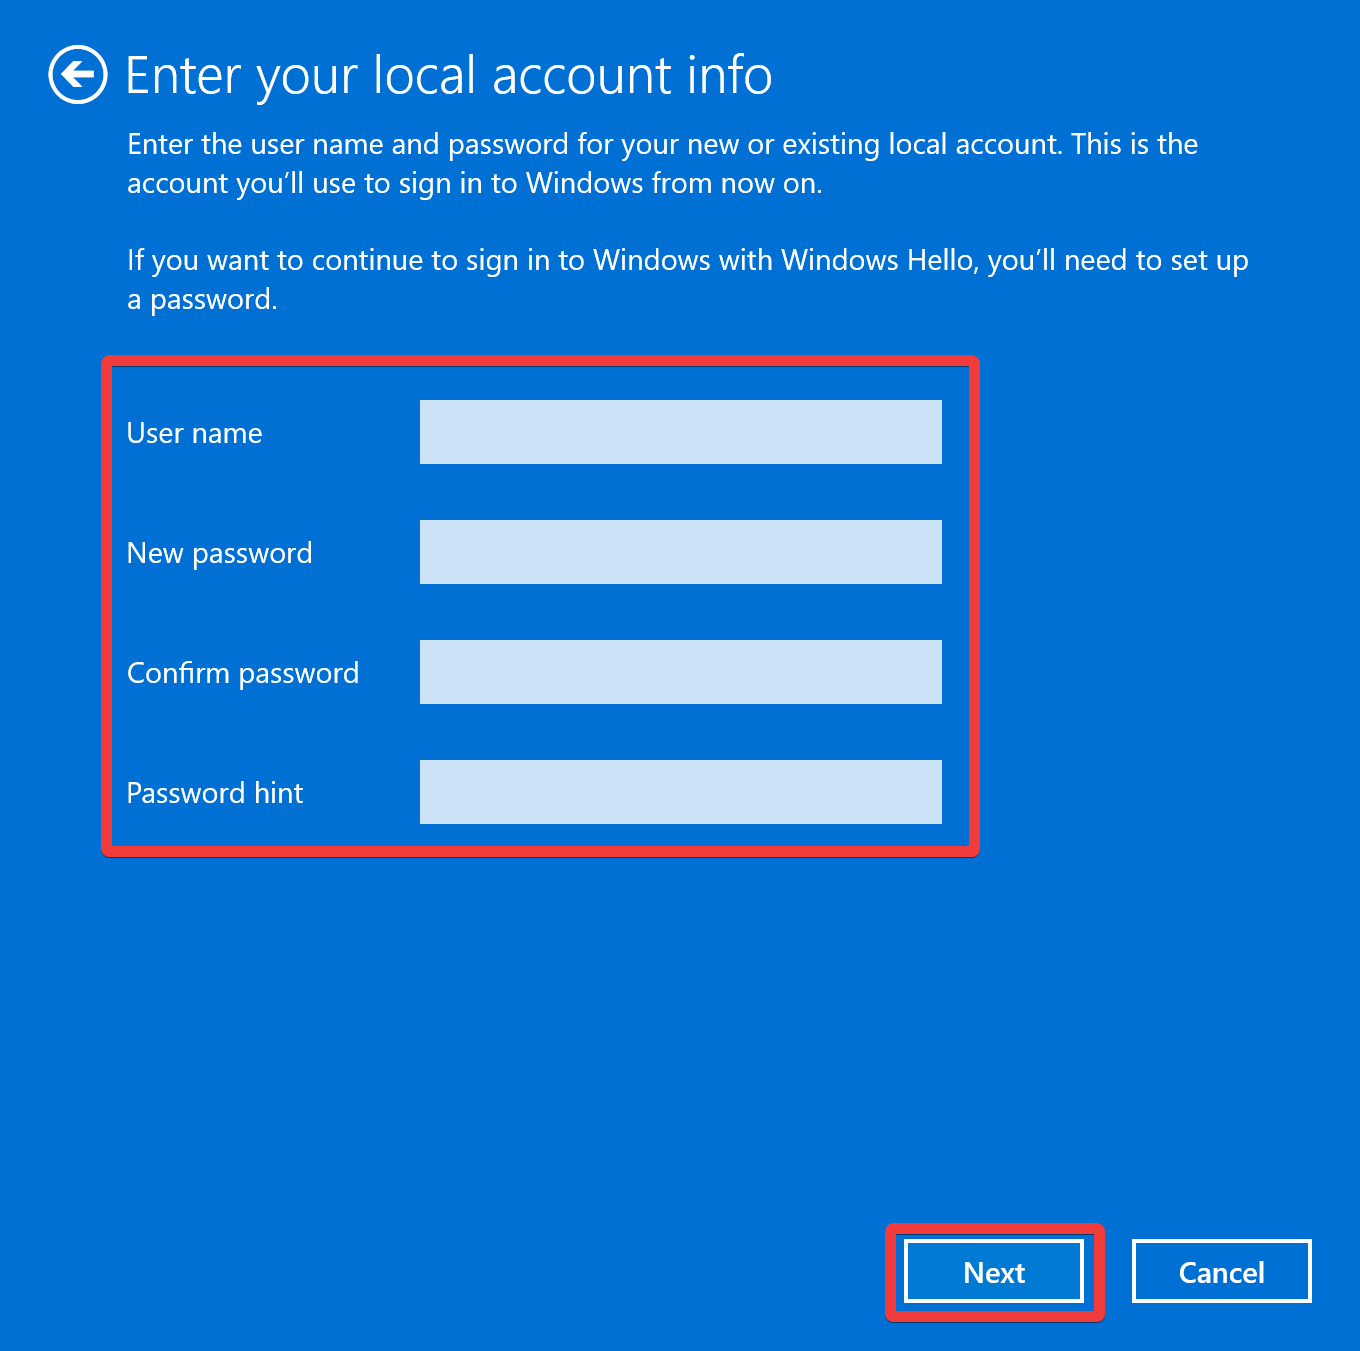
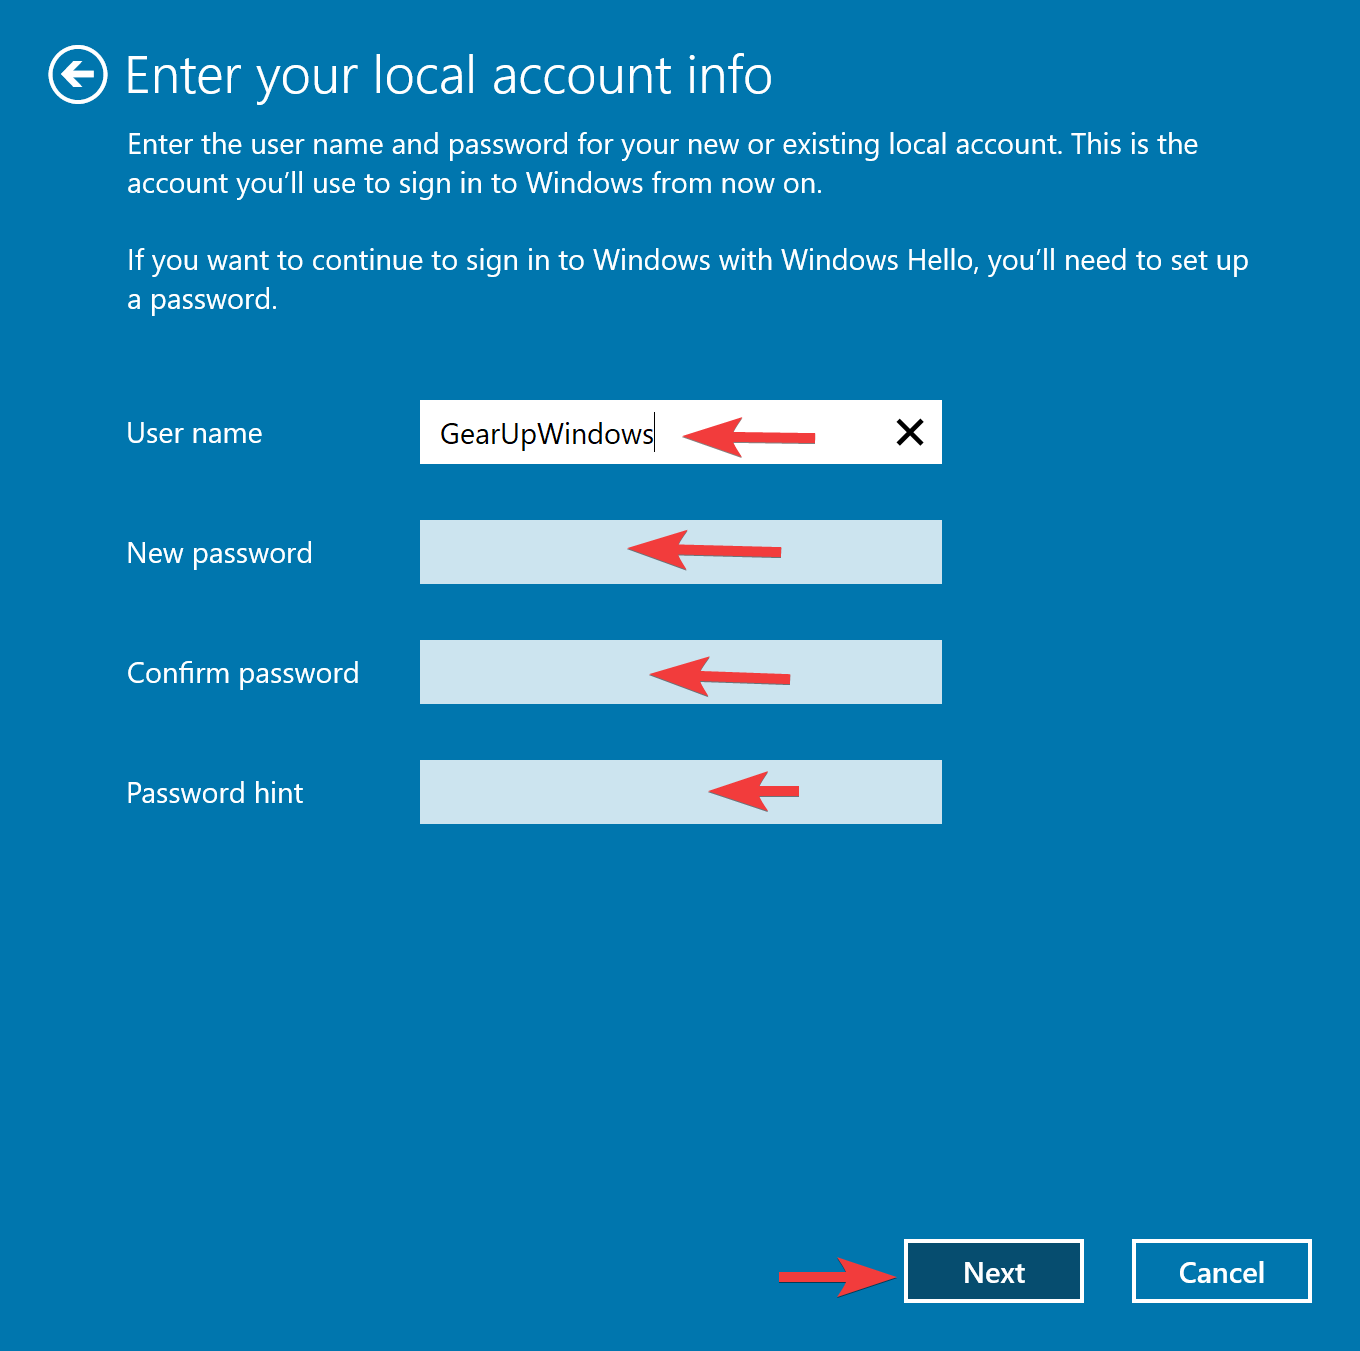
Step 7. In the following screen, fill the details of “User name,” “New password,” “Confirm password,” and “Password hint.”
Step 8. Then, click the Next button.
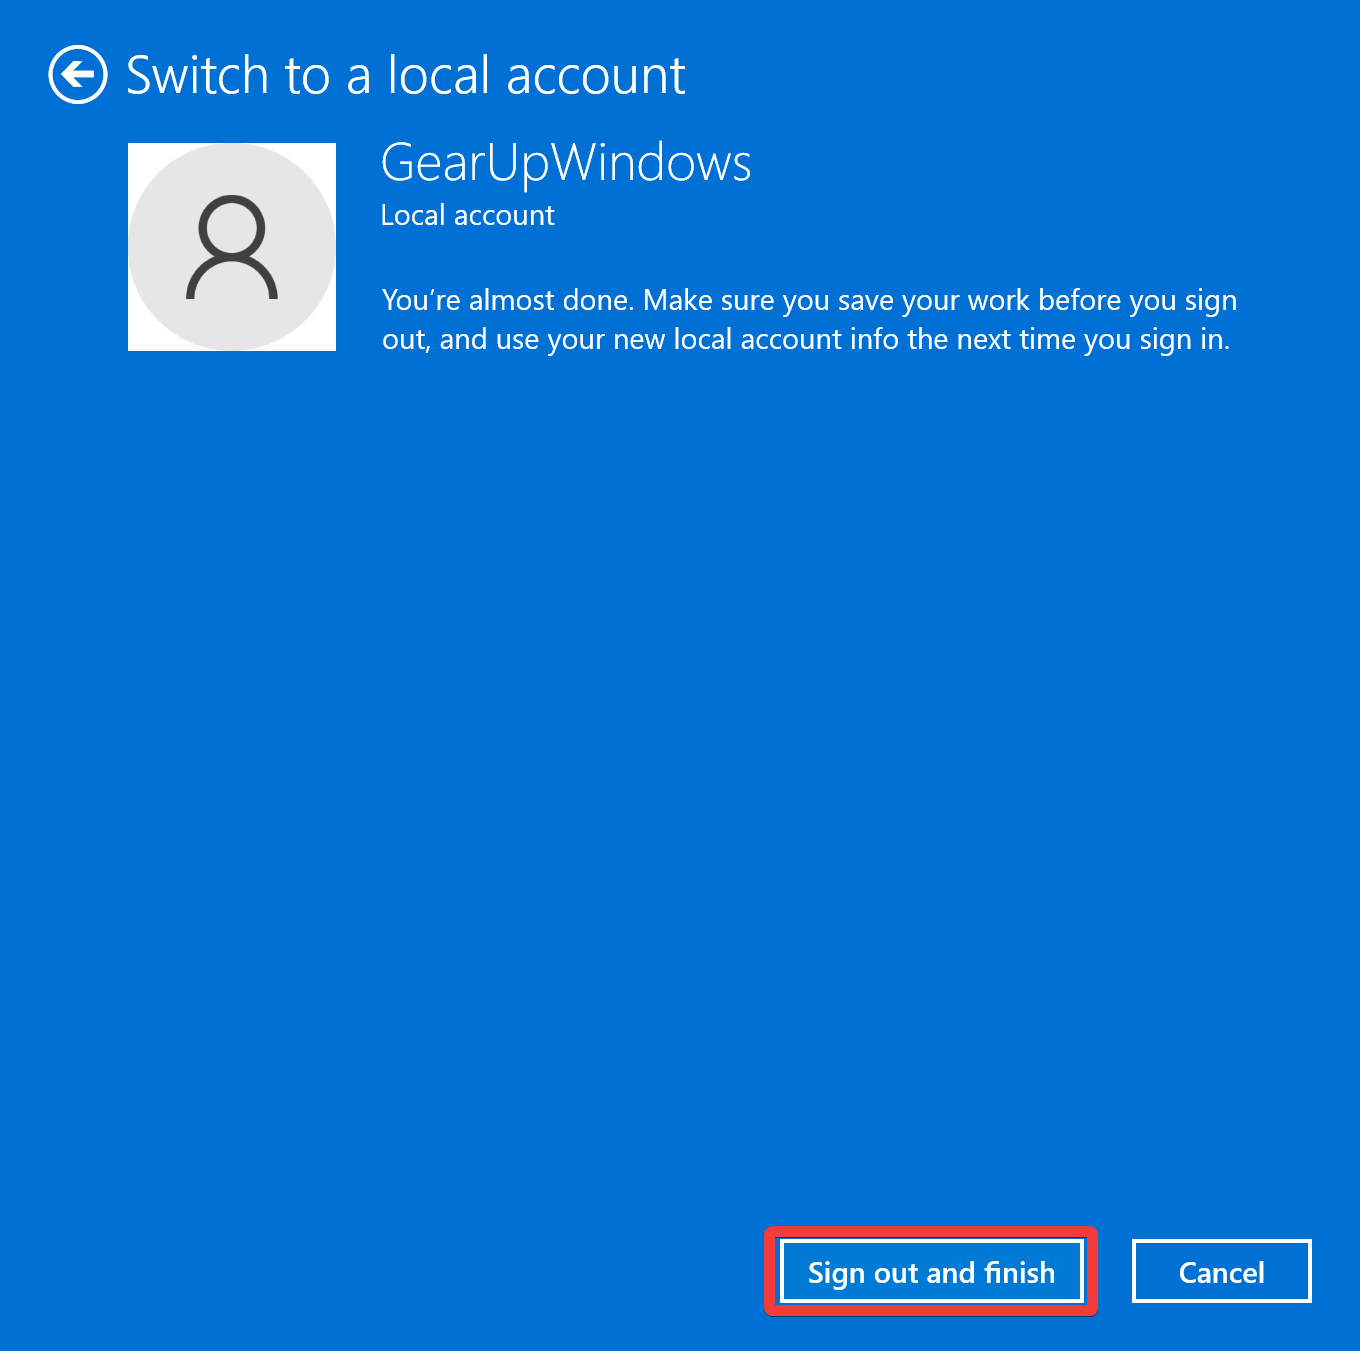
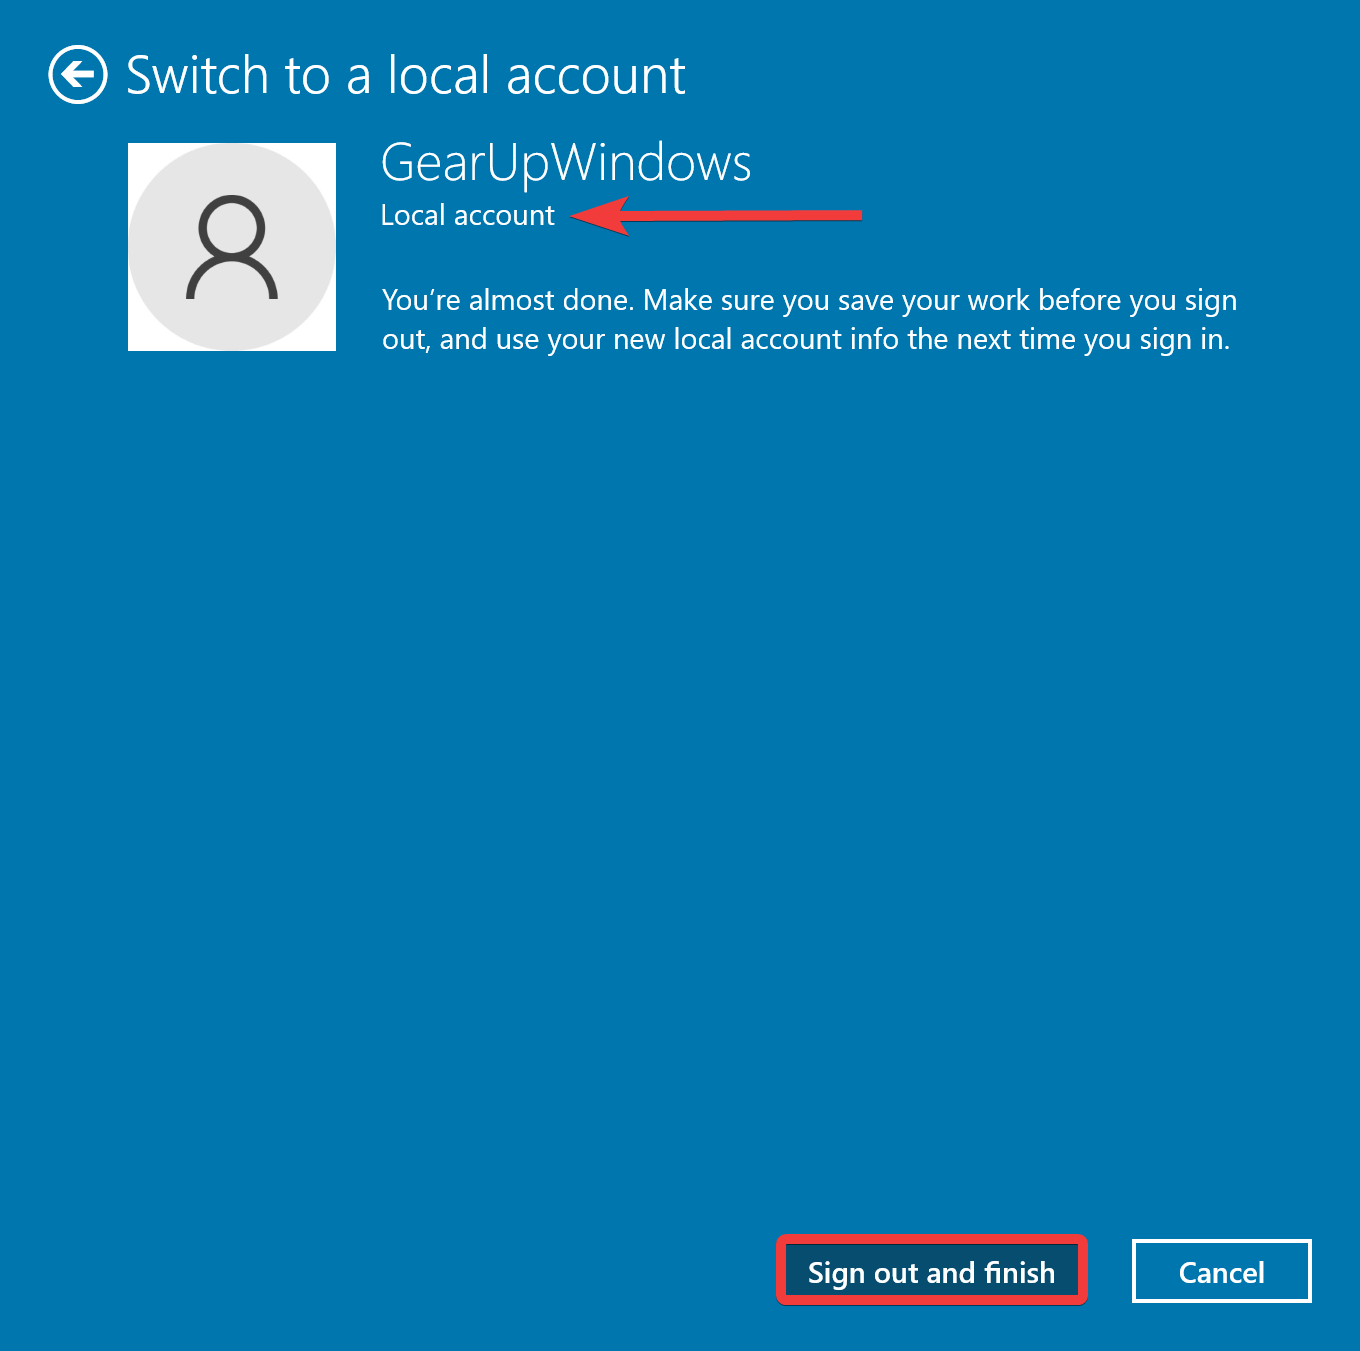
Step 9. Finally, click the Sign out and finish button.
Now you can sign in to your Windows 11 PC with local account details. Microsoft account is removed from your local account.
How to Change to Local Account from Microsoft Account in Windows 10?
Like Windows 11, you can also switch to a local account from Microsoft account in Windows 10. Here is how to do it:-
Step 1. First, open the Settings app on your PC. For that, either press Windows + I keys on the keyboard or use another method.
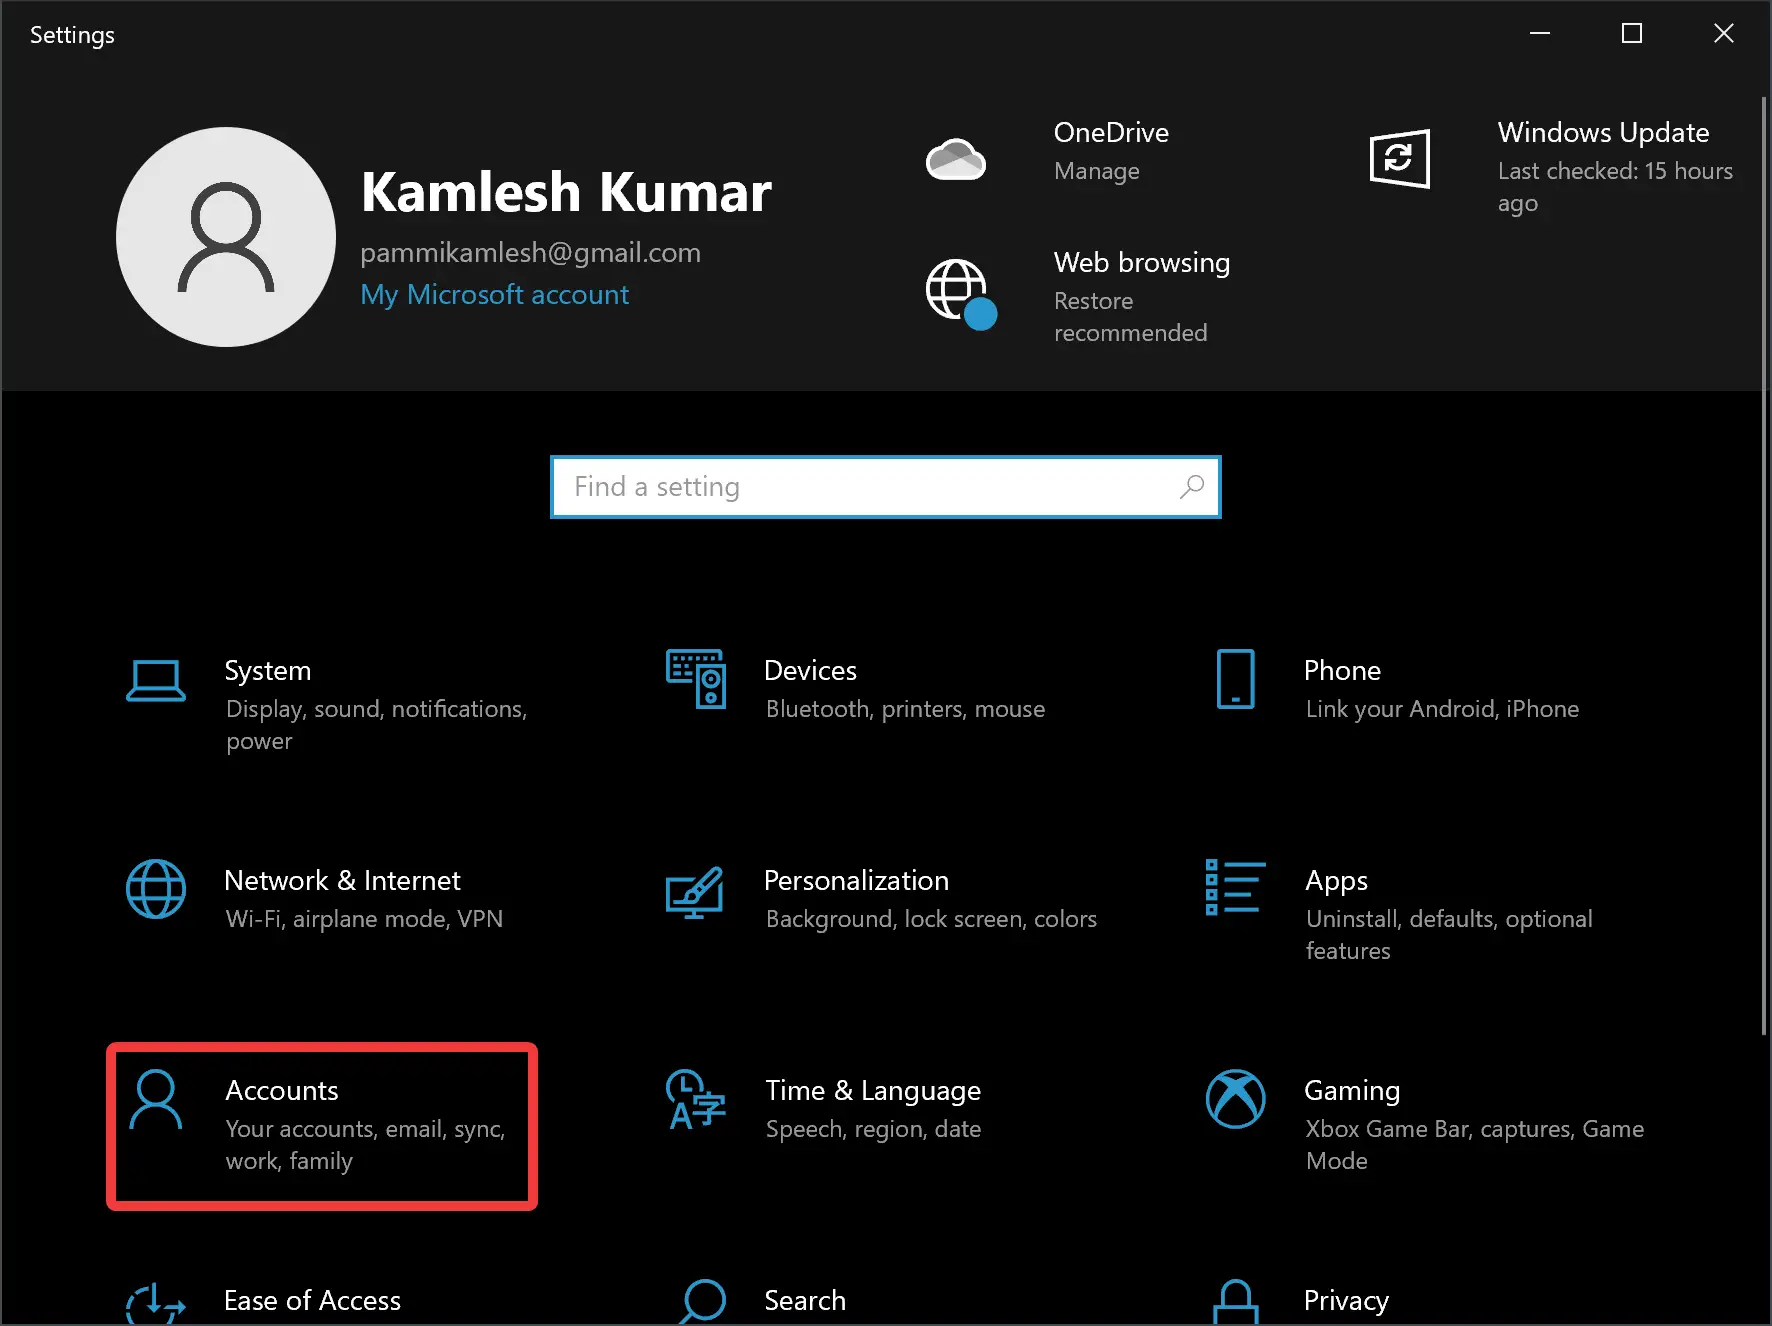
Step 2. When Windows Settings opens, click on the Accounts category.
Step 3. After that, hit the Your info option under Accounts in the left sidebar.
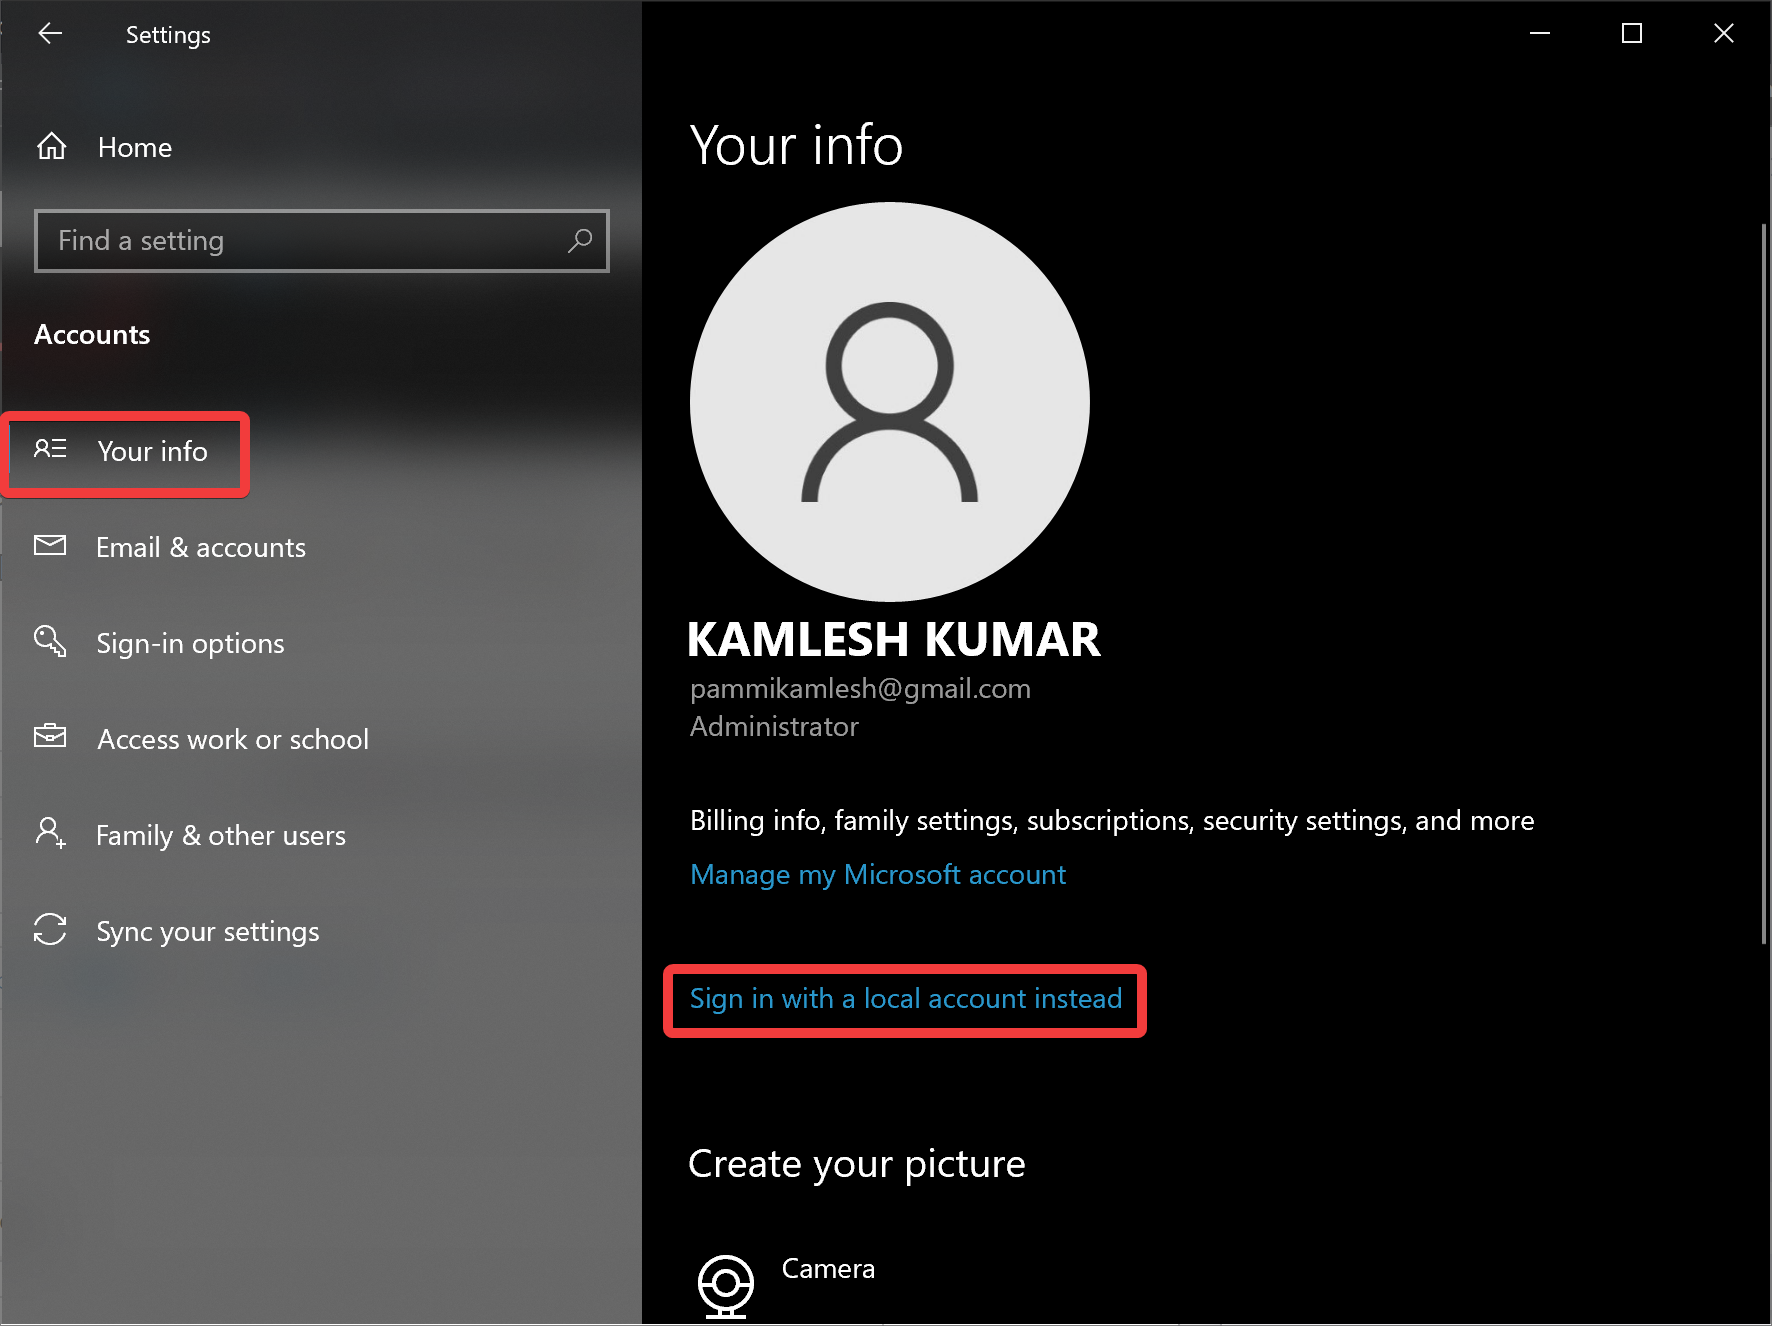
Step 4. On the right side of “Your info,” click the link Sign in with a local account instead.
Step 5. A new window will appear on the screen when you’re done with the above steps. Click the Next button.
Step 6. After that, “Windows Security” will open. Type your account password and click the OK button.
Step 7. Then, fill in the details of “User name,” “New password,” “Confirm password,” and “Password hint.”
Step 8. After filling in the user account details, click the Next button.
Step 9. Finally, click the Sing out and finish button.
Now, you’ll be logged out of your account. You can log in back to your PC with new credentials.
Conclusion
In conclusion, whether you are using Windows 11 or Windows 10, switching from a Microsoft account to a local account is a straightforward process. With just a few simple steps, you can unlink your Microsoft account from your local account and sign in to your PC with new credentials. The benefit of using a local account is that you have more control over your account, including the ability to remove the account password if you prefer. This tutorial provides an easy-to-follow guide for anyone looking to switch from a Microsoft account to a local account on their Windows 11 or Windows 10 PC.