On a Windows 11/10 PC, the screen automatically gets brighter or dimmer by default. If you are tired of this Windows behavior, you can quickly turn it off. For that, you need to go through Windows Settings app. In this gearupwindows article, we will guide you on enabling or disabling auto-brightness on Windows 11/10.
Windows Automatic or adaptive brightness feature is only applicable to Windows devices with built-in screens, such as laptops, tablets, and all-in-one desktop PCs. If you use an external monitor, you will not find any controls for adaptive brightness in Settings.
If your Windows machine includes a built-in light sensor, then your system will automatically adjust screen brightness based on ambient lighting conditions. Some Windows machine also automatically changes brightness depending on what you’re viewing on your screen to save battery life. Microsoft calls this feature “Content Adaptive Brightness Control (CABC).”
Depending on your Windows PC features, you may see one or two checkboxes to control these options in the Settings app.
How to Enable or Disable Adaptive Brightness in Windows 11?
To turn on/off the adaptive brightness in your Windows 11 device, do the following steps:-
Step 1. First, open the Settings app. To do that, press Windows + I keys on your keyboard.

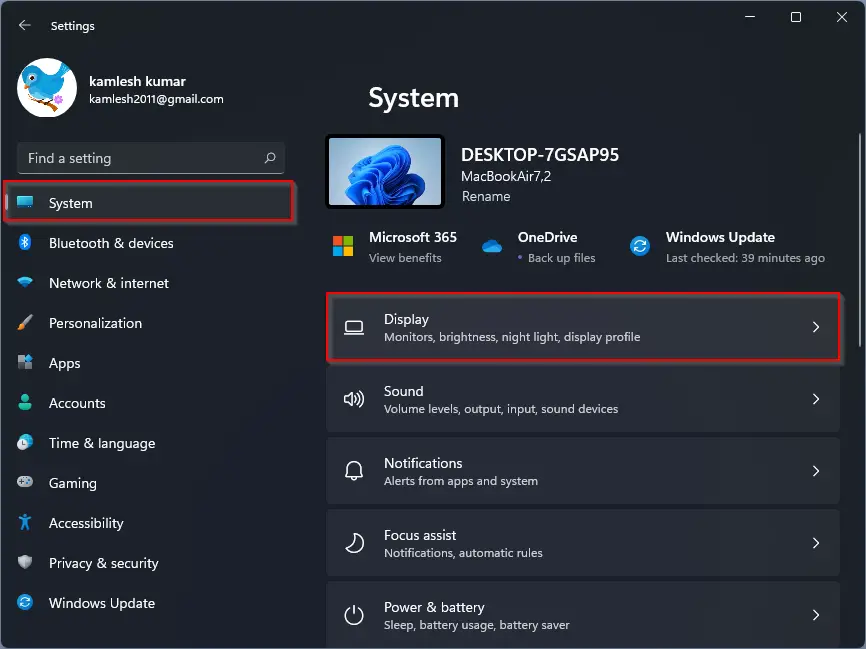
Step 2. Then, select the System option from the left sidebar of the Settings window.
Step 3. After that, click the Display tile on the right sidebar of the System.
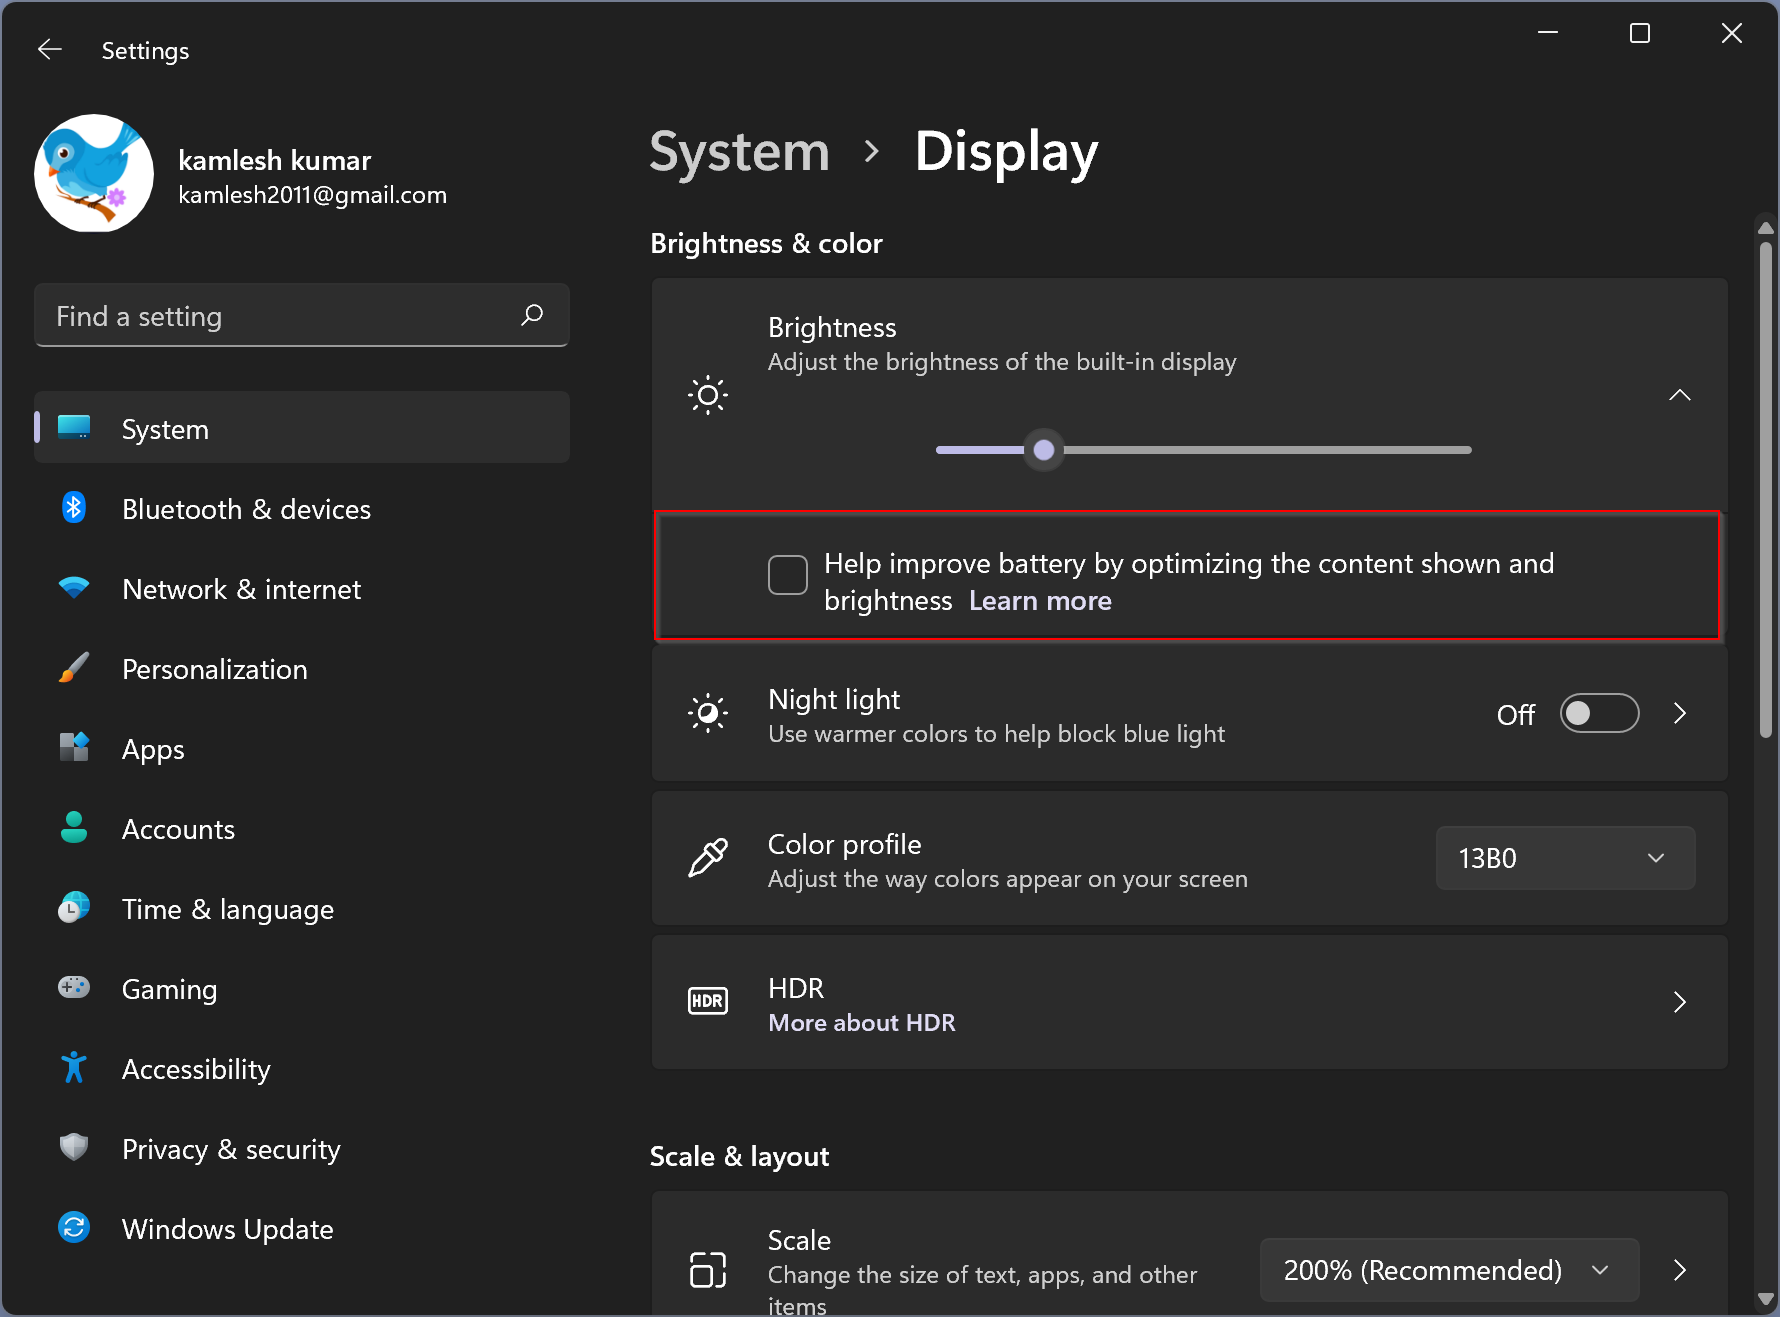
Step 4. On the Display settings page, click Brightness under the “Brightness & color” section.

Step 5. Finally, uncheck the checkbox beside “Help improve battery by optimizing the content shown and brightness.” If you see “Change brightness automatically when lighting changes,” uncheck them also to turn off Auto-Brightness on your Windows 11 machine.
If you want to enable this feature again on your device, repeat the above steps, and in step 5, check the checkbox next to “Help improve battery by optimizing the content shown and brightness.”
How to Turn On or Off Adaptive Brightness in Windows 10?
Turning on/off adaptive brightness in Windows 10 is similar to Windows 11. Do the following to complete the task:-
Step 1. First, open the Settings app by hitting Windows + I keys on the keyboard or any alternate method you would like.
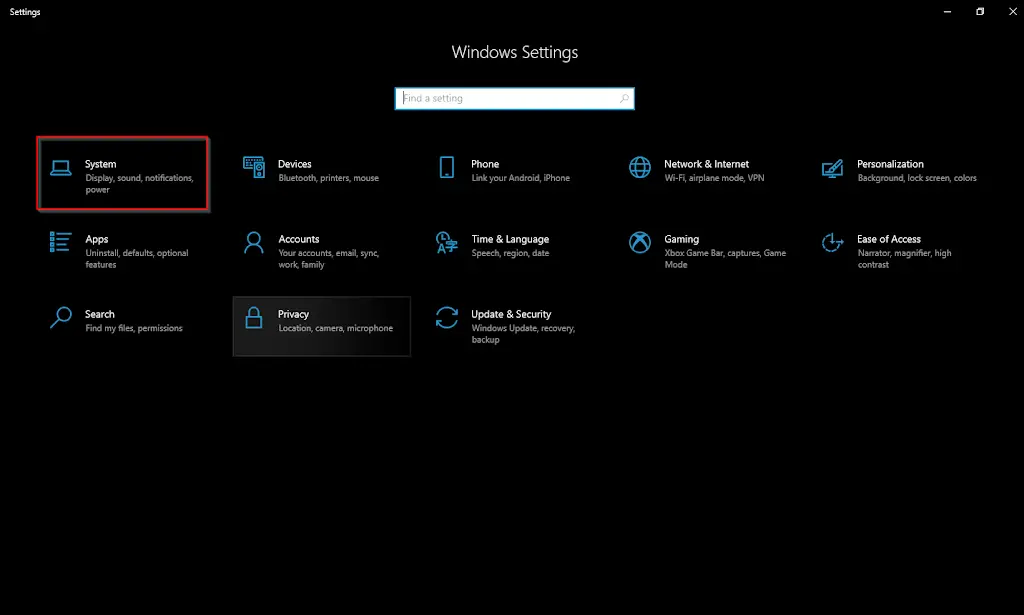
Step 2. When Windows Settings opens, click on the System category.
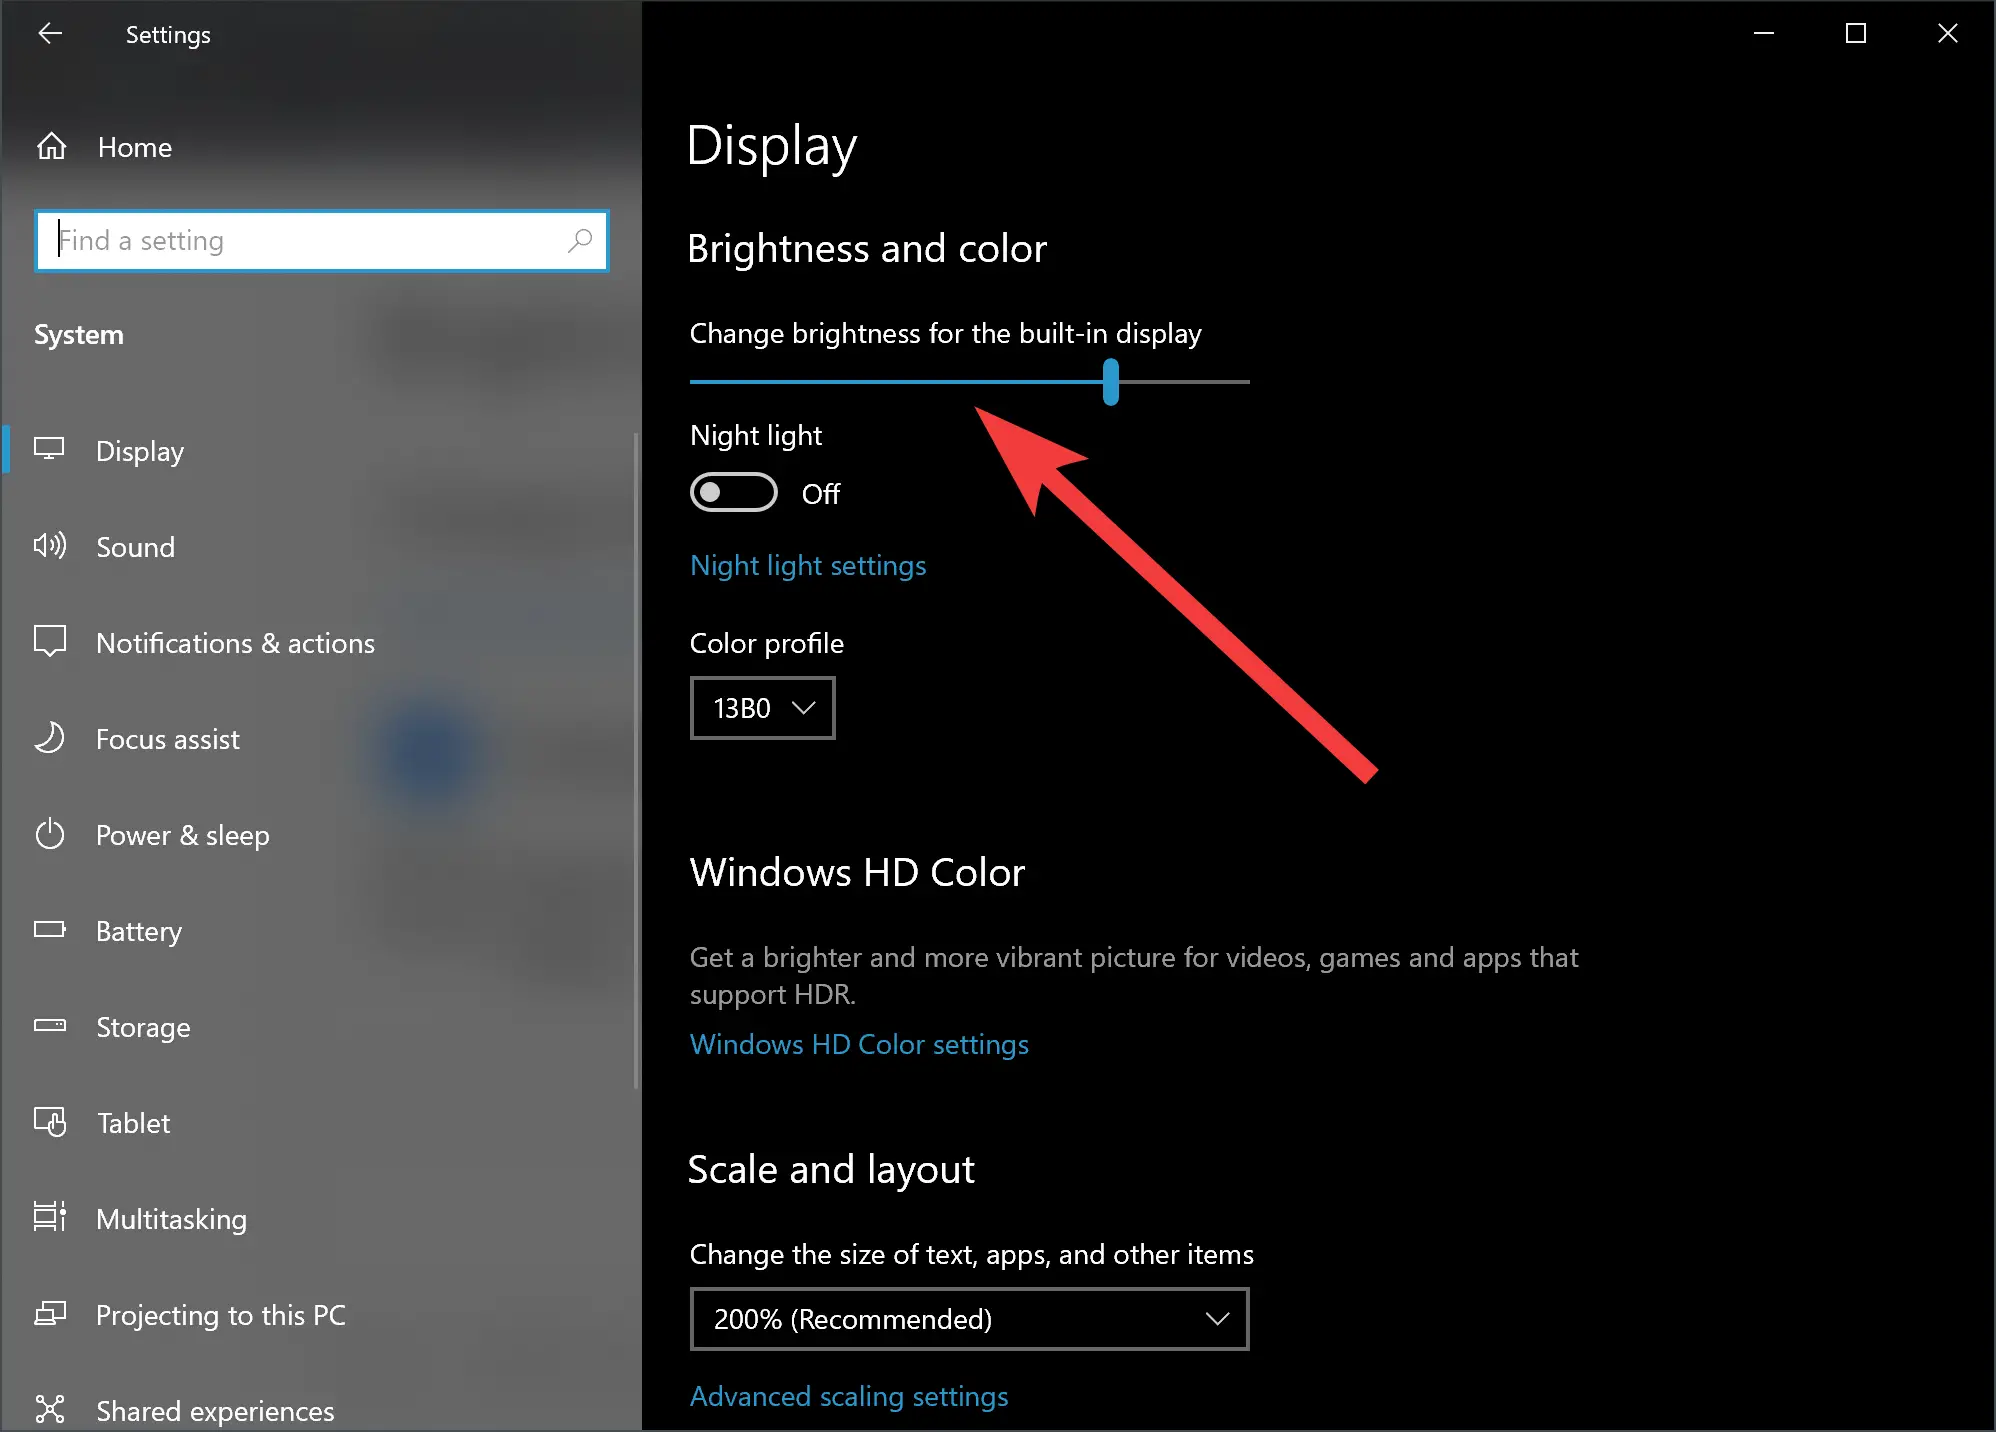
Step 3. Select “Display” in the left side pane. On the right pane, under the “Brightness and Color” section, just below the Brightness slider, uncheck the box beside “Automatically adjust contrast based on the displayed content to help improve battery” or “Change brightness automatically when lighting changes.” If you see both options, please uncheck both. If you don’t see these options, your graphics card does not support this feature.
Conclusion
In conclusion, the automatic brightness feature on Windows 11/10 is useful for laptops, tablets, and all-in-one desktop PCs with built-in screens. However, some users may find it annoying and want to turn it off. Windows 11 and Windows 10 provide users with the option to enable or disable this feature through the Settings app. The steps to follow are straightforward and easy to understand. By disabling the auto-brightness feature, users can manually adjust the screen brightness according to their preferences.