Notepad is a simple text editor that comes pre-installed with Windows 10. While it is a useful tool for editing text files, you may find that you no longer need it or that you prefer to use a different text editor. Fortunately, Windows 10 allows you to uninstall or reinstall Notepad using the Settings app easily. In this article, we will guide you through the steps to uninstall or install Notepad in Windows 10 using the Settings app so that you can customize your computer to your liking.
Uninstalling or installing Notepad in Windows 10 is a straightforward process that can be done in a few simple steps. By following the steps outlined in this article, you can easily remove Notepad from your computer or reinstall it if you need to use it again. Whether you are looking to free up space on your hard drive or you simply prefer to use a different text editor, Windows 10 provides an easy way to manage your installed apps and features. In the following sections, we will explain how to uninstall or install Notepad in Windows 10 using the Settings app.
How to Uninstall NotePad from Windows 10?
If you don’t use NotePad and want to uninstall it from your PC completely, or if Notepad is not working properly on your Windows 10 computer or notebook and want to uninstall it from your PC, perform the following steps to uninstall it from your PC:-
Step 1. Open the Settings app by pressing the Windows logo + I keys or clicking on the Settings icon in the Start menu.
Step 2. In the Settings window that opens, click the Apps category.
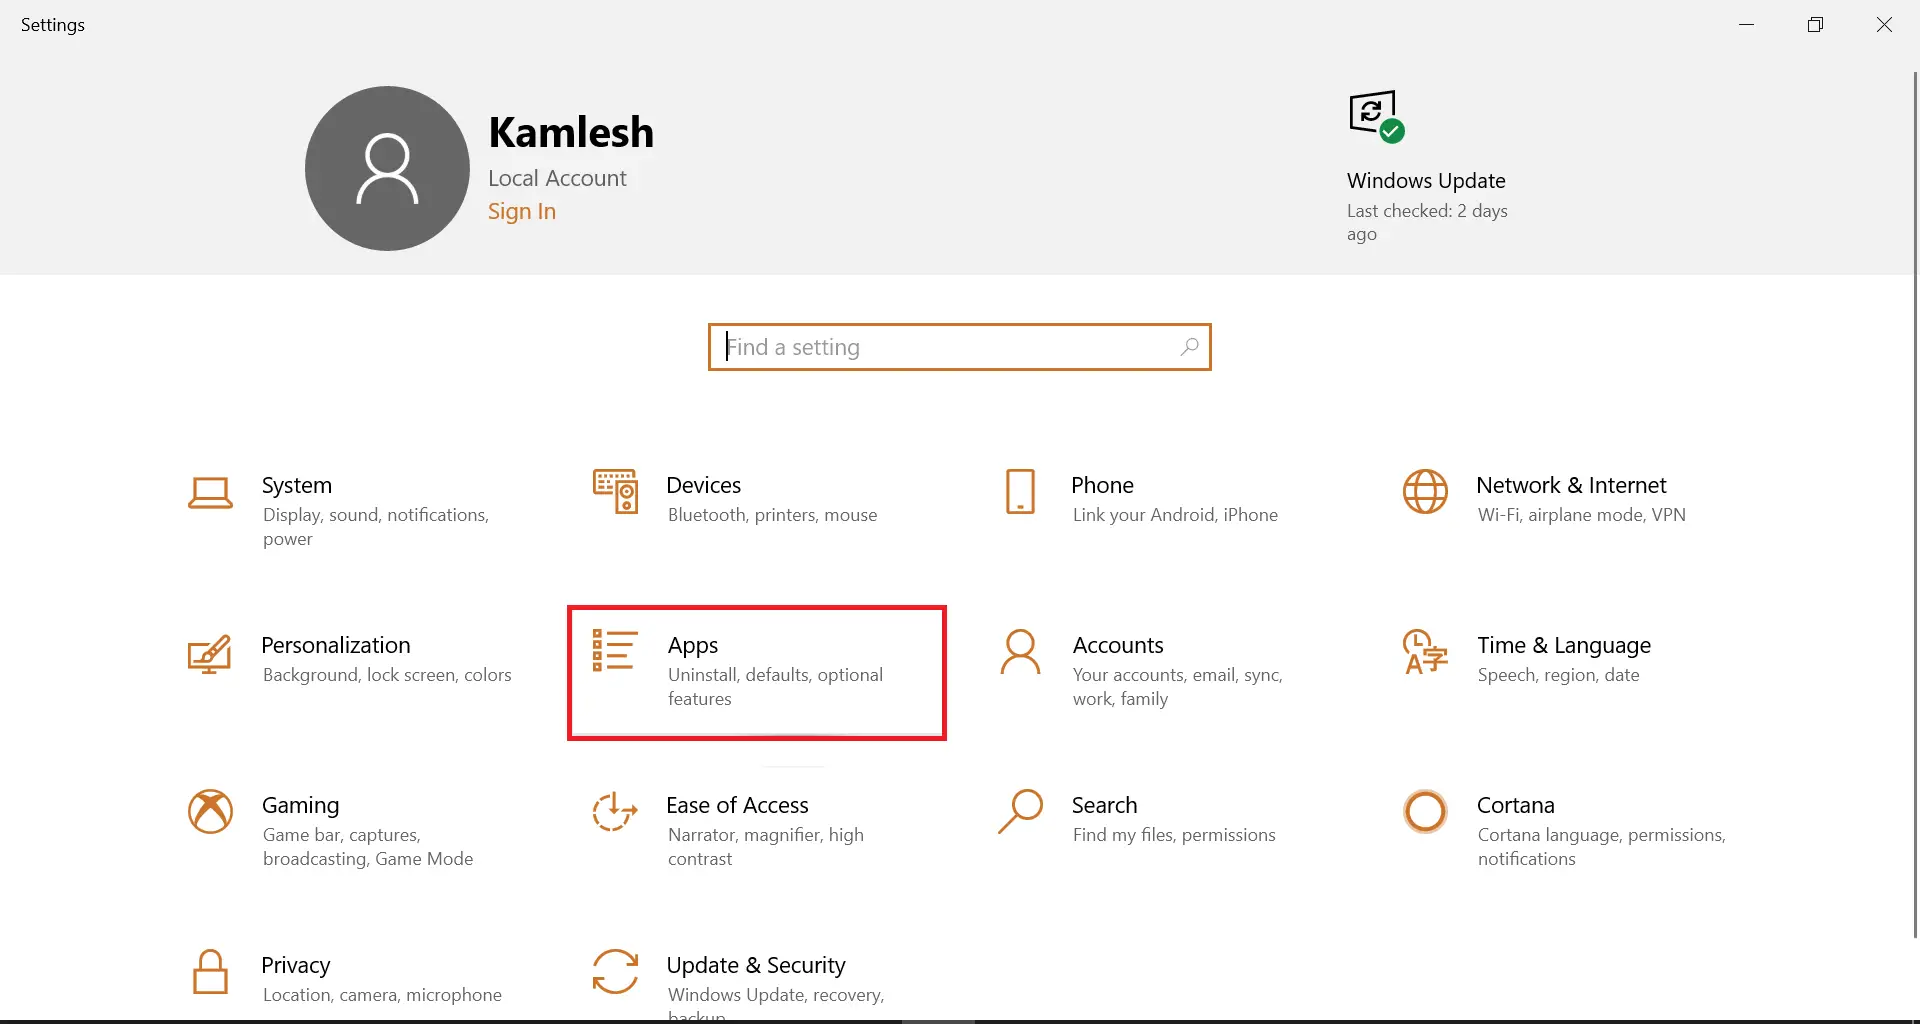
Step 3. Under the Apps category, click on “Apps & features” from the left side.
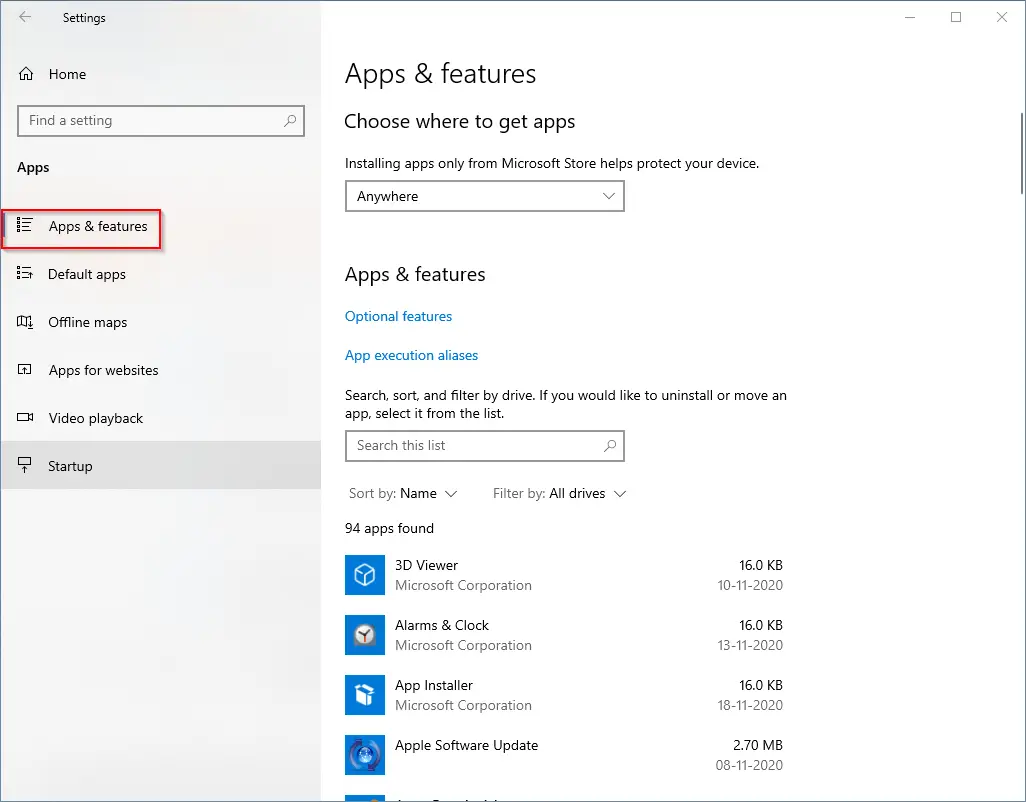
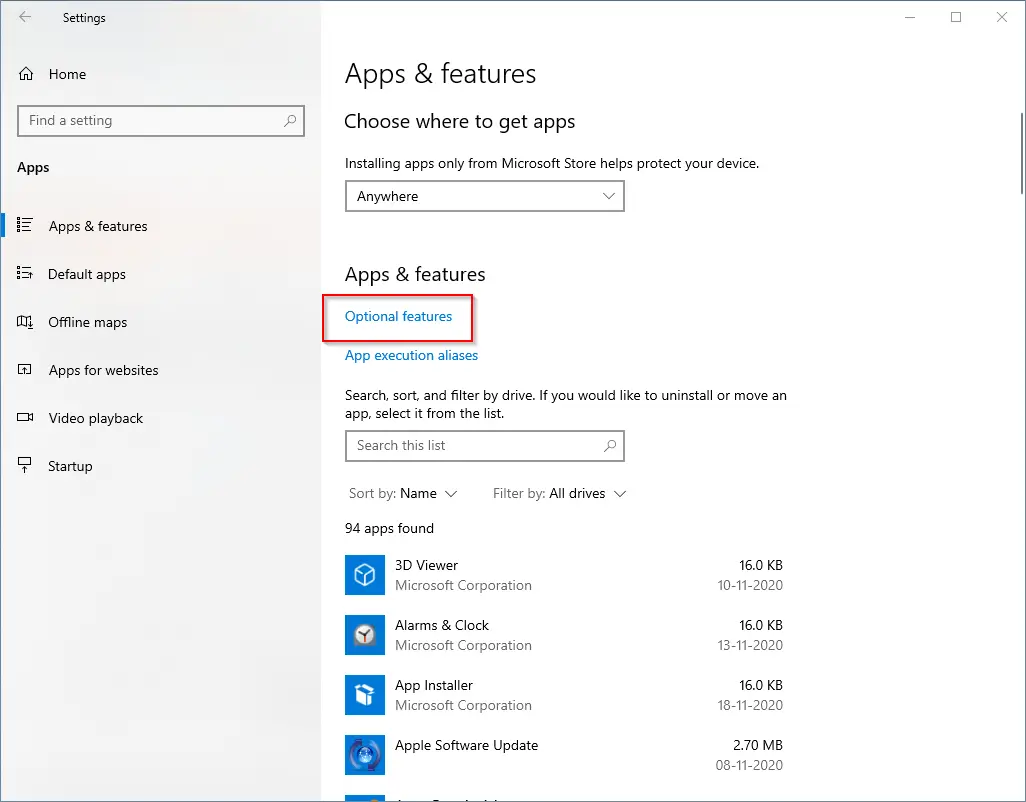
Step 4. On the right-side pane, click the Optional features link.
Step 5. Scroll down to see the Notepad entry, or quickly locate the Notepad app by tying the Notepad in the Search box.
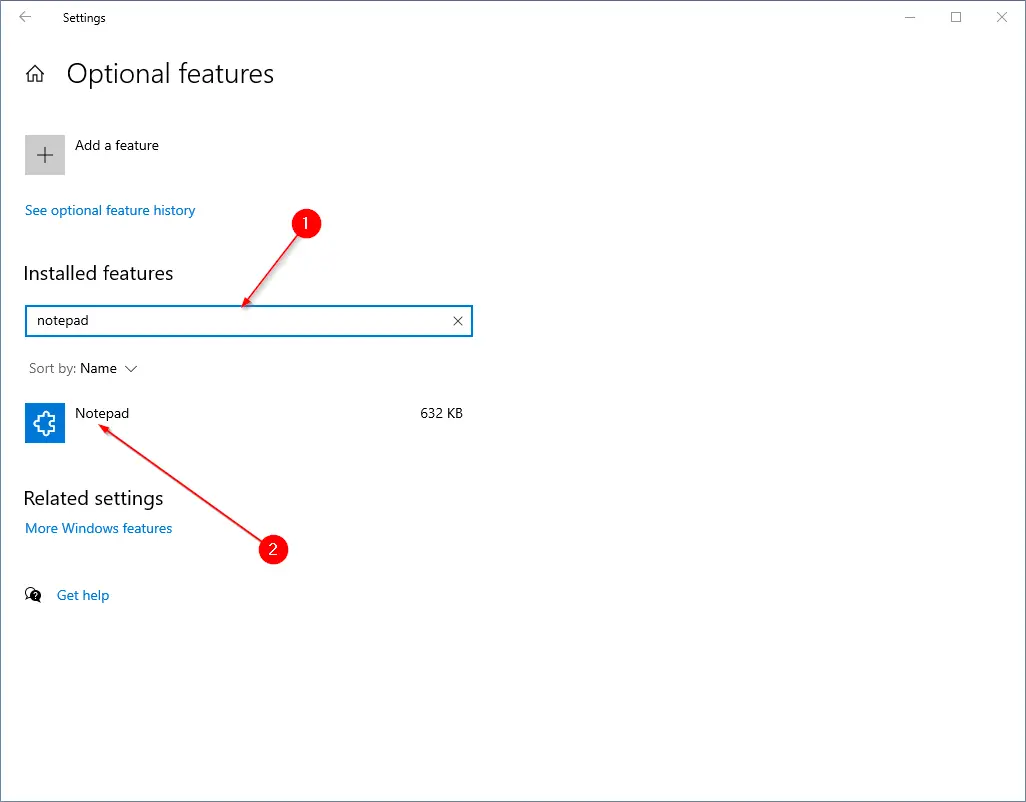
Step 6. Click the Notepad entry to see the Uninstall option.
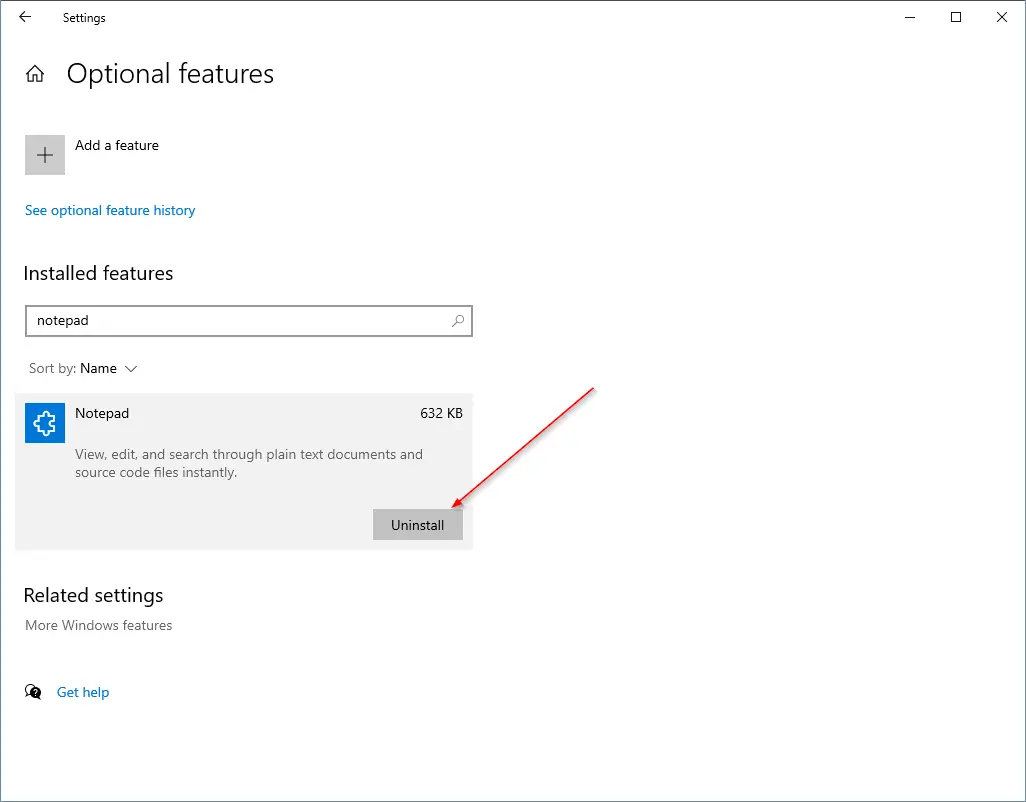
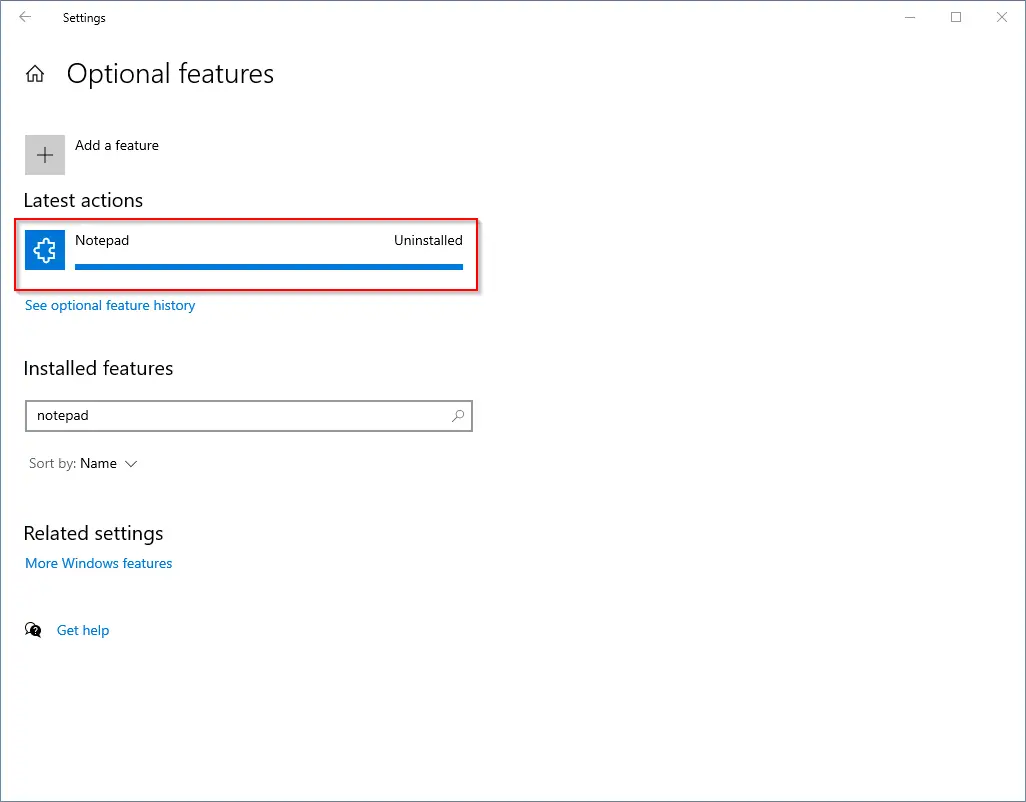
Step 7. In a few seconds, the Notepad application will be removed from your PC.
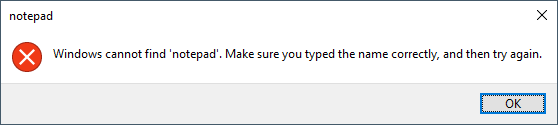
Step 8. To confirm if the Notepad has been uninstalled from your PC, press the Windows + R keys to open the Run dialog box. Type Notepad and press Enter from the keyboard to open the notepad.

Step 9. You should see an error message, “Windows cannot find ‘notepad.’ Make sure you typed the name correctly, and then try again.”
How to install NotePad in Windows 10?
Due to some reasons, you have removed the notepad application from Windows 10 and want to reinstall it, perform the following steps:-
Step 1. Open the Settings app by pressing the Windows logo + I keys or clicking on the Settings icon in the Start menu.
Step 2. In the Settings window that opens, click the Apps category.
Step 3. Under the Apps category, click on “Apps & features” from the left side.
Step 4. On the right-side pane, click the Optional features link.
Step 5. Click the Add a feature button.
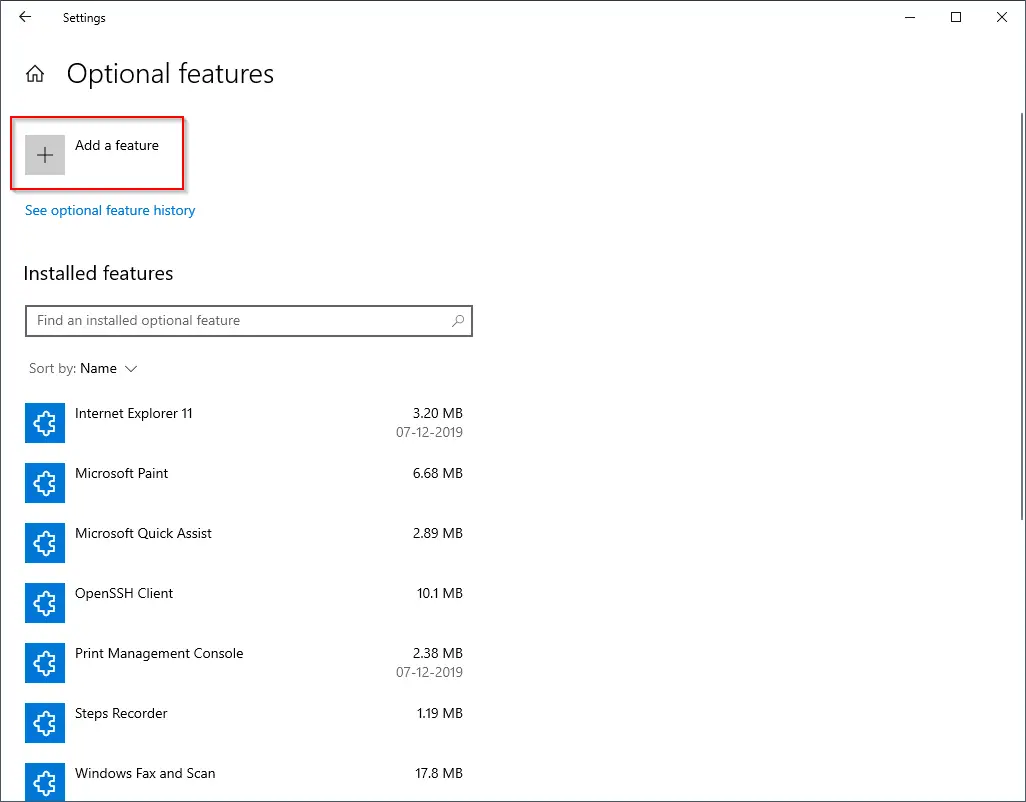
Step 6. In the search box next to “Add an option feature,” type Notepad.
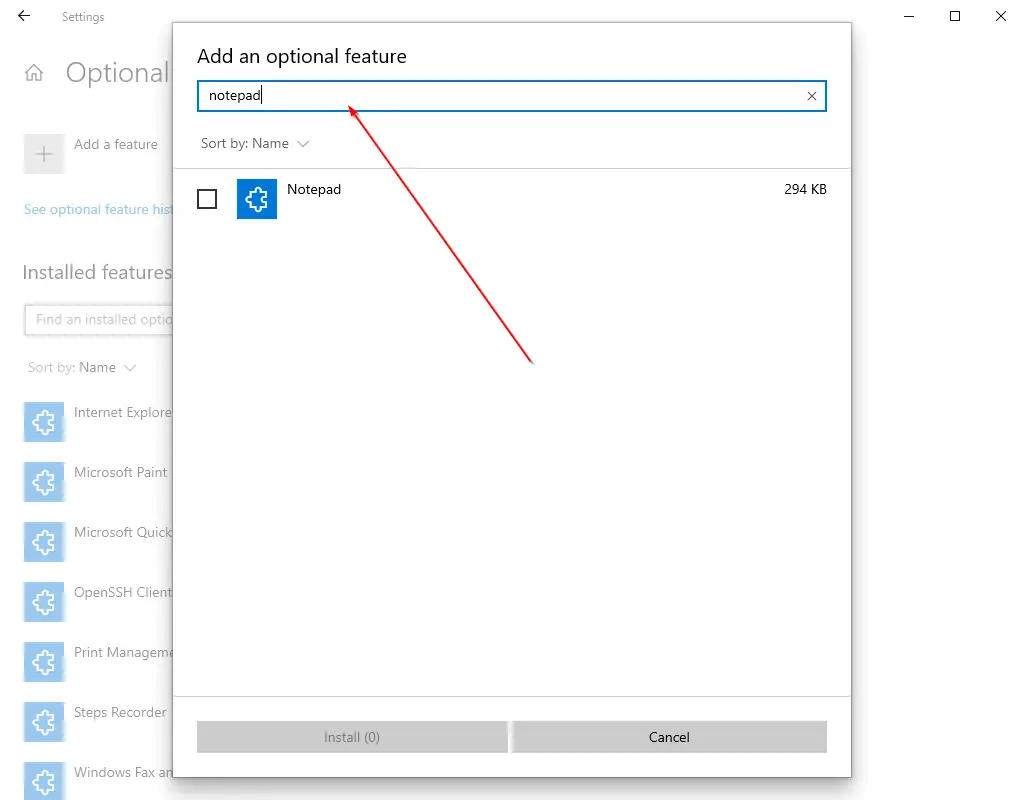
Step 7. Select the Notepad and click the Install button.
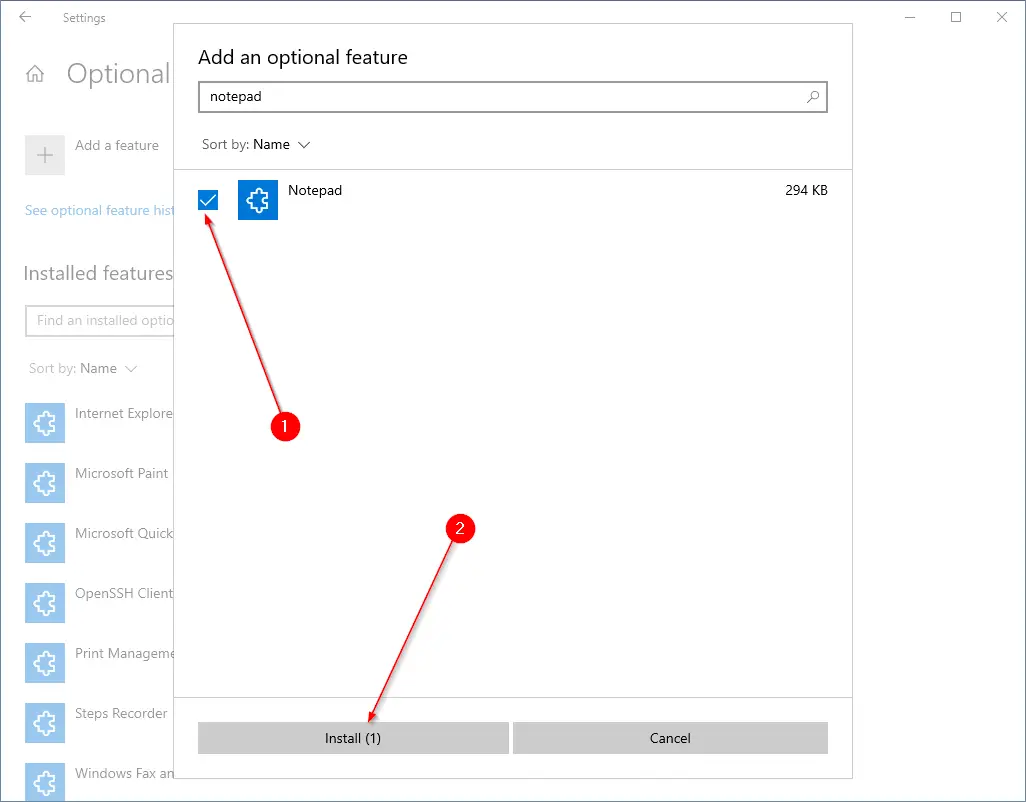
Notepad will be downloaded and installed on your Windows 10 again. Once the Notepad app is installed, you can access and use Notepad again.
Update: It is now possible to install Notepad from the Microsoft Store.
Conclusion
In conclusion, Notepad is a basic text editor that comes pre-installed with Windows 10. Although it is a useful tool, some users may prefer to use other text editors or may want to free up space on their hard drive by uninstalling Notepad. Fortunately, Windows 10 provides an easy way to uninstall or reinstall Notepad using the Settings app. By following the simple steps outlined in this article, users can quickly and easily manage their installed apps and features. Whether you need to uninstall Notepad to free up space or reinstall it to use again, the process is straightforward and can be completed in a matter of minutes.