After deleting the appraiserres.dll from Windows 11 ISO, you can install Windows 11 on unsupported hardware. Now, the popular bootable USB drive creator tool, Rufus, officially supports bypassing TPM, Secure Boot, and RAM checks while making a bootable USB flash drive of Windows 11. That means you don’t have to manually delete the appraiserres.dll file to bypass the minimum hardware requirements to install Windows 11 on an unsupported hardware device. The software is still in the beta stage, so you may find a bug in this tool.
How to Make a Windows 11 Bootable USB drive with TPM, Secure Boot, and RAM Checks Disabled?
Those Windows 11 could not install Windows 11 due to the lack of minimum hardware requirements enforced by Microsoft can use the latest version of Rufus. Here are the complete steps to make a bootable USB drive of Windows 11 that has already bypassed minimum system requirements:-
Step 1. Download the latest version of Rufus utility from its official website.
Step 2. Now, download the Windows 11 ISO from the Microsoft website if you have not already done it.
Step 3. When downloading is completed, navigate to the “Downloads” folder and double-click on the executable file of Rufus.
Step 4. Then connect the USB flash drive to your PC with at least 8 GB of free storage.
Note: If any valuable data is available in your flash drive, it will be erased when creating bootable USB media. Please ensure, before proceeding with further steps, take a backup of your data.
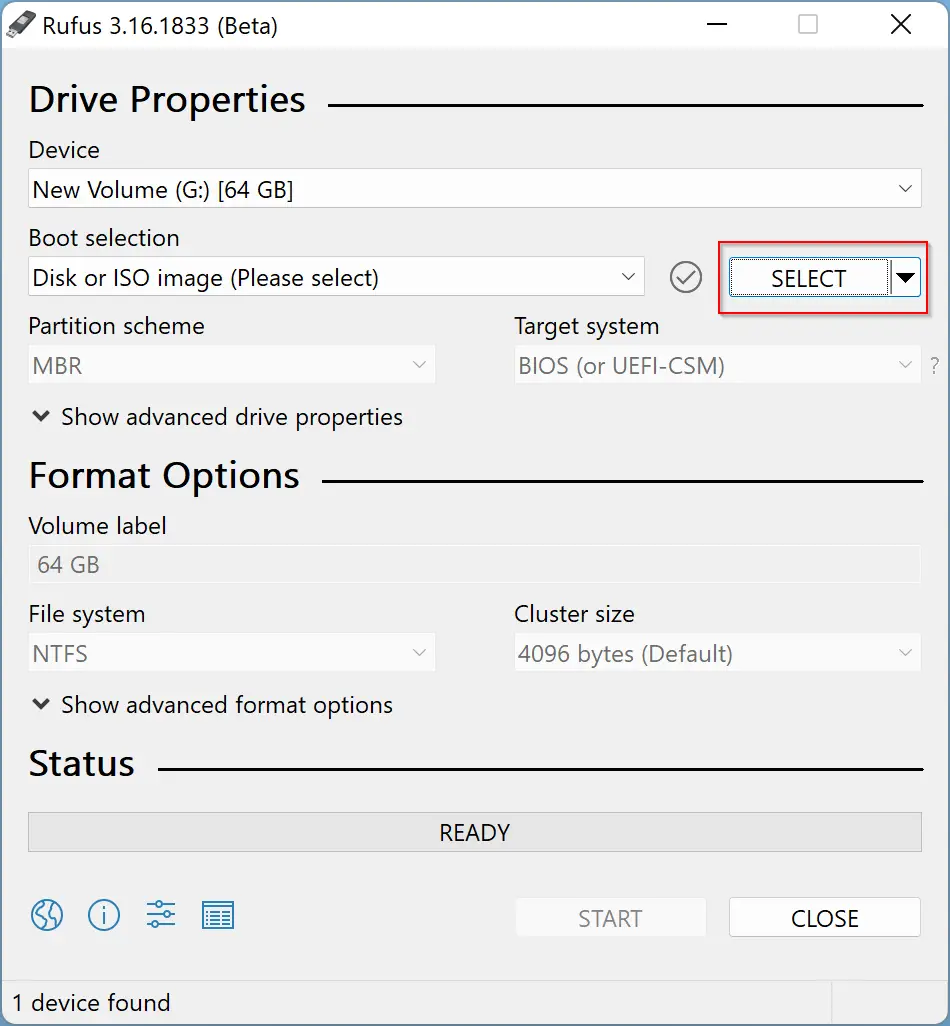
Step 5. Rufus will automatically detect the inserted USB flash drive in your PC. When you’re ready, click the Select button beside “Disk or ISO image (Please select).”
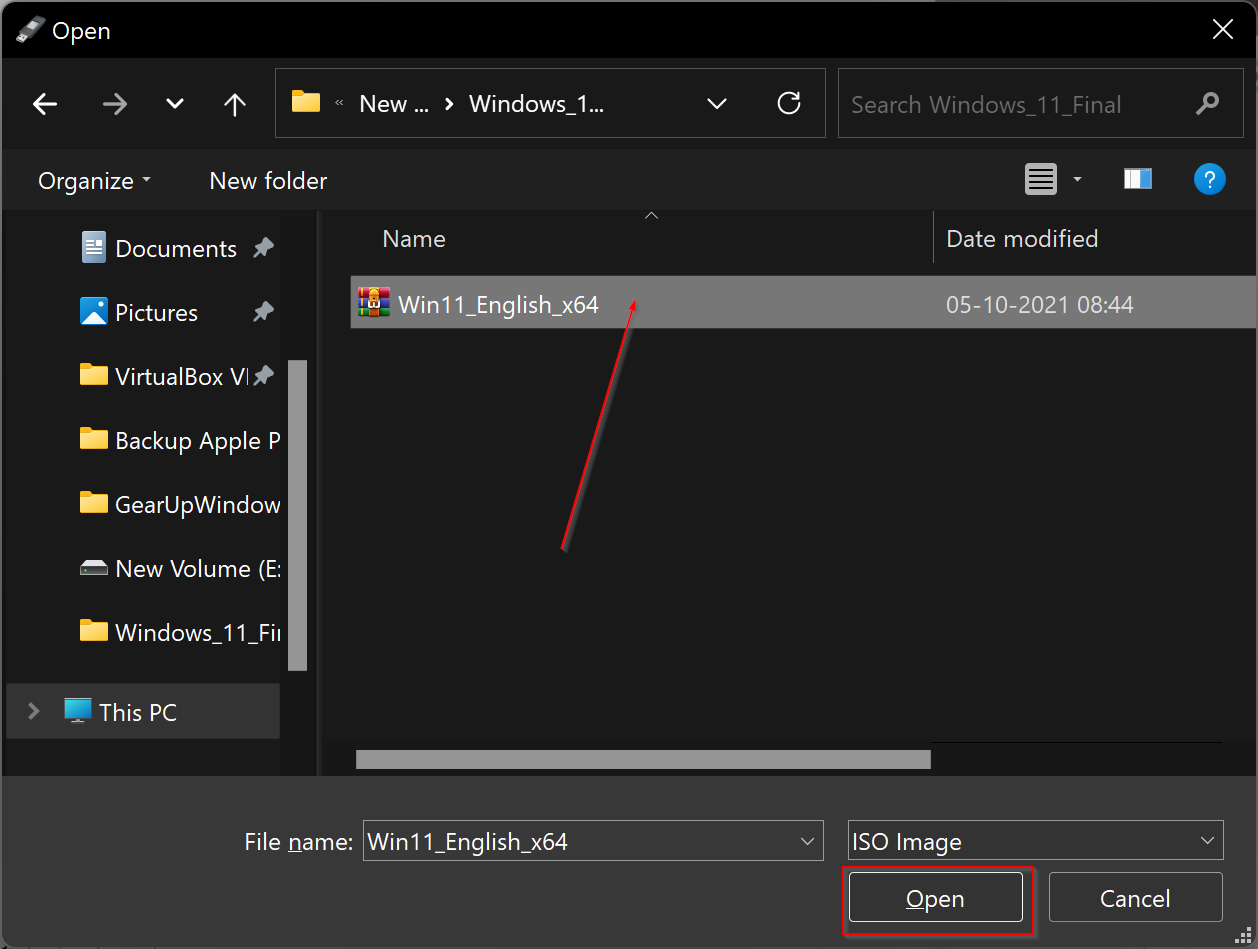
Step 6. In the File Explorer window that opens, select the Windows 11 ISO file and then click the Open button.
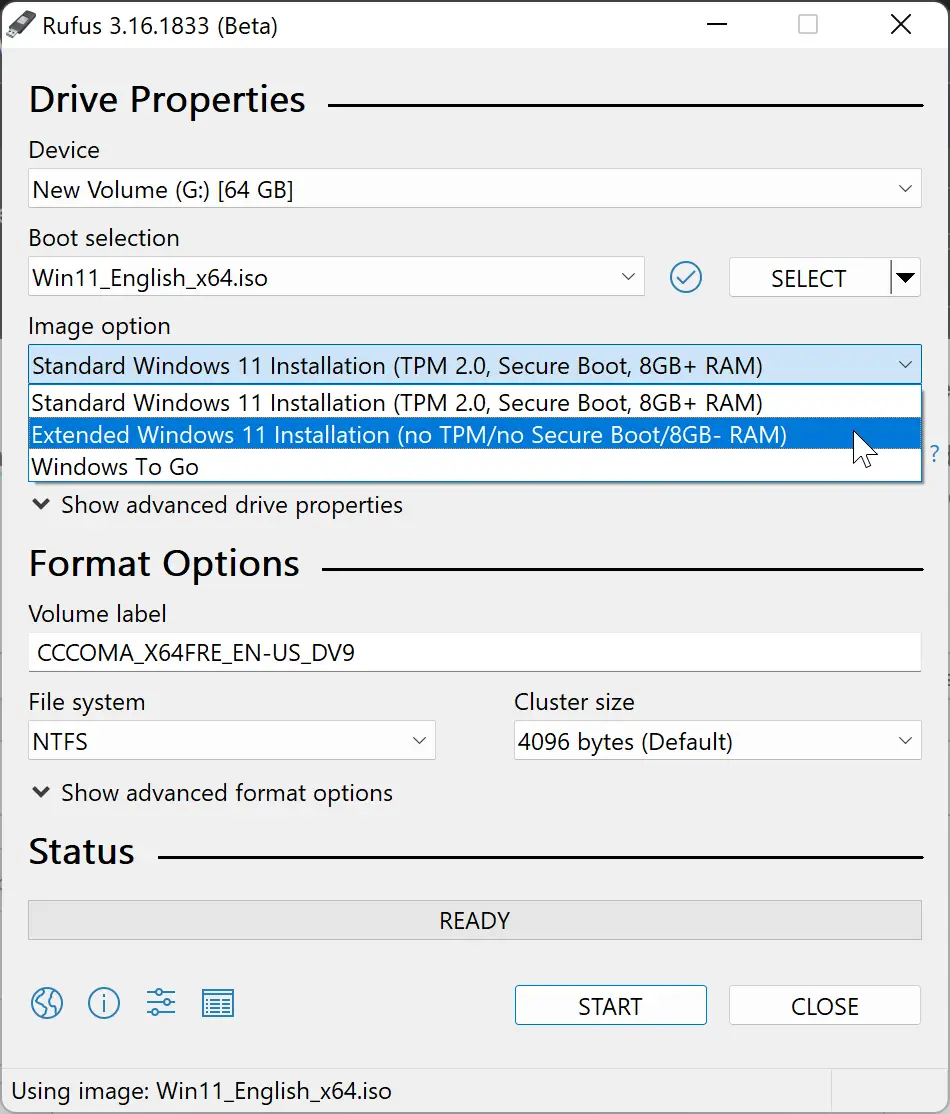
Step 7. Once the ISO file is loaded in the Rufus utility, the rest of the options will be automatically selected.
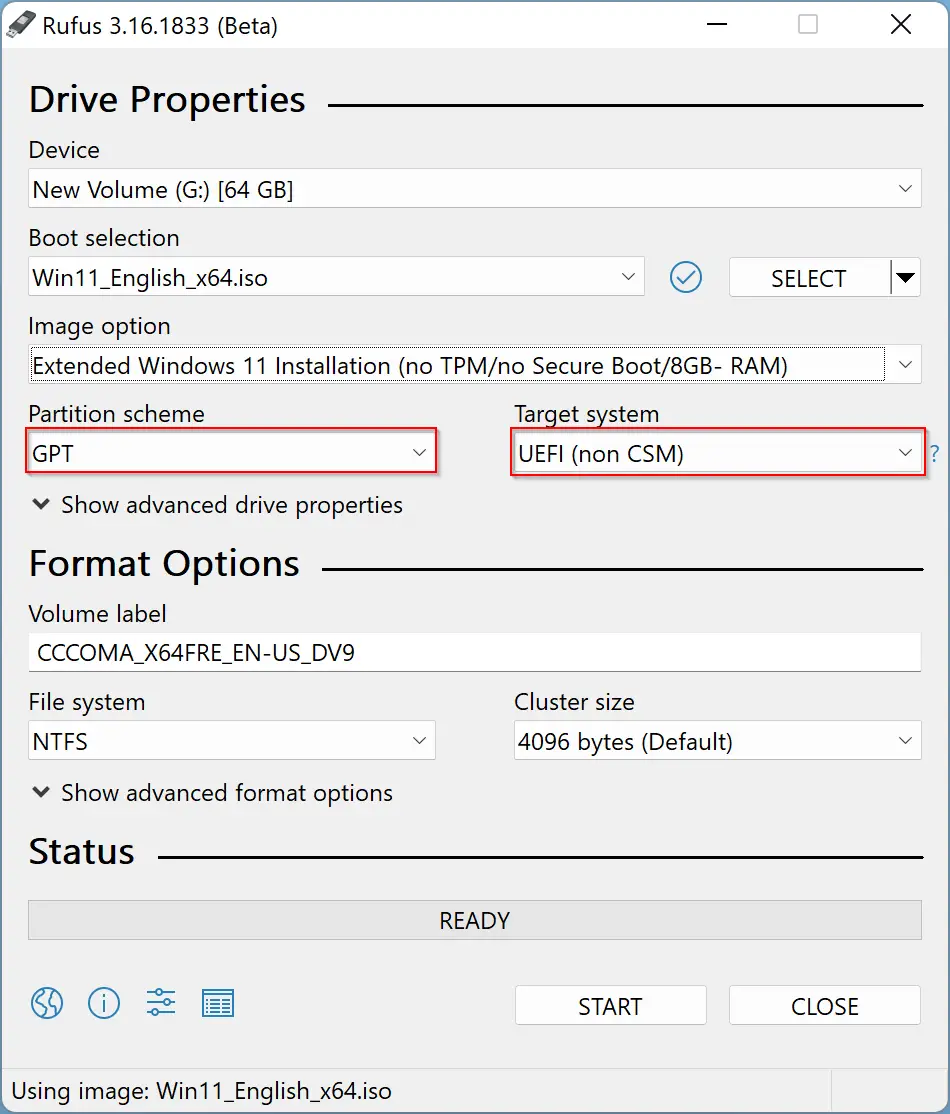
Step 8. The most crucial part of this post is that you need to choose the option “Extended Windows 11 Installation (no TPM/no Secure 800t/8G8- RAM)” option from the drop-down menu of the “Image option.” Don’t forget to select this option; otherwise, the whole purpose will be defeated.
Step 9. Then ensure that the Partition scheme is set to “GPT” and the Target system is set to “UEFI (non CSM).”
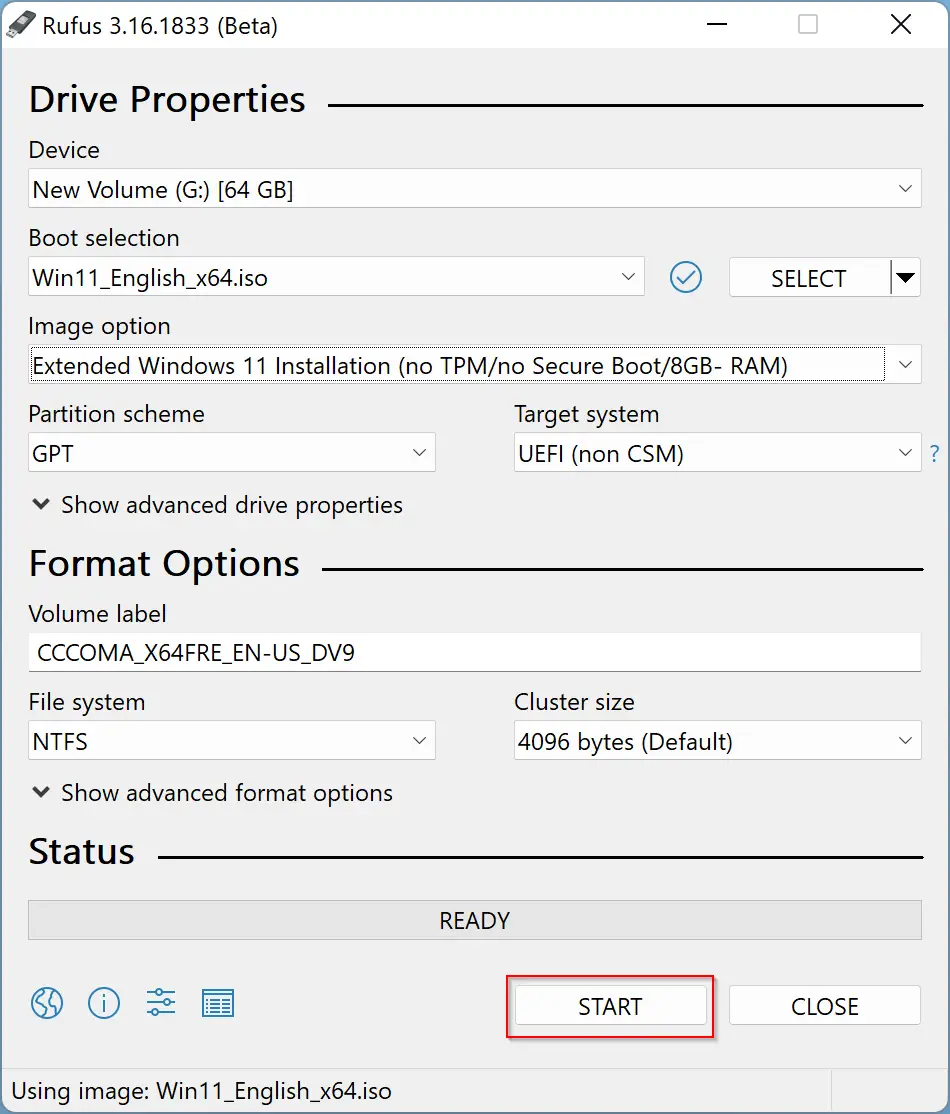
Step 10. For all other options, you can leave the default if you don’t know about that. After that, click the Start button.
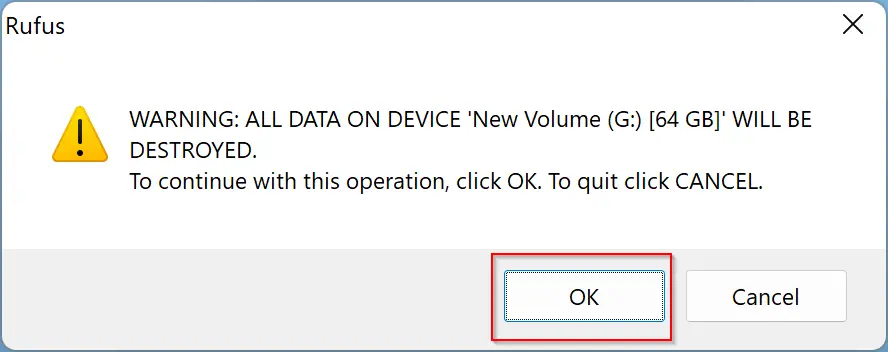
Step 11. Next, read the warning message pop-ups from Rufus and click the OK button.
That is, now, the process of creating a bootable USB drive will start, and it may take some time to complete. Once it’s ready, you will see a notice about the secure boot. Read the message and then click the Close button.

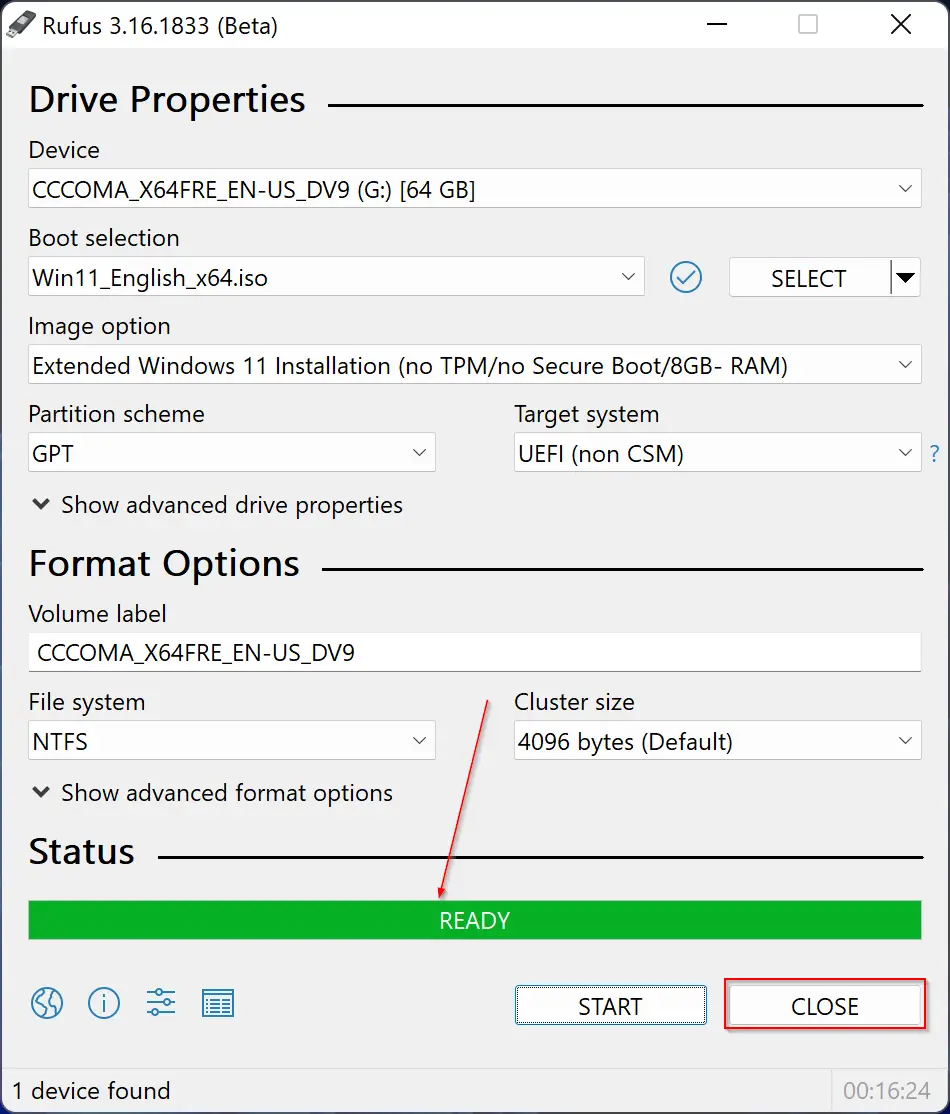
After that, you will notice the “Ready” status message turn green. Now that the USB disk is ready. You can remove the USB drive from your PC and start installing Windows 11 on any PC that does not support RAM, TPM 2.0, Secure Boot, etc.
Good luck.
Conclusion
In conclusion, installing Windows 11 on unsupported hardware has become easier with the latest version of Rufus utility, which supports bypassing TPM, Secure Boot, and RAM checks while creating a bootable USB flash drive of Windows 11. This eliminates the need for manually deleting the appraiserres.dll file from the Windows 11 ISO. However, since the software is still in the beta stage, bugs may be encountered. By following the steps outlined above, users who do not meet Microsoft’s minimum hardware requirements can now install Windows 11 on their devices. It is important to note that creating a bootable USB drive will erase all data on the drive, so it is recommended to back up any important data before proceeding.
A very good tutorial, efficient and easy to perform. Thank very much.
You are most welcome.
not working for me
cant figure how to install without saying, does not meet requirements
For now, please follow https://gearupwindows.com/bypass-tpm-2-0-and-secure-boot-on-windows-11-iso/
If you want to install quickly.
Tomorrow, I will come back with complete steps to install Windows 11 using Rufus.
Does not work for me either BUT I am attempting yo upgrade from Windows 10 by clicking on the setup exe file.I get the TMP warning and the upgrade aborts
Its not working for me. I have the ISO downloaded to my USB in the “No TPM, No Secure Boot”. But when I launch the Setup.exe from the USB I get the Windows 11 install prompt which says this computer does not meet the requirements and I cannot install it.
I thought the Rufus “No TPM, No Secure Boot” was supposed to bypass this issue? Should I select the “TPM, Secure Boot” option when loading the ISO to the USB drive?
Please find a file name “appraiserres.dll” in the USB drive and if it exists, delete it. It should work now.
I get same error does not meet minimum system requirements. There is no option in Rufus that says no TPM no secure secure boot and no 8gb ram. The ram part is not there, I have 4gb ram so is this the issue? What happened to ram requirements being removed?
Dear Reid,
If you are using an old version of Rufus, then the option, “no TPM no secure secure boot and no 8GB ram” will not be available.
However, if you want, you can bypass these all using Registry Editor during installation of Windows 11 https://gearupwindows.com/fix-this-pc-cant-run-windows-11-error-in-virtualbox-or-vmware/