Rather than pressing Ctrl+V to paste the text into Word, you can use the Insert key instead. The Insert key is an in-built feature of Word, but it is not enabled by default, so you can enable it by going to Word Options, Local Group Policy Editor, or Registry Editor.
You can paste texts into Word documents using the Insert key by turning on this setting in Word Options. If you do not wish to use the built-in Word Options panel, you can use Registry Editor or Local Group Policy Editor.
Here, at gearupwindows, we’ll take a look at all three methods and show you how to apply any of them. The Word Options panel is available for any operating system. However, Registry Editor and Local Group Policy are limited to Windows 11 and 10.
How to Activate Insert Key to Paste Text into Word using Word Options?
Follow these steps to paste the text into Word using the Insert key:-
Step 1. First, you will need to open Microsoft Word on your computer.
Step 2. Next, choose File from the menu.

Step 3. In the bottom-left corner, click the Options button.

Step 4. Go to the Advanced tab in the left sidebar.
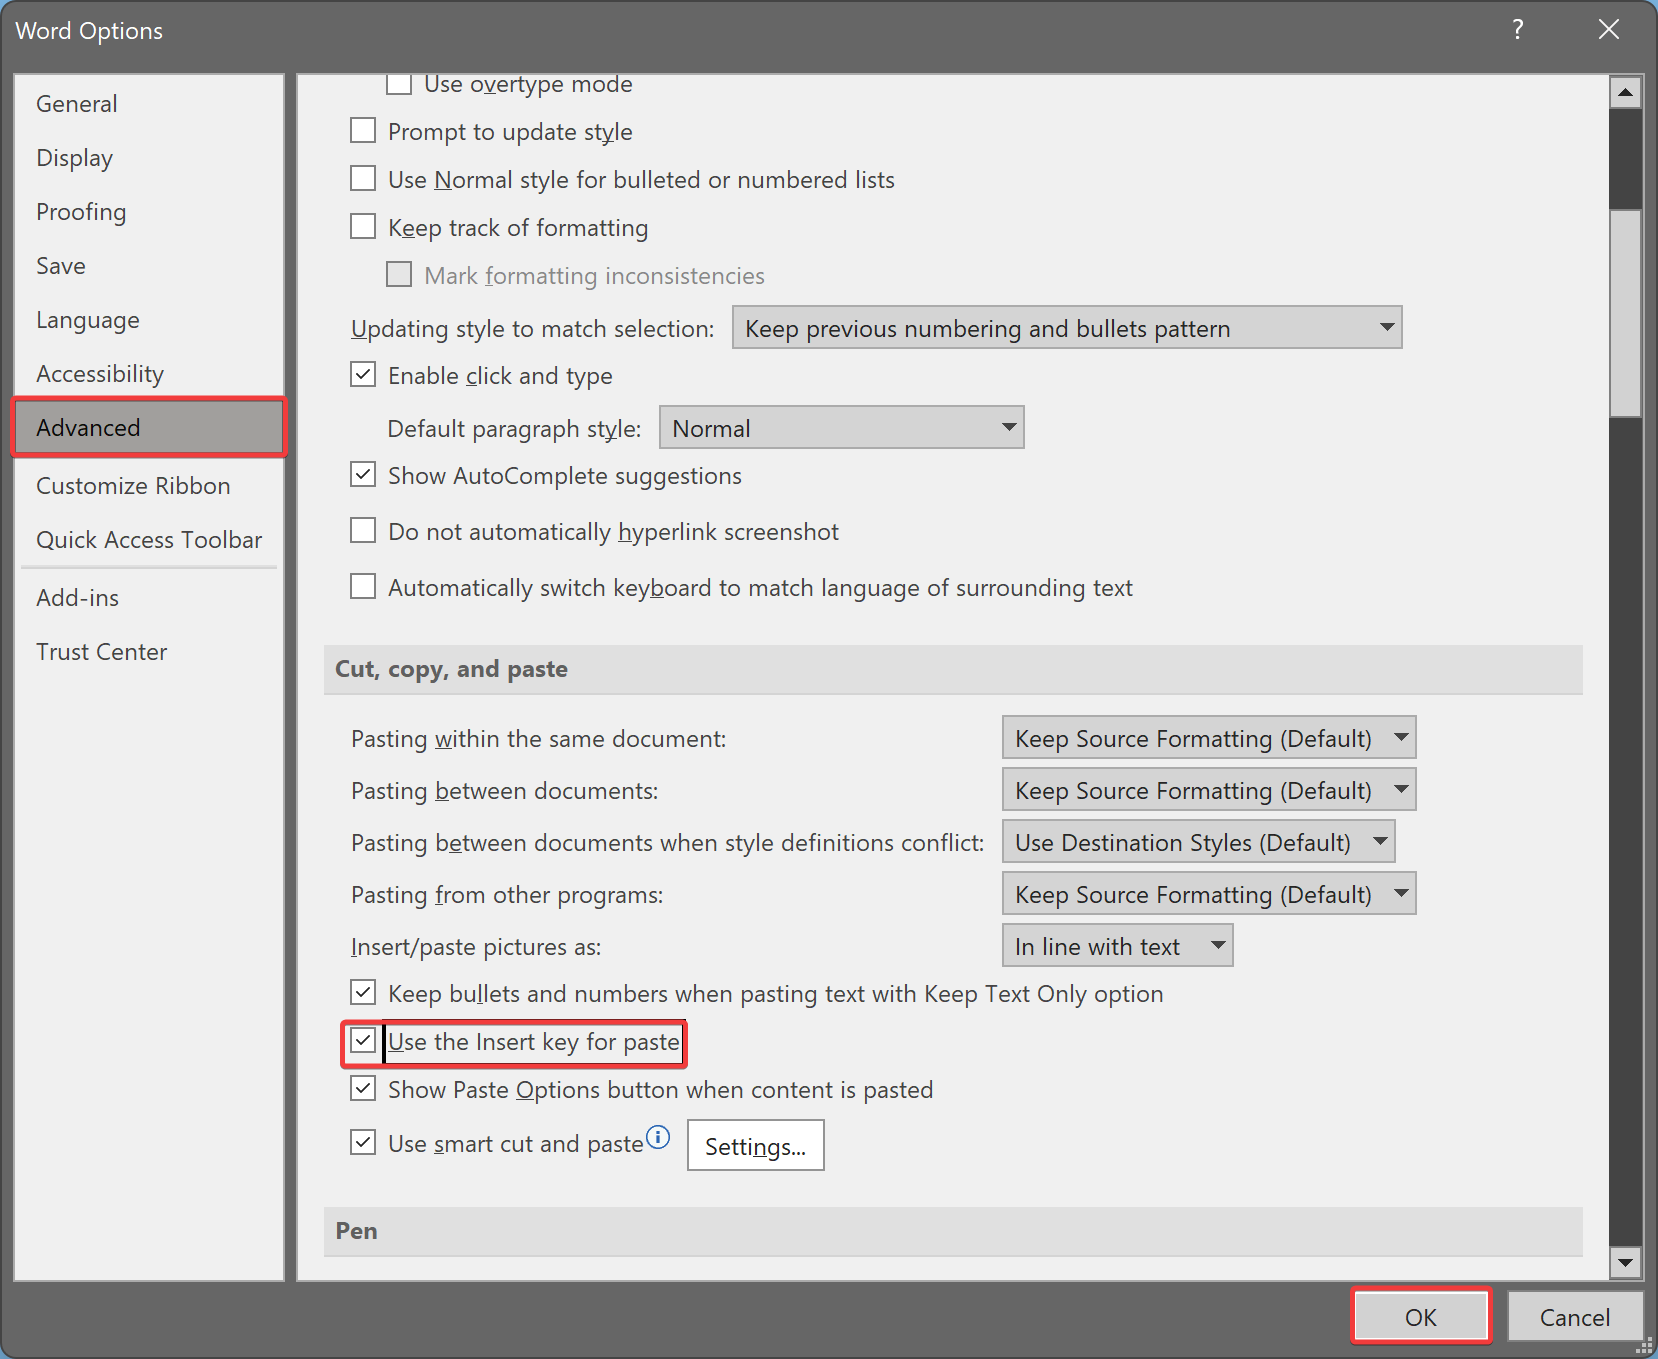
Step 5. Make sure you’re in the section dedicated to “Cut, copy, and paste.”
Step 6. Check the “Use the Insert key for paste” box.
Step 7. Save your changes by clicking OK.
That’s it. You can now press the Insert key after copying the text you want to paste. To paste something into your Word document, you can use both Ctrl+V and Insert.
How to Enable Insert Key to Paste Text into Word through Local Group Policy Editor?
Using the Local Group Policy Editor, you can enable or disable pasting using the Insert key. After installing the Office template, follow these steps to enable pasting using the Insert key:-
Step 1. Start the Local Group Policy Editor.
Step 2. Go to this path in the left sidebar of Local Group Policy Editor:-
User Configuration > Administrative Templates > Microsoft Word 2016 > Word Options > Advanced
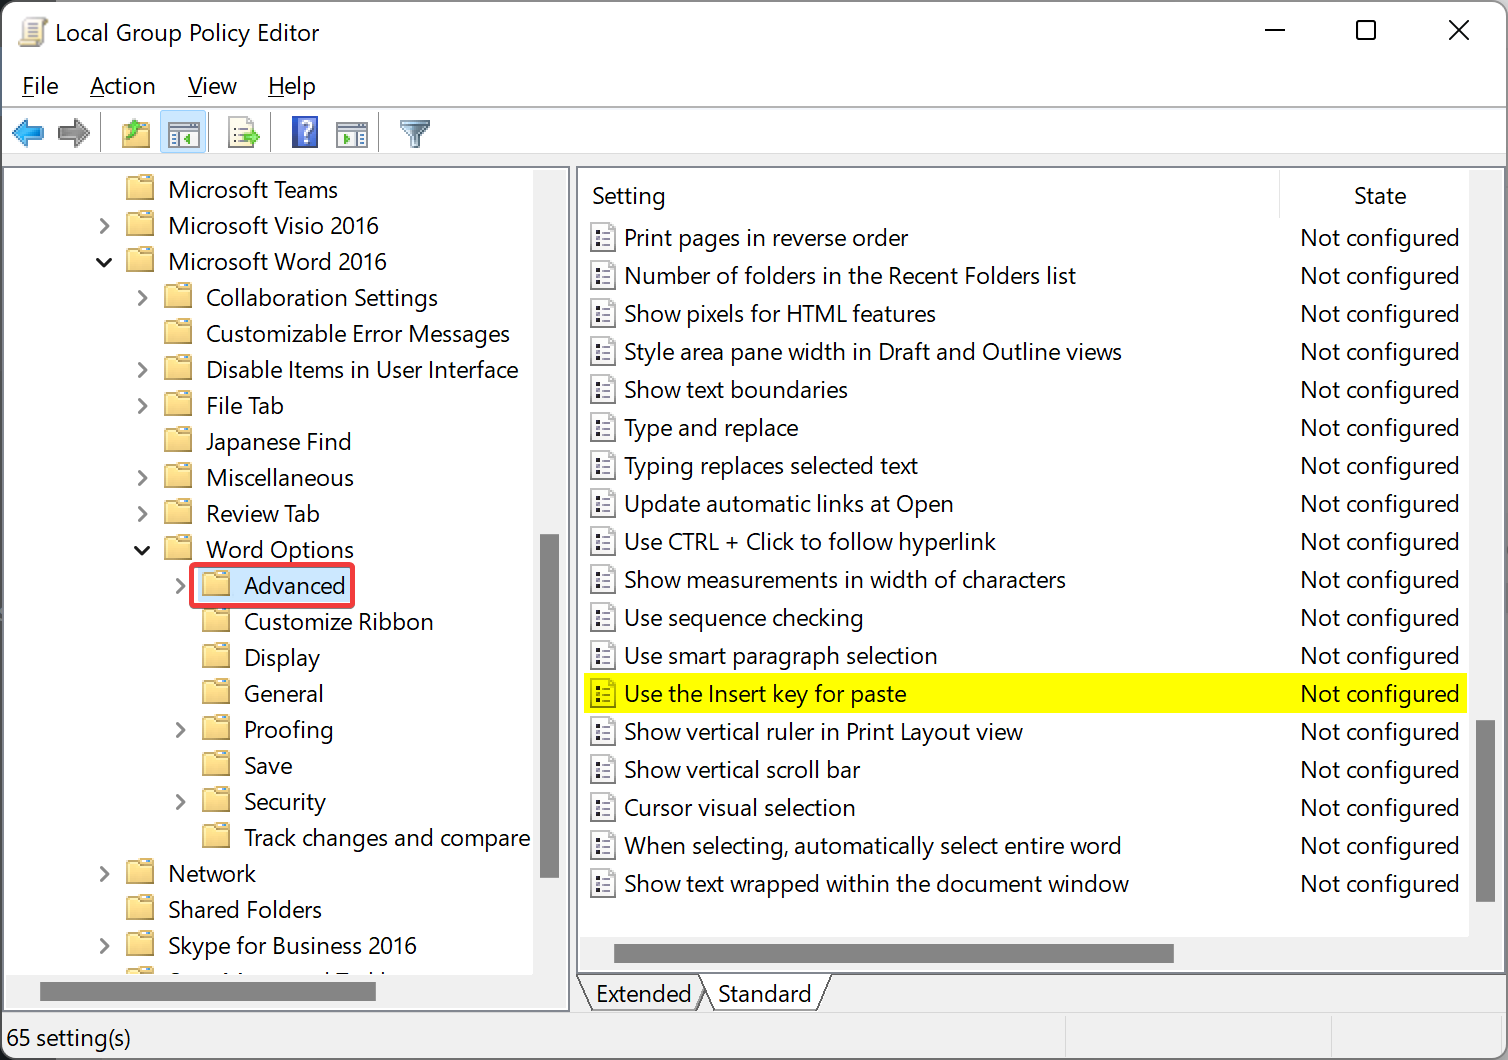
Step 3. On the right sidebar, double-click on the “Use the Insert key for paste” policy.
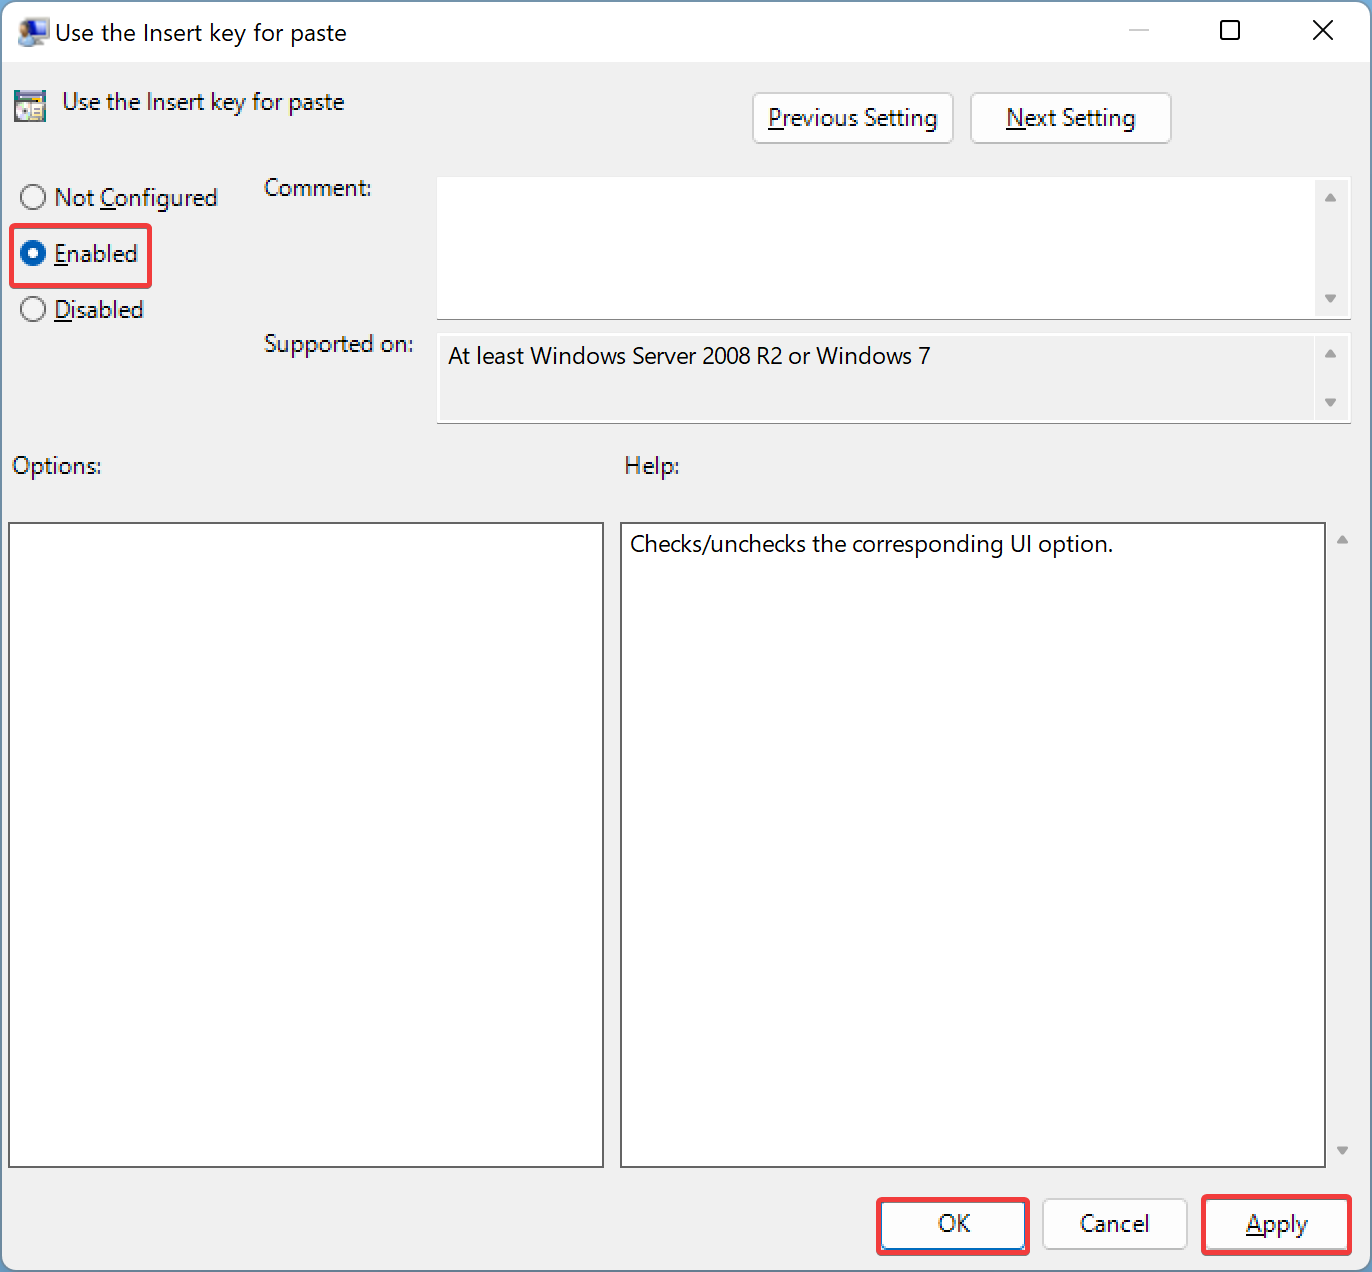
Step 4. Make sure Enabled is selected.
Step 5. Click the Apply button.
Step 6. Save your changes by clicking OK.
Step 6. Restart Microsoft Word in order to apply the changes.
Now, you can press the Insert key to paste copied texts.
How to Turn On Insert Key to Paste Text into Word using Registry Editor?
Follow these steps to active Insert key to paste Text into Microsoft Word using Registry Editor:-
Step 1. First, start Registry Editor on your computer.
Step 2. Next, navigate to the following path in the left sidebar:-
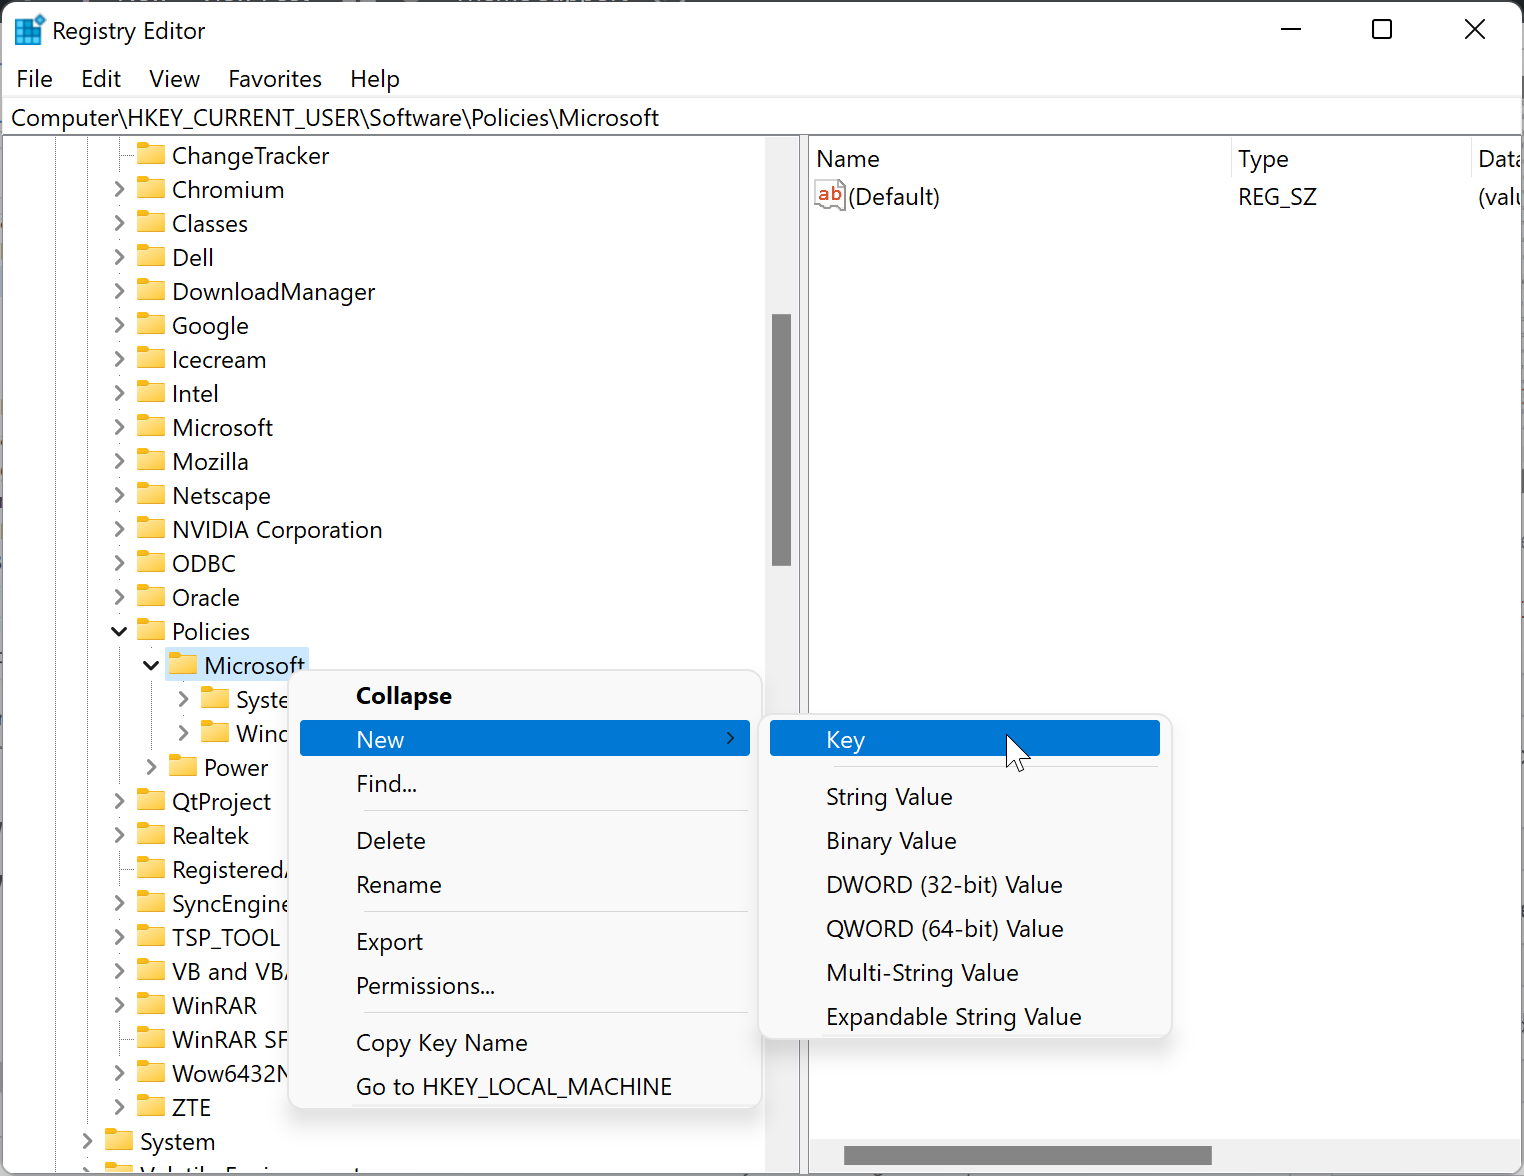
HKEY_CURRENT_USER\Software\Policies\Microsoft
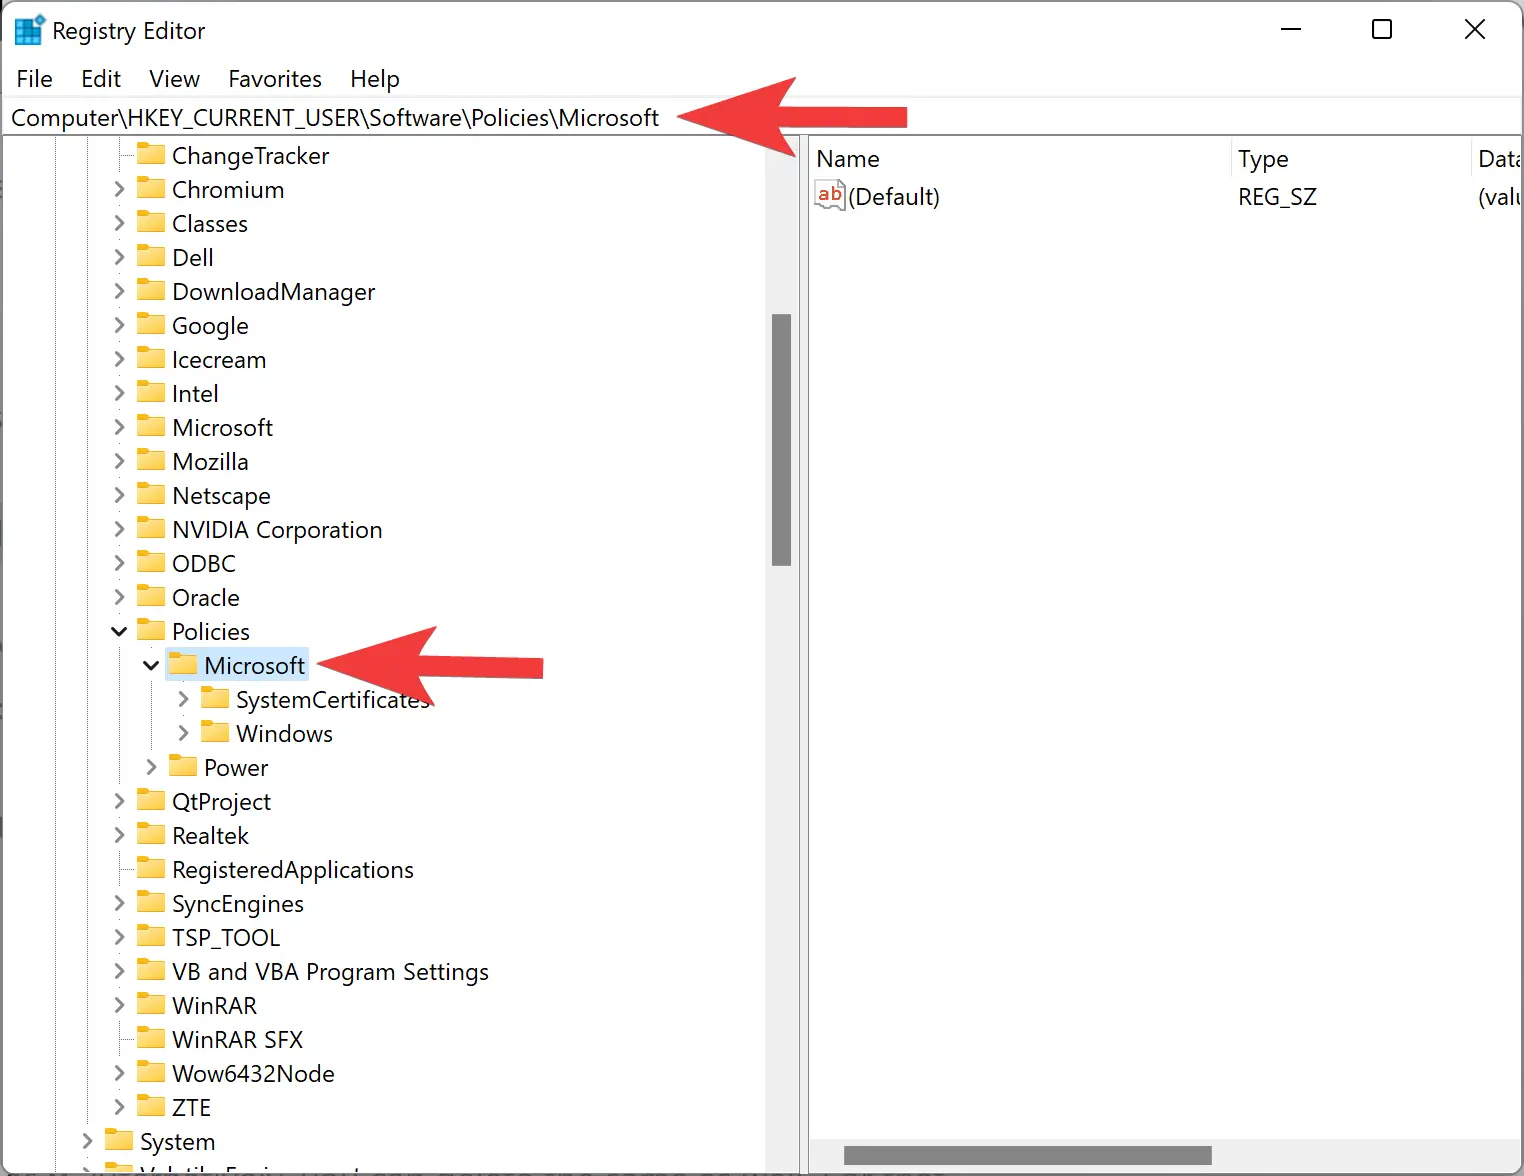
Step 3. Now, right-click on the Microsoft key and select New > Key options.
Step 4. Name the new key to the office that has just been created.

Step 5. Now, right-click on the office key and choose New > Key options.
Step 6. Set the name 16.0.
Step 7. Next, right-click on the 16.0 key and pick New > Key options.
Step 8. Name this newly created key to word.
Step 9. After that, right-click on the word key and pick New > Key options.
Step 10. Set the name to options.
Step 11. Now, right-click on the options key and select New > DWORD (32-bit) Value.

Step 12. Give it the name inforpaste.
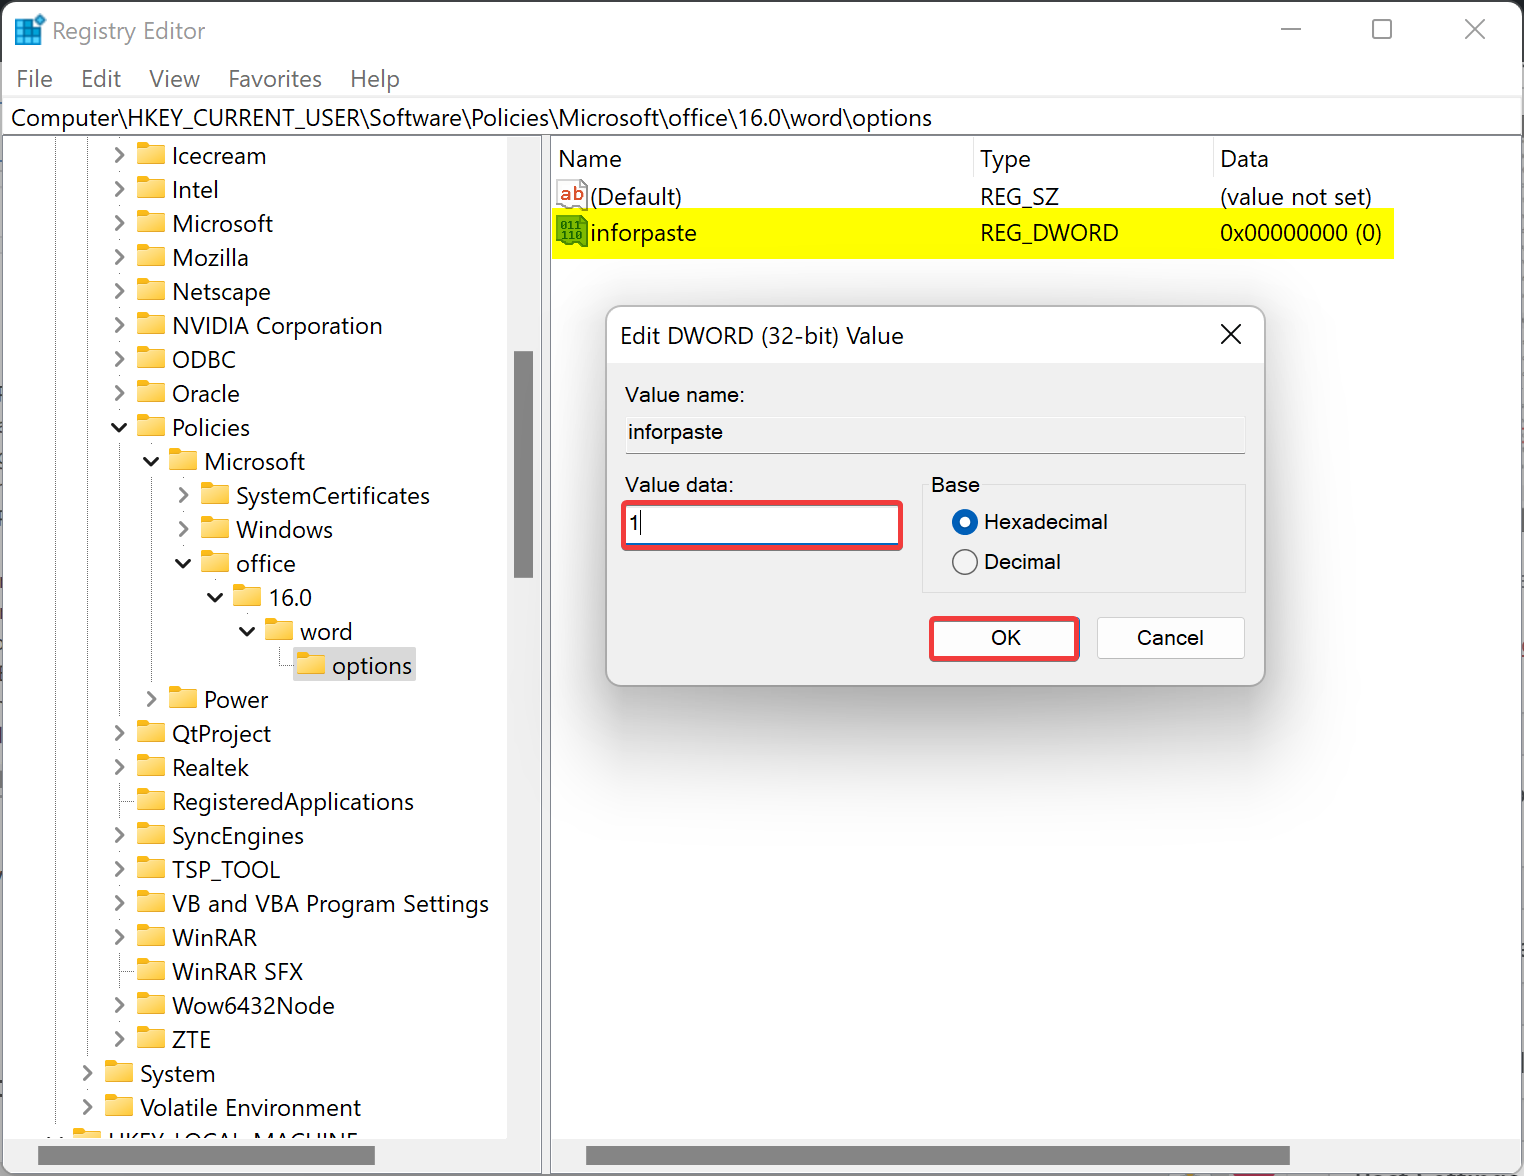
Step 13. Set inforpaste REG_DWORD “Value data” to 1 by double-clicking on it.
Step 14. Click the OK button.
Step 15. Lastly, restart your computer.
Conclusion
In conclusion, enabling the Insert key to paste the text into Microsoft Word can be a useful feature for users who prefer using the keyboard instead of the mouse. This article has highlighted three methods to activate this feature: Word Options, Local Group Policy Editor, and Registry Editor. By following the step-by-step instructions provided, users can easily enable the Insert key for pasting texts into Word documents. Regardless of the method used, users can save time and increase their productivity by utilizing this feature in Microsoft Word.