You can easily copy and paste an image or picture into your Microsoft Word document. But, wrapping texts around the photos is not an easy task. If you want to wrap texts organized around the images, then keep reading this gearupwindows article.
How to Wrap Text Around Images in Microsoft Word?
To wrap text around images or pictures on a Word document, use these steps:-
Step 1. Open a new or existing MS Word document.
Step 2. Enter texts and images on the document.
Step 3. Click on the image.
Step 4. Switch to the Layout tab and click on the Wrap Text button, which further expands several text wrap choices. Here, you can choose how the picture should interact with the adjacent text.

- In Line with Text: In this option, texts do not wrap around the picture and look like a part of the paragraph.
- Square: Text invariably wraps around the picture’s outer frame.
- Tight: If the picture added is clipart with a colorless background, the text readily wraps around the edges of the image.
- Through: Through wrapping is essentially the same as tight wrapping, except it allows text to wrap so that it fills holes within the image created by the path of the wrapping points.
- Top and Bottom: The image is interspersed between the text. The text occupies space above or below the picture.
- Behind Text: The texts appear as an overlay on top of the picture.
- In Front of Text: The image appears above the text.
Once wrapping of the texts is completed, you should position the image. So, click on the Position button and select a fixed place, which automatically wraps text around it.
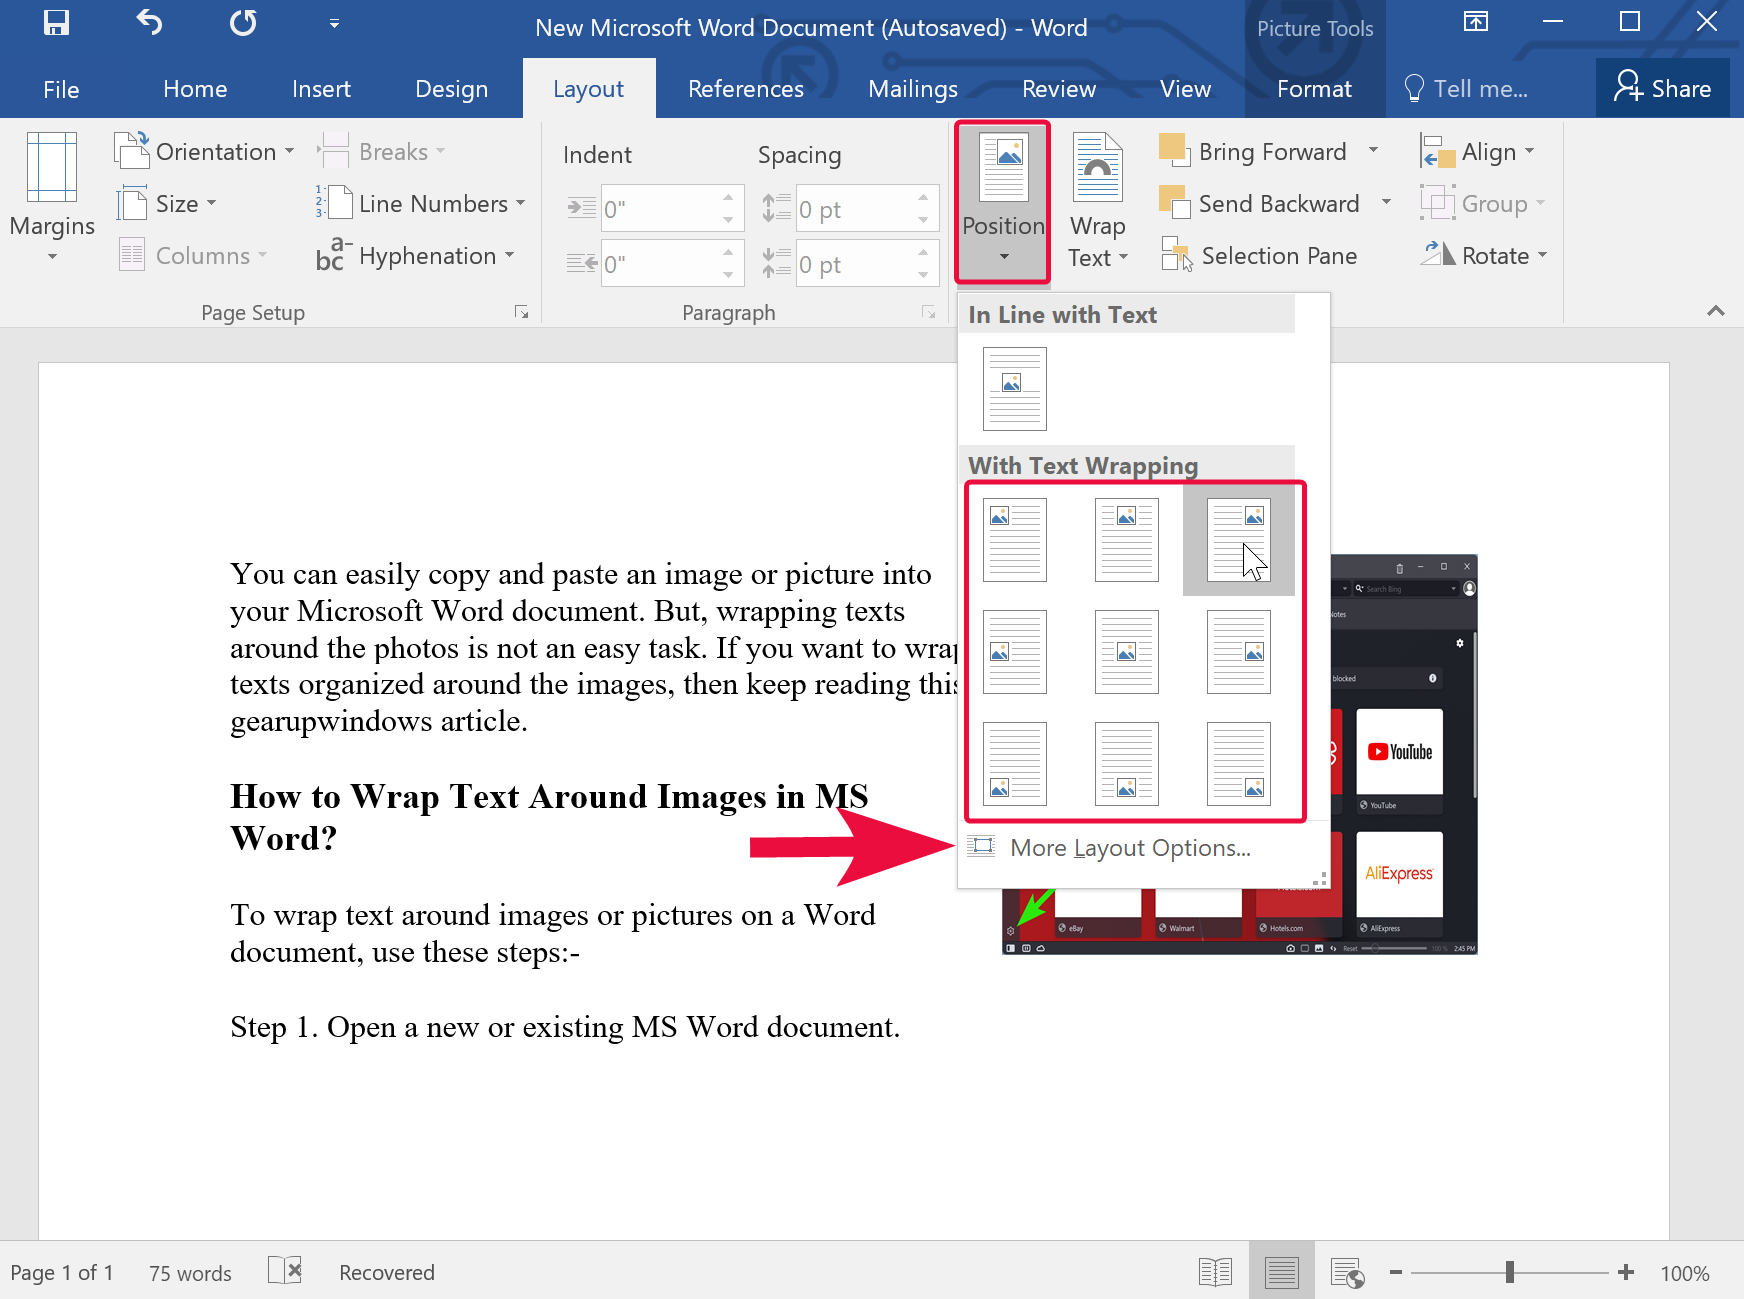
If you need a custom layout, click the option at the bottom, “More Layout Options.” In the Layout dialog, you can customize the position of the image and text wrapping around it.
Conclusion
In conclusion, Microsoft Word provides various text wrapping options to wrap text around images, such as “In line with text,” “Square,” “Tight,” “Through,” “Top and Bottom,” “Behind text,” and “In front of text.” Users can easily wrap text around images by following the simple steps outlined in this gearupwindows article. Moreover, users can customize the position of the image and text wrapping around it by selecting the “More Layout Options” button. So, if you want to make your documents more organized and visually appealing, try wrapping text around images in Microsoft Word.